Steak and Quinoa Squachos – NachOMG!

Steak and Quinoa Squachos are a healthy take on nachos and gluten-free, low-carb appetizer optionl
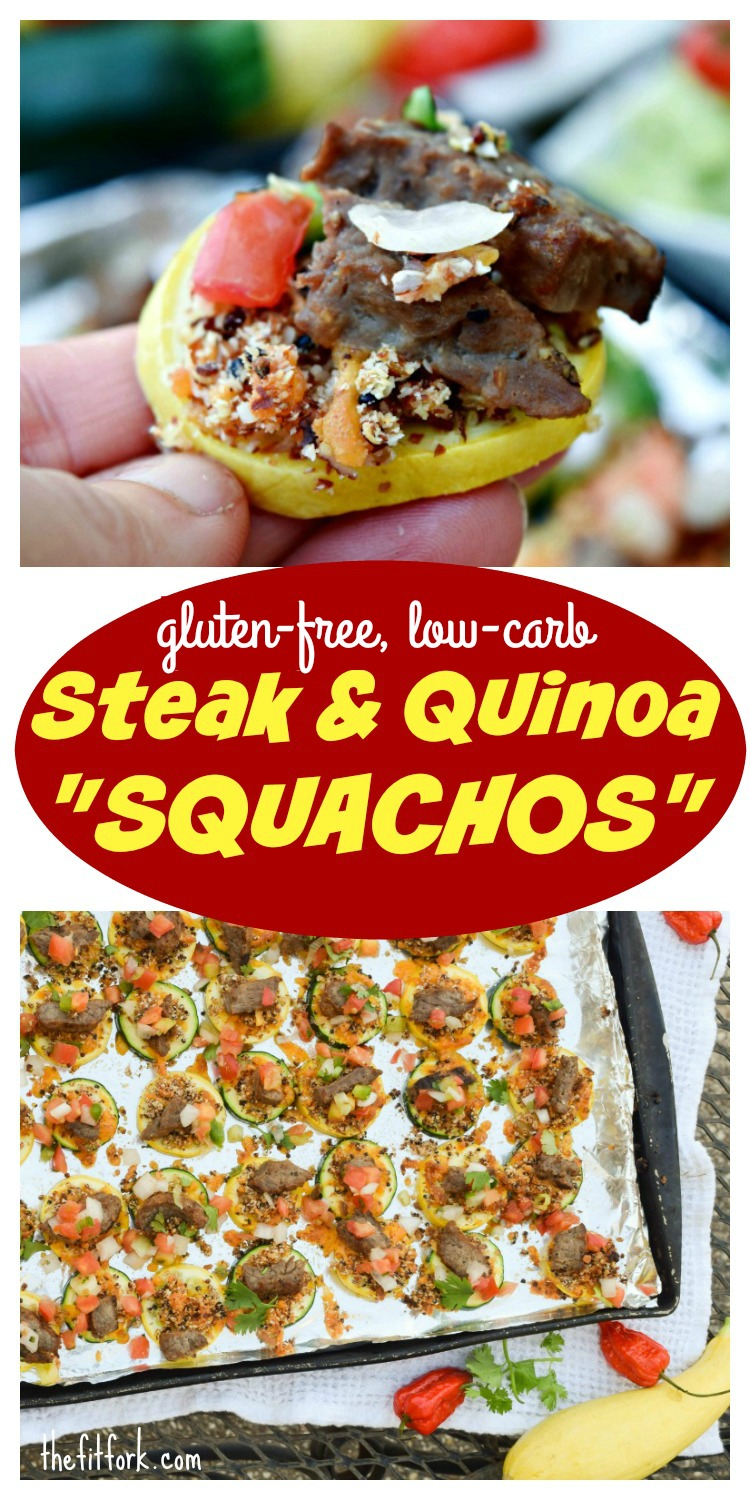
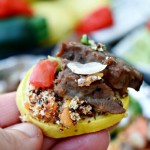
You may be thinking, “Ummmm, excuse me . . . but what the heck on God’s green Earth are SQUACHOS”? This quick and easy appetizer is a healthy swap for traditional nachos made with tortilla chips which are typically fried, overly salted and plentiful in carbs (if you’re counting).  Made on slices of summer’s finest squash, my Steak & Quinoa Squachos are, in two simple words, “life changing!”

Steak & Quinoa Squachos - gluten-free and low carb appetizer!

Zucchini and Summer Squash
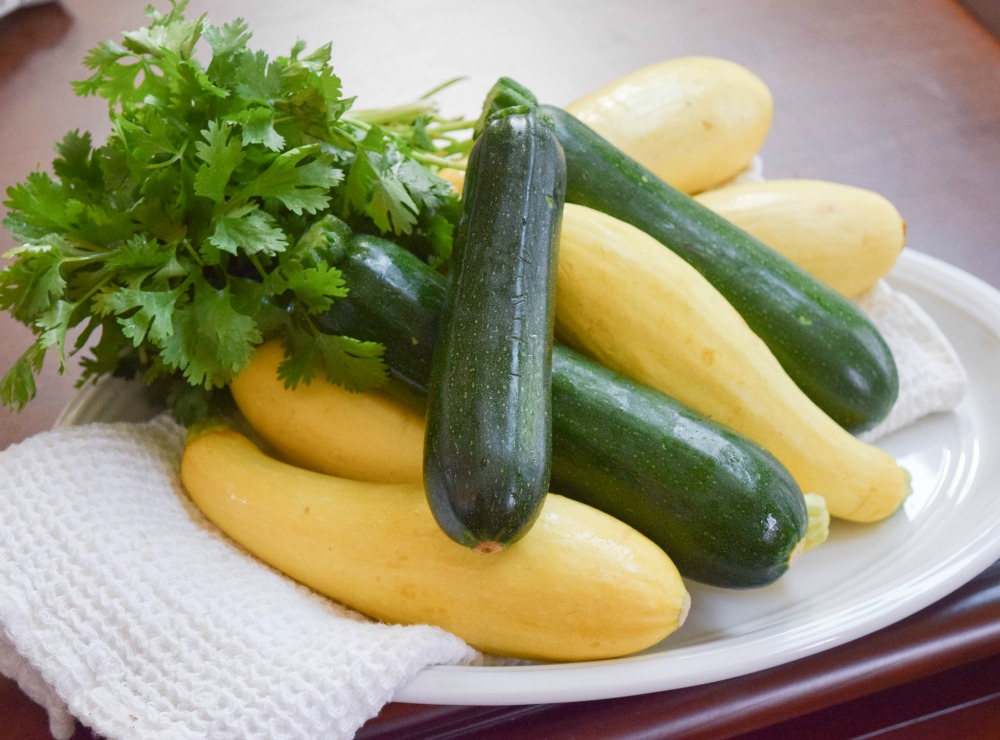
The farmer’s markets (and personal gardens of you green-thumbers) are exploding with green zucchini and yellow summer squash this time of year — and this fun and fit finger food is a tasty way to take advantage of a bumper crop and squeeze a few extra veggies into the day.


Recipes similar to this use panko bread crumbs to create that familiar nacho crunch — but that defeats to purpose of my low-carb, higher protein mission. So, instead, I tossed together almond meal and cooked quinoa with a bit of cheese to create a tasty texture on top of each squash disc.

Steak and Quinoa Squachos -- a low carb, gluten free appetizer!

I used two of my go-to non-GMO, gluten-free and certified organic pantry staples from NowFoods.com Tri-Colored Quinoa  and Raw Almond Flour. This tri-color quinoa a blend of white, red and black seeds and is a great source of protein and iron — I typically serve it as a side dish or salad, but freeze leftovers for speedy recipes like this! Raw Almond Flour (or Almond Meal, as some people call it) is simply finely ground almonds and it makes a great low-carb swap for flour in many recipes. If you can’t find these products in your market, I’ve dropped the Amazon links below.
 

More Protein, More PowerNow, if you’ve been following along on the blog or social media, you know I’ve been sharing my (numerous time) journey on the Protein Challenge and encouraging others to join. This free 30-day challenge sponsored by BeefLovingTexans.com (who I also originally developed the Squacho recipe for) shows you how to tweak your daily protein intake for optimal heath — to be very succinct, you should be getting about 25 – 30 grams of protein at each of your three meals — and also protein rich snacks throughout the day and possibly at bedtime, depending on your activity level. You can register for the Protein Challenge and get tips, support and recipes HERE.

Join the 30 day Protein Challenge

Steak & Quinoa SquachosSo, are you making these Squachos this weekend, or what?!

What are your other plans – a race, a vacation, just catching up on the to-do list? Let’s chat in the comments below – XOXO, Jennifer 


Steak & Quinoa Squachos
You'll exclaim "squash-OMG" when you taste these unique beef nachos that swap tortilla chips for discs of zucchini -- almond meal and quinoa create a crunch texture while keeping the appetizer gluten-free and low carb.
Course: Appetizer, Snack
Cuisine: American
Servings: 8 as appetizer
Ingredients
  • baking spray
  • 2 lbs summer squash (such as zucchini, crookneck etc.)
  • 1/2 cup raw almond flour I like Now Foods "Living Now" brand
  • 1 tablespoon dry fajita seasoning
  • 1 cup shredded sharp cheddar cheese
  • 1/2 cup cooked quinoa I like Now Foods "Living Now" brand
  • 2/3 cup prepared Pico de Gallo, drained of any excess juice
  • 1/2 cup fresh chopped cilantro leaves
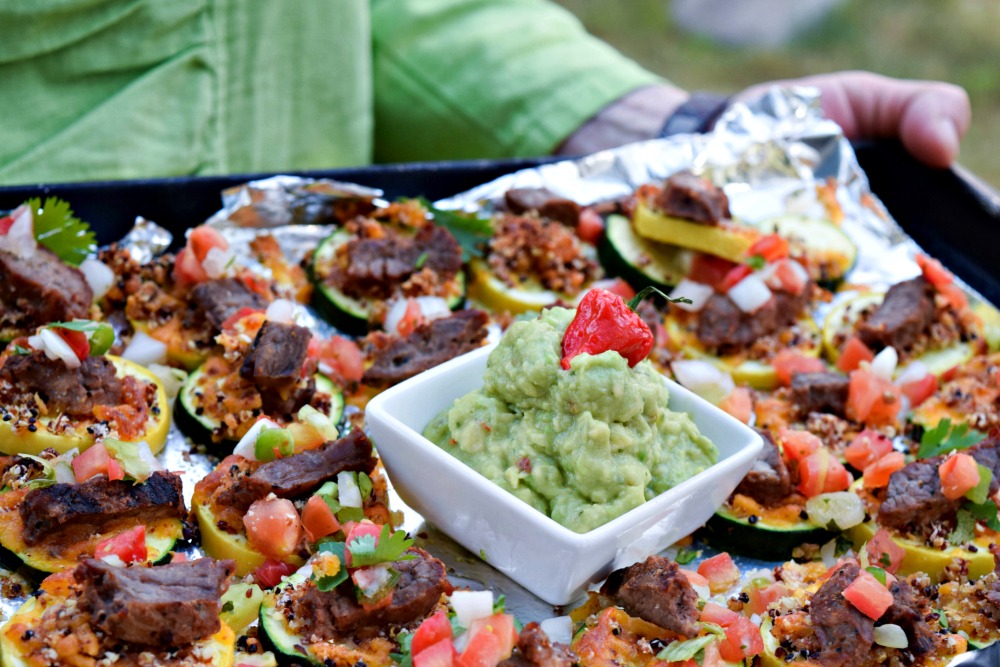
  • garnishes salsa, guacamole, sour cream or others as desired
Instructions
  1. Preheat broiler on high. 2. Line two rimmed baking sheets with foil, coat with baking spray.
  2. lice squash into ¼” slices. Place squash, with edges touching each other, onto baking sheets.
  3. In bowl, toss together almond meal with dry fajita seasoning. Stir in cheese, cooked quinoa and almond meal until combined.
  4. Use a tablespoon to pile a big dollop of this cheese mixture on top of each squash slice. If leftover topping in bowl at end of dolloping, sprinkle evenly across tops.
  5. Cut leftover steak or fajita meat into bite-sized pieces. Place a piece of two of beef on top of each Squacho.
  6. Place oven rack on second to top position. Broil Squachos for 2 to 4 minutes, or until cheese mixture bubbling and turning golden brown on edges Watch carefully to prevent burning.
  7. Remove from oven and sprinkle with drained Pico de Gallo. Serve with other desired accompaniments such as guacamole, sour cream or salsa.

Candied Meyer Lemon Cake with Blackberries – Paleo and Gluten Free Recipe

Candied Meyer Lemon Cake with Blackberries - Paleo

I never paid much attention to Meyer lemons until recently – I mean a lemon is a lemon is a lemon, right?!  Well, come to find out, not all lemons are created equally. The Meyer lemon is a soft-skinned citrus fruit that looks a lot like a 10-cent lemon, but actually tastes like sweet million bucks.  That’s because the Meyer lemon is actually a lemon crossed with an orange, taking some of the acidic bite. Even though Meyer lemons are more fragrant and sweeter, they’re still a bit tart and better balanced in a recipe.

Meyer Lemon

I got my Meyer Lemons from Friedas.com!

Paleo Blackberry Lemon Cake - TheFitFork.comUse the perfect pucker of Meyer lemons in cocktails, with chicken piccata, in salad dressing, to make a sweeter lemon curd, or alongside fish and seafood – or even better, use them to make my delicious Candied Meyer Lemon Honey Cake with Blackberries (it’s also Gluten-Free). I was inspired by a lemon cake recipe I saw in the Food Network Magazine, but of course I tinkered with it to make it my own! I made this cake to take to Easter dinner at my Aunt’s house — it’s just bursting with spring flavor and a beautiful sight to behold.She’s going to love it.

berry lemon smoothieBy the way, if you don’t have time for cake-making, you can get a quick fix with my Blackberry Lemon Smoothie.


Notes about the recipe:

  1. If you are unable to get your eggs to the glossy peak stage, don’t worry the cake will still taste just as delicious (it just won’t be quite as fluffy – it’s a denser cake anyway).
  2. Do not skip the steps of simmering and draining the lemon slices three times. It seems redundant, but you are boiling off the bitterness from the pith and acid from the lemon flesh.  The result is lemon peel that is delightfully tender, edible and yummy.
  3. Feel free to swap out raspberries for the blackberries in the syrup and garnish.

Blackberry Lemon Cake

Candied Meyer Lemon Honey Cake with Blackberries
Prep Time
15 mins
Cook Time
50 mins
Total Time
1 hr 5 mins
 
This gluten-free dessert recipe is bursting with flavor - lemons and blackberries make perfect for Easter, graduation and other spring celebrations
Course: Dessert
Cuisine: American
Servings: 8 servings
Ingredients
  • 1/2 cup coconut oil
  • 1 3/4 cup almond flour (meal)
  • 1/3 cup coconut flour
  • 1 1/2 cups palm sugar divided
  • 2/3 cup honey
  • 4 large Meyer lemons or regular lemons will do
  • 1 teaspoon pure vanilla extract (zest 2 lemons and squeeze juice / slice other 2 lemons very thinly)
  • 6 large eggs (divided separately into 4 yolks (discard 2 yolks) and 6 egg whites
  • 1 pint blackberries divided
Instructions
  1. Pre-heat oven to 325 F degrees. Line bottom of 9-inch springform pan with parchment paper and spray top of paper and sides of pan with coconut oil cooking spray (or just rub with coconut oil).
  2. In medium bowl, whisk together almond flour, coconut flour and salt in medium bowl. Set aside.
  3. In a large bowl, add ½ cup sugar, 1/3 cup honey, zest from 2 lemons, 4 egg yolks, vanilla and olive oil. With mixer on medium, beat for 2 – 3 minutes until smooth and creamy.
  4. With mixer on low, slowly add almond flour mixture to egg mixture bowl, beating until just combined (don’t over beat).
  5. In a clean bowl, add 6 egg whites that are at room temperature. With mixer on medium, beat for approximately 1 minute or until foamy. Add in ½ cup sugar and beat on medium-high for another 3 minutes or until glossy peaks have formed.
  6. Scrape ½ of egg white peaks into almond meal and gently incorporate by hand with spatula. Add the remainder of egg whites and stir until mostly combined.
  7. While cake is baking, make candied lemons by adding 2 thinly sliced and seeded lemons to small saucepan and cover with water. Bring to a boil and reduce heat to simmer for 3 minutes. After 3 minutes, drain water and refill with fresh water on lemons. Simmer for another 3 minutes. Repeat this process a 3rd time to remove bitterness from pith.
  8. After lemon slices have been simmered and drained 3 times, add 1 cup of fresh water, remaining ½ cup sugar, remaining 1/3 cup honey and the juice from 2 lemons. Bring to a boil over high heat and then reduce to medium and simmer for 20 minutes, stirring occasionally.
  9. Use a fork to transfer lemons to plate and let cool. Keep lemon syrup in saucepan and add 1/2 of blackberries. Simmer over medium for an additional 10 minutes, mashing up blackberries with fork.
  10. Remove cake from springform pan, using a knife to loosen sides before unlatching. Transfer cake to serving platter and brush top of cake with blackberry syrup. Top cake with candied lemon slices, fresh blackberries and drizzle with remaining blackberry syrup (or reserve leftover syrup for another use).
Recipe Notes
  1. If you are unable to get your eggs to the glossy peak stage, don’t worry the cake will still taste just as delicious (it just won’t be quite as fluffy – it’s a denser cake anyway).
  2. Do not skip the steps of simmering and draining the lemon slices three times. It seems redundant, but you are boiling off the bitterness from the pith and acid from the lemon flesh.  The result is lemon peel that is delightfully tender, edible and yummy.
  3. Feel free to swap out raspberries for the blackberries in the syrup and garnish.

Plethora of Pears? Try this Cranberry-Ginger Pear Crumble Recipe

When you have a plethora of pears that won’t last until the morning, make pear cobbler. It’s that whole lemon-lemonade philosophy! I came into a large windfall of sliced red pears that didn’t get used in a recent cooking demonstration because I couldn’t bear to see them be thrown away. I mean, not are pears a favorite winter fruit high in fiber, anti-oxidants, minerals and vitamins, they are just darn tasty. Plus, someone else had already done all the legwork, lovingly slicing them and tossing with a bit of lemon juice for freshness. So, with no shame (my son calls me a raccoon for this behavior), I skillfully rescued them from their ultimate demise in the dimpsty-dumpster.   “Wait, I’ll take those!” I say like a brash bandit! And, when I got home, I whipped up this scrumptious Cranberry-Ginger Pear Crumble from ingredients I already had squirreled away in the pantry. That reminds me, next time I will add nuts!

Cranberry-Ginger Pear Crumble Recipe

  • 6 pears, sliced (choose pears that are ripe yet still firm)
  • 1 tablespoon finely chopped ginger
  • 1/2 cup brown sugar
  • 1/2 cup dried cranberries
  • 2 teaspoons cinnamon
  • 2 tablespoons butter cut into bits

Topping:

  • 1/2 cup almond meal
  • 1/2 cup oatmeal
  • 1/3 cup brown sugar
  • 1 teaspoon cinnamon
  • 6 tablespoons butter, cut into bits

Preheat oven to 350 degrees. Toss first six ingredients together in a bowl. Pour pear mixture into a 9” x 13” baking dish. In a medium bowl, combine all topping ingredients and mix with the back of a fork until crumble and butter is broken down into very small pieces.  Top pears with topping and pat down. Bake uncovered for 30 – 40 minutes, or until brown and bubbly.  Serve warm with vanilla ice cream or alternative of your choice.

This is what it looks like before baking, if you wanted to do omit the topping!

Note: You can peel the pears if you like; however I prefer to keep the skin intact because it’s a rich source of nutrients. Remember, natural color (not artificial) usually indicates lots of vitamins and anti-oxidants.