Small-Batch Chocolate Chip Protein Cookies with Gluten-Free Option

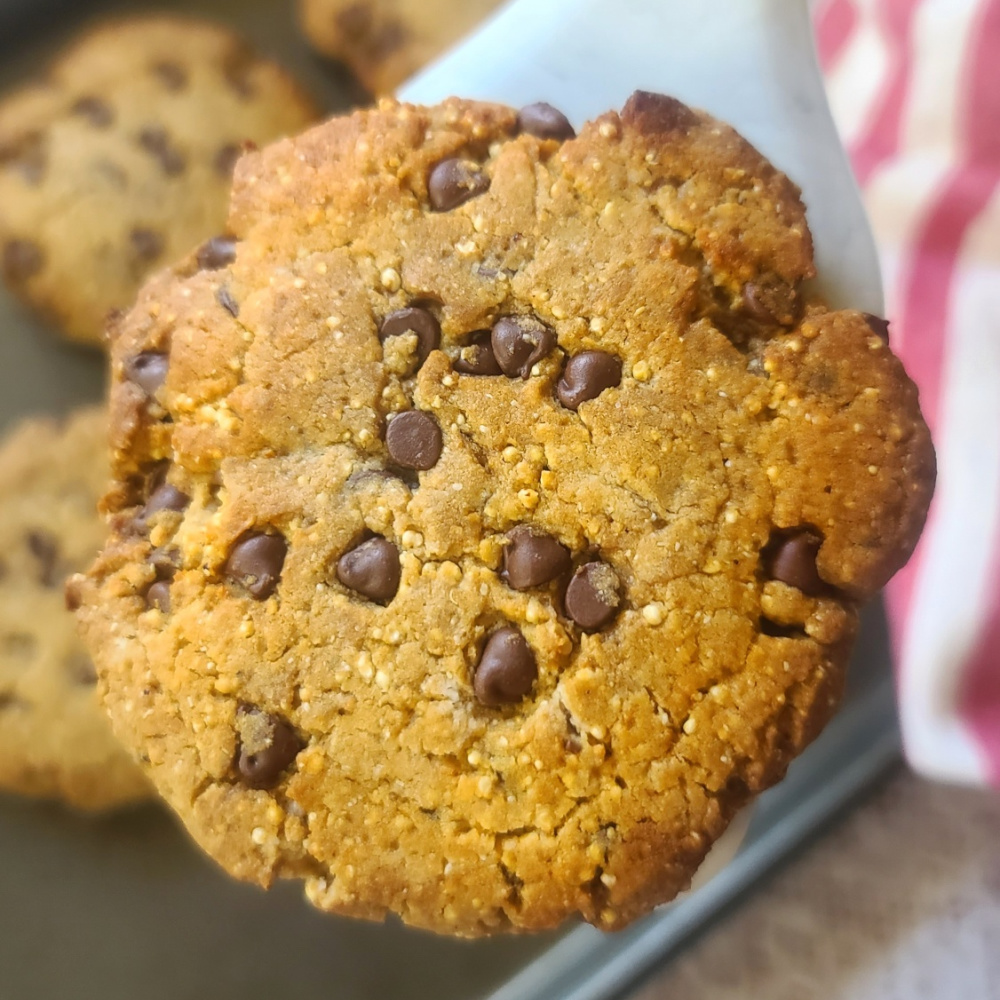
So many reasons to make your own Chocolate Chip Protein Cookies and my gluten-free, high-protein recipe, first and foremost, will leave you drooling! They definitely satisfy that craving for something chocolaty, tender and sweet – with the addition of protein powder can help you meet your daily protein goals – which may be higher for athletes and fitness enthusiasts looking for muscle repair and growth.   

Enjoy homemade cookie goodness with a boost of muscle-making protein. These Chocolate Chip Protein Cookies are all comfort food with none of the guilt, and have a gluten-free option. The small-batch size (makes 4) is just right to share or last a couple days!
Big cookie, big healthy benefits! 184 calories, 13+ grams protein, plus fiber and other nutrients!

Another great thing about homemade protein cookies is that you can bake a batch whenever the mood strikes! Yes, store-bought protein cookies may be convenient, but also come with high price tag (at least one out of my snacking budget) and less control over the exact ingredients such as the type of flour, protein, sweetener, or other ingredients which can make adhering to dietary restrictions difficult.

Enjoy homemade cookie goodness with a boost of muscle-making protein. These Chocolate Chip Protein Cookies are all comfort food with none of the guilt, and have a gluten-free option. The small-batch size (makes 4) is just right to share or last a couple days!

In terms of making this Chocolate Chip Protein Cookie work for your dietary eating preferences, there are options (see the tips below). Many protein cookie recipes online use a lot of peanut butter or nut butters – this is a nut-free protein cookie recipe. Not only for those with allergies, but to keep the calorie count around my reasonable snacking target.   

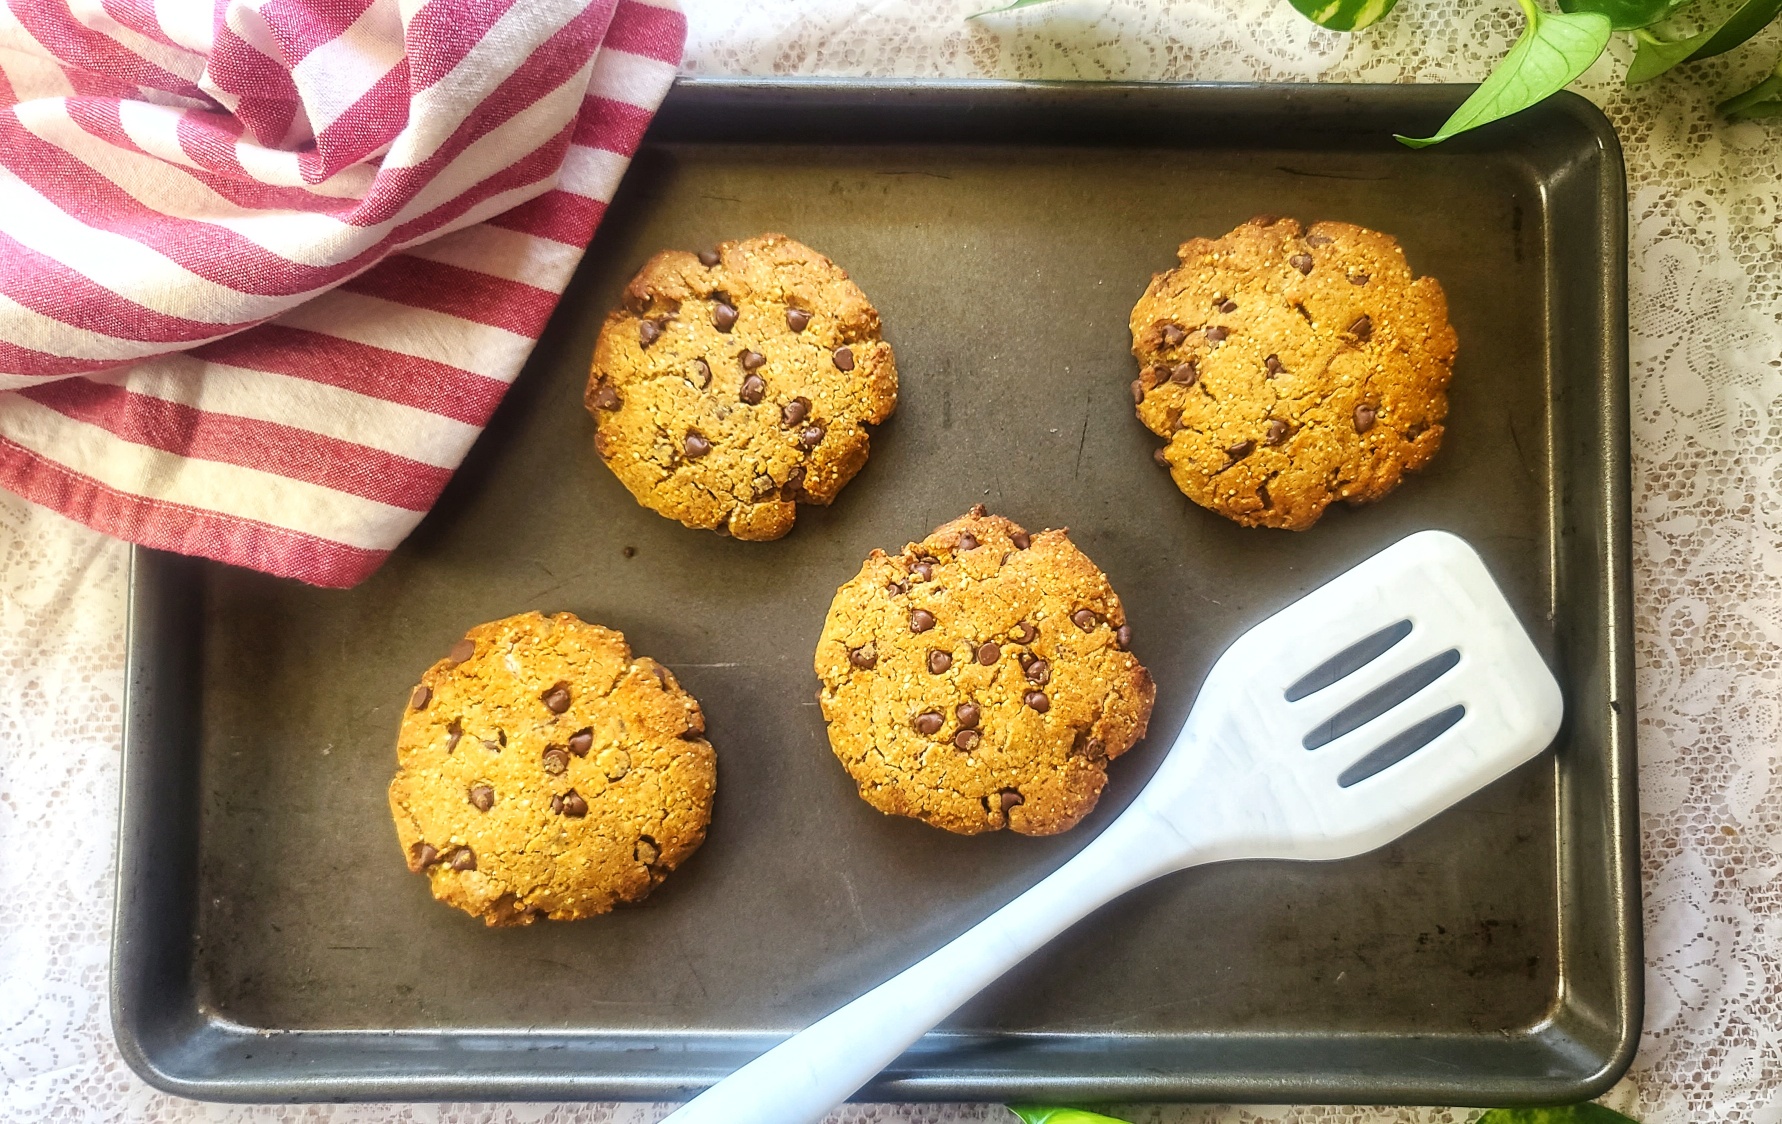
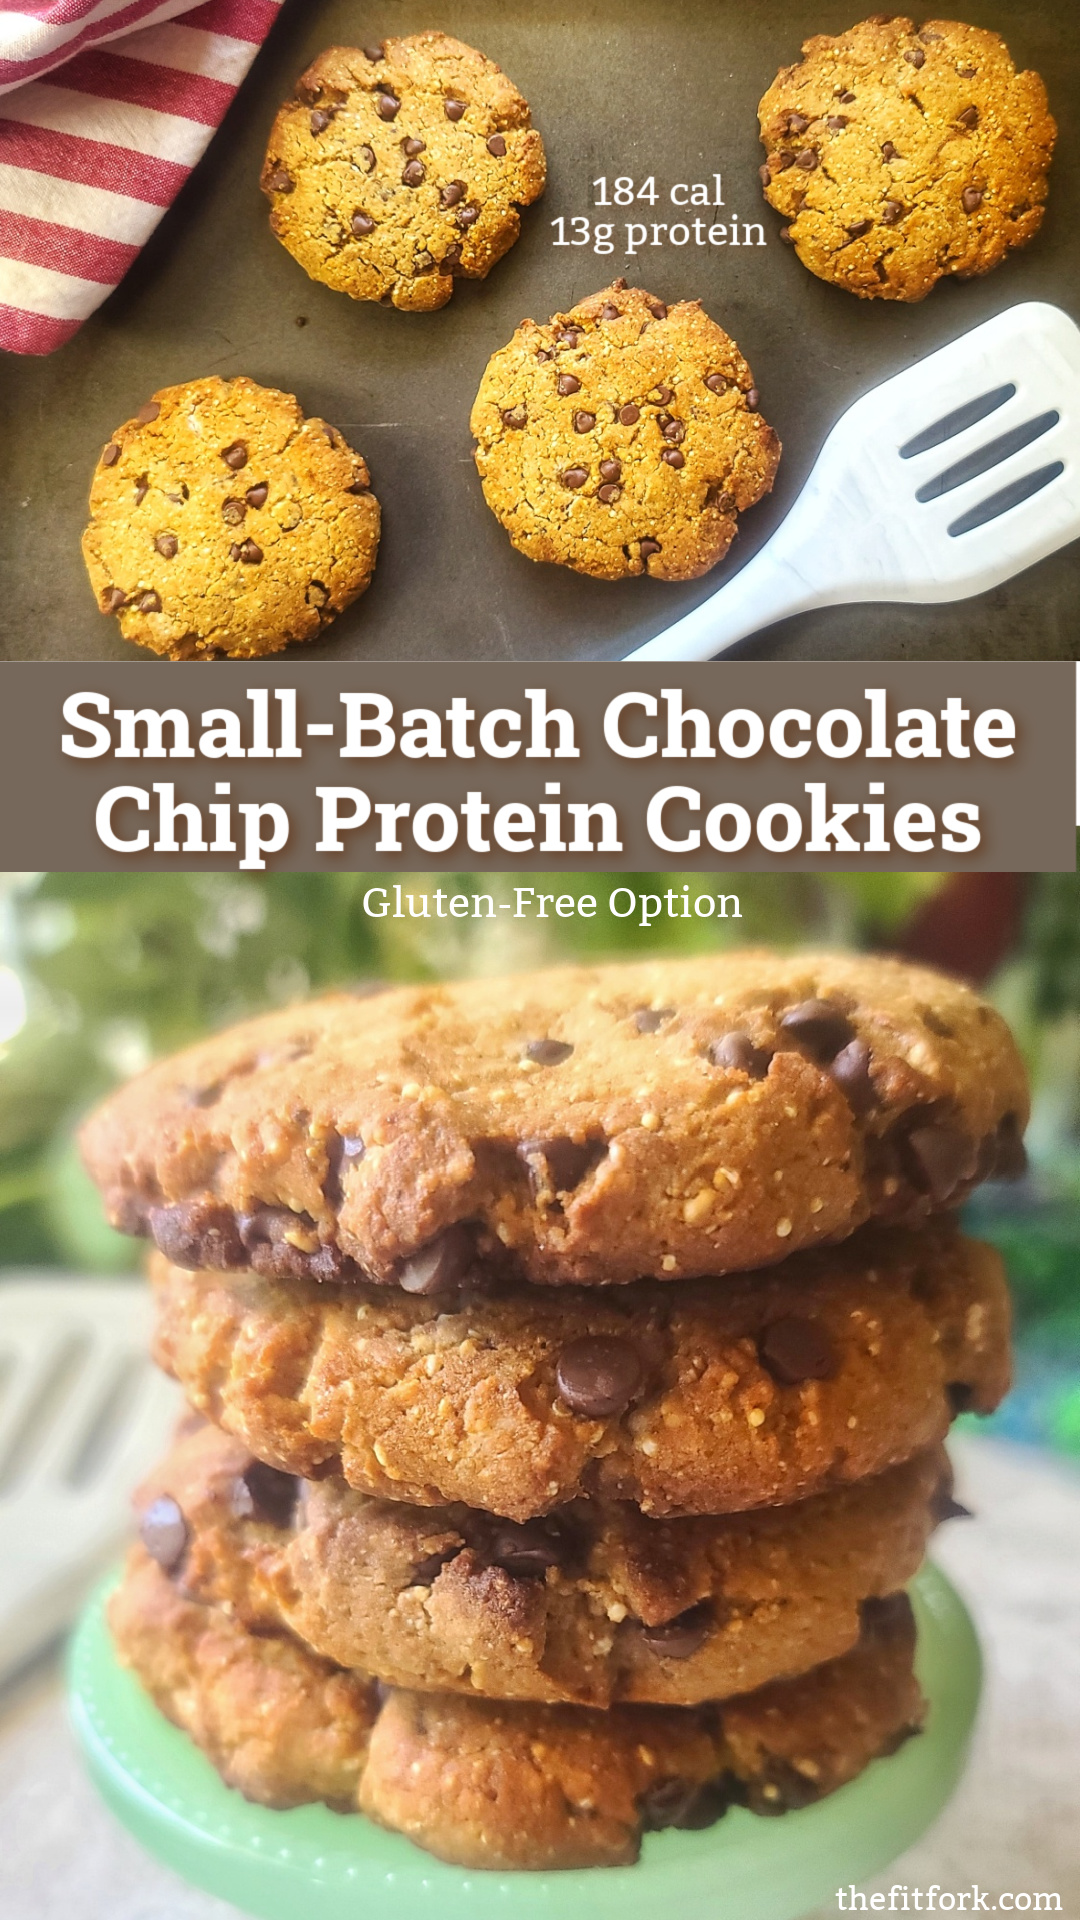
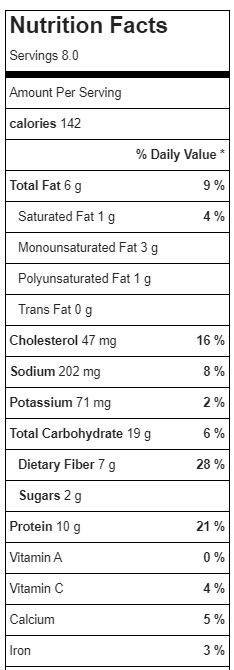
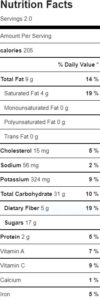
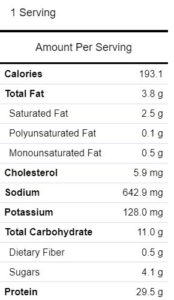
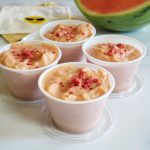
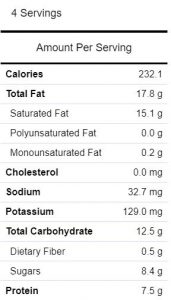
This small-batch Chocolate Chip Protein Cookie recipe makes FOUR large cookies – enough to share or to portion out through the week! Each protein cookie has only 184 calories and more than grams of protein! Note: Macros can vary based on what exact ingredients you use.

A fun, 15-second tutorial for Chocolate Chip Protein Cookies!

Chocolate Chip Protein Cookie Ingredient Choices and Other Tips

Flour Choice: All-purpose flour (like used in traditional cookie recipes) definitely works in this protein cookie recipe. But you may also substitute equal amounts of an all-purpose gluten-free baking blend (I like Bob’s Red Mill Gluten-Free 1:1) or an oat flour (or oats simply ground up to be fairly smooth in a blender). For this particular batch, I used popped amaranth that I also pulsed in a blender until mostly “floury” – it gave a light and fluffy result. Amaranth is an ancient grain that is naturally gluten-free – you can purchase amaranth flour or make your own with this popped amaranth method I described. ** Note: For best results, do not use almond flour, coconut flour or other similar type of dense, low-carb flour.

Sugar Choice: Just one-quarter cup of sugar is required for this recipe, but I still opted for a lower-carb stevia-based option to tweak the overall macros. If not using a “real” sugar (including brown sugar, cane sugar, coconut sugar), make sure that you choicer lower-cal choice is a granulated, 1:1 cup measuring equivalent. If it’s a granulated, “white’ sweetener, you can add 1 tsp. molasses to give a more “brown sugary” vibe.

Protein Powder Choice: Whey protein, casein and plant-based proteins (like pea protein) will all work about the same. I suggest using a vanilla flavor in this chocolate chip cookie with protein powder. My go-to is Clean Lean Protein from Nuzest in Smooth Vanilla – it’s a pea protein with no added gunk. I love it. Save 15% with my Nuzest discount code: FITFORK

Save 15% at Nuzest with code FITFORK

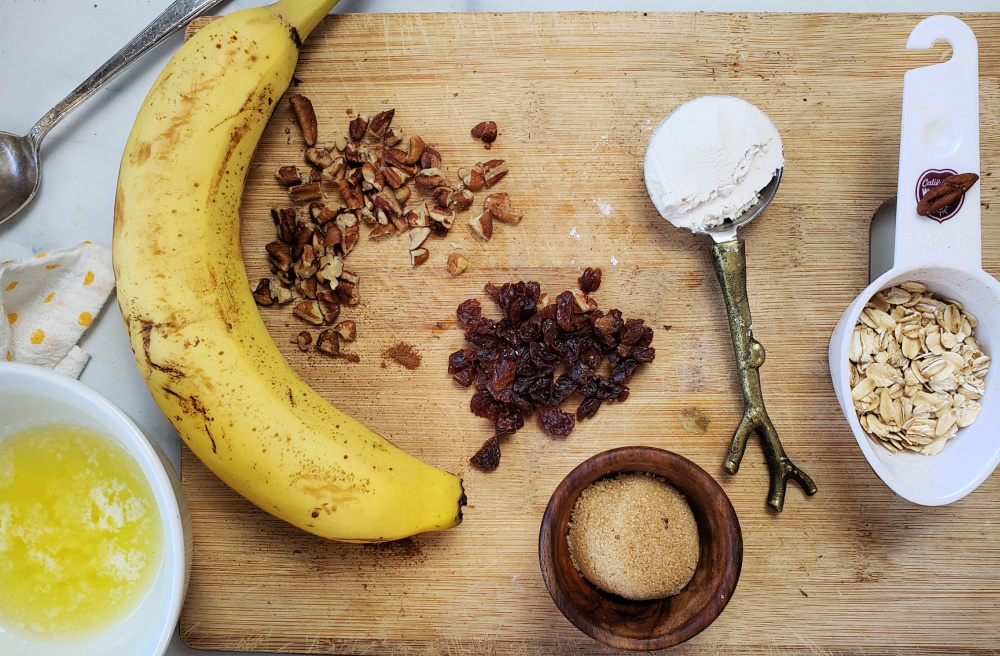
Chocolate Chips Choice: I prefer sugar-free, mini chocolate chips. Often these can be hard to find, so I’ll chop up the regular-sized, sugar-free baking chips, or just use the traditional mini chips (like Toll House), as the recipe doesn’t require too much. Feel free to use what suits you best in this small batch protein cookie recipe, even another flavor baking chip. You can even add other mixings like a couple tablespoons of chopped walnuts or pecans.

Baking Method:  Bake in a conventional oven at 350F. However, since this is a smaller-batch recipe, it can also be made in a larger toaster oven (just keep a closer eye, as toaster ovens tend to brown faster IMO).  Also consider using a silicone baking sheet liner so that you don’t have to spray or grease your pan, or wastefully throw away parchment paper.

Storage: If you don’t eat the protein cookies up right away, store on the counter in an air-tight container. Or, freeze cooked cookies in an air-tight, freezer zip bag for up to 6 months. Uncooked dough may also be frozen – roll into 4 balls, store in a freezer-safe container and thaw-and-bake a piece or two as needed.

Enjoy homemade cookie goodness with a boost of muscle-making protein. These Chocolate Chip Protein Cookies are all comfort food with none of the guilt, and have a gluten-free option. The small-batch size (makes 4) is just right to share or last a couple days!

Note: This posts contains affiliate links.

Chocolate Chip Protein Cookie – Small Batch with Gluten-free Option
Prep Time
7 mins
Cook Time
12 mins
Total Time
20 mins
 

Enjoy homemade cookie goodness with a boost of muscle-making protein. These Chocolate Chip Protein Cookies are all comfort food with none of the guilt. The small-batch size (makes 4) is just right to share or last a couple days!

Course: Dessert, Snack
Cuisine: high protein
Keyword: chocolate chips, cookie, protein powder
Servings: 4 cookies
Ingredients
  • ½ cup flour of choice ground popped amaranth, ground oats, gluten-free baking blend, traditional all-purpose flour, etc. However, DO NOT use almond or coconut flour or similar, will be too dense.
  • ½ cup protein powder (about 37 grams or 3 scoops of the @Nuzest plant-based protein I suggested)
  • ¼ cup granulated sweetener real sugar or alternative with cup for cup equivalent measuring
  • ¼ tsp baking powder
  • large egg
  • 2 tbsp coconut oil melted
  • 1 tsp molasses optional
  • 3 tbsp sugar-free mini chocolate chips or the baking chip and/or nuts of your choice
Instructions
  1. Pre-heat oven to 350F.
  2. Add popped amaranth or oats in blender and pulse-blend to a coarse but flour-y consistency. Or use an all-purpose traditional flour or all-purpose gluten-free flour.
  3. Add protein powder, sweetener, and baking powder – pulse to combine. Pour out into mixing bowl.
  4. Stir in egg, oil and molasses. Then add chocolate chips and work together until dough ball forms.
  5. Divide into 4 smaller dough balls.
  6. Place on baking sheet and press down lightly to flatten some with measuring cup.
  7. Bake for 12 minutes or until golden brown on top. Makes 4 cookies

Lemon Chia Seed Protein Snack Cake with Collagen

Lemon is flavor favorite of mine, especially around spring when I’m looking for a light, bright, sweet-tart taste so yummy for treats!

A light, bright, yummy snack cake featuring collagen protein. Only 142 cal per slice and 10g protein. This Lemon Chia Seed Protein Cake a treat for a healthy dessert, post workout snack or even breakfast.

My Lemon Chia Seed Protein Cake is a no-guilt option that is easy to whip up and offers 10 grams of protein, along with 12g net carbs, and6g fat for 142 calories per serving.

This lemon protein cake is great for a healthy dessert, post-gym snack, or anytime you are craving something sweet put looking to keep your lower-carb and strong. High protein low carb desserts like this Lemon collagen cake also makes a great breakfast.

I used Collagen from Great Lakes Wellness, my discount code will save you 10% – THEFITFORK10off

save 10% Great Lakes Wellness collagen and products with code THEFITFORK10off

I’m a big fan, and have used it for years to optimize my wellness and boost my protein intake at the same time. If you ever have any questions about using collagen powder in recipes, shoot me an email.

TIPS FOR MAKING LEMON CHIA SEED CAKE WITH COLLAGEN:

  • I used a standard 9” round cake pan, but you can substitute an 8” square pan, or a 12-count cupcake pan (standard size, not jumbo)
  • Fresh lemon juice gives a bolder, brighter flavor. One larger lemon yields about ¼ cup (4 tablespoons) fresh juice, which is what this recipes calls for. However, in a pinch, you can substitute bottled lemon juice and skip the lemon zest (or use a dehydrated lemon zest).
  • Store leftovers in an air-tight container for up to 5 days, or “meal prep” by packaging up individually in zip-top baggies and stick in the freezer for a thaw, grab-and-go breakfast or snack on your busy days.
  • Lemon protein desserts can be customized into the citrus dessert of your choice by swapping out lemon juice for lime juice, grapefruit juice or orange juice in the cake and glaze parts of the recipe.
A light, bright, yummy snack cake featuring collagen protein. Only 142 cal per slice and 10g protein. This Lemon Chia Seed Protein Cake a treat for a healthy dessert, post workout snack or even breakfast.
Pin this for Later!

Note: This post contains affiliate links.

Lemon Chia Seed Protein Cake with Collagen
Prep Time
5 mins
Cook Time
20 mins
Total Time
25 mins
 

A light, bright, yummy snack cake featuring collagen protein. Only 142 cal per slice and 10g protein. This Lemon Chia Seed Protein Cake a treat for a healthy dessert, post workout snack or even breakfast.

Course: Breakfast, Dessert, workout
Keyword: cake, chia seeds, collagen, high protein, lemon
Servings: 8 servings
Calories: 142 kcal
Ingredients
  • 3/4 cup gluten-free baking flour
  • 1/2 cup unflavored collagen powder
  • 1 tsp baking soda
  • 1/3 cup granulated stevia blend
  • 1/4 tsp salt
  • 2 tbsp chia seeds
  • 2 large eggs
  • ¼ cup almond milk
  • 1/2 cup unsweetened Greek yogurt
  • 3 tablespoons fresh lemon juice
  • 2 tbsp olive oil
Glaze:
  • 1 tbsp collagen powder
  • 2 tbsp stevia blend preferably powdered
  • 1 tbsp lemon juice
  • 1 tsp lemon zest
Instructions
  1. Preheat oven 350F.
  2. Mix together dry cake ingredients: flour, collagen, baking soda, stevia, and salt, and chia seeds.
  3. In another bowl, whisk together eggs, milk, yogurt, lemon juice and oil. Pour into dry ingredients; stir until smooth.
  4. Pour batter into standard 9″ cake pan coated with cooking spray. Bake for 20 minutes. Let cool 10 minutes, invert from pan.
  5. In small bowl, mix glaze ingredients. Use a fork to make small prices in cake for glaze to settle. Pour glaze over top. Cut into 8 slices.; Enjoy!
  6. Note, if using an 8" square pan, baking time will be the same. IF using 12-count cupcakes, reduce time to 15 minutes.

Recipe Notes

Air Fryer Banana with Oatmeal Cookie Crumble Topping

Air Fryer Bananas are the latest trend going around with the recipe crowd on social media . . . and I can see why this banana dessert recipe is so “a-peeling.” LOL!  In minutes, you can make an amazing banana dessert that cooks right in the skin, has almost no prep or clean-up, can be scaled up easily depending on the size and appetite of your crowd, and is incredibly delicious.

Banana dessert recipe, Air fryer bananas, Simple dessert recipe, banana recipes

When my kids were little, we used to frequently grill banana “boats” in foil and this air fryer banana recipe seemed like a similar concept to me!

Banana dessert recipe, Air fryer bananas, Simple dessert recipe, banana recipes

I decided to dress up my version of Air Fryer Bananas with a crumbled topping (reminiscent of a fruit crisp topping) but with the vibe of a comforting homemade oatmeal cookie!

The banana flesh softens quickly in the air fryer into a spoonable delight, and the buttery topping with oats, raisins and pecans browns up into a yummy crust.

Air Fryer Bananas are so EASY to make!

An Air Fryer Banana with Oatmeal Cookie Crumble Topping is ah-mazing served warm, as is – or pair up with something creamy like Greek yogurt, ice cream, or cottage cheese blended with a few drops of stevia.

Banana dessert recipe, Air fryer bananas, Simple dessert recipe, banana recipes
Pin this for later!

P.S. I use the Omni Plus XL Air Fryer Toaster Oven from Instant Pot — it’s like a little oven for my countertop — it broils, roasts, bakes air-frys and more plus I love the larger capacity and how the door and shelves work similar to my traditional oven set up. It’s just easy!

This is the toaster over – air fryer I use , the Omni XL from Instant.

Disclaimer: This post contains affiliate links. I may earn a small commission for purchases made, however the price to you remains the same. Proceeds are used to offset operating expenses for The Fit Fork. Thank you!

5 from 6 votes
Air Fryer Banana with Oatmeal Cookie Crumble Topping
Prep Time
2 mins
Cook Time
8 mins
Total Time
10 mins
 

Quick, easy and absolutely delicious, this simple dessert recipe features a banana air-fryed right in the it's skin. A healthier option for dessert — serve with Greek yogurt for extra "a-peel"!

Course: Dessert, Snack
Keyword: air fryer, banana, dessert
Servings: 2 servings
Ingredients
  • 1 large banana
  • 1 ½ Tbsp. butter melted
  • 1/8 tsp ground cinnamon
  • 1 Tbsp. coconut sugar date sugar or brown sugar
  • 2 Tbsp rolled oats
  • 2 Tbsp gluten-free baking blend
  • 1 Tbsp chopped raisins
  • 1 Tbsp chopped pecans
  • Toppings of choice
Instructions
  1. Pre-heat air-fryer to 350F .
  2. Slice banana in half crosswise and place in basket.
  3. In small bowl, mix up remaining ingredients (except toppings) into a “dough” and press onto each half of banana. Cook in air-fryer for about 5 to 8 minutes or until top golden brown.
  4. Serve hot with toppings of choice like whipped cream, ice cream, yogurt or whatever pleases you.
Recipe Notes

Sugar-free Chocolate Chip Cottage “Cheesecake” – no bake, lower carb)

Jump to Recipe

Craving dessert? My Sugar-free Chocolate Chip Cottage “Cheesecake” is a smart, no-added-sugar, single-serve solution to soothing a sweet tooth. And, it’s loaded with more than enough protein to stand alone as a quick meal thanks to cottage cheese and collagen powder (193 calories, 11g carb, 29.5g protein per serving).

This sugar-free cheesecake dessert features blended collagen and cottage cheese to create a high-protein, lower carb healthy dessert with no added sugar. Great for post workout snack or bedtime snack.

The secret to making a high-protein cheesecake dessert is to process cottage cheese in the blender until creamy. I also add a serving of collagen hydrolysate powder to up to protein and reap the additional health benefits — for me particularly that is joint and bone health as well as overall wellness.

Great Lakes Wellness Collagen - save 10% coupon discount code THEFITFORK.COM
Save 10% on great lakes  gelatin collagen with code THEFITFORK10OFF at bit.ly/ShopGreatLakesGelatin
Collagen helps to boost protein and provide health benefits for skin, joints & overall wellness!

This is a single-serve dessert recipe, which is nice when I want a healthier dessert and want to stay out of my hubby and kid’s ice cream and Oreos, lol! However, if you want to meal prep a few (it will keep for several days in an air-tight container), simple multiply the ingredient list by however many servings you need.

This single-serve, sugar-free dessert incorporates cottage cheese and collagen blended smooth to create a healthy cheesecake experience -- sugar-free chocolate chips and diced strawberries make it extra yummy! Get this no-bake recipe that supports workout recovery, health joint and bone support, and overall wellness at thefitfork.com
Pin this for later!

As for the collagen, I used the Collagen Hydrolysate from Great Lakes Wellness– I used the vanilla flavor, but unflavored works too, just add a splash of vanilla extract and a packet or two of stevia for sweetness.  I’ve been using this brand for three years, and love it – you can use my discount code THEFITFORK10OFF to save 10% on your order.

Great Lakes Gelatin collagen hydrolysate -- vanilla flavored  Use code THEFITFORK10OFF to save 10% off your order

Sugar-free chocolate chips are also key – you just toss them right in the blender with the collagen cheesecake mixture and they chop up into smaller bits.

save 10% Great Lakes Wellness collagen and products with code THEFITFORK10off

YUM, hope you enjoy this high protein cheesecake dessert! It makes a great post-workout snack as well as bed time snack. In fact, dairy products contain help to encourage sleep (tryptophans!) . . . and collagen has been show to support a good night’s rest too. And the protein helps to keep you satiated through the night and support muscle recovery/gains – so win-win for this collagen cheesecake with cottage cheese!

Disclaimer: This post contains affiliate links. I may earn a small commission on sales, but price to you remains the same. Proceeds help to offset operating expenses for The Fit Fork. Thank you!

5 from 5 votes
This no added sugar cheesecake dessert features cottage cheese and collagen blended until creamy -- sugar free chocolate chips and strawberries put this no-bake, no crust, lower carb, single-serve recipes over the top.
Sugar-free Chocolate Chip Cottage “Cheesecake” – no bake, no crust, very easy
Prep Time
5 mins
Total Time
5 mins
 

This sugar-free cheesecake dessert features blended collagen and cottage cheese to create a high-protein, lower carb healthy dessert with no added sugar. Great for post workout snack or bedtime snack.

Course: Dessert, Snack, workout
Keyword: cheesecake, chocolate chips, collagen, dessert, high protein, low carb, no bake, sugar-free, workout snack
Servings: 1 serving
Calories: 193 kcal
Ingredients
  • 2/3 cup 2% cottage cheese
  • 2 tbsp. vanilla collagen powder if substituting plain collagen, add 1 little packet stevia and 1/4 tsp vanilla extract
  • 1 tbsp sugar free chocolate chips
  • 1 tbsp sugar-free chocolate syrup
  • 1 small strawberry, diced
Instructions
  1. Add cottage cheese and collagen to blender, process. Mixture will be thick and you will have to stop blender once or twice to scrape down sides — keep blending until smooth.

  2. Add chocolate chips to this mixture and blend for 30 seconds or until they are chopped up a bit.

  3. Spoon 1/2 of the cheesecake mixture into a small container, drizzle with chocolate sauce. Add remaining cheesecake mixture on top and add diced strawberry and extra chocolate chips if desired.

  4. To make more than one serving, multiply recipes accordingly. Will keep in fridge, covered, for up to 3 days.

Recipe Notes

save 10% on great lakes gelatin collagen and other products with code THEFITFORK10OFF
Save 10% code: THEFITFORK10OFF

“Shake It Up” Paleo Watermelon Ice Cream

This post is sponsored by Watermelon.org, however all opinions, comments and enthusiasm remain my own!

Jump to Recipe

Warmer weather is on the way and I’m craving all the watermelon things and quite literally working my appetite up! Check out my “Shake It Up” Paleo Watermelon Ice Cream that is fun to make as it is to eat! 

Do you have memories of making “kick the can” ice cream at summer camp or spring break gathering as a kid? Back in the day, my mom would pour in the ingredients for ice cream into a can and then stick that can into a bigger can filled with ice and salt. Then my brother and I would kick, roll and throw that can around until a creamy sweet treat formed from our hard work!

“Shake It Up” Paleo Watermelon Ice Cream - no ice cream machine or freezer necessary. Simple ingredients poured into a zip-top baggie and then place into a container with ice and salt. Then, it’s a 15-minutes of shake-shake-shaking to create a creamy frozen dessert treat that is added sugar free, lower carb, Paleo-friendly and with a vegan option. A fun family activity and way to sneak exercise into your day. #Ad
Pin this for later!

I took the same idea for this no-machine-needed, no-churn ice cream and turned it into a healthier version with fewer carbs and suitable for Paleo diets – and, of course, it features my favorite fruit – WATERMELON! Plus, you get a little 15-minute workout during the human-powered freezing process.

3 cups of watermelon has only 120 calories!
3 cups of chopped watermelon has only 120 calories!

Technically, you can make “kick the can” ice cream (or in this case, “shake the container” ice cream) with any type flavor profile you desire. However, for me, watermelon was a non-negotiable featured ingredient – the amount and volume of watermelon used (3 cups cubed) helped me to cut some of the extreme richness and displace some of the calories used with the second main ingredient – full-fat coconut cream. Did you know that three cups of cubed watermelon have just 120 calories?!  

Watermelon also adds natural sweetness and a bumper crop of health benefits for my active lifestyle like vitamin C and A, lycopene for heart health, and the amino acid l-citrulline which studies show may help move blood through the body, lower blood pressure, and help lessen muscle soreness after a workout. Plus, watermelon always puts me in a happy mood.

Watermelon is deliciously sweet, but I added a few drops of stevia to bring up the coconut cream. Collagen powder from Great Lakes Wellness (save 10% code: THEFITFORK10OFF) is also added for a protein boost and other functional nutrition.

save 10% Great Lakes Wellness collagen and products with code THEFITFORK10off

For me specifically as an older runner and athlete, I use collagen to help support my joints, ligaments, bones and overall wellness. Collagen combined with the l-citrulline in watermelon is a big win-win for my workout recovery. Feel free to use an animal or plant-based collagen powder depending on your dietary needs – or, the collagen powder can be omitted completely without any change to the recipe.

This low carb watermelon ice cream is super easy to make – let the kids make their own batch and have a family “shake off” to see who can get theirs to freeze first! Simply toss cubed watermelon in a blender with full-fat coconut cream, and puree it all up.

Next, pour watermelon coconut ice cream mixture in a heavy-duty zip-top bag and set inside a larger container filled with ice and 1/2 cup salt. Salt will typically be labeled “ice cream salt” or “rock salt,” in in a pinch you can use COARSE sea salt (but not regular table salt). I had to go this route as the rush on rock salt cause by the recent Texas storm. Now it is in the 80s – crazy Texas weather!

When choosing your container, you can use a big old coffee can like my mom did (if they even sell coffee like that anymore). I preferred to use a big-mouthed water jug with handle so that I could swing it around! In a pinch, you can also put the ice and salt in a bigger gallon-sized baggie.

Then all that’s left is shaking, swinging, kicking or rolling it around for about 15 minutes until the coldness of the ice (kept colder by the salt) and constant motion of the container creates a creamy sweet reward for your work!

“Shake It Up” Watermelon Ice Cream Exercise Ideas

Shake it Up Watermelon Ice Cream is a fun activity for kids of all ages — sneaking that exercise in is a win-win. Stock the freezer with frozen watermelon cubes for year-round enjoyment.

For a complete demo on how to make Shake it Up (Kick the Can) Watermelon Ice Cream, watch my IGTV video HERE.

Check out the other amazing and creative watermelon recipes at Watermelon.org like Creamy Watermelon Sherbet  and Watermelon Ice Cream Bars.

watermelon ice cream bars
5 from 3 votes
“Shake It Up” Paleo Watermelon Ice Cream
Prep Time
5 mins
Cook Time
15 mins
Total Time
20 mins
 
Work up a hunger for this simple and naturally sweet watermelon ice cream that is friendly for lower carb and Paleo diets. No churning required, simply shake the ice and salt filled outer container for 15 minutes until you create a sweet reward! Fun for kids and whole family.
Servings: 4
Calories: 232 kcal
Ingredients
  • 3 cups chopped watermelon frozen if you want a head start, but not necessary
  • 1 13.5-oz can full-fat unsweetened coconut milk
  • ½ cup unflavored collagen powder optional
  • 5 – 15 drops liquid stevia
  • 5 to 6 cups ice cubes
  • ½ cup rock salt or coarse salt
  • Topping of choice
Instructions
  1. Add chopped watermelon to blender. Use cold watermelon chunks or if you want a head start, use frozen chunks.
  2. Add full-fat coconut milk to pitcher. Other milk options can be used (like almond milk, light coconut milk, or whole milk), but will create a less creamy result.
  3. If desired, add a plant-based or animal-based unflavored collagen powder to blender. This may be omitted completely without need to swap for another ingredient.
  4. Blend everything up until smooth, about 30 seconds. Taste test the mixture and add stevia drops to achieve your level of sweet preference.
  5. Pour mixture into a 1-quart freezer-style zip-top baggie; seal tightly.
  6. Fill container with half of the ice and salt. Use a container similar to a large coffee can, handled wide-mouth jug, or even gallon sized heavy-duty zip-top bag.
  7. Add tightly sealed smaller baggie of watermelon mixture in center. Top with remaining ice and salt. Close container lid or seal tightly.
  8. Shake vigorously for approximately 15 minutes, constantly moving the ice around ice cream mixture.
  9. Remove ice cream bag from container and snip off end. Pipe into four small bowl or cones. Enhance with toppings as desired (I used crushed freeze-dried strawberries).
Recipe Notes

Save at GreatLakesGelatin.com with code: THEFITFORK10OFF
Save 10% Code: THEFITFORK10OFF