Good Nuts! Macadamia Crusted Tilapia

Photo by Taste of Home

Macadamia nuts and tilapia are a tasty, healthy recipe combination.

Macadamia nuts get a bad rap for having “too much” monosaturated fat, or so says the U.S. Food and Drug Administration, the same big brother who says BPA in food packaging is safe for kids and that ketchup could be considered a vegetable. Apparently these tree nuts, along with Brazil nuts and cashews, are on the naughty nosh list because they exceed the cut-off point of 4 grams of saturated fat per 50 grams of nuts – macadamias have 6 grams of saturated fat.

But, if you love this buttery nut that hails from Hawaii and Australia, don’t fret! A recent study found that eating a heart-healthy diet that included 1.5 ounces of macadamia nuts per day versus eating the ‘regular American diet’ could possibly reduce total cholesterol by up to 9-percent along with additional reductions in low-density lipoprotein cholesterol and triglyceride levels. Both diets in the study provided equal amounts of fat consumption and researchers observed that the reduction in LDL or bad cholesterol was more significant than would be predicted by just the healthy fats in the nuts alone, an indication that macadamias contain some other unknown property that helps lower cholesterol.

In plain English, all this science talk simply means that macadamia nuts are much more than the FDA has cracked them up to be. Used in moderation, as part of a heart-healthy diet, this nut may actually be doing your body good – but not chocolate covered!  If you’re looking for your daily dose of macadamia nuts, here’s a great healthy recipe I developed that was published in Taste of Home:

 Macadamia Crusted Tilapia

Ingredients

  • 2 eggs
  • 1/8 teaspoon cayenne pepper
  • 1 cup all-purpose flour
  • 1-3/4 cups macadamia nuts, finely chopped
  • 4 tilapia fillets (6 ounces each)
  • 1 tablespoon butter, melted

Pineapple Salsa

  • 1 cup cubed fresh pineapple
  • 1/4 cup chopped sweet red pepper
  • 3 tablespoons thinly sliced green onions
  • 2 tablespoons sugar
  • 1 jalapeno pepper, seeded and chopped
  • 1 tablespoon lime juice
  • 1/2 teaspoon minced fresh gingerroot
  • 2 tablespoons minced fresh cilantro

Directions

In a shallow bowl, whisk eggs and cayenne. Place flour and macadamia nuts in separate shallow bowls. Coat tilapia with flour, then dip in egg mixture and coat with nuts.

Place on a greased baking sheet; drizzle with butter. Bake at 375° for 15-20 minutes or until fish flakes easily with a fork.

Meanwhile, in a small serving bowl, combine the pineapple, red pepper, onions, sugar, jalapeno, lime juice and ginger; sprinkle with cilantro. Serve with fish. Yield: 4 servings (1-1/2 cups salsa).

Nutritional Facts1 serving (1 each) equals 681 calories, 51 g fat (10 g saturated fat), 135 mg cholesterol, 233 mg sodium, 44 g carbohydrate, 6 g fiber, 19 g protein.


Oh, Yes I Did! Nuun Tri-Berry Electrolyte Jellies

Nuun recipe perfect for Hood To Cost Relay - Team After Nuun Delight

Nuun electrolyte jellies are both a novel and nutritious recipe.

A Jell-O dish of some sorts has long been on the menu at our Easter gatherings, think big 60s style molds suspending little bits of fruit and marshmallow. But, hey, this is 2012 and I need some Jell-O that’s a little more ‘on-the-go’ friendly and addresses my electrolyte needs this week as I finish up training for the Boston Marathon. So hmmm, scratching head . . . why not combine my favorite sports drink tab (Nuun) with a mixture of plain and flavored gelatin to create some mighty-fine, finger-food fuel? Can’t wait for the reaction when I set down this masterful remix of our time-warped gelatin salad tradition on the big Easter buffet.

I’ve been drinking Nuun for years out on my long runs, the subtle yet seriously yummy flavors don’t overwhelm with sweetness – in fact, Nuun tablets are sugar-free with no artificial flavors or colors, providing optimal hydration without all those carbs that sometimes upset my stomach during a race. Now, these jellies do have some sugar in the recipe . . . a girl can’t live by sodium, magnesium and potassium alone!

I have used plain ole table sugar (sucrose) as studies are showing it is really the best best when it comes to endurance and so does this study.  For example, you can’t really ingest enough glucose and metabolize it at a rate fast enough to keep up with your needs in an endurance event and fructose is linked with tummy troubles. So, I’ve just stayed with sugar.  If you want to swap in coconut sugar instead, that will work well too — it’s 80% sucrose and free of fructose.

This recipe uses Nuun Tri-Berry tablets, but after the Boston Marathon, I am going to experiment more with this  recipe and make a ‘sweet victory’ version using Lemon Chai from the Natural Hydration line along with lemon Jell-O and a litt levodka . . . stay tuned for that!

Nuun ‘Tri-Berry’ Electrolyte Jellies

Jello made with Nuun Tri-Berry tablets

• 1 env. (1/4 oz.) unflavored gelatin
• 1¼ cup cold water
• 3 NUUN Tri-Berry sports drink    tablets
• 1/3 cup sugar
• 2 Tbs. cornstarch
• 2 pkg. (3 oz. each) sparkling wildberry flavor gelatin*

Pour cold water into small bowl, drop in Nuun tablets and let dissolve. Sprinkle unflavored gelatin over Nuun-gelatin mixture, let stand 1 min. Mix 1/4 cup sugar and cornstarch in medium saucepan. Gradually whisk in Nuun-gelatin mixture until blended. Bring to boil on medium heat; cook 5 min., stirring constantly. Remove from heat. Add dry gelatin mixes; stir 2 min. until completely dissolved. Pour into 9×5-inch loaf pan** sprayed with cooking spray. Refrigerate 1 hour or until firm. Remove from mold by holding pan upside-down over cutting board, it will slip out. Cut into 24 pieces.

*you can use any mixture of Nuun and flavored gelatin that you prefer
** In lieu of the loaf pan, I used a 24-ct ‘brownie bite’ silicone baking mold.

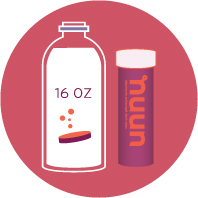
Nuun Tri-Berry Hydration

This is what the current Nuun Tri-Berry container looks like!

Core Values

Valerie Hunt CrossFit abs

Aspire to abs like these with easy core workout.

There are many reasons to exercise your core muscles, not just having killer six-pack abs like my friend Valerie Hunt from Fit & Fearless CrossFit – although we’ll all agree this is a nice perk! Keeping fit in your midsection, by working out both the abs and back muscles, helps the body function properly with everyday chores like lugging around a kicking toddler or unloading bags of mulch from car. With stronger core muscles, you’ll be less prone to injury and have more stability, flexibility and muscle tone to boot! I used to avoid sit-ups and crunches at all costs, until one day after a 10-mile running race I wondered why my back hurt more than my legs. Apparently, it was almost too much for my weak core to stay upright for the distance – that’s when I gave in to a new workout plan that included a little more attention to my middle! Nothing hardcore or time-consuming, you can make up a routine at home that takes 15 minutes or less, two to three times a week. There are plenty of core exercises to choose from if you surf around the Web or flip through fitness magazines, here are three fun and fairly easy moves to get you started that were first published in Real Simple:

                                               Knee Fold Tuck 

(A) Sit tall, hands on floor, knees bent, squeezing a medium ball between them. (B) Lift knees so shins are about parallel to the floor; extend arms. Pull knees toward shoulders, keeping upper body still. Bring knees back to starting position. Repeat 15 to 20 times.


Side Balance Crunch

Begin with left knee and left hand on the floor, right arm straight up. Extend right leg so your body forms a straight line. (B) Pull right knee toward torso and right elbow toward knee. Straighten arm and leg. Repeat 10 times, then switch sides.


Sliding Pike

(A) Begin in a plank on an uncarpeted floor, hands under shoulders and a towel under feet. (B) With legs straight, raise hips and draw legs toward hands into a pike position—your feet should slide easily. Hold for one count, then return to start. Repeat 10 times.


‘Better-For-You’ Chocolate Chip Banana Bread

Looking for a quick banana bread recipe that is not too fat-laden yet moist and tasty enough to go ape over? Several years ago, I gave a makeover to my favorite banana bread recipe by replacing some of the fat with applesauce and a fat-free sour cream substitution. The success of the swap was as clear as the crumbs left in the pan – it was a winner with my family for a breakfast treat and afterschool snack. Plus, I’ve even been known to sneak a piece on occasion– hey, it might be a cheat on the Paleo, Zone and other low-carb diets, but you have to live a little people! Recipe written by yours truly, Jennifer Fisher, and originally published in Country Woman February/March 2010, p34.  Enjoy!


‘Better-For-You’ Chocolate Chip Banana Bread

Ingredients

  • 2 tablespoons butter, softened
  • 1-1/2 cups sugar
  • 2 eggs
  • 1-1/4 cups mashed ripe bananas (about 3 medium)
  • 1/2 cup fat-free sour cream
  • 1/4 cup unsweetened applesauce
  • 1 teaspoon vanilla extract
  • 3 cups all-purpose flour
  • 2 teaspoons baking soda
  • 3/4 teaspoon salt
  • 2 cups (12 ounces) semisweet chocolate chips

Directions

In a large bowl, beat butter and sugar until crumbly, about 2 minutes. Add eggs; mix well. Beat in the bananas, sour cream, applesauce and vanilla. Combine the flour, baking soda and salt; add to butter mixture just until moistened. Fold in chips. Transfer to two 9-in. x 5-in. loaf pans coated with cooking spray.

Bake at 350° for 40-45 minutes or until a toothpick inserted near the center comes out clean. Cool for 10 minutes before removing from pans to wire racks. Yield: 2 loaves (16 slices each).

Nutritional Facts: 1 slice equals 155 calories, 4 g fat (2 g saturated fat), 16 mg cholesterol, 148 mg sodium, 28 g carbohydrate, 1 g fiber, 2 g protein. Diabetic Exchanges: 1-1/2 starch, 1/2 fat.

Food and Fun at the Capitol 10K

Placed 11th female overall!

This past Sunday I got my feet out on the street with about 25,000 other like-minded crazies to run the famous Capitol 10,000 in Austin, Texas. Now in its 35th year, this race is the largest 10k in Texas and the 5th in the nation.  Despite the hills, the heat and the humidity, there was plenty to be smiling about during the race including my Texas Beef Team cheering squad at mile 3 and an assortment of random sights — a guy jumping roadside on a big trampoline, a volunteer pushing bacon strips as ‘race fuel,’ and lots of interesting-to-say-the-least costumes.

Also keeping my mind off the pain during the tough 10k were the thoughts of post-race food! The party on Auditorium Shores had plenty of goodies, my favorite being the Eoni energy cakes and bars made from all natural ingredients (get them at HEB and Sprouts). While you shouldn’t pig out after a 10K, you definitely do need to take in some carbs and protein within 30 minutes to help recover. To get an idea of your energy expenditures, check out this article I wrote last year on Calories Burned Running a 10K.