Throw a Wall Ball Into Your Workout

If you’re getting into CrossFit or some other functional fitness program, you’ll soon be introduced to Wall Ball, if you haven’t already!  When you consider functional exercise is meant to move multiple muscles and joints over multiple planes, Wall Ball is a winner in so many ways!  This one move alone works 11 different muscles including quads, glutes, calves, hamstrings, abs, lower back, chest, front delts, back delts, bis and tris.  Plus, if you are doing the drill to achieve the highest number of reps possible within a certain time period, it can also be quite an intense cardiovascular workout.

As the name implies, the only equipment needed for Wall Ball is a sturdy wall and soft medicine ball. Beginners can start with a 6-pound ball and, over time, work up to 10, 12, 16, 20 pounds or more! Before you start the drill, chalk off a line about 8 to 10 feet above the ground as your target.

To perform the movement, assume a front squat position with feet shoulder width apart. Hold ball to your chest, elbows tucked close to sides. Propel body upward in an explosive movement and follow through by pushing / tossing the ball toward the wall target. As the ball rebounds, catch it with outstretched arms and absorb the impact while moving back into the squat position.  Repeat for a predetermined amount of reps (5 sets of 8 reps a good start). Be mindful that each shot / catch movement remains fluid and continuous.  The drill can be made as difficult as needed by increasing the weight of the ball, moving further back from the target, or raising the height of the target.

As you become more proficient, The CrossFit Journal  lists milestones to work toward:

  • 1 minute: 25 shots
  • 2 minutes: 50 shots
  • 3 minutes: 75 shots
  • 4 minutes: 100 shots
  • 5 minutes: 125 shots
  • 6 minutes: 150 shots


With Hydration and Juice For All! Nuun-ified Watermelon-Blueberry-Pomegranate Agua Fresca Recipe

Happy 4th of July! Nothing like sitting out on the front porch, resting hamstrings fatigued from the morning’s Freedom 5000 and declaring independence from corn-syrupy sodas with a nice big glass of watermelon agua fresca in hand. Even though these “fresh waters” originated in Mexico and Central America, I am happy to pledge my allegiance to the light-bodied, fruitiness that is oh-so ultra thirst-quenching without being too sugary sweet.

Of course, I had to take my own liberties with this summery south-of-the-border sipper by adding a couple Nuun All-Day Hydration Blueberry Pomegranate tablets.  If you aren’t familiar with this new product from Nuun, you should be! Each fizzing drink tablet has less than 8 calories, zero sugar and no artificial stuff while boasting a blend of vitamins A, B, C, D and E to keep you hydrated, energized and focused throughout the day

Nuun Watermelon-Blueberry-Pomegranate Agua Fresca Recipe

  • 2 cups cold water
  • 2 tablets Nuun All-Day Hydration Blueberry Pomegranate
  • 2 cups seedless watermelon, chopped in 1-inch cubes
  • 1 teaspoons Stevia sweetener
  • Crushed ice for serving (optional)
  • Handful of frozen blueberries for garnish (optional)

Pour water in blender; drop in Nuun tablets and wait for them to completely dissolve. Add watermelon chunks and Stevia to blender and puree until smooth. Pour mixture through a strainer into a pitcher, forcing a bit of the pulp through. Chill at least 30 minutes before serving. Serve with or without ice cubes and a smattering of frozen blueberries. Makes two servings (only 60 calories each)!

Coming up tomorrow: A Nuun Giveaway!

Blogger on the Run aka Jennifer Fisher

If you could see me, you’d notice that I’m blushing! Today, I am being featured as a Blogger on the Run at Women’s Running magazine. Check out the interview and find out all my secrets!  Plus, as a bonus, if you leave a comment today at the bottom of the article (not here), you’ll be entered to win a one-year subscription to Women’ Running magazine.  This monthly magazine is a great resource for female runners, covering all aspects of the running lifestyle, from training plans to the coolest (and cutest) new gear.

If you didn’t win today, come back and get a 20-issue subscription here:

From Flexed-Arm Hang Flunkee to Dead-Hang Pull-Up Diva – Pull Up Tips

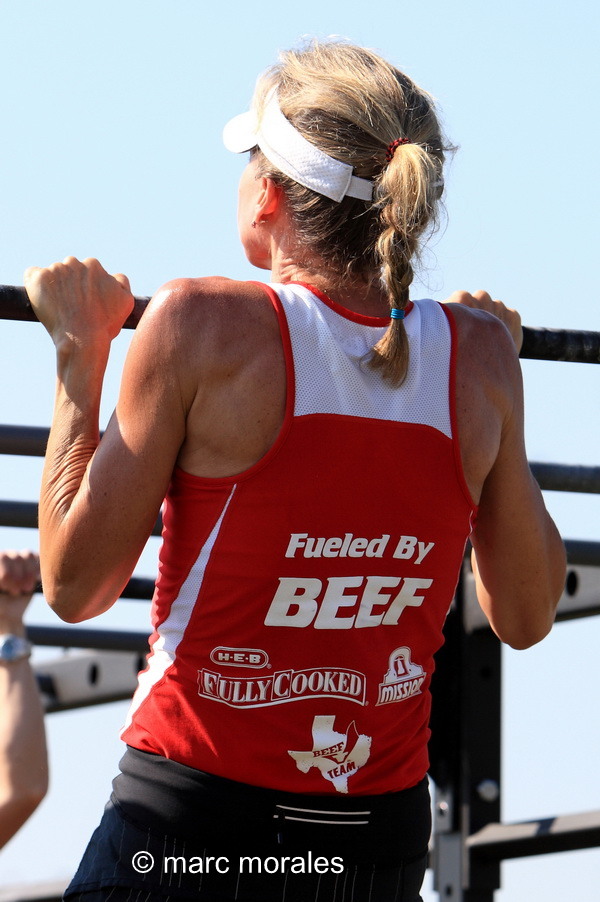
My recent experience at the 2012 Austin Fit Magazine Fittest was filled with quite a few events outside my comfort zone. One of the most intimidating of all was the pull up test that required us girls to perform this classic upper-body strength move just like the guys. No easier chin-ups (where fingertips are oriented on the bar to your face), no swinging, jumping, kipping, butt-wiggling or knee-pumping.   These pull-ups had to be strict, military-style pull-ups where the body must fully-extend back downward into a “dead hang.”  How could I ever make this happen? Never had I EVER even passed the flexed-arm hang test for the Presidential Fitness Test in elementary school. Ugh!

In January at CrossFit Endurance Camp, I could only do one strict pull-up and a couple with a kip. It was embarrassing to be around so many strong women, but a least I had them on the run! Not fully committed to the idea, I started practicing pull-ups chin-up style with a kip (maybe) once a week working my way up to four or five using major swinging motion to get my chin over the bar. Not long later, I could do four or five without the kip. On competition day, an adrenaline rush helped me squeak out six military dead-hang pull-ups and the judge noted I had “good form.”  Whoo-hoo! Inspired by the winner in my age-group who completed 15, I started working a little harder on the dead hang pull-up. Now less than a month later I can do 9!

If I can do “proper” pull-ups (palms facing away from you, no extraneous body movement), so can you! Here are some tips to get you started.

Practice: Do a pull-up progression 3x per week.  Start with 5 sets of 1 or 2 and then work your way up to 3 sets of a few less than your maximum effort.

Negatives: If you are unable to complete a strict pull-up, work on “negatives” first. Negatives are done by jumping up to the bar from the ground, box or half stability ball or with a spotter boost. Once your chin clears the bar, slowly move into the fully-extended dead hang position. Repeat!

Machine-Assisted Pull-Ups: This piece of gym equipment isn’t as intimidating as it looks. Set the counter-weight an amount that offers you an attainable challenge. Kneel on the platform, grasp the overhead bar and pull up!

Supplemental Exercises: Lat Pull-Downs, Ring Rows, Ring Dips, Bicep Curls, Dumbbell Rows

‘Whey Cool’ Strawberry Sherbet Pie with Protein Powder Recipe

Pie has a bad reputation and it’s no wonder why. A small slice of apple pie with a modest ½ cup scoop of vanilla ice cream has 571 calories, 27 grams of fat and scant protein.  Of course, a piece of decadent pie on special occasions isn’t going to ruin results earned from working out, running or whatever you do; but, it just isn’t the right fuel to keep an active person feeling well and going strong.  If you have a sweet tooth (like me) and want a little slice of heaven more frequently than on July 4th and Thanksgiving, whip up my ‘Whey Cool’ Strawberry Sherbet Pie with Protein Powder tonight. Based on a super-easy summer recipe my mom used to make during my childhood in blazing hot Arizona, this no-bake pie is modified for maximum performance with no-sugar added and fat-free products along with a couple scoops of protein powder. Yeah, that’s right, I said protein powder.


‘Whey Cool’ Strawberry Sherbet Pie with Protein Powder Recipe

  • 1 quart no-sugar added sherbet
  • 2 scoops whey protein powder, vanilla flavor
  • 1 8-oz container no-fat, dairy-free whipped topping, thawed
  • 1 pre-made chocolate cookie pie crust (Keebler Ready-Crust Chocolate)
  • ½ cup fat-free chocolate syrup
  • 1 pound fresh strawberries, washed, cored and sliced

Scoop entire container of sherbet into large mixing bowl; let sit for a few minutes to soften a bit. Sprinkle protein powder over sherbet a little at a time (to prevent clumping); mix in by hand or with beaters. After all protein powder is incorporated, fold in whipped topping with spatula until combined. Spoon entire mixture into prepared chocolate cookie crust; freeze for 3 hours or overnight until firm. To serve, cut into 8 slices with knife run through hot water. Top each slice with 2 ounces of strawberries and 1 tablespoon of chocolate syrup. Serves 8.

Nutrition information (per 1/8 of pie with toppings): calories 275, total fat 6g, saturated fat 1g, trans fat 2g, total carbs 48g, sugars 9g, protein 9g.

Note: If you want to clean this recipe up even more, skip the pie crust and just spoon the sherbet mixture into the pie pan.  This removes about 100 calories, 4g of total fat (2 of which are trans fat), 14g carbs and 6g sugars.