
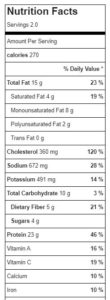
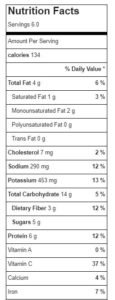
When life gets hectic and you’re wondering what to eat for lunch, it’s tempting to reach (or drive-thru) for something quick and not-so-healthy. But instead try my Southwest Cottage Cheese Egg Salad, a delicious, nutritious option that’s just as fast. This busy-day lunch idea is simple, economical, low-carb, and packed with protein to keep you fueled up to going. Macros: 270 cal, 15g fat, 5g net carb, 23g protein
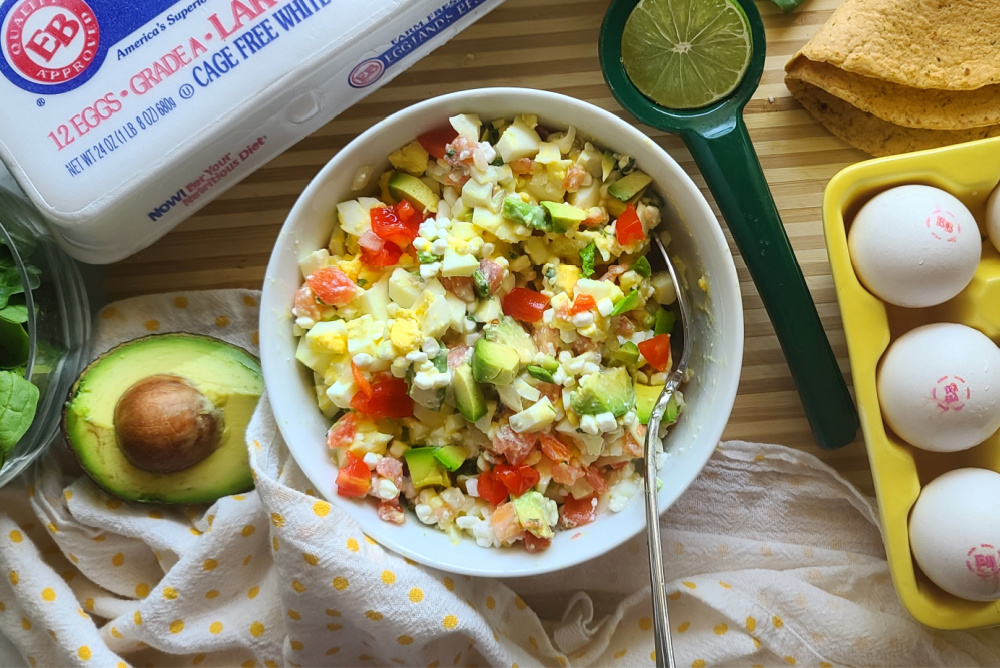
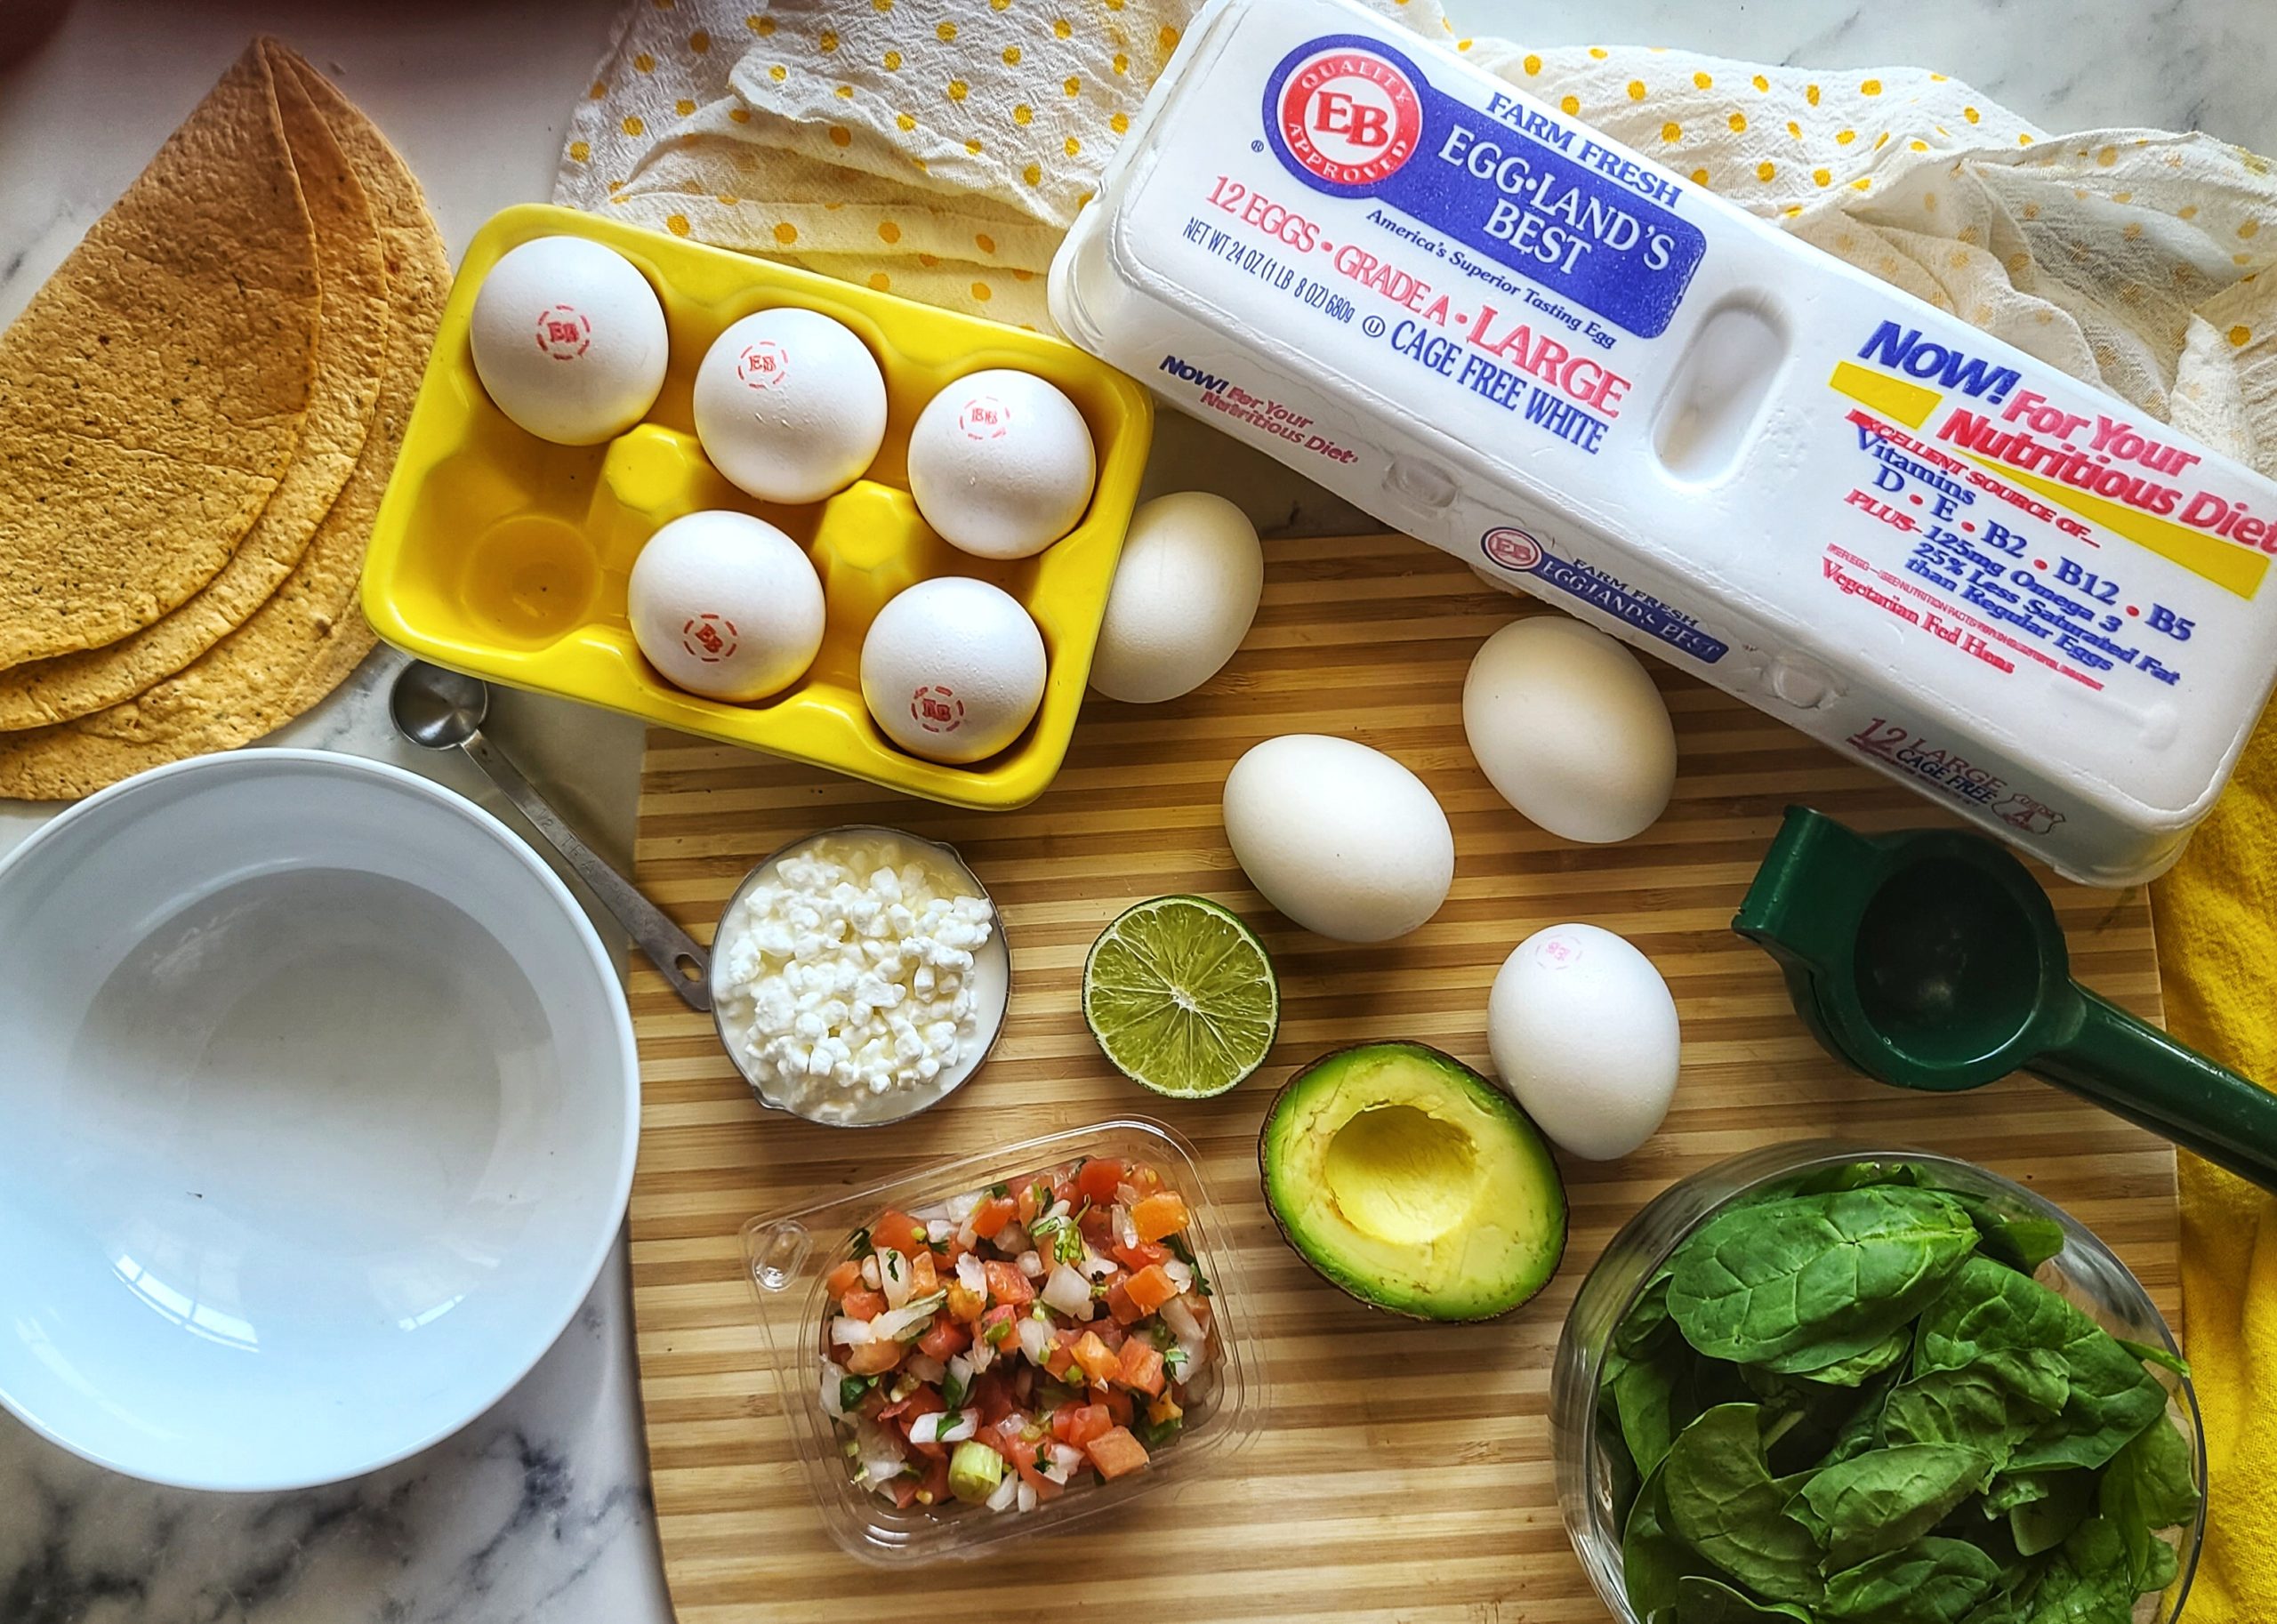
The simple, wholesome ingredients include chopped eggs mixed with pico de gallo, cottage cheese, fresh lime juice (try this lime squeezer), and avocado. This combination makes for a satisfying, flavorful meal that you can enjoy in so many ways! Pile it into a low-carb wrap for a convenient handheld lunch or spread it on a slice of whole-grain bread. But, it’s not just for sandwich and wrap fillings — try tossing it over a fresh salad, stuffing it into a scooped-out tomato or cucumber, or even serving it as an appetizer with crackers.
One of the best parts of this egg salad variation is the use of low-fat cottage cheese instead of mayonnaise. Blending the cottage cheese until smooth gives you a creamy texture without the extra fat, while boosting the protein content. This swap makes the dish not only lighter but also more satisfying, perfect for those looking to stay full throughout the day.
This southwest egg salad is a true lifesaver when you’re on the go or need a quick meal idea. You may have tried other eggs salad recipes that have been mediocre – but this one is a winner! Give it a try, you’ll be amazed at how simple and flavorful healthy eating can be! In the video, I’m eating in one of my favorite ways – a low-carb tortilla wrap! BTW, love to store my boiled eggs in a cute ceramic egg holder so I don’t get them confused in the fridge with raw eggs!
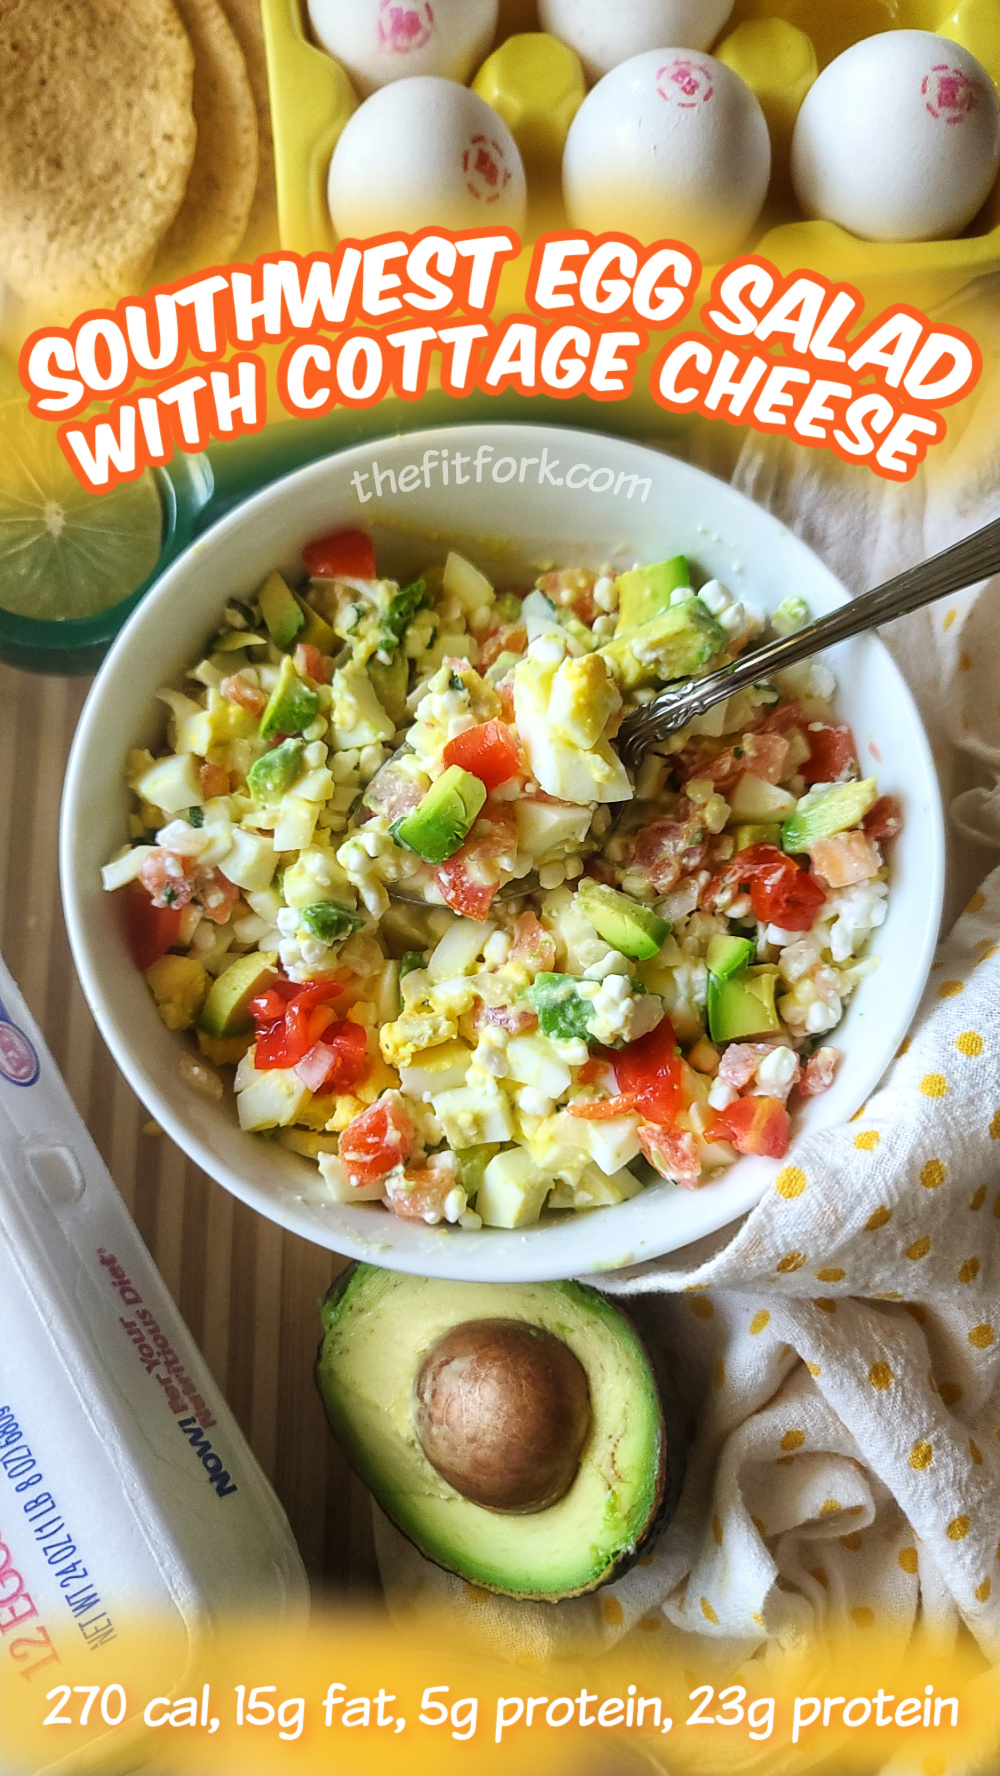

Spice up lunch with these flavorful Southwest Cottage Cheese Egg Salad. Thanks to cottage cheese, it offers more protein with less fat than a traditional recipe. With a zesty lime kick and great nutrition, this quick meal – use in a tortilla wrap, fix up a sandwich, pile on a salad, or stuff into a scooped-out tomato or cucumber.
- 4 large hard-boiled eggs peeled and roughly chopped
- 4 ounces Pico de Gallo
- 2/3 cup cottage cheese* *blended if you prefer a more creamy texture
- ½ medium avocado chopped
- 2 tsp lime juice
-
In medium bowl, mix together chopped eggs, cottage cheese, chopped avocado, pico de gallo and lime juice.
-
Serve in wrap, sandwiched between bread, on a green salad or stuffed into a tomato — so many options!
Note: This post contains Amazon affiliate links.


