CrossFit + POSE: My Secret Weapon to Running 50 Miles on a Whim

SAMSUNGA few weeks ago, Valerie Hunt, my good running friend (who, conveniently, happens to be a coach for both POSE Method and CrossFit) dragged me across the country to pace her in the first half of an ultra-marathon. When she first told me of the plan to run the American River Endurance 50 Mile Run in Sacramento, CA, I put my hands up to my ears as in “la-la-la, I can’t hear you.” I thought either she was teasing, dehydrated and in a delusional state, or perhaps a little more masochistic than I realized.  But my initial displeasure didn’t faze her one bit; you see, it’s not the first time I’ve dug in my heels when called to go outside my comfort zone — that scary place on the other side of “what I THINK I know. “

For example, when she first instructed me in POSE Method to improve my running mechanics, I cringed, I bitched, I belly-ached.  All those “falling” and “pulling” and “fore-foot” landing drills felt foreign, awkward and, quite frankly, unnecessary. After all, I KNEW how to run, I had been running for 15 years at that point — and quite well, thank-you-very-much.  Oh yeah, except for those times when I was sidelined because of ongoing foot, ankle and hip injuries. Eventually, I let her coach me through the principles of POSE and we checked in on form at least two times a week; now the movements are as natural to me as “the old way” and I run injury-free with more efficiency and  less impact than ever before.
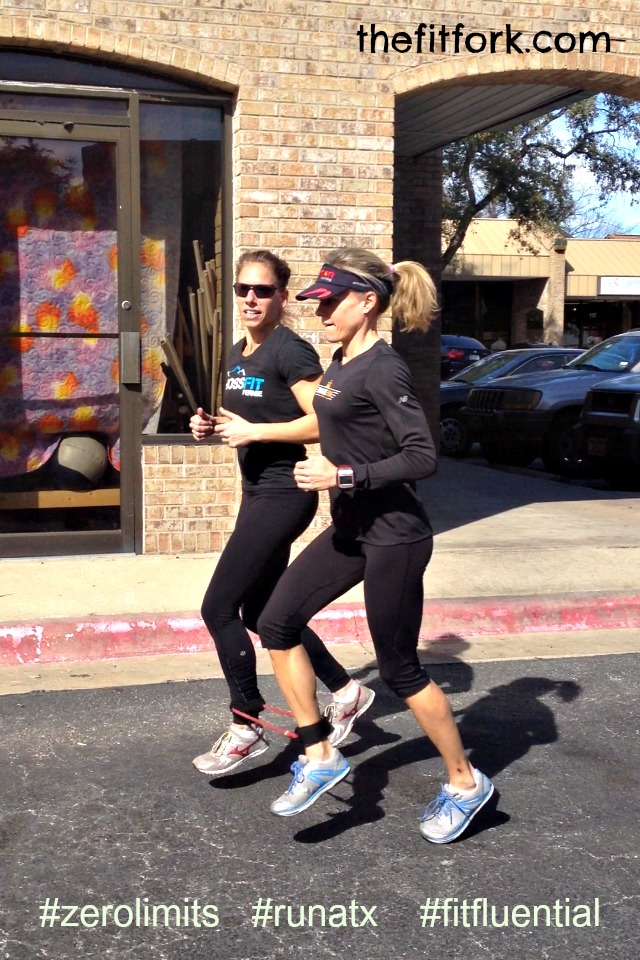
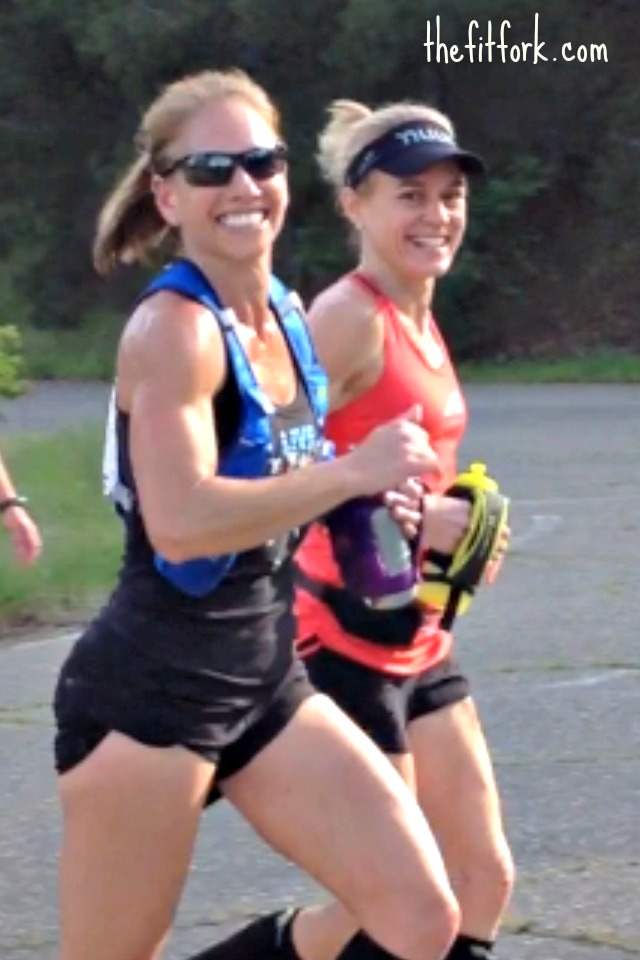
Valerie and Jennifer practicing POSE Method drills,

Valerie and Jennifer practicing POSE Method drills,

This entire example of KNOWING (make that NOT KNOWING) what is good for me in running mechanics was almost entirely replicated with my debut into CrossFit almost two years ago – only the running drills were replaced with functional WOD exercises and my objections were even more on the defense. I’d tell my friend, “I DO strength train, you know, I sit there in the gym and do bicep curls and leg-extensions – but nothing too hard-core, I don’t want to bulk up.”  After her eye-rolling, Valerie took off her POSE coach hat and put on her CrossFit coach hat (although actually, the two hats can be worn teamed up together!)and patiently began taking baby steps with me, teaching me the basic movements used in CrossFit. On those mornings after, when I awoke too sore, I would conveniently “forget” about CrossFit and focus on my running.

However, the realization that I needed to marry the two together forever came when she took me to CrossFit Endurance Camp a few months later.  Because “endurance” was in the name, I figured I’d be a natural because, after all, I was a hot-shot runner and therefore a stellar athlete (insert sarcastic tone). Who cares that I could only do one pull-up and thought a “Good Morning” was a yoga position. However, after spending a weekend at camp getting one-upped in everything from pull-ups to presses, I was humbled enough to admit that maybe I DIDN’T KNOW what was best for me, my body and my running.

And, that’s when I committed to making it all work together, the CrossFit and the running and the being good to my body. And, today I’m happy to report that I didn’t bulk up (in fact, I am leaner than ever), I have broken all my previous Master’s PRs in every distance from 5k to marathon, and have had virtually NO injuries to speak of. Even when I was much younger, one of my biggest aches and pains after a race would be my lower back; well, no more !  But probably most impressive thing to me is that I feel like I’m prepared to do anything, at any time.
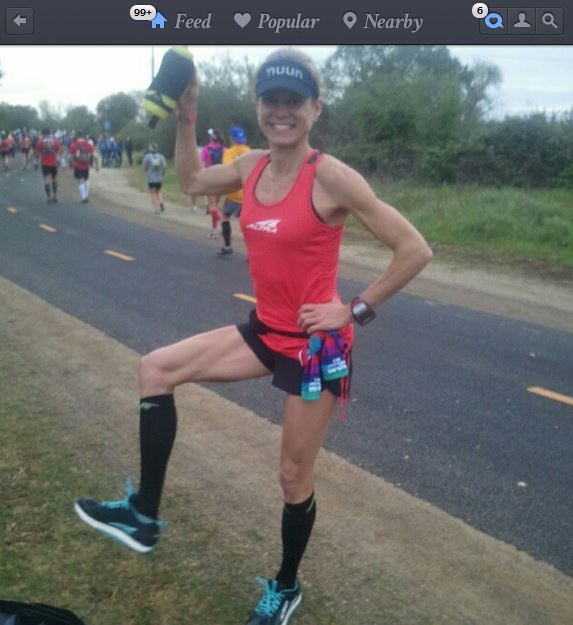
2013_04 america river torin shoes

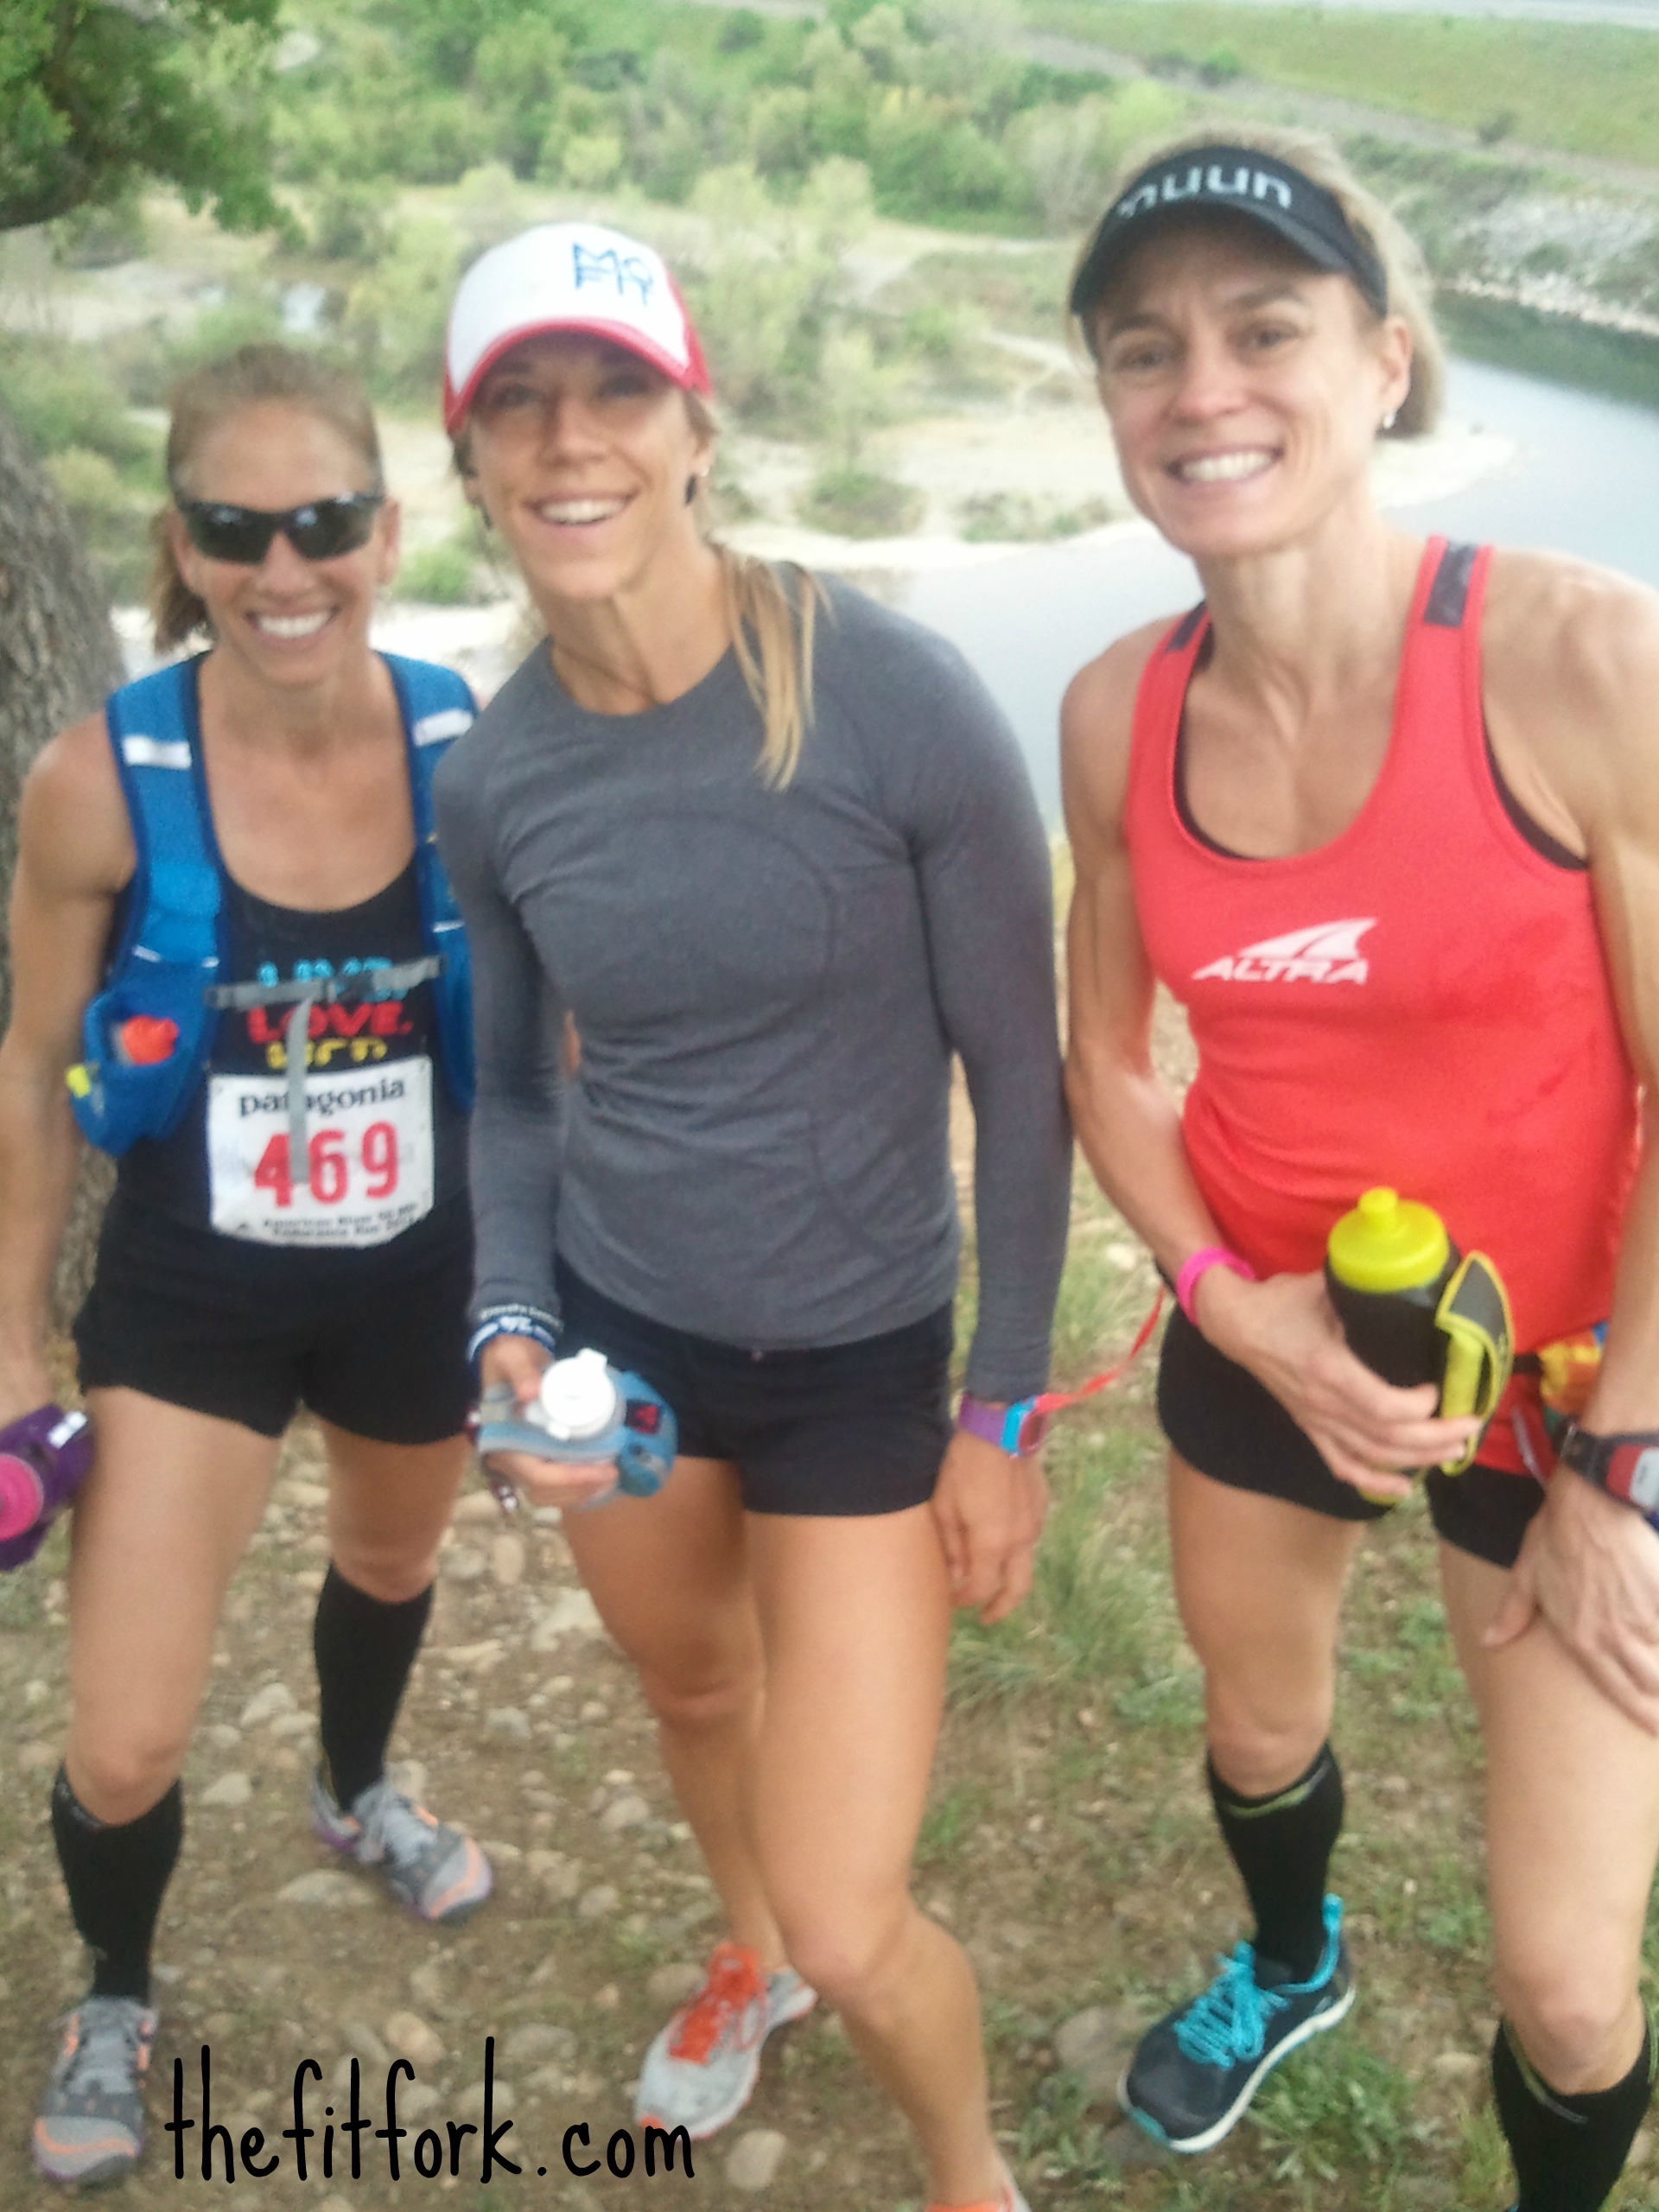
Yup, you guessed it! After agreeing to pace my friend and coach, Valerie Hunt, and CrossFit Games star, Carey Kepler, for 20 miles during the American River 50 Mile Endurance Run, I decided to make my own go for the finish line. Lets’ do this; why not? I was about 18 miles into the run when I decided it would be no big deal to just complete the whole thing. Who cared that I had never run a step past 26.2 miles and my latest long run in ages had been just 13 miles? With no training, no special preparations, no pre-race worrying, I was free to just run and enjoy. As the three of us picked up the pace on our final miles to the finish, we looked and felt strong. We reveled in the cheers from the spectators and high-fived our awesome friends who jumped in for a few hundred yards after crewing us the entire way along the course. These were uphill miles and very few participants were still running at this point. While my legs were dead tired at the end of the day, I finished the race easily and recovered quickly enough to place high in a 10 mile race the next weekend.
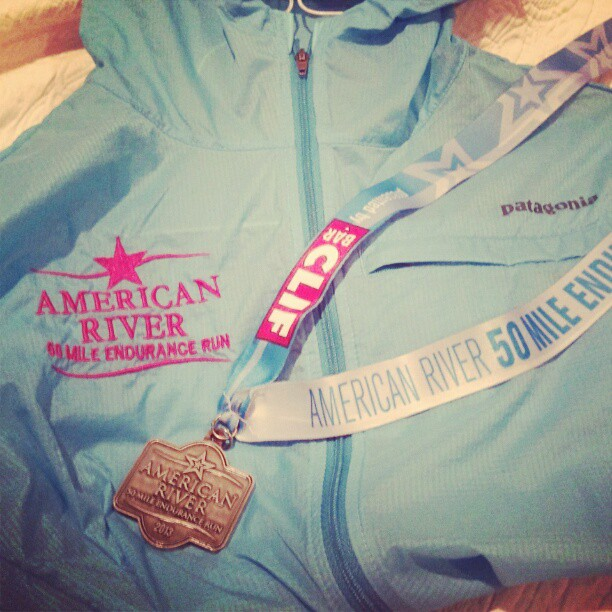
american river run bling

I have no doubt that it was the combination of all-over functional fitness (from CrossFit) and efficient running mechanics (from POSE) that gave me the wherewithal to run 50 miles on a whim. Because CrossFit is all about “constantly varied, high-intensity, functional movement” and POSE focuses on moving your body in a series of efficient positions (hello, POSE is not just for running it can be applied to any human movement), the two team up perfectly to keep me prepared to do nearly anything that comes up on the spur of the moment – like running 50 miles – without too much trouble!  I don’t know if I would ever run 50 miles again, but it is a thrill to know that I could at any time!
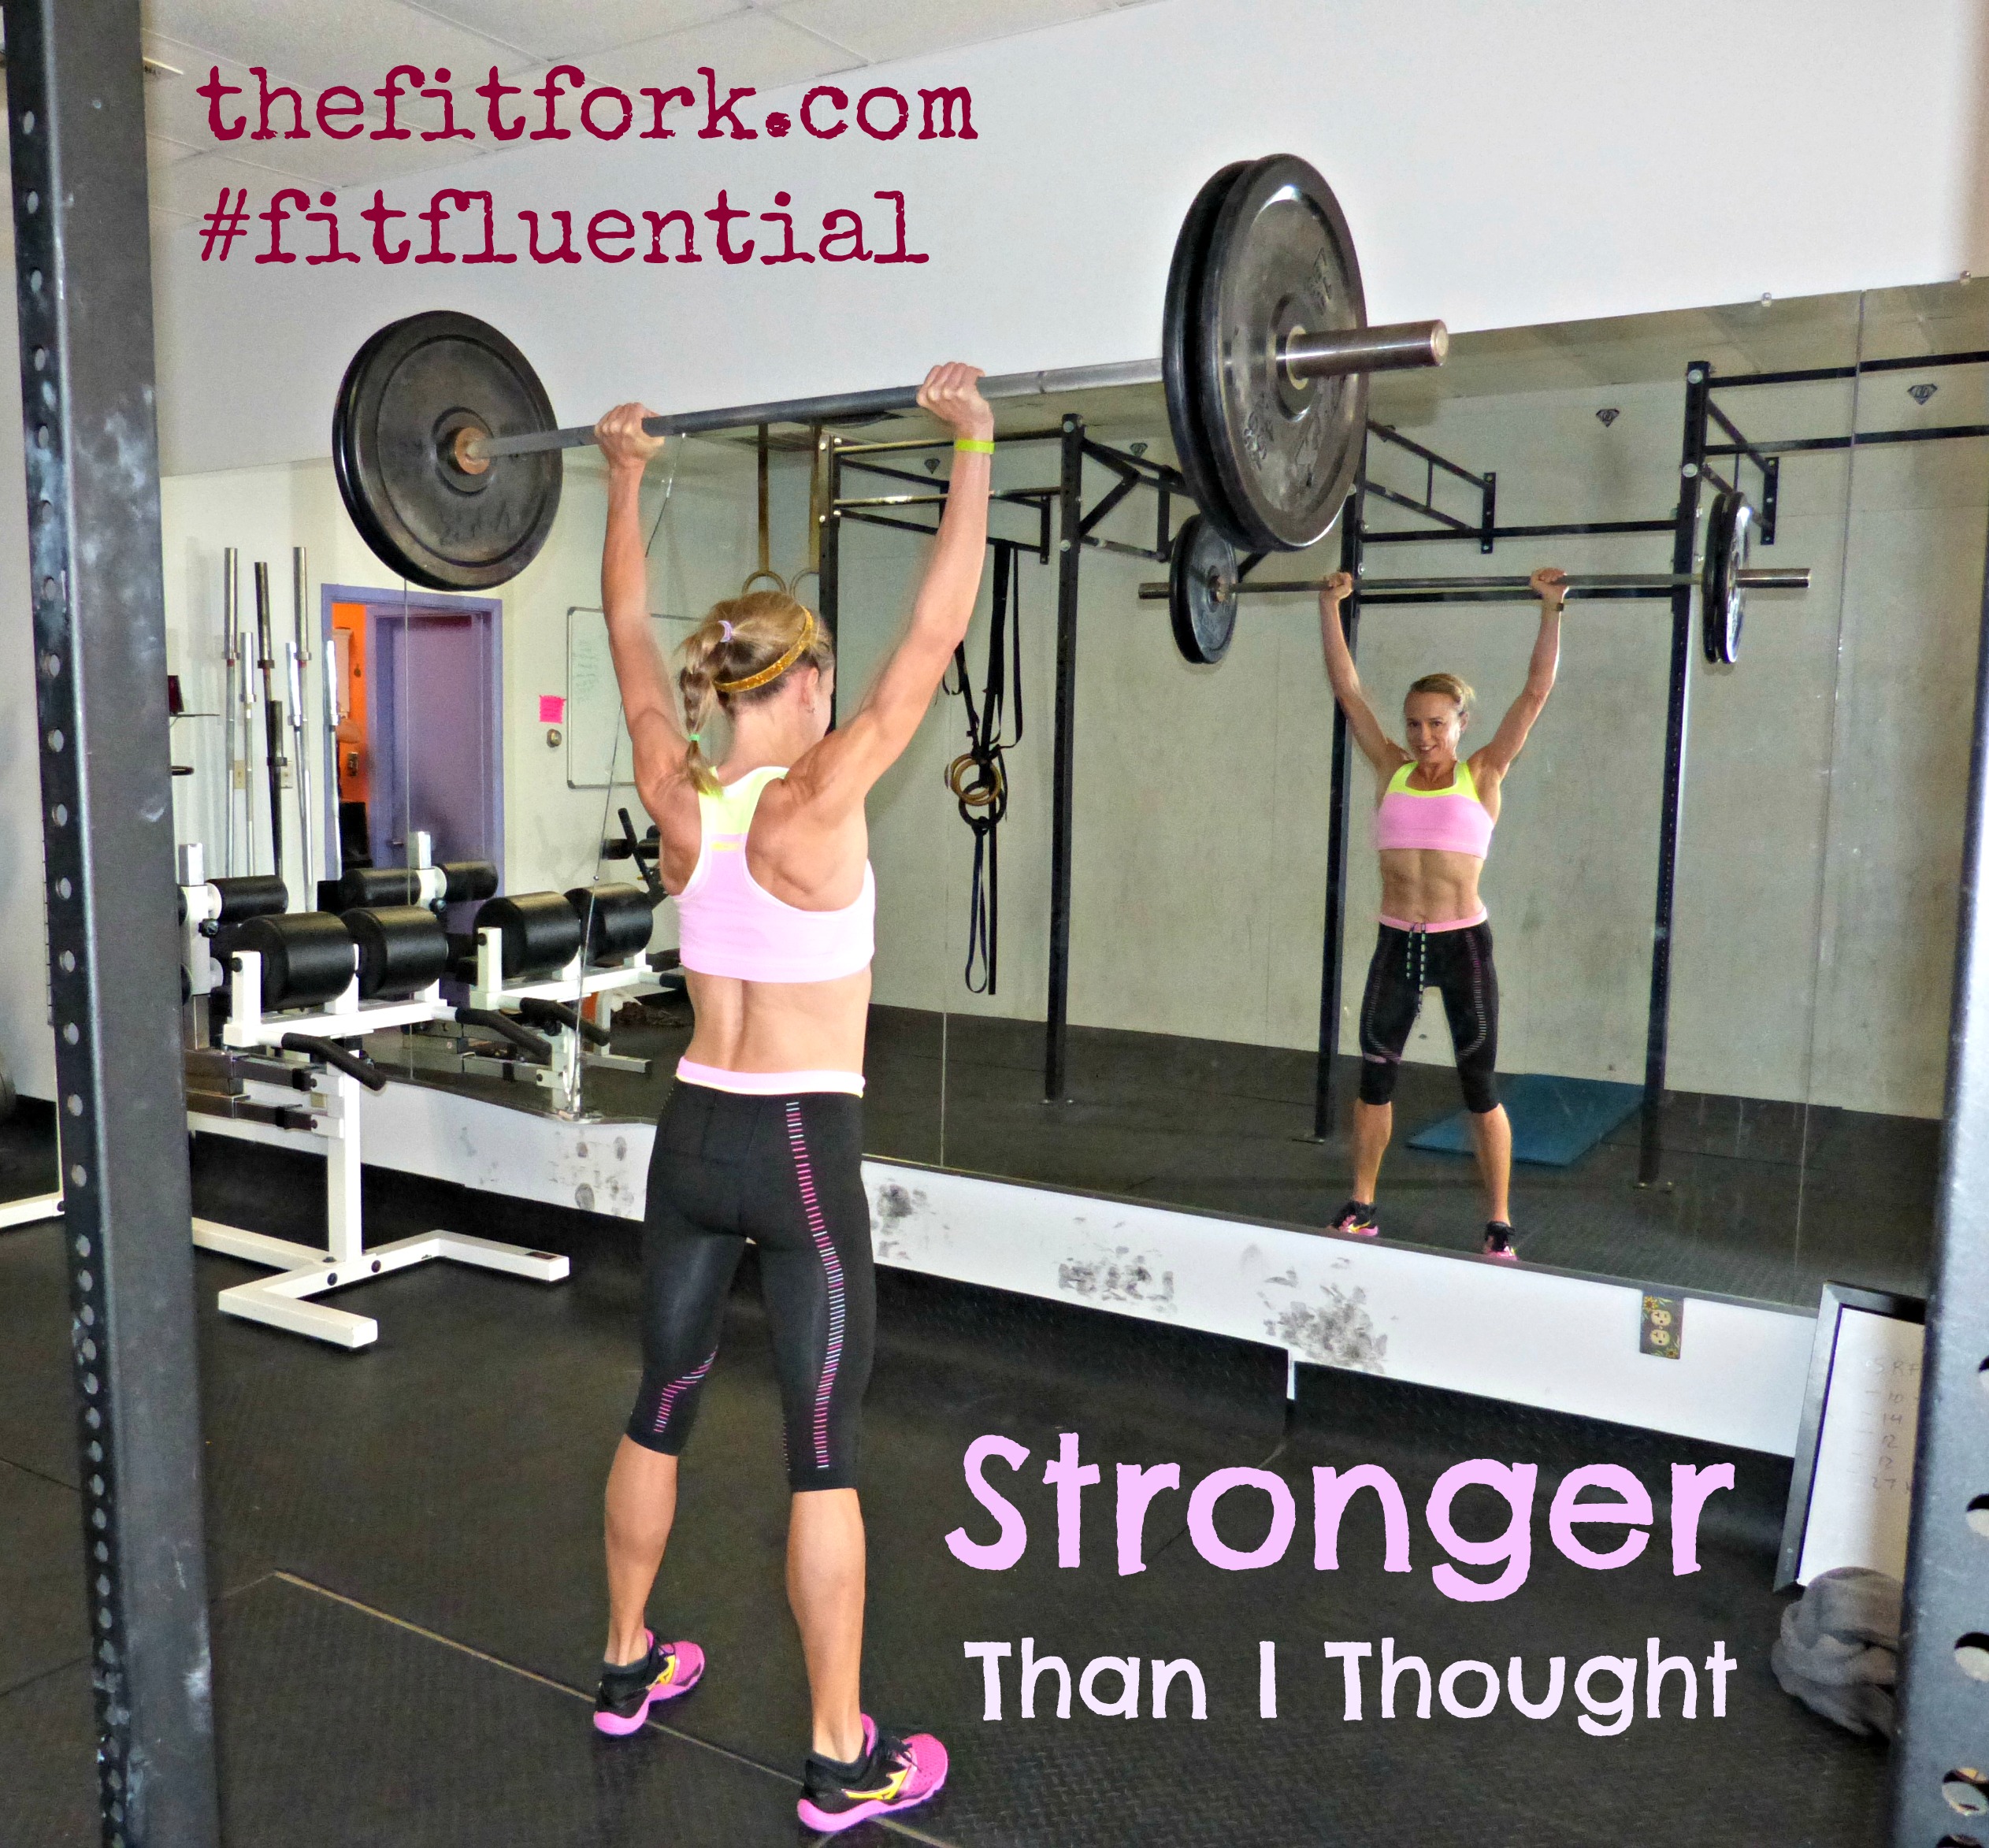
jennifer fisher_thefitfork_stronger than I thought


So Zesty! Lemon Citrus Spaghetti and Shrimp Recipe

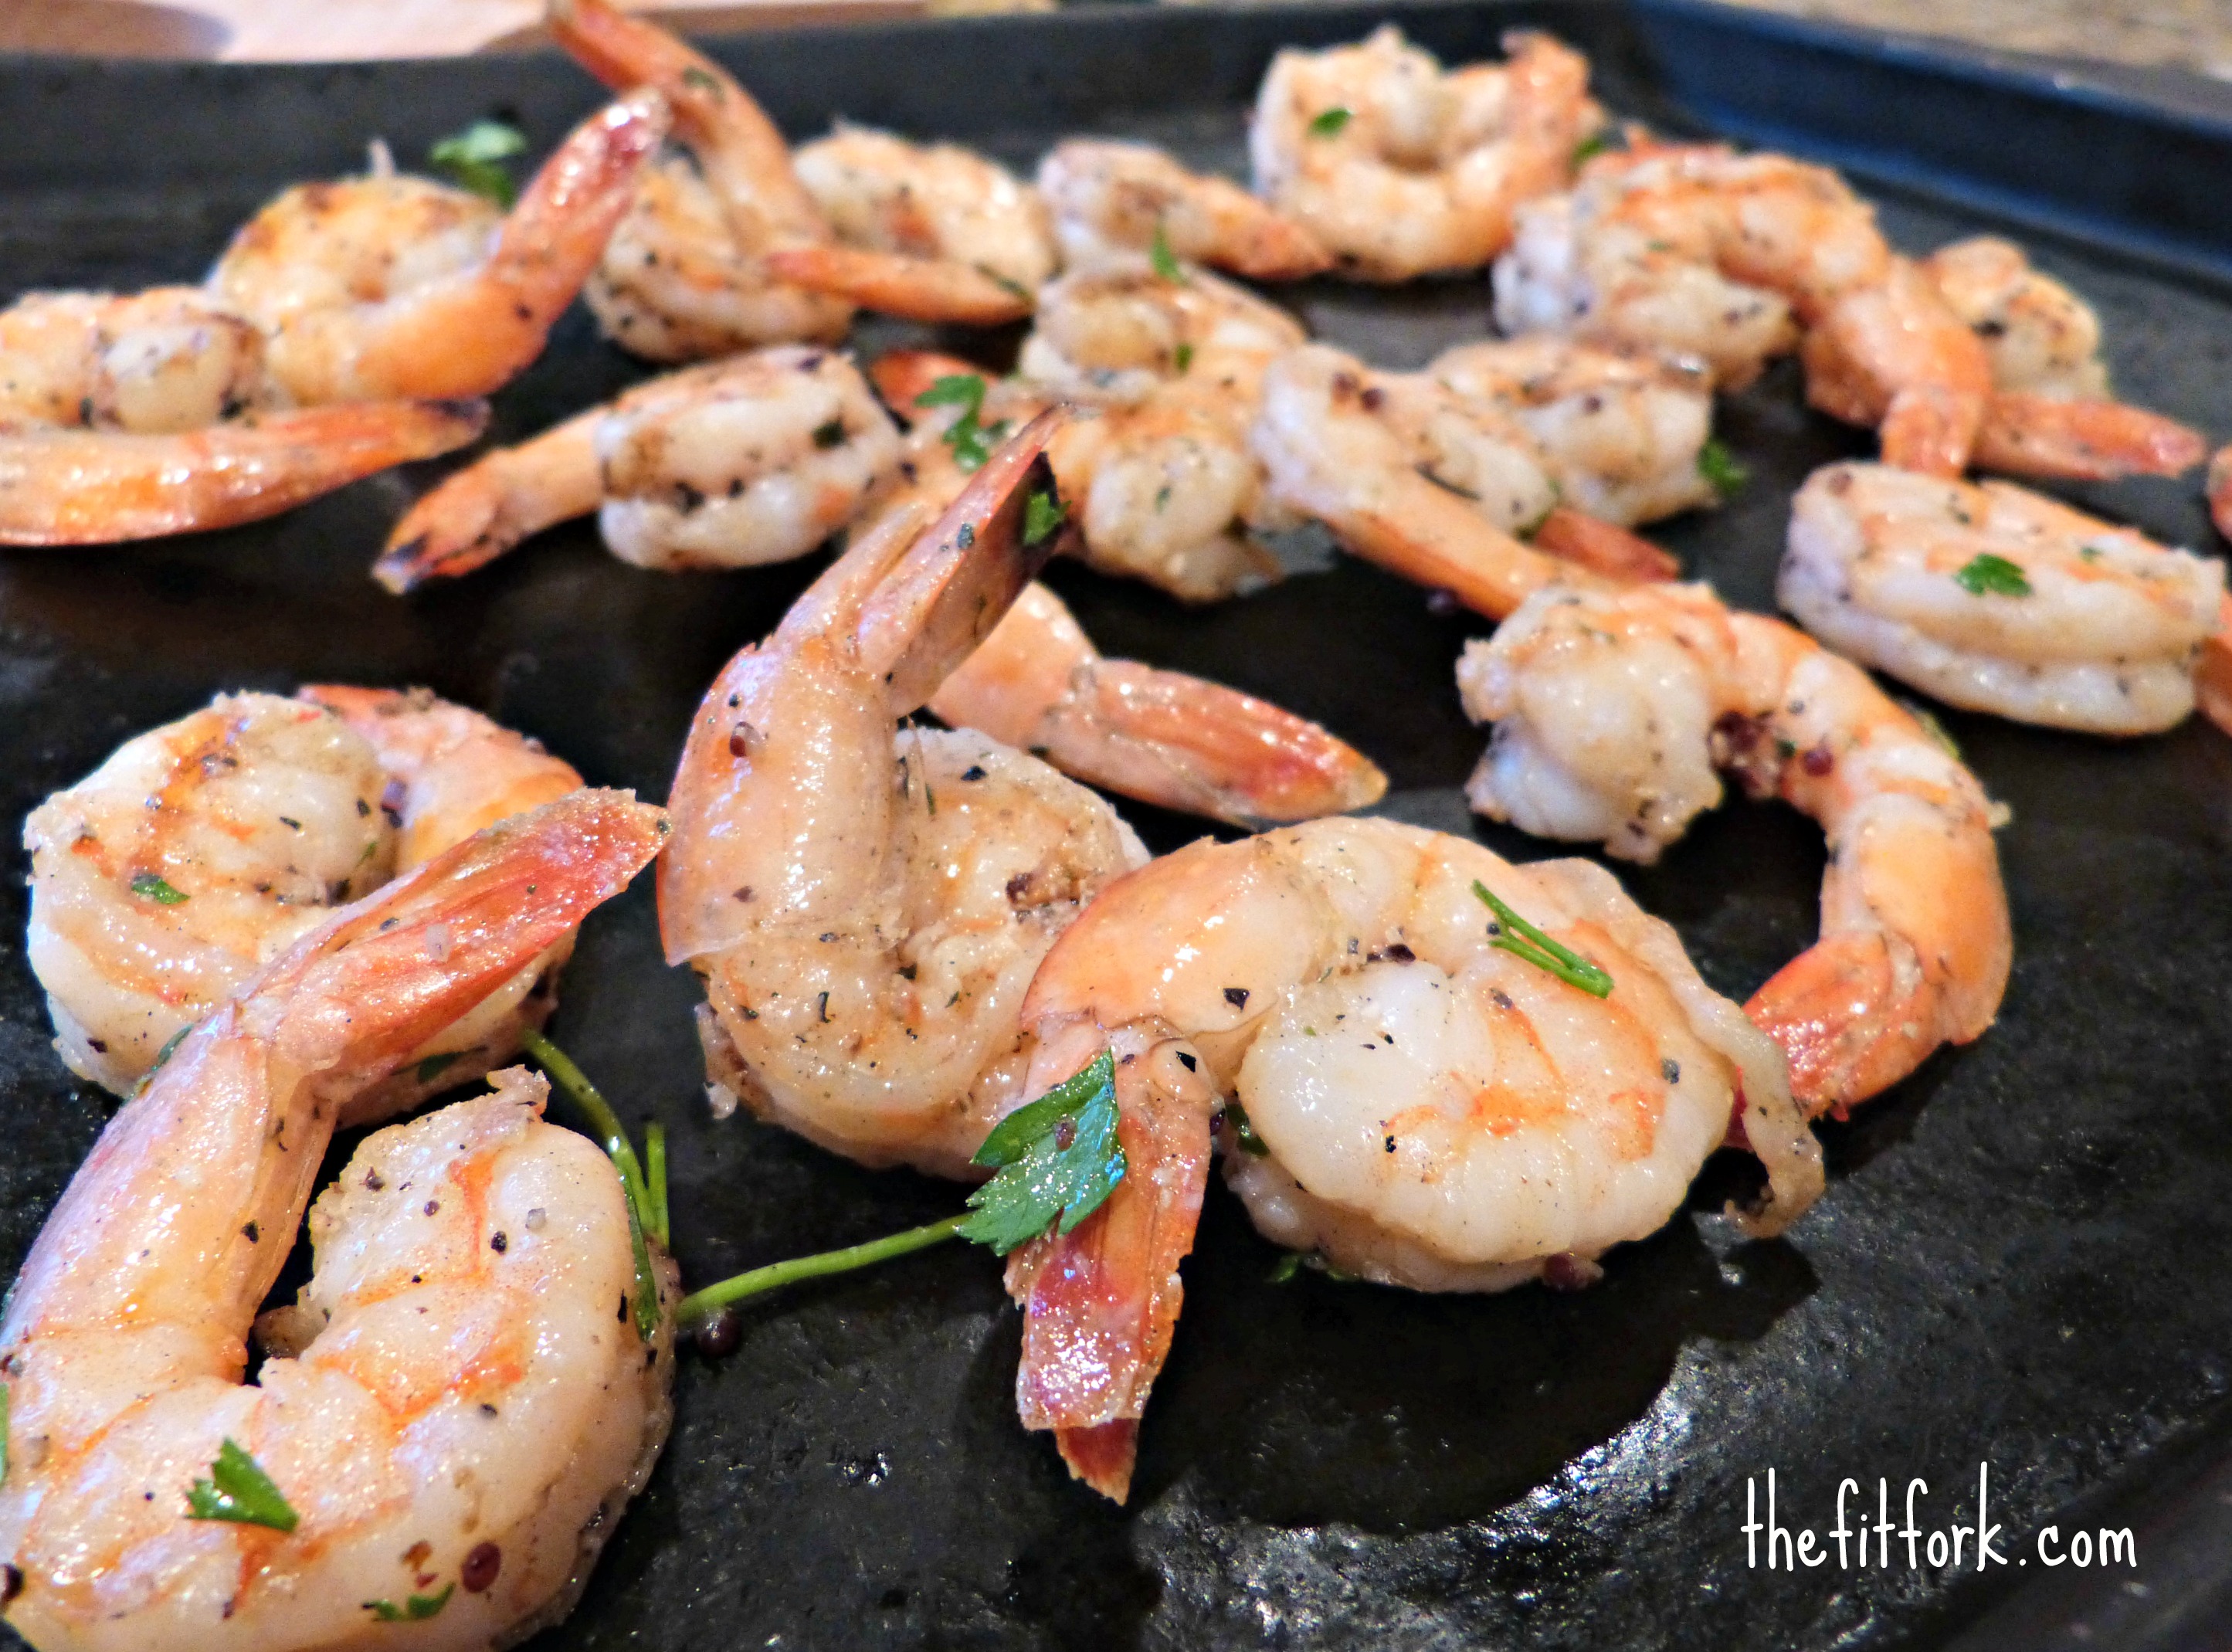
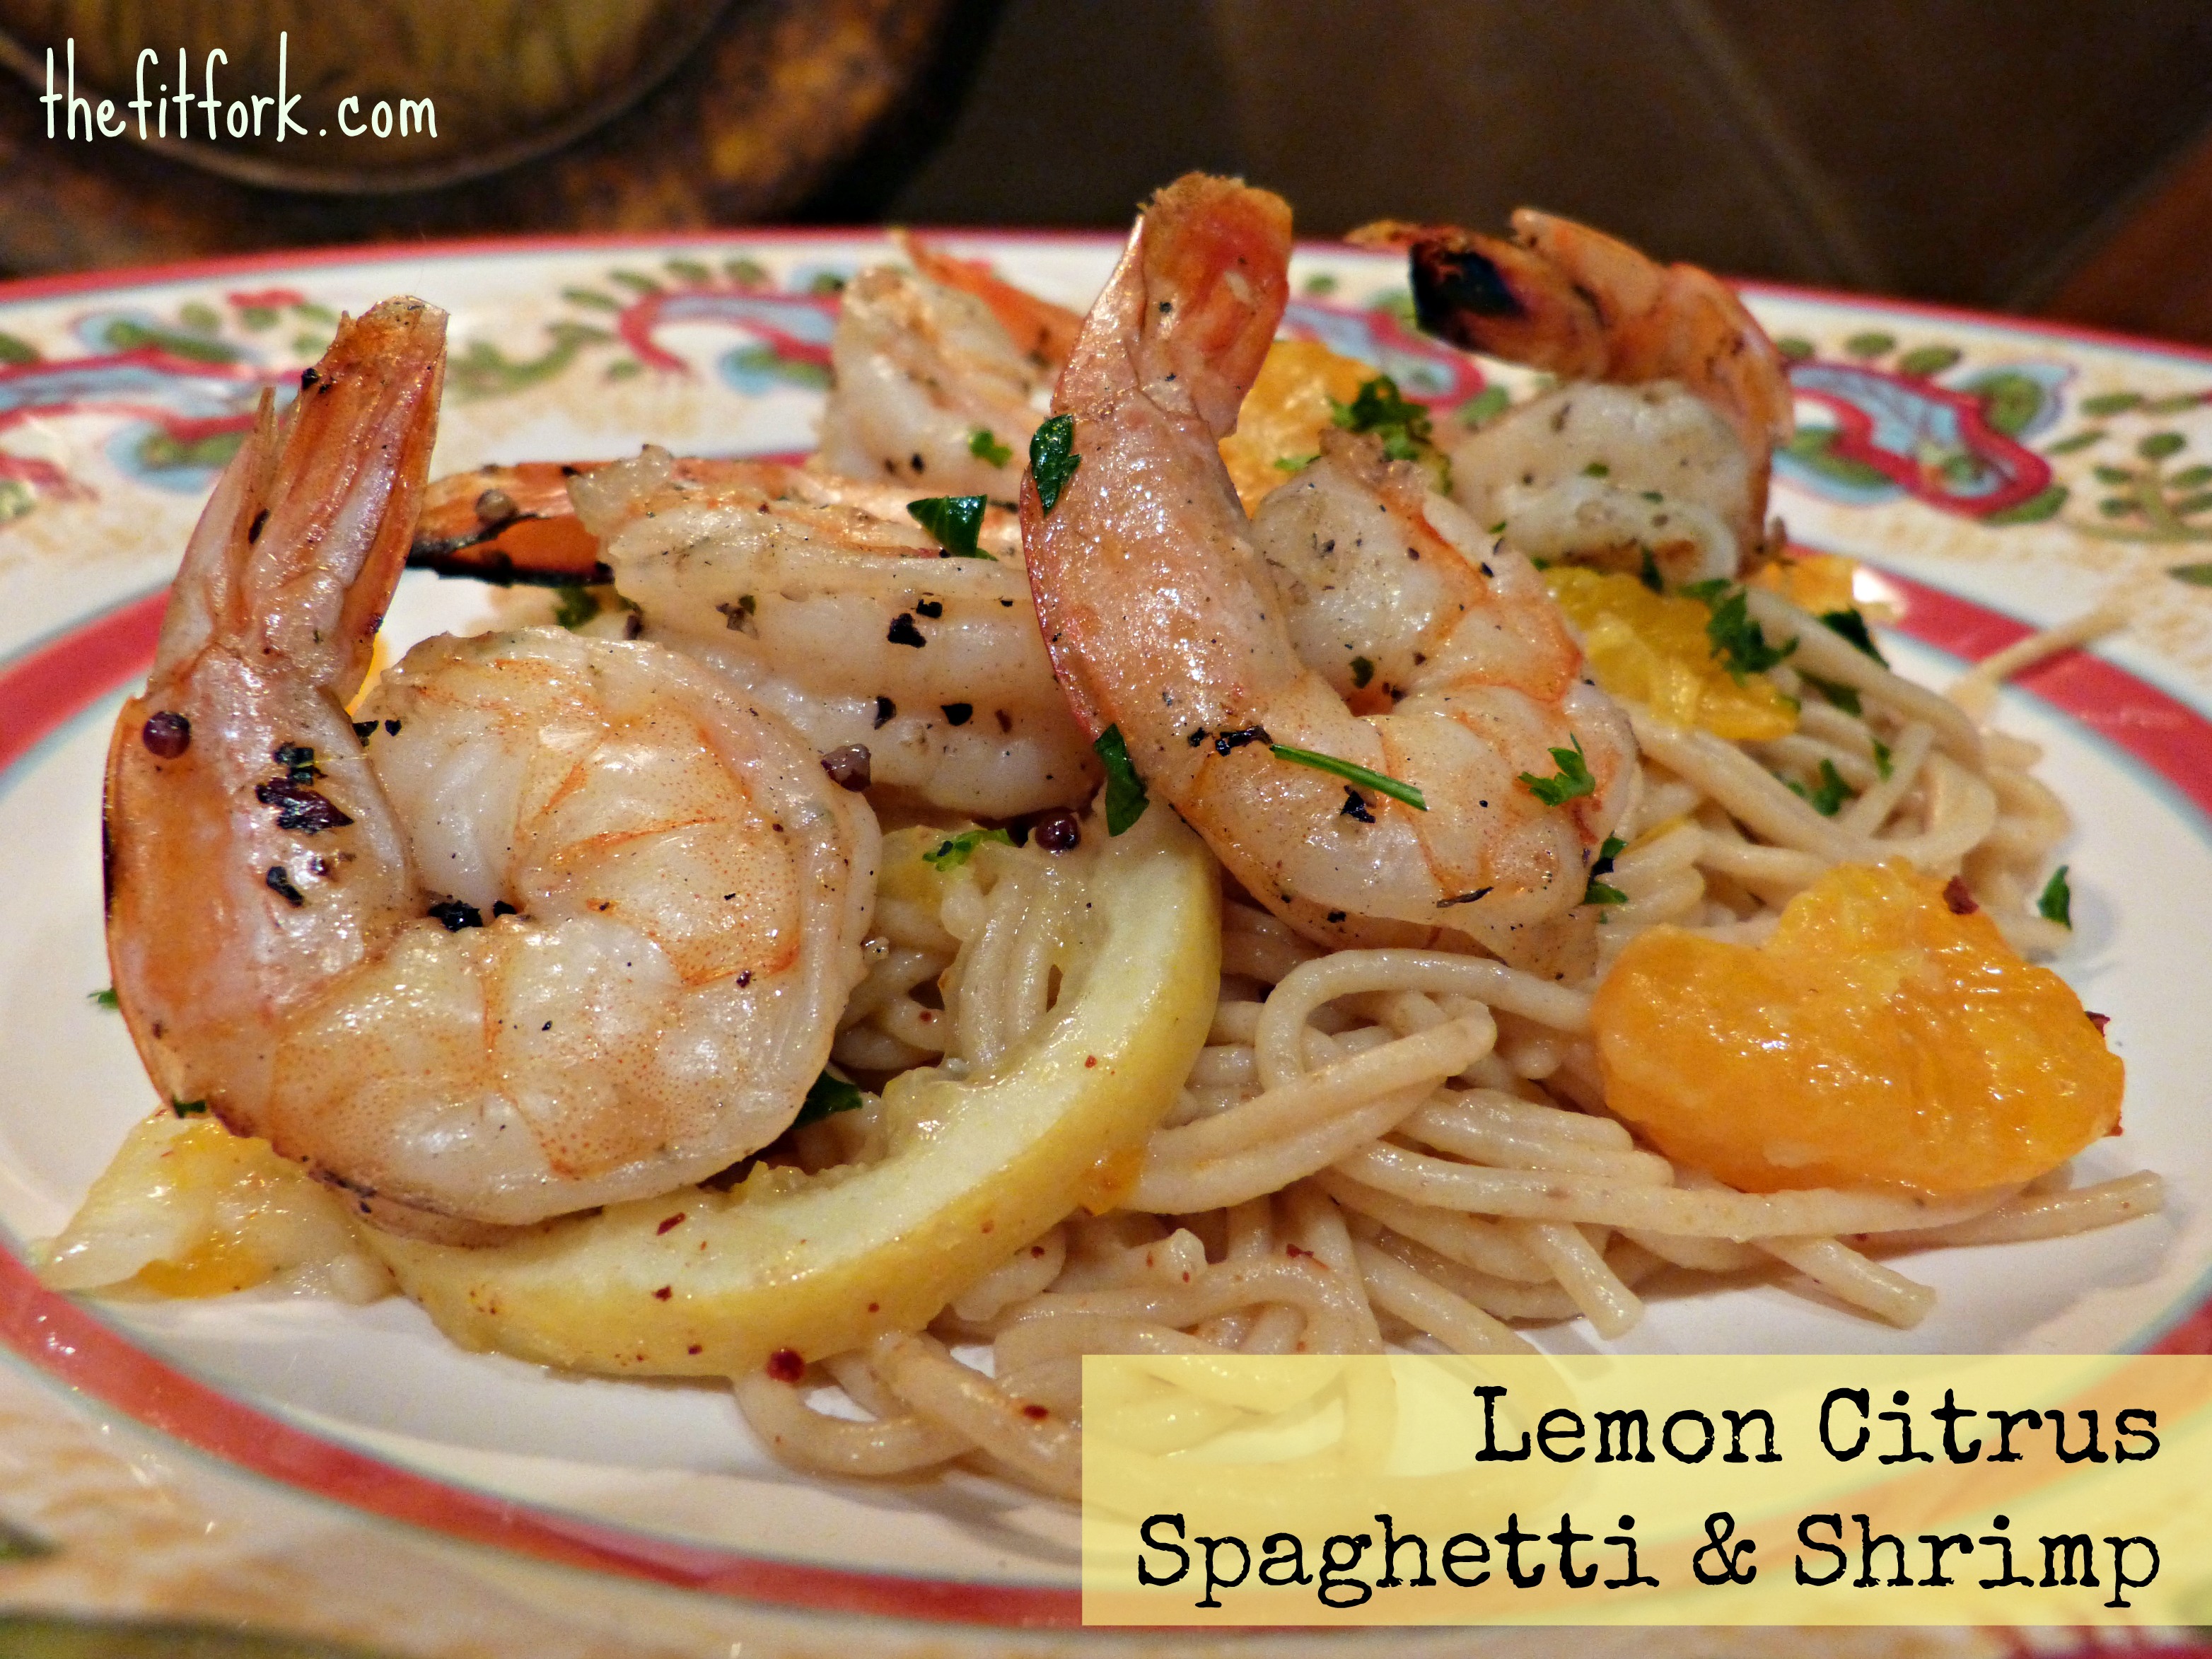
jennifer fisher - thefitfork.com - lemon citrus spaghetti shrimpLemons make me happy. First, they are yellow, which just happens to be my favorite color. They add a little pleasing pucker to drinks and desserts. Lemons are loaded with vitamin C and potassium, and the scent of lemon really lifts my mood.  So, when life hands me lemons, I feel utterly elated. Tonight I used a windfall of this wonderful fruit to create a Lemon Citrus Spaghetti and Shrimp!

Lemon Citrus Spaghetti with Shrimp Recipe

  • 3/4 lb large shrimp, peeled but with tails intact
  • 1 tablespoon olive oil
  • ½ teaspoon salt
  • ½ teaspoon pepper
  • 4 ounces whole wheat spaghetti
  • 2 tablespoons butter
  • 1 garlic clove, minced
  • 1/2 cup white wine
  • 4 clementines, peeled and sectioned
  • 1 lemon, sliced thinly
  • 1 lemon (zested and juiced)
  • 1 tablespoon fresh chopped parsley
  • Sea salt, to taste


Preheat the oven to 400 degrees F.

Place the shrimp on a sheet pan with olive oil, salt, and pepper.  Toss well, spread them in 1 layer, and roast for 6 to 8 minutes, just until pink and cooked through.


Meanwhile, drizzle some olive oil in a large pot of boiling salted water, add the pasta, and cook al dente, about 8 minutes. Drain and set aside.

Slice one lemon very thinly. Zest the other lemon, gathering about 1 tablespoon. Squeeze the juice from the zested lemon. Peel and section clementines.

citrus lemons clementines

Melt butter in large skillet over medium heat. Add garlic, stirring for 1 minute or until fragrant. Add wine, clementine sections, zest from 1 lemon (about 1 tablespoon), juice from 1 lemon, and lemon slices. Bring to a light boil and cook for several minutes until ingredients are heated through and alcohol in wine is cooked off.

While still hot, add shrimp and pasta to the skillet and toss.  Season with sea salt to taste and garnish with chopped fresh parsley.

Serves 2.

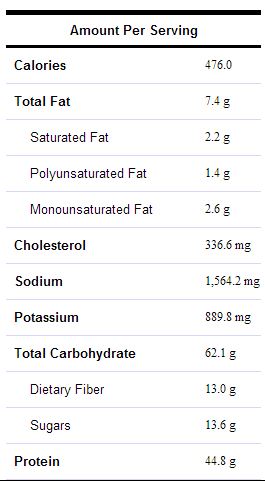
lemon citrus spaghetti with shrimp nutrition

Fat and then Carbs! Latest in Pre-Race Nutrition for Marathons and Ultras

Wondering what to eat to easily get through a marathon or ultra race?

Wondering what to eat to easily get through a marathon or ultra race?

Before you binge out on pasta dinners and bagel breakfasts, you might want to take a serious look at what researchers are reporting about “carbo-loading” before a marathon or long endurance event. The days of high-carb diets may be over – well, make that modified — for athletes who want to perform their best on race day, or so says the March 2013 issue of Competitor magazine. New research is suggesting that a low-carb diet may actually have benefits because it trains an athlete’s muscles to be better fat burners.

When muscles can access fat as fuel during a race, glycogen stores are spared and saved for use later down the road – this means “hitting the wall” or “bonking” can be delayed and perhaps even avoided completely. But don’t swear off pancakes just yet. Training day after day on a low-carb diet can leave a runner feeling sluggish and slow because glycogen stores never get topped off. Plus, there hasn’t been any irrefutable, one hundred percent conclusive proof that removing carbs from the diet improves endurance performance. In fact, one study at the University of Birmingham in England found that low-carb runners (41% carbs) reported more fatigue and showed reductions in performance than their high-carb counterparts (65% carbs) during intensive training runs.

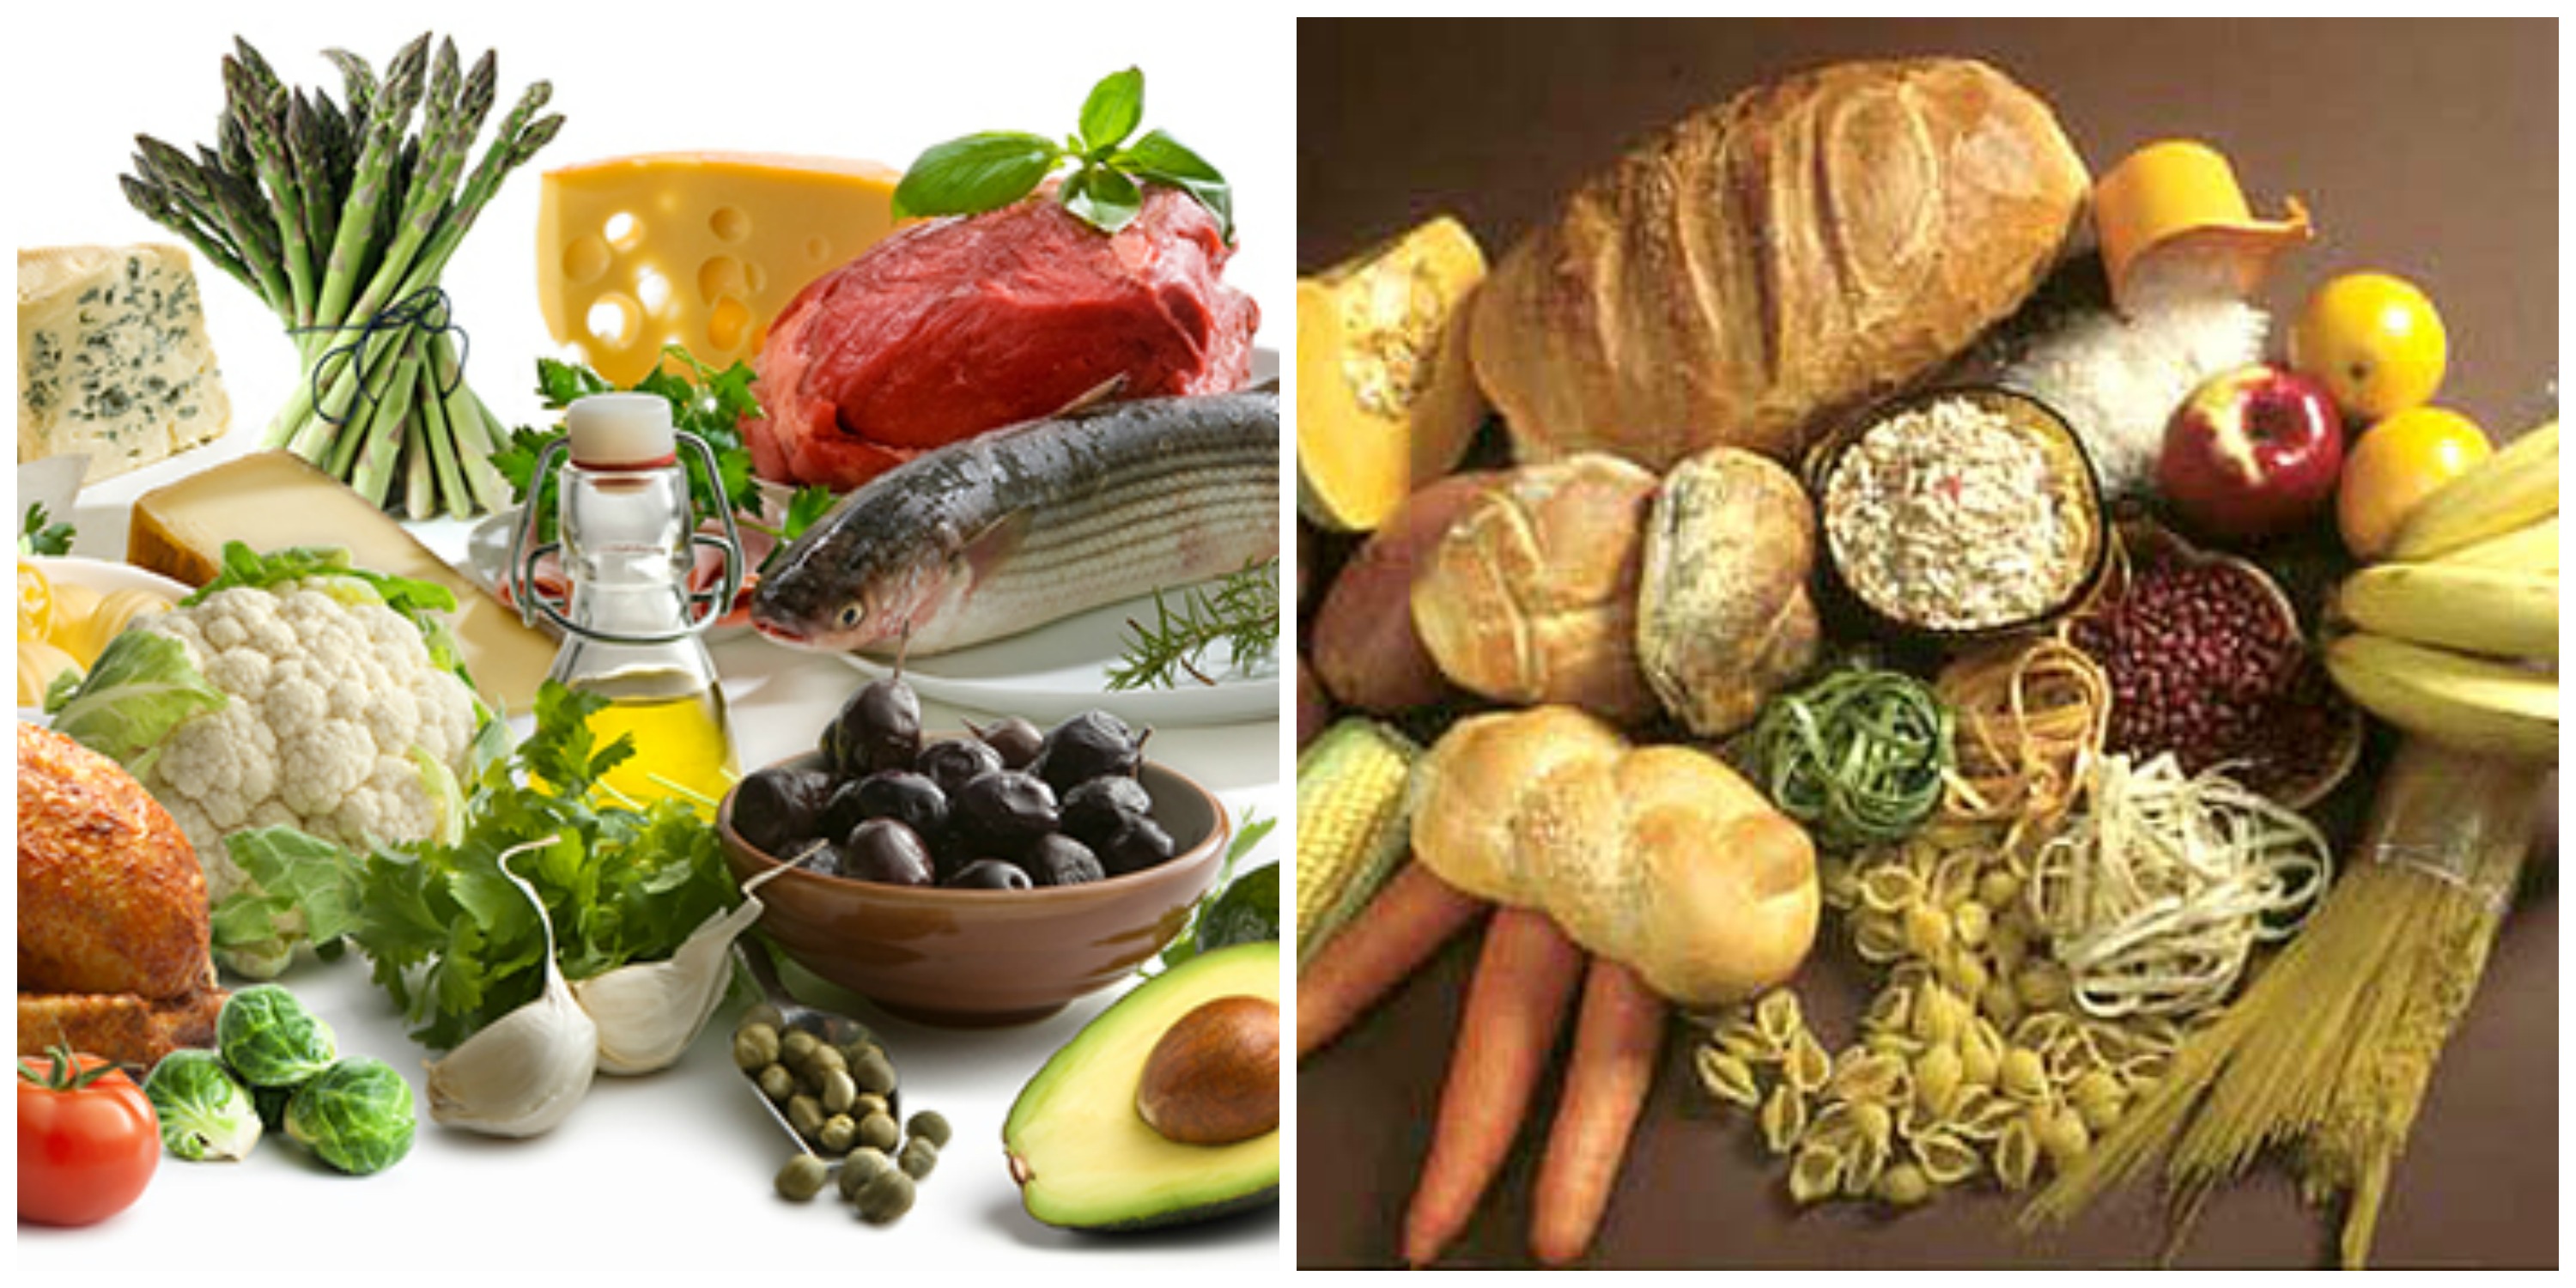
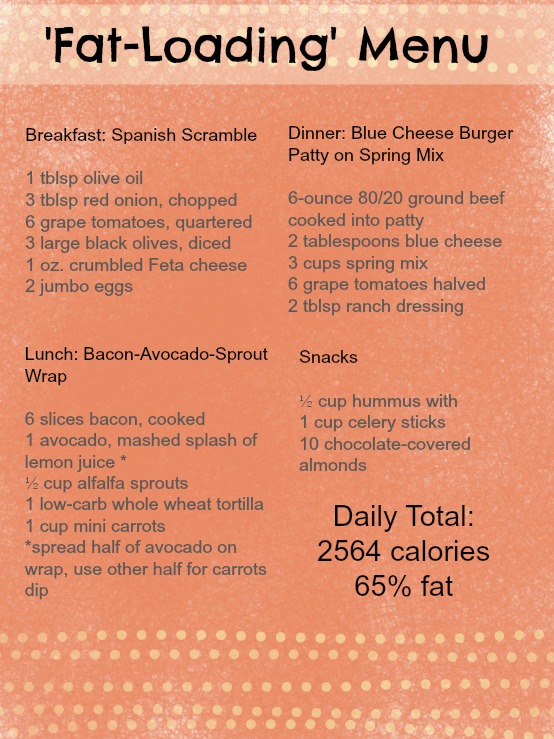
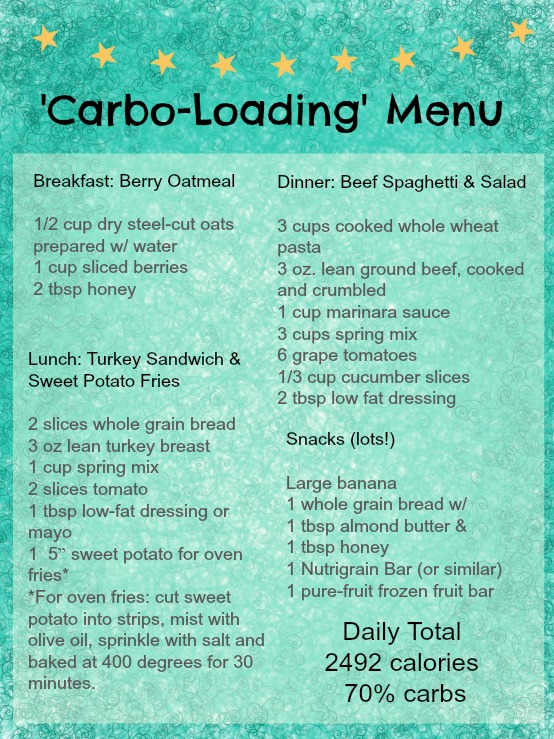
Good fat-loading choices on left. Good carb-loading choices on right.

Good fat-loading choices on left. Good carb-loading choices on right.

A new pre-race nutrition paradigm that combines the two ‘loading’ approaches is being recommended by experts in the sports performance field.  Here’s the plan in a nutshell. About two weeks out from an endurance event, aim to get about 65 percent of calories from fats and continue this high-fat intake for 10 days. This “hall pass” to eat fats doesn’t mean you can pig out on pizza and ding-dongs all day, or really any day. Quality fats from healthy oils, nuts, meats, avocados, whole milk, cheese, eggs, and fatty fish are what should be on the table. During this phase, your body will learn how to tap into fat stores for fuel; and, your training won’t suffer much because you’ll be tapering down anyway.

After 10 days of eating low-carb, high-fat foods, switch to a traditional “carbo-load” diet that incorporates 70 percent of calories from carbohydrates for the next three days. This ensures that your glycogen levels are as high as they can be and are raring to go on race day. Stay away from processed carbs and too much sugar. Instead, top off your tank with high-quality, healthy carbs including whole-grain pastas, breads, and rice along with plenty of fruits and veggies (but, of course, cut the fiber intake 24 hours before event).

A study conducted by the University of Cape Town in South Africa implemented this 10-day ‘fat-load’ followed by 3-day ‘carbo-load’ plan on a group of experienced cyclists. After a moderate two-hour warm-up, the athletes were able to complete a 20k time trial 4.5 percent faster following the new diet protocol. What do you think? Is it worth a try?

To recap:

  • Day 14 through Day 5 before event: High-Fat, Low-Carb
  • Day 4 through Day 2 before event: High-Carb, Low-Fat
  • Day 1: Race!

 To give you an idea of what a “High Fat, Low Carb” and a “High Carb, Low Fat” days look like, I’ve come up with a sample menu based on an approximate 2,500 calorie diet.

Jennifer Fisher - thefitfork.com - fat-loading menu


jennifer fisher - thefitfork.com - carbo loading menu

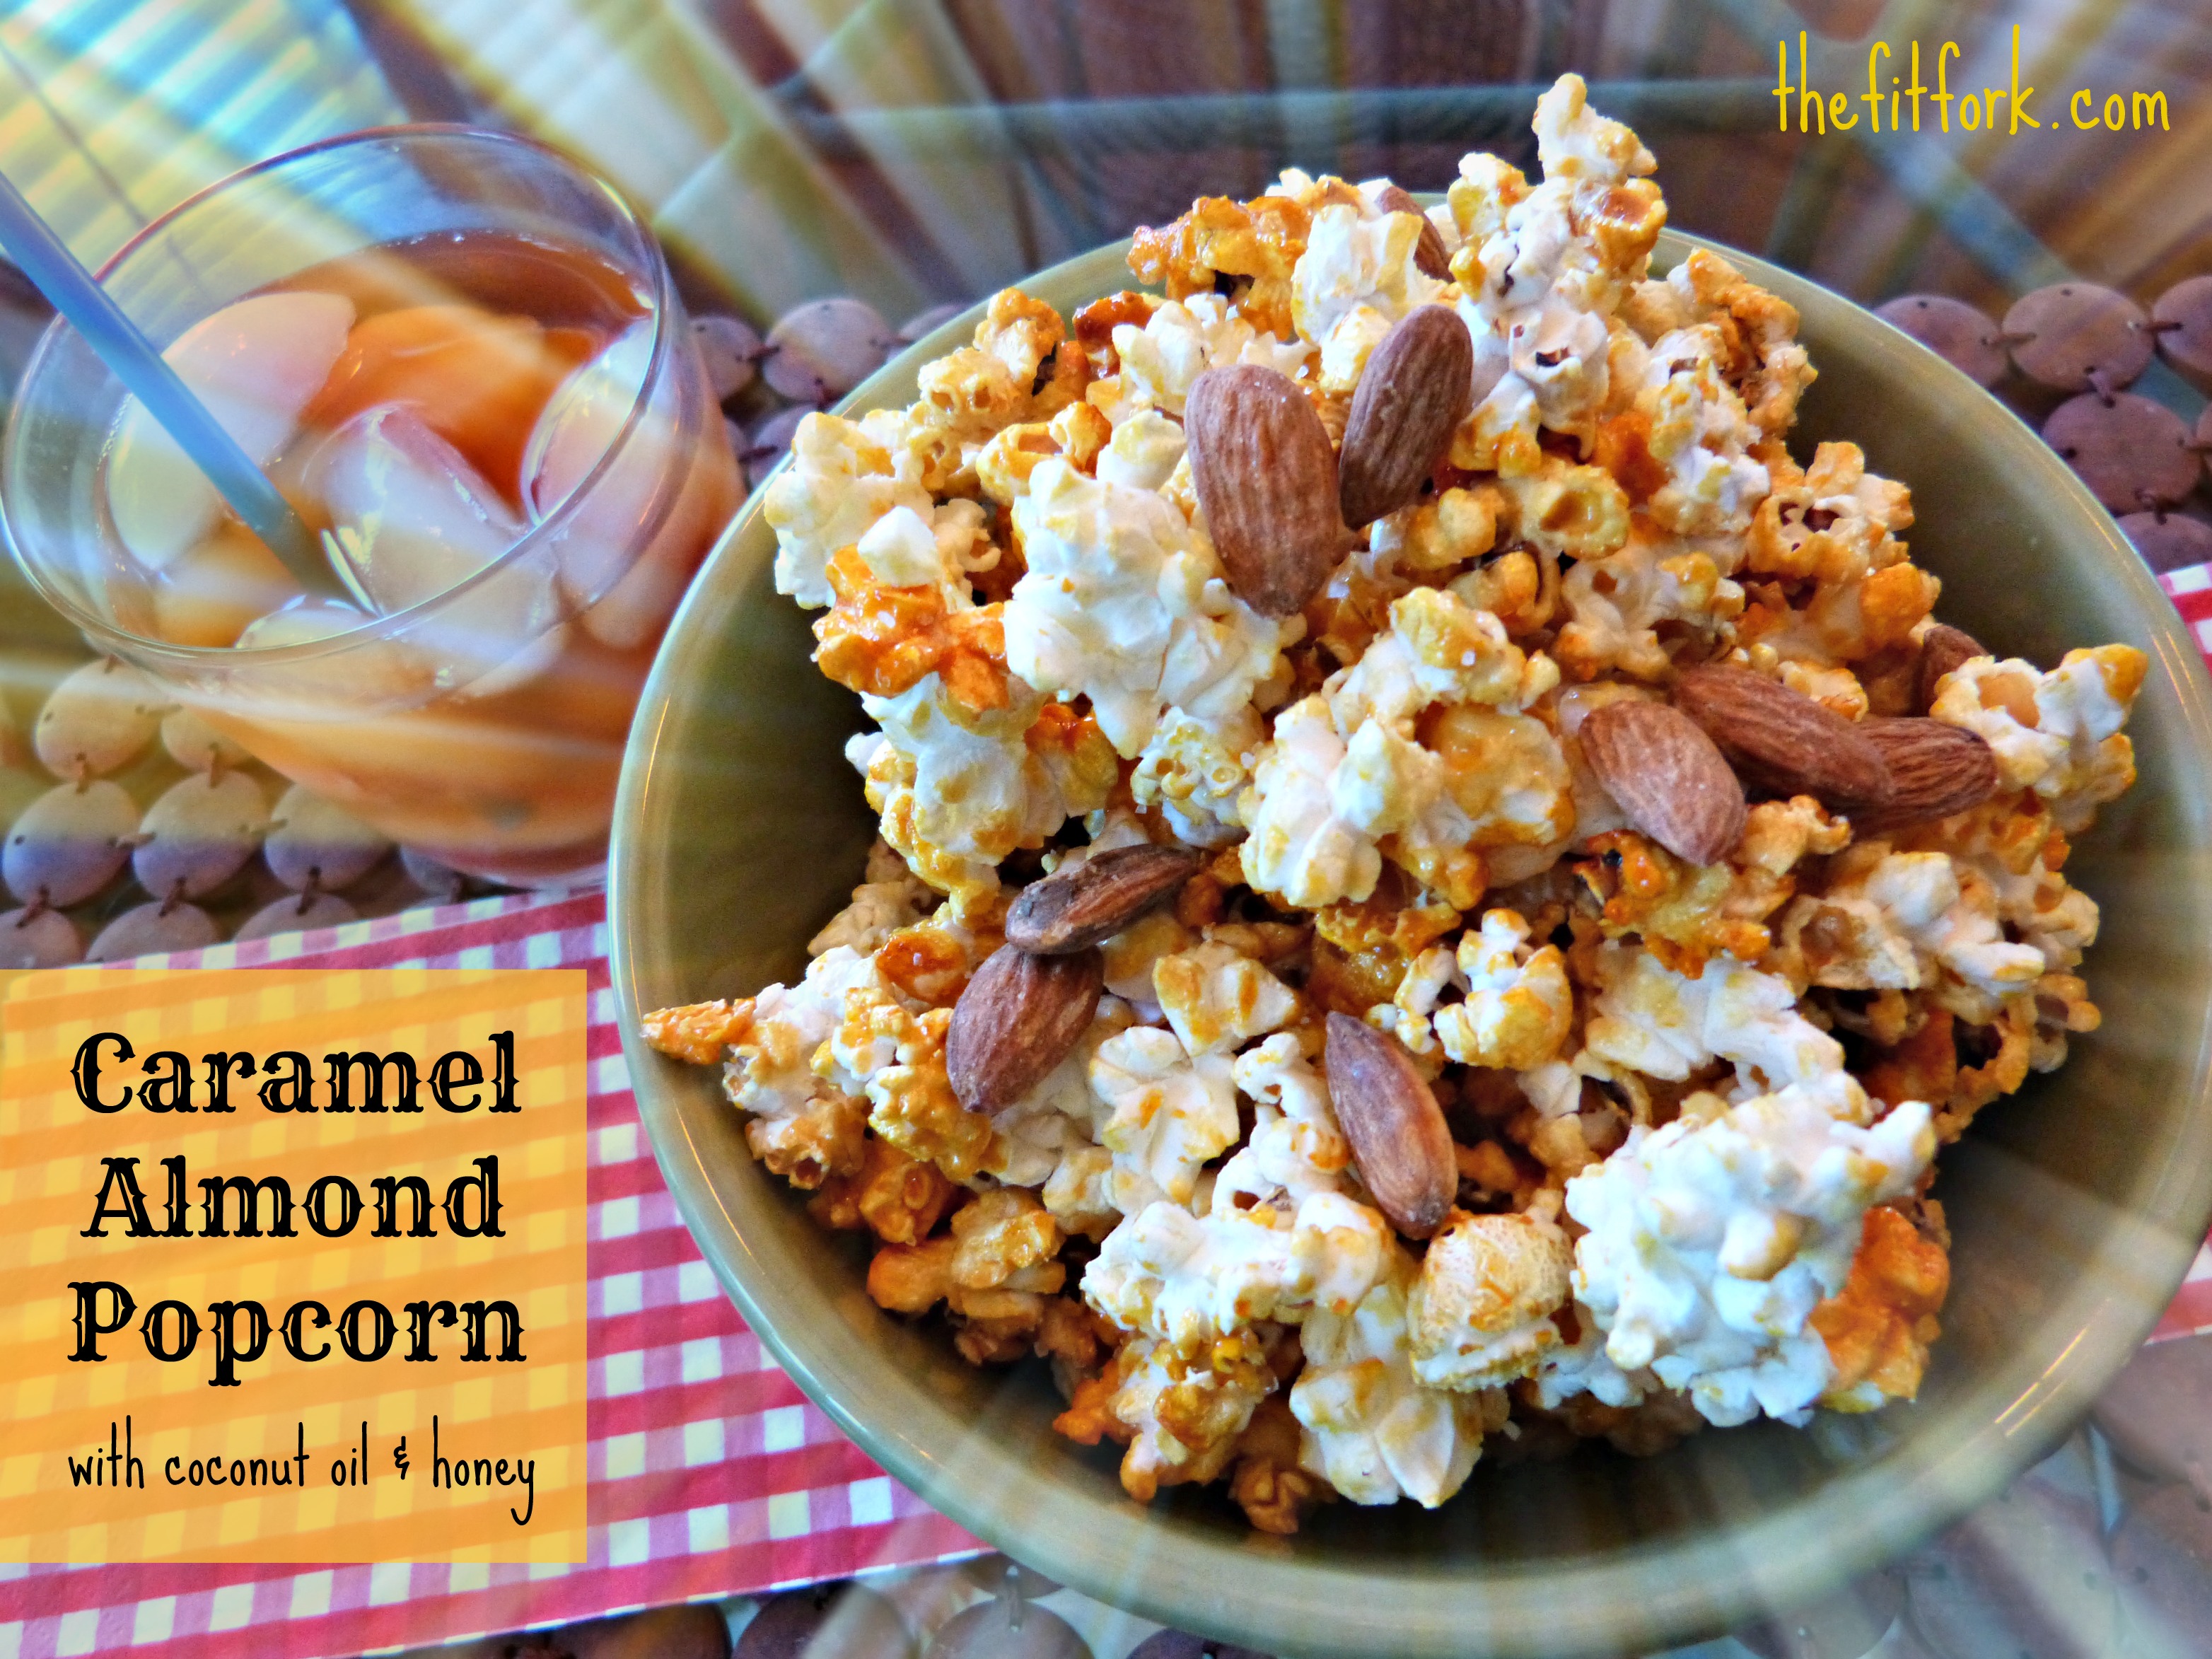
Movie Night Manna – Crunchy Caramel Almond Popcorn with Coconut Oil & Honey

jennifer fisher - thefitfork.com - caramel almond popcorn coconut oil honey

Did you know that the average American scarfs down more than 50 quarts of popcorn per year? I know I eat my fair share. In theory, this whole grain sibling in the maize family is a healthy whole grain snack, low in calories (just 31 per cup, air-popped) and high in dietary fiber. But, more often than not, the “healthy treat” is a real fat and sodium bomb. A study by the Center for Science in the Public Interest revealed that a large tub of popcorn (from Regal Cinemas), holds 20 cups of popcorn with 1,200 calories, 60 grams of saturated fat and 980 mg of sodium. This doesn’t even include the mystery yellow oily substance the concession stand pours on top after asking, “do you want butter with that”?

Store-bought microwave popcorn is even worse. For extended shelf life, the kernels are sitting in artery-clogging trans-fatty oils and use the chemical diacetyl for fake butter flavoring. According to the U.S. Environmental Protection Agency, there are nearly four dozen other chemicals in a package of microwave popcorn including the aforementioned nasty diacetyl. Diacetyl vaporizes at high temperatures and seeps out when you open the bag and breathe in the buttery aroma. Repeated exposure to the toxic steam can actually give you “popcorn lung.” This sounds silly, but it is a serious respiratory disease known as bronchiolitis obliterans.

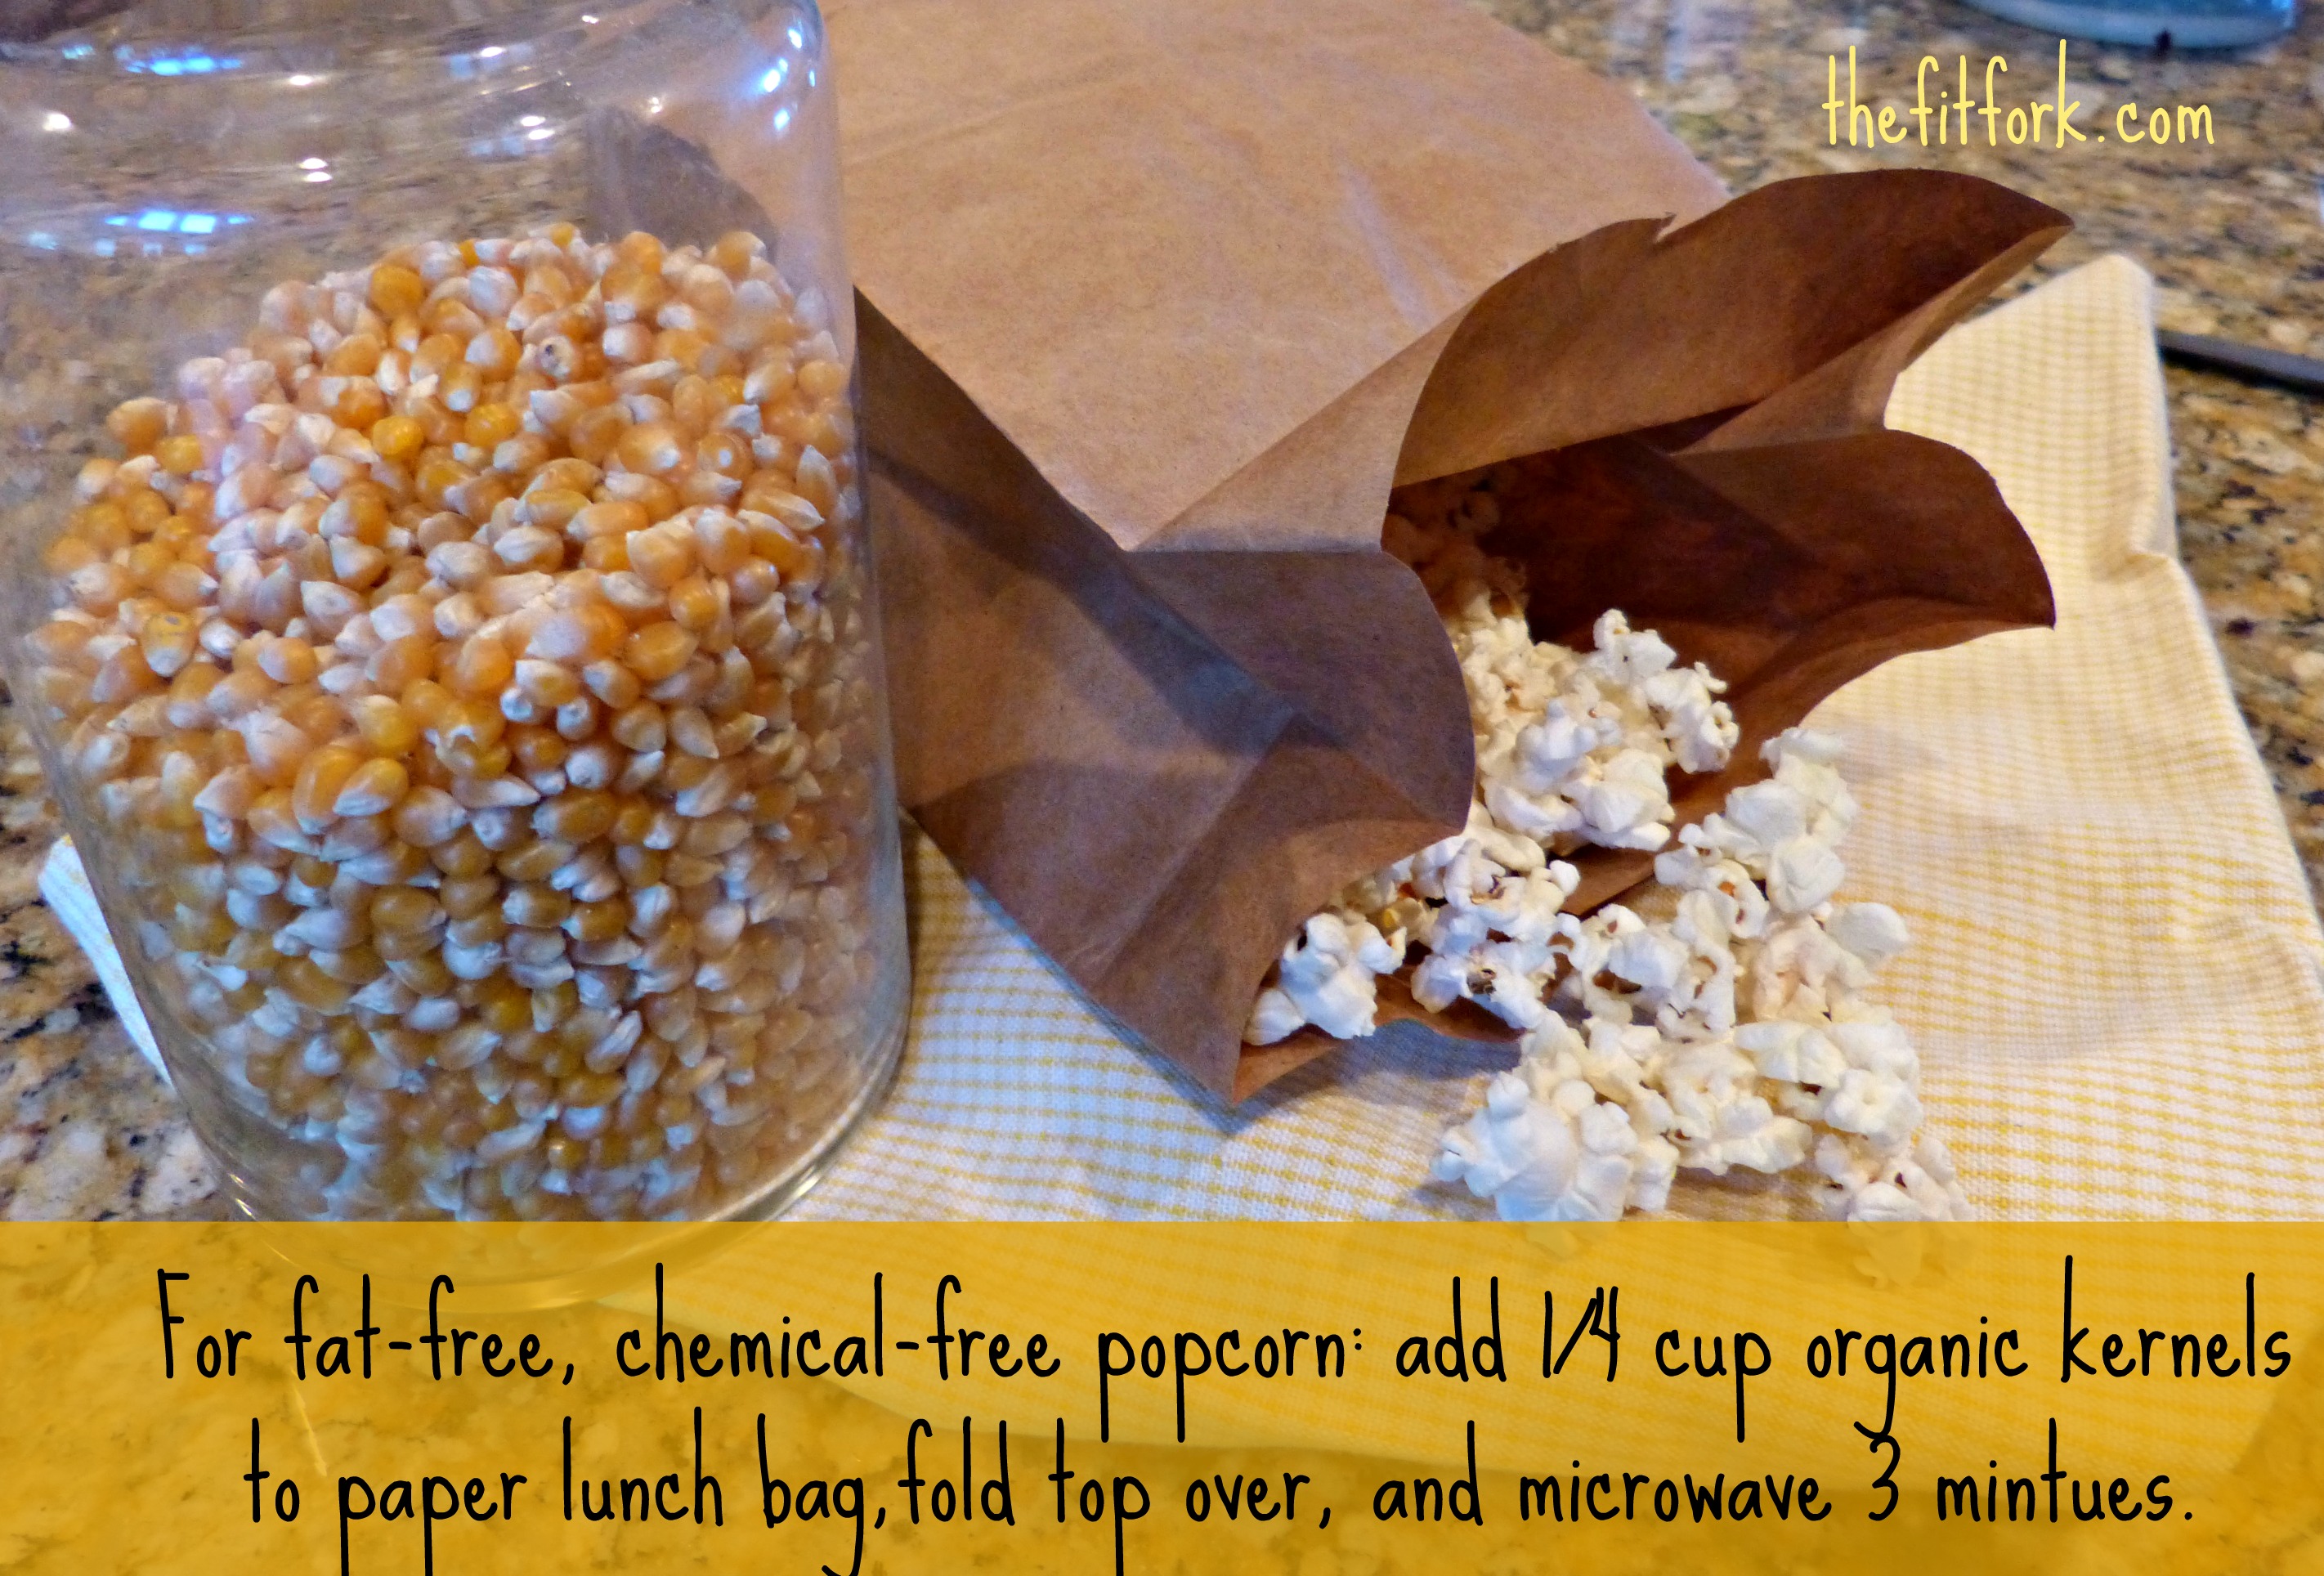
The good news is that you can make your own popcorn completely free of anything using a brown paper lunch sack. It’s as easy as making toast or boiling water. In celebration of “Caramel Popcorn Day” on Sunday, April 7th, you can jazz up your plain popcorn with a healthier sweet coating.  I hope you love my Crunchy Caramel Almond Popcorn with Coconut Oil & Honey recipe  In fact, why don’t you pop in a movie tonight and make this salty-sweet snack can be the starring attraction!


Crunchy Caramel Almond Popcorn with Coconut Oil and Honey 

  •  ¼ cup organic popcorn kernels
  • 2 teaspoons coconut oil (I am fond of the Now Foods brand)
  • 2 tablespoons honey
  • 2 teaspoon Stevia (2 – 4 packets)
  • ½ teaspoon vanilla extract
  • 1/4 teaspoon baking soda
  • 1-ounce (about 24) roasted, salted almonds
  • 1/2 teaspoon sea salt

jennifer fisher - thefitfork.com - brown bag popcorn

Pour popcorn kernels into brown lunch-sized paper bag. Fold down top and place in center of microwave; cook on high for approximately 3 minutes or until kernels have slowed down to popping every three seconds. Set aside.

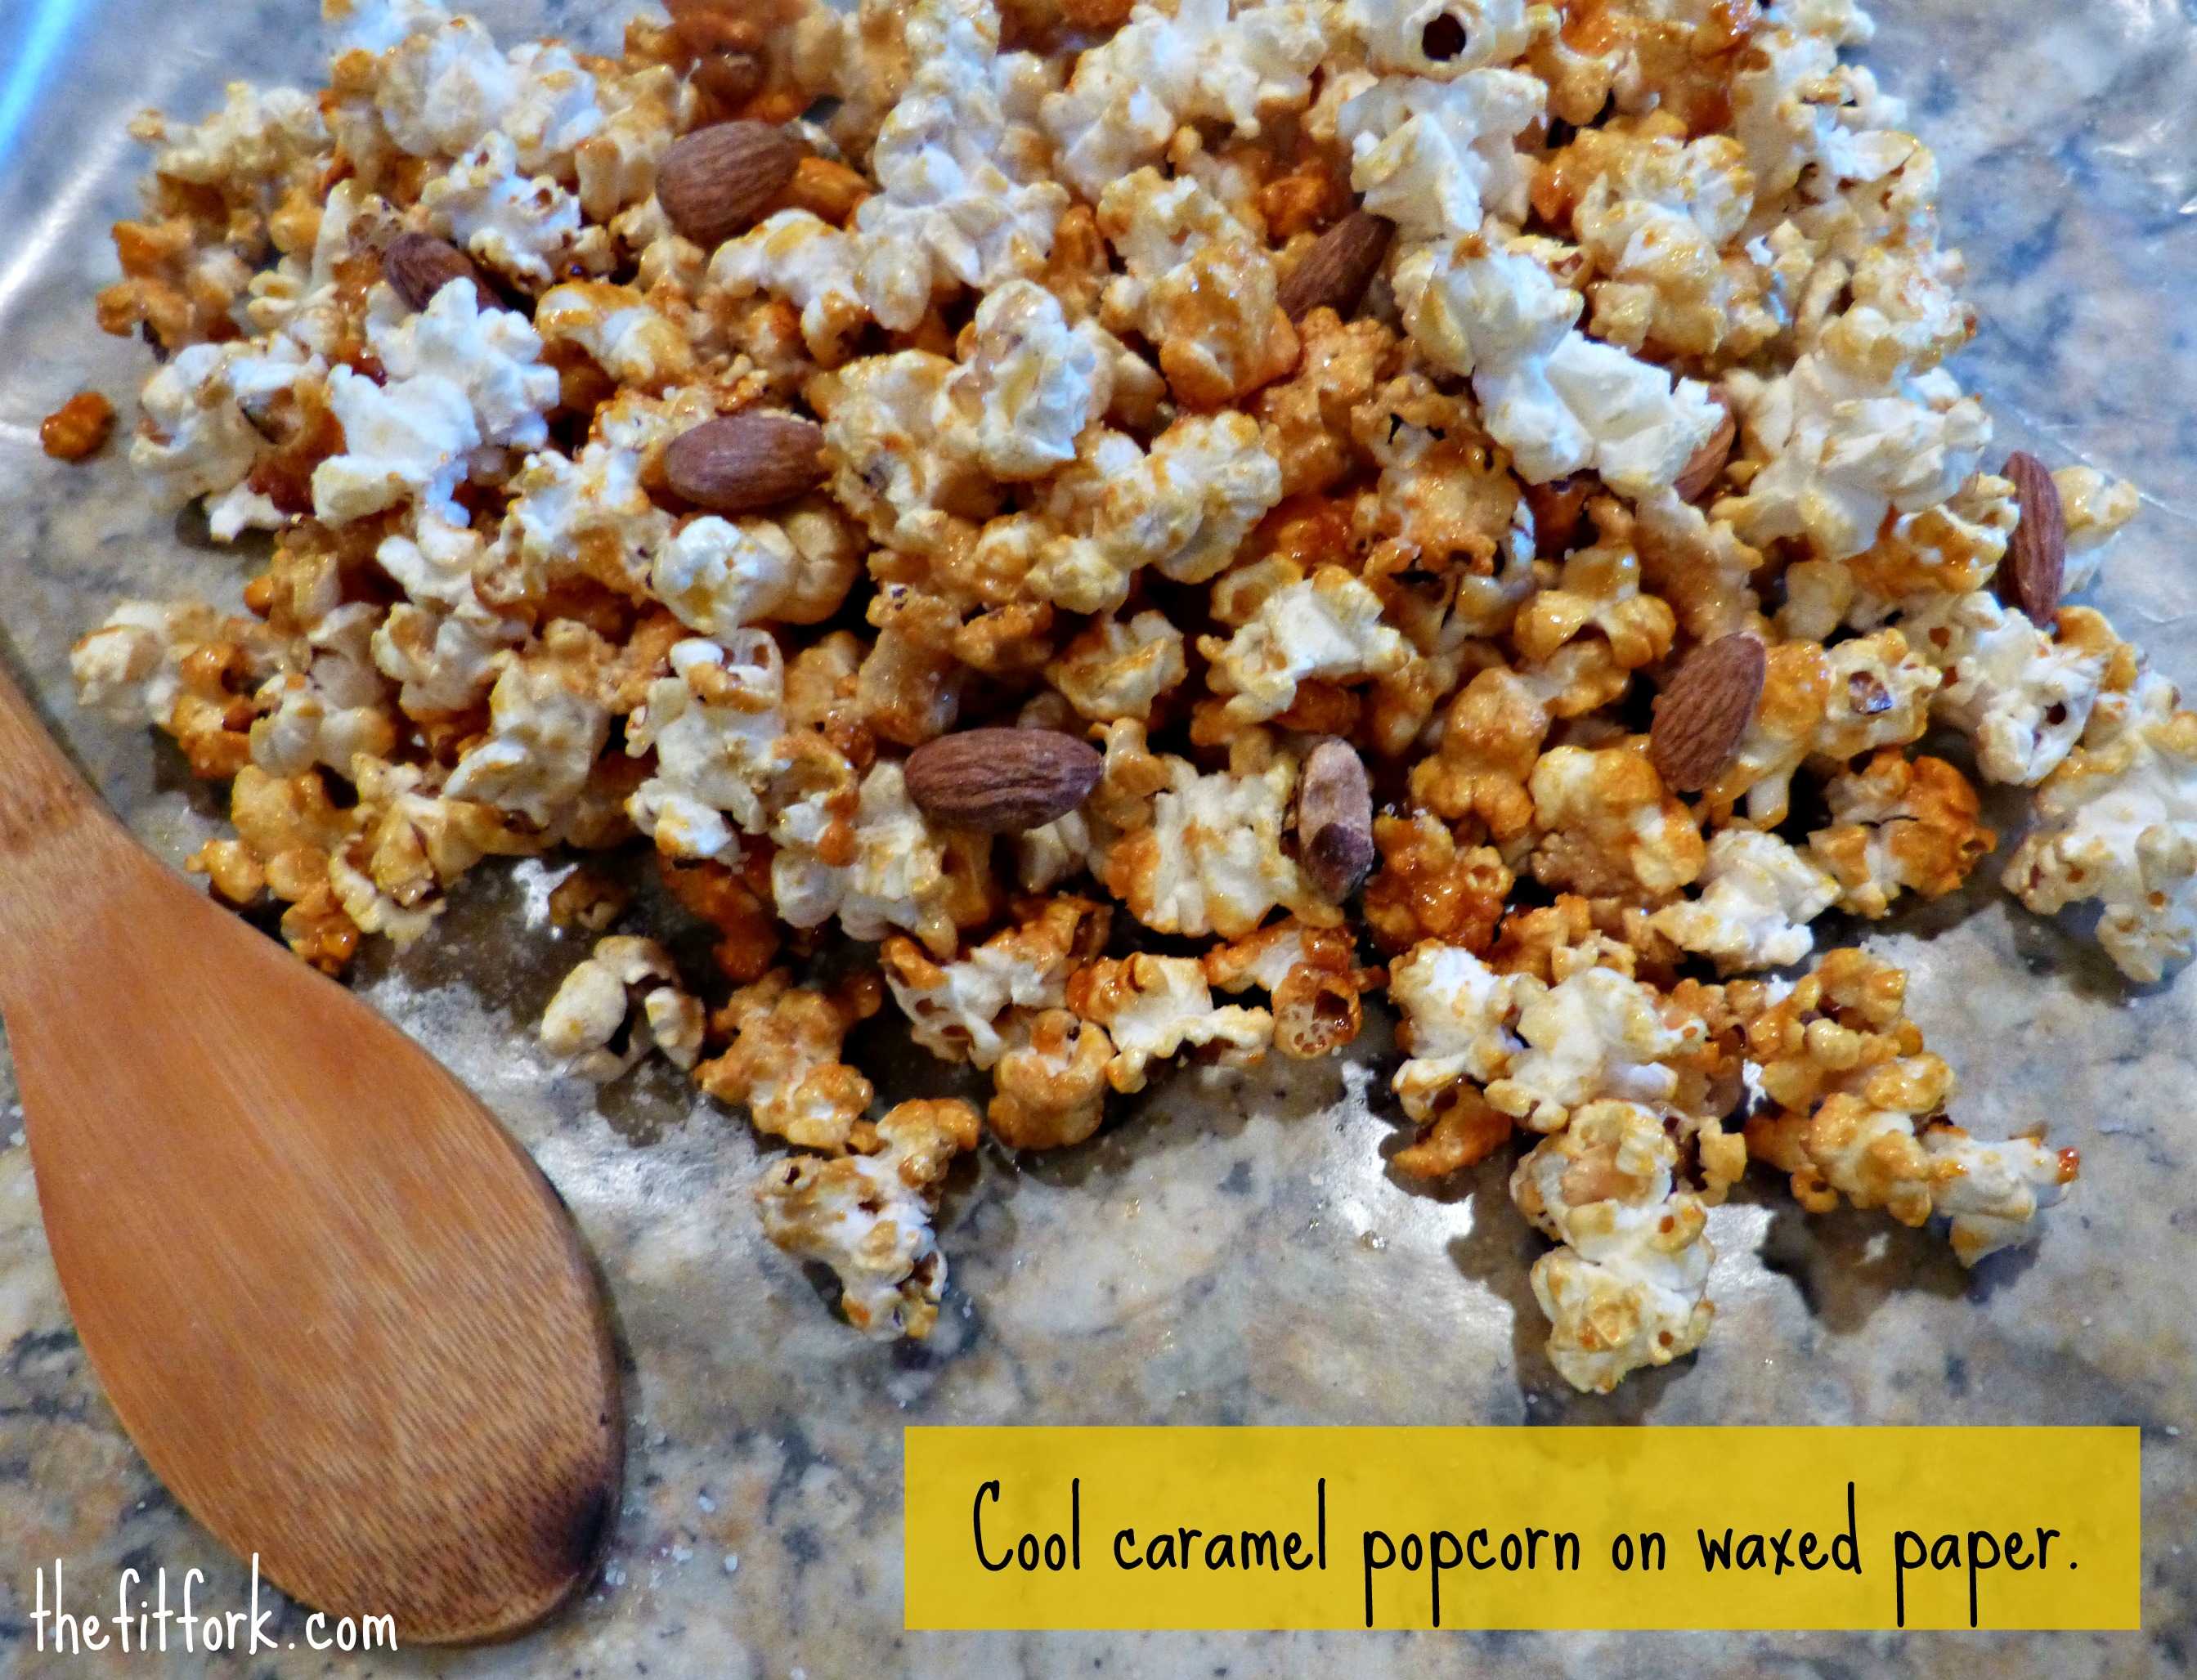
In 2-quart pot, melt coconut oil over medium-low heat. Add honey and Stevie, stir until well-combined, approximately 1 minute. Stir in vanilla. jennifer fisher - thefitforkk.com - cool caramel popcorn

Stir in baking soda; this will cause mixture to foam up. Remove from heat and toss in almonds and popped corn. Stir until popcorn is coated with caramel mixture.

It’s fine to eat as is, but if you like it crunchier, place on parchment-paper lined rimmed baking sheet and bake at 250 F degrees for about 30 minutes. Sprinkle with sea salt.

Makes four 1-cup servings.

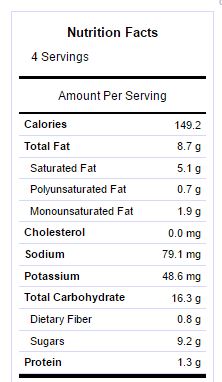
honey-almond-popcorn-made-with-coconut-oil-nutrition


Take-Out Makeover – Baked Chicken Spring Rolls with Raspberry Chipotle Sauce

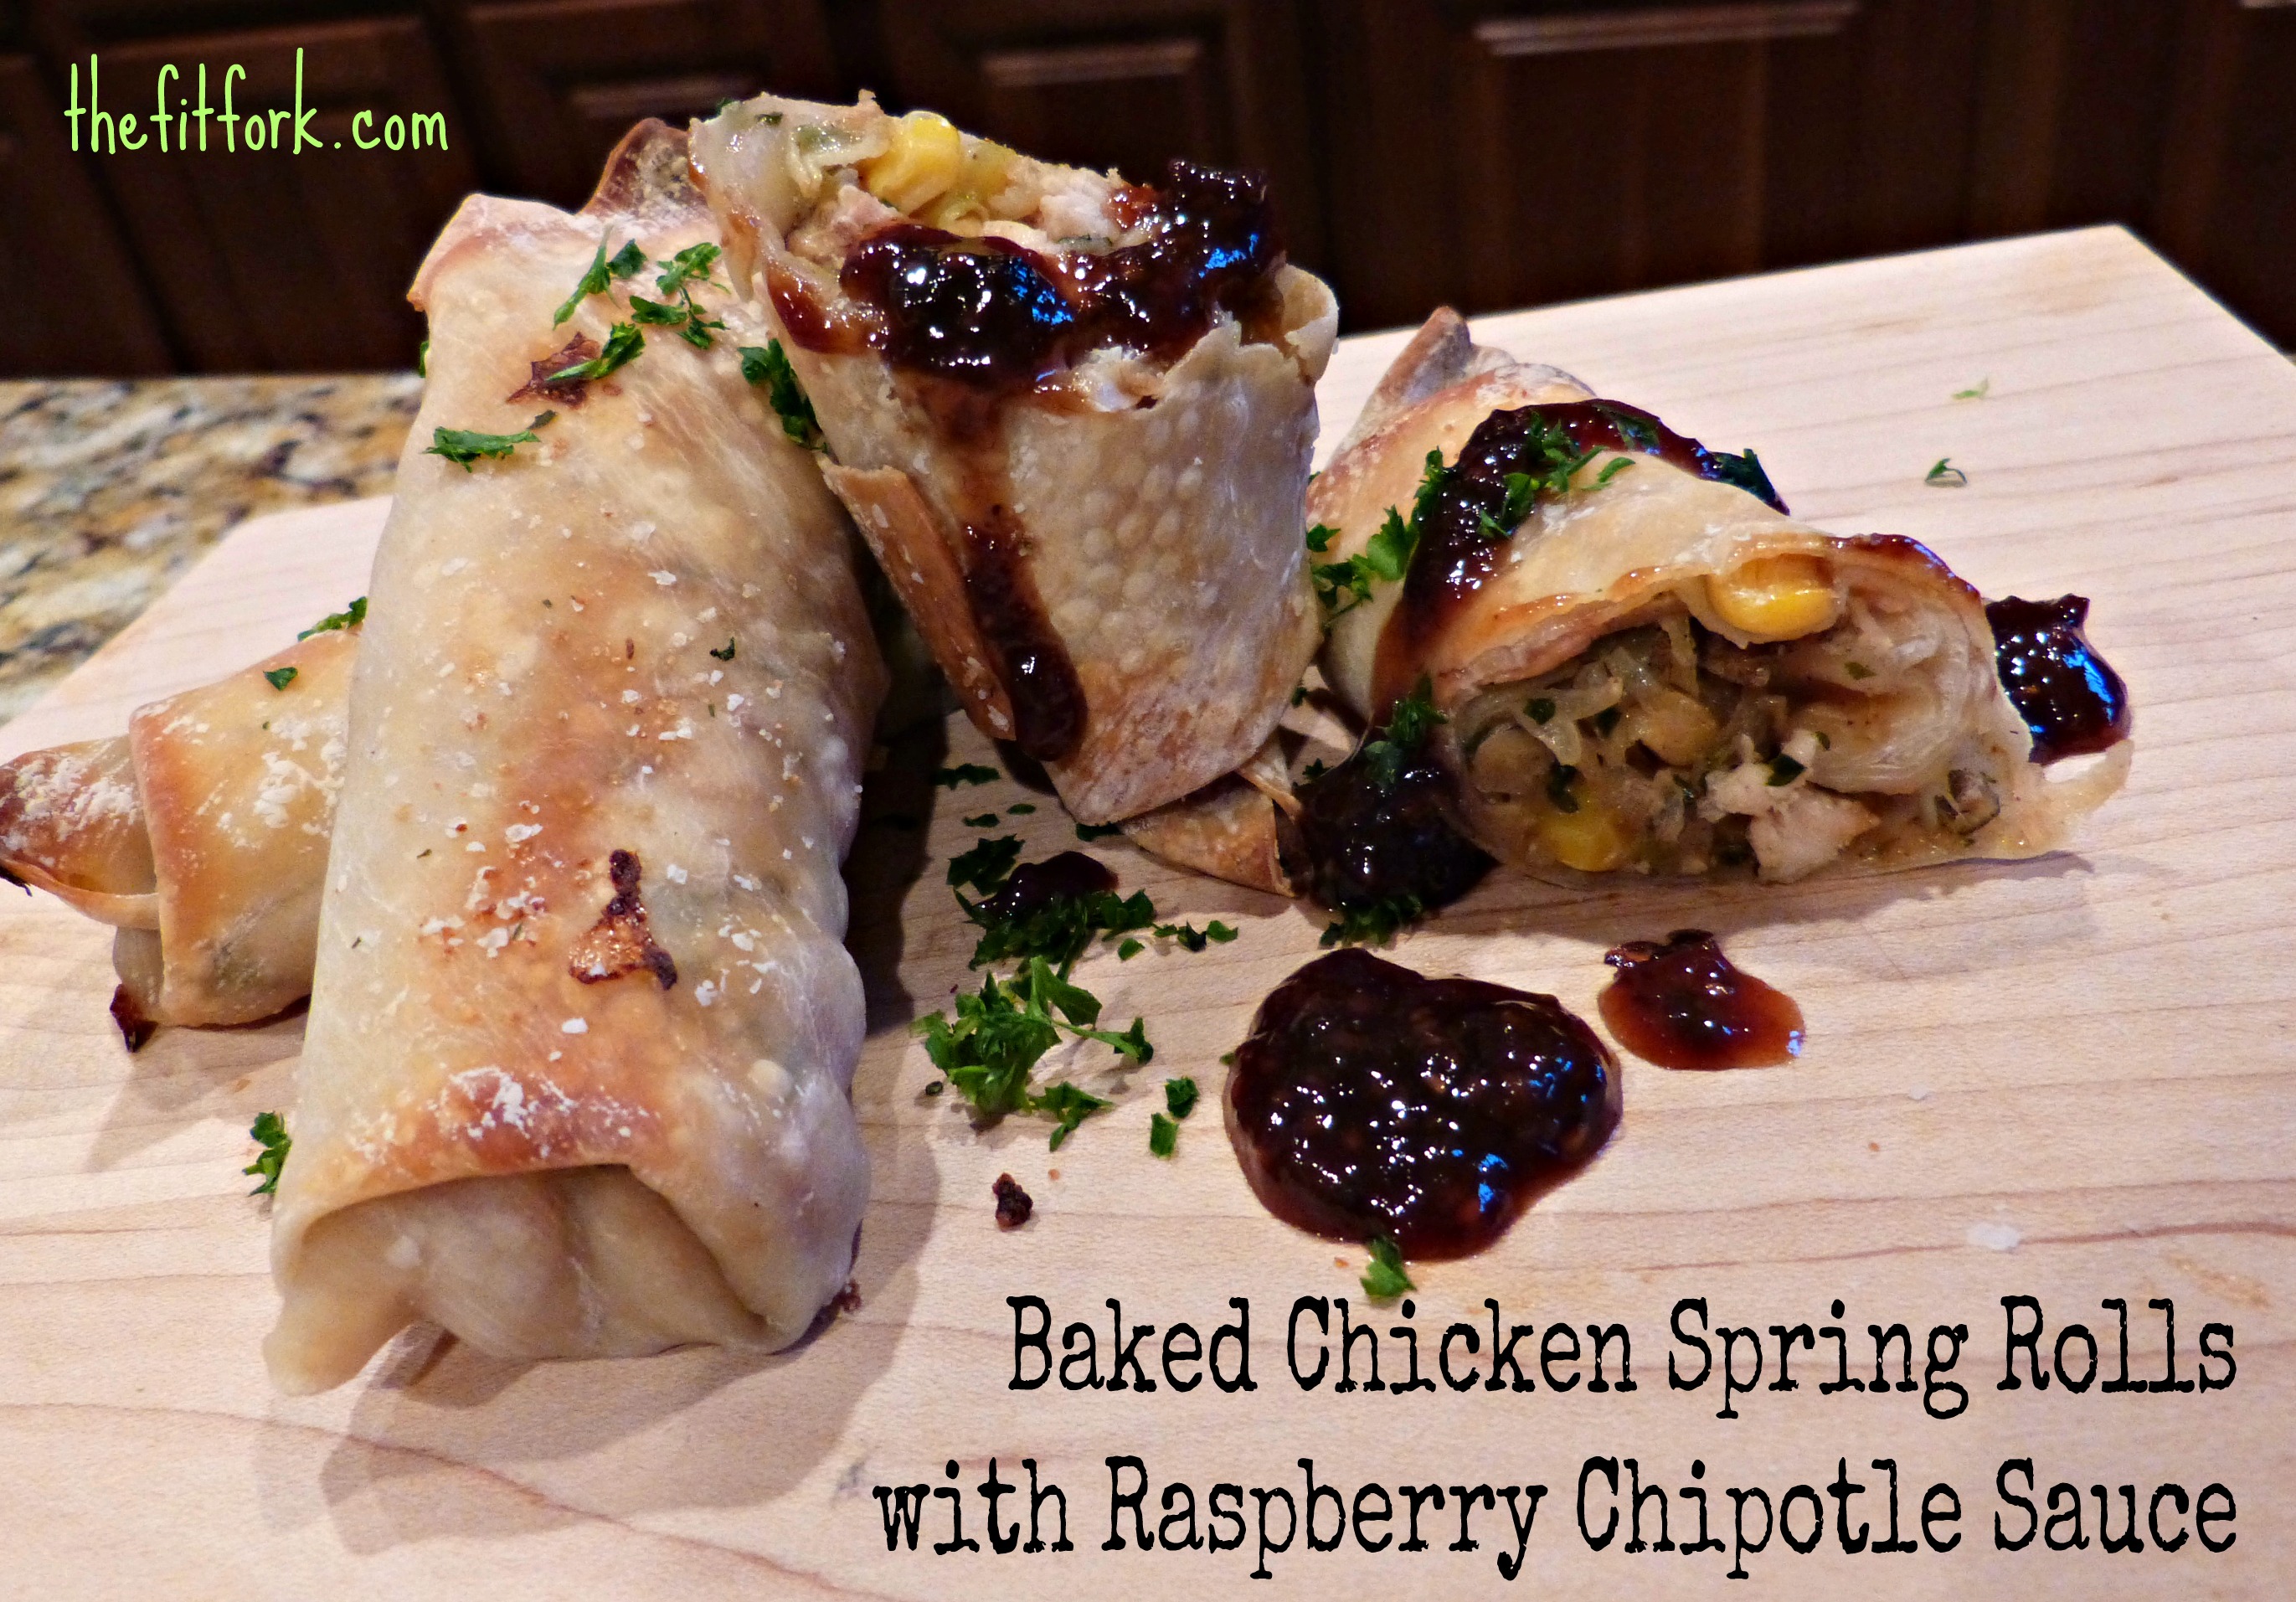
baked chicken spring rolls  raspberry chipotle sauce

Get that crispy crunch of an egg roll with virtually none of the fat with this yummy Baked Chicken Spring Rolls with Raspberry Chipotle Sauce recipe. A lightened up version of a take-out favorite, this snack or light dinner option can be made at home snippity-snap, quicker than the delivery guy can even get to your front door.

Inspired by the vegetables already in my produce bin, this recipe is easily adaptable to whatever colorful vegetables (and maybe even fruits for the daring) you need to use up. For convenience, I like a pre-prepared sauce for my spring rolls; Fischer & Wieser Raspberry Chipolte Sauce is a favorite.

Baked Chicken Spring Rolls with Raspberry Chipotle Sauce Recipe

2 teaspoons sesame oil
1 teaspoon dried, ground ancho chile powder
1 Tablespoon minced garlic
1/2 large red onion, diced
6-ounces cabbage blend (I used a coleslaw bag)
¾ cup fresh corn kernels
3 tablespoons fresh minced parsley (more for garnish)
1 lime, juiced
1 tablespoon soy sauce
1 teaspoon dried, ground ancho chile powder
2 cups diced or shredded chicken breast (already cooked)
12 square (7-inch) spring roll wrappers
3/4 cup Raspberry Chipotle Sauce, for serving (I used Fischer & Wieser brand)
Preheat the oven to 400ºF.

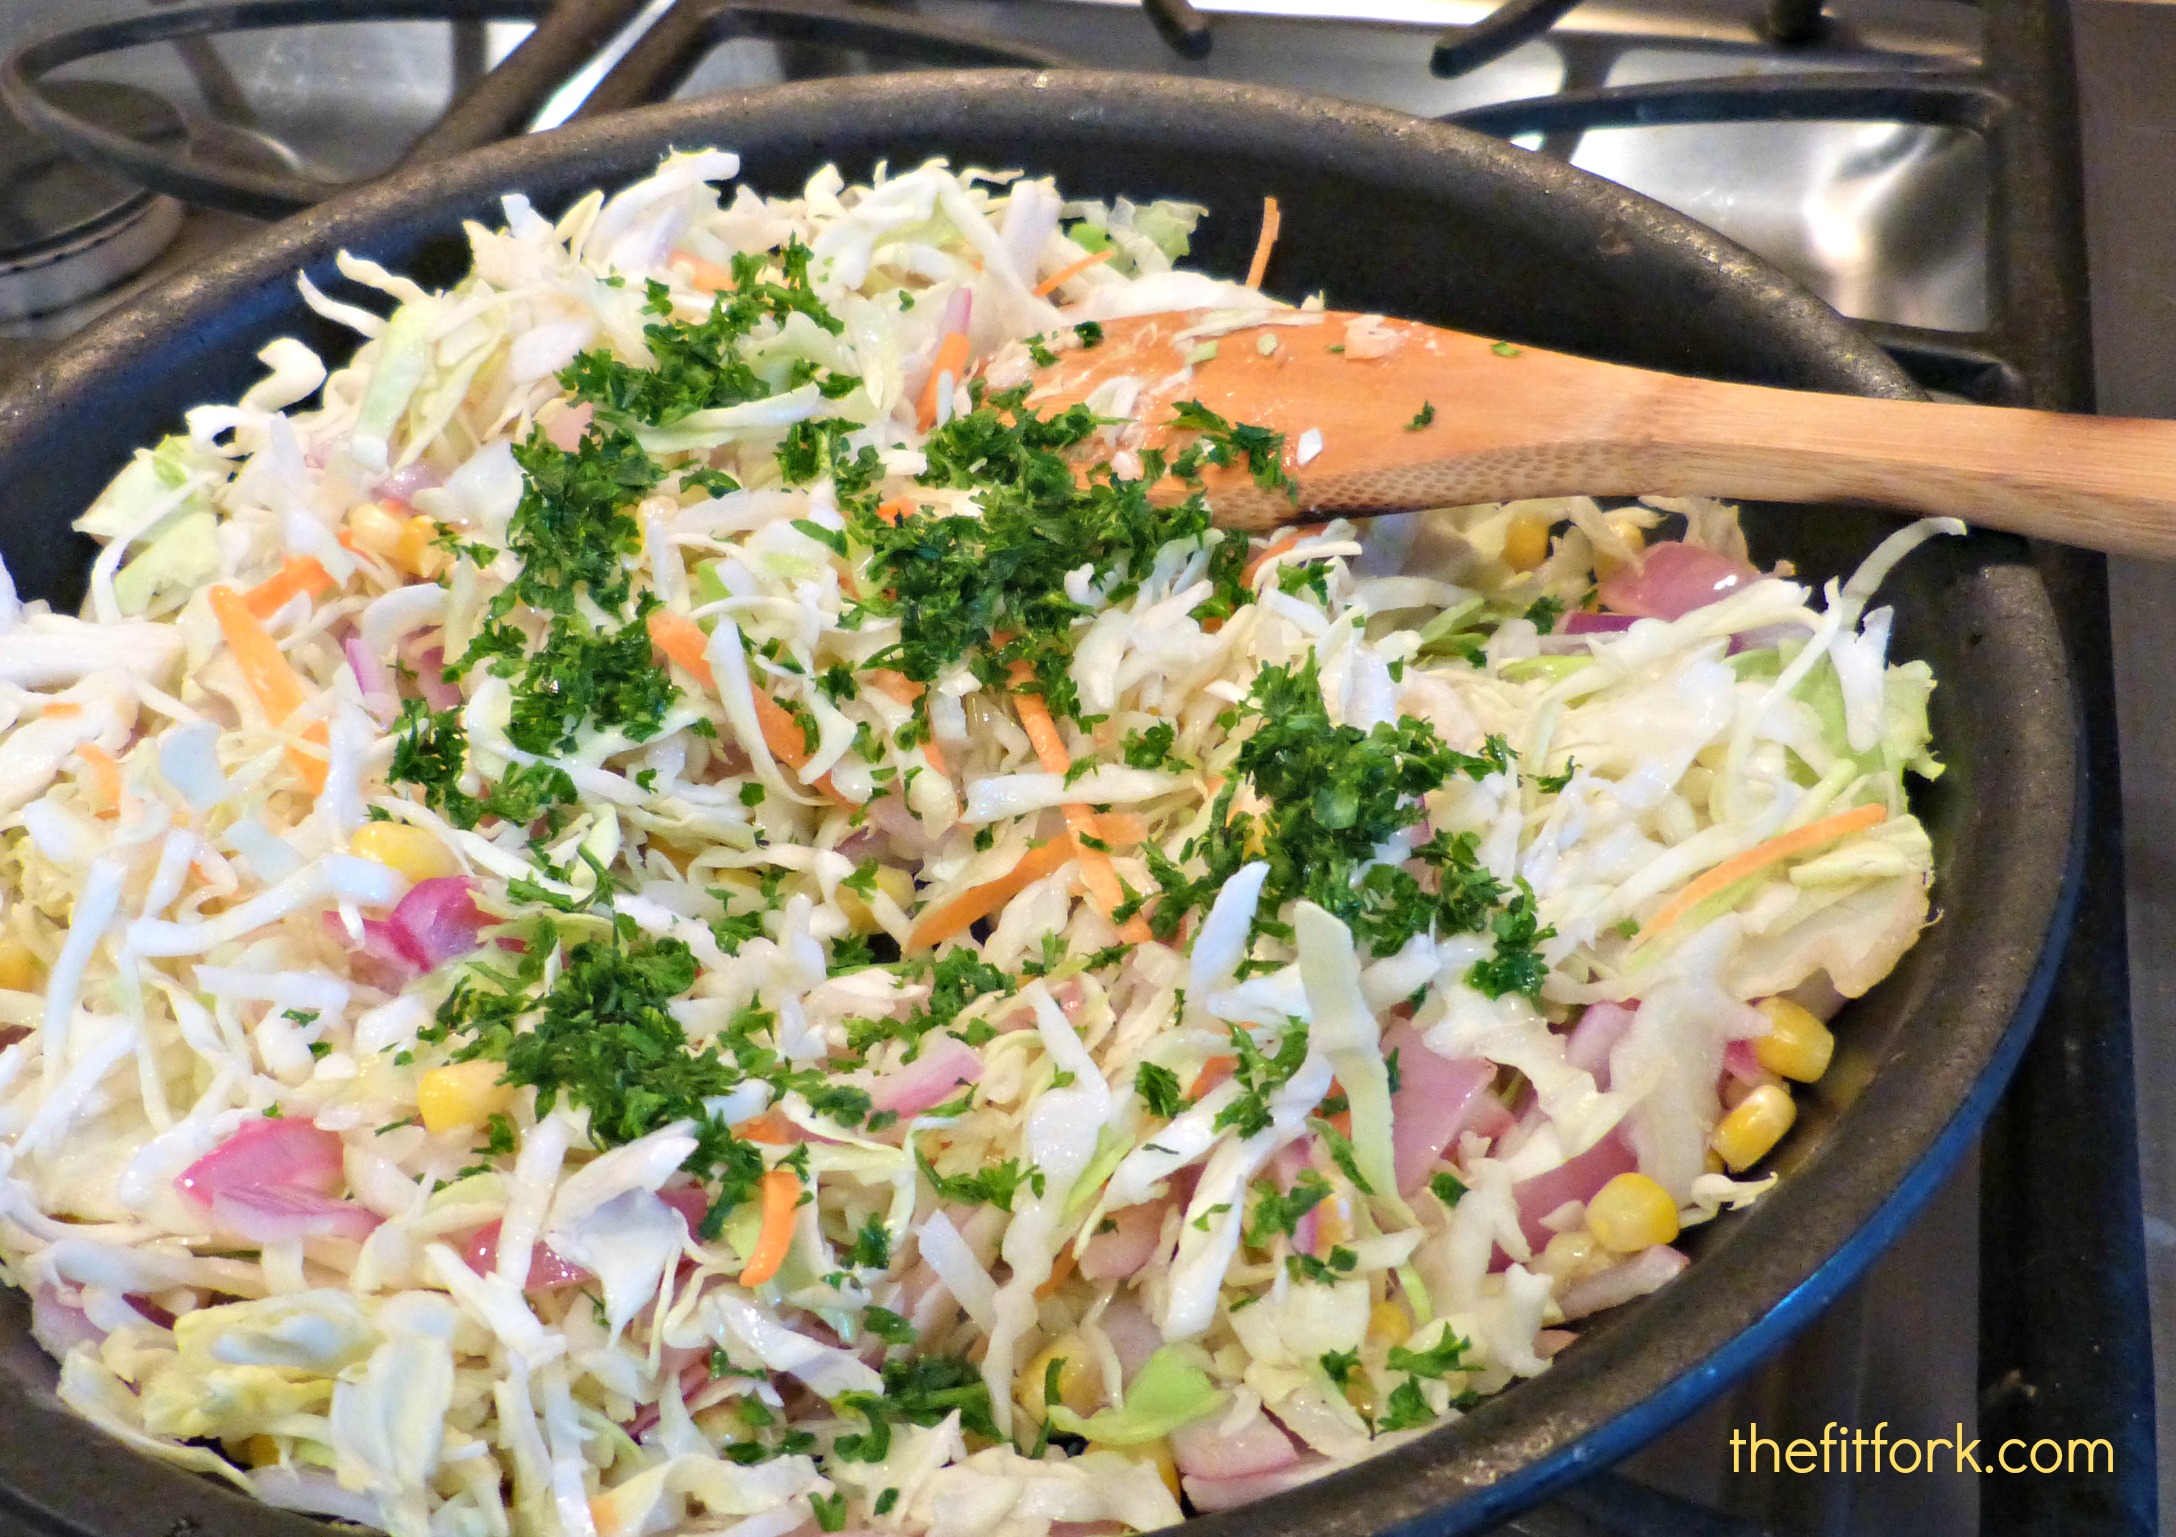
In large sauté pan heat up sesame oil over medium-low heat and add chile powder and garlic; sauté for 2 minutes. Add red onions and corn and sauté for 3 – 5 minutes until somewhat softened, but not soggy. Sir in the cabbage, lemon juice, and soy sauce and continue cooking, stirring frequently, for another 2 – 3 minutes. Stir chicken into vegetable mixture. Remove from heat and let mixture cool for 5 minutes.

spring roll veggies

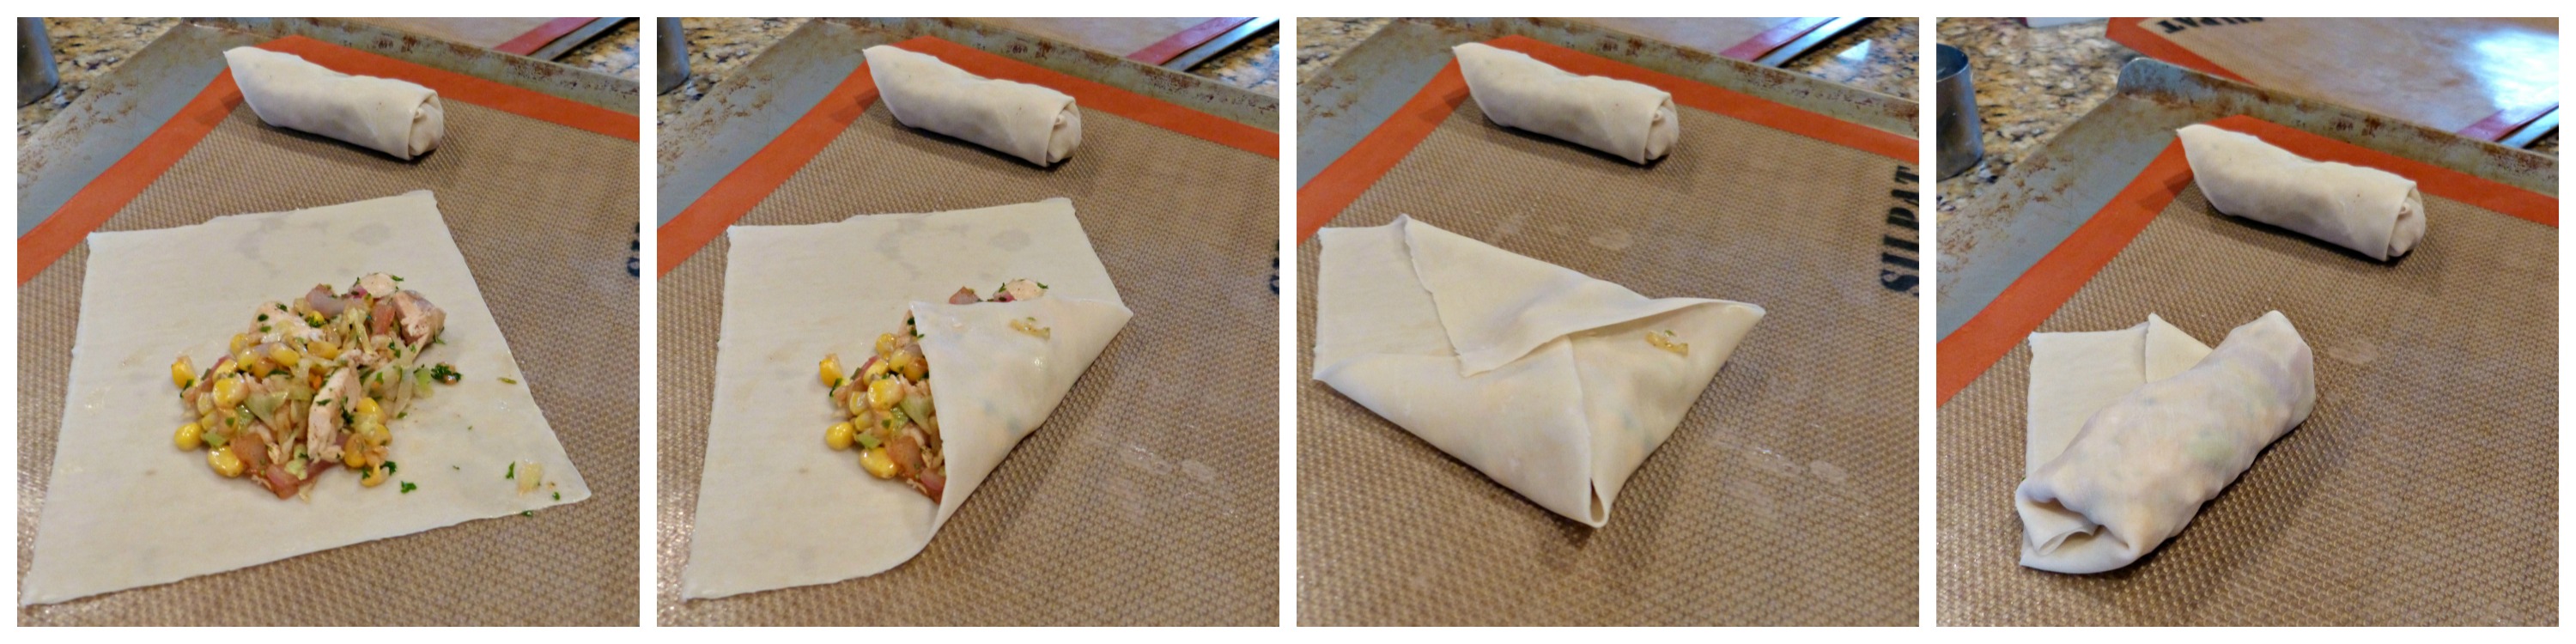
Arrange the spring roll wrappers on a dry work surface then place 1/3 cup of the mixture in the center of each wrapper. Roll the wrappers snuggly around the mixture, folding the edges inward. Before your final fold, dip fingers in water and then moisten the outer edge of the wrapper to seal the spring roll shut.

spring roll collage

Line a baking sheet lined with parchment paper or a Silpat nonstick baking mat and line up spring rolls. Brush the tops of the rolls with olive oil then bake them for 25 – 30 minutes (rotating half-way through) or until golden brown and crisped. Remove the spring rolls from the oven and serve them immediately with warmed raspberry chipotle sauce.

spring rolls ready for oven

Makes 12 spring rolls.

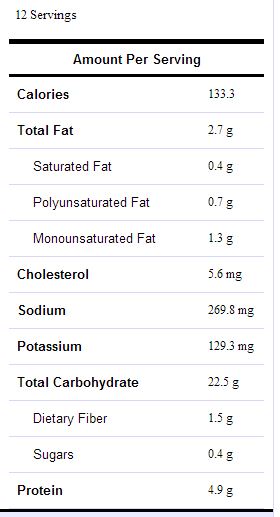
Nutrition Information:

baked chicken spring roll nutrition info