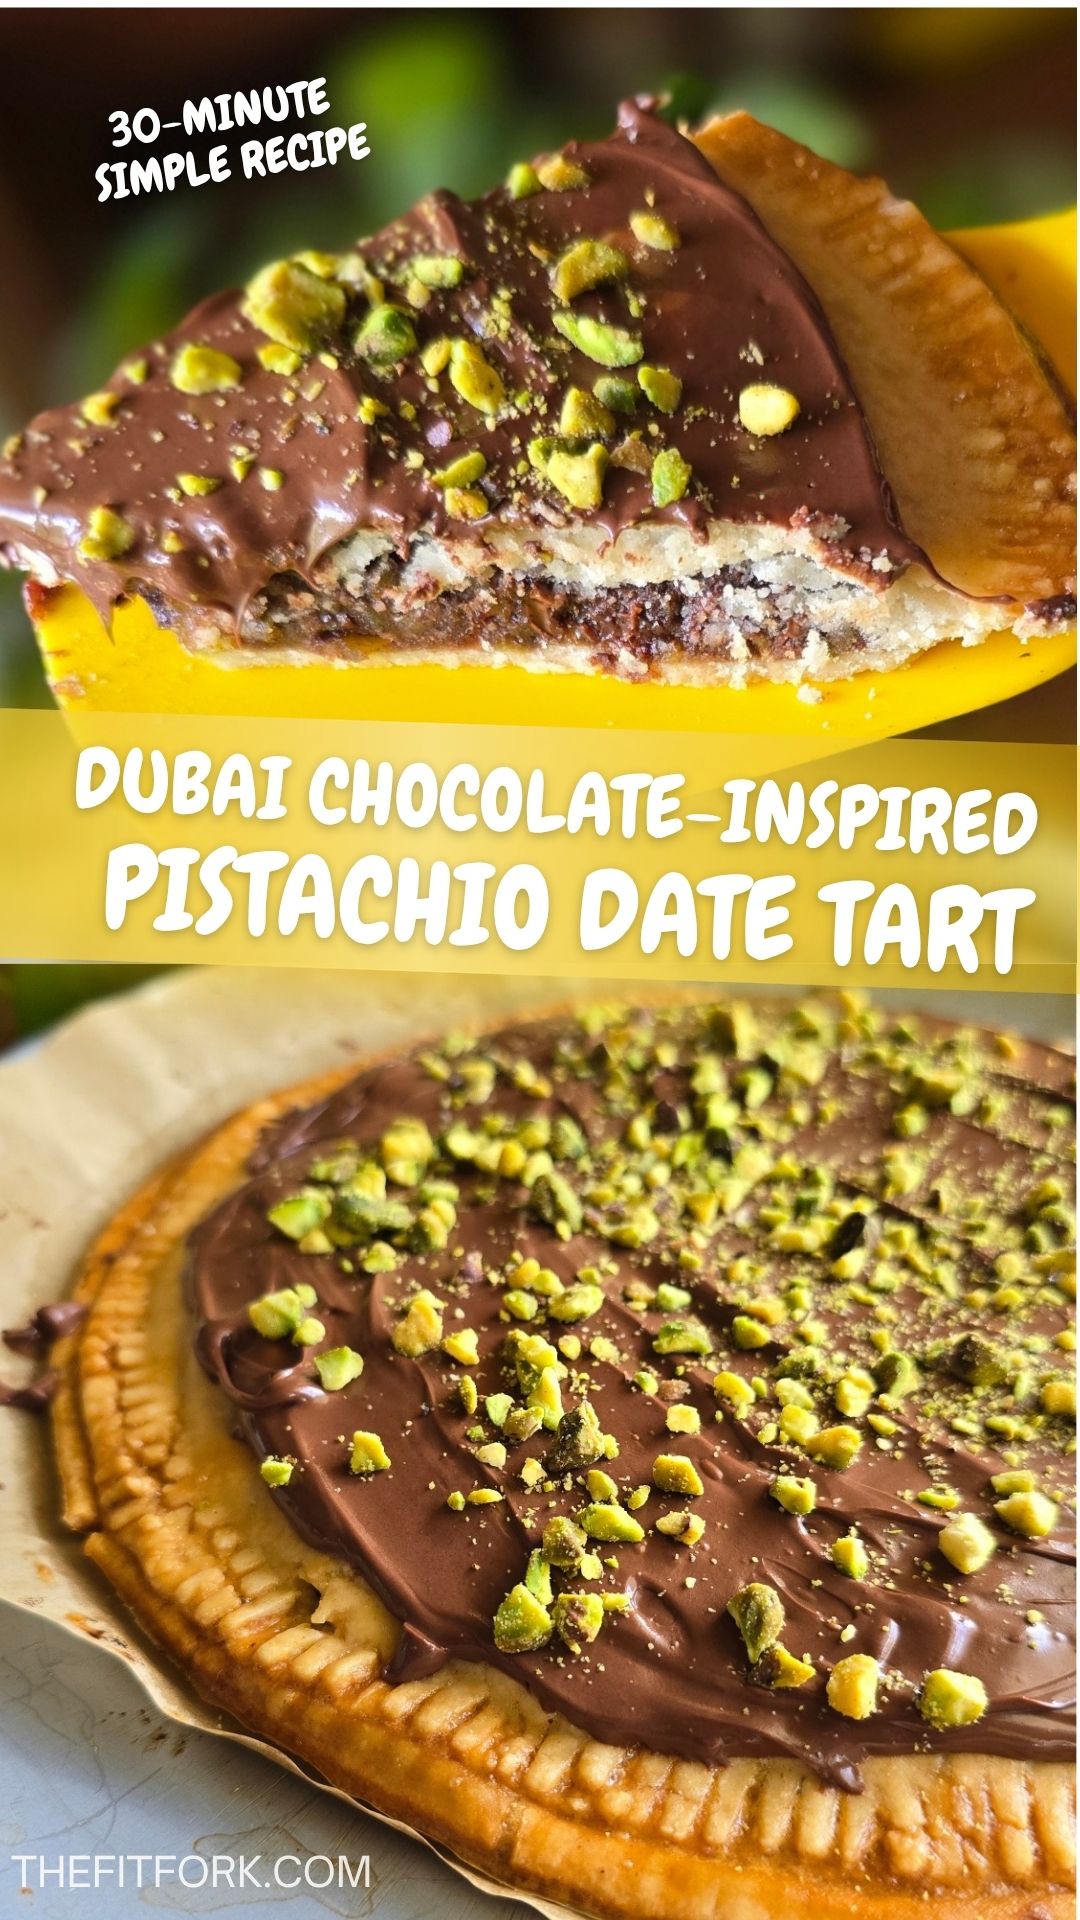
If you’ve spent any time on social media in the past year, you’ve probably seen the Dubai chocolate craze taking over feeds everywhere. Rich chocolate, pistachios, and Middle Eastern-inspired flavors? I’m definitely here for it with this easy pie crust dessert recipe that I updated with my own spin– Dubai-Inspired Chocolate Pistachio Date Tart.
Instead of recreating the original exactly, I wanted to make it quick and easy (like using pie crust instead of phyllo or toasted kataifi)– and of course, pay tribute to the warm, rich flavors that remind me of my tastings of this trendy chocolate bar and also traditional baklava: naturally sweet dates, crunchy pistachios, fragrant spices like cinnamon. The result is a giant shareable tart that’s easy enough for weeknights yet pretty enough for entertaining.
Even better? This chocolate pistachio date tart contains no added sugar when made with sugar-free dark chocolate chips (though regular dark chocolate chips work beautifully too if that’s your preference – you do you)!
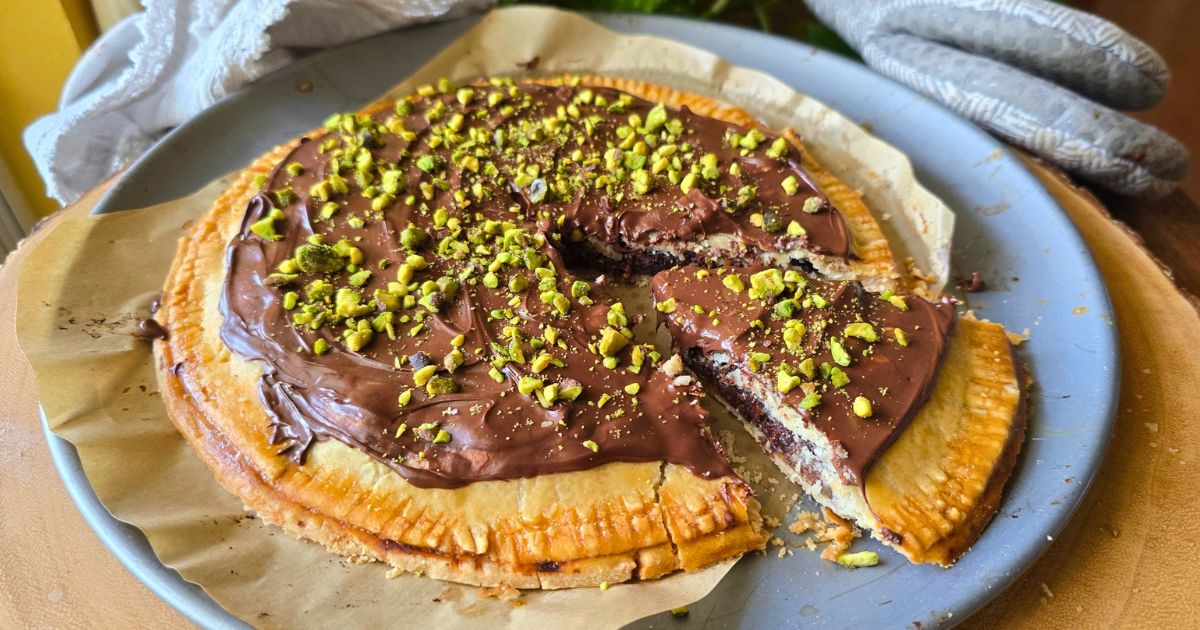
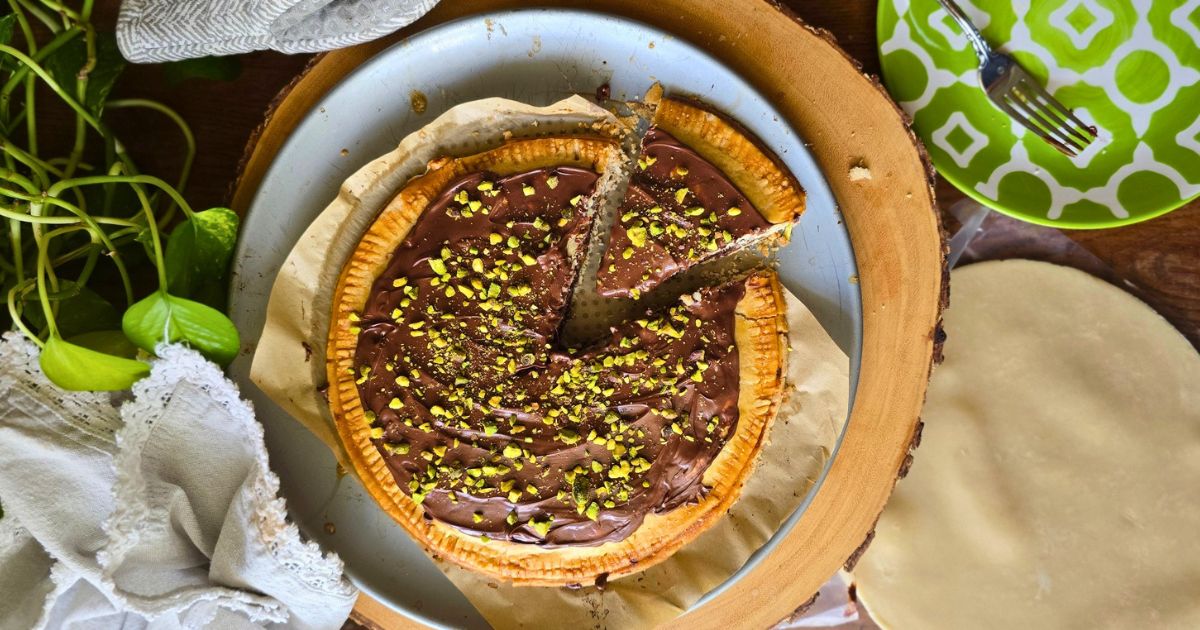
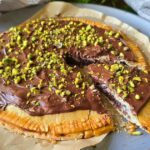
As hinted, the filling is tucked between two ready-to-bake pie dough circles from Wick’s Pies, baked until lightly golden, then topped with melted chocolate and extra pistachios for the perfect finishing touch. Slice it into eight wedges for an easy anytime treat that also can slide in seamlessly as the finishing touch on an elegant meal.
Why I Love Keeping Wick’s Pie Dough Circles in My Freezer
One kitchen shortcut I always keep on hand? Raw, ready-to-bake pie dough circles from Wick’s Pies. I love having these raw dough circles stashed in the freezer because they make both sweet and savory recipes incredibly easy. There’s no measuring, rolling, or worrying about making homemade pie dough from scratch. You don’t have to be a pie expert to create bakery-worthy dishes at a moment’s notice.
Whether I’m whipping up desserts like this tart or savory creations, having ready-to-use pie dough means homemade comfort food is always within reach. Today’s recipe is swee,t but one of my favorite savory go-to recipes is my Rustic Mushroom Bacon Blue Tart with Garlic Thyme Pastry Leaves.
Dessert with Baklava, Dubai Chocolate & Giant Pop Tart Vibes
This easy 30-minute dessert recipe is simple but incredibly flavorful:
- Dates for natural sweetness
- Pistachios for crunch and nutty richness
- Cinnamon for spiced warmth
- Dark chocolate for indulgence
- No rolling and wrangling pie dough, just sandwich the filling between pre-formed pie dough circles and crimp.
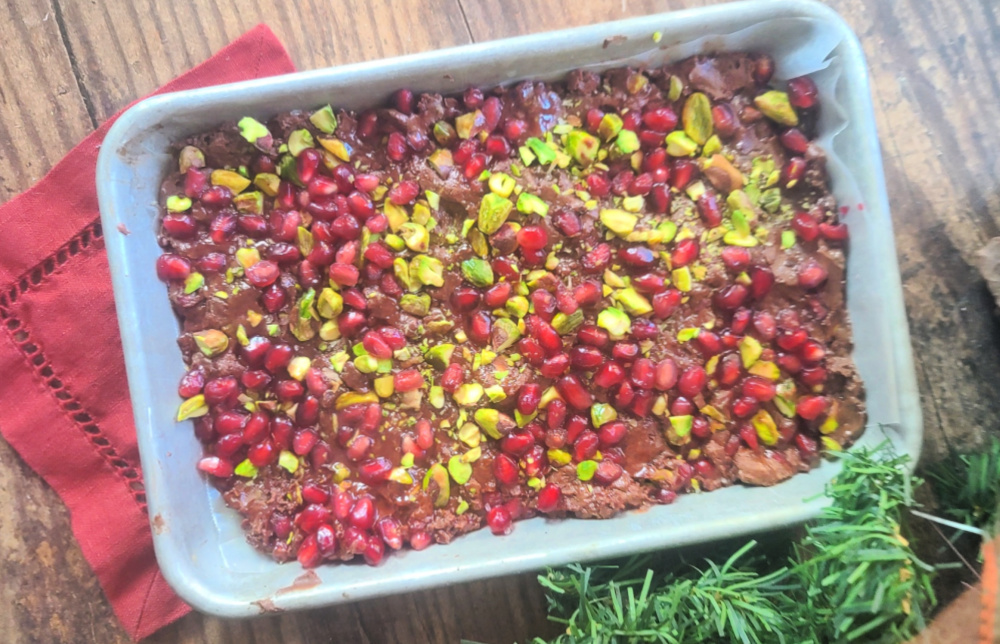
Once baked, I sprinkle chocolate chips directly onto the hot tart while it’s cooling. The residual heat melts the chocolate into a glossy topping—this is my go-to ganache-inspired hack (no need to dirty another bowl). A quick swipe with a spatula and a sprinkle of chopped pistachios and dessert is served.
Leta me know if you try this simple pie crust dessert idea — and don’t forget to checkout Wick’s Pies (on Instagram and Facebook, too).
#BakeWithWicks, #WicksPieCreations, #WicksRecipeChallenge
Inspired by the Dubai chocolate trend, this no-added-sugar Chocolate Pistachio Date Tart combines dates, cinnamon, pistachios, and sugar-free dark chocolate inside convenient Wick's pie dough circles for an easy dessert with Middle-eastern baklava + chocolate vibes.
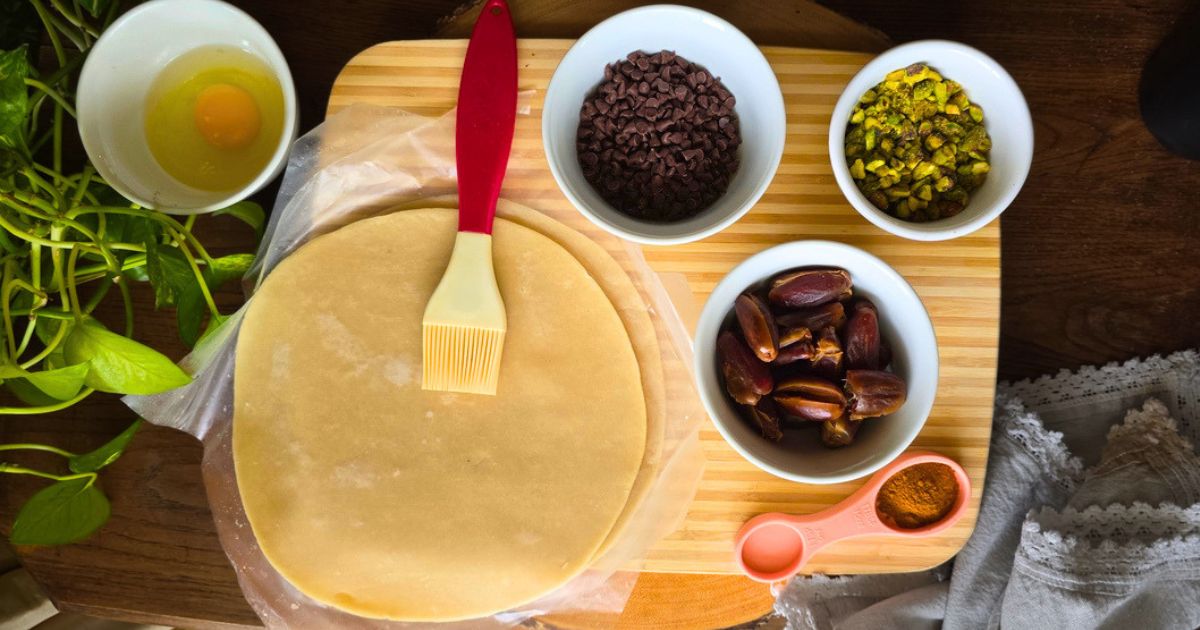
- 2 8 or 9-inch frozen, thawed pie crust dough circles I used dough from Wick's Pies
- 6 oz pitted dates see recipe step #1 to pre-soak
- 2/3 cup raw pistachios divided (see recipe instructions)
- 2/3 cup sugar free dark chocolate chips divided (see recipe instructions)
- 2 teaspoon ground cinnamon
- 1 egg
- Water
-
In bowl, cover dates with water and soak for 30-60 minutes until pump and softened. Drain off excess water.
-
Pre-heat oven to 400F degrees.
-
To food processor, add all pistachios and pulse until chopped – remove and RESERVE 2 tablespoons for the topping.
-
With the remaining chopped raw pistachios remaining in food processor, add 3 cup of the chocolate chips, ground cinnamon, and 1-2 tablespoons of water. Pulse for approximately 60-90 seconds until a coarse paste as formed.
-
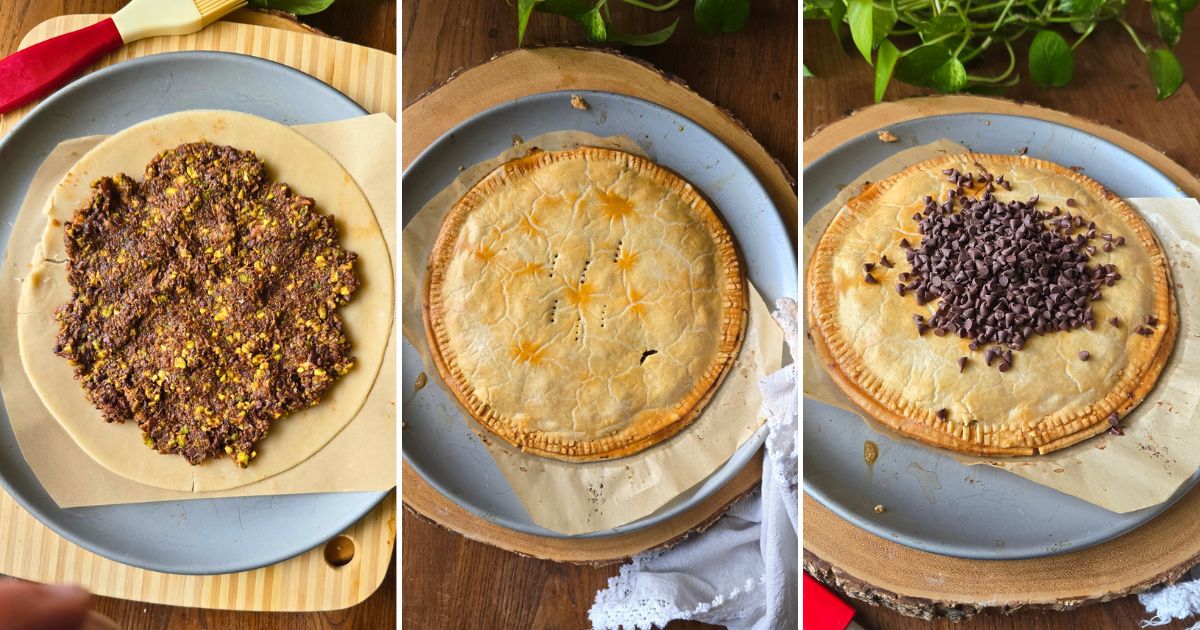
Place one dough circle on a parchment-lined baking sheet or pizza pan. Top dough with paste mixture, gently spreading and flattening out with spatula or hands to 1-inch of the border. Use a pastry brush to coated exposed dough edge with water.
-
Add second dough circle on top, keeping in line with the edges of the bottom dough. Use a fork to crimp dough edges together around the entire diameter.
-
In small bowl, whisk egg with 1 tablespoon water. Use pastry brush to coat the top layer of dough with the egg wash (discard remaining egg mixture). Use fork to lightly puncture the top layer of dough in a few places.
-
Place on center rack of pre-heated 400F oven and back for 18-20 minutes, until lightly golden brown. Turn off oven.
-
Remove from oven and immediately sprinkle with remaining 1/3 cup chocolate chips. Set back in turned off (but still hot) oven for 2-3 minutes to soften the chocolate chips.
-
Remove from oven and with an off-set spatula, spread melted chocolate chips around to create the “icing.” While still warm, sprinkle top of chocolate with the reserved pistachios.
-
Let cool 10 minutes before, slicing into 8 wedges.