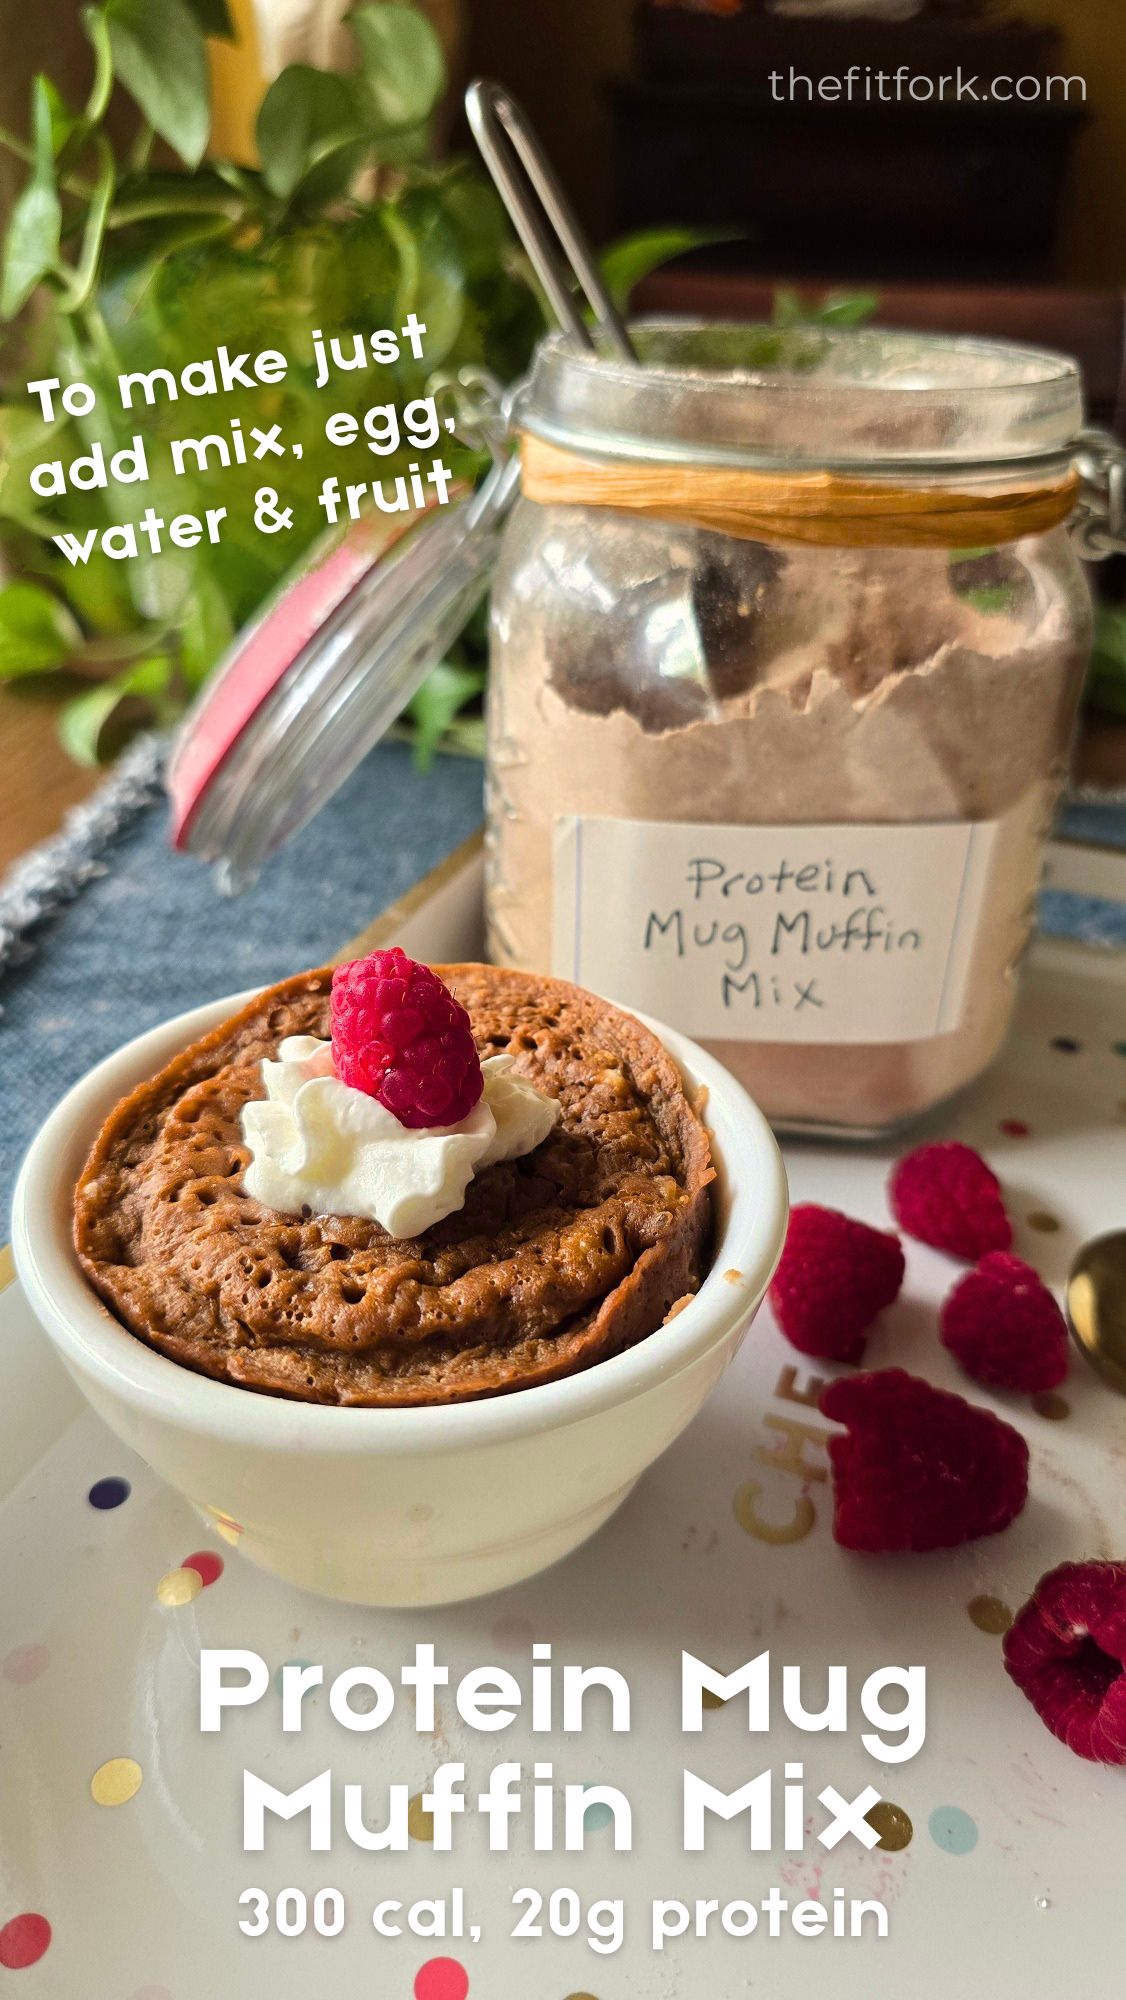
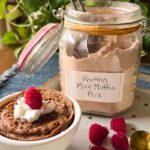
Some mornings call for a leisurely homemade breakfast. Other mornings, you just need something quick, satisfying, and packed with protein. That’s exactly why I created this Make-Ahead Protein Mug Muffin Mix.
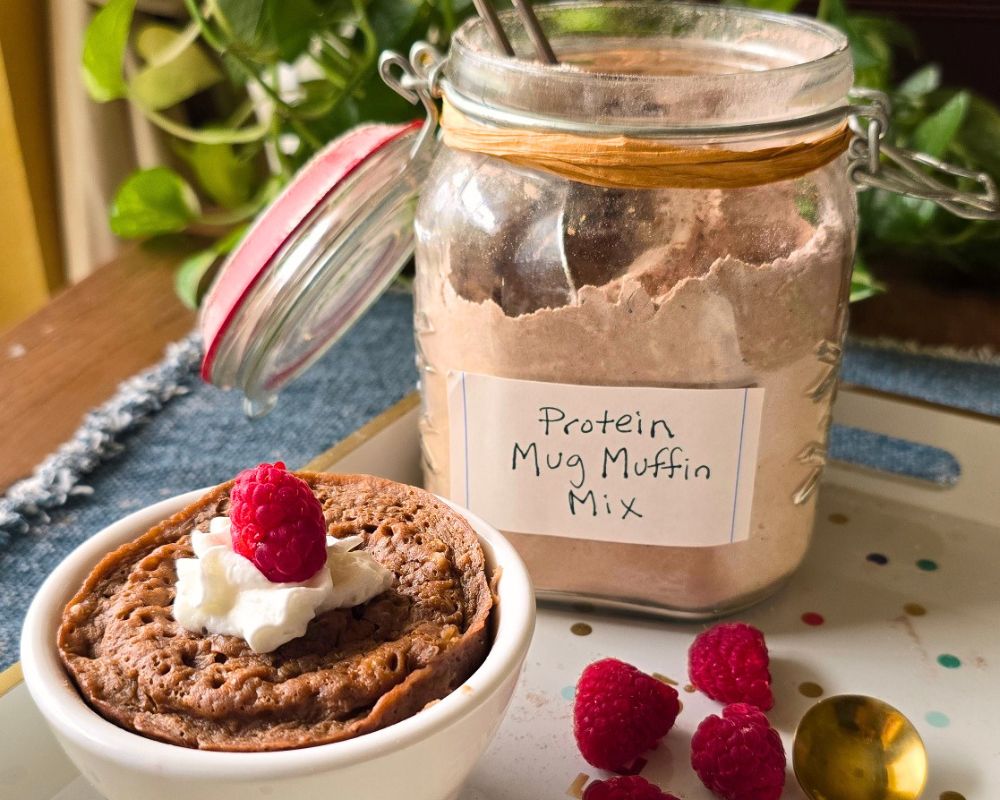
With one batch of dry mix prepped ahead of time, you can enjoy a warm, fluffy protein muffin whenever the craving strikes. Yeah, single-serve mug muffins are easy – but now you don’t even have to measure out each ingredient, it’s all waiting for you to scoop out and use. To prepare a single muffin, simply add an egg, a little water, and your favorite mashed fruit, then pop it in the microwave along with 1/3 cup of the mix. In about two minutes, you’ll have a hearty muffin that will fill you up and keep you going.
Why You’ll Love This Protein Mug Muffin Mix
Life gets busy, but that doesn’t mean breakfast has to suffer. This recipe bridges the gap between convenience and nutrition by delivering:
- Nearly 20 grams of protein per serving
- A warm, fresh-made muffin in minutes
- Easy pantry storage for up to 6 months
- Endless flavor customization options
- A satisfying breakfast, snack, or healthier dessert
The Secret to a Better Protein Mug Muffin
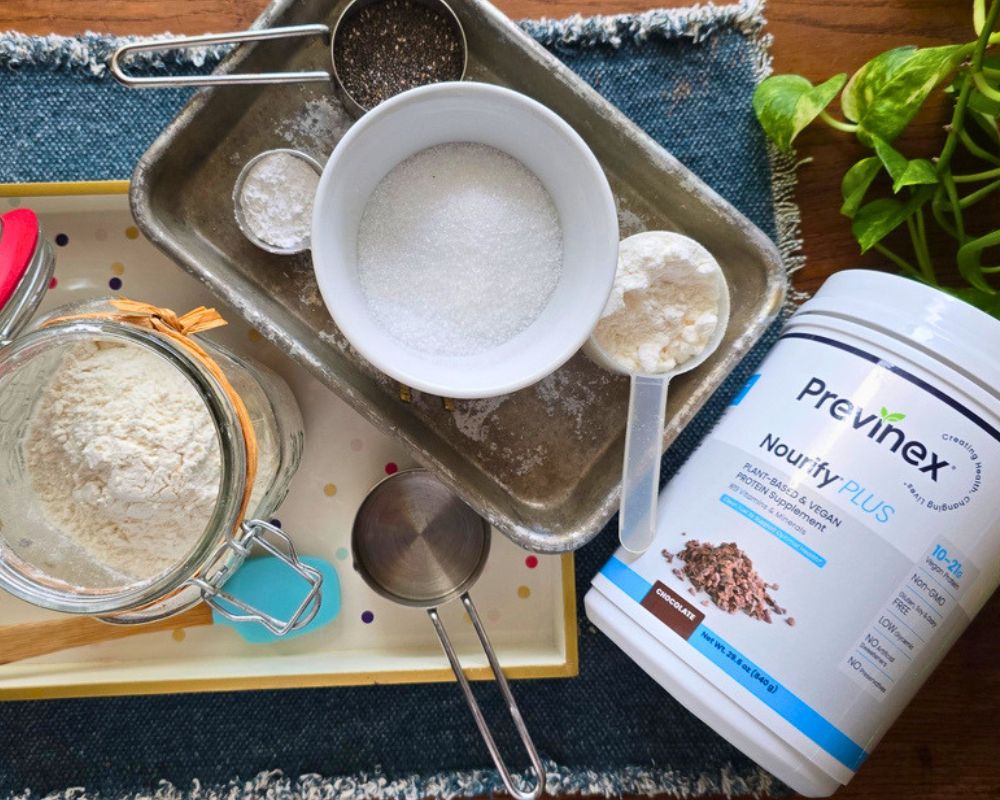
For this recipe, I used Nourify Plus protein powder from Previnex (use my Previnex discount code to save 15%: THEFITFORK) . I love that this is a plant-based protein supplement , easy to digest, and provides more than just protein. It includes additional nutritional support that helps make every serving a little more nourishing.
I’ve also added chia seeds to the mix for a boost of fiber and texture and coconut milk powder (so as not needing to have fresh milk on had when the muffin mood hits). Combined with oat flour, the result is a muffin that’s moist, hearty, and filling without feeling heavy.
Customize Every Muffin
One of my favorite things about this recipe is how versatile it is. Each mug muffin can have a completely different flavor profile depending on what you add. It does call for a couple tablespoons of mashed fruit to keep the muffin moist (try banana, pumpkin or applesauce) – but along with this you can mix in nuts, chocolate chips, coconut flakes or whatever floats your muffin-munching boat. You can even switch up the protein powder flavor to create endless combinations.
Perfect for Meal Prep
The beauty of this recipe is that the work happens upfront. Simply mix the dry ingredients together and store them in an airtight container or zip-top bag. When you’re ready for breakfast, scoop out a serving, add the wet ingredients, and microwave. No measuring multiple ingredients. No dirty mixing bowls. No waiting for the oven to preheat.
It’s an easy solution for busy weekdays, post-workout snacks, afternoon cravings, or those moments when you want something comforting without spending time in the kitchen.
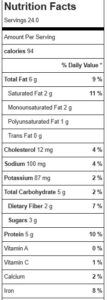
Nutrition Highlights
While nutrition may vary slightly depending on the protein powder, sweetener, and fruit used. Each prepared serving (made with 1/3 cup of mix, 1 large egg egg and 2 tablespoons mashed banana) provides approximately:
- 300 calories
- 19.3g protein
- 28g carbohydrates
- 12g fat
Prep this easy Make-Ahead Protein Mug Muffin Mix once and enjoy fresh, fluffy high-protein muffins in just 2 minutes. Perfect for busy breakfasts, snacks, or healthy desserts.
- 1.66 cups protein powder, any flavor I used Nourify Plus from Previnex
- 1.25 cup oat flour – can sub another type of flour like: all-purpose flour, whole wheat flour, gluten-free baking blend but I do not advise with a heavy flour like almond or coconut
- 1/4 cup sweetener of choice 1:1 sweetness equivalency
- ¼ cup chia seeds
- ¼ cup coconut powder milk powder or any dried milk powder
- 1.5 tsp baking powder
- 1 egg
- 2 tbsp water
- 2 tbsp of mashed fruit like banana applesauce or pumpkin
-
To make mix: mix all dry ingredients together in an air-tight container or zip-top bag. Store in a dry pantry and use within 6 months.
-
To make:
-
Add whisk egg, water and mashed fruit together in a 12 to16 ounce microwave-safe bowl or mug. Next, use 1/3 cup of Protein Microwave Mug Muffin Mix.
-
Microwave on High for 1 minute. Then let rest for 1 minute, then microwave for another 1 minute (For a total of 2 minutes or until muffin looks set). Note: it will rise pretty high in the microwave, but will settle down upon cooking.
Makes 10 serving – per serving with wet ingredients (egg and 2 tb banana)
300 cal, 28g carb, 12g fat, 19.3g protein