No-Bake Protein Brownies with Real Strawberry “Sprinkles”

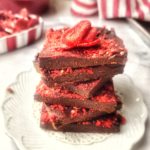
Satisfy your sweet tooth in a lower-carb and protein-boosted way with this easy recipe for No-Bake Protein Brownies with Real Strawberry “Sprinkles.”
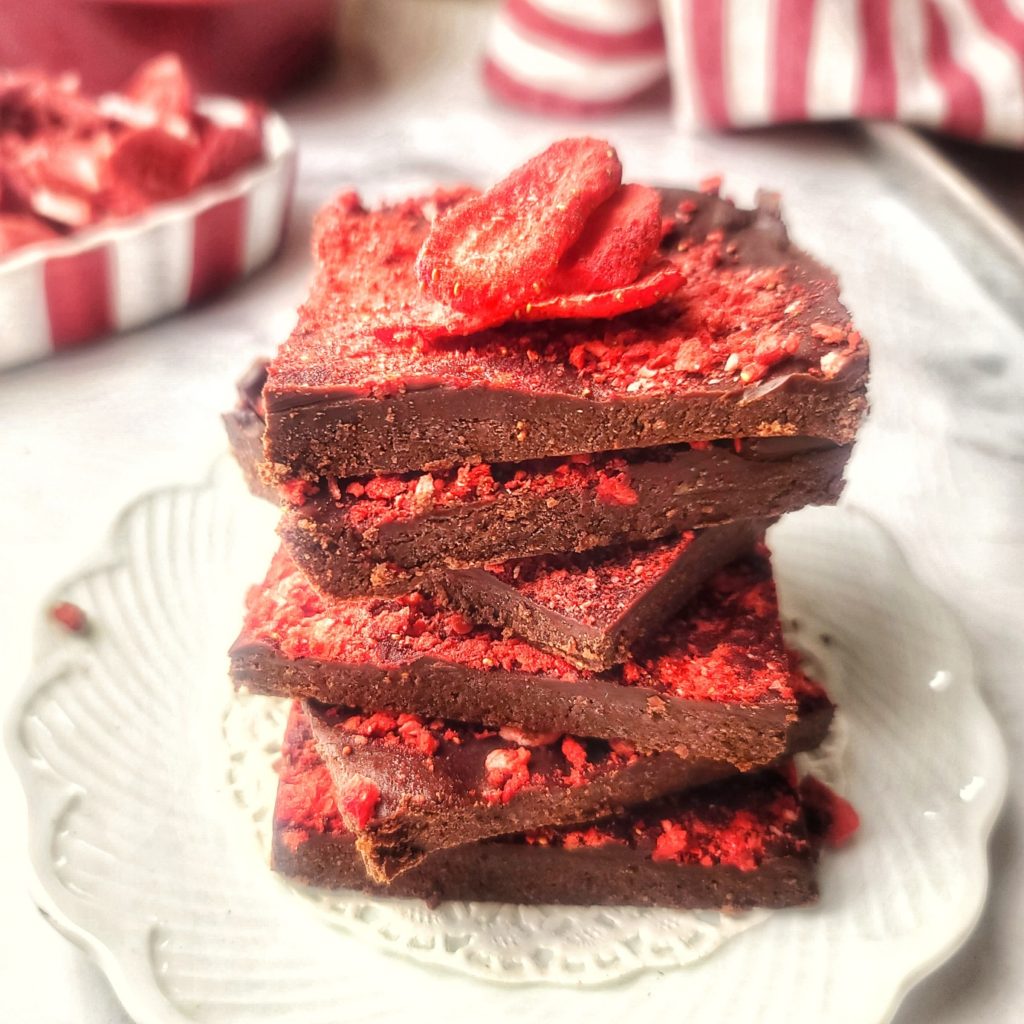
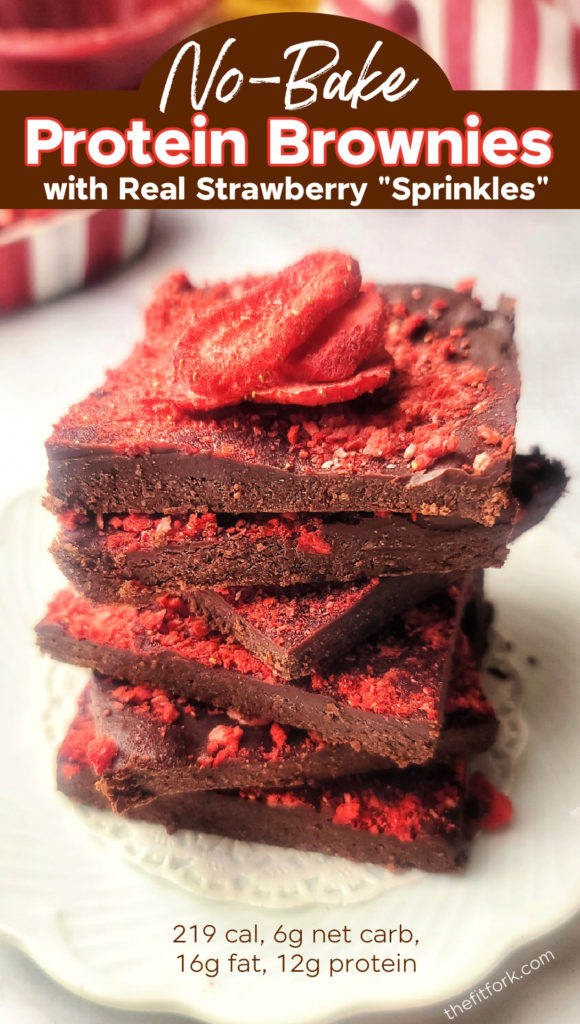
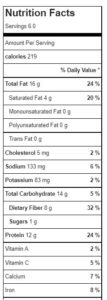
It’s a seemingly decadent strawberry chocolate brownie is actually a homemade brownie protein bar that is low in sugar and higher in protein. Macros for each generous slice of this homemade protein brownie: 219 calorie, 16g fat, 14g carb (6g net carb), 8g dietary fiber, 12g protein.

 Almond meal, unsweetened cocoa powder, and protein powder make the low-carb, protein-rich base that is held together by sugar-free syrup (or the sticky sweetener of your choice like real maple syrup or honey). There is no need to bake this homemade protein brownie, you simply press into the pan (I used a 1/8th sheet pan size with dimensions of about 9” x 6” – you can also use an 8”-diameter cake pan).
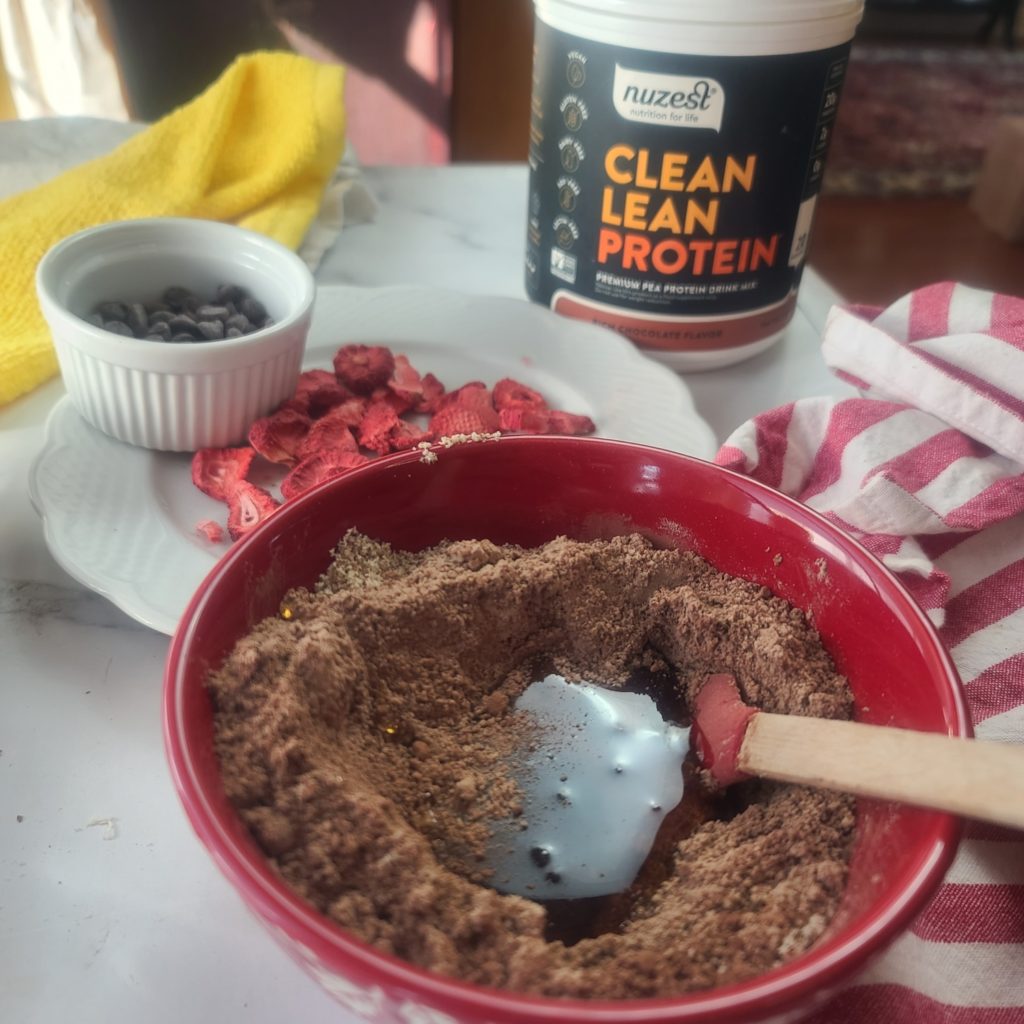
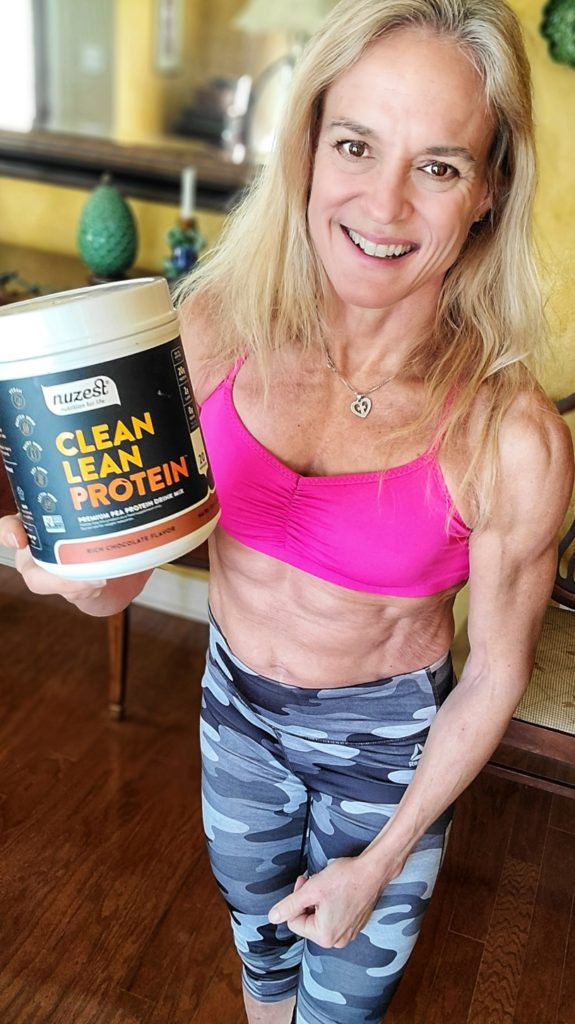
I came up with this chocolate protein powder recipe idea at the beginning of the year, as I was clearing out all our holiday treats but still craving a healthy sweet treat – I’m a chocolate lover for sure! You can use most any variety of chocolate protein powder (for example whey or plant-based).

I use Clean Lean Protein in Rich Chocolate flavor, a plant protein powder from Nuzest that is easy to digest, has a great texture, and can work with most types of diets including keto, gluten-free, paleo and more.

Here’s a don’t-miss-deal: you can always save 15% at Nuzest HERE with my code FITFORK

What makes this fudgy protein brownie extra special is the rich chocolate ganache topping. Making a ganache (a shiny thin layer of chocolate icing) seems so fancy and like you need major chocolatier skills – but it’s easy. The standard ganache formula is 2:1 chocolate to heavy cream. So, for a heaping ¼ cup chocolate chips, that would be 2 tablespoons of cream. It’s as easy as putting both in a microwave safe small bowl and heating at 70% power for about 1 minute, and stirring quickly afterward until smooth and glossy (return to microwave in 15 second increments if not melted thoroughly).
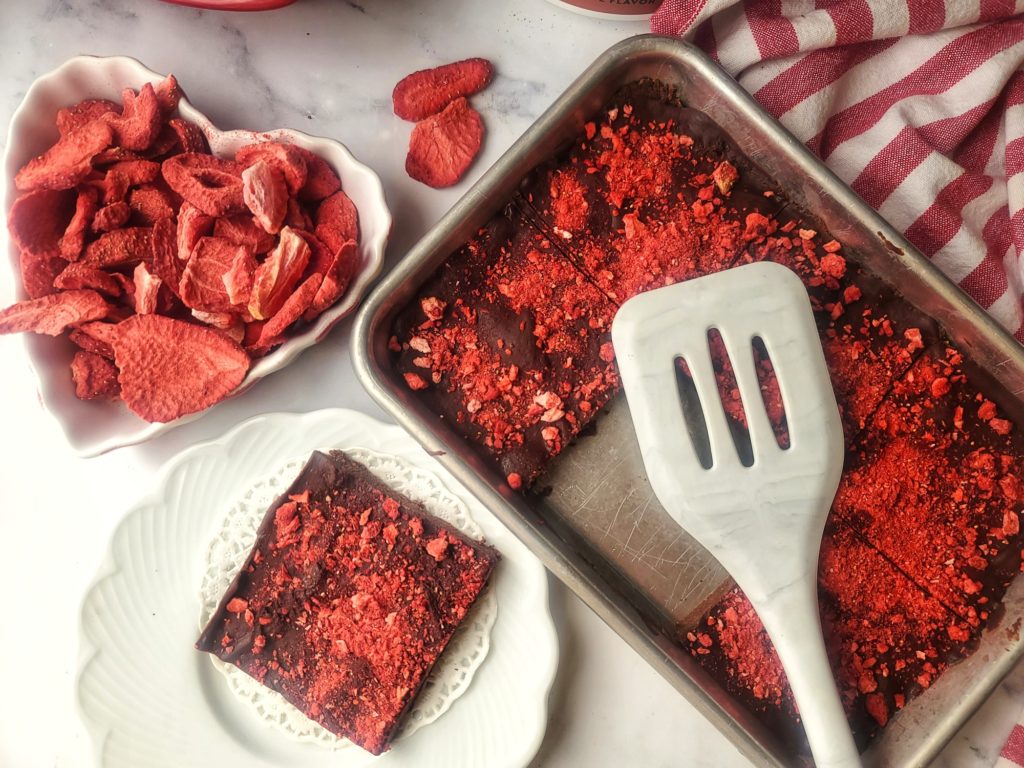
And, the strawberries on top! I’m calling them sprinkles – I took freeze-dried strawberries and coarsely crushed them before sprinkling on top of the still-warm ganache. You could substitute any other type of freeze-dried fruit, or swap out for nuts, seeds, and/or coconut.

Nuzest Plant-Based Protein Powder - save 15% with code THEFITFORK15

These no-bake protein brownies should be placed in the fridge for 30 minutes to set up before slicing. Store any leftovers in the fridge too, for up to 1 week. ENJOY!
Pin this for later!

Note: This post contains affiliate links.
5 from 6 votes
Satisfy your sweet tooth mindfully with this easy recipe for No-Bake Protein Brownies with Real Strawberry “Sprinkles.” Deliciously chocolate and seemingly decadent dessert or snack, but only 219 calories, plus low carb with 6g net carb, and 12g protein.
No-Bake Chocolate Protein Brownies with Real Strawberry “Sprinkles”
Course: Dessert, Snack
Keyword: brownies, chocolate, fudge, protein powder
Servings: 6 servings
Calories: 219 kcal
Ingredients
  • 1 cup almond meal
  • ¼ cup unsweetened cocoa powder
  • ½ cup chocolate protein powder
  • ¼ cup sugar-free maple syrup or can sub real syrup, just more carbs
  • 3 to 4 tbsp water
Topping
  • 2 ounces sugar free chocolate chips about heaping ¼ cup
  • 2 tbsp heavy cream
  • ½ to 1/3 cup freeze-dried strawberries* or other freeze dried fruit (or nuts, seeds and coconut for a swap)
Instructions
  1. In bowl, mix together almond meal, cocoa powder and protein powder. Add syrup and 3 tablespoons of water. Stir until combined and making a cohesive dough. If too crumbly (like because of super thick syrup, mix in the additional 1 tbsp water).
  2. Press dough into approximate 9” x 6” rimmed pan. In ramekin, add chocolate chips and cream. Microwave for 1 minute on High. Stir until smooth and spread over top of protein mixture. Place freeze-dried strawberries in plastic bag and crush with bottom of cup or rolling pin until coarsely powdered. Sprinkle of chocolate topping. Set in fridge for 30 minutes before cutting into 6 squares.

  3. Store leftovers in air-tight container in fridge for up to 7 days
Recipe Notes

Small Batch Hummus to Serve One or Two

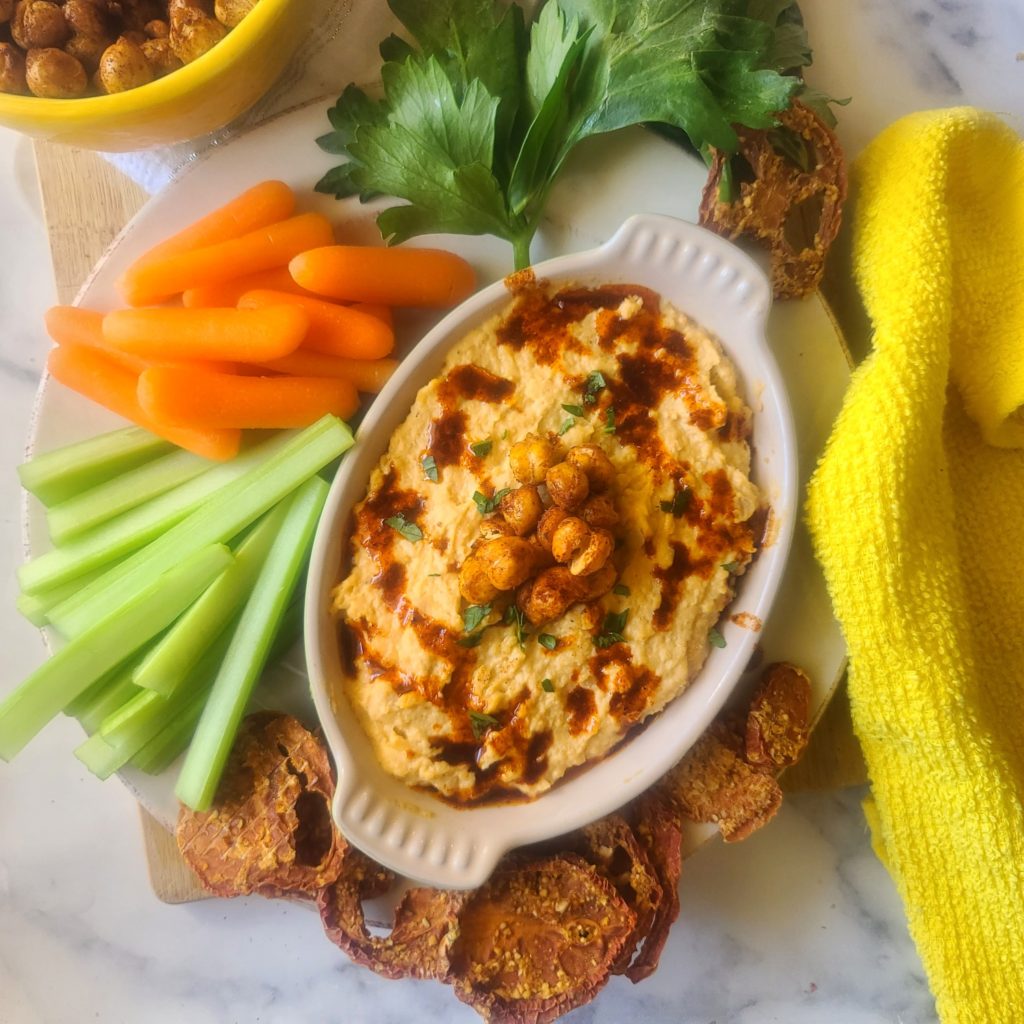
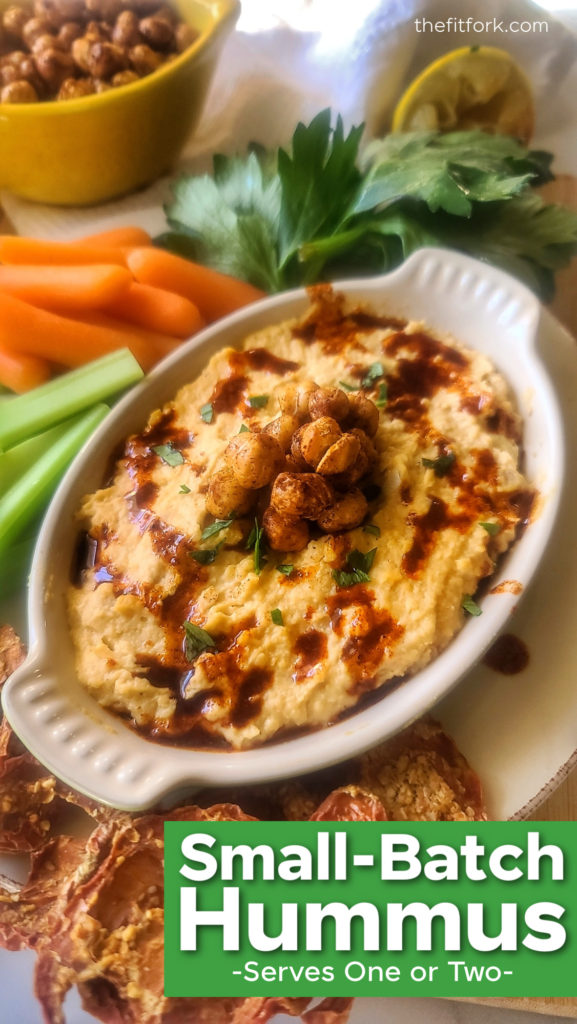
Buying a big tub of hummus can seem like such a commitment, especially if you’re snacking solo or with a just friend or two.  My Small Batch Hummus recipe is perfectly proportioned so that you can finish it off in two sittings (or one snack session if super hungry) – or share it with a buddy and have no leftovers clogging up the fridge!   

Small Batch Hummus - Cooking for One

Exciting News:

This small batch dip (or spread) is featured in my upcoming cookbook, Cooking for One for Dummies (which can be pre-ordered now, ships on March 7, 2023)

Plus, when you make homemade hummus, you’re in total control of the ingredients – there’s no weird preservatives, additives, or yucky stuff.  Plus, you get all the benefits of chickpeas, they are abundant in dietary fiber and also a good source of plant protein, iron, folate and other essential nutrients.

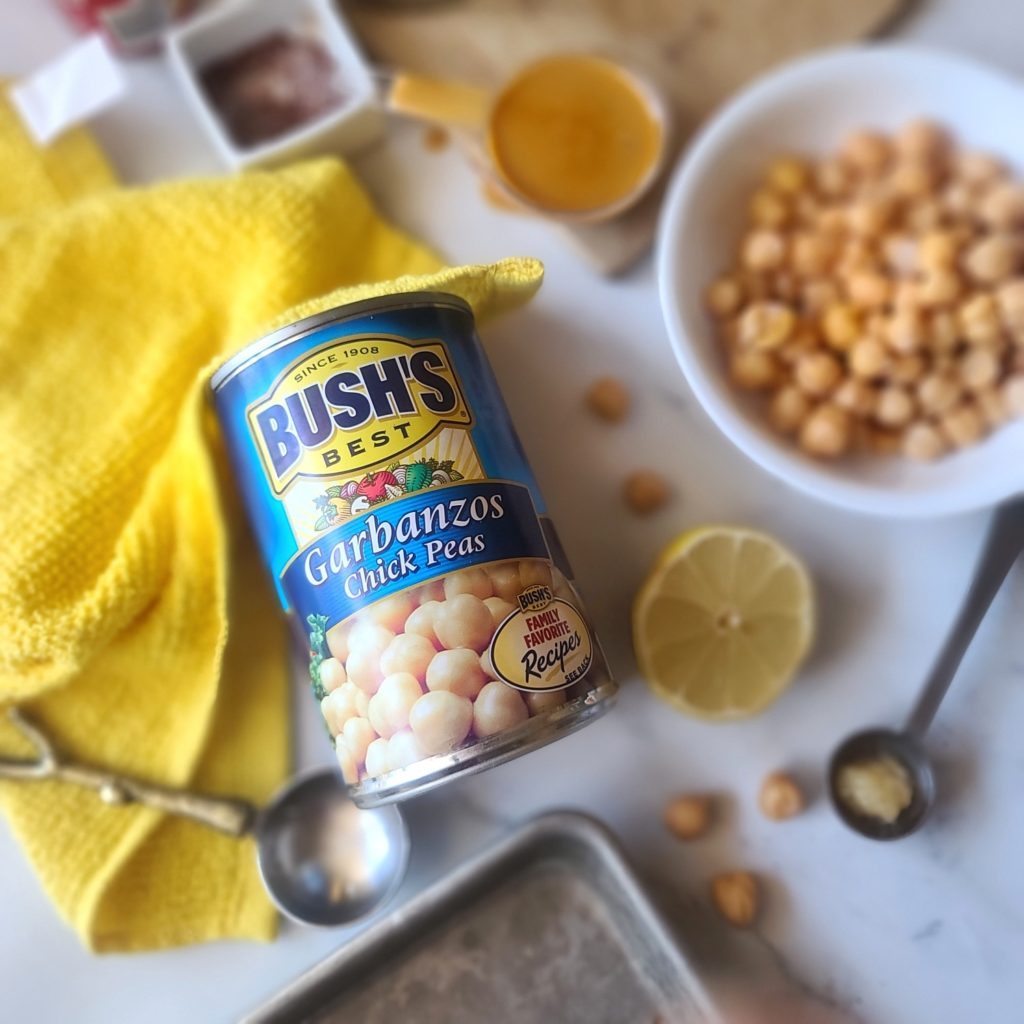
It’s fast, it’s easy, there is no cooking – you start with a can of chickpeas. Of course, you can make your own chickpeas, but that adds a lot of time and hassle to what is an easy-peasy snack recipe for one or two.

skin on chickpeas
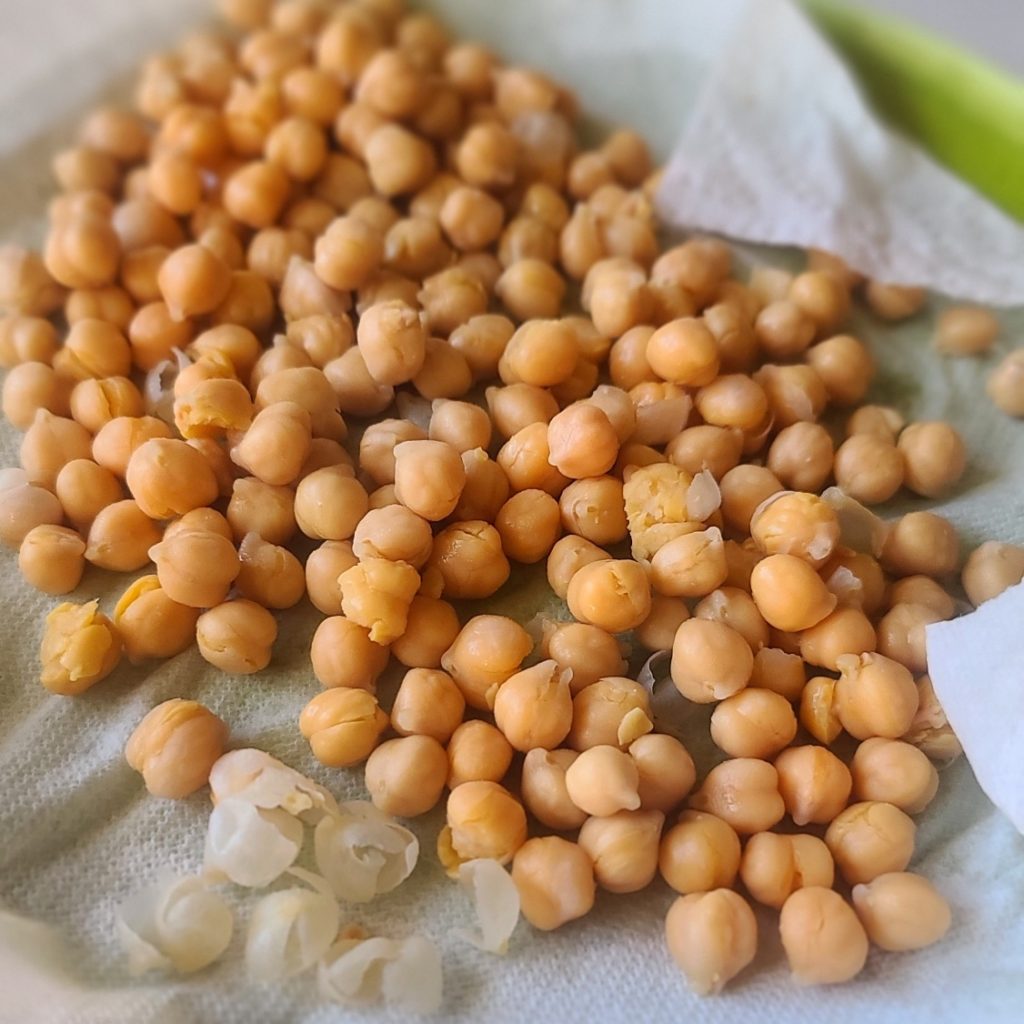
Gently rub any remaining skins off your chickpeas for smoother hummus.

After draining the chickpeas (a legume sometimes referred to as garbanzo beans), pour them out onto a clean dishcloth or paper towels and lightly rub dry. In addition to drying the chickpeas, the other goal here is to remove any lingering skins. The light patting dry will encourage stragglers to fall off, simply pick the skins out and discard. The skins will do no harm if they end up in your hummus, it will just be not quite as smooth and creamy.  

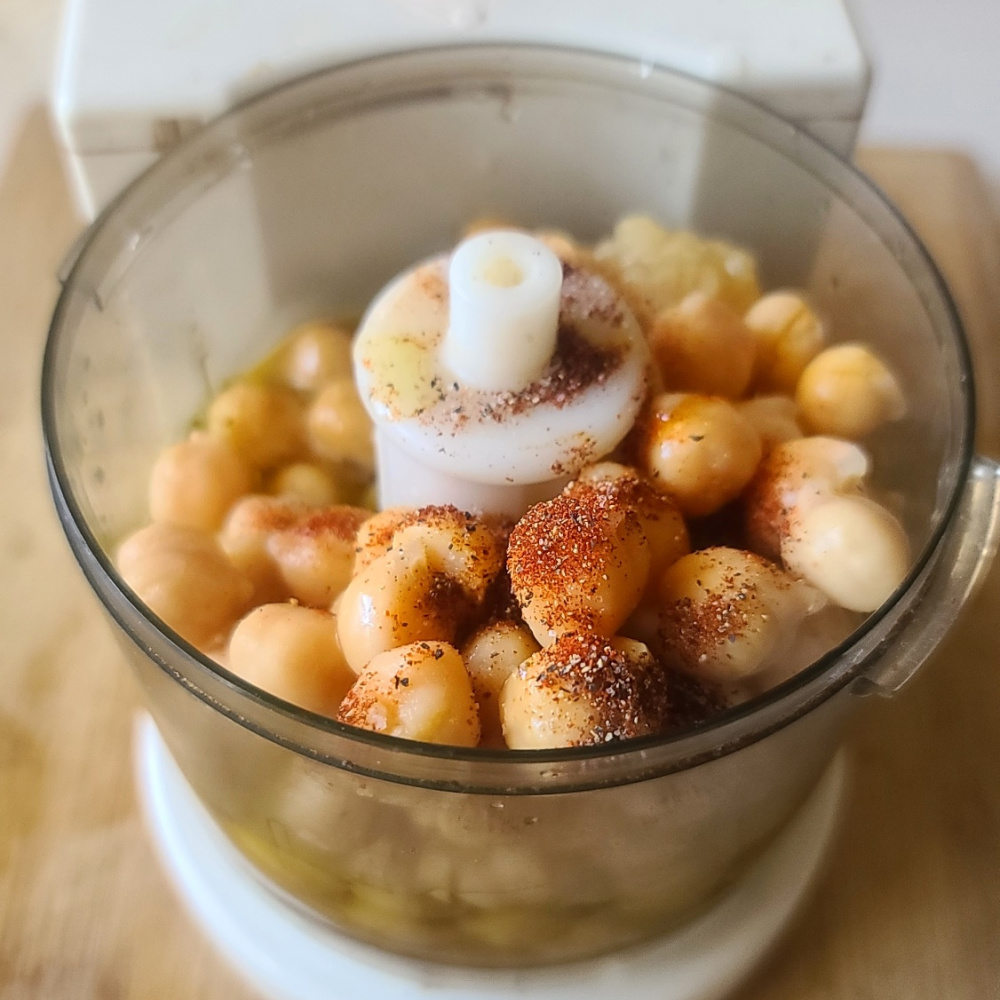
Then, it’s just a matter of whipping everything up in a food processor or blender. Since this is a small batch appetizer recipe, a mini food processor or personal sized blender will work best.

How to Serve Small Batch Hummus

  • Simply paired with raw veggies like carrots, celery, radishes, squash rounds are my favorite way to eat hummus.
  • Serve with pita wedges for dipping, smear on crackers, or spread on slices of toasted baguette.
  • Elevate sandwiches, wraps and quesadillas by spreading around as part of the filling.
  • Get creative and toss with hot pasta or zoodles for an instant chickpea sauce.
Pin this for later!

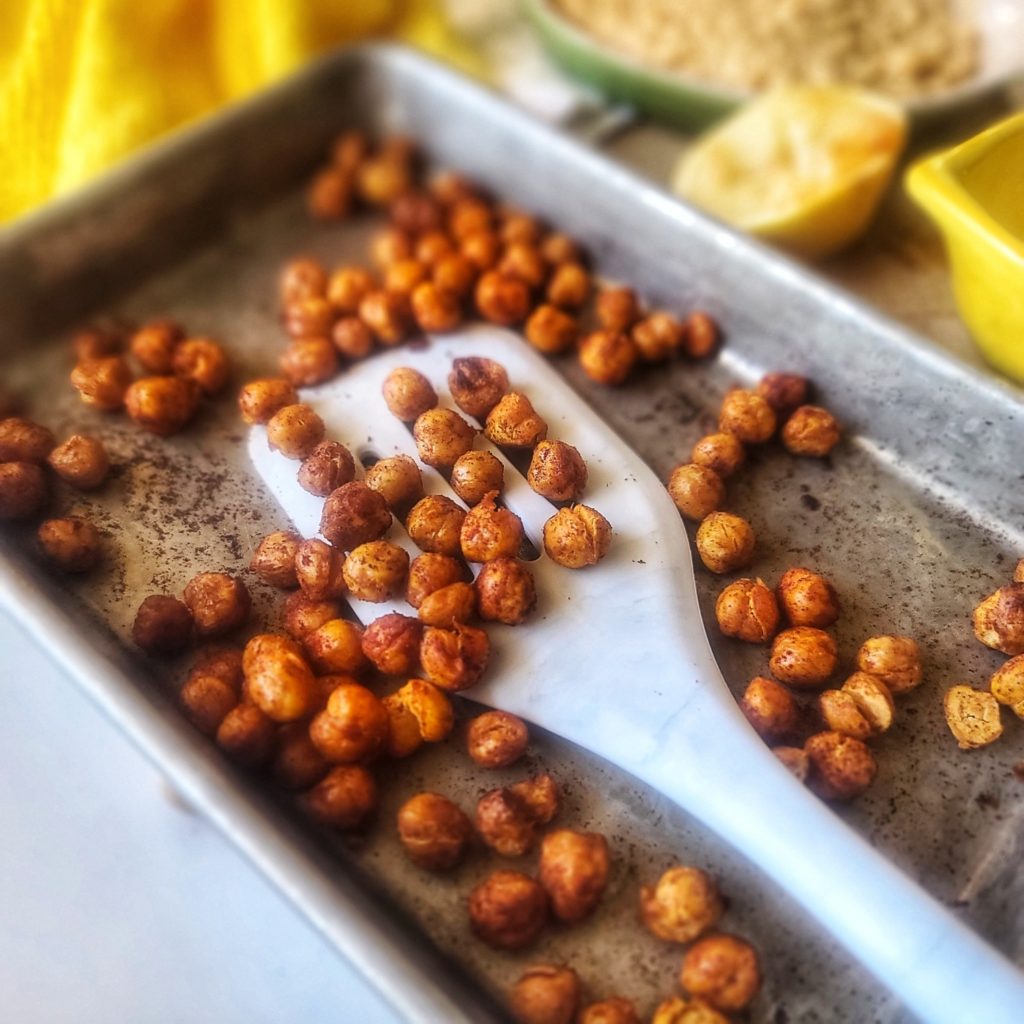
Leftover Chickpeas in Can? While this homemade hummus for two uses just half a can of chickpeas, don’t throw the remainder out — you have options. First, you could easily double the homemade dip recipe, it scales up beautifully (however, do note the capacity of your mini food processor and use a bigger processor or blender, if needed). I also have another “1/2 can chickpea” recipe — Air-Fryer Crispy Chickpeas for One which also make a fabulous, heathy snack or salad topper.

Air Fryer Crispy Chickpeas for One a=is a quick, easy and healthy snack with lots of dietary fiber plus protein, iron, and folate.

Make both the Small Batch Hummus and the Air-Fryer Crispy Chickpeas for Ones and kill off the whole can at once making healthy snacks.

This post contains affiliate links.

5 from 9 votes
Small Batch Hummus - Cooking for One
Small Batch Hummus
Prep Time
5 mins
Total Time
5 mins
 

Make just enough homemade hummus to get your through a couple health snack sessions — or to share with a friend. Easy, healthy, and homemade, a fantastic snack and spread to add to your active lifestyle. Lots of dietary fiber and a good source of plant protein, dietary fiber, iron, folate and other important nutrients.

Course: appetizers, dips, snacks, spreads
Cuisine: Mediterranean
Keyword: appetizer, chickepeas, dip, garbanzo beans, snacks, spread
Servings: 2 servings
Ingredients
  • ¾ cup canned chickpeas drained and rinsed (about half a 15.5-ounce can)
  • 3 tbsp olive oil plus an additional 1 teaspoon for topping, if desired
  • tbsp tahini
  • 1 tbsp lemon juice
  • ½ tsp garlic or garlic paste
  • ¼ teaspoon salt
  • ¼ teaspoon ground black pepper
  • 1/2 teaspoon smoked paprika
Instructions
  1. Place all the ingredients in a personal-sized blender or mini food processor; process until smooth. If the consistency seems too pasty or thick, blend in 1 teaspoon of water at a time until desired texture is achieved.
  2. Transfer the hummus to serving bowl and drizzle with 1 teaspoon of olive oil and a sprinkle of paprika.
Recipe Notes

NOTE: Store the leftovers in an airtight container in fridge for up to 4 days.
VARY IT! Extra chickpeas from can be kept in an airtight container in fridge for a few days and added to salads, soups, and wraps

LEARN MORE! This small batch dip (or spread) is featured in my upcoming cookbook, Cooking for One for Dummies (which can be pre-ordered now, ships on March 7, 2023)

Giant Peanut Butter Protein Cookie for One

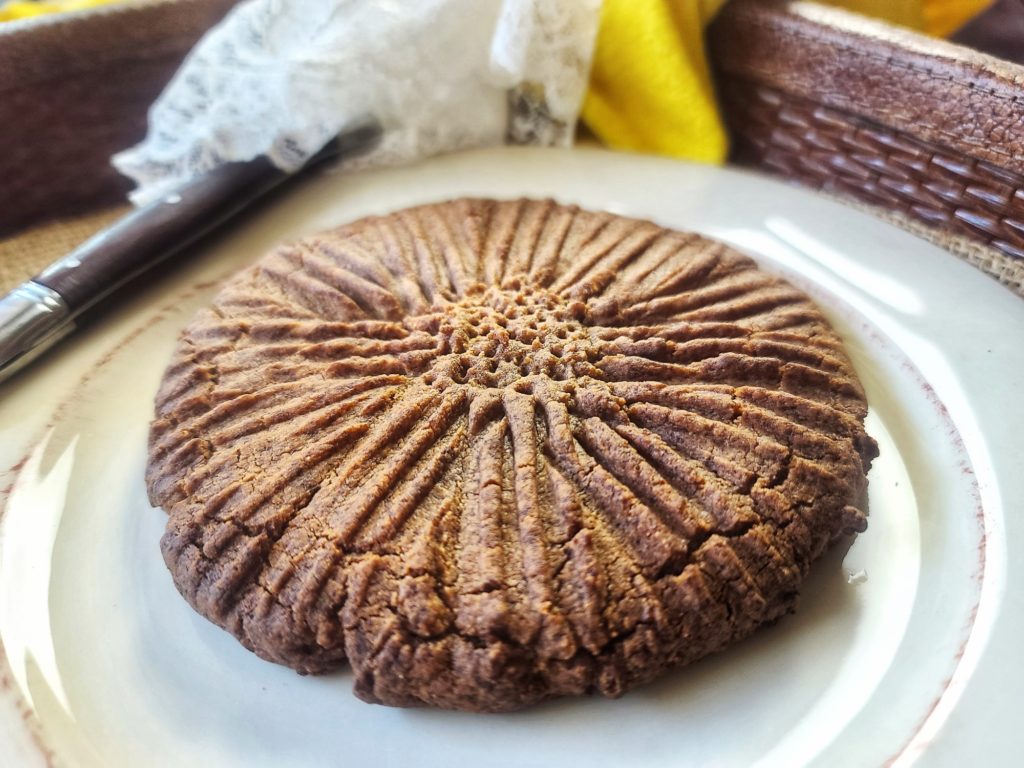
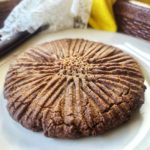
A great way to keep your hand mindless out of the cookie jar is to bake up a single serve cookie — when it’s gone, it’s gone! My Giant Peanut Butter Protein Cookie for One tastes nostalgically amazing, yet is packed with protein so that it fills you up and you CAN be satisfied with just one.

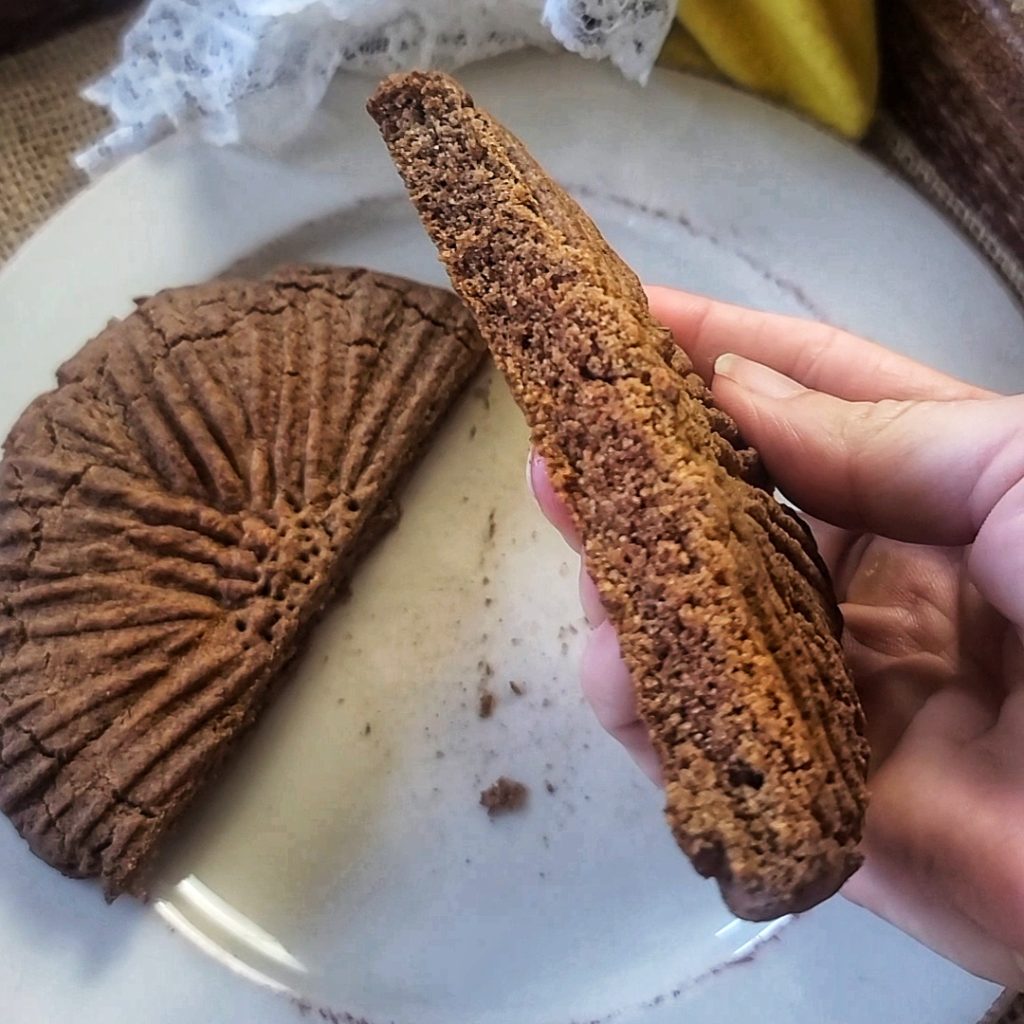
Actually, you may even be happy and your sweet tooth satisfied with just half a cookie — it’s HUGE! I typically eat half and save the other half for later in the day, for double the yum time!

In order to avoid heating up a big oven to bake just one cookie, I made this protein peanut butter cookie in the toaster oven — I use the Instant Oven™ 18L Air Fryer Toaster Oven which is an air fryer and multi-purpose toaster oven. Only a few minutes to put the batter together and about 9 to 10 minutes to bake. In less than 15 minutes you’ll be enjoying a fresh-from-the-oven protein dessert.

Giant Peanut Butter Protein Cookie for One is HUGE, big enough to share (or not)!

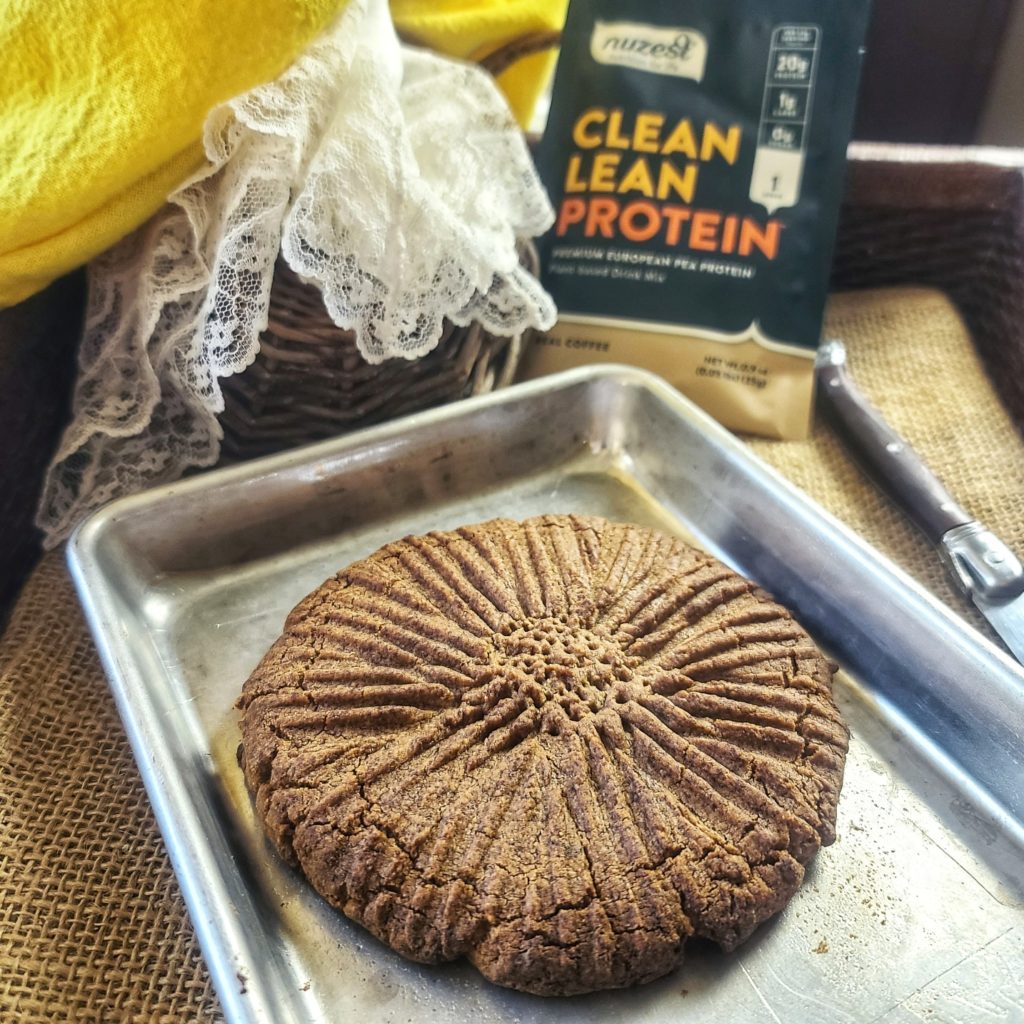
Ingredients are natural peanut butter (you could swap for almond butter or, better yet, homemade sunflower seed butter), butter, egg white, coconut flour, baking soda, granulated stevia blend and a plant-based protein powder.

In terms of the best plant-based protein powder, I like the Clean Lean Protein Powder from Nuzest –it has a great nutrient profile and works for vegan, vegetarian and paleo diets. I love it for this protein powder cookie recipe and smoothies and other uses too! You can save `15% with my discount code: FITFORK .

Before baking the cookie, you want to press the dough ball out into an approximate 5″ diameter circle, and then make the fork marks which as SO nut butter cookie important. Because this protein cookie is bigger that an standard old fashioned peanut butter cookie, you can’t really to the criss-cross hatch marks. Instead, I used the tins of the for to go around the edges of the cookie with points of for going up almost to center of cookie, but not quite — this made a “center” that I then used the tips of the fork to make a bunch of little pock marks. It all looked like a flower to me in the end and didn’t puff out the design during baking either!

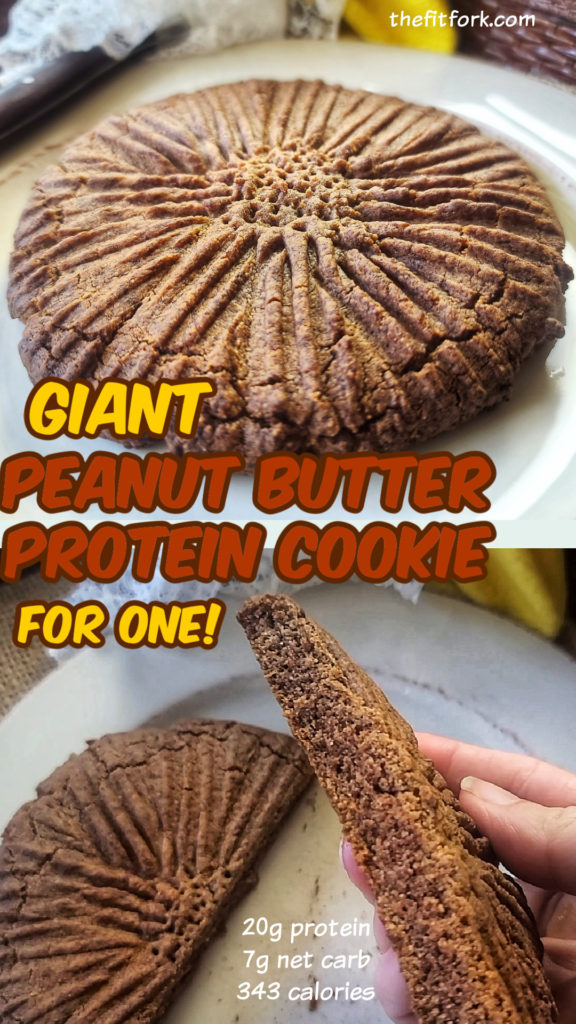
Pin this for later!

Note: This post contains affiliate links. I may earn a small commission from purchases made through links, however price to you remains the same. Proceeds help offset operating costs for The Fit Fork. Thank you!

5 from 4 votes
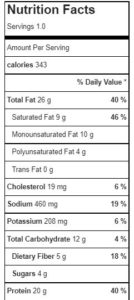
This ginormous cookie made with protein powder is a A delicious, low-carb peanut butter that will make you feel nostalgic for the treats of your childhood, but offers 20g of protein and only 7g net carb. Bake it in a toaster oven! Big enough to share, but you may not want too
Giant Peanut Butter Protein Cookie for One
Prep Time
5 mins
Cook Time
10 mins
Total Time
15 mins
 

A delicious, low-carb peanut butter that will make you feel nostalgic for the treats of your childhood, but offers 20g of protein and only 7g net carb. Bake it in a toaster oven! Big enough to share, but you may not want too!

Course: Dessert, Snack, treat
Keyword: cookie, cooking for one, peanut butter, protein powder
Servings: 1 serving
Calories: 343 kcal
Ingredients
  • 2 tbsp. butter softened
  • 2 tbsp natural-style peanut butter
  • 2 tbsp granulated stevia blend baking sweetener
  • 1 tbsp liquid egg white
  • 1/8 tsp baking soda
  • 1 scoop Nuzest Lean Clean Protein Powder (chocolate or vanilla) or 2tbsp other protein powder
  • 1 tbsp coconut flour
Instructions
  1. Mix together butter, peanut butter, stevia and egg white.
  2. Stir in baking soda, protein powder and coconut flour. Shape into big dough ball. Press out into thick circle with clean hands.
  3. Use tins of fork to press out remainder of way to about 1/3” thickness and approx. 5” diameter.
  4. Bake for 9 to 10 minutes. Let cook for 5 minutes on baking sheet
Recipe Notes

Vegetarian Mini BBQ “Meat” Loaf Muffins

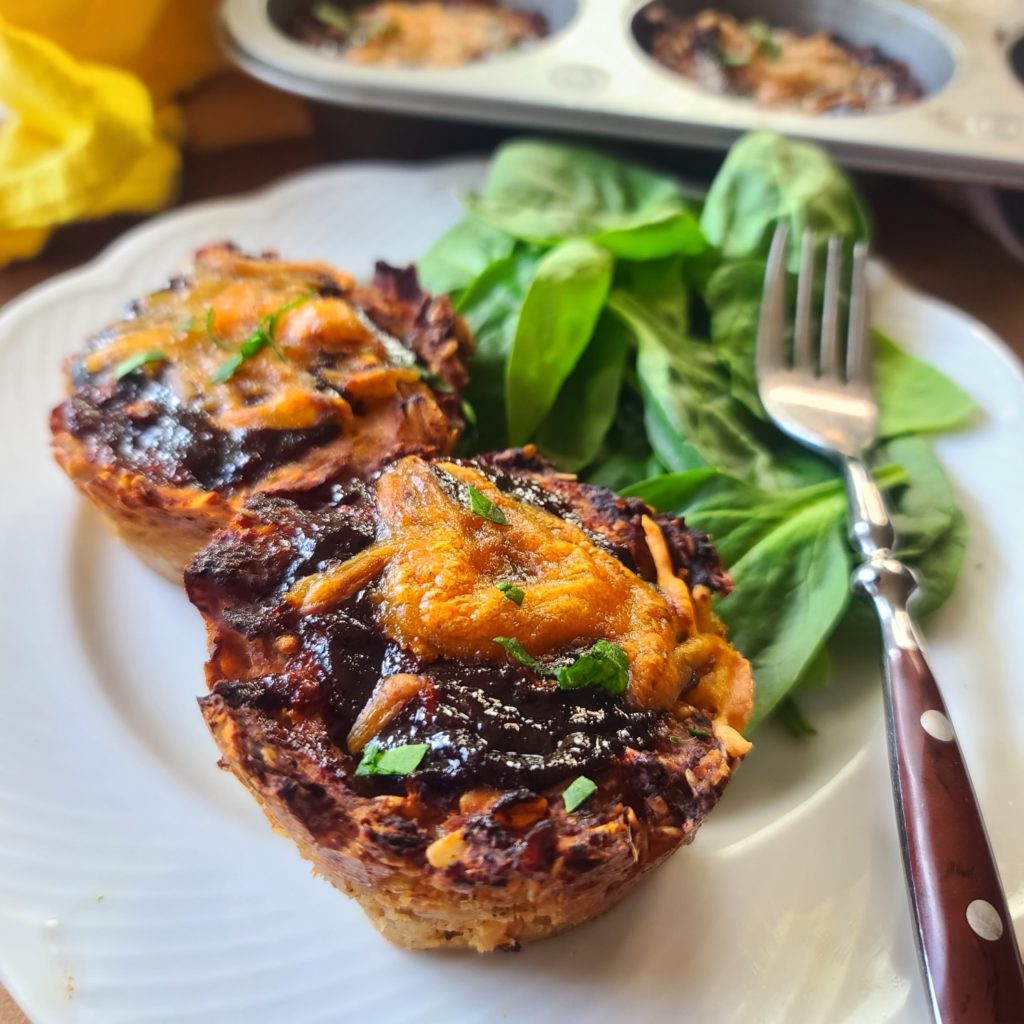
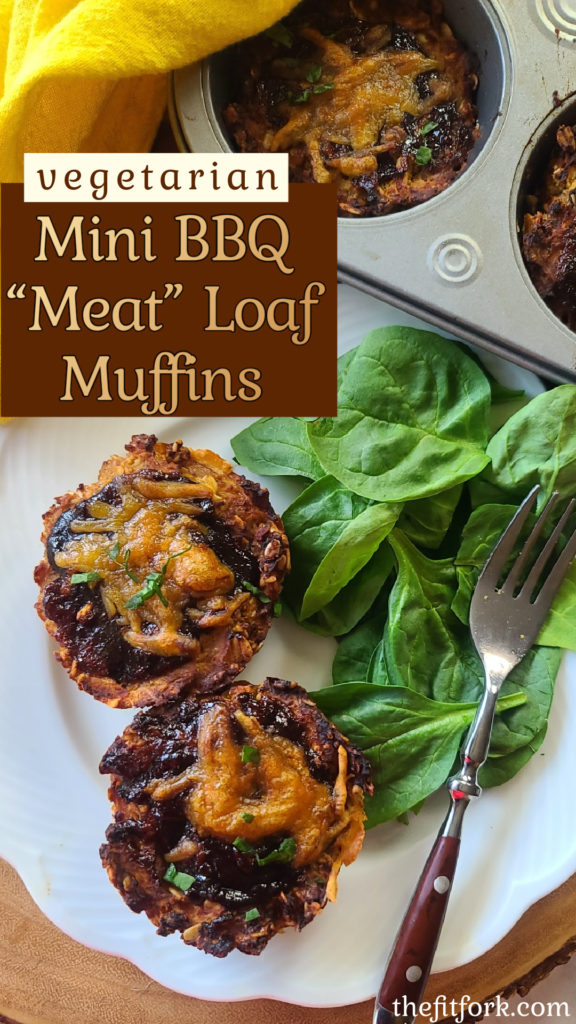
Vegetarian Mini BBQ “Meat” Loaf Muffins are so good even without the ground beef (and, goodness, you know I love my beef). We all can benefit from eating more plants in our diet, whether a confirmed carnivore, adventurous omnivore, or full-fledged vegetarian.

Not your grandma's meatloaf but just as delicious make with lentils and oats! The spicy BBQ sauce gives this satisfying vegetarian meal some zing! So delicious, easy and suitable for meal prep. 398 calories and 21g per serving of two.

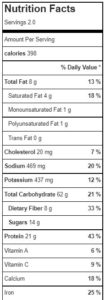
A balanced plate that varies from day to day, is best in my opinion. This vegetarian meatloaf is one of the dishes I like to prepare on nights when I’m not doing chicken, beef, or fish.  The protein count is still great, 21 grams per serving and 398 calories for TWO. Very filling and a good source of essential nutrients, especially dietary fiber (33% RDA) and iron (25% RDA).

Not your grandma's meatloaf but just as delicious make with lentils and oats! The spicy BBQ sauce gives this satisfying vegetarian meal some zing! So delicious, easy and suitable for meal prep. 398 calories and 21g per serving of two.

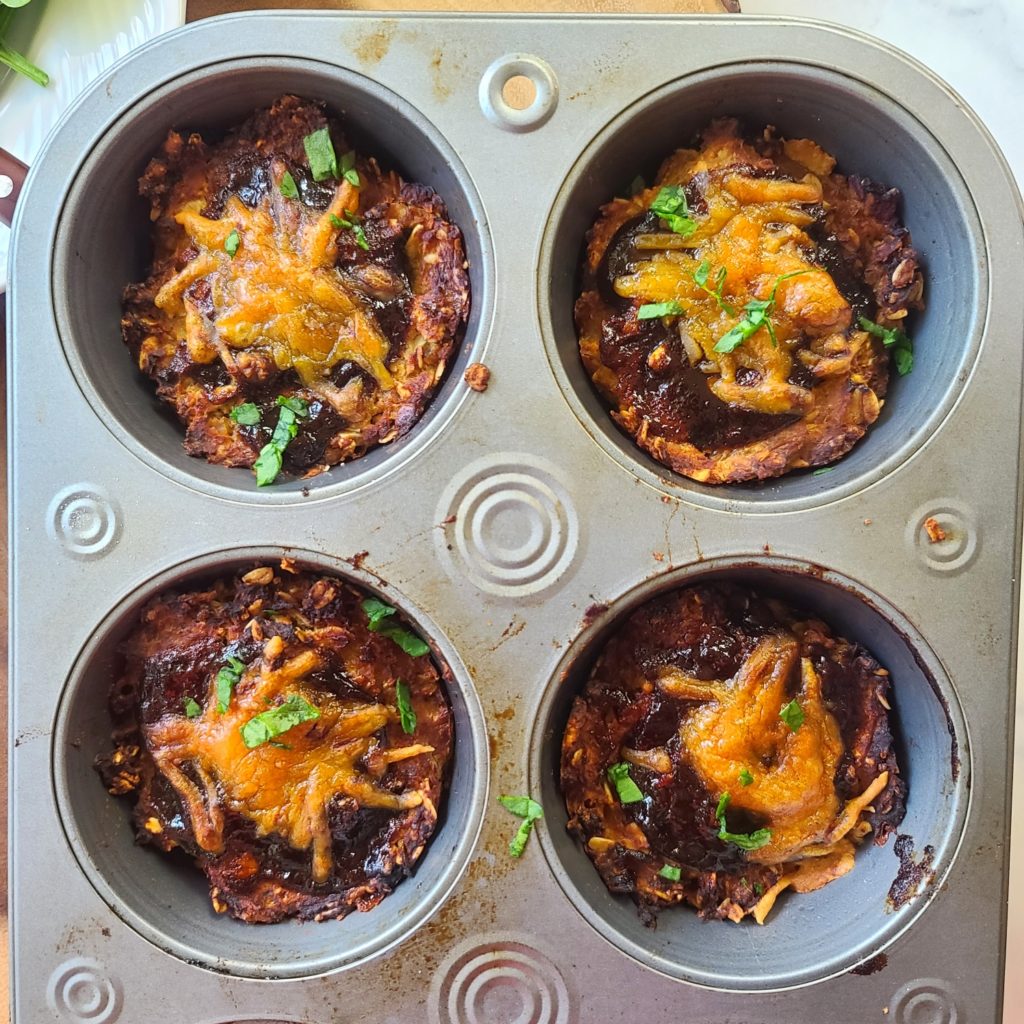
I use a jumbo muffin tin to create this meatloaf alternative, because I just prefer the crisper outside texture that the extra surface area of a muffin tin creates rather that smashing it all up in a loaf pan. Plus, the meatless muffins turn out great for making ahead in this manner and hold up well for freezer storage. This is a great vegetarian meal prep recipe, just double or triple your batch!

Check out the 15-second mini tutorial!

Putting this no meat meatloaf recipe together is as easy as cooking a pot of lentils and then smooshing it all up with the other ingredients before baking.

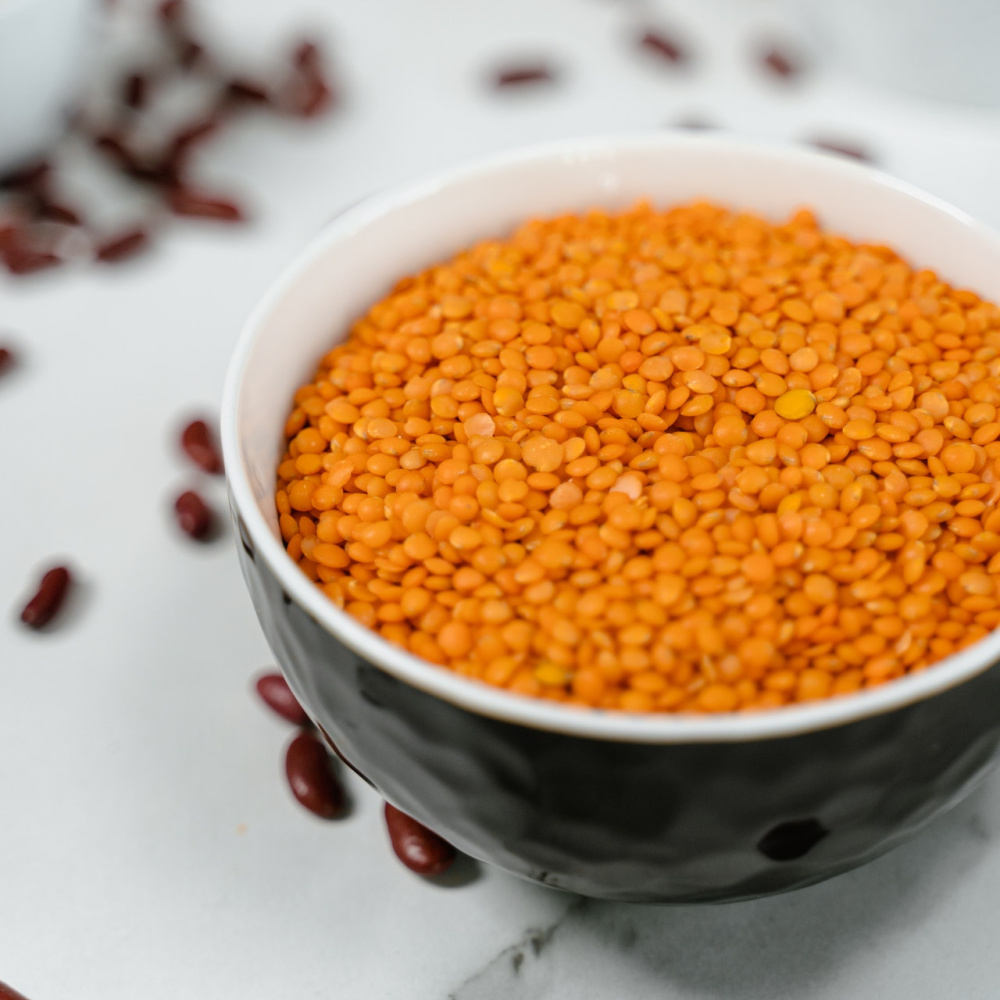
I don’t know why we don’t eat more lentils over here in the US. These little edible seeds in the legume family area food staple in so many other parts of the world – economical, nutritious and versatile! I used red lentils in this lentil loaf recipe, mainly I felt the color was best for an alternative meatloaf and they are already split, which means they cook faster than whole brown lentils. But no worries if you want to swap!

Not your grandma's meatloaf but just as delicious make with lentils and oats! The spicy BBQ sauce gives this satisfying vegetarian meal some zing! So delicious, easy and suitable for meal prep. 398 calories and 21g per serving of two.
Pin this for later!

A bit Reduced Sugar BBQ Sauce in the “meat” mixture as well as brushed on top in the last 5 minutes of baking, gives these lentil loaves a little zing! Use whatever bottled sauce you prefer, or make your own – if you are a traditionalist, then ketchup!

NOTE: This is also a gluten-free recipe, however to make suitable for vegan lifestyle you need to swap out egg and cheese for non-dairy alternatives.

Disclaimer: This post contains affiliate links. I may receive a small commission, but the price to you remains the same. Proceeds offset operating costs for The Fit Fork, thank you!

5 from 7 votes
Not your grandma's meatloaf but just as delicious make with lentils and oats! The spicy BBQ sauce gives this satisfying vegetarian meal some zing! So delicious, easy and suitable for meal prep. 398 calories and 21g per serving of two.
Vegetarian Mini BBQ “Meat” Loaf Muffins
Prep Time
10 mins
Total Time
45 mins
 

Not your grandma's meatloaf but just as delicous make with lentils and oats! The spicy BBQ sauce gives this satisfing vegetarian meal some zing! So delicious, easy and suitable for meal prep. 398 calories and 21g per serving of two.

Course: dinner, dinner, entree, lunch
Cuisine: American, gluten free, vegetarian
Keyword: barbecue sauce, bbq, meatless
Servings: 2 servings (2 muffins each)
Calories: 398 kcal
Ingredients
  • 1 cup water
  • ½ cup red lentils
  • 1/4 cup diced white onion
  • ¼ cup diced white mushrooms
  • 1 tsp. minced garlic
  • ½ cup quick cooking oats
  • 3 oz. shredded cheddar cheese 2 tbsp reserved
  • 2 tbsp liquid egg product
  • 1/4 cup bottled BBQ sauce
  • 1/2 salt
  • 1/4 teaspoon black pepper
Instructions
  1. Bring water to boil in small sauce pan. Add lentils and simmer, covered, for 25 minutes or until lentils are soft and most water is evaporated.
  2. Drain and excess water from lentils and coarsely mash with a fork.
  3. Transfer lentils to mixing bowl; cool slightly.
  4. Mix in onion, mushrooms, garlic, oats and cheese.
  5. Mix in egg, 2 oz. of BBQ sauce, salt and pepper.
  6. Spoon evenly among 4 spots in jumbo muffin pan that has been prepped with cooking spray.
  7. Bake at 350 degrees for 20 minutes; remove and spread remaining BBQ sauce and reserved cheese over each. Cook 5 more minutes.
  8. Cool 5 minutes, loosens sides with knife to release from pan.

  9. A serving is TWO! Enjoy warm or keep in fridge up to 4 days, or freezer for 3 months.

Recipe Notes

How to Make the Best Popped Quinoa

Toasting quinoa gives it a great texture, fabulous aroma, and magnifies the nutty flavor. Plus, it’s a great way to add more of this ancient grain (which is actually a seed), into your diet – the health benefits of quinoa are plentiful. It’s a good source of plant protein, fiber, and heart-healthy fats, just to name a few.

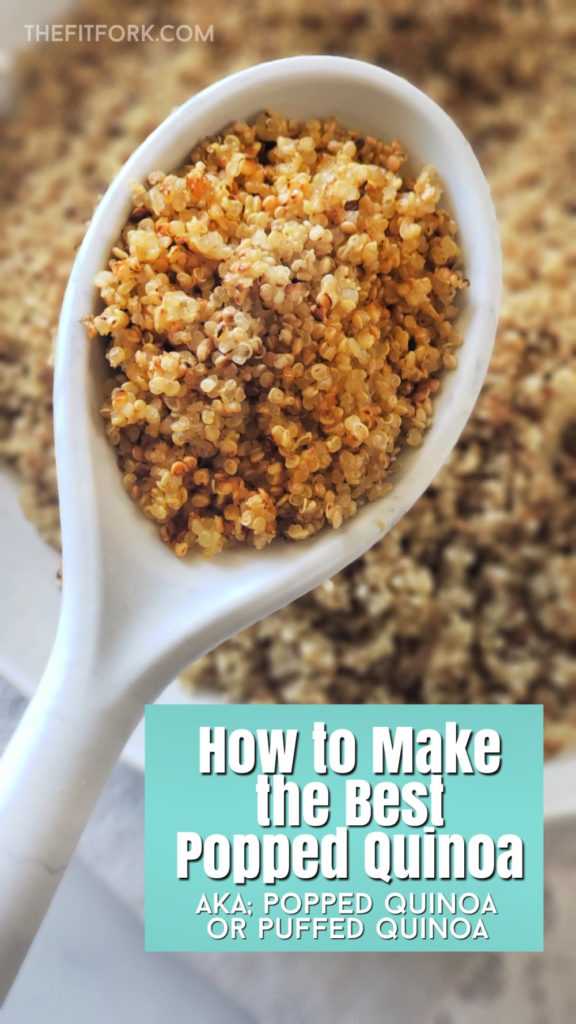
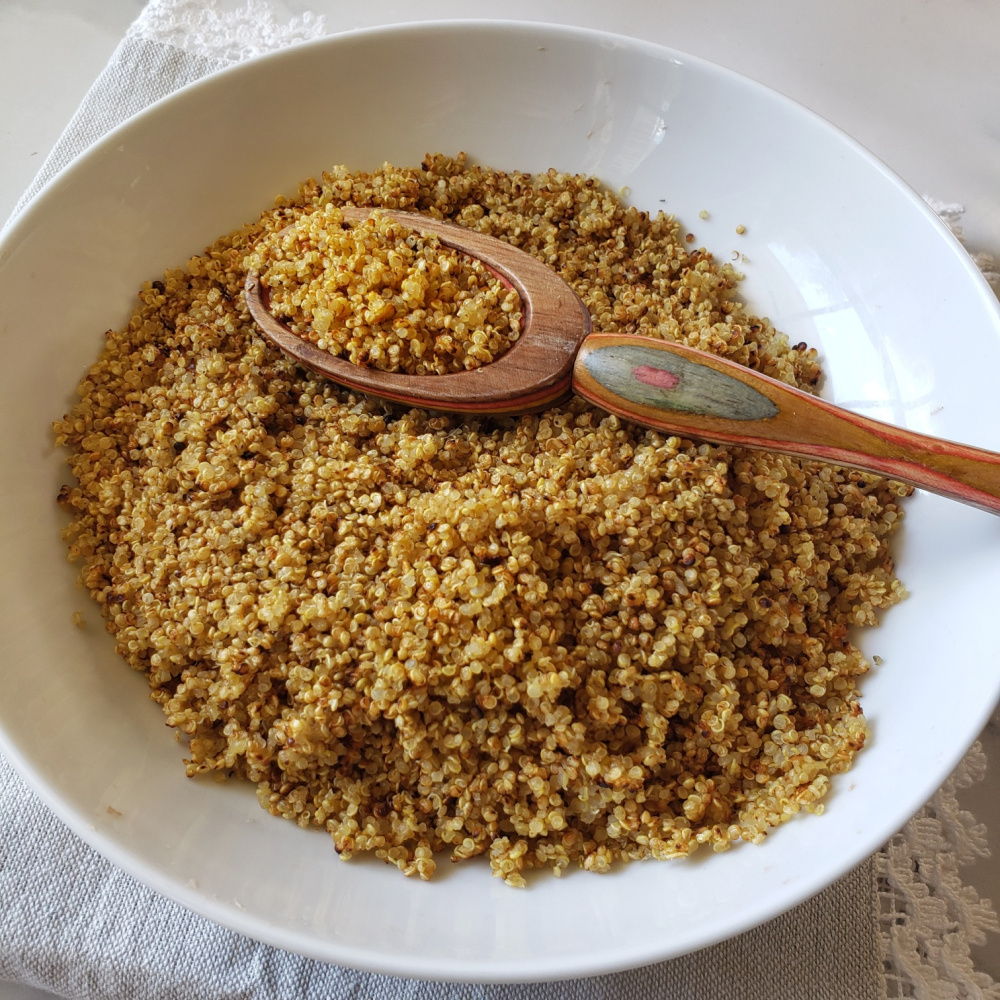
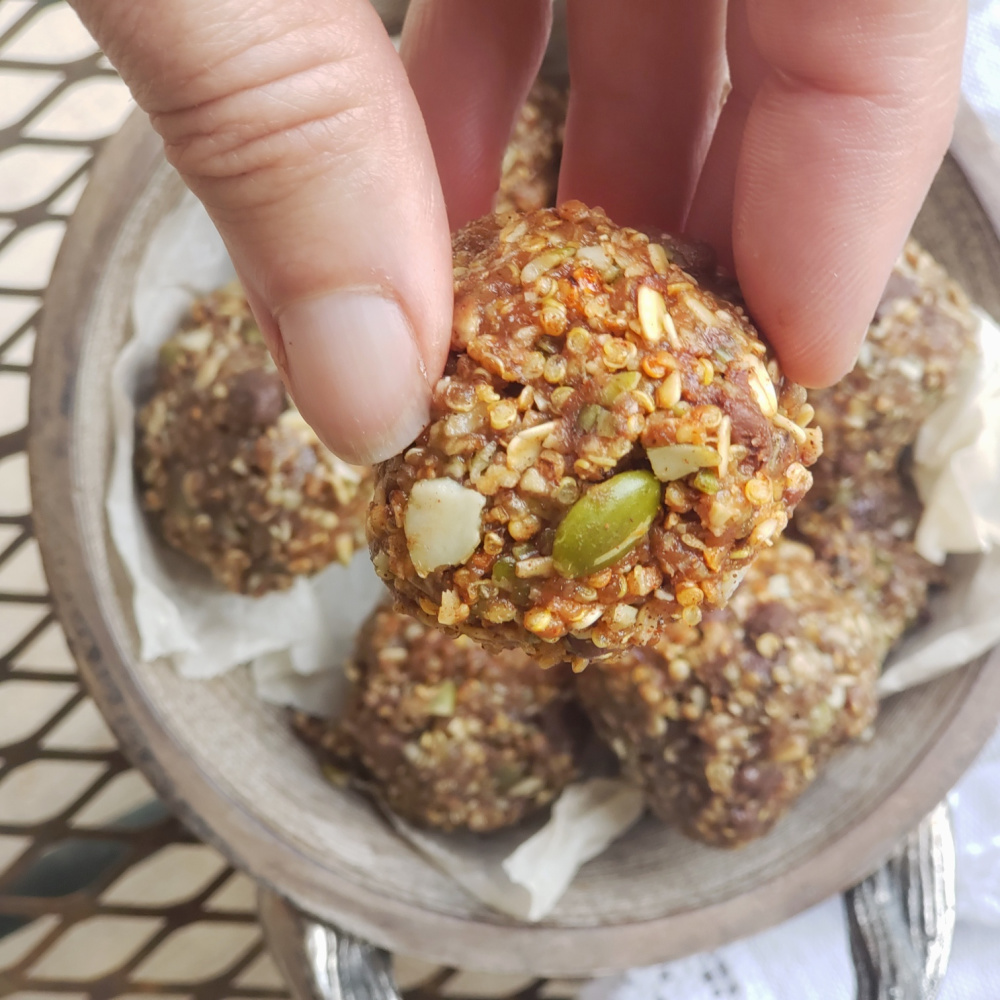
Popping quinoa gives it a wonderful aroma, crunchy yet chewy texture, and nutty flavor -- eat like popcorn, toss on everything from yogurt to salads, or use as an ingredient in recipes like energy balls or granola bars.
Whether you call it Toasted, Puffed or Popped, prepping quinoa this way will make you smile.

 The process of toasting quinoa is also referred to as “popping” or “puffing.” Store-bought puffed quinoa (like quinoa cereal) is very light and crispy. This is achieved through commercial-grade equipment and not 100-percent replicable at home. But just throwing quinoa kernels into a skillet (as is the usual method mentioned on internet sources), yields a very dry, hard result – almost like chewing on sand.

The best method for popping quinoa at home, in my opinion, is to cook it first, dry it out in the oven, and then pop on the skillet for a few minutes. I think you get a bigger “finished” kernel with better textures – it’s crunchy-chewy, but doesn’t feel like a mouthful of pea gravel.

Popping quinoa gives it a wonderful aroma, crunchy yet chewy texture, and nutty flavor -- eat like popcorn, toss on everything from yogurt to salads, or use as an ingredient in recipes like energy balls or granola bars. For more meal prep tips and quinoa recipes visit thefitfork.com

Here is the step-by-step on how to pop quinoa (you can also check out my PIN TUTORIAL).

Rinse quinoa in bowl of water and drain off in an extra fine-mesh strainer to remove the natural coating which can have a soapy, bitter taste. However, some people don’t notice an unpleasant taste, then lucky you – skip this somewhat tedious step!

Simmer 1 cup of rinsed quinoa with 1 ¼ cups of water for 15 minutes, with lid on – or until water is absorbed.

Popping quinoa gives it a wonderful aroma, crunchy yet chewy texture, and nutty flavor -- eat like popcorn, toss on everything from yogurt to salads, or use as an ingredient in recipes like energy balls or granola bars.

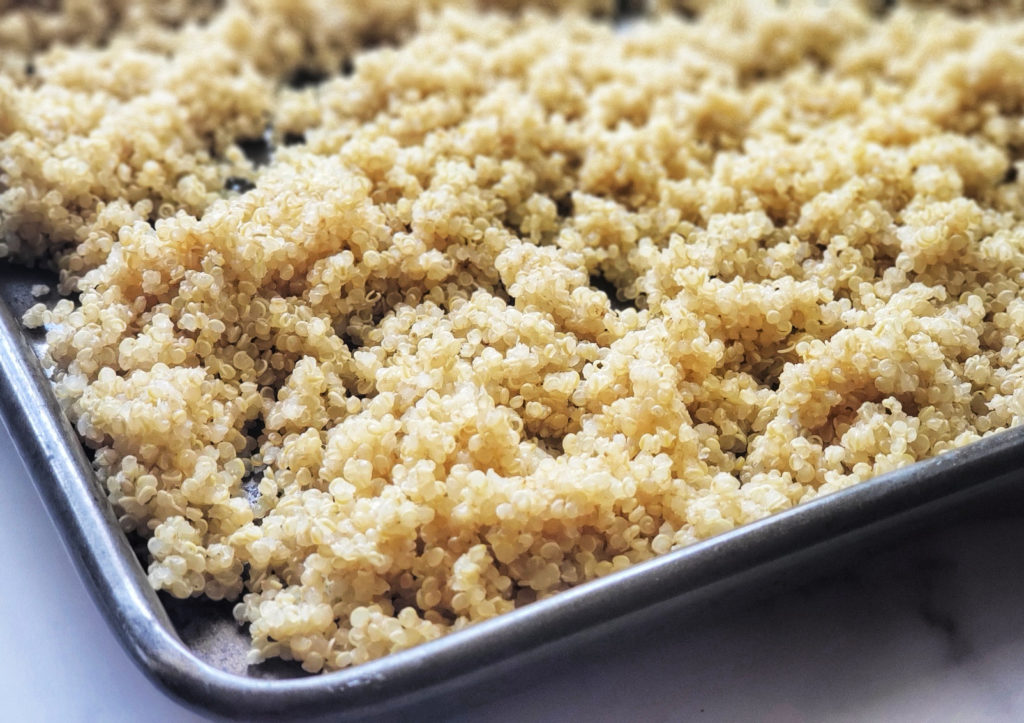
Dry out quinoa (which will have expanded to 3 cups) by spreading out on a rimmed, standard-sized sheet pan. Bake for 30 minutes 175F degrees to further dry out excess moisture. Every 10 minutes, use spatula to stir up quinoa, break apart any clumps, and keep from sticking on the pan.

Popping quinoa gives it a wonderful aroma, crunchy yet chewy texture, and nutty flavor -- eat like popcorn, toss on everything from yogurt to salads, or use as an ingredient in recipes like energy balls or granola bars.

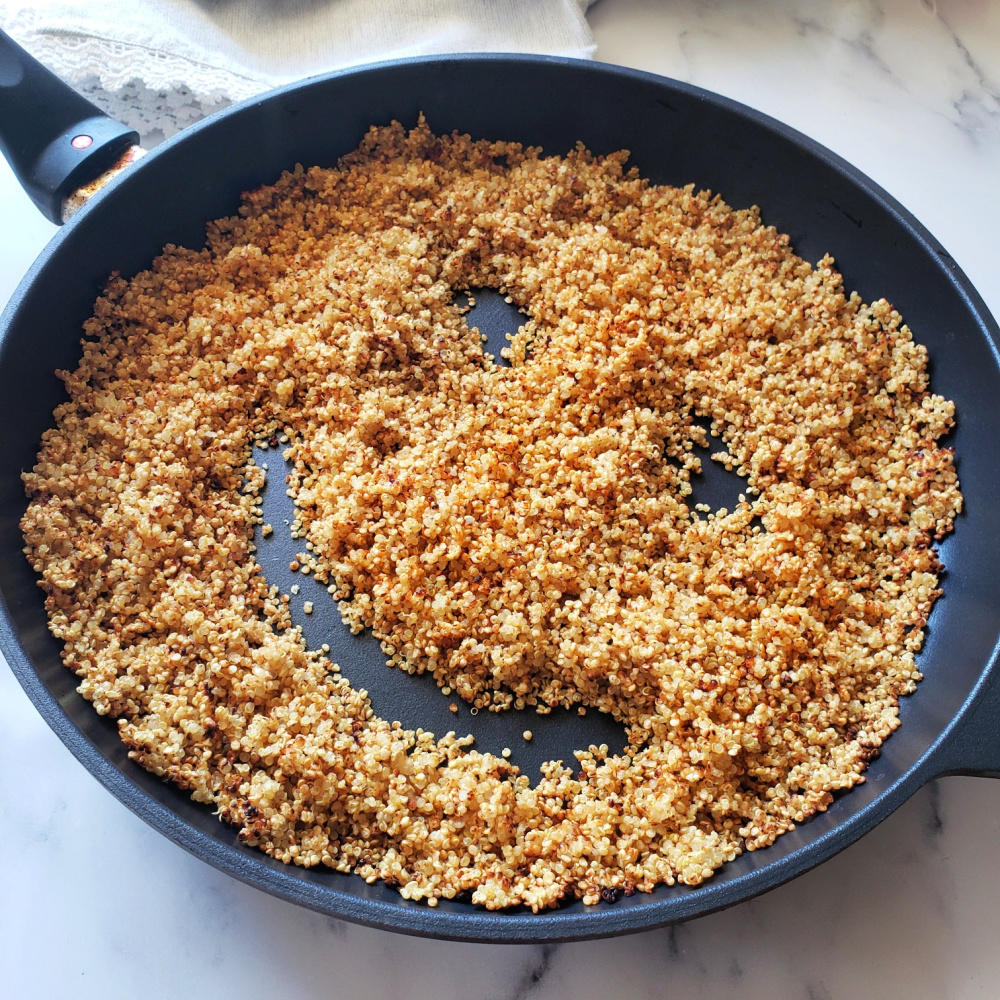
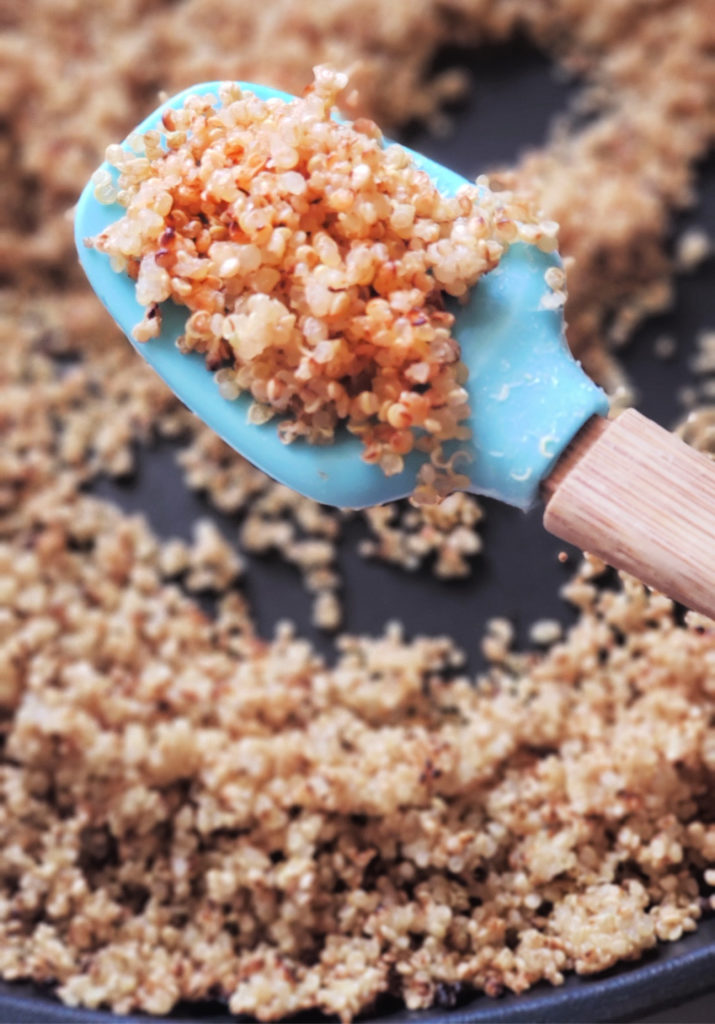
Skillet pop quinoa after you remove it from oven. Work in 1-cup batches, toast in large non-stick skillet, stirring constantly (no oil needed). Quinoa will be toasted properly when you hear the tiny popping sounds and it is turning golden brown and developing a crunchy texture.

Popping quinoa gives it a wonderful aroma, crunchy yet chewy texture, and nutty flavor -- eat like popcorn, toss on everything from yogurt to salads, or use as an ingredient in recipes like energy balls or granola bars.

You can use popped quinoa or toasted quinoa in a variety of ways. For example, add salt and eat like popcorn, sprinkle on salads or on yogurt, use in granola-bar type recipes. It’s one of my favorite ways to meal prep quinoa.  What you don’t use can be kept in the fridge in a zip top bag for a week.

Pumpkin Seed Popped Quinoa Balls
Popped Quinoa (also called Puffed Quinoa or Toasted Quinoa)

Popping quinoa gives it a wonderful aroma, crunchy yet chewy texture, and nutty flavor — eat like popcorn, toss on everything from yogurt to salads, or use as an ingredient in recipes like energy balls or granola bars.

Course: meal prep, side, Snack
Keyword: meal prep, quinoa, whole grains
Ingredients
  • 1 cup dry uncooked quinoa, any color
  • 1 1/4 cup water
Instructions
  1. Rise quinoa in bowl of water and drain off in a fine-mesh strainer to remove the natural coating which can have a soapy, bitter taste. However, some people don’t notice an unpleasant taste, then lucky you – skip this somewhat tedious step!
  2. Simmer 1 cup of rinsed quinoa with 1 ¼ cups of water for 15 minutes, with lid on – or until water is absorbed.
  3. Spread out quinoa (which will have expanded to 3 cups) out on a rimmed, standard-sized sheet pan.
  4. Bake for 30 minutes 175F degrees to further dry out excess moisture. Every 10 minutes, use spatula to stir up quinoa, break apart any clumps, and keep from sticking on the pan.
  5. Remove quinoa from oven and, working in 1-cup batches, toast in large non-stick skillet, stirring constantly (no oil needed).
  6. Quinoa will be toasted properly when you hear the tiny popping sounds and it is turning golden brown and developing a crunchy texture.
  7. You can use popped quinoa or toasted quinoa in a variety of ways. For example, add salt and eat like popcorn, sprinkle on salads or on yogurt, use in granola-bar type recipes. What you don’t use can be kept in the fridge in a zip top bag for a week.