If you’re working from home, fueling between workouts, or just tired of the same old lunch routine, this one’s for you.
These high-protein lunch ideas for one are quick, satisfying, and anything but boring. No sad desk salads. No basic sandwiches. Just real, flavor-packed meals that help you power through the rest of your day feeling energized—not sluggish.
Each recipe is perfectly portioned, easy to make, and loaded with protein to support muscle recovery, keep you full longer, and stabilize energy levels.
427 calories | 33g protein
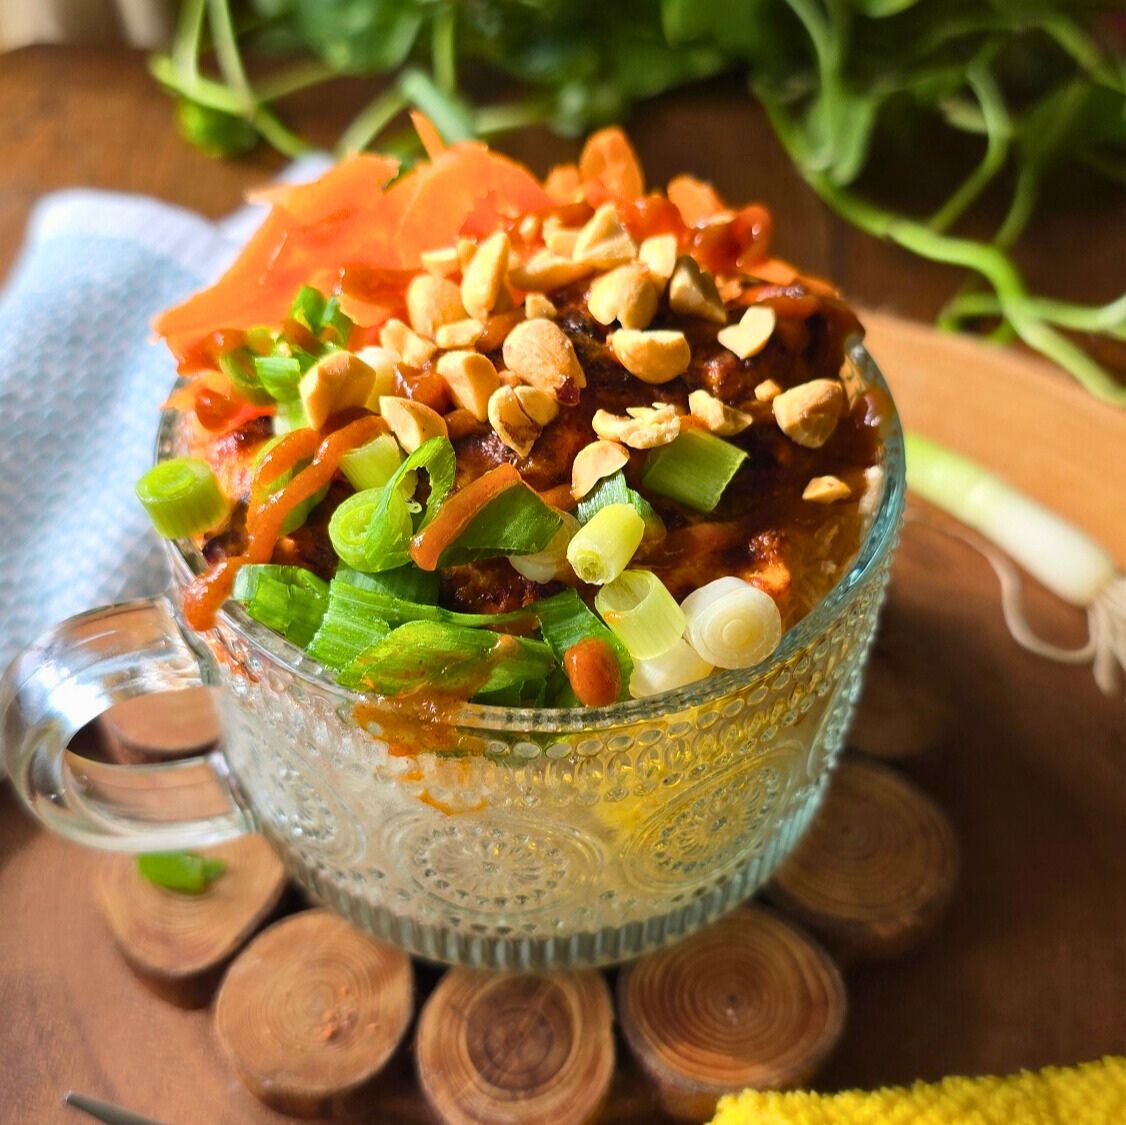
Big flavor, minimal effort. This quick-bake dish combines tender rice, protein-rich tuna, and bold Asian-inspired flavors into a warm, satisfying meal that comes together fast—perfect for busy weekdays.
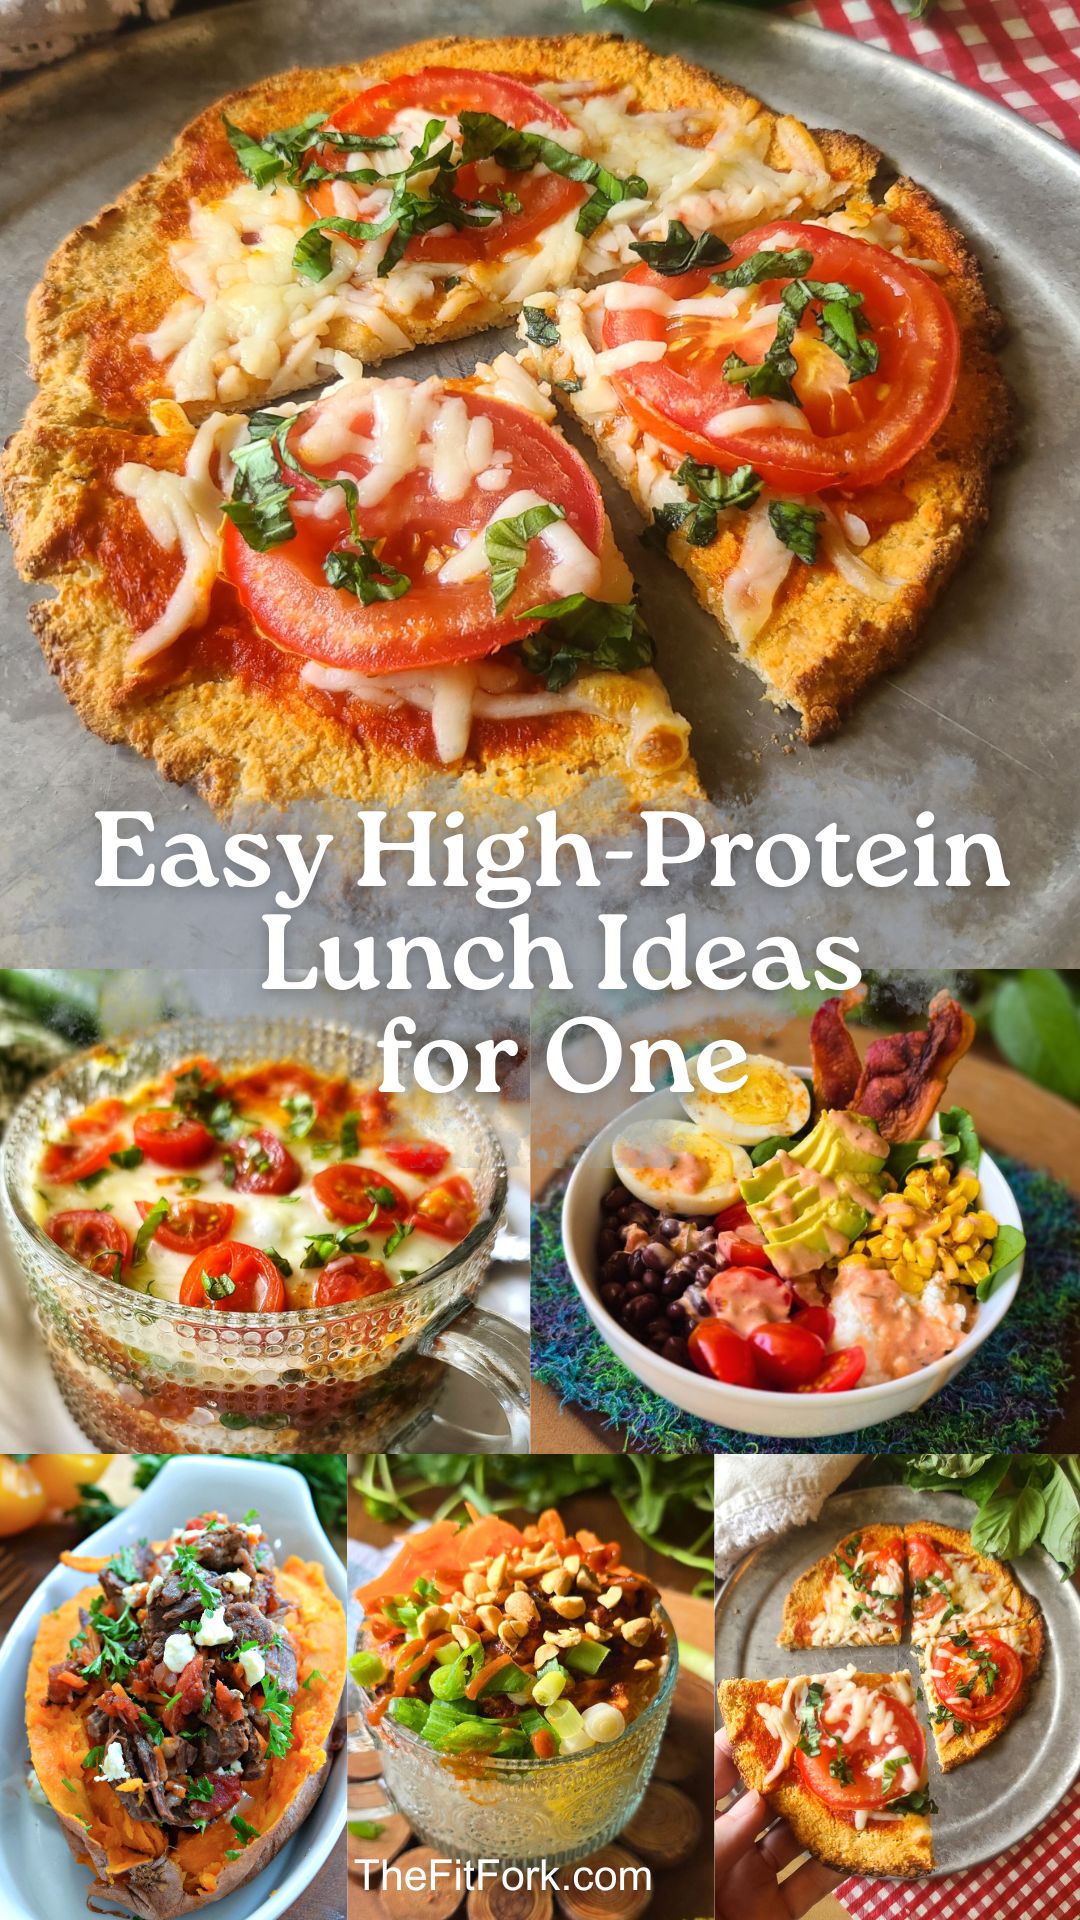
Cottage Cheese Pizza Crust (Top It Your Way)

163 calories | 18g protein (without toppings)
Pizza for lunch… but make it high-protein. This simple 3-ingredient crust is low-carb, gluten-free, and super versatile. Recipe makes two, so you can keep the second in the fridge for another lunch later in the week. Add your favorite toppings depending on your mood—classic, veggie-loaded, or even Tex-Mex style.
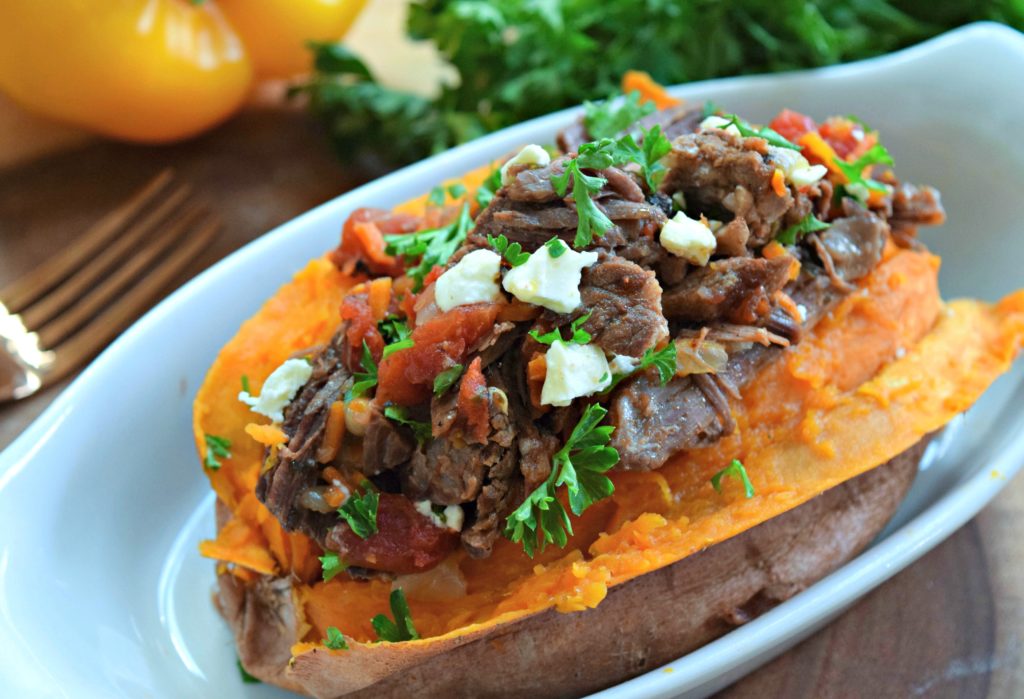
Mediterranean Shredded Beef Stuffed Sweet Potato
551 calories | 28g protein
This one brings the comfort. A naturally sweet baked potato stuffed with savory shredded beef and Mediterranean flavors creates a balanced meal with protein, fiber, and healthy carbs to keep you going strong. Instant pot recipe makes 8 servings that you can freeze in individual portions.
411 calories | 33g protein
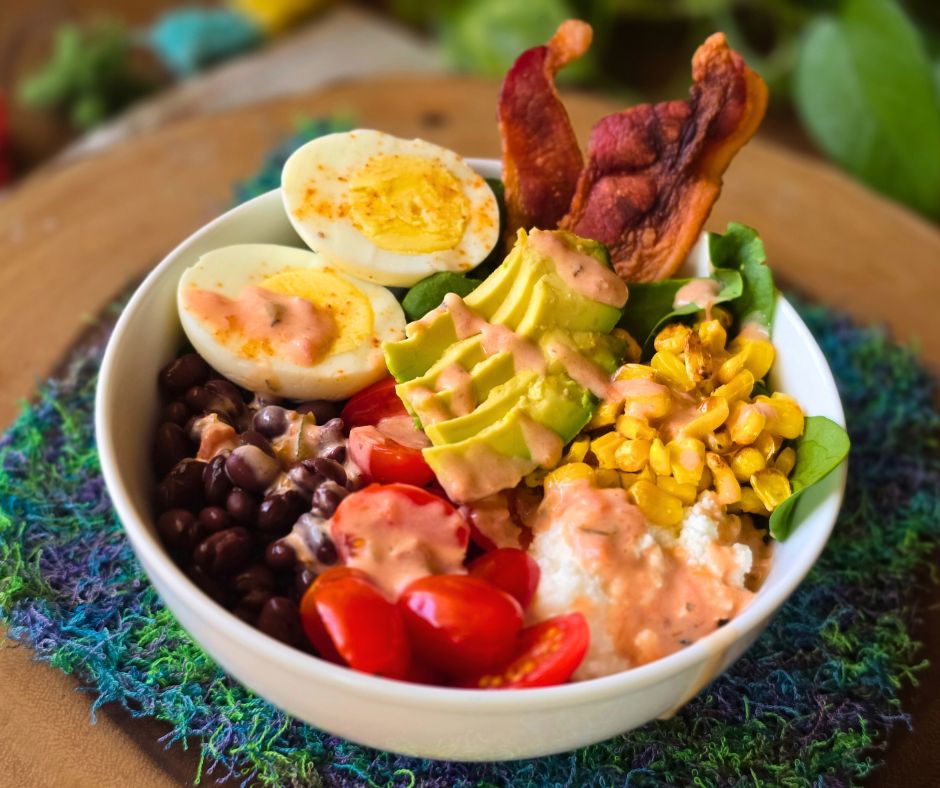
No cooking required, big payoff. This cottage cheese bowl is creamy, zesty, and packed with both protein and fiber. It’s a perfect grab-and-go option when you need something fast but still want to stay on track.
188 calories | 21g protein
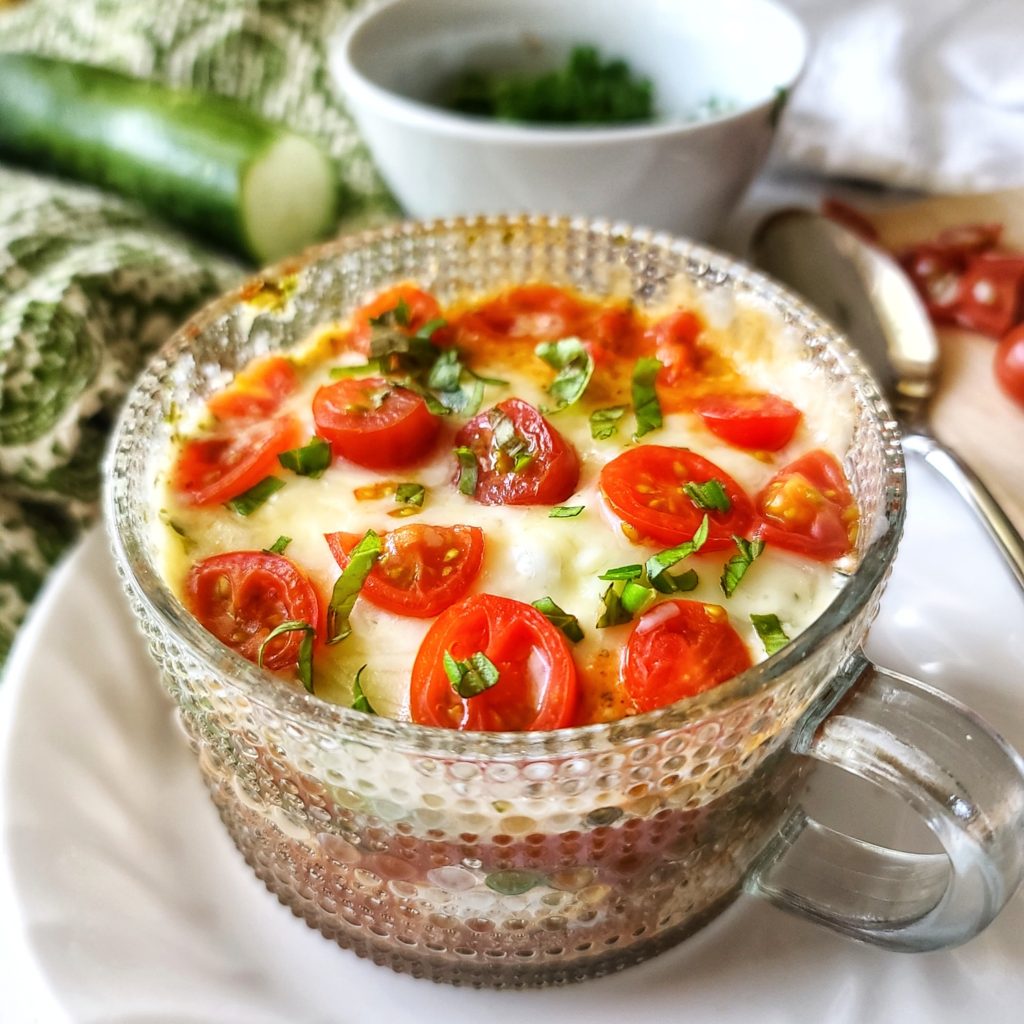
Lasagna in minutes? Yes please. This single-serve mug meal skips the noodles but keeps all the cozy Italian flavors, making it lighter, veggie-packed, and protein-rich.
Why High-Protein Lunch Matters
A protein-packed lunch isn’t just about hitting macros—it’s about feeling better all afternoon.
- Helps maintain muscle (especially important if you’re training or 40+)
- Keeps you fuller longer (less snacking temptation)
- Supports steady energy (no mid-afternoon crash)
- Aids recovery if you’ve already worked out