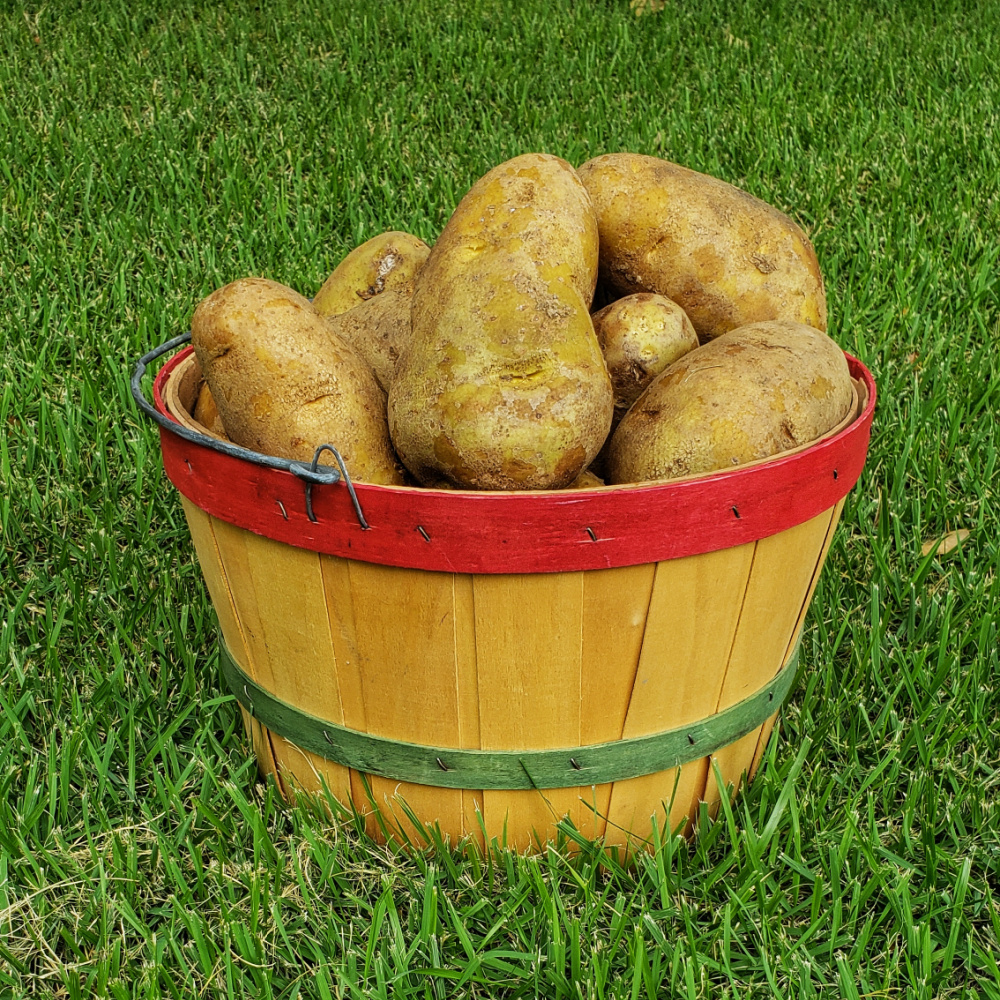
How to Make the Best Popped Quinoa

Toasting quinoa gives it a great texture, fabulous aroma, and magnifies the nutty flavor. Plus, it’s a great way to add more of this ancient grain (which is actually a seed), into your diet – the health benefits of quinoa are plentiful. It’s a good source of plant protein, fiber, and heart-healthy fats, just to name a few.

Popping quinoa gives it a wonderful aroma, crunchy yet chewy texture, and nutty flavor -- eat like popcorn, toss on everything from yogurt to salads, or use as an ingredient in recipes like energy balls or granola bars.
Whether you call it Toasted, Puffed or Popped, prepping quinoa this way will make you smile.

 The process of toasting quinoa is also referred to as “popping” or “puffing.” Store-bought puffed quinoa (like quinoa cereal) is very light and crispy. This is achieved through commercial-grade equipment and not 100-percent replicable at home. But just throwing quinoa kernels into a skillet (as is the usual method mentioned on internet sources), yields a very dry, hard result – almost like chewing on sand.

The best method for popping quinoa at home, in my opinion, is to cook it first, dry it out in the oven, and then pop on the skillet for a few minutes. I think you get a bigger “finished” kernel with better textures – it’s crunchy-chewy, but doesn’t feel like a mouthful of pea gravel.

Popping quinoa gives it a wonderful aroma, crunchy yet chewy texture, and nutty flavor -- eat like popcorn, toss on everything from yogurt to salads, or use as an ingredient in recipes like energy balls or granola bars. For more meal prep tips and quinoa recipes visit thefitfork.com

Here is the step-by-step on how to pop quinoa (you can also check out my PIN TUTORIAL).

Rinse quinoa in bowl of water and drain off in an extra fine-mesh strainer to remove the natural coating which can have a soapy, bitter taste. However, some people don’t notice an unpleasant taste, then lucky you – skip this somewhat tedious step!

Simmer 1 cup of rinsed quinoa with 1 ¼ cups of water for 15 minutes, with lid on – or until water is absorbed.

Popping quinoa gives it a wonderful aroma, crunchy yet chewy texture, and nutty flavor -- eat like popcorn, toss on everything from yogurt to salads, or use as an ingredient in recipes like energy balls or granola bars.

Dry out quinoa (which will have expanded to 3 cups) by spreading out on a rimmed, standard-sized sheet pan. Bake for 30 minutes 175F degrees to further dry out excess moisture. Every 10 minutes, use spatula to stir up quinoa, break apart any clumps, and keep from sticking on the pan.

Popping quinoa gives it a wonderful aroma, crunchy yet chewy texture, and nutty flavor -- eat like popcorn, toss on everything from yogurt to salads, or use as an ingredient in recipes like energy balls or granola bars.

Skillet pop quinoa after you remove it from oven. Work in 1-cup batches, toast in large non-stick skillet, stirring constantly (no oil needed). Quinoa will be toasted properly when you hear the tiny popping sounds and it is turning golden brown and developing a crunchy texture.

Popping quinoa gives it a wonderful aroma, crunchy yet chewy texture, and nutty flavor -- eat like popcorn, toss on everything from yogurt to salads, or use as an ingredient in recipes like energy balls or granola bars.

You can use popped quinoa or toasted quinoa in a variety of ways. For example, add salt and eat like popcorn, sprinkle on salads or on yogurt, use in granola-bar type recipes. It’s one of my favorite ways to meal prep quinoa.  What you don’t use can be kept in the fridge in a zip top bag for a week.

Pumpkin Seed Popped Quinoa Balls
Popped Quinoa (also called Puffed Quinoa or Toasted Quinoa)

Popping quinoa gives it a wonderful aroma, crunchy yet chewy texture, and nutty flavor — eat like popcorn, toss on everything from yogurt to salads, or use as an ingredient in recipes like energy balls or granola bars.

Course: meal prep, side, Snack
Keyword: meal prep, quinoa, whole grains
Ingredients
  • 1 cup dry uncooked quinoa, any color
  • 1 1/4 cup water
Instructions
  1. Rise quinoa in bowl of water and drain off in a fine-mesh strainer to remove the natural coating which can have a soapy, bitter taste. However, some people don’t notice an unpleasant taste, then lucky you – skip this somewhat tedious step!
  2. Simmer 1 cup of rinsed quinoa with 1 ¼ cups of water for 15 minutes, with lid on – or until water is absorbed.
  3. Spread out quinoa (which will have expanded to 3 cups) out on a rimmed, standard-sized sheet pan.
  4. Bake for 30 minutes 175F degrees to further dry out excess moisture. Every 10 minutes, use spatula to stir up quinoa, break apart any clumps, and keep from sticking on the pan.
  5. Remove quinoa from oven and, working in 1-cup batches, toast in large non-stick skillet, stirring constantly (no oil needed).
  6. Quinoa will be toasted properly when you hear the tiny popping sounds and it is turning golden brown and developing a crunchy texture.
  7. You can use popped quinoa or toasted quinoa in a variety of ways. For example, add salt and eat like popcorn, sprinkle on salads or on yogurt, use in granola-bar type recipes. What you don’t use can be kept in the fridge in a zip top bag for a week.

Procrastinator’s Guide to an A+ Graduation Party — Fast & Cheap

What a school year it has been! Whether college, high school or even just kindergarten, celebrate your special 2021 graduate with a hearty congratulations, keepsake mementoes and a really fun graduation party – whether virtual or in-person!  

Don’t let the fact that graduation 2021 is sneaking up on us limit your party planning. Check out my Procrastinator’s Guide to an A+ Graduation Party and get going!

Procrastinator’s Guide to an A+ Graduation Party – Fast & Cheap

Get Quick Customized Gradation Announcements & Party Invitations: Let the world know that you are celebrating the accomplishments of your scholar with a custom graduation invite – not those generic, cookie-cutter ones through school ordering.  I always head over to BasicInvite.com where, I can better show off my personal style while quickly creating high-quality but inexpensive cards using their trendy to traditional templates. Simply tweak the text, color and layout as needed, and upload cherished photographs of your own. The whole process takes minutes, no more than 7 days to ship, and nothing puts a personalized touch to a 2021 graduation announcement more than a photo of your own graduating Senior smiling ear-to-ear.  

As a perfectionist regarding quality and content (yet also someone prone to typos), I really appreciate how Basic Invite allows me to order a printed sample of my actual invitation before placing the final order – I can ensure everything is spot-on perfect before ordering the hundreds I need to share with my world. 

Promo Alert: BasicInvite.com is offering 15% off graduation invitations (really popular right now is the nurse graduation announcement – go future nurses!), party invitations, thank you cards and most all products with coupon code 15FF51 

Give Yourself Permission to Use Non-Professional Photos: This is a huge graduation party hack that will save you so much time, money and stress. Instead of forking over a small fortune in sitting fees and then still having to order the photos and digital rights, just simply snap your own! With the camera quality of the latest cell phones these days, you don’t even need a fancy DSRL camera and studio set up. Plus you have senior photo access instantly when making cheap graduation announcements and other keepsake memorabilia.

Serve Food Graduates Really Want: The great news is that most graduating seniors and their young adult and teenage guests don’t want fussy, gourmet food. They just want good eats, like the meals they enjoy on the weekends with their friends when socializing. For graduation party food themes, think pizza, sub sandwiches, tacos or a burger bar that can provide additional options that satisfy a variety of diet types (like plant-based or gluten-free). All of these simple graduation food ideas can be pulled together quickly by ordering out or even pulling it all yourself with simple hacks like you can find in my past post on Burger Bar Tips & Tricks. Also, I think it’s fun to serve non-alcoholic mocktails, the kids feel grown up and I know everyone is safe. Since my son is heading to Texas Tech University this fall, I created this virgin Michelada – aka, Red Raiderade!

Do-It-Yourself DJ: No need for a live band DJ . . . or boring parent “elevator music.”  Put your graduate to the task of putting together his or her own playlist for the graduation party Your son or daughter likely already has a huge collection of music enjoyed by their peer group – just ask for them to use the “clean” lyric versions to be friendly for all age-groups and temperaments. Blast it from the home entertainment center, a portable pull-around speaker by the pool or in your Zoom session, whever you are!  

Zoom Everyone Together: For those who can’t make it to the party due living far away or the need to still remain social distanced, can still attend the party via Zoom, Google Hangouts or other virtual meeting services. Use the chatroom functions to break out in to smaller conversations, or play big party games! You can even use a far-away guest to make a special speech via one of these meeting services, and play it on the big screen.

Sentimental Slide Show: Search through your digital photos and pull photos from your graduate’s life, from birth to current day – choose a selection of snapshots that are sentimental, milestone-marking, silly and maybe even a little embarrassing. Use Windows Movie Maker or even a phone app to upload photos, make transitions, add text and music. This is always the most popular graduation party entertainment around – grandparents “ooh and ahh,” parents tear up, and the teenage guests always get a good chuckle with the “vintage” photos. Success Tip: include as many photos as you can with your graduate and guests you know are coming to the party.

In-A-Flash Party Favors: Graduation party favors are a thoughtful way to let guests know you appreciate their stopping by to share in the graduate’s big day and accomplishments. There is no need to spend hours or big bucks on these takeaway trinkets, I prefer to make it a little treat they can immediately enjoy. In the past, I’ve done tiny mortar boards made out of a mini peanut butter cup with a cardstock square and tassel on top or “Commence-Mints” (above) made with mints and a simple printout made at home.  

Thank You Cards: To many teens, the “thank you” requirement for a graduation gift or money might must mean saying, “Dude, thanks,” or sending out sentiments of appreciation via text or email. Take your son or daughter’s etiquette to the next level by ordering custom thank you card for them to personally write out and hand or snail-mail deliver their appreciation to the gift-giver. They may even want to drop a note of thanks to special teachers, mentors, coaches or individuals who wrote letters of recommendation for their college applications.  Again, I order mine from Basic Invite because they are quick, high-quality and customizable. (Don’t forget to use their 15% off Promo Code: 15FF51)

Disclaimer: This post is sponsored by BasicInvite.com, however all opinions, comments, and enthusiasm remain my own.

How to Keep White Workout Wear and Fitness Gear White: Laundry Stain & Stink Tips

Updated 10/13/2023

Nothing is as clean and fresh as a new pair of white sneakers or white fitness wear. The clean, pristine look of white workout clothing really pops and makes you feel fine. That is, until you get the fabric stained or it turns a dingy grey from laundering. Or, because you spilled a berry smoothie down the front — that would be me!

Tips on how to keep white workout wear and fitness gear white -- remove dingy grey and stains.

Find out how to keep your whites white, these white laundry tips will let you keep that pristine look going on at the gym, on the courts, in fitness class or wherever you like to wear your white gear!

The main reason white items become dull is due to incorrect sorting. Maybe you don’t have enough solid white items to make up a full load, so you just toss what you have in with darks or colors. Certain fabrics, like cotton, aren’t colorfast which means that a little bit of the dye seeps out in the water with each wash and sinks, most noticeably, on lighter items. Dingy whites can also be caused by washing heavily soiled white items (like nasty socks from a trail run) with very lightly dirtied items, like that cute workout top you wear to yoga class. In addition to co-mingling colors and levels of dirtiness, the quality of water in your home can also affect the whiteness of whites. For example, water with high levels of iron or hard water, loaded with minerals, make detergents less effective and can be a perpetrator of staining.

Get tips on how to keep white workout wear, athletic shoes and fitness gear bright white! Learn all the secrets of how to remove stains and dingy grey. Learn more at thefitfork.com

BASIC TIPS for keeping white laundry white:

  1. Wash whites in their own separate load, always. Not negotiable.
  2. Use the hottest water that the care label says is advisable. Make sure you actually read the care label!
  3. Look for “bleach alternative” and/or “enzymes in the laundry detergent you purchase.
  4. Don’t skimp on detergent, use the exact amount (and not more) than recommended on the back of bottle. The detergent helps keep the removed dirt suspended in the water during the washing cycle, lessening its ability to settle back in on the fabric. The use of too much though, becomes hard to wash out in one cycle.
  5. For stubborn stains and dinginess, soak fabrics in a solution of water and oxygen bleach before laundering, according to package directions.
  6. Never put a stained item in the dryer until you are satisfied with the progress you have made removing the stain. The heat will “set” it in. While the item is still damp, soak, spot treat, scrub — or whatever is needed — and then rewash again.
  7. If possible, do not dry whites, allow them to air dry. If running tight on hanging space, a fold out clothes drying rack that mounts to wall is perfect for sports bras, running shorts, and such. OR, if you can, drying outside in the sun is a great option, the sunlight offers natural lightening abilities.
  8. And ½ to 1 cup white vinegar distilled vinegar to rinse cycle to help in stain and odor removal. For synthetic workout wear, you can use a specifically designated laundry soap (like this one I use), to help keep fitness clothing bright and odor-free. I give WIN Detergent a big thumbs up!
  9. Install a water softener to help remove minerals from your water supply and thusly fabric mineral stains and dinginess from your white fabrics.

SPECIFIC TIPS for stain removal on white clothes and white workout wear:

  1. Perspiration and greasy stains: Use a clean toothbrush to rub clear-colored detergent or dishwashing liquid into stain. Sweat has a lot of iron in it, and that’s why it can discolor fabric so easily.
  2. Blood stains:  The sooner you can attend to a blood stain, the better. Treat area carefully by pouring a little hydrogen peroxide directly on the stain, also treated reverse side of the stain too (flip fabric over).  After it bubbles up, add clear detergent and scrub with a clean toothbrush, rising with cold water.
  3. Colored stains: From sports drink and yellowed underarms, apply undiluted liquid oxygen bleach directly to fabric right before washing. You can try a homemade baking soda paste and (2 parts warm water to 1 part baking soda) and scrub into affected area before laundering. For an extra stain removal boost, allow baking soda paste to dry in sun before washing off.
  4. Grass Stains: Treat with baking soda paste (as described at all); rinse; rub in vinegar with a clean toothbrush; launder with an enzyme or oxygen based bleach detergent.
  5. HANDY HACK: I discovered that refillable dauber bottles with sponge or mohair tips (like those you might use in crafting / painting) make excellent, inexpensive containers to hold various homemade stain solutions like bleach water, baking soda water, vinegar water.

before and after adidas cleats

HOW TO clean white athletic shoes:

  1. To clean white leather shoes: Use a dry toothbrush to remove and dried mud and debris. Next add several drops of liquid dish soap to a cup of warm water and use this to scrub shoes uppers and soles. Wipe down with a wet paper towel. If stains remain, use an eraser sponge to gently treat the area. Let air dry completely. Any scuffs can be covered with dab-on white shoe polish at this point.
  2. To clean white mesh shoes: Use dry brush to remove dirt and mud on soles. Mesh uppers need to be treated more carefully than leather uppers. Use several drops of clear liquid laundry soap in water and gently rub uppers with circular motion with white wash cloth. Periodically rinse wash cloth to prevent spreading dirt. Use a soft bristled tooth brush to work on more stubborn stains. Carefully rinse shoes under the faucet, taking care not to totally submerge. Use a dry towel to pat off excess water and let air dry. For non-leather shoes, you can speed up the drying process with a mesh shoe dryer bag that attached to the inside door of your drying.
  3. To clean all-white shoelaces:  After knowing how to clean white sneakers, you need to make the laces pop, too! For all white shoelaces, use a solution of 3 tbsp. bleach to one gallon of water. Soak laces for 5 minutes, remove and rinse, and then let air dry.

HOW TO clean white hats, caps and visors:

  1. To clean white caps and visors: Do not place in the dishwasher as some suggest. This can leave your cap misshapen. Use a cotton swab, paper towel or white cloth to apply hydrogen peroxide to the stain. Then use a clean toothbrush to work in in, let set and then rinse. If hat is dirty all over with sweat stains, soak it for up to 30 minutes in a bowl filled with warm water, a bit of oxygen-based bleach and laundry detergent. Rinse thoroughly with warm water, dab dry with clean white towel, and air dry with paper towels wadded up to keep the caps shape.
How to keep white tennis clothes and other sports apparel white! Laundry, stain and care tips. Learn more at thefitfork.com

Note: This post contains Amazon affiliate links. Please visit my Amazon Storefront for more finds I love and use to support an active and healthy lifestyle.

I’m a fan of WIN Detergent to keep our activewear clean and stink-free!

You can find WIN Activewear Detergent on Amazon. Raising three active boys (and being an athlete myself), it’s been a huge help keeping sports uniforms and workout clothes clean and odor-free. WIN for the win!

Note: This post contains affiliate links. I may earn a small commission on purchases which helps me run The Fit Fork. For more of my favorite products, visit my Amazon Shop.

Wholesome Oat Quinoa Breakfast Bake – Master Recipe with Endless Flavor Options to Meal Prep!

Fueling up for a morning of activity (whether workouts or just the business of life) is much simple thanks to a meal prepping routine I started a few years ago making Wholesome Oat Quinoa Breakfast Bakes.

Chai Pear Quinoa Oat Back

These nourishing casseroles built long-lasting energy that whole grains provide, can be customized to suit my mood or, honestly sometimes, what I’ve currently got in the pantry/fridge – like various fruit, protein powder, spices and nuts or seeds. The final quinoa oat bakes are cut into (generous) single-serve portions and stored in the fridge or freezer. Such a comforting, filling and fast breakfast that I can reheat faster than my coffee brews.  Read on to get the Master Oat Quinoa Breakfast Bake and tons of mix-in ideas.

How to Make Canned Soup More Nutritious – Easy Health Boosts!

This post in sponsored by Now Foods. However, all content, opinions and enthusiasm remain my own. This post also contains affiliate links. Thank you for supporting amazing companies that stand behind The Fit Fork.

December is always a hectic time of year for me. This year it’s been compounded by extra worries and stress, and likely for you too! I am constantly reminding myself that eating well by focusing on nourishing food (and not just holiday junk) is so important for my sports performance and overall well-being.Easy Upgrades to Make Canned Soup More Nutritiious


It may sound almost contradictory, but I like to stock my pantry with canned soups ensure that I have a healthy, quick meal just minutes away, no matter what. No shame in the canned soup game, read on to find out some easy nutrition boosts for canned soup – and any other type of shelf-stable convenience soup from carton, jar, or pouch.

Continue reading