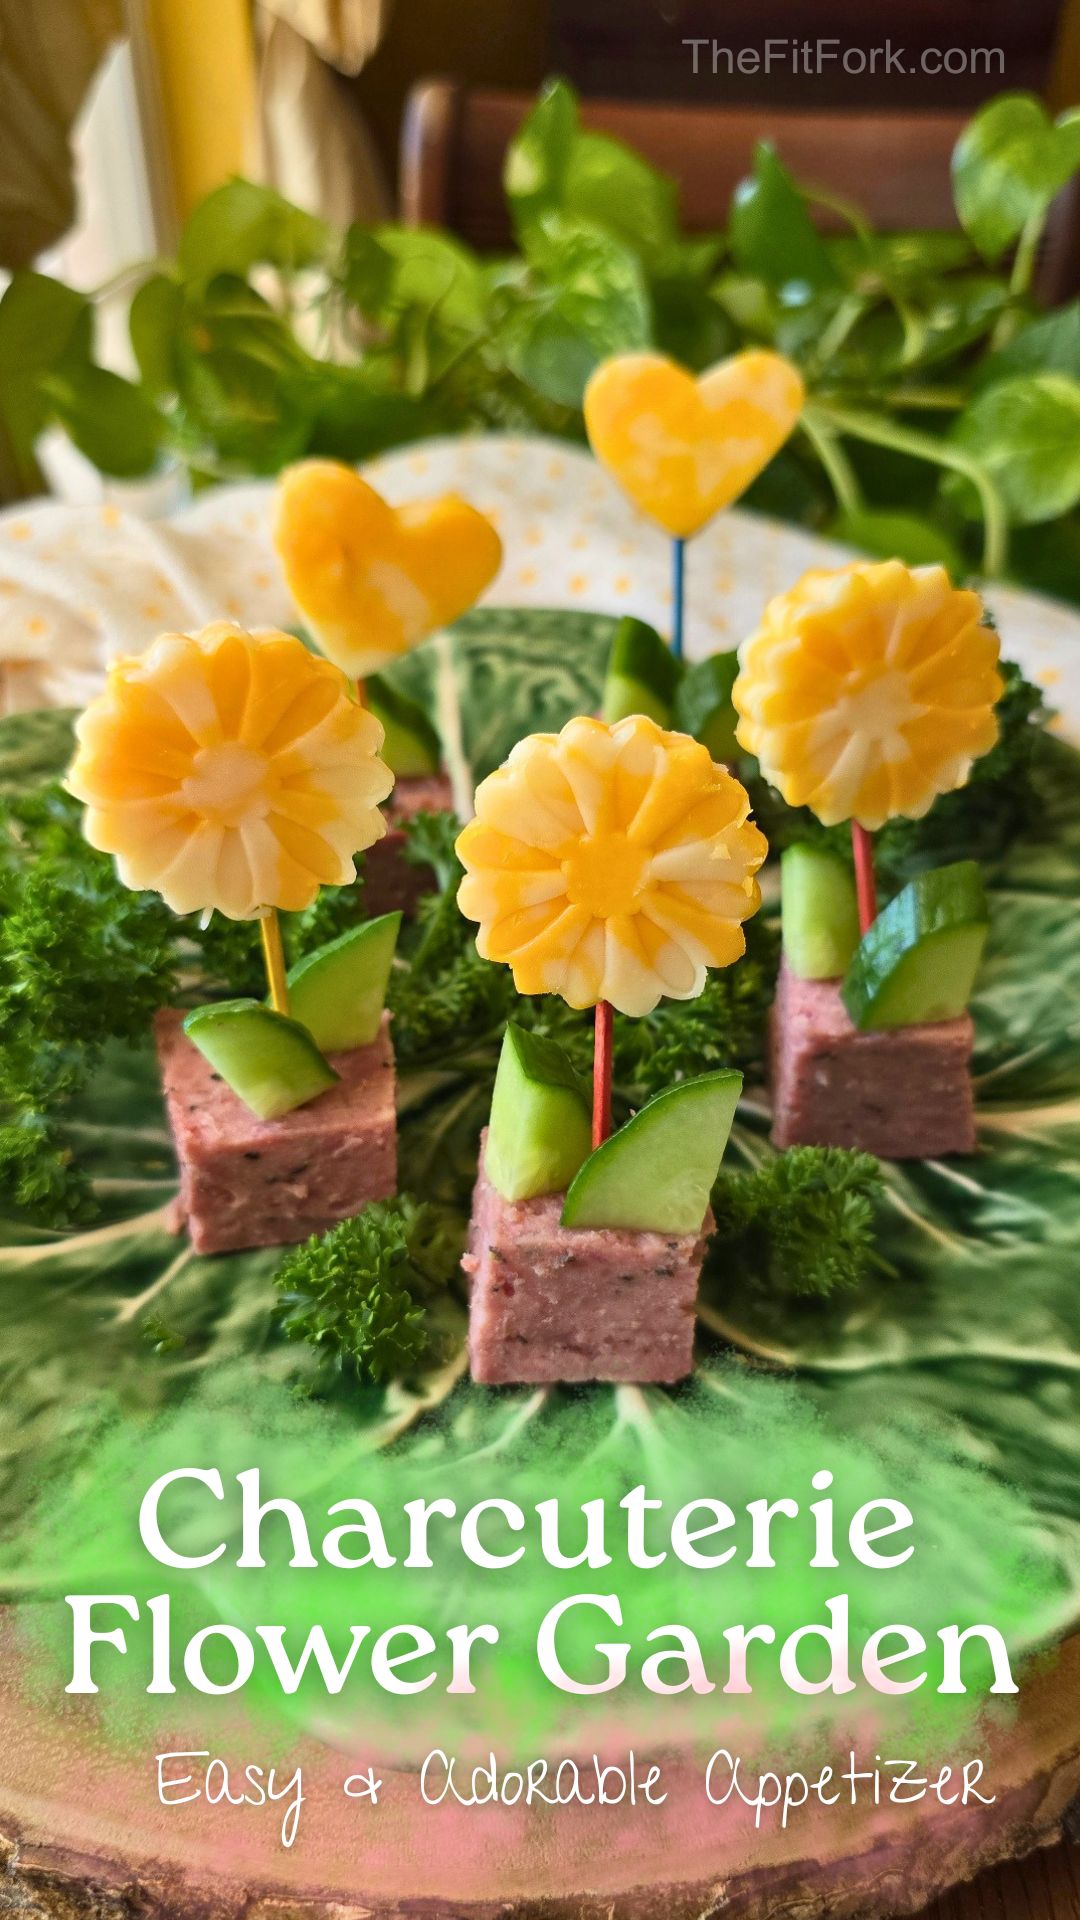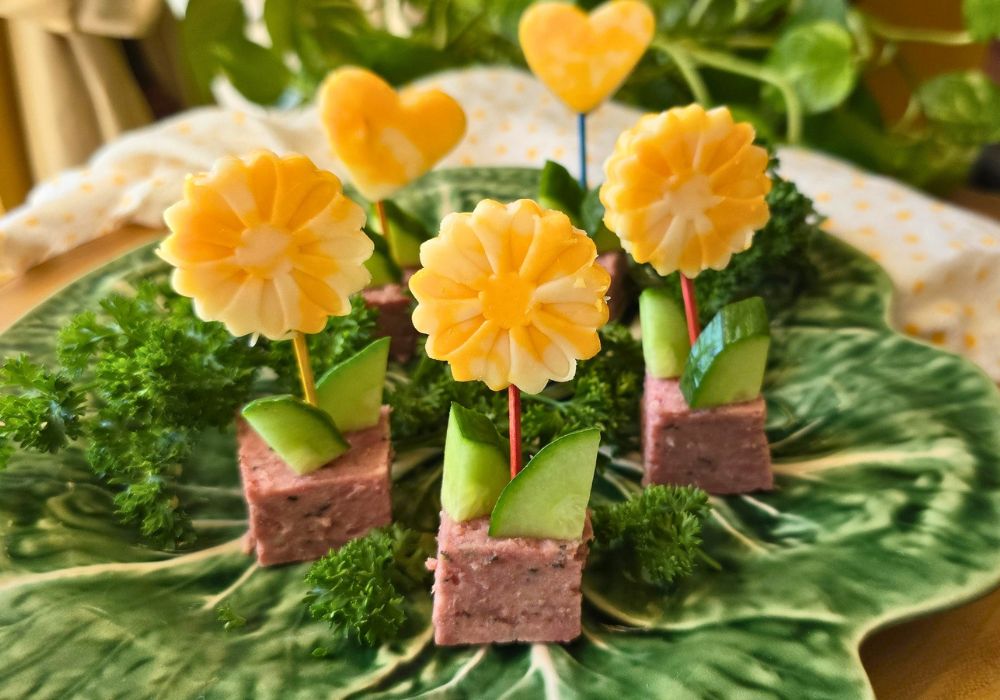
If you’re looking for a show-stopping but ridiculously easy appetizer for spring entertaining, this Charcuterie Flower Garden is it. Made with just three simple ingredients, this board transforms everyday snack staples into a blooming, edible centerpiece that’s perfect for Easter, bridal showers, Mother’s Day, graduation parties, and more.
It’s fresh, fun, and totally customizable—plus, no cooking required This Charcuterie Flower Garden proves you don’t need complicated ingredients or hours in the kitchen to create something beautiful and memorable. It’s the kind of appetizer that gets people talking—and snapping photos—before they even take a bite.
Why You’ll Love This Meat & Cheese Tray Idea
- Only 3 ingredients
- No cooking or complicated prep
- Budget-friendly and easy to scale
- Perfect for spring-themed gatherings
- Cute and sure to score compliments
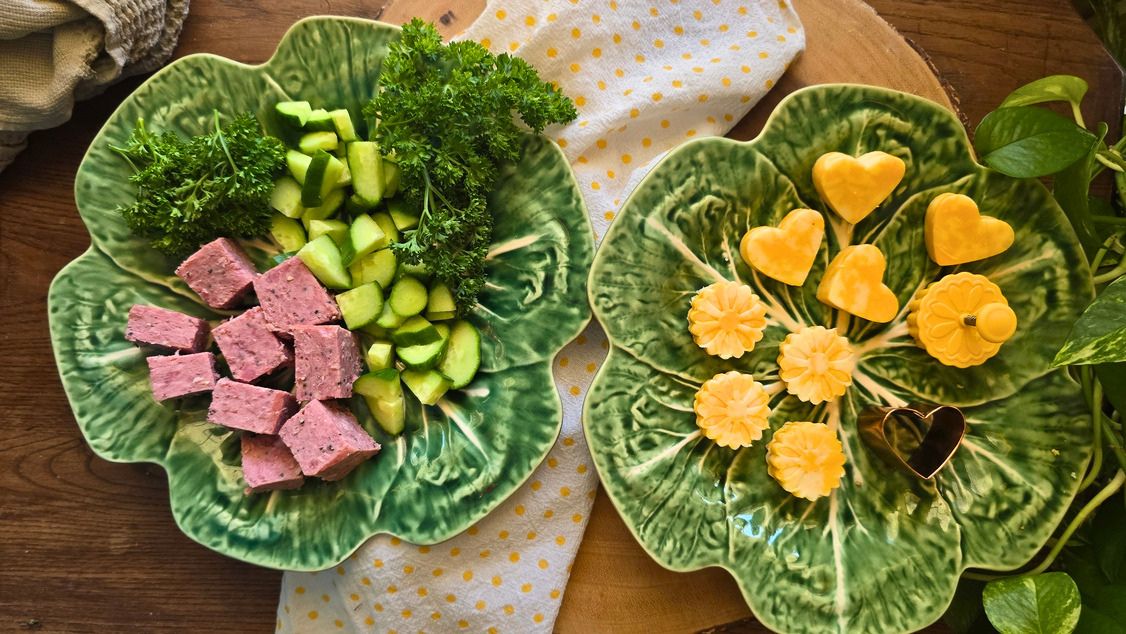
Ingredients for Cheese Flowers in Sausage Pots
- Summer sausage or salami (for the “flower pots”)
- English cucumber (for stems and leaves)
- Cheese slices or blocks (to cut into flower shapes)
How to Make a Charcuterie Flower Garden
1. Create the “Pots”
Slice your summer sausage or salami into approximate ¾” cubes or circles. The size can vary depending on the cookie cutters you will use – bigger cut outs need bigger bases! Arrange them at the base of your board or platter to mimic little flower pots.
2. Add the Stems & Leaves
Add toothpicks to the center of each sausage piece to serve as the steam. Slice English cucumber on a slight diagonal into ¼” slices. Next, quarter these slices to create leaves. Two pieces are layered outside of the toothpick, standing tall on the sausage cube.
3. Cut the Cheese Flowers
Use mini cookie cutters (flower shapes work best!) to cut cheese slices into blossoms. A thicker slice works better than pre-bought cracker cuts. I buy a pound block and then slice it in half (like a bun) to create a thick “canvas” to make shapes from. Cheddar, Colby Jack, Swiss, or pepper jack all work beautifully for color variety. Add these cheese cutouts to the top of toothpick.
4. Optional Finishing Touches: You can sprinkle fresh herbs (like parsley or dill) for extra greenery, add crackers around the board, and mix in colorful veggies for even more spring vibes. You are only limited by your creativity!
5. Prep Notes: For best results, prepare shortly before serving. If desired, to save time, you can prep the ingredients beforehand, store in air tight containers, and then assemble right before serving.