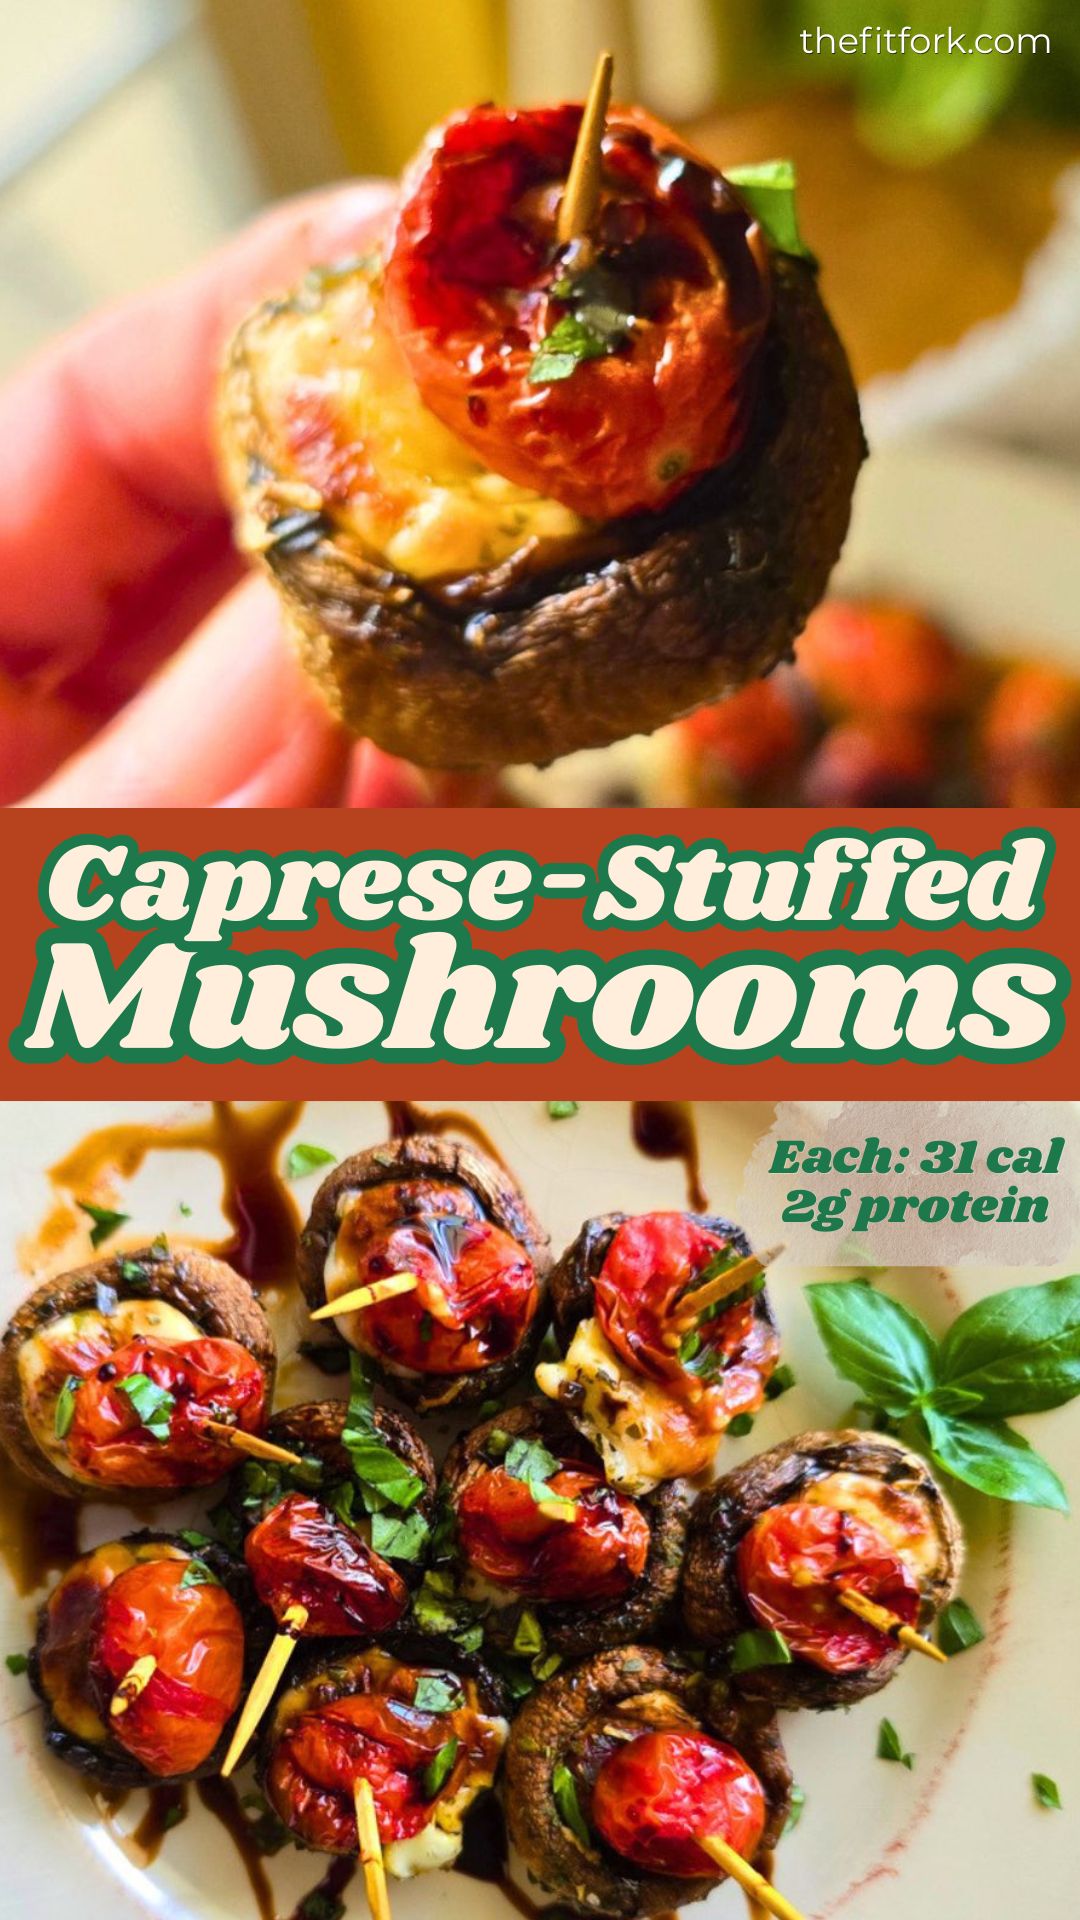
If there’s a sweet spot in my kitchen life, it’s the intersection of looks impressive and requires almost no effort. A plate full of Caprese Stuffed Mushrooms situation lives right there.
It’s the kind of appetizer that makes people think you planned ahead, prepped thoughtfully, and maybe even “tested a few versions.” In reality? You pulled a few things together, tossed them in the air fryer, and called it a win. Low carb, high flavor, and only about 31 calories per mushroom and always a hit. Also worth noting: these are dangerously snackable. You will think you made enough. You did not – lol, so just heed my warning and double the batch!
Air Fried Stuffed Mushrooms: Lazy-Genius Ingredients
These stuffed mushrooms hit that perfect balance of sweet and savory. Think Caprese salad but reimagined into a warm, cheesy, handheld bite. Gourmet without requiring any actual gourmet behavior.
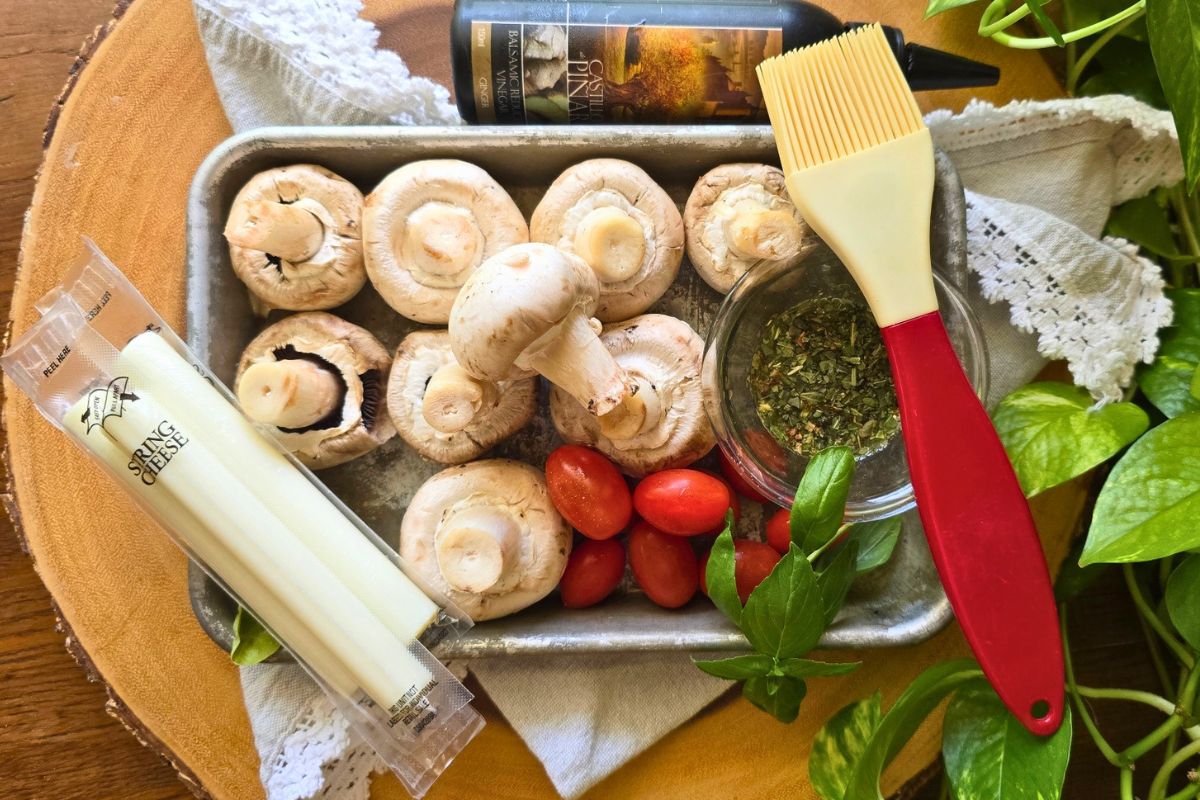
Mushrooms: Use white button mushrooms or cremini. They hold their shape, roast beautifully, and don’t turn into mushy little puddles in the air fryer.
Mozzarella Cheese Sticks: Lol, genius, right?! Cutting each cheese stick into a few chunks is honestly the most “effort” this recipe demands. For a flavor twist, try sharp cheddar cheese sticks instead of the traditional mozzarella.
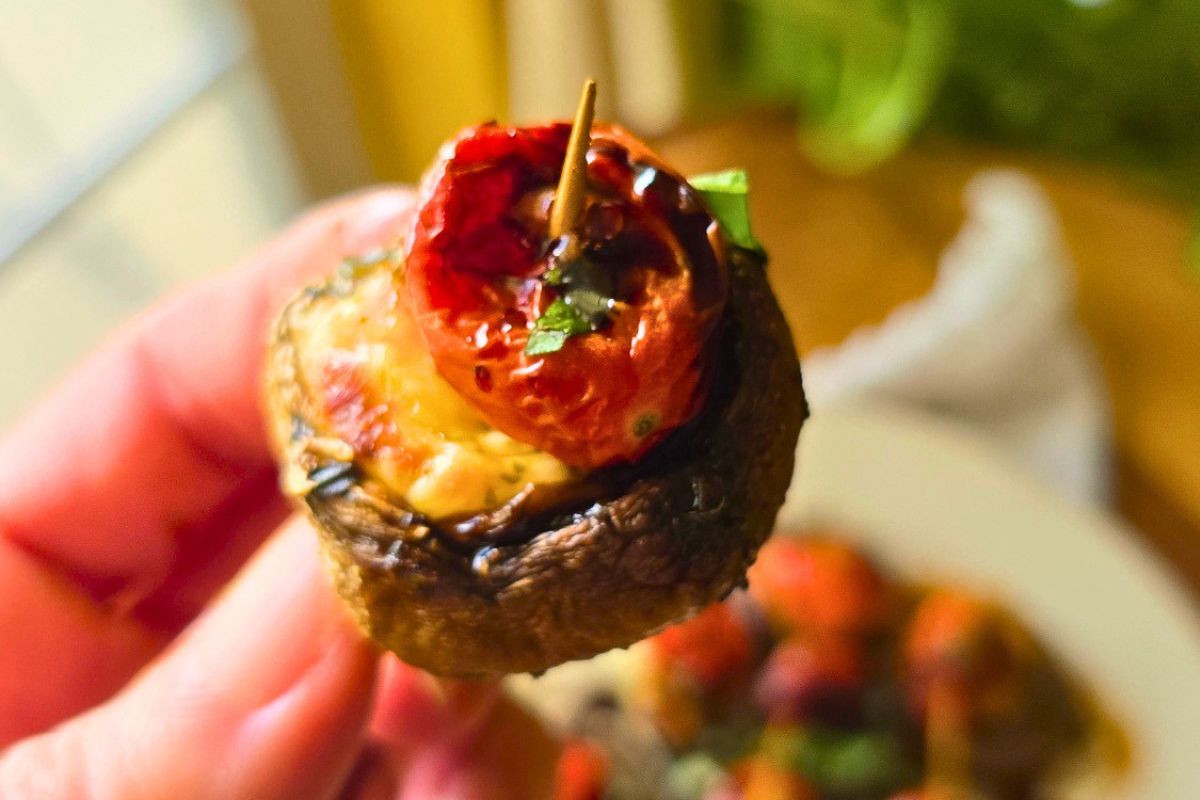
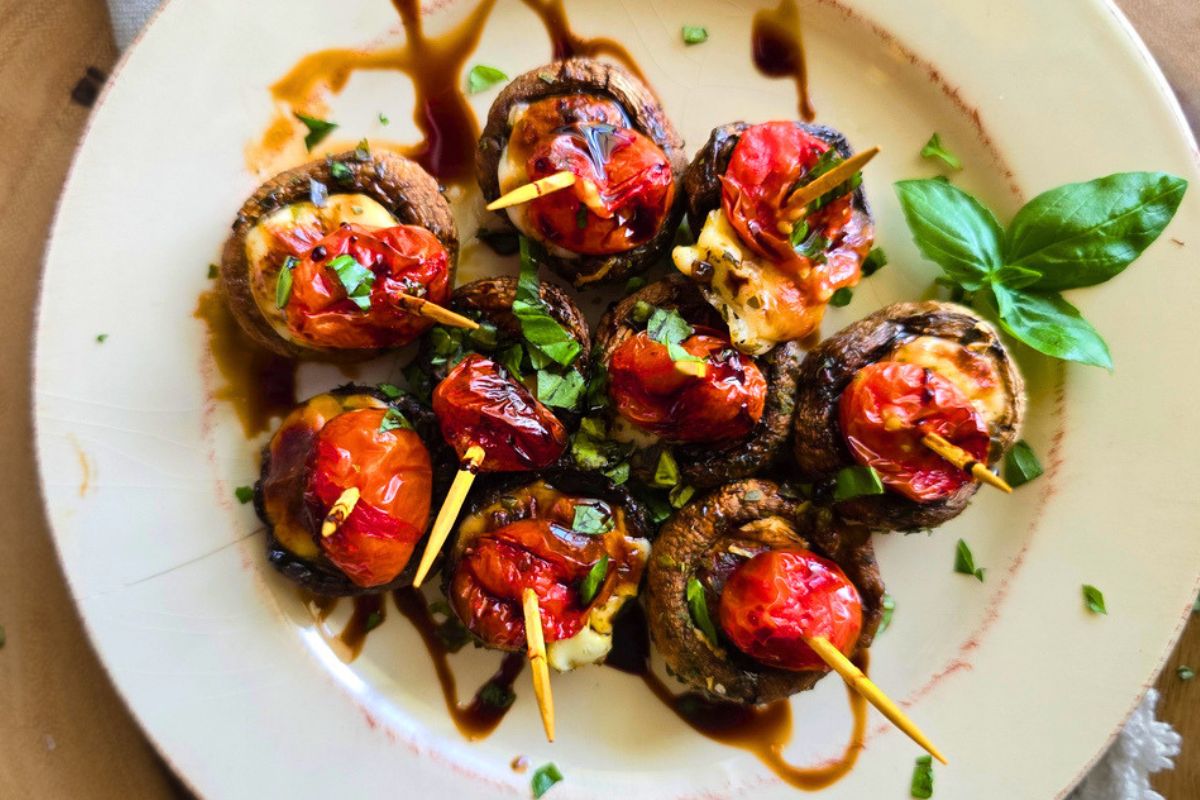
Grape tomatoes. A grape tomato skewered to the top of each cheese-stuffed mushroom adds a burst of sweet flavor. Use a toothpick to fasten and prevent both rolling off while roasting and also having the tomato explode with air frying (that little puncture from the toothpick releases the pressure)
Fresh basil: The herb of choice for Caprese inspired recipes. Use a sharp paring knife to chiffonade into thin, ribbon-like strips before garnishing.
Balsamic syrup: Balsamic syrup (commonly known as balsamic glaze or balsamic reduction) is a thick, syrupy condiment made by simmering balsamic vinegar until it reduces into a concentrated, sweet, and tangy glaze. You can make yourself, but SO MUCH EASIER to by it bottled.
Why You’ll Love Mozzarella Stuffed Mushrooms Caprese Style
The pre-made balsamic syrup drizzle and cheese sticks (like the kiddos snack) on are two little hacks that can stay your secret!
- It tastes like something you’d order at a wine bar.
- It takes about the same amount of effort as making a grilled cheese.
- The air fryer (my air fryer, love it) does almost all the work – but you can also use a regular oven (details in recipe below).
- Just a handful of simple ingredients.
- Low carb, just 31 calories each, with a couple grams of protein.
- Fancy enough for guests, easy enough for a Tuesday.

- 1 pint 8-oz. White Button or Cremini mushrooms medium to larger sized ones work best (my container had 9)
- 2 teaspoon Italian dressing or just olive oil + ½ tsp Italian seasoning
- Salt and ground black pepper to taste
- 2 mozzarella cheese sticks
- 9 Grape tomatoes or enough to match quantity of mushrooms on hand
- 1 tablespoon chopped fresh basil
- 1 tablespoon balsamic syrup
-
Preheat air-fryer to 380°F (Or oven to 350°F).
-
Remove the stems from the mushrooms by gently twisting them off. Discard or save for another use.
-
Place mushroom caps on air fryer try (or baking sheet), smooth side up, and brush with Italian dressing and season with a little salt and pepper. Flip mushrooms back over so openings are face up.
-
Slice cheese sticks into approximate 9 pieces* Place a piece of cheese inside the opening of each mushroom.
-
Add a grape tomato to the top of cheese-stuffed mushroom, keeping in place upright with a toothpick (using the toothpick will also prevent tomato from bursting in the air-fryer)
-
Cook in pre-heated 380F air fryer for 10 minutes (or traditional oven at 350F for 20 minutes) or until tomato is softened and roasted and cheese is gooey.
-
Remove and drizzle with balsamic syrup and garnish with basil.
*Note: My pint of mushrooms contained 9 button mushrooms, so I used 9 tomatoes and cheese sticks cut into 9 pieces. You may need to adjust depending on your mushroom count (pints can vary based on the size).