Rock a Lunchbox |Caramel Banana Protein Cereal Bars

Even though I try to eat with my health in mind, I don’t always say “no” to sweets – but I do try to clean them up a bit. For example, instead of a bowl full of cold, creamy ice cream topped with crumbled cookies, I eat plain Greek yogurt that I’ve sweetened with stevia and topped with a crunch protein-based chocolate cereal (Power Os from Love Grown Foods). I also top that with mini-chocolate chips, it’s my go-to bedtime snack – it’s still sweet, but more balanced with protein to boost my workout recovery and make muscles while I sleep!

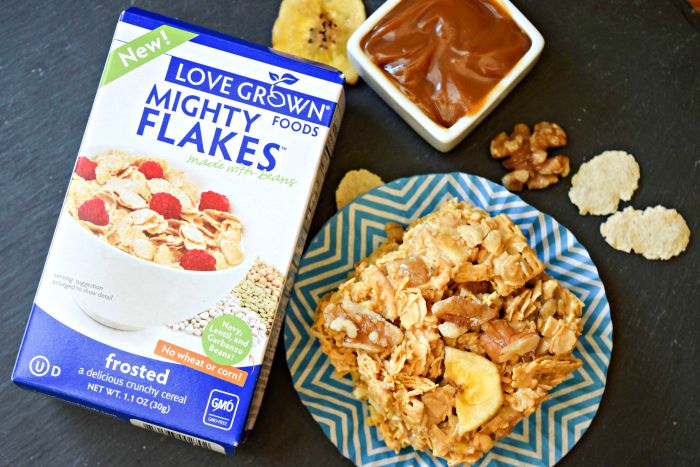
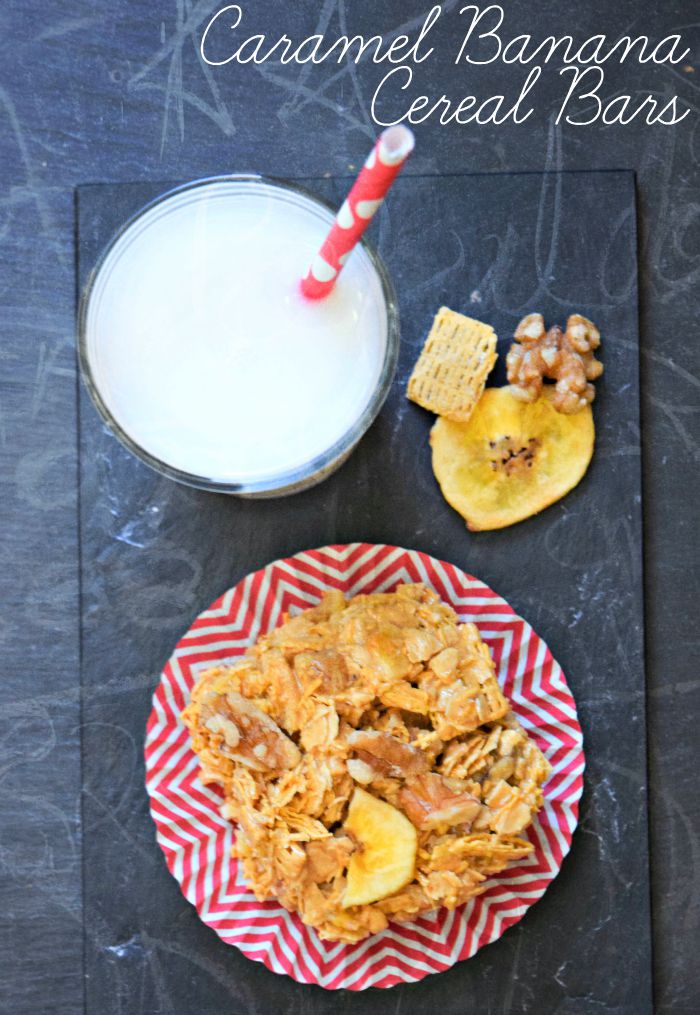
Caramel Banana Protein Cereal Bars make a healthier lunch box treat.

I also like to implement my “protein-hacks” in my kid’s lunchbox desserts as well. A study has shown that children ages two to 18 years old get 40 percent of their daily calories from junk foods like sugary sodas and fruit drinks, cookies, donut, candy, fried foods and more – that’s unconscionable. Kids of all ages want sweets, I get it – believe me I GET IT! I would try and trade the raisins my health-nut mom would pack in my lunch for a friend’s Hostess Cupcake – she never would trade, but started bringing me an extra cupcake on the sly.

So, as a parent myself now for more than 18 years, I’ve allowed my kids to eat sweets so that they don’t feel deprived but talked about limits and the effects of eating too much “less than quality food” – but that a small amount also be fine occasionally in the context of an overall healthy lifestyle. I also like to make our cookies and cakes at home, so I know exactly what is going into the recipe and into our bodies – choosing more nutritious alternatives when possible. Like heart healthy fats, sugar swaps, no chemicals or preservatives, organic when possible – you get the drift.
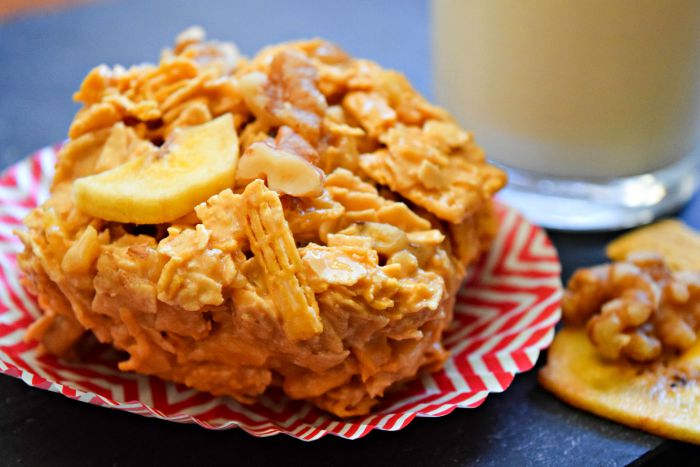
Caramel Banana Mighty Cereal Bars made with Love Grown Mighty Flakes make a healthier lunch box treat.

Caramel Banana Cereal Bar Today I’m sharing a healthier version of classic crispy yet chewy cereal bars. They are perfect for lunch boxes, backpacks, after school snacks, picnics, and pot lucks and bake sales! I used less butter and marshmallows than the traditional “crispie” recipe and supplemented with a reduced-sugar caramel and dried fruit for sweetness. For long-lasting energy, I threw in some nuts and a bean-based cereal for extra protein. Enjoy!
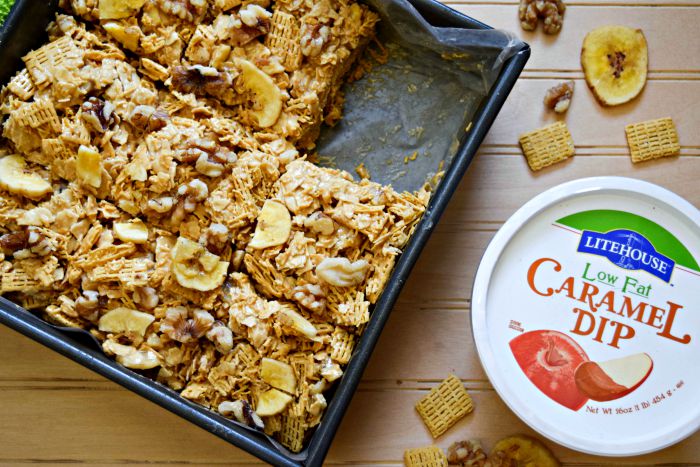
Caramel Banana Cereal Bars using Reduced Fat Caramel from Litehouse Foods makes a healthier lunch box treat.

What was your favorite treat to find inside your lunchbox as a kid . . . or today? Please share in the comments below – XOXO, Jennifer
Caramel Banana Protein Cereal Bars
Prep Time
15 mins
Total Time
15 mins
 
Course: Dessert, Snack
Cuisine: American
Servings: 18 servings
Ingredients
  • 3/4 cup banana chips or freeze-dried bananas
  • 3 ounces raw walnuts
  • 4 cups unsweetened, protein-fortified flake or “Os” cereal I used Love Grown Food's Mighty Flakes
  • 4 cups unsweetened Chex type cereal
  • 2 tablespoons butter
  • 6 ounces mini marshmallows
  • 2/3 cup low fat caramal dip I used Litehouse Foods brand
Instructions
  1. Add banana chips and walnuts to medium bowl and lightly break up into coarse chunks with mallet or back of spoon.
  2. Add cereals to bowl with banana walnut mixture; toss to combine. Set aside. In large microwave-safe bowl, add marshmallows, caramel dip and butter. Microwave on 50% power for one minute, stir until creamy. Return to microwave and cook at 50% power for additional 1 minute; stir until creamy. If marshmallows aren’t completely incorporated, continue and stir in 20 second blasts.
  3. Add dry cereal mixture to caramel mixture and stir with spatula until everything well coated.
  4. Line 8” x 8” baking pan with wax paper or spray with oil.
  5. Press mixture down firmly into pan. Let cool for 5 minutes and then cut into 9 bars, or size of your preference.

Chocolate Covered Strawberry Banana Boats | Grilled Recipe #ConquerTheMess

Summer means sticky. There is just no way to avoid the heinous heat and humidity that comes with August in my part of Texas. Sticky, sticky, sticky, it can make a mother grouchy if she lets it! I keep my parental cool when summer temps and the kids’ tempers flare with a toolbox of tactics to chill out.  Yup, let’s stay in our bathing suits all day long, crank up the songs of summer, eat easy clean up desserts and, by all means, stay out of the kitchen (I’d hate to heat up the house)!

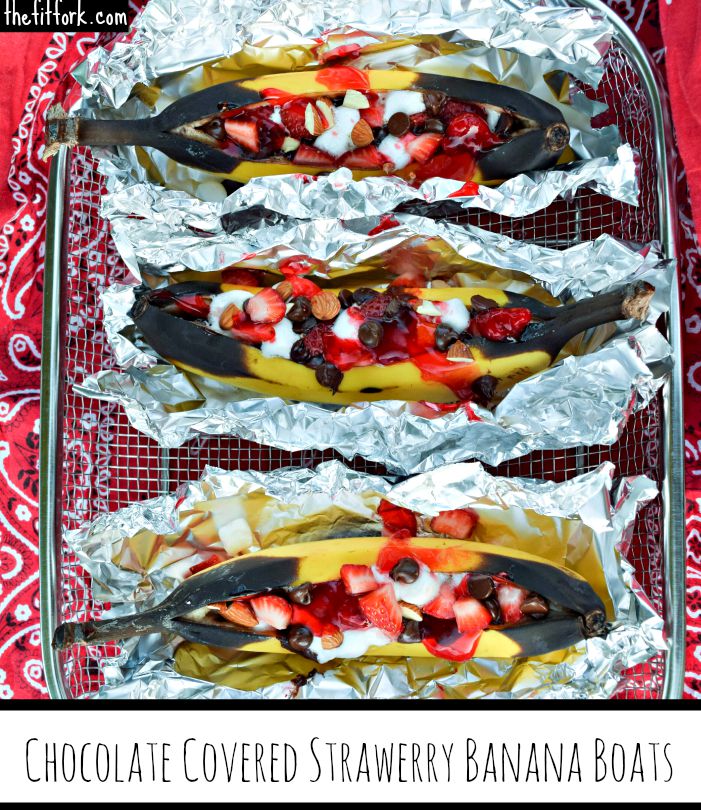
Chocolate Covered Strawberry Banana boats are an easy, foil-packet recipe that kids love for taste and moms love for easy clean up (and extra fruit as dessert)!My boys have been clamoring for chocolate chip cookies, but no way I’m turning on the oven!  Despite the heat, they want a summer treat that is warm and gooey – Chocolate Covered Strawberry Banana Boats are the solution.

jennifer fisher - grilled bananas - main photo option1The kids learned a version of this simple foil-packet dessert at Boy Scout camp in years past and we’ve created many versions at home, including this Raspberry Chocolate Banana Boat. So much for a mom to love about these easy desserts – it’s made on the grill, kids can make them on their own with parental supervision,  you’re sneaking in extra fruit to the diet, and there are no dishes to clean up as these treats roast in their own skins.

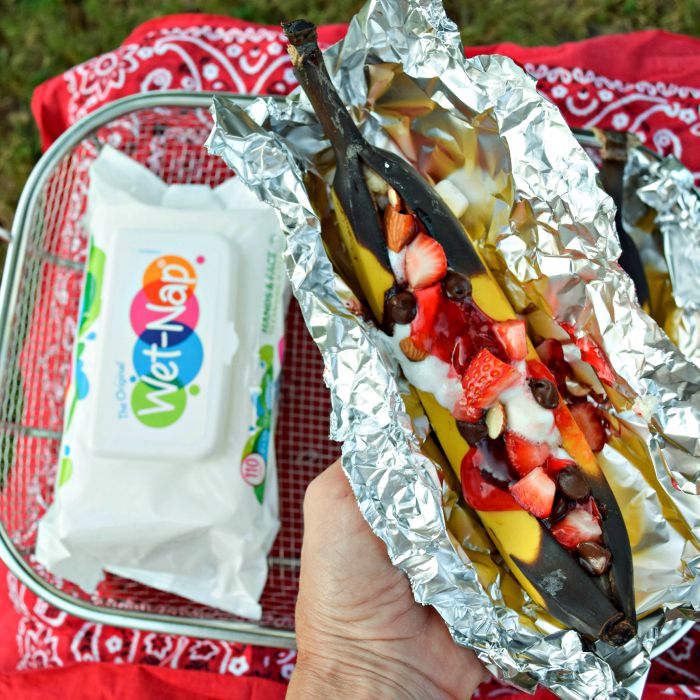
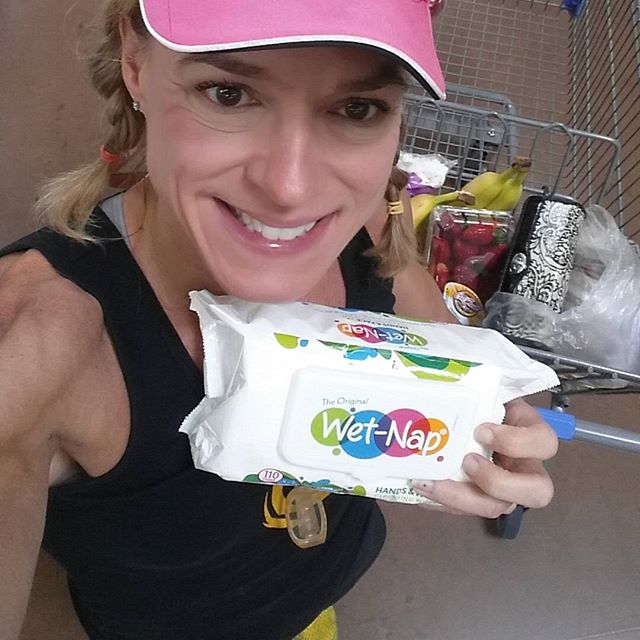
Chocolate Covered Strawberry Banana Boats and Wet Naps  go hand in hand!

The only clean up after diving face first into this ooey-gooey foil-packet dessert are messy mouths and sticky fingers. Yay,  Wet-Nap® Hands, Face, & Body Cleansing Wipes.  These wipes are one of the most multi-purposed, genius products of summer living. I started using Wet-Nap®  when the kids were toddlers, but now they’re teens – and just as messy! Safe on the face, body and hands, these wipes are awesome after stick recipes like the banana boats, but also a great way to refresh after running, working out and sitting in the fan stands watching the kids’ sports in sweltering heat. I keep a container in the car, my gym bag and purse!

Kids, Messy Desserts and Wet Naps


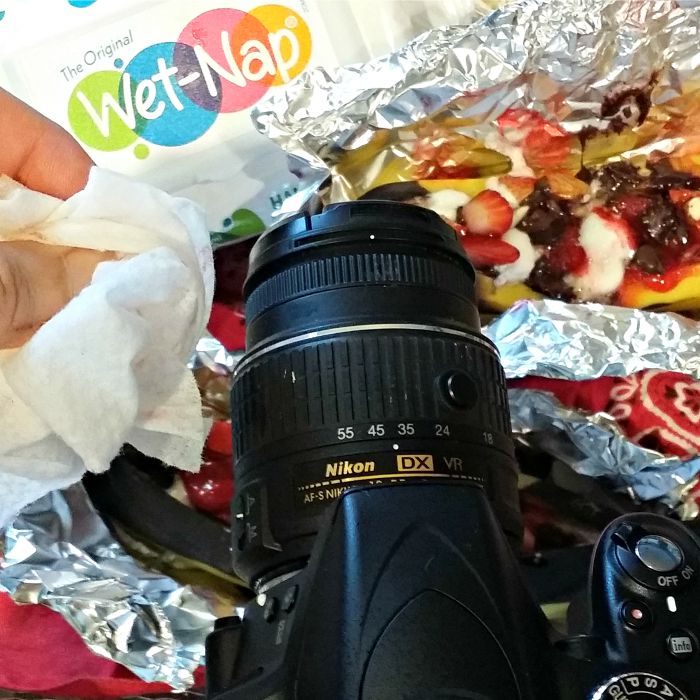
Wet-Nap® help tidy messes that life throws at us every day – this includes easy clean up desserts and easy clean up recipes and easy clean up crafts (just imaging the convenience for toddlers who like to finger paint). Also, as a food blogger, using Wet-Nap® products is a great way to keep my camera from getting too gunked up — snapping photos while food styling ALWAY make for messy buttons (don’t use on the lens, though)!Wet Naps are a must for a food blogger's camera!

I never forget to toss a pack of Wet-Nap® wipes into my cart on Walmart shopping trips. Visit Walmart for all your Wet-Nap® needs: 110-Count Hands, Face, & Body Cleansing Wipes, 24-Count Packettes Antibacterial Hand Wipes and 40-Count Canister Antibacterial Hand Wipes.

Shopping for Wet Naps at Walmart

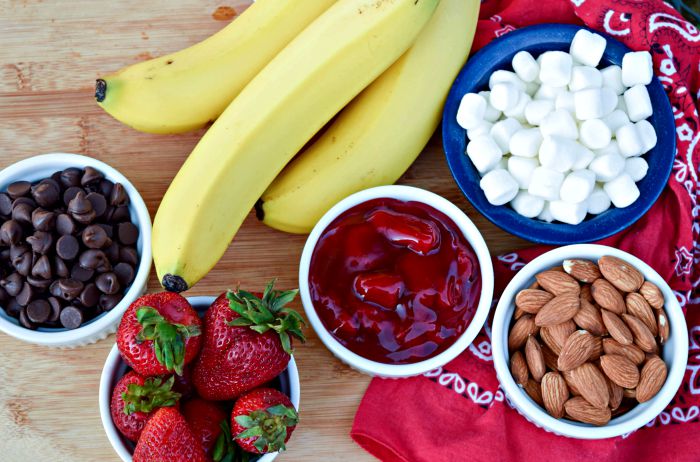
Chocolate Covered Strawberry Banana Boats ingredients

Oh, hello delicious ingredients in Chocolate Covered Strawberry Banana Boats!

Have you ever grilled a dessert?! What has your biggest mess been this summer? Please share in the comments below. XOXO – Jennifer

This post is part of a social shopper marketing insight campaign with Pollinate Media Group® and Wet-Nap®, but all my opinions are my own. #pmedia #ConquerTheMess http://my-disclosur.es/OBsstV

Chocolate Covered Strawberry Banana Boats
Prep Time
5 mins
Cook Time
10 mins
Total Time
15 mins
 
This grilled dessert is ooey-gooey delicious -- kids love the taste, moms love the easy clean up of this foil packet recipe (plus, sneaking extra fruit in for dessert)!
Course: Dessert, Fruit
Cuisine: American
Servings: 4 servings
Ingredients
  • 4 medium bananas medium-firm, not too ripe
  • 1/2 cuo]p mini marshmallows
  • 1/2 cup chopped strawberries
  • 1/2 cup chocolate chips
  • 1/2 cup strawberry glaze or syrup
  • 1/3 cup chopped raw almonds
Instructions
  1. Heat gas or charcoal grill to approximately 400°F or use a wire rack over campfire.
  2. Cut 4 (1-foot) sheets of heavy-duty foil, set aside.
  3. Using a sharp knife, make a deep incision lengthwise along the top curve of each banana; take care not to cut through the bottom peel. Gently push both banana ends toward each other to create a pocket. Place banana on the center diagonal of tin foil.
  4. Stuff each banana with approximately 2 tablespoons each of marshmallows, chopped strawberries and chocolate chips.
  5. Pull up corners of tin foil to create a tent over the top of banana, leaving a few inches of headroom so marshmallows won’t melt all over the foil.
  6. Place banana packets on heat source, close lid and cook for approximately 10 minutes or until marshmallows are softened.
  7. Carefully remove banana packets and open foil. Banana skins may have turned brown; however, this does not affect taste. Drizzle each banana with warmed strawberry glaze and sprinkle with almonds. Eat warm.

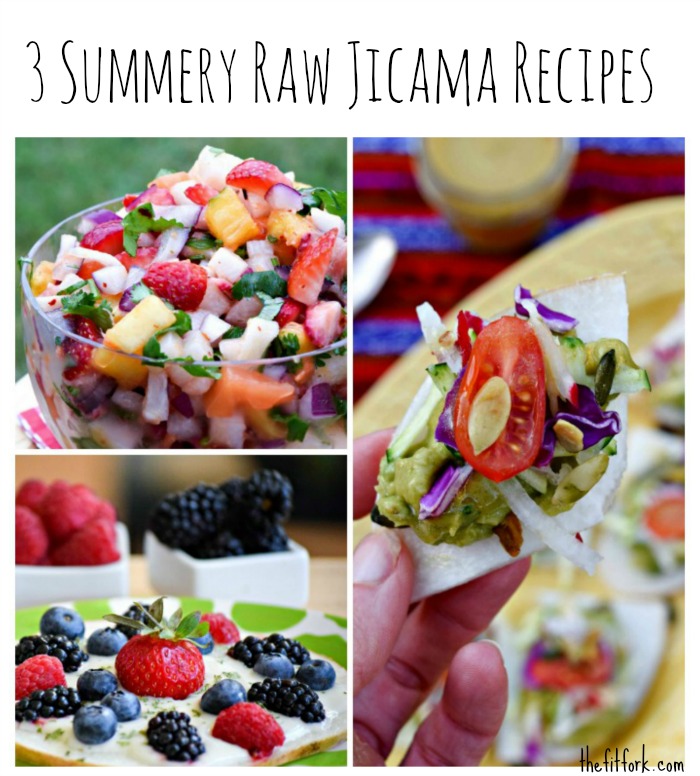
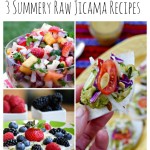
3 No-Cook Summer Jicama Recipes + More Yum

Jicama is a root vegetable that tastes a bit like a mild apple. It doesn't oxidize when cut -- the perfect crunchy ingredient for salads and summer no-cook recipes.

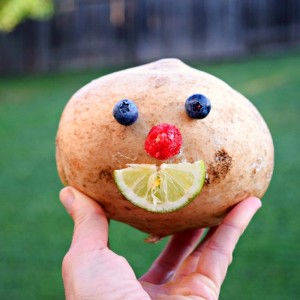
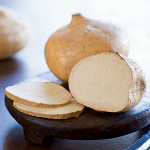
Mister Jicama Head

Mr. Jicama Head!

Have you ever tried jicama? It’s not the prettiest pick in the produce section (in fact, you’ve probably buzzed right by it), but it’s certainly a cool and crispy addition to no-cook summer recipes. Jicama is an edible root from Mexico that resembles a cross between a potato and turnip. Jicama has a thin brown skin that is easily removable with a vegetable peeler and the white flesh inside is crispy, crunchy and very mildly sweet – some say it reminds them slightly of pear or apple mixed with a water chestnut texture. But, unlike pears and apples, a convenient thing about this root is that it doesn’t oxidize when cut open and exposed to air – which means you can prep your dishes well in advance and not worry about the vegetable turning brown.

Another perk of jicama is that it’s pretty darn inexpensive and for just a few bucks you can get one big enough to make several recipes. Or, just cut raw jicama up into sticks and eat like celery sticks with your favorite sweet or savory dip!  Some sweet dips I love to use with jicama are Opadipity By Litehouse Foods Sweet Greek Yogurt Dips  — three flavors including Cheesecake, Strawberry Delight and Vanilla Almond.  Lower in calorie and higher in protein that similar products you’ll find at the store – plus, everything is free of preservatives and high fructose corn syrup.

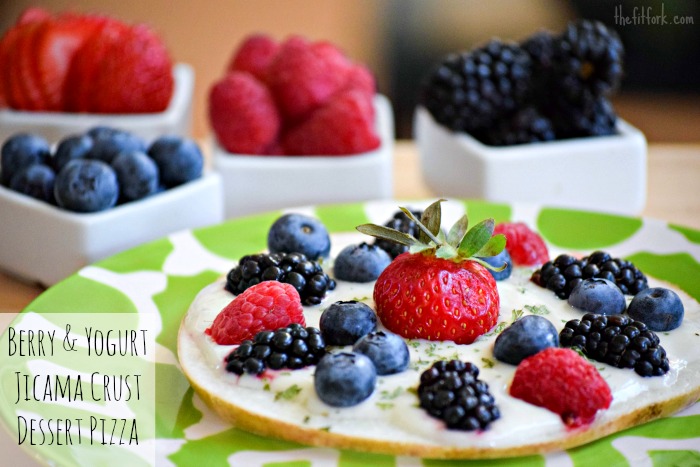
Berry and Yogurt Jicama Crust Pizza makes a healthy choice for your summer dessert!

Berry  & Yogurt Jicama Crust Dessert Pizza – Perfect for when you need something sweet but are being mindful of your diet. This healthy dessert recipe was first shared on the Living Litehouse Blog, check it out!

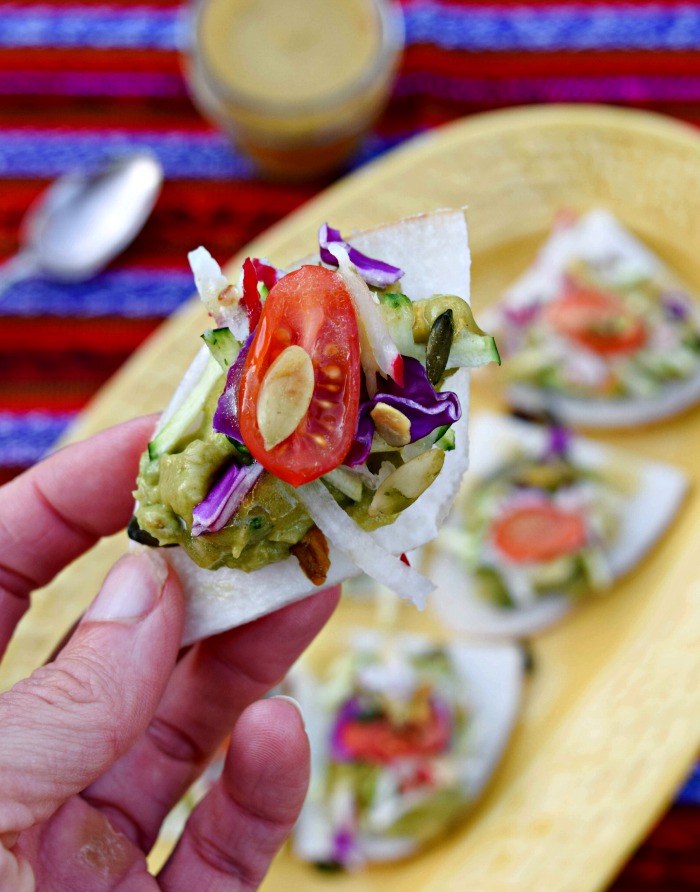
Raw Jicima Nachos make a vegan swap for the traditional recipe.

Raw Vegan Jicama Nachos – A meatless, non-dairy take on the quintessential patio happy hour food! Another bonus of this healthy appetizer recipe is that no cooking is required!

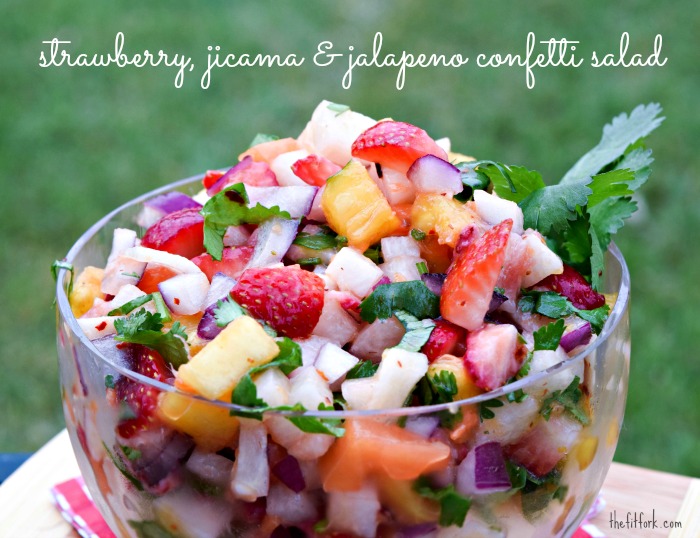
Strawberry, Jicama and Jalapeno Confetti Salad is so colorful and healthy!

Jicama Jalapeno Confetti Fruit Salad – This delicious bowl of fruit and jicama is the definition of eating a rainbow! Kicked up with jalapeno, the jicama adds a crisp crunch to all the best fruits of the summer season.

JicamaCheck out Cooking Light for more healthy recipe ideas using jicama — I think this vegetable is going to become one of your new favorites! You’ll also find great tips on how to pick out this root vegetable at the market and how to best store and prep it at home.


Arm Balance Yoga

I’ve been working on my yoga practice – I try to do a little bit each day to improve my runner-impaired hip and hamstring mobility (some of the simplest moves are the hardest for me)!  I have lots of fun trying some of the arm balances – they use so much concentration, strength and balance. I’m just waiting to break my face on some of the crash landings!


Are you a fan of jicama?  Do you have any favorite jicama recipes?

What is a new fitness-related thing you’ve tried lately?

Berry & Yogurt Jicama Crust Dessert Pizza
Prep Time
10 mins
Total Time
10 mins
 
Indulge your sweet tooth with this healthy option for a light summer dessert.
Course: Appetizer, Salad, Snack, Vegetable
Cuisine: American, Southwestern
Servings: 4 people
Ingredients
  • 1 6" diameter jicama sliced into 1/3" thick rounds (there will be leftover)
  • 1/2 pint fresh blueberries
  • 1/2 pint fresh blackberries
  • 1/2 pint fresh raspberries
  • 8 strawberries
  • 8 ounces plain Greek yogurt can substitute Litehouse Food's Opadipity Greek Yogurt Dip -Cheesecake or Vanilla
  • stevia to taste
  • 1 tablespoon fresh mint, chopped or substitute Instantly Fresh brand mint
Instructions
  1. Slice jicama into 1/3" rounds. Rinse berries, set aside to dry.
  2. Mix greek yogurt with stevia to achieve desired sweetness. Spread evenly over tops of jicama rounds.
  3. Top Greek yogurt with berries as desired and sprinkle with fresh mint.

Kickstart Morning with Coconut Chai Smoothie Bowl

This post is sponsored by Almond Breeze Almondmilk.

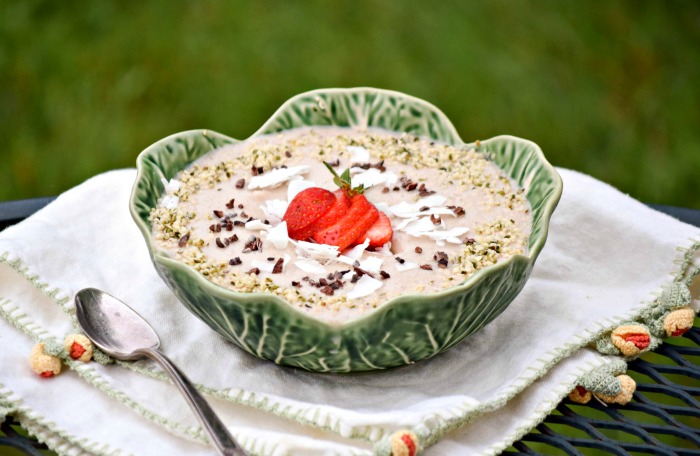
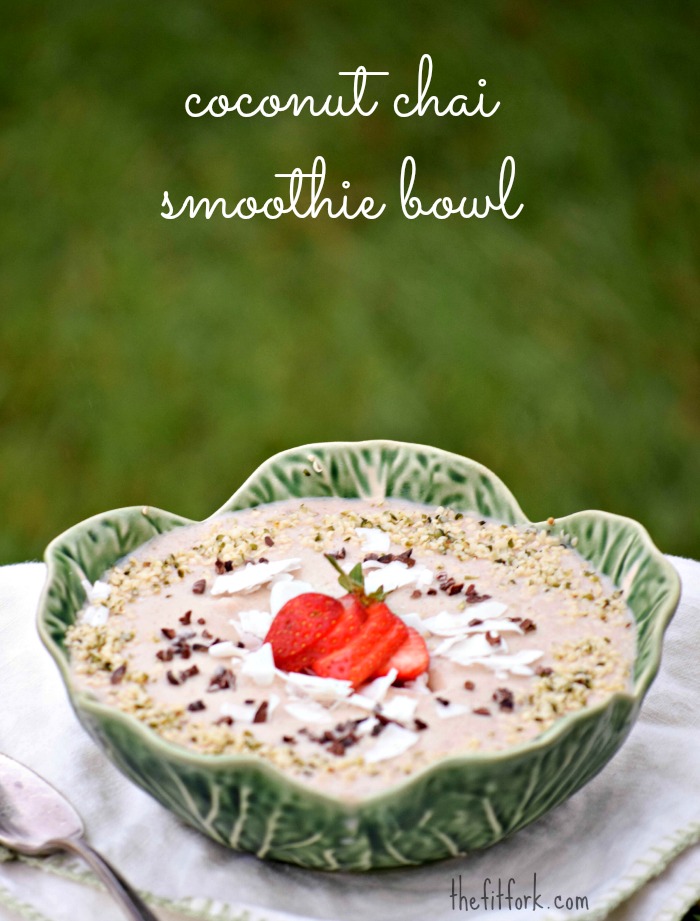
Coconut Chai Smoothie Bowl makes a healthy breakfast or dessert  dressed up with cacao nibs, hemp seeds and strawberries.

Slurping your smoothie from a straw is so last year. The tastiest trend in town is to “eat” your smoothie in a bowl with a spoon! Not only do chains like Jamba Juice offer these frozen, fruity and fiberous concoctions but smoothie bowls are blowing up social media – just search the hashtag #smoothiebowl and you’ll get over 85K results.

One of the benefits of smoothie bowls (other than getting a ton of nutrition in one easy-to-make meal) is the artistic license. I don’t know about you, but I really enjoy make my food pretty – Mother Nature has given us so many colorful and amazingly delicious ingredients to work with. Instead of throwing all your smoothie goodies into the blender, the key to a smoothie bowl is to make a thick base smoothie and then add the remainder of your fruits, whole grains, seeds and such to the top.

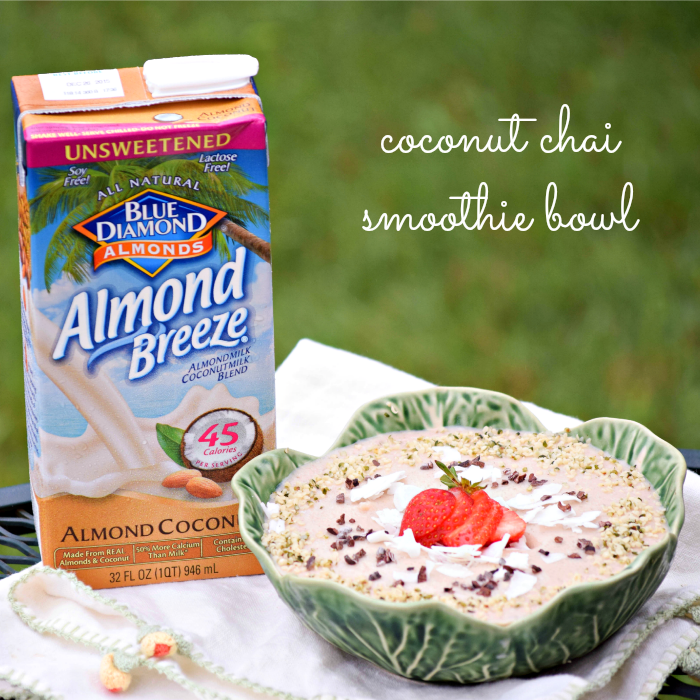
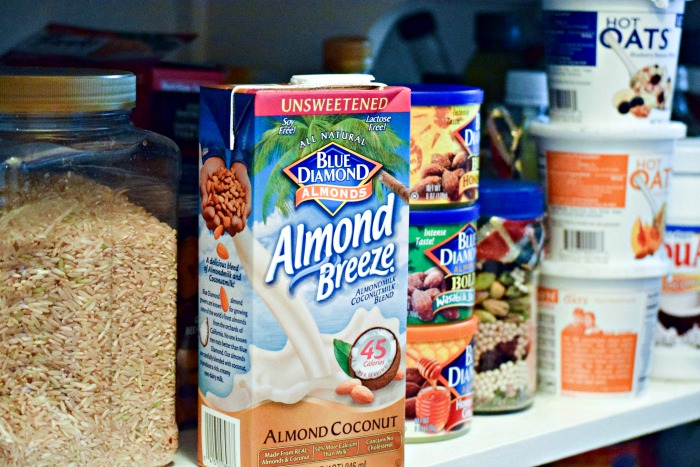
Almond Coconut Milk from Almond Breeze makes a healthy, creamy base for your smoothie bowls and blended beverages.

Unsweetened Almond Coconut Milk from Almond Breeze creates a creamy base for any smoothie bowl or blended beverage. Made from real almonds and coconutmilk, this alternative to diary milk contains medium chain fatty acids; is lactose, soy and gluten-free; is an excellent source of calcium; and works with vegan and kosher diets. I also love how it has no added sugar and only 45 calories per one-cup serving.  Another great thing – Unsweetened Almond Coconut Milk from Almond Breeze is available in a shelf-stable version which means that I can keep my pantry stocked for last-minute meal making.

I appreciate how I can keep shelf-stable Almond Breeze in the pantry, on hand for when cravings strike!

I appreciate how I can keep shelf-stable Almond Breeze in the pantry, on hand for when cravings strike!

If you love the exotic spices of cha (like cardamom, cinnamon, star anise, cloves and more), but need something more than just of a cup of tea in the morning, by Coconut Chai Smoothie Bowl is the perfect way to get your crave on while kick-starting the day with a little caffeine. I topped my bowl with hemp seeds, cacao nibs and strawberries, but feel free to beautify your bowl any way you see fit.

Coconut Chia Smoothie Bowl makes a quick, easy and healthy breakfast or post-workout snack.

In addition to breakfast, I’ve been digging into Coconut Chai Smoothie Bowls for a post-workout snack and healthy dessert after dinner – use decaff tea instead. Don’t forget to look for Unsweetened Almond Coconut Milk, it’s one of my favorites from all the yummy Almond Breeze products — the shelf-stable versions are usually on the cereal aisle.


What is your must-have ingredient in a smoothie or smoothie bowl? Let me know in the comments!

Coconut Chai Smoothie Bowl
Prep Time
10 mins
Total Time
10 mins
 
Coconut Chia Smoothie Bowl is a tasty way to get your crave on while kick-starting the day with a little caffeine, fruit, protein and fiber. Go breakfast!
Course: Breakfast, Dessert, Smoothies, Snack
Cuisine: American
Servings: 1 serving
Ingredients
  • 1 1/2 cups Almond Breeze Unsweetened Almond Coconut Milk divided
  • 1 tea bag chai tea
  • 1/2 large banana frozen
  • 2 packets stevia if desired
  • 1 cup ice more or less, depending on consistency
  • 1 tablespoon raw shelled hemp seed
  • 1 tablespoon cacao nibs
  • 1 tablespoon unsweetened flaked coconut
  • 1 large strawberry sliced
Instructions
  1. Heat half milk (3/4) cup in microwave safe mug for 1 1/2 - 2 minutes, until very hot. Add tea bag and steep for 5 minutes.
  2. Remove and discard tea bag and add remaining milk to help cool off tea. Put in freezer for 15 minutes to cool down further, if needed.
  3. Add cooled tea-milk mixture to blender. Add frozen banana, stevia and ice and blend until smooth. Add more ice or banana to make thicker, if needed. Pour into bowl.
  4. Top with hemp seed, coconut, cacao nibs and strawberries. Eat immediately.

Candied Meyer Lemon Cake with Blackberries – Paleo and Gluten Free Recipe

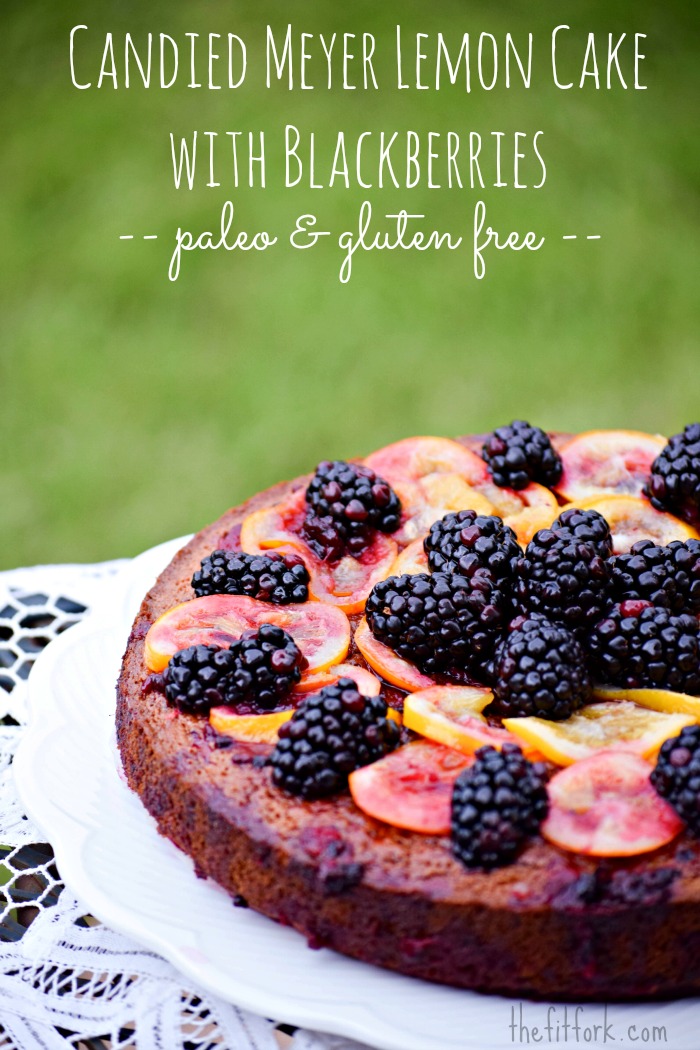
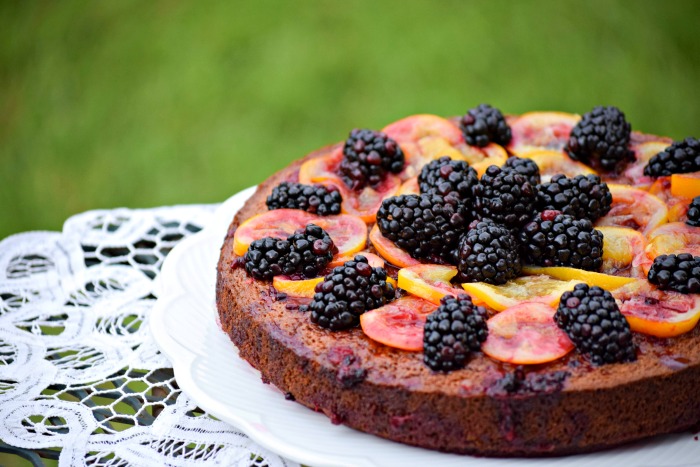
Candied Meyer Lemon Cake with Blackberries - Paleo

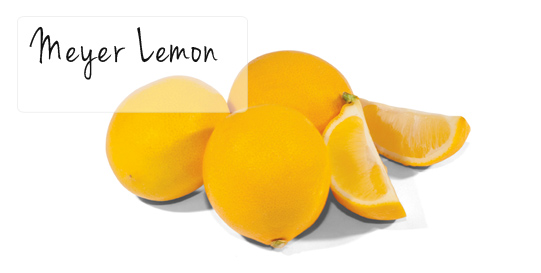
I never paid much attention to Meyer lemons until recently – I mean a lemon is a lemon is a lemon, right?!  Well, come to find out, not all lemons are created equally. The Meyer lemon is a soft-skinned citrus fruit that looks a lot like a 10-cent lemon, but actually tastes like sweet million bucks.  That’s because the Meyer lemon is actually a lemon crossed with an orange, taking some of the acidic bite. Even though Meyer lemons are more fragrant and sweeter, they’re still a bit tart and better balanced in a recipe.

Meyer Lemon

I got my Meyer Lemons from Friedas.com!

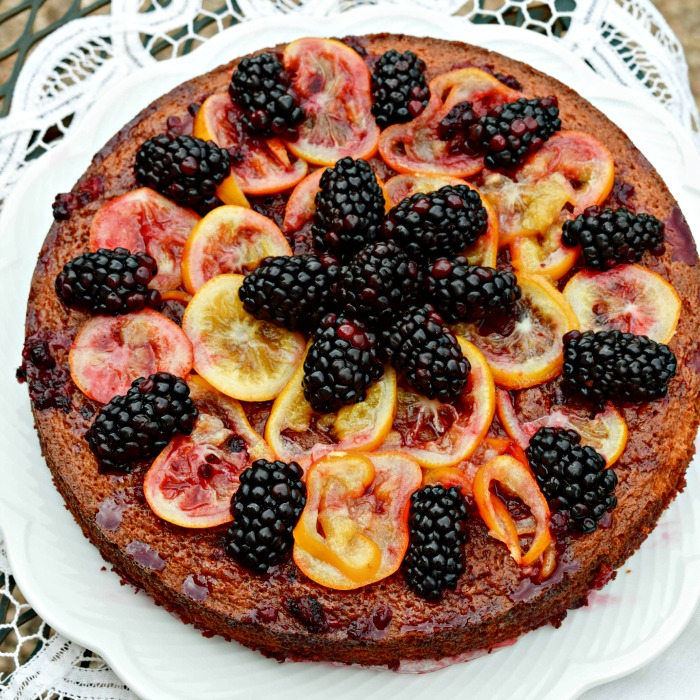
Paleo Blackberry Lemon Cake - TheFitFork.comUse the perfect pucker of Meyer lemons in cocktails, with chicken piccata, in salad dressing, to make a sweeter lemon curd, or alongside fish and seafood – or even better, use them to make my delicious Candied Meyer Lemon Honey Cake with Blackberries (it’s also Gluten-Free). I was inspired by a lemon cake recipe I saw in the Food Network Magazine, but of course I tinkered with it to make it my own! I made this cake to take to Easter dinner at my Aunt’s house — it’s just bursting with spring flavor and a beautiful sight to behold.She’s going to love it.

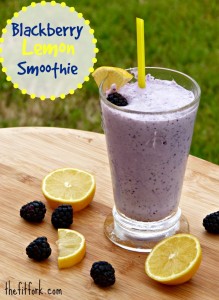
berry lemon smoothieBy the way, if you don’t have time for cake-making, you can get a quick fix with my Blackberry Lemon Smoothie.


Notes about the recipe:

  1. If you are unable to get your eggs to the glossy peak stage, don’t worry the cake will still taste just as delicious (it just won’t be quite as fluffy – it’s a denser cake anyway).
  2. Do not skip the steps of simmering and draining the lemon slices three times. It seems redundant, but you are boiling off the bitterness from the pith and acid from the lemon flesh.  The result is lemon peel that is delightfully tender, edible and yummy.
  3. Feel free to swap out raspberries for the blackberries in the syrup and garnish.

Blackberry Lemon Cake

Candied Meyer Lemon Honey Cake with Blackberries
Prep Time
15 mins
Cook Time
50 mins
Total Time
1 hr 5 mins
 
This gluten-free dessert recipe is bursting with flavor - lemons and blackberries make perfect for Easter, graduation and other spring celebrations
Course: Dessert
Cuisine: American
Servings: 8 servings
Ingredients
  • 1/2 cup coconut oil
  • 1 3/4 cup almond flour (meal)
  • 1/3 cup coconut flour
  • 1 1/2 cups palm sugar divided
  • 2/3 cup honey
  • 4 large Meyer lemons or regular lemons will do
  • 1 teaspoon pure vanilla extract (zest 2 lemons and squeeze juice / slice other 2 lemons very thinly)
  • 6 large eggs (divided separately into 4 yolks (discard 2 yolks) and 6 egg whites
  • 1 pint blackberries divided
Instructions
  1. Pre-heat oven to 325 F degrees. Line bottom of 9-inch springform pan with parchment paper and spray top of paper and sides of pan with coconut oil cooking spray (or just rub with coconut oil).
  2. In medium bowl, whisk together almond flour, coconut flour and salt in medium bowl. Set aside.
  3. In a large bowl, add ½ cup sugar, 1/3 cup honey, zest from 2 lemons, 4 egg yolks, vanilla and olive oil. With mixer on medium, beat for 2 – 3 minutes until smooth and creamy.
  4. With mixer on low, slowly add almond flour mixture to egg mixture bowl, beating until just combined (don’t over beat).
  5. In a clean bowl, add 6 egg whites that are at room temperature. With mixer on medium, beat for approximately 1 minute or until foamy. Add in ½ cup sugar and beat on medium-high for another 3 minutes or until glossy peaks have formed.
  6. Scrape ½ of egg white peaks into almond meal and gently incorporate by hand with spatula. Add the remainder of egg whites and stir until mostly combined.
  7. While cake is baking, make candied lemons by adding 2 thinly sliced and seeded lemons to small saucepan and cover with water. Bring to a boil and reduce heat to simmer for 3 minutes. After 3 minutes, drain water and refill with fresh water on lemons. Simmer for another 3 minutes. Repeat this process a 3rd time to remove bitterness from pith.
  8. After lemon slices have been simmered and drained 3 times, add 1 cup of fresh water, remaining ½ cup sugar, remaining 1/3 cup honey and the juice from 2 lemons. Bring to a boil over high heat and then reduce to medium and simmer for 20 minutes, stirring occasionally.
  9. Use a fork to transfer lemons to plate and let cool. Keep lemon syrup in saucepan and add 1/2 of blackberries. Simmer over medium for an additional 10 minutes, mashing up blackberries with fork.
  10. Remove cake from springform pan, using a knife to loosen sides before unlatching. Transfer cake to serving platter and brush top of cake with blackberry syrup. Top cake with candied lemon slices, fresh blackberries and drizzle with remaining blackberry syrup (or reserve leftover syrup for another use).
Recipe Notes
  1. If you are unable to get your eggs to the glossy peak stage, don’t worry the cake will still taste just as delicious (it just won’t be quite as fluffy – it’s a denser cake anyway).
  2. Do not skip the steps of simmering and draining the lemon slices three times. It seems redundant, but you are boiling off the bitterness from the pith and acid from the lemon flesh.  The result is lemon peel that is delightfully tender, edible and yummy.
  3. Feel free to swap out raspberries for the blackberries in the syrup and garnish.