BBQ Shrimp Kebabs with Pineapple & Kumquats – Foodie Flag Flying for July 4th

July 4th festivities will be firing up through the week . . .and I bet your grill is too! It’s no coincidence that July is National Grilling Month considering 200 million Americans own a grill and 72% plan to put a gas or charcoal grill to use on Independence Day (HBPA data). Personally, I enjoy the freedom from cooking in the kitchen and, while it’s traditional to throw down some burgers, dogs or steaks on the grates, my recipe for Sticky-Sweet Shrimp, Pineapple & Kumquat Kebabs gives you the liberty to let your creative food flag fly.
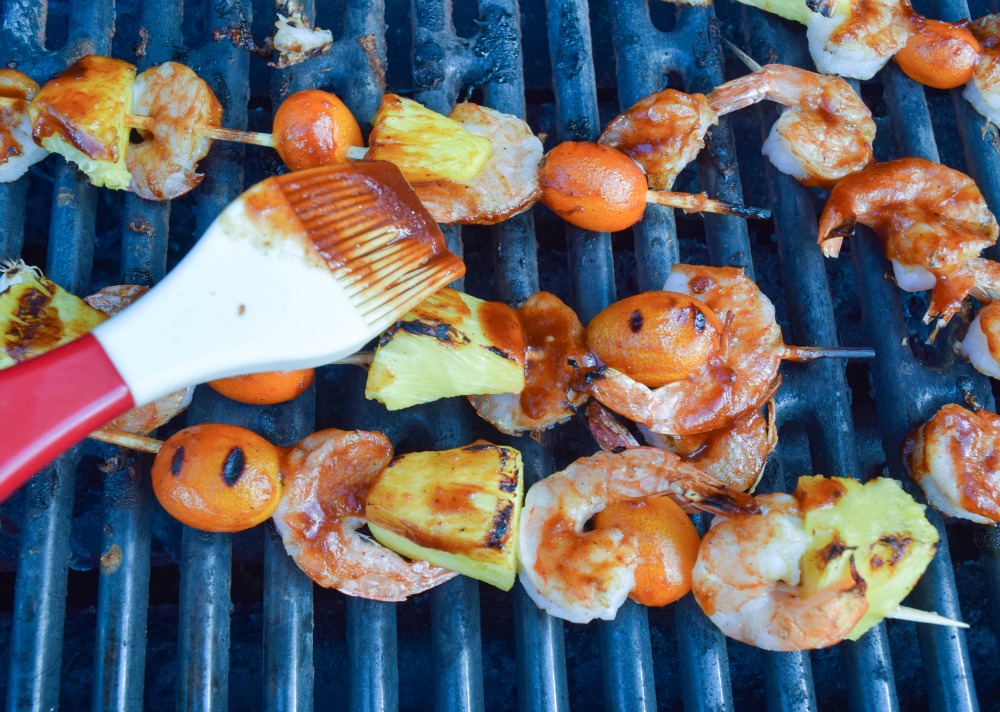
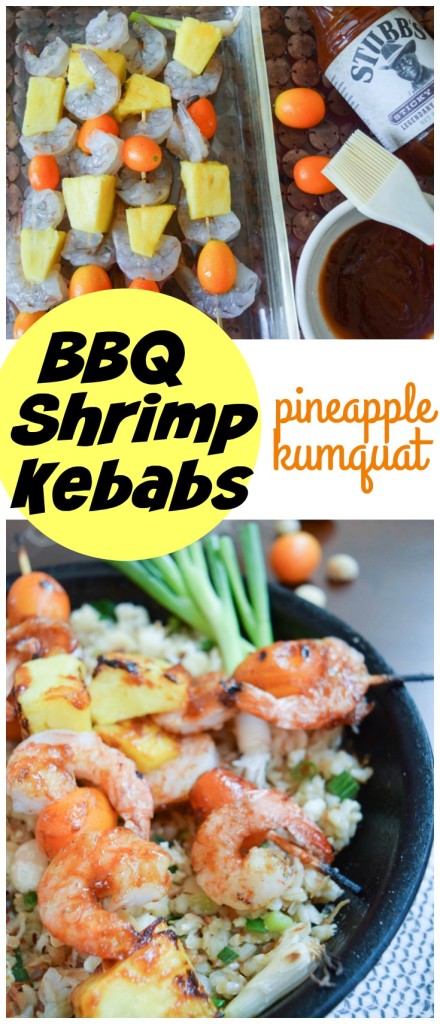
Pineapple Kumquat BBQ Shrimp Kebabs are a quick and easy grilled dinner solution with loads of flavor!

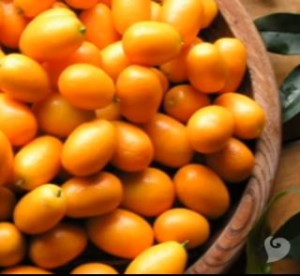
kumquatsWhile I’ve skewered up shrimp, pineapple and kumquats, it’s your inalienable, edible right to use the proteins, fruit and veggies you like best on a kabob.  However, I highly recommend the kumquats, grilling makes them even more fabulous. However, in the USA, this fruit (that is like a mini orange with edible skin) is in season from November through July – so hurry up and grill some! If you can’t find kumquats, you can substitute orange wedges.

Nutritional and Health Benefits of Kumquats: 

According to the USDA National Nutrient Database, a serving of eight whole raw kumquats (including peel) has 108 calories. This same serving size is an excellent source of dietary fiber, providing 9.9 grams — more than 25% of the Daily Value for men, and nearly 40% for women. Kumquats are also a great course of Vitamin C, Vitamin A, riboflavin and even calcium (providing almost 10% of the adult daily needs).

Fiber

A diet high in dietary fiber is beneficial to the health of your heart and gastrointestinal tract. Eight raw kumquats provide 9.9 g of dietary fiber. The amount of fiber recommended daily by the Institute of Medicine is 25 g for women and 38 g for men. Dietary fiber also controls blood glucose and insulin concentrations and reduces the risk of developing Type 2 diabetes.

Vitamin C

Vitamin C is an important antioxidant and is necessary for the health of blood vessels, tendons, ligaments and bones. According to the USDA, eight raw kumquats have 66.7 mg of vitamin C. The National Institute of Health has set the daily recommended amount at 75 mg for women and 90 mg for men. Adequate vitamin C is also necessary for proper wound healing.

Vitamin A

Vitamin A is a fat-soluble vitamin that promotes vision and is necessary for the health of teeth, skeletal tissue and skin. Eight raw kumquats have 441 IU of vitamin A. According to the Institute of Medicine, men need 3,000 IU of vitamin A daily and women need 2,333 IU. Vitamin A also functions as an antioxidant, protecting your body from free radical damage.

Riboflavin

Kumquats provide the B vitamin, riboflavin, which is a component of various enzymes involved in energy metabolism. Eight kumquats provide 0.137 mg of riboflavin. The daily amount of riboflavin recommended by the National Institute of Medicine is 1.1 mg for women and 1.3 mg for men.

Calcium

Calcium is essential for nerve transmission, muscle contraction and for formation of teeth and bones. The USDA National Nutrient Database shows that eight kumquats have 94 mg of calcium. The Institute of Medicine recommends adults consume 1,000 mg of calcium daily.

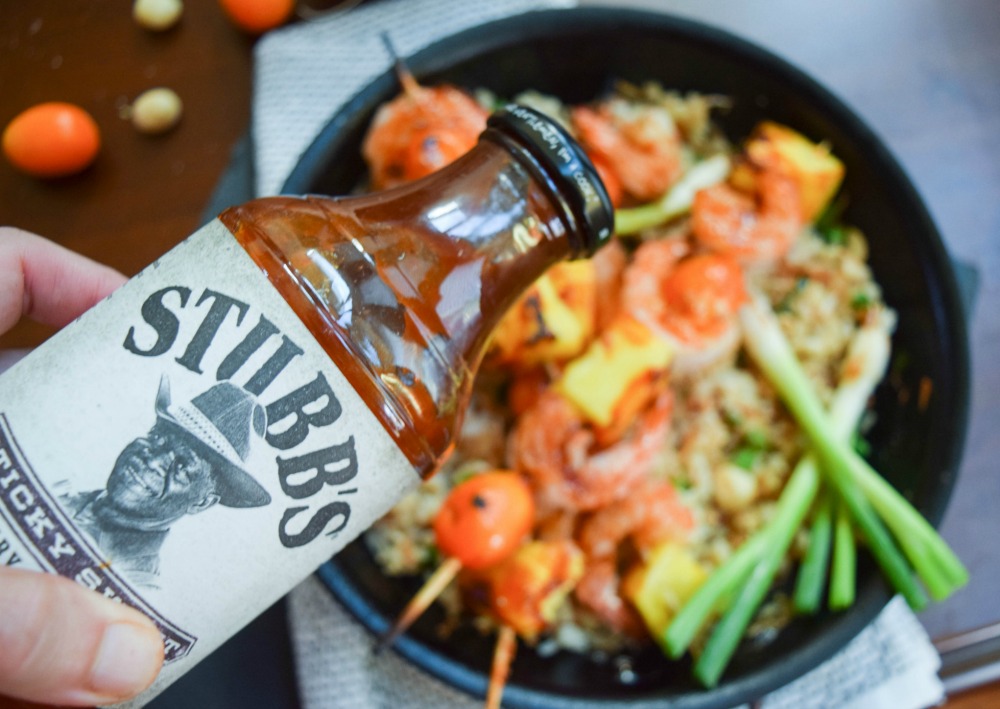
stubb's sticky sweet bbq sauce on shrimp kebabs

The little secret that pulls this super easy kabob recipe together is brushing on Stubb’s Sticky Sweet Bar-B-Q Sauce – seriously, why you make your own barbeque sauce when you can buy Stubb’s Legendary Bar-B-Q sauce (available in six different flavors) down at your local market?! The Sticky Sweet Bar-B-Q Sauce is my current infatuation of the moment – it’s got real southern flair, is rich and thick and loaded with brown sugar and gooey molasses.  Plus, I really appreciate how this product and the other sauces, marinades and rubs make it easy to add flavor to a meal while avoiding the fat, calories, or artificial flavors, sweeteners, colors or preservatives often found on the condiment aisle.

stubb's sticky sweet bbq sauce on shrimp kebabs

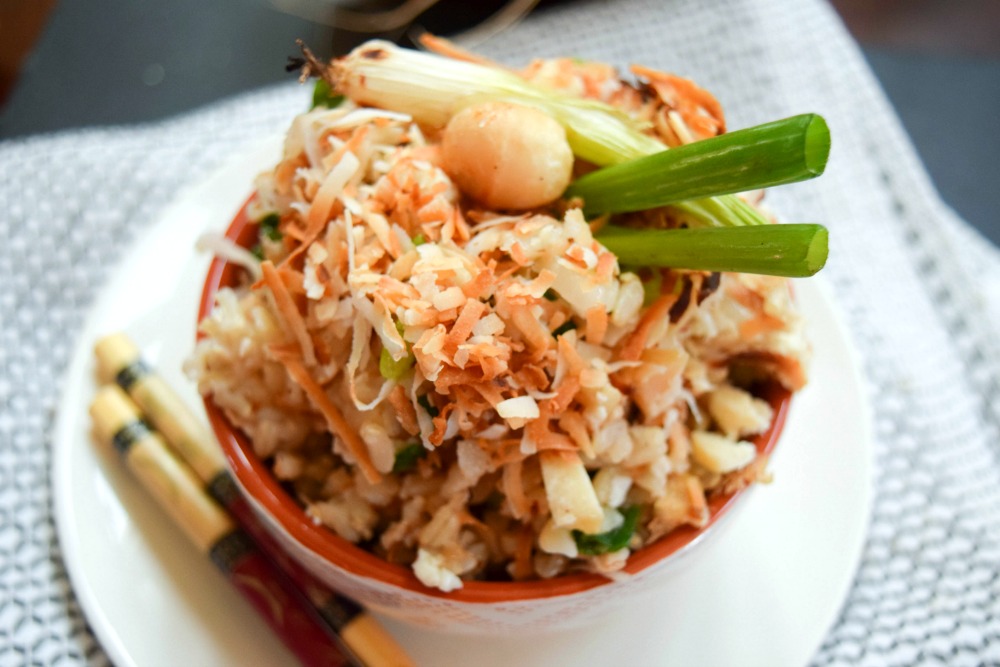
Looking for a side dish to serve with this tropical take on BBQ skewers? My recipe for Coconut Macadamia Fried Rice makes a pleasing pair-up – it’s been a frequently requested dinner on it’s own at my house.

Coconut Macadamia Nut Fried Rice


Cooler of Frozen Sizzlefish

As far as selecting your shrimp, you can grab a bag from the market, but I prefer to get mine from SizzleFish.com because I really trust their commitment to bringing me a responsibly sourced, perfectly-portioned seafood products with no additives or yucky stuff. additives – plus all their products are healthy, high-quality perfectly portioned and have an athlete’s lifestyle in mind! From these shrimp to Coho salmon to halibut and more, their products are vacuum-sealed in individual serving size packets, nestled in dry ice and shipped straight to my door for ultra convenience — I always have a lean protein on hand in the freeer to make a quick and easy dinner!

Get the recipe for Coconut Macadamia Nut Fried Rice here!

What are you grilling for the 4th of July weekend?  Have you ever had a kumquat? Do you like a spicy, sweet or vinegary BBQ sauce? Please share in the comments – XOXO, Jennifer    

BBQ Shrimp Kebabs with Pineapple & Kumquats
Prep Time
10 mins
Cook Time
10 mins
Total Time
20 mins
 
1 lb jumbo shrimp with tails on, peeled and deveined (approximately 24 shrimp) 2 cup fresh pineapple chunks 24 kumquats (or orange slices/ wedges with peel on) 1 cup Stubbs BBQ Sauce Sweet & Sticky flavor (divided equally into 2 bowls) Garnish, toasted unsweetened coconut
Course: Fruit, Main Dish
Cuisine: Asian, Caribbean
Servings: 4 servings
Ingredients
  • 1 pound jumbo shrimp,, peeled and deveined (approximately 24 shrimp) I use 4 individual packs of wild gulf shrimp from Sizzlefish.com
  • 2 cups fresh pineapple chunks
  • 24 kumquats (or orange slices)
  • 1 cup Sweet BBQ Sauce (divided 1/2 cup & 1/2 cup) I used Stubb's Sticky Sweet Bar-B-Q Sauce
Instructions
  1. Use 8 metal skewers or soak 8 bamboo sticks in water for 10 minutes. .
  2. On each skewer, thread on 3 shrimp, 3 pineapple chunks and 3 kumquats in alternating pattern.
  3. Place skewers on grill heated to approximately 400 F degrees, cook for approximately 2 minutes, brush sides with bbq sauce and then grill for 1 additional minute.
  4. Flip skewers, brush with additional bbq sauce and cook for approximately 2 more minutes or until shrimp are pink and no longer translucent.
  5. Discard bbq sauce used for brushing on shrimp. Sprinkle kebobs with coconut and serve with rice and remaining ½ cup bbq sauce for dipping or drizzling.

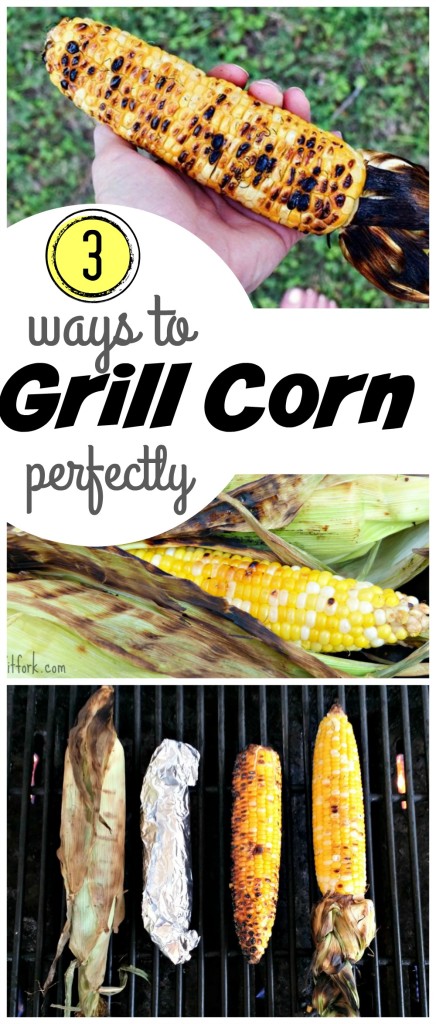
3 Ways to Grill Corn Perfectly this Summer

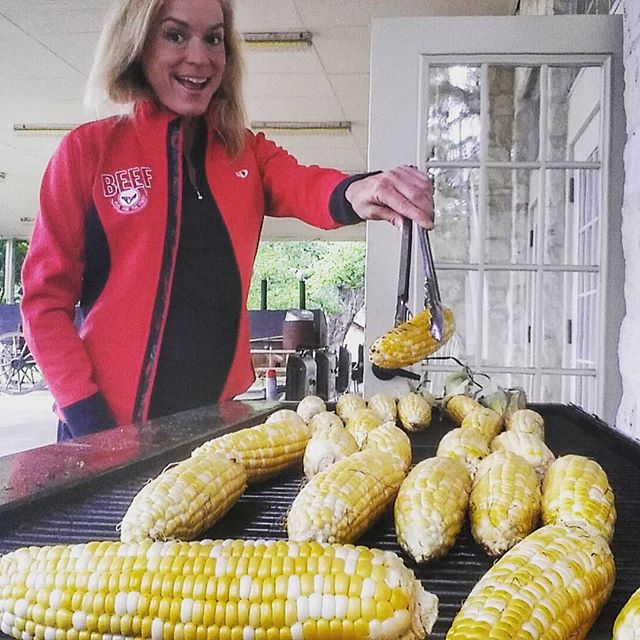
Raise your hand if you can’t resist corn on the cob !  Not only is this vegetable fun to eat, it’s usually super cheap in the summer season – I just bought a dozen plump, juicy organic ones at Whole Foods for $3 total! Making corn on the cob on the grill is super easy; it’s a must-have at our house for backyard barbecues and casual entertaining. You know it’s on my menu for all the big summer celebrations including Memorial Day, the Fourth of July and our big family reunion!    jennifer grilling cornThere are three main ways to cook a whole ear of corn on the grill, and I’m going to run you through them. But, first, you’ll want to find the freshest corn possible for the yummiest result. Corn sugars undergo enzymatic reactions after ears are picked, slowly converting into less tasty, mealy starches. So, the fresher the corn, the sweeter – all the more reason to make friends with your local farmers.

3 Ways to Grill Corn Perfectly -- the perfect side dish to any backyard BBQ or summer celebration!

Method 1 – Cook Corn in Husk

 Grilling an ear of corn in the husk is so simple and mess-free – the end part of the cob serves as a handle as your peel back the husk dig into the steamed kernels. Notice how I said “steamed” – that’s because this method actually uses water from all the parts of the corn to steam it into tenderness – the grill just serves as the heat source. If the corn is fresh, it won’t need a pre-soak in water. However, if the husk looks a bit dried out, soak the entire ear of corn in water for about 10 minutes before grilling.

How to: Simply place corn directly on the coals or grates of your grill or campfire (heated to about 400F degrees) and cook for approximately 10 to 15 minutes until tender (peel back husk if needed). The outside will be blackened, but inside it’s pure perfection. Peel back the husks; remove the silks and butter and season to your preferences. If you want to get fancy, you peel back husks without taking completely off, remove silks, butter and season and then pull back up the husks before grilling. But, I think this makes it too complicated (and the butter tends to drip out!)

Method 2 – Foil-wrapped

Grilling your corn wrapped in foil is a handy-dandy way to prepare it if you don’t want family and friends to be dealing with charred, messy husks. Again, you are actually steaming it with this method.  Plus, you can easily oil, butter or season your corn before cooking and the toppings won’t drip out . . . and you don’t have to deal with mess and logistics of setting out these perishable condiments if you have a large crowd.

How to: Shuck corn toss away silks and husk. Wrap the corn in heavy duty aluminum foil, with or without flavorings like butter, herbs, salt, pepper, grated cheeses, etc.  Grill right on top of hot coals, or on a grill grate set, turning a few times, about 10 – 15 minutes

Method – Naked

This is my favorite way to prepare corn on the grill because I like the nutty, smoked flavor that a bit of charring on the kernels brings. However, this method is not “steaming” like the other ways to grill corn, so the final result is not quite as juicy and, it can’t be cooked directly on coals. But, I feel like this is how we do it down here in Texas and it tastes so good — yeehaw!

How to: Pull back husks and remove completely or braid and tie off for a decorative effect. Pull away most of the silks – the remaining will burn away on the grill! Cook corn over a medium-hot grill (about 400F degrees) for about 10 to 15 minutes, rotating frequently to prevent burning and encourage all-over light charring. In the last few minutes you can brush with a flavored olive oil and sprinkle with herbs or do that while still warm before serving.

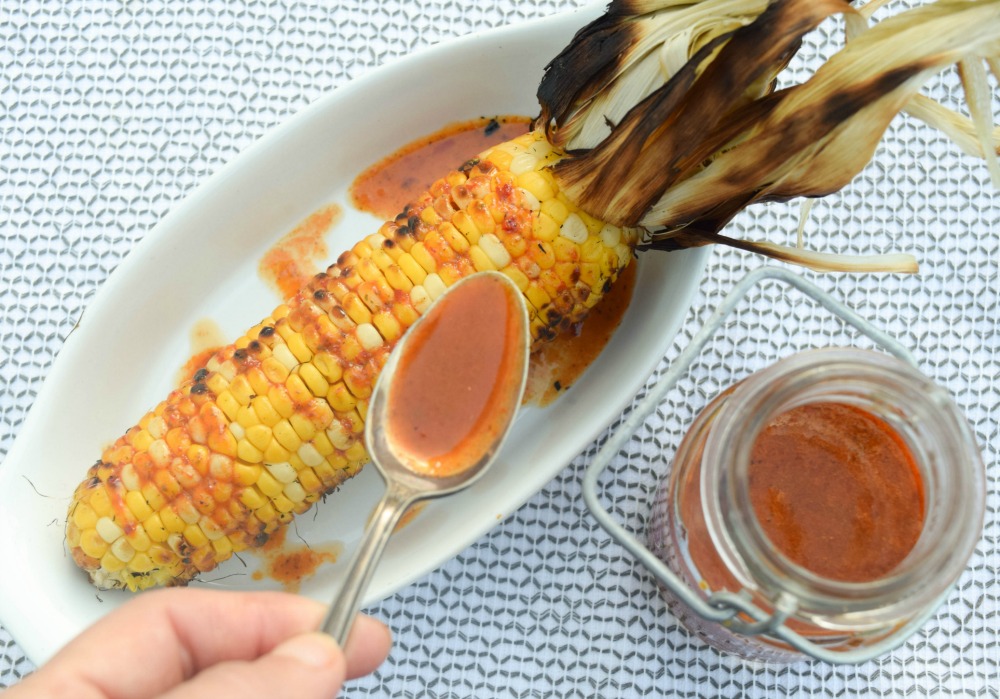
Grilled Corn with Ancho Vinaigrette is a southwestern inspired side dish for your next bbq or summer celebration.

I love serving my grilled corn with slightly spicy-sweet Ancho Vinaigrette – you can get my recipe here:

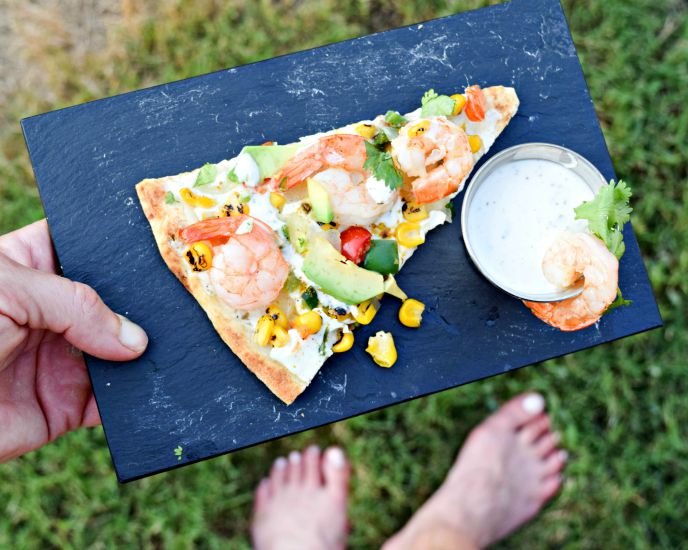
CalCornia Shrimp Pizza makes a speedy mead for busy weeknights - grill or make in the oven.

I’ve also been known to grill waaaaaaay to much corn and I’ll shear off the kernels and use in recipes like my Cali-Corn-ia Shrimp Pizza!

cooking light cornAlso, check out Cooking Light’s collection of in-season ideas for Cooking with Corn.

So, how do you usually make your grilled corn – foil, husked or naked? Also, do you use those little stab-in handle thingies or just eat right out of hand? Got any corny jokes? Please share in the comments below – XOXO, Jennifer 


Globally Inspired Steak Recipes using Wet Rubs

Strip Steaks for Grill with Wet RubWe are just a couples weeks out from Memorial Day, the “official” start of grilling season in most parts of the country. One of the “grate” perks about living here in the Lone Star State is firing up the grill a month or so earlier thanks to near-guaranteed beautiful weather.  However,I’d bet my last bag of charcoal brickettes that even if backyards from Amarillo to McAllen were to be covered in blankets of freak snow, we meat-eating Texans would still be outside fixing up some steaks – make no mistake!

jennifer fisher I love beefI’ve known my way around the grill since knee high, from camping grub to just keeping the kitchen cool in the suumer.  However, if you need a refresher on this meaty matter, you can catch up on grilling basics at TxBeef.org. Here, you’ll find everything you need to know about making the most from your charcoal grilling, gas grilling or smoking experience and also learn just about every other cooking method invented for beef! There is no better job than spreading the grilling love on behalf of Texas cattleman — in fact, I’m teaming up to teach another Grilling 101 class this weekend.


Aside from the technicalities of building a fire (or turning a knob), creating memorable flavor while maintaining the juiciness tenderness of a steak is what will ensure your success as a sizzling, tong-twirling superstar at the grill. While salt and pepper always add simple flavor to a good hunk of beef, sometimes a little more “wow” is on the wish-list of dinner guests Rubs are a quick and easy way to add an endless array of flavor profiles to steak.

Globally Inspired Wet Rub Recipes for Steak

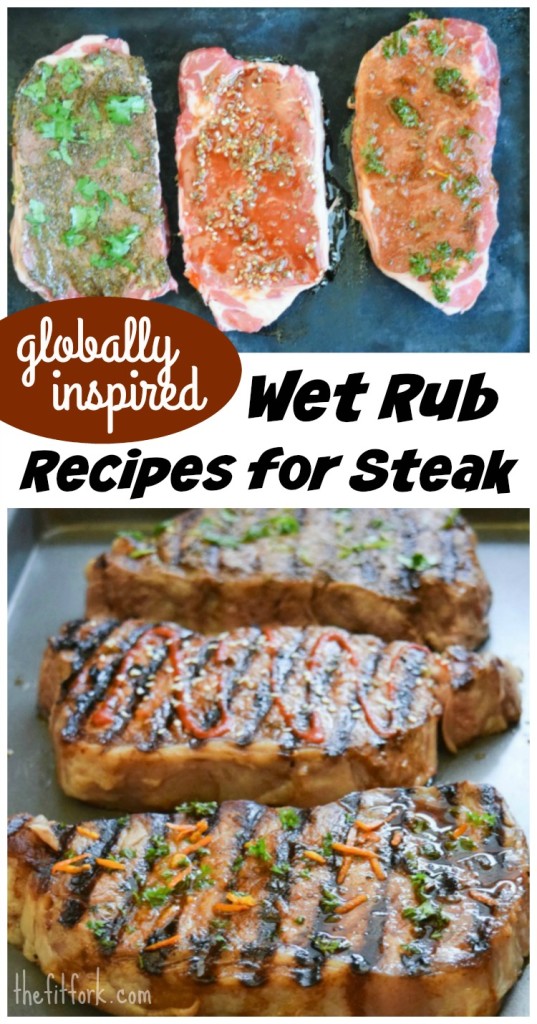
Globally Inspired Wet Rub Recipes for Steak – an easy way to add flavor without a lot of fat when grilling or pan searing.

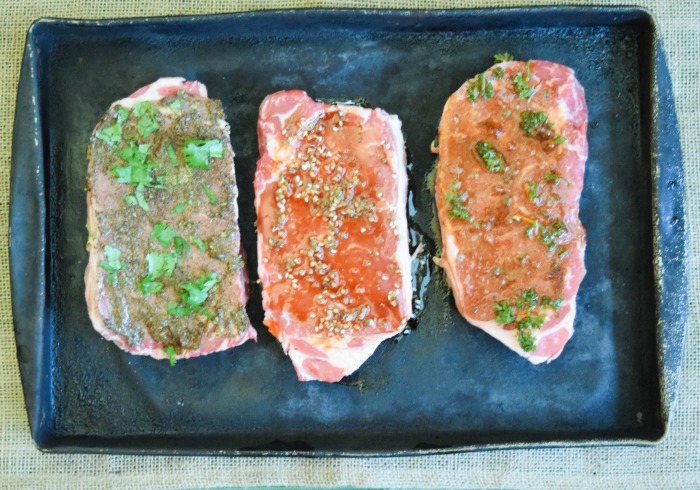
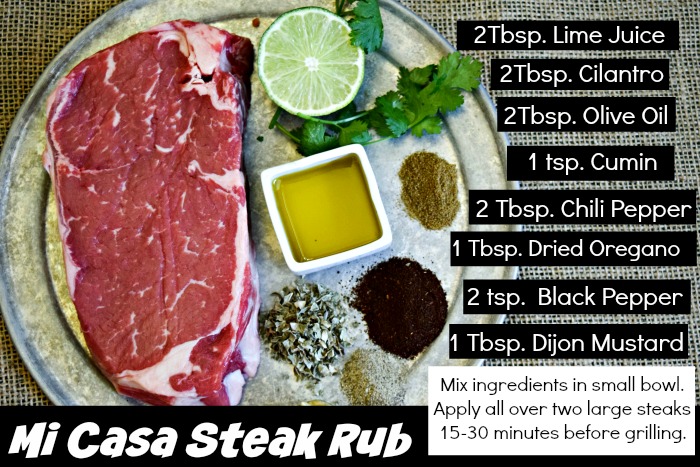
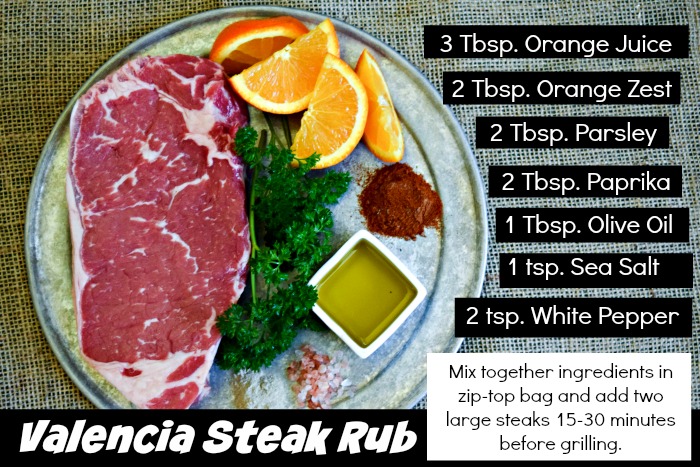
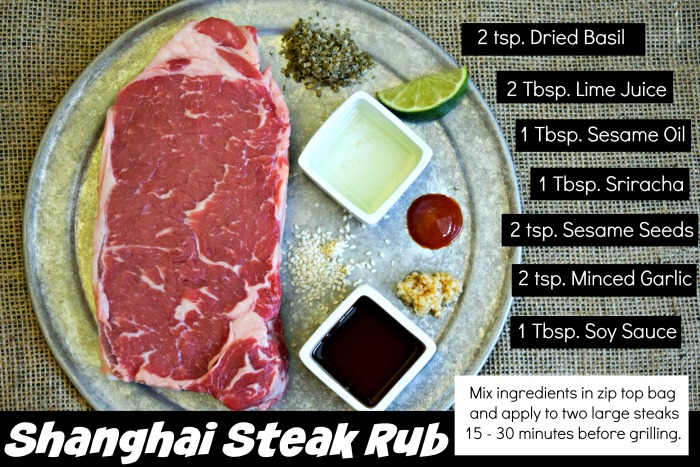
Today, I’m sharing three wet rub recipes that will kick up your grill game in a creative cross-cultural way. The Tex-Mex inspired Mi Casa Steak Rub, Spanish-meets-California inspired Valencia Steak Rub, and Asian-centric Shanghai Steak Rub all added a little something special to steaks at my recent weekend cookout.

Mi Casa Steak Rub

Valencia Steak Rub

Shanghai Steak Rub

These steak rub recipes aren’t the dry rubs recipes you may be familiar with, made with just herbs, spices and other non-liquid seasonings. Instead, wet rubs add just a little bit of liquid, but not enough to be a marinade – the consistency is more like a paste or thick dredge. Liquids used in wet rubs would be similar to those found in a marinade (like oils, juices, wine, wet condiments), but measured in a much smaller volume. While marinades are typically applied for several hours (up to a day) to render tougher cuts less chewy, wet rubs can be used to add loads of flavor on inherently tender cuts like strip steak, tenderloin, ribeye, T-bone, flat iron and more in 15 – 30 minutes.

Tips for Wet Rub Success:

  • For quick clean up, mix ingredients in zip-top bag, add steaks and massage around until coated.
  • Or, mix in small bowl and apply to steaks with a silicone brush or fingers.
  • It is fine to leave wet rub on for more than the 15 – 30 minutes, but make sure to place in refrigerator.
  • Discard any juices that remain in the bag.
  • Feel free to double or triple recipes if grilling for a crowd.
  • Make another batch to use as a grilling sauce for skewers of vegetables.
  • Allow yourself to make substitutions, experiment and create your own signature touch –that’s the fun in grilling!

How do you prep your steaks? What is your favorite cut of steak? Which of these three rubs sounds the best? What are your weekend plans — please share in the comments below – XOXO Jennifer 

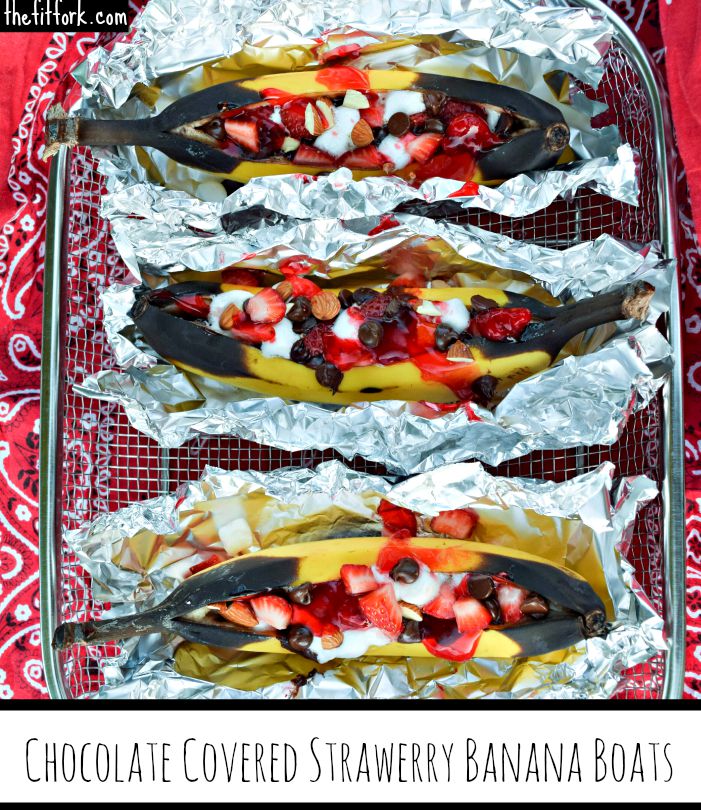
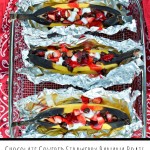
Chocolate Covered Strawberry Banana Boats | Grilled Recipe #ConquerTheMess

Summer means sticky. There is just no way to avoid the heinous heat and humidity that comes with August in my part of Texas. Sticky, sticky, sticky, it can make a mother grouchy if she lets it! I keep my parental cool when summer temps and the kids’ tempers flare with a toolbox of tactics to chill out.  Yup, let’s stay in our bathing suits all day long, crank up the songs of summer, eat easy clean up desserts and, by all means, stay out of the kitchen (I’d hate to heat up the house)!

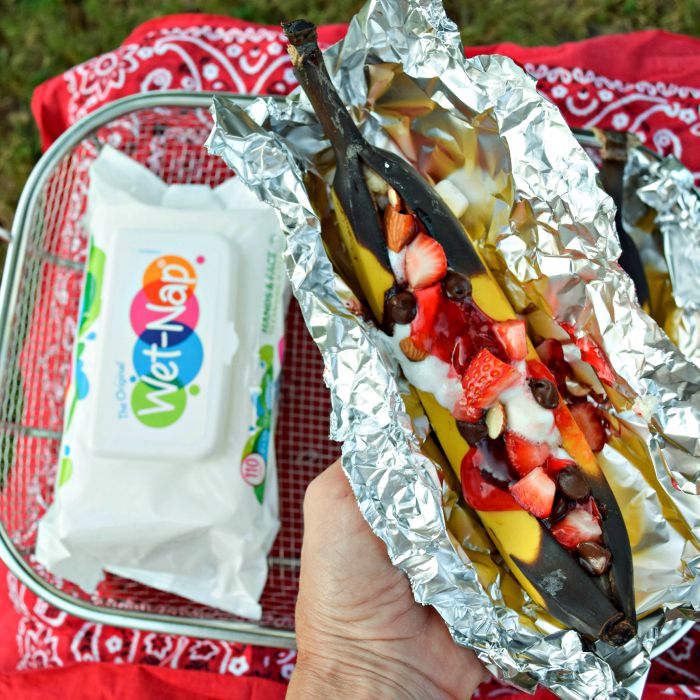
Chocolate Covered Strawberry Banana boats are an easy, foil-packet recipe that kids love for taste and moms love for easy clean up (and extra fruit as dessert)!My boys have been clamoring for chocolate chip cookies, but no way I’m turning on the oven!  Despite the heat, they want a summer treat that is warm and gooey – Chocolate Covered Strawberry Banana Boats are the solution.

jennifer fisher - grilled bananas - main photo option1The kids learned a version of this simple foil-packet dessert at Boy Scout camp in years past and we’ve created many versions at home, including this Raspberry Chocolate Banana Boat. So much for a mom to love about these easy desserts – it’s made on the grill, kids can make them on their own with parental supervision,  you’re sneaking in extra fruit to the diet, and there are no dishes to clean up as these treats roast in their own skins.

Chocolate Covered Strawberry Banana Boats and Wet Naps  go hand in hand!

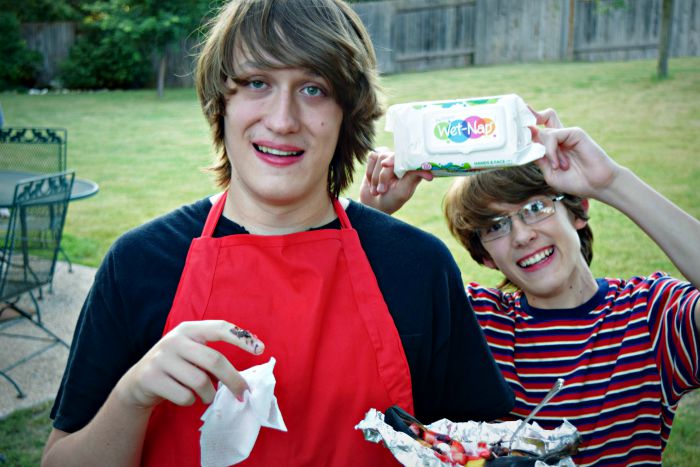
The only clean up after diving face first into this ooey-gooey foil-packet dessert are messy mouths and sticky fingers. Yay,  Wet-Nap® Hands, Face, & Body Cleansing Wipes.  These wipes are one of the most multi-purposed, genius products of summer living. I started using Wet-Nap®  when the kids were toddlers, but now they’re teens – and just as messy! Safe on the face, body and hands, these wipes are awesome after stick recipes like the banana boats, but also a great way to refresh after running, working out and sitting in the fan stands watching the kids’ sports in sweltering heat. I keep a container in the car, my gym bag and purse!

Kids, Messy Desserts and Wet Naps


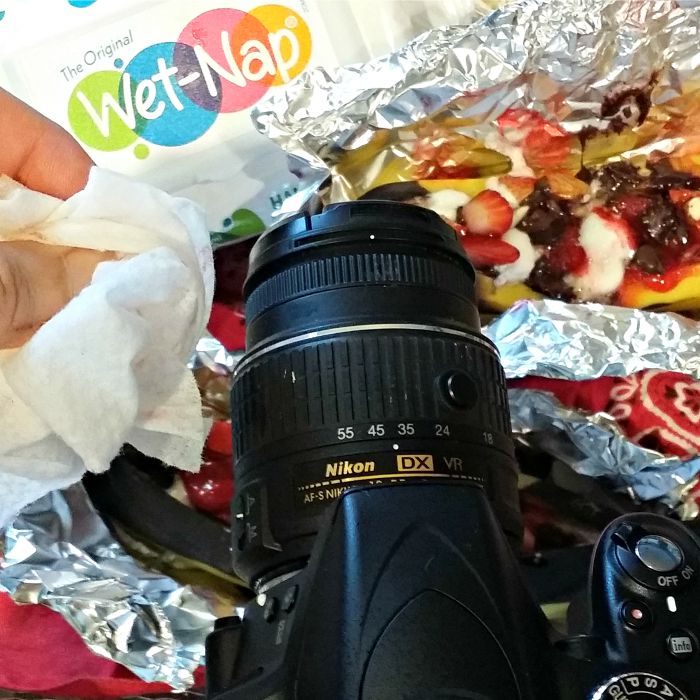
Wet-Nap® help tidy messes that life throws at us every day – this includes easy clean up desserts and easy clean up recipes and easy clean up crafts (just imaging the convenience for toddlers who like to finger paint). Also, as a food blogger, using Wet-Nap® products is a great way to keep my camera from getting too gunked up — snapping photos while food styling ALWAY make for messy buttons (don’t use on the lens, though)!Wet Naps are a must for a food blogger's camera!

I never forget to toss a pack of Wet-Nap® wipes into my cart on Walmart shopping trips. Visit Walmart for all your Wet-Nap® needs: 110-Count Hands, Face, & Body Cleansing Wipes, 24-Count Packettes Antibacterial Hand Wipes and 40-Count Canister Antibacterial Hand Wipes.

Shopping for Wet Naps at Walmart

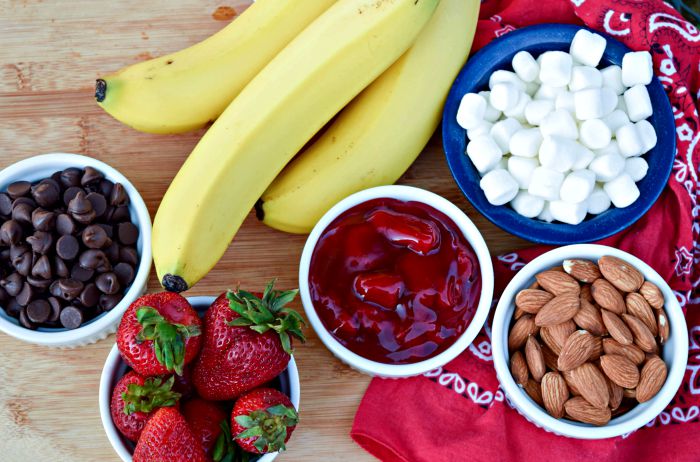
Chocolate Covered Strawberry Banana Boats ingredients

Oh, hello delicious ingredients in Chocolate Covered Strawberry Banana Boats!

Have you ever grilled a dessert?! What has your biggest mess been this summer? Please share in the comments below. XOXO – Jennifer

This post is part of a social shopper marketing insight campaign with Pollinate Media Group® and Wet-Nap®, but all my opinions are my own. #pmedia #ConquerTheMess http://my-disclosur.es/OBsstV

Chocolate Covered Strawberry Banana Boats
Prep Time
5 mins
Cook Time
10 mins
Total Time
15 mins
 
This grilled dessert is ooey-gooey delicious -- kids love the taste, moms love the easy clean up of this foil packet recipe (plus, sneaking extra fruit in for dessert)!
Course: Dessert, Fruit
Cuisine: American
Servings: 4 servings
Ingredients
  • 4 medium bananas medium-firm, not too ripe
  • 1/2 cuo]p mini marshmallows
  • 1/2 cup chopped strawberries
  • 1/2 cup chocolate chips
  • 1/2 cup strawberry glaze or syrup
  • 1/3 cup chopped raw almonds
Instructions
  1. Heat gas or charcoal grill to approximately 400°F or use a wire rack over campfire.
  2. Cut 4 (1-foot) sheets of heavy-duty foil, set aside.
  3. Using a sharp knife, make a deep incision lengthwise along the top curve of each banana; take care not to cut through the bottom peel. Gently push both banana ends toward each other to create a pocket. Place banana on the center diagonal of tin foil.
  4. Stuff each banana with approximately 2 tablespoons each of marshmallows, chopped strawberries and chocolate chips.
  5. Pull up corners of tin foil to create a tent over the top of banana, leaving a few inches of headroom so marshmallows won’t melt all over the foil.
  6. Place banana packets on heat source, close lid and cook for approximately 10 minutes or until marshmallows are softened.
  7. Carefully remove banana packets and open foil. Banana skins may have turned brown; however, this does not affect taste. Drizzle each banana with warmed strawberry glaze and sprinkle with almonds. Eat warm.

Balsamic Grilled Vegetable Salad & Grilling Produce Tips

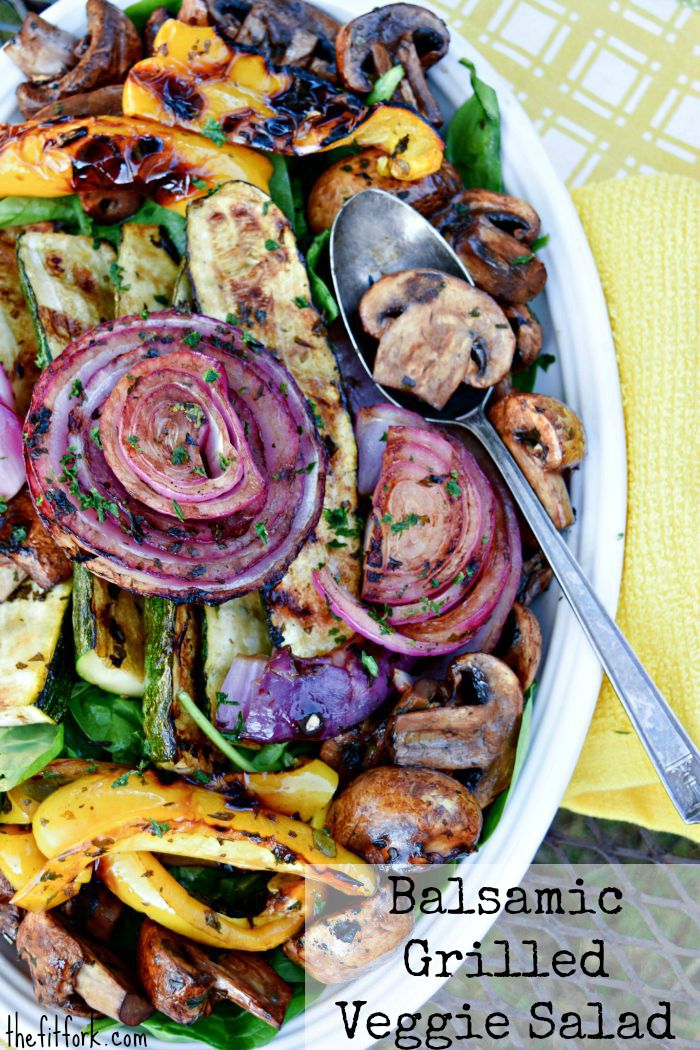
Take advantage of the summer's best produce with this Balsamic Grilled Vegetable Salad -- and check out the grilling tips.This coming weekend, I’m teaching 200 carnivores how to grill vegetable side dishes to go along with their beef. It’s hard to upstage a delicious, juicy flat iron steak — but I think a couple of my recipes can come close — especially this Balsamic  Grilled Vegetable Salad!

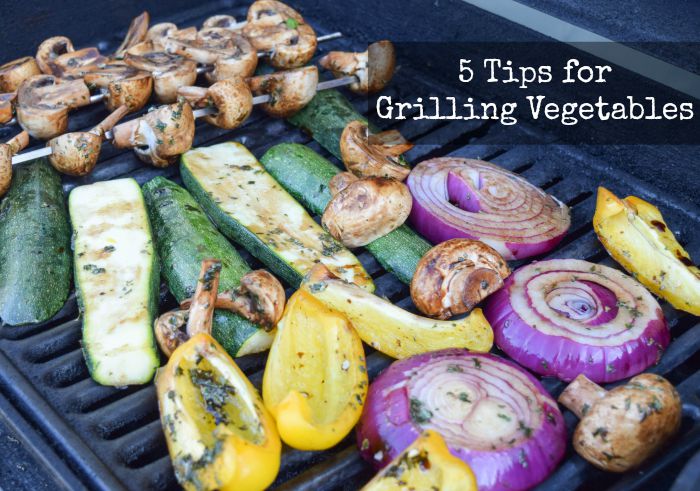
Five Tips for Grilling Vegetables this Summer

Grilled vegetables is super easy, and in the heat of the summer — there is no need to also turn on an oven or stove if the grill is already going. At BeefLovingTexans.com, I’m sharing Five Tips for Grilling Vegetables – go check that out! Meanwhile, I hope you enjoy this delicious, easy grilled vegetable salad that is the perfect way to take advantage of your favorite fresh seasonal vegetables — feel free to swap in the veggies you love.  It’s also a great dish for my Paleo diet and low-carb peeps.

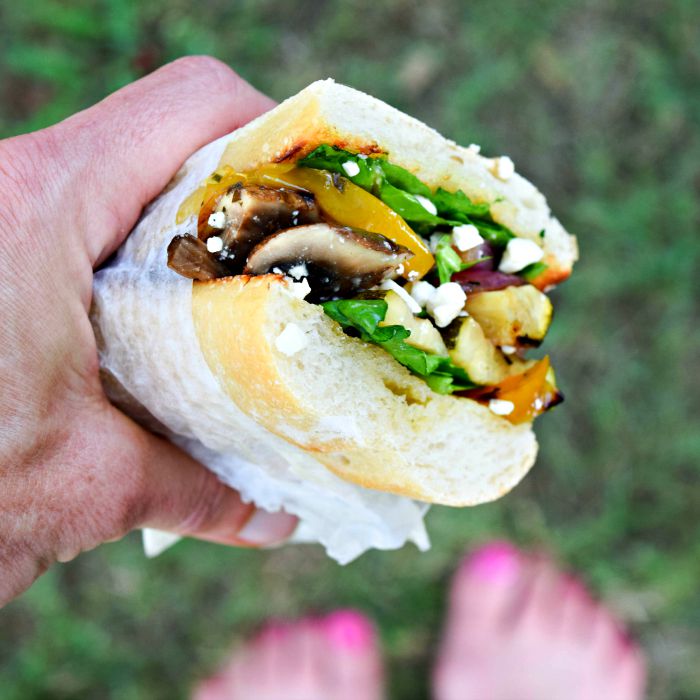
And, if you have any leftovers, these vegetables are so good in a sandwich! Or in an egg scramble, or on a pizza, or tossed with pasta.

Balsamic Grilled Veggie Sandwich

What is your favorite vegetable (or fruit) to toss on the grill? Please share in the comments below — XOXO, Jennifer


Balsamic Grilled Vegetable Salad
Prep Time
10 mins
Cook Time
8 mins
Total Time
48 mins
 
Grilling vegetables is a great way to add a hint of smoky goodness and flavor to the summer season's best vegetables. The leftovers for this grilled salad can be used on pizzas, pastas and sammies.
Course: Salad, Sandwich, Vegetable
Cuisine: American, Italian
Servings: 4 people
Ingredients
  • 1/2 cup balsamic vinegar
  • 6 tablespoons olive oil
  • 1/4 cup finely chopped parsely
  • 1/4 cup finely chopped basil
  • salt and pepper to taste
  • 3 cloves garlic, minced
  • 1 pound zucchini, sliced into 1/3″ planks lengthwise
  • 1 pint button mushrooms, sliced in half
  • 1 large red or yellow bell pepper, seeded and quartered
  • 1 large red onion, cut into 1/2-inch discs
  • 6 cups baby spinach, washed and dried
Instructions
  1. In small bowl, whisk together balsamic vinegar, oil, parsley, basil and garlic. Season with salt and pepper, to taste.  Place veggies in large zip-top bag and add balsamic mixture; close bag and turn a few times to coat contents. Let marinate at room temperature for approximately 30 minutes.
  2. Skewer together mushrooms. Coat grates with oil and heat grill to medium-high — approximately 400 F degrees.
  3. Drain balsamic marinade off vegetables and reserve (never reserve marinade on raw meat, but on vegetables it is fine)
  4. Grill veggies for 6 to 8 minutes, turning halfway through cooking. Vegetables will be done when they are becoming tender (a little “crunch” is desired and have golden brown grate marks. Let vegetables cool on cutting board for several minutes and then cut down into bite sized pieces.
  5. In small sauce pan, bring balsamic mixture to a boil over medium-high heat, let simmer for a couple minutes to reduce a volume a bit.
  6. Add spinach to serving platter and top with grilled vegetables and balsamic dressing (made from the marinade). Toss with tongs and serve warm — or make the vegetables in advance, chill and serve as a cold salad