This post is sponsored by Wick’s Pies.
Autumn is here, the cozy yet bold flavors are dropping faster than the leaves from a tree! Like this Rustic Mushroom Bacon Blue Tart (with Garlic-Thyme Pastry “Leaves”), an autumn-inspired, delightfully delicious meal that comes together conveniently thanks to frozen pie crusts from Wick’s Pies.

Eating pie for dinner is where it’s at! This is one of the best savory tarts I have ever made and is brimming with mushrooms, leeks, bacon and fresh herbs on a bold layer of creamy blue cheese.
Oh, and the crust! Let’s talk about the crust! Delicate, tender, flakey yet oh-so convenient! It’s a frozen pie crust from Wick’s Pies. I am NOT a pastry chef, and having the time and skill to make a pie crust worthy to envelope all the delicious ingredients in this mushroom tart stresses me out!
Using a frozen (and thawed) 8” Raw Circle of rolled out dough from Wick’s Pie, make my life so much easier – and I can spend my culinary talents focusing on the fillings and overall flavor of my tart rather than worrying about a dry, soggy, or otherwise lackluster crust.
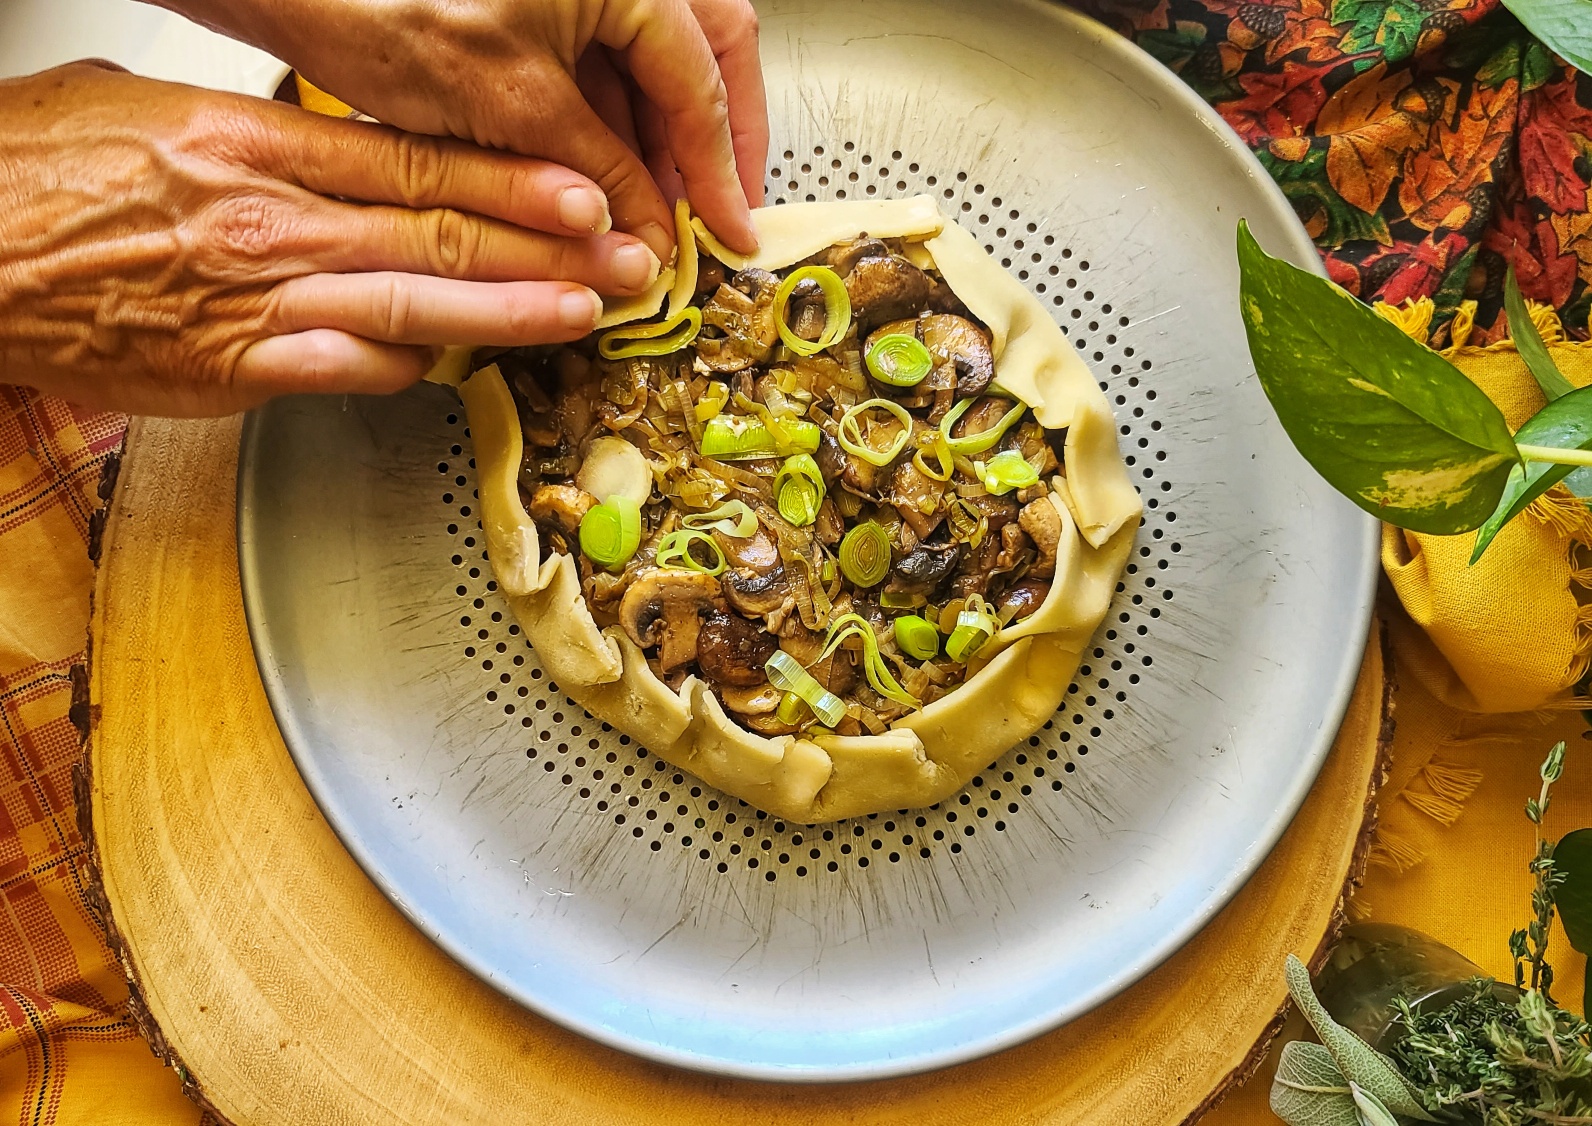
Also, I making a “rustic” tart, NOT in a pie pan with fancy lattice work, pinching or braiding also makes easy savory tart recipe a winner. Just put fillings in the middle, leaving about a 1-inch border, and then fold up the edges to secure. This mushroom pie CAN’T be messed up and any imperfections in executing the crust “fold up” just adds to the rustic, country charm.
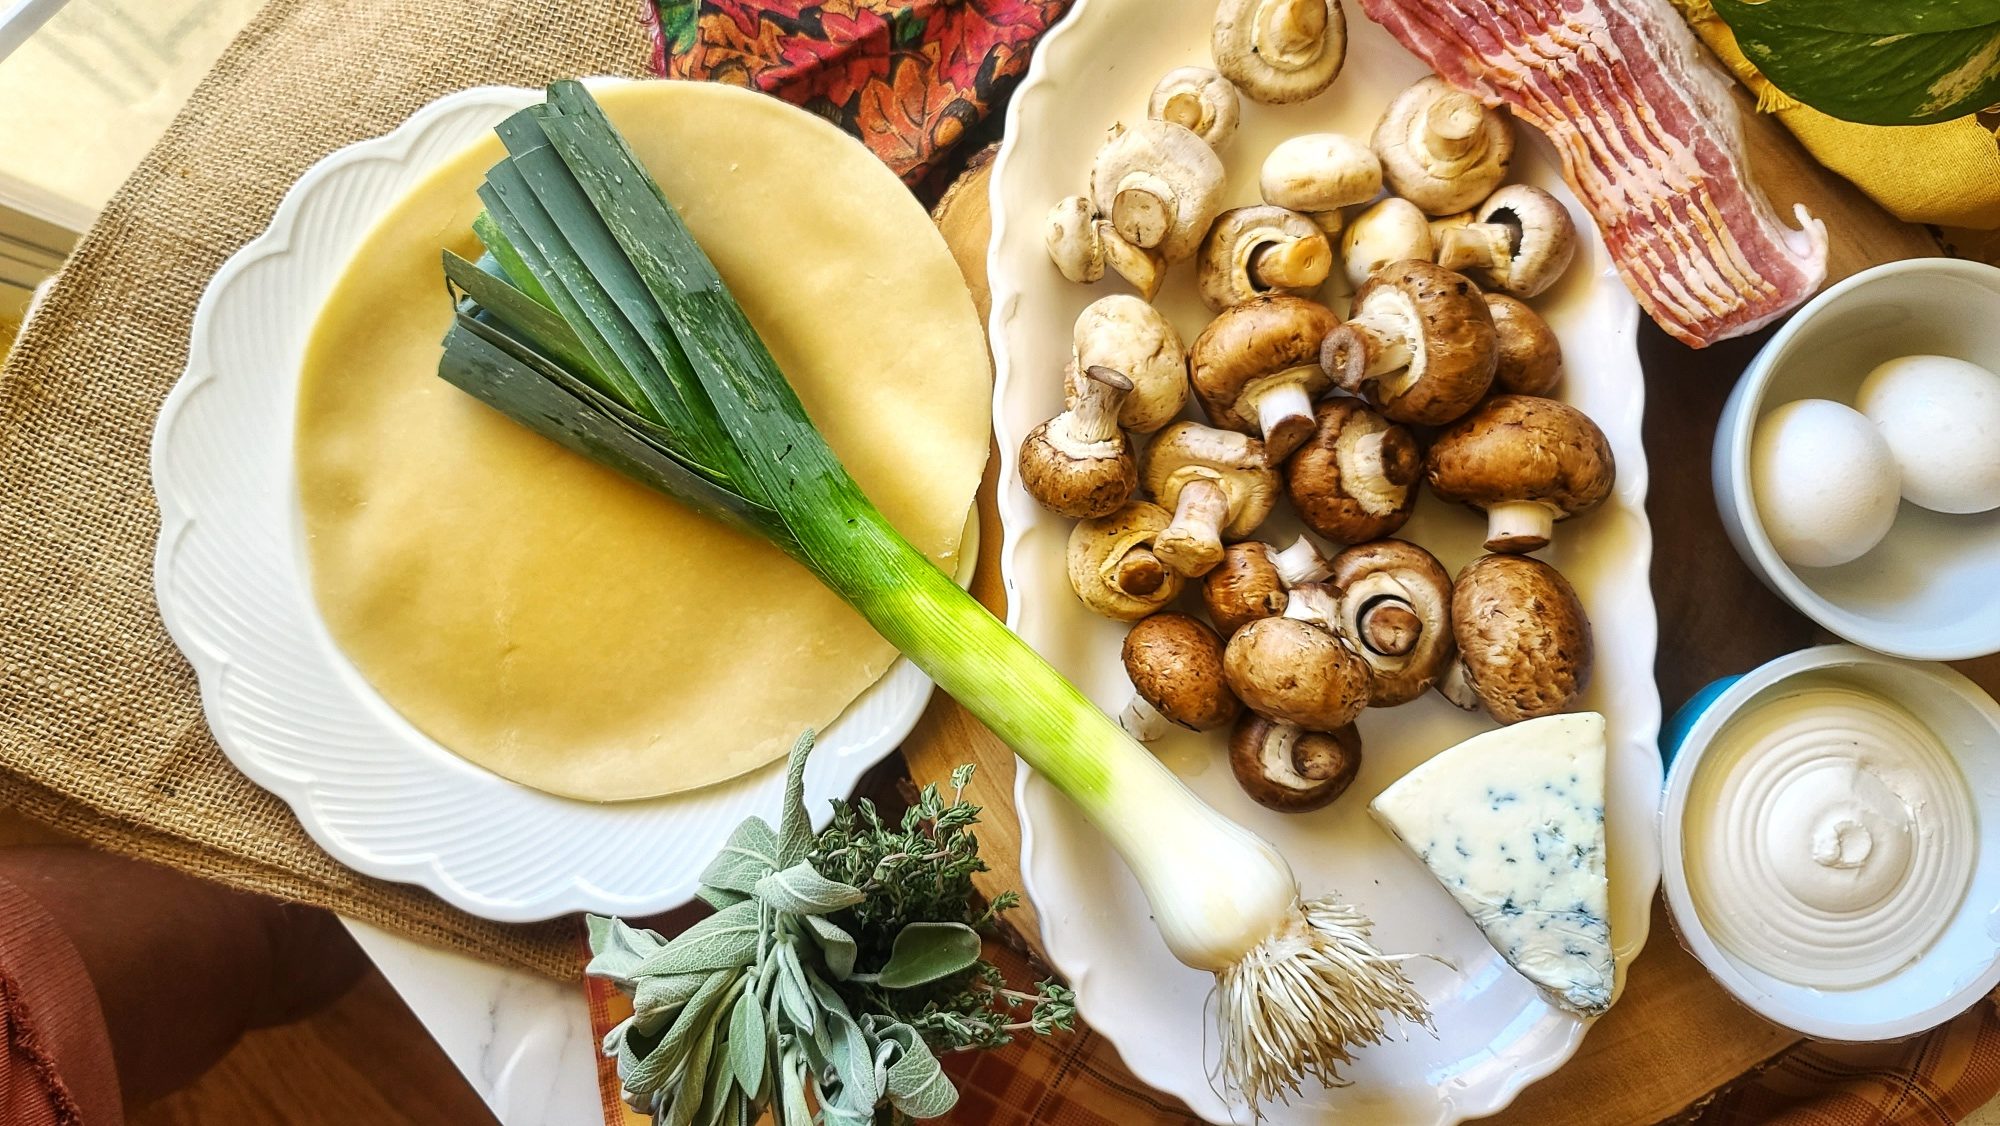
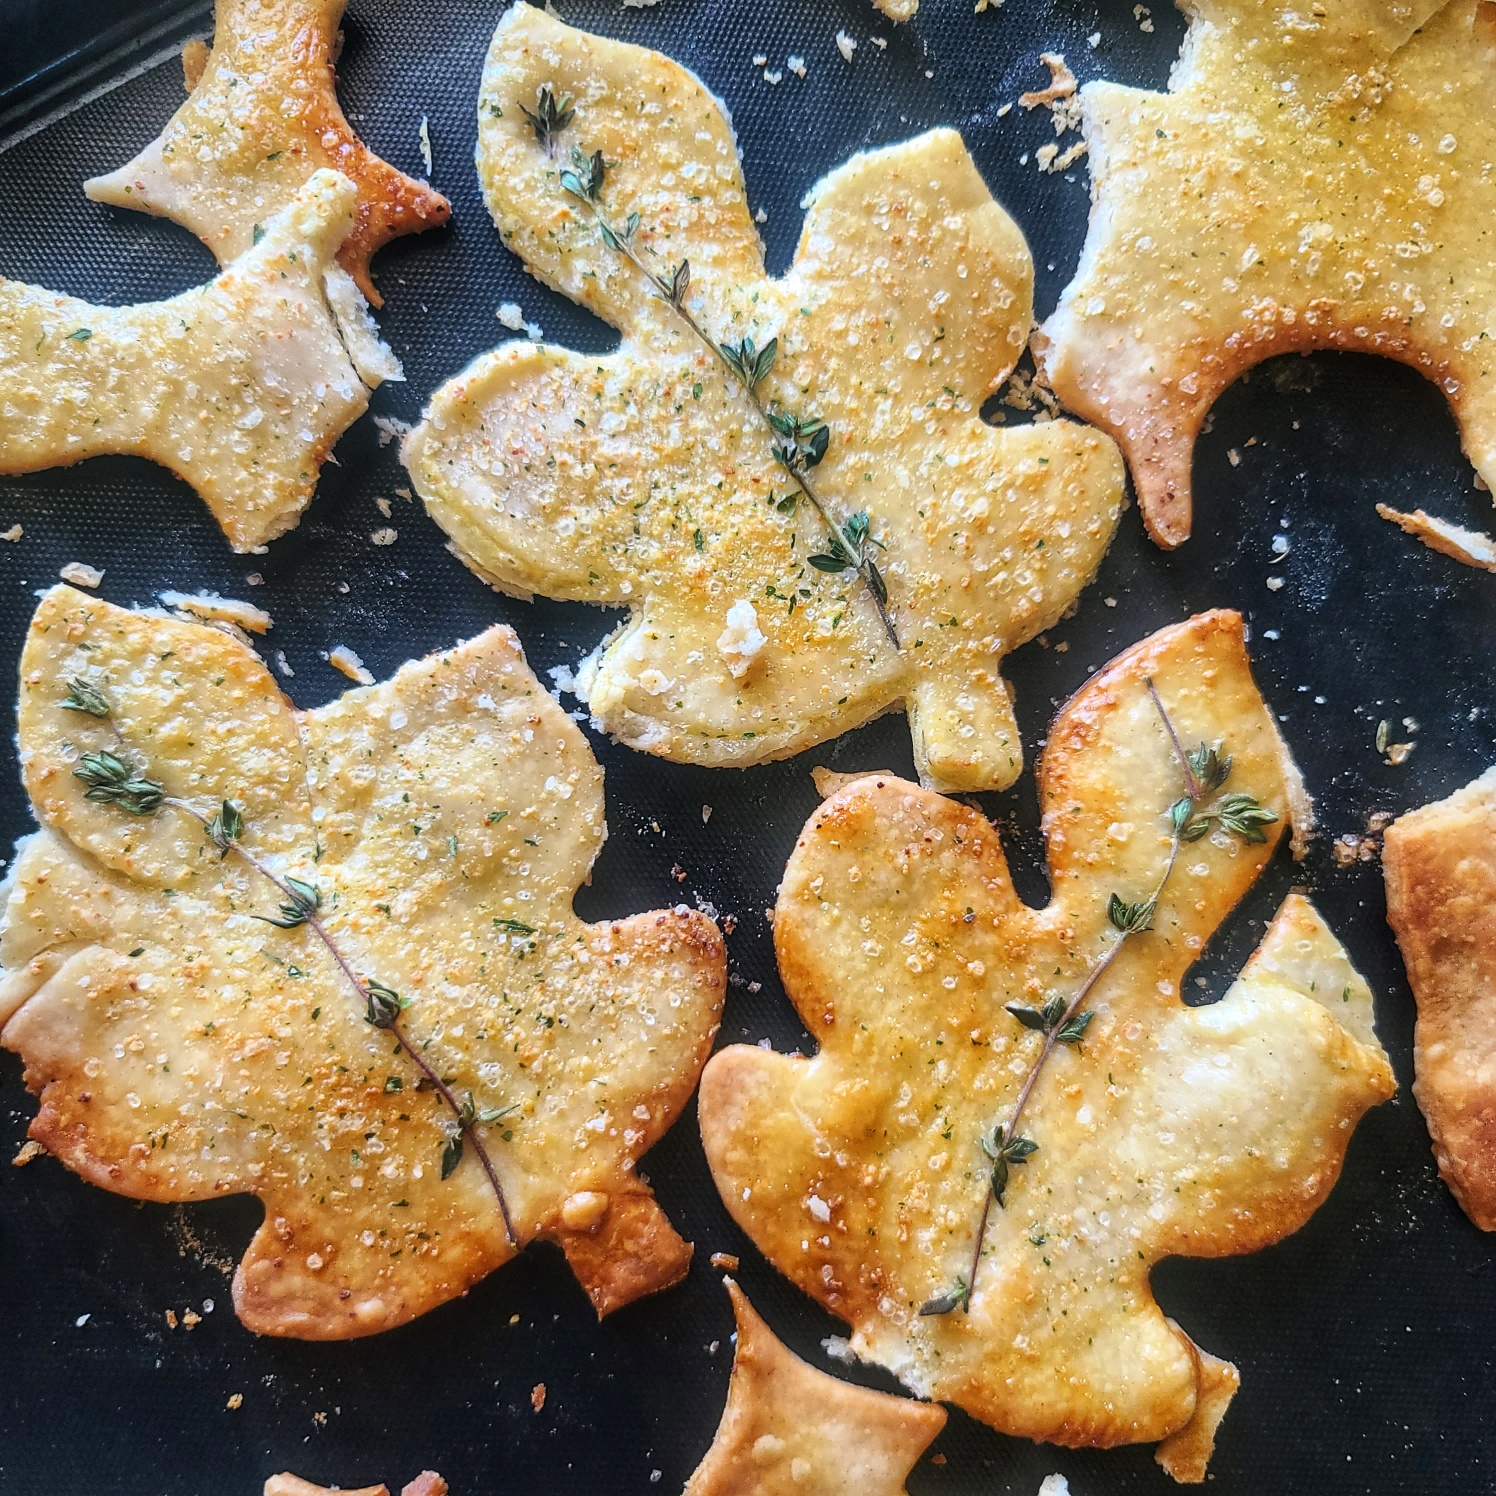
Because I’m so addicted to this delicious, tender convenience pie crust, I decided to use a leaf-shaped cookie cutter to make extra savory pie-crust pastries. You can NEVER have too much crust, am I right?! I simply sprinkled these pie dough cut outs with garlic salt and pressed in a bit of fresh thyme decoratively. Feeling so fancy serving this casual yet pretty darnclassy meal to my mom and dad this weekend!
Mushroom Tart Pro Tips:
After sautéing mushrooms, slightly tilt pan to pool up excess liquid and mop off with a paper towel. This will prevent the crust from getting soggy.
Don’t skip the egg wash step in the recipe, this helps the crust turn a beautiful golden brown with a nice gloss.
If you are not a blue cheese fan, you can substitute another type of cheese (maybe crumbled Feta or even grated sharp white cheddar) instead.
I like to use a vented pizza pan, I think it keeps the crust crispier and flaker.
Check out Wick’s Pies wholesaler page for the source of the 8” Raw Circles used in my recipe . . . or you can also order whole pies of the dessert type to be delivered to your door– what a fabulous way to minimize upcoming holiday entertaining stress!
- Website: https://www.wickspies.com/
- Facebook: https://www.facebook.com/WicksPies
- Instagram: https://www.instagram.com/wickspies/
- Twitter: https://twitter.com/WicksPies
Learn more about Wicks Pies!
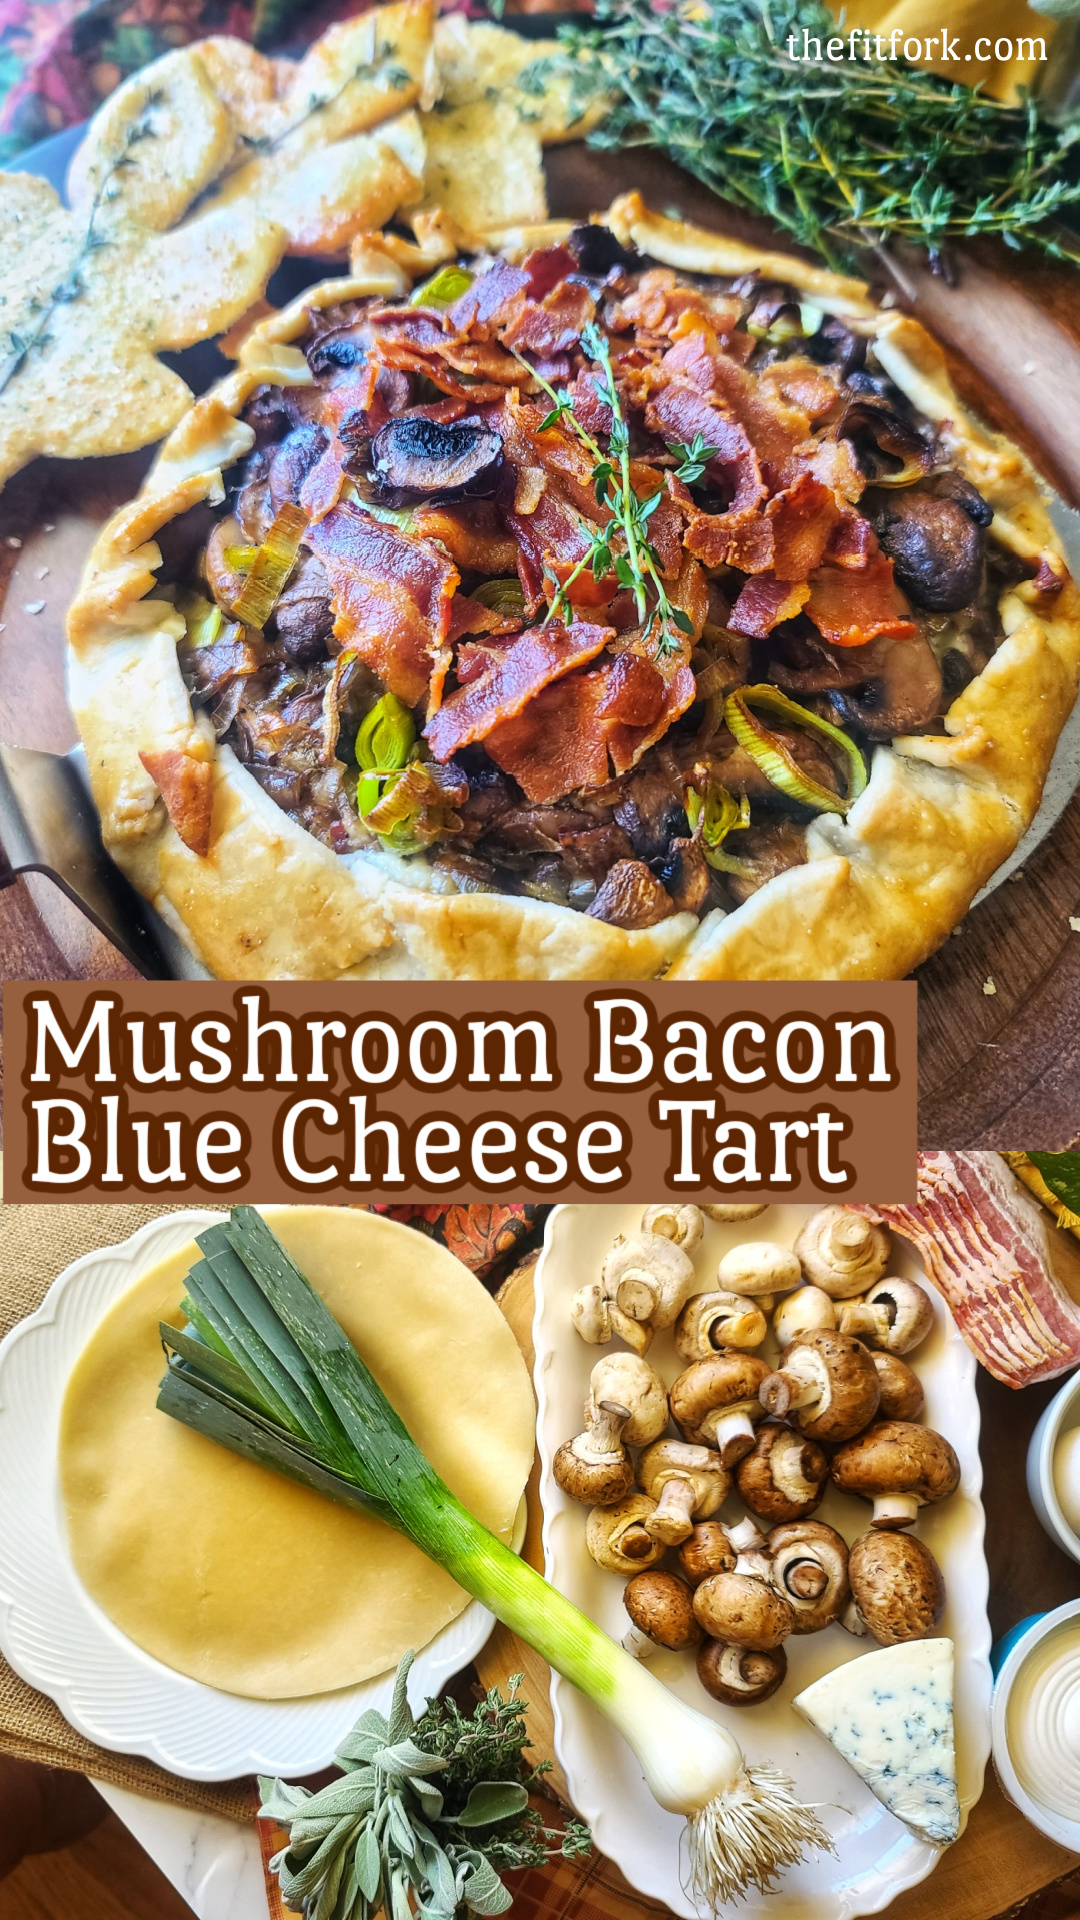
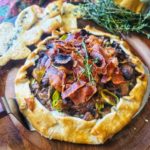
So bold and beautiful, filled with flavor and easy to make thanks to a frozen pie crust! Sever with a green salad for a brunch or light dinner — or as an appetizer for your fall-season party!
- 4- ounce bacon
- 10 ounces mushrooms of choice I used Cremini and White Button
- 1 cup sliced leeks whites and light greens
- 1/4 teaspoon black pepper
- ¼ teaspoon sea salt
- 4 ounces cream cheese softened
- 2 ounces blue cheese crumbled
- 1 teaspoon fresh thyme leaves plus extra for garnish and crust “leaves”
- 1 whisked egg for wash
- ½ teaspoon garlic salt
- 2 frozen Wick’s Pie crusts, thawed 1 for tart, 1 for extra crust “leaves” (optional
-
Heat 12-inch stainless steel skillet over medium-high and cook bacon for several minutes each side, until browning and crispy. Remove to paper towel-lined plate to drain, reserving about 1 tablespoon bacon fat in pan (discarding the rest).
-
Add sliced leeks to pan, and sauté for 2 minutes and then add mushrooms and continue to cook for a 4 to 5 more minutes until softened and liquid released. Season with salt and pepper. Remove from heat and slightly tilt pan to pool up any remaining mushroom liquid and carefully pour off or sop up with paper towel. This will help prevent tart from getting soggy.
-
Preheat oven to 400F.
-
Allow mushroom mixture to cool for a few minutes. Meanwhile, make cheese filling by coarsely mashing together 2 ounces of crumbled blue cheese with 4 ounces cream cheese.
-
Place thawed Wick’s Pie crust on a baking sheet (I prefer a vented pizza pan), coated with non-stick spray.
-
Using spatula, spread on cheese mixture eaving a 1” border. Next pile on mushroom mixture over cheese and lightly pat down.
-
Fold up edges of pie crust “rustically,” pinching excesses in the folds together as needed. Brush exposed edges of pie crust with egg wash.
-
Top with crumbled bacon.
-
Bake at 400F for 25 minutes or until crust golden and cheese bubbling.
-
Once you stick tart in oven, start preparing the optional garlic-thyme “leaves” which will bake in the same oven as the tart for the last 5 to 6 minutes of baking.
-
Spread thawed Wick’s crust on a baking sheet and sprinkle with garlic salt. Use leaf shaped cookie cutter (or other cutter design of choice) to make impressions that cut through – slightly wiggle the cut crust from them, but leave on the pan to cook as “extra” snacking material for later! Press on some of the fresh thyme into to dough decoratively. Bake at 400F for 5 to 6 minutes or until golden. Remove to cool on pan for 5 minutes before handling.
-
Serve garlic-thyme leaves alongside the tart, if desired (making the leaves is an optional step).