No-Crust Tomato Pie – Lower Carb, Gluten-free

Crustless Tomato Pie is a low-carb spin on one of my favorite southern dishes. Such a yummy way to use up a bumper crop of sweet, ripe tomatoes.

Most southern tomato pies have a pastry crust, but I personally like mine without! Tomatoes tend to get watery and seep all over a crust and make it unpleasantly soggy, especially you have leftovers. But a crustless tomato tart or pie doesn’t have nearly the same issue.

Watch it – 15-second tutorial!

However, one of the most important preparation steps you’ll want to take for this tomato mozzarella pie is to “sweat” the tomatoes. To do this simple task, just sprinkle your slice tomatoes with a little salt and let them rest on a plate for about 30 minutes. Afterward, drain off any liquid released onto the plant and use paper towels to blot up any excess moisture (this also helps remove some of the salt so that it doesn’t overpower). Sweating tomatoes like this helps keep them from making dishes watery and also makes the tomato flavor more intense – win-win!

Sweat the tomatoes with a little sale for 30 minutes - this helps remove excess moisture so recipe doesn't get soggy and also intensify flavor.
Don’t skip the 30-minute tomato “sweat” session!

To assemble the tomato pie, you just layer tomato slices and half of the egg-cheese mixture, and then repeat those layers again, and finish with a final tomato layer – so 3 layers of tomatoes and two layers of filling. The recipe does call for two eggs in it, but only to serve as a binder to help keep everything together – it’s definitely not eggy like a quiche or frittata.  It’s all about the tomatoes!

Ready to pop in the oven for 30 minutes!

Serve a side dish to dinner or light lunch – it’s even delicious as summery breakfast. My husband says it’s a casserole with tomatoes, but I say it’s a low carb tomato pie since it’s in a pie dish – he does agree it’s delicious. My kids say the low carb tomato casserole slash pie tastes like a pizza! Any way you slice it, we gobble it all up.

Pin this for later!

However, if you do want to heat leftovers up the next day, you can microwave a slice for about 45 seconds. Or, if you have an air-fryer, I prefer to set my slice in a small dish and air fry at 390F for about 6 minutes – this returns the cheese to more of the original gooey-crispy state.

Makes 6 servings, each with 178 calories, 9g carb, 12g fat, 13g protein

Disclaimer: My post contains affiliate links. I earn a small commission on products purchase, however the price to you remains the same. Thank you!

5 from 6 votes
Crustless Tomato Pie: No crust means the intense flavor of vine-ripe tomatoes shines through in this recipe whether you want to call it a pie, tart or casserole. Simple ingredients, lower carb, gluten-free and sure to delight for breakfast, brunch or as a side dish any night.
No Crust Tomato Pie – Low Carb and Gluten Free
Prep Time
10 mins
Cook Time
30 mins
“Sweating” tomatoes
30 mins
Total Time
1 hr 10 mins
 

Crustless Tomato Pie: No crust means the intense flavor ofvine-ripe tomatoes shines through in this recipe whether you want to call it apie, tart or casserole. Simple ingredients, lower carb, gluten-free and sure todelight for breakfast, brunch or as a side dish any night.

Course: Appetizer, Breakfast, brunch, lunch, Side Dish
Cuisine: American, Southern
Keyword: brunch, pie, tart, tomato
Servings: 6 servings
Calories: 178 kcal
Ingredients
  • 1 ½ lbs. tomatoes about 5 to 6 medium
  • 1 tsp salt
  • 1 cup chopped sweet onion
  • 1 tablespoon butter
  • 2 eggs
  • ½ tsp black pepper
  • 2 tablespoons fresh chopped basil
  • 2 cups shredded mozzarella reserve 1/3 cup
  • 2 green onions tops and whites chopped
Instructions
  1. Slice tomatoes and sprinkle with salt. Let sit 30 minutes, then pour off juices and blot excess with paper towels.
  2. While tomatoes are “sweating,” saute onion in butter. Let cool of a bit.
  3. Mix together cooled sauteed onions, eggs, pepper, fresh basil, and 1 2/3 cups of the mozzarella.

  4. Layer pie dish with tomatoes, then dollop and spread ½ of the cheese-egg mixture on top.
  5. Sprinkle with green onions. Layer with tomatoes and remaining cheese mixture.
  6. There should be enough tomatoes left for the top. Arrange these and sprinkle with remaining cheese.
  7. Bake at 375F for 30 to 40 minutes, or until cheese bubbling and starting to brown in places.
  8. Let rest for 15 minutes before cutting into 6 wedges.
Recipe Notes

Makes 6 servings, each with 178 calories, 9g carb, 12g fat, 13g protein

Feta Egg Tomato Rings

Easy summer meals, I love them from my head tomatoes! See what I did there, I’m punny (groan)! When summer brings me a bumper crop of tomatoes, I keep finding ways to use them up.

Any which way you slice it, this quick egg recipe is delicious and tastes like summer with sweet, ripe tomato, herby basil and salty feta cheese.  Low-cal, but still lots of protein, a great quick breakfast or lunch idea.

These low-cal Feta Egg Tomato Rings are one of my favorite quick egg recipes of all time and make a healthy and nutritious breakfast, lunch or light dinner.

So easy to make this quick, 4-ingredient meal!

I was inspired by egg recipes that use a slice bell pepper for a ring to contain scrambled or sunny-side up egg. This egg and tomato breakfast hack also reminds me of “egg in a hole” toast where you use a biscuit cutter to remove a circle from the center of your toast, and then crack an egg in the middle.

The entire batch of this low-cal egg recipe has just 136 calories, 8g fat, 7g protein and 10g protein. Honestly, I’d make two for myself!

Pick tomatoes that are about 5 to 6 ounces and “medium ripe” — too ripe and the rings loose shape, too firm and the inside is too hard to smash up for the filling.

I used an approximate 6-ounce tomato (because that’s what I had), and it made 5 slices (discarding the small stem and bottom ends). I wouldn’t use a smaller tomato, but a bigger one would be great too – however, you may need to whisk up a second egg to accommodate the larger openings.

One of the keys to this egg tomato recipe is finding a glass that, when inverted, will “punch out” the center. Lol, I’m using a cordial glass in the video. Of course, you can also trim out the middle with a paring knife.

When you remove the center of the tomato slices, you want to save the tomato “guts” – e.g., the core, the seeds and the locular jelly (that’s the official term). Those are added to the fork-whisked egg and smashed up. If some parts of the core are too tough to mash, just discard that section. Each center took about 1 tablespoon of the whisked egg and tomato filling, which worked out perfectly. If you are using a larger tomato, you will need to whisk up a second egg.

Any which way you slice it, this quick egg recipe is delicious and tastes like summer with sweet, ripe tomato, herby basil and salty feta cheese.  Low-cal, but still lots of protein, a great quick breakfast or lunch idea.

Once you spoon your egg mixture into the tomato ring and sprinkle with basil and feta (or your favorite cheese), they are cooked a few minutes until set – you will not be flipping. That’s it, whoo-hoo – you are finished with this easy egg recipe – serve on a salad, on a piece of whole-grain toast, or however moves your taste buds! Enjoy.

Any which way you slice it, this quick egg recipe is delicious and tastes like summer with sweet, ripe tomato, herby basil and salty feta cheese.  Low-cal, but still lots of protein, a great quick breakfast or lunch idea.  Find more healthy recipe to fuel an active lifestyle at thefitfork.com
5 from 4 votes
Feta Tomato Egg Rings
Any which way you slice it, this quick egg recipe is delicious and tastes like summer with sweet, ripe tomato, herby basil and salty feta cheese.
Course: Breakfast, brunch, lunch
Keyword: egg, low cal, tomato
Calories: 136 kcal
Ingredients
  • 1 5 to 6 ounce tomato
  • 1 large egg
  • 1 tablespoon crumbled feta
  • Dash salt and pepper
  • 1 teaspoon chopped basil
Instructions
  1. Slice tomato crosswise, in approximate 1/3” slices, discarding small stem and bottom ends.
  2. Use small glass or paring knife to remove the seeds, locular jelly and core (save all of this) from tomato. This creates the delicate rings.
  3. In a small bowl, fork-whisk egg. Add tomato “guts,” tossing away any core pieces that are too hard to smash up with a fork.
  4. Carefully add rings to a non-stick skillet. Fill each ring with approximately 1 tablespoon of the egg-tomato mixture. I had 5 rings and the filling amount worked out perfectly, If you use a bigger tomato, you may need another egg.
  5. Sprinkle egg mixture with crumbled feta cheese and basil.
  6. Cook over medium heat until center set and firm to touch, about 4 to 5 minutes. You will NOT be flipping. Serve with salad, on toast or however desired!
Recipe Notes

Mushroom Swiss Omelet Quesadilla | Easy Breakfast “Omelet-adilla”

True. I did see this viral egg and quesadilla hack on TikTok. But in reality, I’ve been making and eating egg quesadillas for decades. DECADES!  

Omelet meets quesadilla in this quick and easy egg recipe that is satisfying for any meal of the day -- breakfast, lunch or dinner!
This photo isn’t doing justice to how fun and clever this recipe is — watch the video below!

Growing up in the 70s, when it was my dad’s turn to cook a meal, he would usually make us an omelet or quesadilla. This was back in the day before dads really cooked OR people even knew what a quesadilla was. So, I thought he was pretty cool!  

It was only a matter of time before the eggs met up with the cheese and tortilla. Honestly, it’s a match made in heaven. As my taste buds grew up, my love for omelets and quesadillas didn’t wane. Total comfort food to me! I started adding a variety of veggies to jazz it up and make a little more balanced meal – that works for breakfast, lunch OR dinner, by the way!

Omelet meets quesadilla in this quick and easy egg recipe that is satisfying for any meal of the day -- breakfast, lunch or dinner!

Spinach and mushroom are a classic veggie combo and one of my favorites. Something about mushrooms just plays so well with eggs – it’s a plant-based umami experience. If preferred, the veggies can be swapped out for others that soften up nice and quick in a sauté pan. Think of onions, leeks, grape tomatoes, bell peppers, shaved Brussels sprouts or cabbage, chopped kale, and such.

Omelet meets quesadilla in this quick and easy egg recipe that is satisfying for any meal of the day -- breakfast, lunch or dinner!
I love mushrooms & spinach, but you can swap out for other veggies in this adaptable recipe!

The two eggs, an ounce of cheese and a nine-inch tortilla offer about 22 to 25g protein (even more if you can find a protein tortilla). But, if you want even a bigger protein bump, add a small handful of shredded chicken, beef or diced ham. This quesadilla hack is very adaptable to your custom desires.

Omelet meets quesadilla in this quick and easy egg recipe that is satisfying for any meal of the day -- breakfast, lunch or dinner!
Pin it for later!

The Mushroom Swiss Omelet Quesadilla is such a great meal for anytime of the day, especially when you are pressed for time or fancy ingredients. Once you start making using this egg tortilla hack, you’ll never go back!   

5 from 3 votes
Mushroom Swiss Omelet Quesadilla

Omelet meets quesadilla in this quick and easy egg recipe that is satisfying for any meal of the day — breakfast, lunch or dinner!

Course: Breakfast, lunch
Keyword: egg, omelet, quesadilla
Servings: 1 serving
Ingredients
  • 2 large eggs
  • 1 tablespoon water
  • 1/8 tsp salt
  • 1/8 tsp pepper
  • 1 teaspoon olive oil
  • ½ cup slice mushrooms
  • ½ cup chopped fresh spinach
  • 1 to 2 oz grated Swiss cheese
  • 1 large 9” to 10” tortilla sized to fit your skillet
  • Garnish: Avocado slices
Instructions
  1. Whisk two eggs, water, salt and pepper in bowl; set aside.
  2. Bring 9 to 10-inch non-stick skillet up to medium heat; add oil.
  3. Add mushrooms to skillet and saute for about 2 to 3 minutes until softened. Add spinach and stir around for another 30 seconds or until wilted a bit. Spread out evenly in bottom of pan.
  4. Pour whisked egg over vegetables, tilting pan and swirling egg a bit to cover entire skillet.
  5. Cook for about 2 minutes (without stirring) until almost set; just very lightly wet still on top.
  6. Top with half the cheese and tortilla.
  7. Carefully shimmy spatula under egg mixture to flip entire thing tortilla side down.
  8. Add remaining cheese to top egg side and cook an additional 1 minute.
  9. Flip tortilla in half (for a half-circle) and cook for another 1 minute on each side until tortilla golden brown.
  10. Cut in three wedges and serve with avocado.

Easy Protein Powder Cottage Cheese Waffles – Gluten-free, Vegetarian

I’m still on a serious protein waffle kick, and have been refining my go-to easy waffle recipe with each batch! The outcomes have just been getting tastier and more nutritious! For example, with this protein waffle meal prep, I’ve added a bit of cottage cheese to the batter for a little extra rich flavor and protein.

These easy gluten-free protein waffles feature a plant-based protein, eggs, cottage cheese and amaranth flour for a powerful punch of protein. Only 184 cal, 13g net carb, 6g fat for a THREE WAFFLE serving that totals 20g protein! Boom!  Freezer friendly, meal prep a batch for a breakfast solution on busy mornings.

In fact, I’ve packed SO MUCH protein for the modest calorie count into these waffles with cottage cheese. In addition to cottage cheese, other ingredients include egg, a plant-based protein powder and amaranth flour. The result is a 3-waffle serving for 184 calories 13g net carb, 6g fat and 20g protein. That’s 62 calories and almost 7g protein per waffle! Boom! (note: nutrition could vary some based on exact protein powder used and % fat content of cottage cheese and milk used).

These easy gluten-free protein waffles feature a plant-based protein, eggs, cottage cheese and amaranth flour for a powerful punch of protein. Only 184 cal, 13g net carb, 6g fat for a THREE WAFFLE serving that totals 20g protein! Boom!  Freezer friendly, meal prep a batch for a breakfast solution on busy mornings.  For more protein powder recipes and fit meals to fuel an active lifestyle, visit thefitfork.com

Seriously, 20g protein for a 186-calorie waffle stack?! These protein powder waffles even beats my favorite protein bar and is so much more satisfying to eat than a protein bar snack. This is a real meal, on a plate, with endless topping possibilities.

The flour in this recipe can be either an all-purpose flour or a gluten-free baking blend (with a similar texture of flour, not heavy like almond flour or coconut flour). When I make gluten-free waffles, I almost always use Bob’s Red Mill 1:1 Gluten Free Baking Flour for that light texture I want. I’ve also had luck with amaranth flour as an alternative.

amaranth flour

For convenience, I like to mix the batter in a blender (don’t over blend) and pour out into my mini waffle maker.  This protein waffle meal prep makes about 12 waffles (4 servings). If you don’t have a single waffle maker (which is undeniable cute), it is actually even more efficient to make in most standard 4-slice waffle irons.

Also, to moderate the carb count yet still speak to me sweet tooth, I add stevia liquid sweetener drops to the batter. If you’d like more savory waffles, just omit.

Nuzest Clean Lean Protein Powder -- use coupon code FITFORK to save 15%
Clean Lean Protein from Nuzest — plant-based and amazing! Nuzest 15% off: FITFORK

I use the Clean Lean Protein power from Nuzest, it’s plant-based, paleo-friendly, gluten-free, non GMO. The Smooth Vanilla flavor is delicious and a very versatile option. Use Nuzest coupon code: FITFORK to save 15% .

As per toppings, when a three-waffle stack only has 184 calories, I feel liberated to pile on the toppings. Fresh fruit like strawberries or blueberries is always a favorite – along with a drizzle of a sugar free syrup and dollop of whipped cream or Greek yogurt. Sometimes even some mini chocolate chips!

Many of my other protein waffle recipes have been single serve. This batch makes four servings, suitable for a family breakfast or to meal prep for eating through the week. Store leftovers in the fridge for up to 3 to 4 days or slide the 3-waffle servings into storage containers and keep in the freezer for busy-day breakfasts.

Heat up in the toaster or air-fryer. Honestly, after a few minutes in the air fryer, they are crispier and maybe even more delicious than ever!

This recipe is very easy to customize by swapping the protein powder flavor. And, I recently made a batch with Matcha Cottage Cheese Protein Waffles, so delicious and a fun change. The only thing I did different was add 2 teaspoons of matcha green tea powder to the batter.

Disclaimer: This post contains affiliate links. I earn a small commission from purchases through links, however price to you remains the same. Proceeds are used to help offset operating costs for The Fit Fork. Thank you!

5 from 4 votes
Easy Cottage Cheese Protein Powder Waffles
Prep Time
5 mins
Cook Time
10 mins
Total Time
15 mins
 

Simple, freezer-friendly, gluten-free and vegetarian. Only 184 calories for THREE WAFFLES – 20g protein!

Course: Breakfast
Keyword: breakfast, cottage cheese, meal prep, protein powder, waffles
Servings: 4 3 waffles each
Ingredients
  • 3 eggs
  • 1/3 cup unsweetened milk of choice I used unsweetened almond milk
  • ½ tsp vanilla extract
  • ½ cup 2% cottage cheese
  • 1/2 cup vanilla Nuzest protein powder (or powder of choice) 50 grams or about 1/2 cup
  • ½ cup all-purpose flour or gluten-free baking flour (like bob's red mill gluten free baking blend)
  • ¼ tsp liquid stevia drops or to taste (or not needed, depending on your sweet preferences).
  • 1/4 tsp baking powder
Instructions
  1. Whisk eggs with milk and vanilla, stir in cottage cheese. Toss together protein powder flour and baking powder. Mix into egg mixture a little bit at a time, or until incorporated You can also pulse wet and dry mixtures together in the blender until smooth. Mix in stevia drops to taste, more or less depending on your sweetness preference.

  2. Heat waffle iron (either a mini waffle iron or larger 4-square iron).

  3. Pour in batter and cook for several minutes, until indicator light goes off.
  4. Repeat for remaining batter.
  5. Should make 12 single waffles (or three 4-square waffles).
Recipe Notes

Serving size: 3 waffles
184 calories, 6g fat, 12g net carb, 20g protein.

Banana Bread Muffins with Amaranth (an Ancient Grain) – Gluten-free

I LOVE warm, sweet, soft banana bread, don’t you?! It’s a childhood favorite and reminds me of being at my grandmother’s house.

My gluten-free banana bread recipe incorporates amaranth, an ancient grain that offers protein, healthy carbs, fiber and lots of micronutrients.

Popped amaranth blended with oats to make a gluten-free flour.

Amaranth is kind of a toothsome grain, reminding me of farro or wheat berry. You don’t use the whole seed grain in this gluten free banana muffin recipe, but instead amaranth flour. I like to make my own amaranth flour in my blender using popped amaranth – it’s ready to make into a light, versatile, gluten-free flour right out of the bag. It’s also tasty for snacking right out of the bag or sprinkling on salads or yogurt for extra nutrition.

Check out the video for some tips!

Pro Tips:

  1. Ripe bananas make the tastiest, sweetest, moistest banana bread muffins. I keep my peeled ripe bananas in the freezer, ready to defrost for quick bread recipe like this banana amaranth flour recipe.
  2. Some products may be swapped. For example, use the milk of your choice whether that be dairy, almond, oat or whatever. Also, the sugar can be swapped out for a cup-to-cup equivalent. For example, 1 cup of coconut sugar, 1 cup of brown sugar, or 1 cup of stevia baking blend, etc.  Don’t use liquid sweetener drops or products with very little volume as it will through the proportions of your recipe off and it will be too wet.
  3. While making this easy muffin recipe, make extra amaranth-oat flour and set aside for use in your next batch OR to use as a gluten-free flour substitute for pancakes, waffles and other baked goods.
Pin this for later!

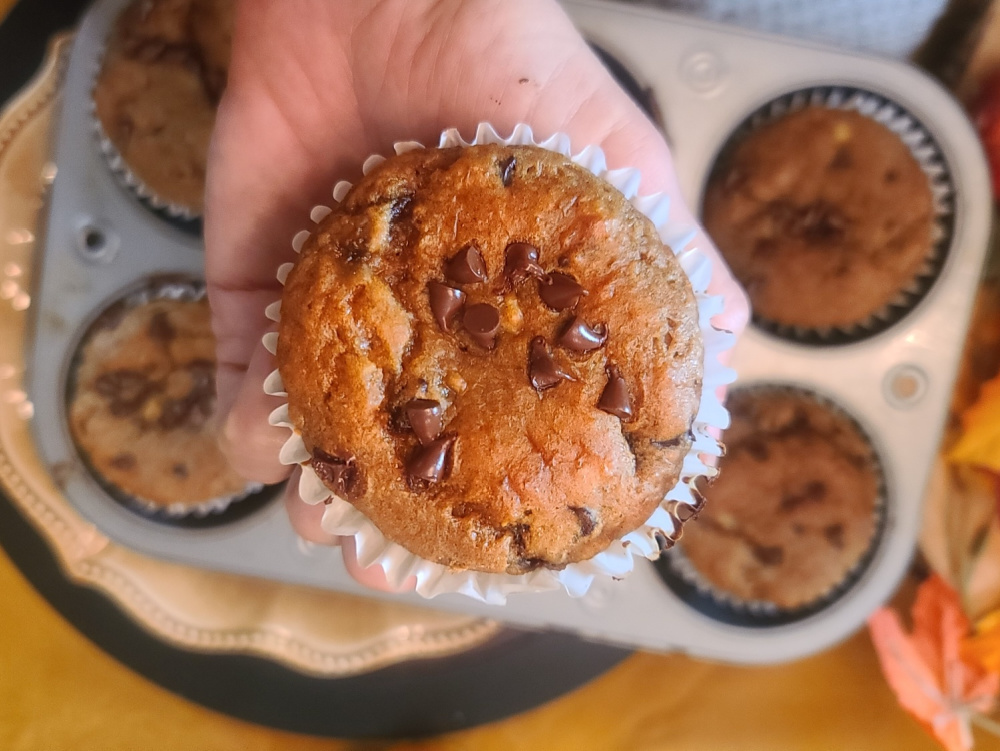
Amaranth Banana Bread Muffins are so delicious – tender, moist and sweet! Before baking I love to top mine with extra goodies like dried fruit, nuts and seeds  — shredded coconut and chocolate chips would be yummy too!

Recipe adapted from Amaranthy.com  (you can save 20% there with my code FITFORK20 )

Disclaimer: This post contains affiliate links. I earn a small commission from sales that are used to help offset operating costs for The Fit Fork.

5 from 5 votes
Gluten-free Banana Bread with Amaranth
Prep Time
10 mins
Cook Time
30 mins
Total Time
40 mins
 

Looking for an easy quick bread muffin that’s gluten-freeand packs extra fiber and protein? Check out these Banana Bread Muffins madewith “flour” that’s created simply by pulsing popped amaranth and rolled oats inthe blender! Also, use an alternative sweetener to moderate the carbs – still sosweet, tender and delicious! A favorite for breakfast – even serve warm withice cream for dessert!

Servings: 6 servings
Ingredients
  • 2 cups popped amaranth from Amaranthy or amaranth flour
  • 1 cup old-fashioned rolled oats
  • 1/2 tablespoon baking powder
  • 1/4 tablespoon baking soda
  • 1/2 cup unsalted butter softened to room temperature
  • 3 medium ripe bananas
  • 2 large eggs
  • 1/3 tablespoon pure vanilla extract
  • 1 1/2 tablespoon milk of choice
  • 1 cup sugar of choice or 1 cup-for-cup equivalent sweetener
  • 1/4 cup dried fruit of choice optional
  • 1/4 cup unsalted nuts and/or seeds of choice optional
Instructions
  1. Preheat oven to 350F. Prepare a standard loaf pan or jumbo 6-count muffin tin.
  2. Add popped amaranth and rolled oats to blender, blend on high for 1 to 2 minutes until a medium-fine flour forms. Pulse in baking soda and baking powder. Set aside.
  3. In large bowl, mash together bananas, eggs, butter, milk, vanilla and sugar.
  4. Empty banana mixture into the blender filled with dry ingredients. Incorporate dry and wet slightly with spatula then pulse, scraping down sides as needed, until thick batter has formed. *Mixture should be thick, but if not blending well add a 1-2 tbsp. more milk.
  5. Divide in muffin tins. Top with nuts, seeds and dried fruit.
  6. Bake approx. 45 minutes in loaf pan and 30 minutes in jumbo muffin tins. Test for doneness by inserting toothpick into center and it pulls clean. Remove from oven, cool in pan for 15 minutes. Store leftovers in fridge.
Recipe Notes