WATERMELON FIT | EXERCISE IDEAS & WELLNESS TIPS FOR EVERY SEASON

This post sponsored by Watermelon.org.

Happy 2023! A new year is a great reminder that watermelon can be incorporated into a fit and active lifestyle year-round! I’m sharing some fun ways to use watermelon to fuel workouts and even be part of your fitness routine during every month this year. Let’s get watermelon fit in 2023!

You might be wondering, “Is watermelon only a summer fruit?” No! The good news is that these days, a ripe watermelon is always nearby in any season – spring, summer, winter and fall. More than 30 states in the U.S. boast watermelon crops and the harvest timing starts on the East coast and rolls westward. When the U.S. season is finally over (it’s very long here in Texas, lucky me!), farmers in Mexico and other parts south of the border can deliver fresh watermelon plucked just a few days from the field. Also available markets are watermelon juice, watermelon seeds, and even frozen chunked watermelon flesh can be found in most stores on the freezer aisle. Read more about the Watermelon Year ‘Round story HERE!

WINTER WATERMELON FIT TIPS

This easy-to-make warm punch featuring watermelon juice is naturally sweet and delicious, bejeweled with fruit and fragrant with seasonal spices. Brandy optional! Perfect for holiday entertaining, including brunches, open houses, cocktail parties and more!

Finding Watermelon in Winter: If your market doesn’t have fresh watermelon, check the freezer aisle for chunks (usually next to the frozen berries), or packaged watermelon seeds, or watermelon juice. If you have the planning gene, you can also meal prep all this watermelon goodness for the freezer when it is more abundant.

Good-for-you Watermelon Drinks: Make a mocktail for winter celebrations using watermelon juice, citrus juice and fresh ginger – or my recipe for Mulled Watermelon Cider is always welcomed with a crowd. Or, take the chill off cold days (or blustery outside runs) with warmed watermelon juice with a squeeze of lemon, fresh ginger and pinch of Himalayan Sea salt – it’s a homemade hot sports drink! My recipe for Hot Watermelon Lemonade is also a unique sports recovery drink.

Vitamin C: Not only is watermelon hydrating (over 92% water), it’s also high in vitamin C that may help you get through the winter season well.

Indoor Home Workouts: Stay inside and work toward your fitness goals. No weights? No worries, you can use a watermelon (from a few pounds to 20+ pounds) as your exercise equipment! I’ve shared lots of fun watermelon home workouts, here’s a watermelon workout to try this winter – WATERMELON HOME WORKOUT!

SPRING WATERMELON FIT TIPS
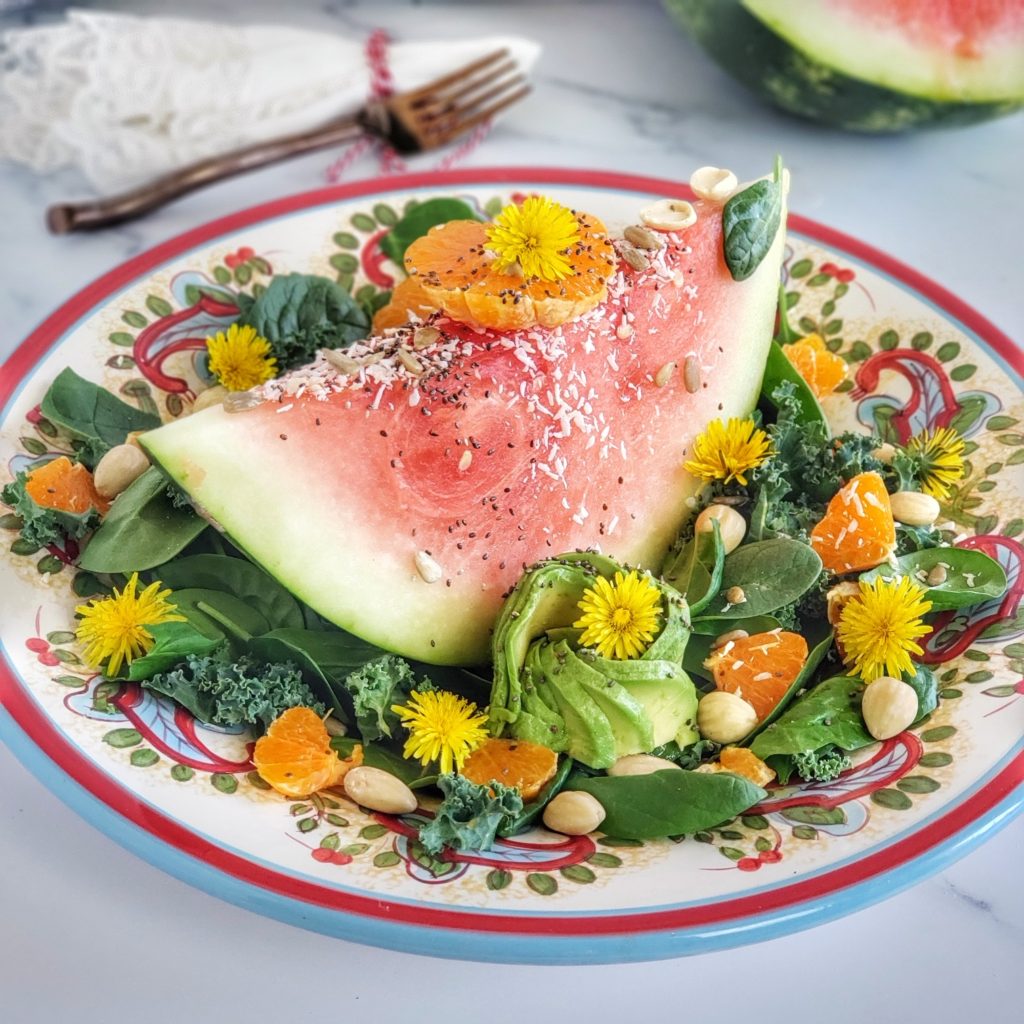
Spring Salads: Take advantage of watermelon benefits and toss chunks into your grain bowls and salads, heck – throw on an entire wedge! Adding watermelon is a great way to dress up boring salads with some unexpected color and sweetness. Check out a few of my favorite watermelon salad recipe I’ve come up with over the years:

Watermelon Holds for Fitness: This season, if you want to add a watermelon to your workout, try a static hold to complement your runs, walks or dynamic strength training sessions. Static holds are isometric exercises that hold the body in one position for a duration of time. This means your muscles don’t contract and change length as in dynamic exercises, but you still benefit from the “time under tension.”  Here are some static holds to try: most variations of planks, v-sit (boat pose), squat hold (or wall sits), overhead hold, front hold, and glute bridge hold.

How to Pick a Ripe Watermelon: Look for the “field spot” where the watermelon was resting while it grew. The more yellow, even almost yellow-orange, the riper – quite white means not ripe! Also, this takes a bit of intuition, but if the watermelon feels “heavy” for its size, this typically means it will be juicer and sweeter. Some also say rounder watermelons are sweeter than elongated watermelons, but I’m not so sure of that! I’ve had great watermelons of every shape. Also, you can look for “sugar webbing” (the coarse, brown web texture on some watermelons)/

SUMMER WATERMELON FIT TIPS

Watermelon Floats: Yes, watermelon floats! This makes the fruit a fun item not just to eat in the summer but to play pool games with at a party. My kids always loved to stand on paddle boards and toss the watermelon back and forth to see who would fall off first! The buoyancy of watermelon also makes it useful for pool workouts by adding resistance when you push or pull it under watermelon.

Grilling Watermelon: Many of us are outside, grilling all the things in the warm weather months. Why not grill watermelon?! Grilling watermelon lends a smokey, savory vibe to the light sweetness that is oh-so magnificently summery. Check out my recipes for Grilled Watermelon with Cherry Balsamic Salsa and Spicy Sweet Watermelon Shrimp Kebobs for summer meals with watermelon inspiration.

Watermelon Juice: Quench your thirst this summer with watermelon juice. I simply collect the juice from a watermelon while cutting it up. It’s easiest to do this if you cut it in a big rimmed baking sheet (so juices to spill out onto counter) and then pour juice out one corner of pan into mesh strainer over glass jar to remove any seeds and excess pulp. I also collect the juice that seeps out of cut watermelon and collects in my plastic storage container. This raw juice stays fresh for up to 72 hours in the fridge or can be frozen for several months. Learn more watermelon juice benefits at my post, Watermelon Juice – How to Prep, Store and More.

FALL WATERMELON FIT TIPS

Watermelon Ruck: Rucking is a big fitness trend right now, but it’s actually ages old and really simple. A ruck is just a walk, hike, run, or other similar workout with a weight on your back. In simple terms, you wear a rucksack (aka backpack) and walk! Rucking and watermelon are a natural fit. Stick the watermelon in your backpack for weight to carry, and when you’re done, slice it open and enjoy as a refreshing, way to refuel.

How to Ruck-Cut a Watermelon: If you’re out on a ruck, then simple slices or wedges of watermelon with the rind on will be the easiest to prep and also to eat. You’ll want to carry a camping knife in a protective sheath for safety. If it’s a personal-sized watermelon, just whack it in half and dig the flesh out with a spoon (or an implement from your Swiss army knife).  Also, it’s a smart idea to stash a big zip-top bag in your rucksack in case you need to carry leftovers home!  If you’re not cutting the watermelon until you get home, check out my favorite way to cut and store a big watermelon in 5 minutes.

Pin this for later!

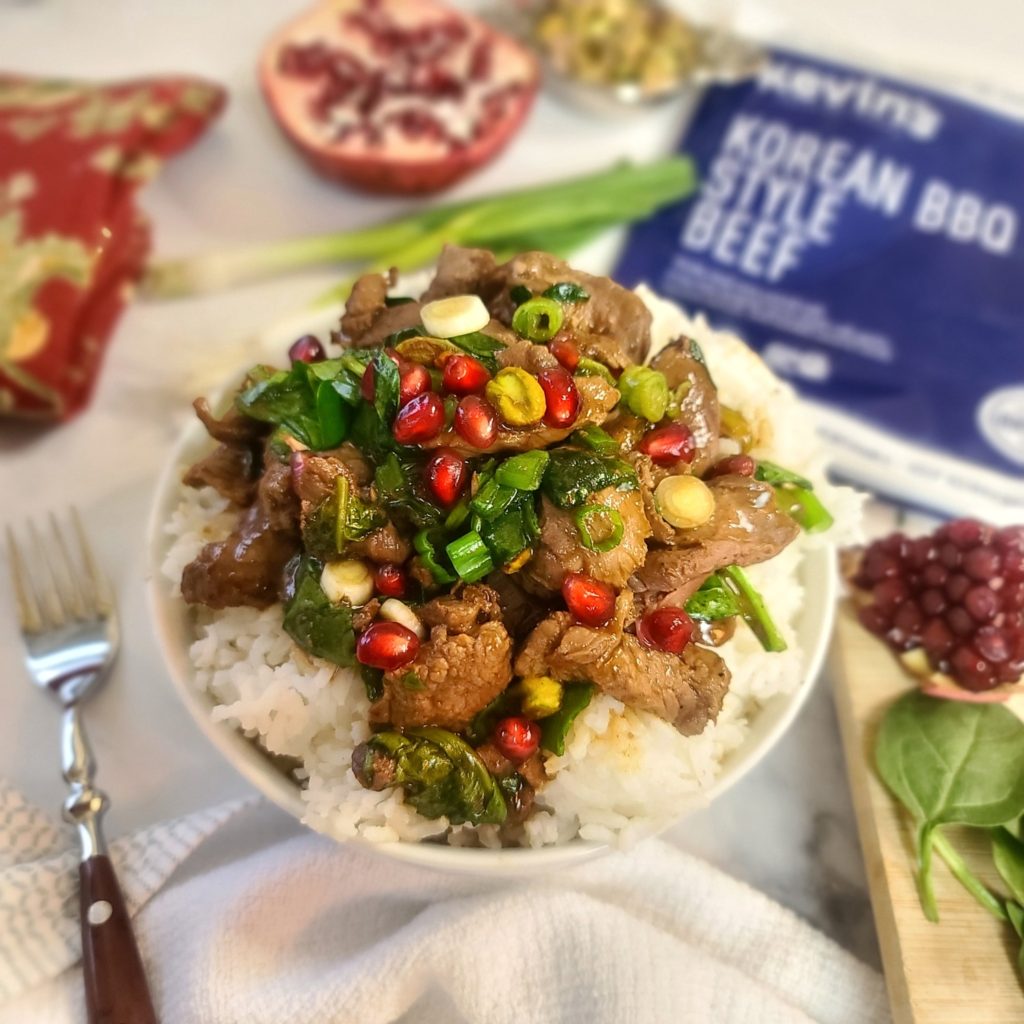
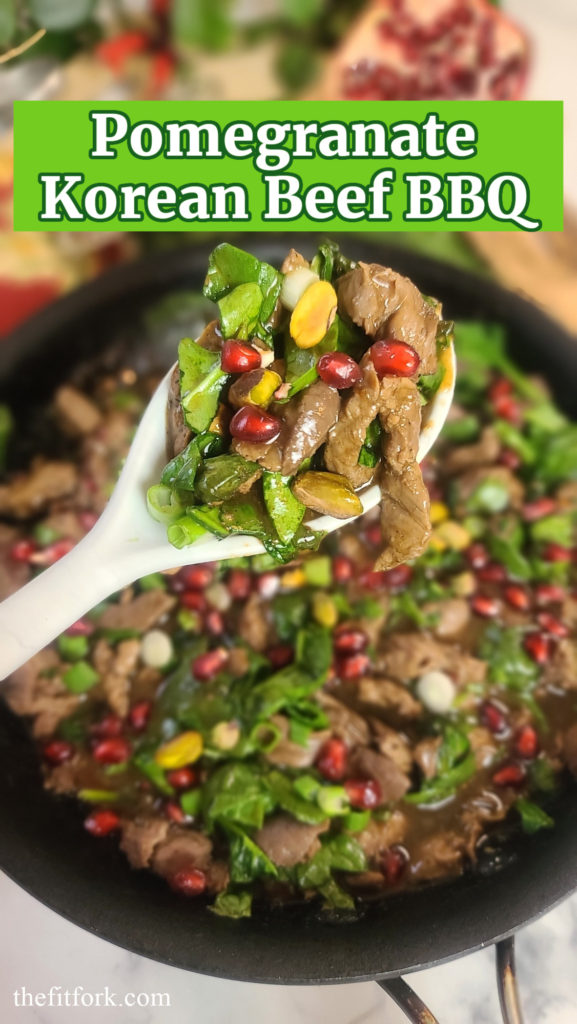
10-Minute Pomegranate Korean BBQ Beef

This post is sponsored by Kevin’s Natural Foods as part of a blogger recipe challenge.

Hmmm, how to save dinner on the craziest of pre-holiday prep days?! I had so much shopping, wrapping, decorating, and last-minute elf-ing around that “what’s for dinner” was the last thing on my mind. Plus, I was just plain tuckered out.

But the quick and easy meal pouches from Kevin’s Natural Foods were the fit foundation for some last-minute refueling and feasting! I used the Korean Beef BBQ to make a holiday-inspired meal — 10-Minute Pomegranate Korean Beef BBQ. 

Pin this for later!

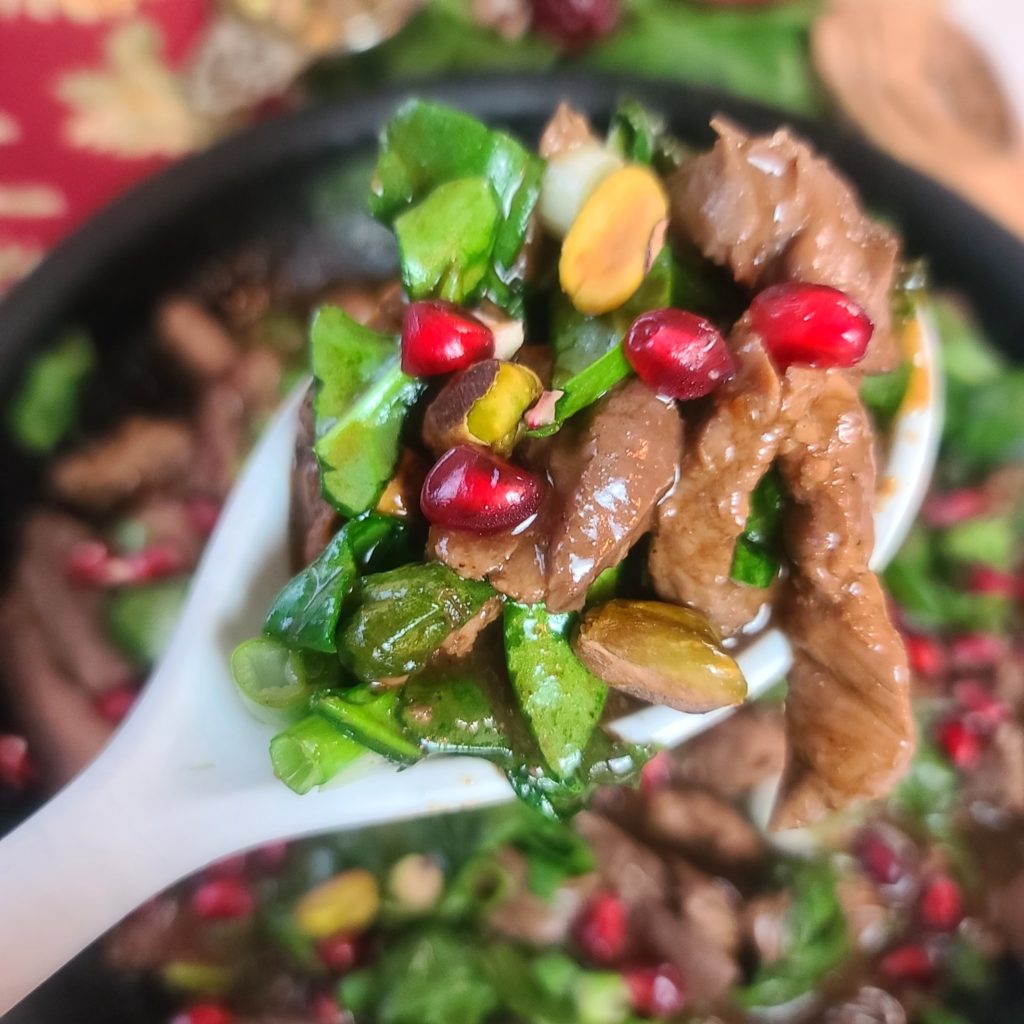
This 10-Minute Pomegranate Korean Beef BBQ recipe is made with a Kevin’s Natural Foods meal pouch that includes sous vide cooked beef and Bulgogi-style sauce. I put my own spin on the already delicious meal by adding a little pomegranate juice and ginger to the sauce and adding pomegranate arils, spinach, and pistachios. SO DARN EASY and it makes an easy-peasy, beautiful, flavorful and festive holiday meal (which also makes dinner any day of the year). I served this pomegranate bulgogi inspiration on rice (use a frozen rice pouch to keep it quick – I actually batch cook my rice and grains and freeze in the portions I need to save time and $$).  But, if you’re not into rice, this festive bulgogi recipe is also yummy on cauliflower rice, smashed sweet potatoes, or with veggie noodles of your choice.

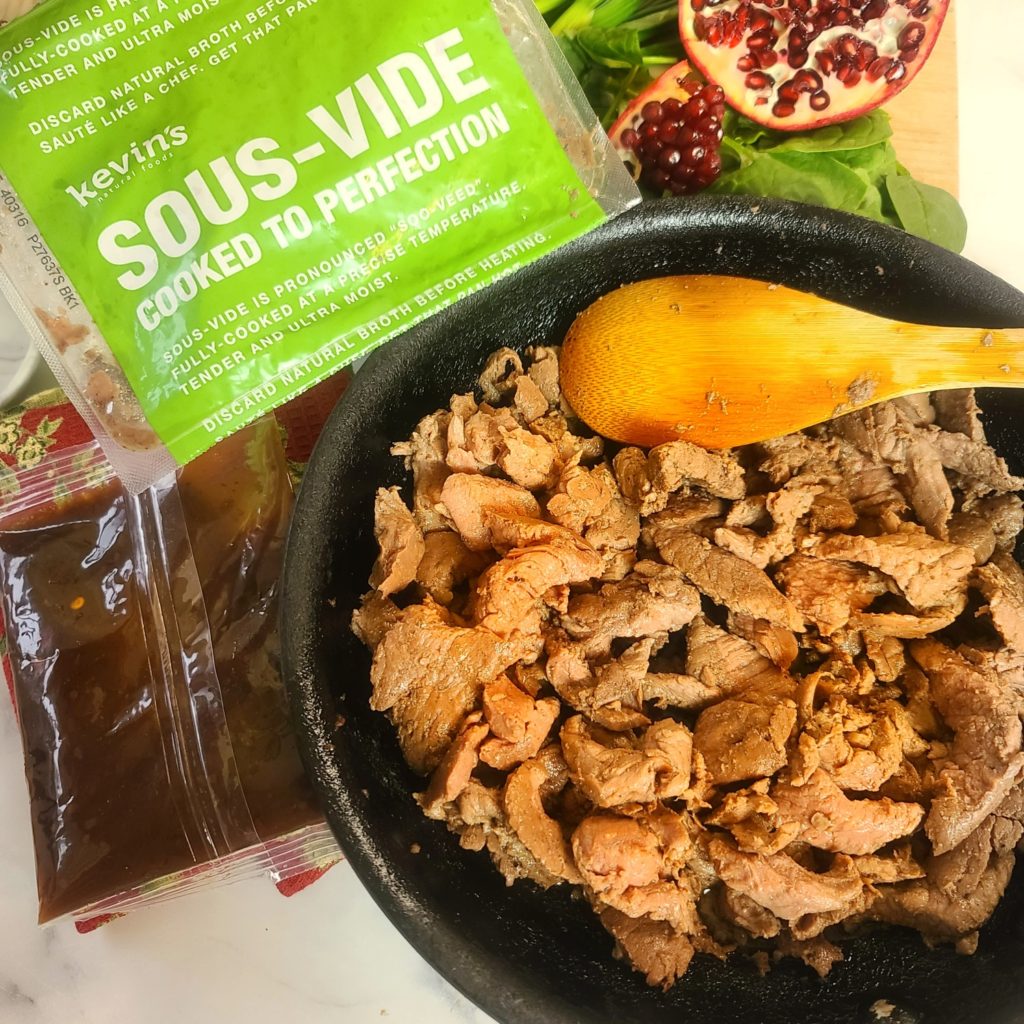
Beef is 100-percent pasture-raised, grass-fed, and grass-finished and cook in sous-vide method, so it stays super tender and juicy.

Real talk: I have been eating and enjoying the chicken meals from Kevin’s for a while but have shied away from trying a beef meal kit. Why? Because I’m definitely a beef snob and was worried that the beef steak tips would be stringy and chewy, as the beef cuts in these types of convenience meals usually are.  But, color me IMPRESSED! The beef steak tips remain super tender thanks to the sous-vide cooking method that is used to prep them. Just a couple minutes in the skillet to warm up and they are still juicy and tender. The beef that Kevin’s natural foods recipes source 100-percent pasture-raised, grass-fed, and grass-finished.

In the past, I’ve picked up my meals from Kevin’s Natural Foods at my local grocery store. But now the meals can be ordered in bundled assortments from the comfort and convenience of your home online. And, actually you can order from whatever vacay adventure you may be crushing so that they are delivered straight to your door, frozen in a cooler, when you roll back from the airport or road trip. No worrying about getting to the grocery store STAT or caving into fast take-out food because you’re starving.

For convenience, use prepped pomegranate arils from a tub!

Today’s recipe used the Korean BBQ-style Beef meal pouch, but there are SO MANY varieties like and Creamy Coconut Chicken and Cilantro Lime Chicken. It’s never boring and ALWAYS easy and delicious. Plus, all meal pouches from Kevin’s are nutritionally built to be compliant with keto, paleo and gluten free diets too!

Check out the Creamy Chicken Coconut Soup (like Tom Kha Gai) recipe I came up with using their Thai-style Coconut Chicken meal kit.

Enjoy a rich, creamy, amazingly flavorful Thai-inspired Creamy Coconut Chicken Soup in just 10 minutes thanks to entree kits from Kevin's Natural Foods! Paleo, So satisfying . . plus Keto, and gluten-free!
Creamy Thai Coconut Chicken Soup

Find additional details about Kevin’s Natural Foods their backstory, and their amazing clean-eating focused products (entrees, sides, sauces, stir-frys and more!)  which can find a place in your diet – whether Keto, Paleo, Gluten-free . . or Mediterranean, like me!  Order online or find in a store near you.

Also check them out on Facebook, Instagram and Pinterest!  AND – give my 10 minute recipe for Pomegranate Korean Barbeque a try, it’s so delicious and festive!

10-Miute Pomegranate Korean BBQ Beef
Prep Time
5 mins
Cook Time
5 mins
Total Time
10 mins
 

Succulent beef tips with spinach in a slightly sweet, slightly spicy sauce that is bejeweled with pomegranate arils and pistachios! It's festive, flavorful and a fit for your clean eating meal.

Servings: 3 servings
Ingredients
  • 1 pouch Korean Beef BBQ from Kevin’s Natural Foods
  • 2 teaspoons olive oil
  • 1 teaspoon finely minced or grated ginger
  • 2 tablespoons 100% pomegranate juice *hack: if using a ready-to-eat tub of arils, just drain off the juice for this use.
  • 3 cups chopped fresh baby spinach
  • 1/3 cup pomegranate arils
  • 3 scallions both white bulbs and greens finely sliced
  • 3 tablespoons chopped pistachios
  • 3 cups pre-cooked rice white, brown, cauliflower rice, etc
Instructions
  1. Open sous-vide pouch of beef and drain of broth from beef tips.
  2. In medium skillet, heat olive oil over medium high; add beef tips and stir-fry for 2 minutes.
  3. Reduce heat to medium and add ginger, pomegranate juice, and SAUCE POUCH from meal kit, and simmer uncovered for 2 minutes, until slightly reduced.
  4. Stir in baby spinach and pomegranate arils and stir around for 30 to 60 seconds until spinach is par-wilted.
  5. Remove from heat and sprinkle with pistachios. Serve with rice or other desired side.
  6. Serves 3.

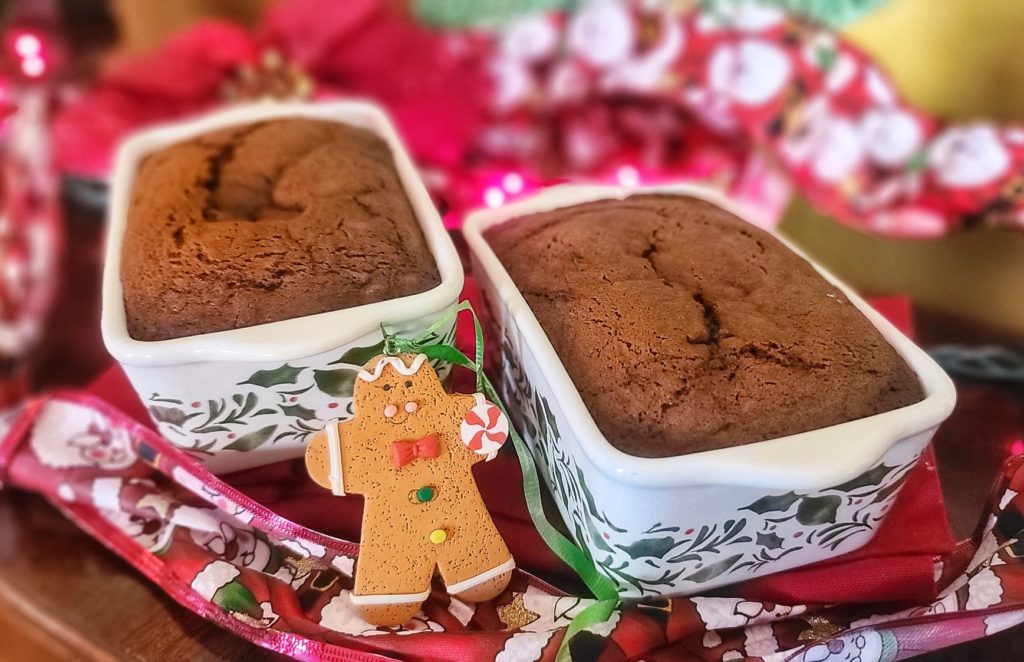
Chocolate Gingerbread Mini Loaves

Gingerbread or chocolate . . .why choose? You’ll “loaf” the joining of these two popular holiday flavors in this recipe for Chocolate Gingerbread Mini Loaves.

Gingerbread is the quintessential holiday treat and most of have fond memories of the delicious aroma and warm, spicy taste of this flavor profile that is incorporated in cookies, cakes, and other yummy Christmas treats. Adding chocolate even deepens the flavor experience and speaks to a chocolate-lover’s soul!

This is a smaller-scale gingerbread recipe making two loaves in approximate-sized 5.5” x 3” loaf pans. You can also use all the batter in a single 6” diameter small cake pan. You can also half the recipe and make a single mini loaf and you can also double the recipe to make 4 mini loaves or fill a bigger 8” to 9” diameter cake pan.

Pin for later!

Slice them up and serve warm with ice cream or whipped cream, or the toppings of your choice. If you’d rather gift them to a friend or family present them in nicer, disposable mini loaf liners or, even better, a beautiful ceramic mini loaf pan (can be used long after the food gift is gone)!  If you are wrapping in plastic wrap or a cellophane food gift bag, make sure the gingerbread loafs are completely cooled. You can also store in the freezer for up to 6 months, in wrapped in plastic wrap and sealed in a freezer bag.

Mini Chocolate Gingerbread is easy to make, sharable, delicious! Enjoy!

This post contains affiliate links.

Chocolate Gingerbread Mini Loaves

A chocolate-lover's twist on the quintessential holiday season treat – gingerbread! Simple and delicious, makes two little loaves, one for you and one for sharing!

Course: bread, Breakfast, brunch, Dessert
Keyword: cake, christmas, gingerbread, holiday
Servings: 2 loaves
Ingredients
  • 4 tablespoons unsalted butter
  • 1/2 cup packed brown sugar
  • 1 large egg
  • 1/2 cup buttermilk hack: whole milk + ½ tsp vinegar, let sit 5 min
  • 1/3 cup molasses
  • 1/2 teaspoon baking soda
  • 2 tablespoons unsweetened cocoa powder
  • 1 teaspoon ground cinnamon
  • 1 teaspoon ground ginger
  • 1/8 tsp ground nutmeg
  • 1/4 teaspoon salt
  • 1 cup flour or gluten free blaking blend
  • 1/2 cup mini chocolate chips
Instructions
  1. Preheat the oven to 350F and lightly grease TWO mini loaf pans (about 5.5” x 3”) or one 6" round cake pan.

  2. Cream the butter and brown sugar then beat in the egg. Mix the buttermilk and molasses into butter mixture. Stir in baking soda, cocoa powder, cinnamon, ginger, nutmeg and salt until combined. Next stir in flour until a smooth batter forms. Fold in chocolate chips.
  3. Bake for about 25 or until a toothpick inserted in center pulls clean. Cool 10 minutes before slicing.

“Breakfast at Midnight” Brunch Charcuterie Board for New Year’s Eve

This post is sponsored by Wildgrain.

My goal for 2023 is to “Eat More Brunch” . . . and I’m starting now with this “Breakfast at Midnight” snacking board. It’s so perfect for our stay-at-home New Year’s Eve celebration. I’m not a fan of going out on this crazy night and would rather stay at home in my PJs and eat my favorite foods – and a breakfast grazing board pretty much covers all the favorite comfort food bases!

With help from Wildgrain Box (more details below), I made this gorgeous grazing board overflowing with beautiful brunch and breakfast trimmings. To balance my board nutritionally, I like to offer an array of nibbles and noshes.

This is a must make for your breakfast and brunch celebration. – or anytime of day!

Ideas for Your Breakfast or Brunch Charcuterie Tray

Eggs: Deviled eggs, sous-vide egg bites, slices of quiche, egg salad, or simple slices of hard-boiled egg.

Meats: Bacon, breakfast sausages, chunks of steak, and traditional charcuterie meats such as salami, prosciutto and summer sausage.

Cheese: Your favorite cheese cut in “cracker stacker” form, along mini wedges of bold cheese like blue cheese, and spreadable cheese and even a ooey-gooey baked brie.

Seasonal Fruit:  All the beautiful fruits you love, avocados and tomatoes too for sandwich building. 

Dried Fruits and Nuts

Butter, Honey, Jams, Spreads

Artisan Breads, Pastries, Crackers: Sourdough sliced for breakfast sandwich making, biscuits, pastries, donut holes, muffins, crackers and more!  I even added homemade cottage fries with this brunch board.

Croissants from Wildgrain are magnifique! For a limited time, new orders get a FREE 4-pack with each shipment for life.


When it comes to artisan breads and pastries, I’ll admit right here and now – I’m NOT a scratch baker (those croissants above would literally take ALL DAY from scratch, but only 18-22 minutes the Wildgrain way)!  Wildgrain Box to sends me other baking championship-worthy items – and no one is the wiser!  Wildgrain is an amazing subscription box that sends artisanal pastas, breads and pastries to my home that are frozen and ready to prepare in no more than 25 minutes!  

I transformed my Cranberry Orange Biscuits from Wildgrain into look-alike baby scones by cutting in half diagonally, giving an egg wash on top, and sprinkling with sugar crystals.

All the labor-intensive work has been done for me thanks to Wildgrain Box. The dough has been hand-prepped, the breads have been proofed, and the pastries given extra TLC. This means I save a ton of time and no extra mess is made at my house, lol!  I also appreciate that Wildgrain use clean, non-GMO ingredients and their fermentation process provides benefits you won’t find at the grocery store. Items are always shipped free in and eco-friendly box and recyclable stay-cold packaging. They also support small bakeries and responsible source products from some of the best bread and pasta makers in existence. With each bite, I can taste the talent and love these yummy delights.

BTW, you can save $10 on your first order with code THEFITFORK. Every month (pause or cancel at any time), I get a frozen shipment of tender pastas, artisan breads and pastries delivered to my door. 

Slow-fermented Olive Oil Ciabatta from Wildgrain is a winner with any meal. I sliced it up to use for breakfast sammies on my brunch board.

For New Year’s Eve . . . and beyond, keep Wildgrain in mind as your secret shortcut. One of my quick and east dinner solutions throughout the year (and to support my carb loading for longs runs, haha) are the artisan pastas from Wildgrain.  These fresh hand-cut pastas taste oh-so “old world,” yet only need to be plopped into boiling water for mere minutes. Add a sauce, some veggies, a protein – and boom-bam, it’s a nutritious meal in under 30 minutes!  

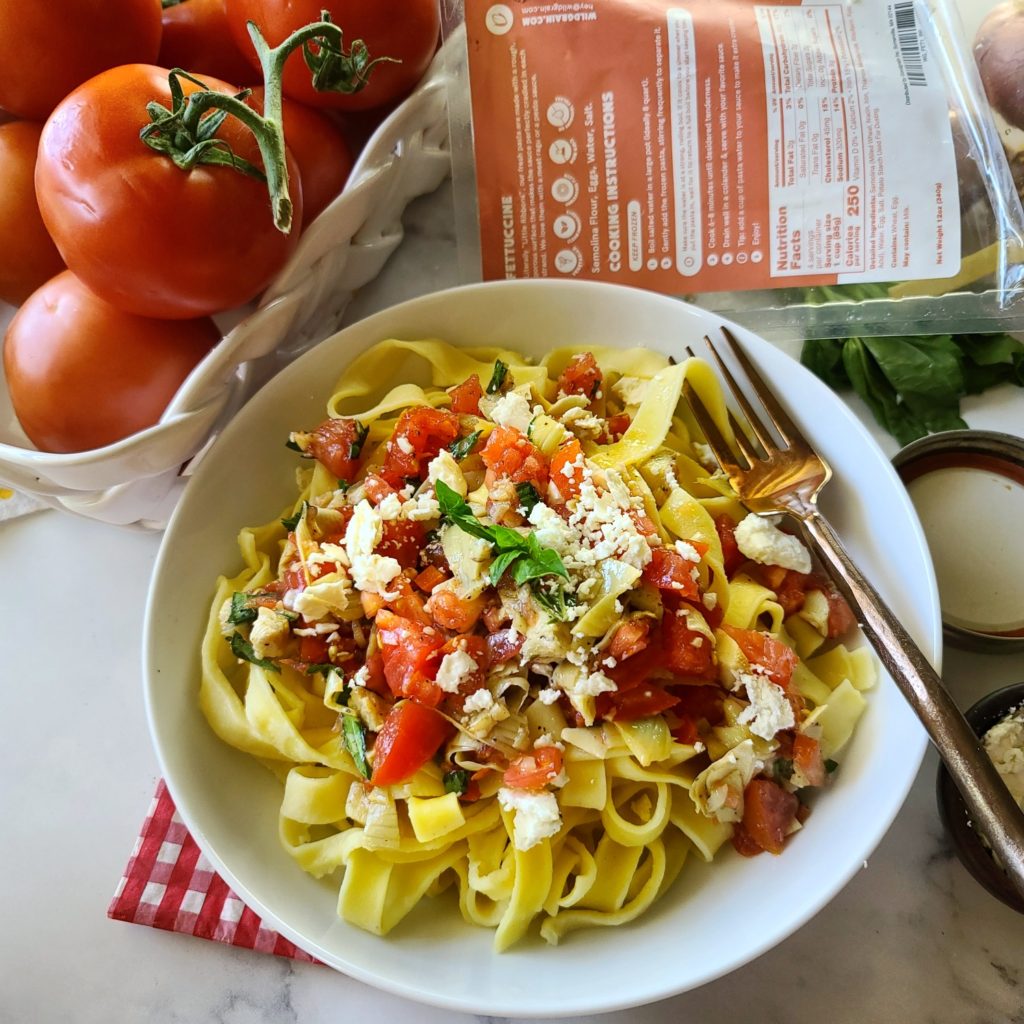
This No Cook Artichoke Fettuccini using Hand Cut Pasta from Wildgrain  is a quick and easy meal to incorporated into your healthy new year!

Whip up a fresh fit meal in minutes with this easy, no-cook pasta sauce that features tomatoes, marinated artichokes, garlic and feta cheese - plus a little EVOO. It's tossed with hot noodles that warms it up! A delicious summer dinner! Used pasta from the Wildgrain subscription box, save $30 with code THEFITFORK at http://bit.ly/Wildgrain
Artisan bread, pastas and pastries in the the Wildgrain subscription box, save $30 with code THEFITFORK at http://bit.ly/Wildgrain

SNEAK PEEK: 

 January 2023 Wildgrain Mixed Box

  • Plain Sourdough Load
  • Cranberry Pecan Sourdough Loaf
  • Spelt Sourdough Loaf
  • Fettuccine Pasta
  • Tonnarelli Pasta
  • Giant Chocolate Chunk Cookes
  • + Free Croissants

 January 2023 Bakery Box: 

  • Plain Sourdough Loaf
  • Cranberry Pecan Sourdough Loaf
  • Spelt Sourdough Loaf
  • English Muffins
  • Slow-Fermented Brioche Rolls (likely but not confirmed)
  • Giant Chocolate Chunk Cookes
  • + Free Croissants

Oh yeah, did I mention that every subscription of a Wildgrain Bread Box started now through January gets a free 4-pack of croissants sent with EVERY box shipment for LIFE. There are no words to describe how good they are! Remember to use my Wildgrain coupon code to save $10 — THEFITFORK

Rustic Mushroom Bacon Blue Cheese Tart with Garlic-Thyme Pastry “Leaves”

This post is sponsored by Wick’s Pies.

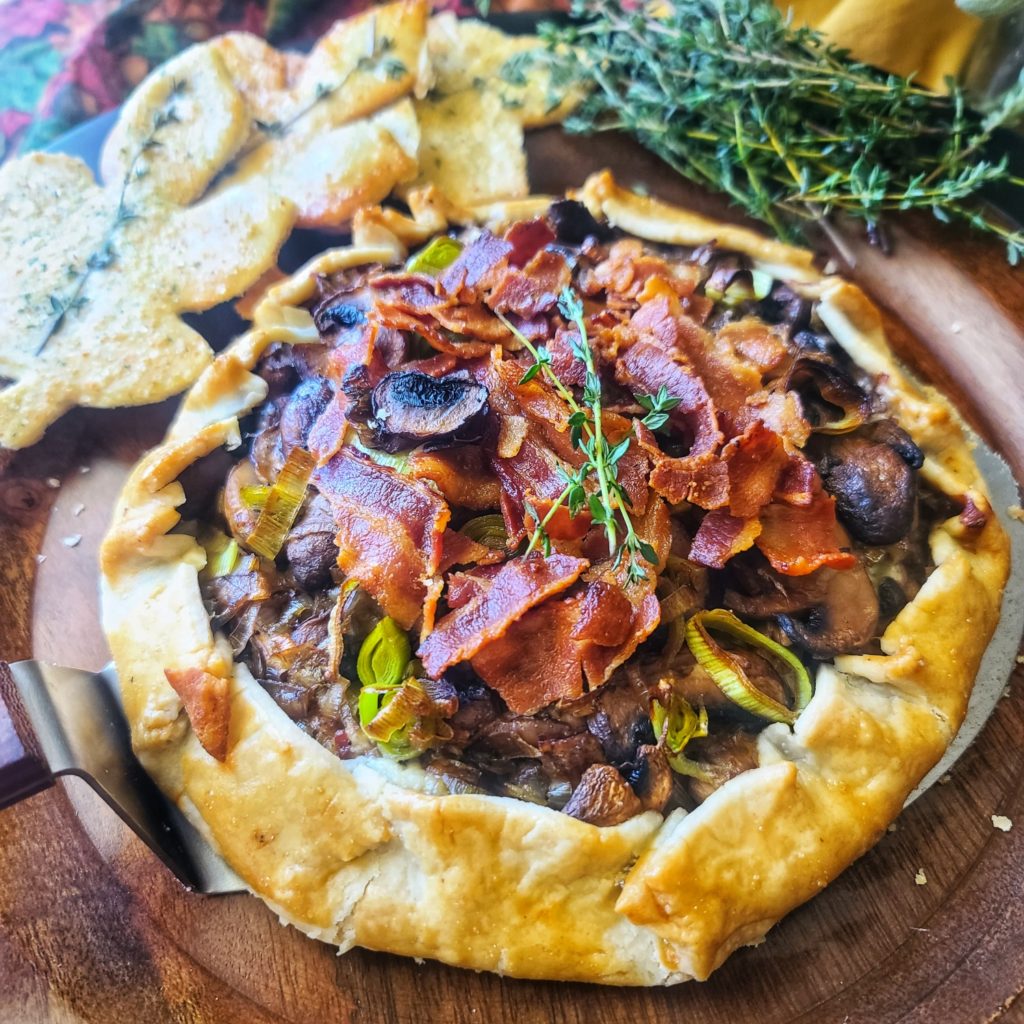
Autumn is here, the cozy yet bold flavors are dropping faster than the leaves from a tree! Like this Rustic Mushroom Bacon Blue Tart (with Garlic-Thyme Pastry “Leaves”), an autumn-inspired, delightfully delicious meal that comes together conveniently thanks to frozen pie crusts from Wick’s Pies.

So bold and beautiful, this mushroom blue cheese tart is filled with flavor and easy to make thanks to a frozen pie crust! Sever with a green salad for a brunch or light dinner -- or as an appetizer for your fall-season party!

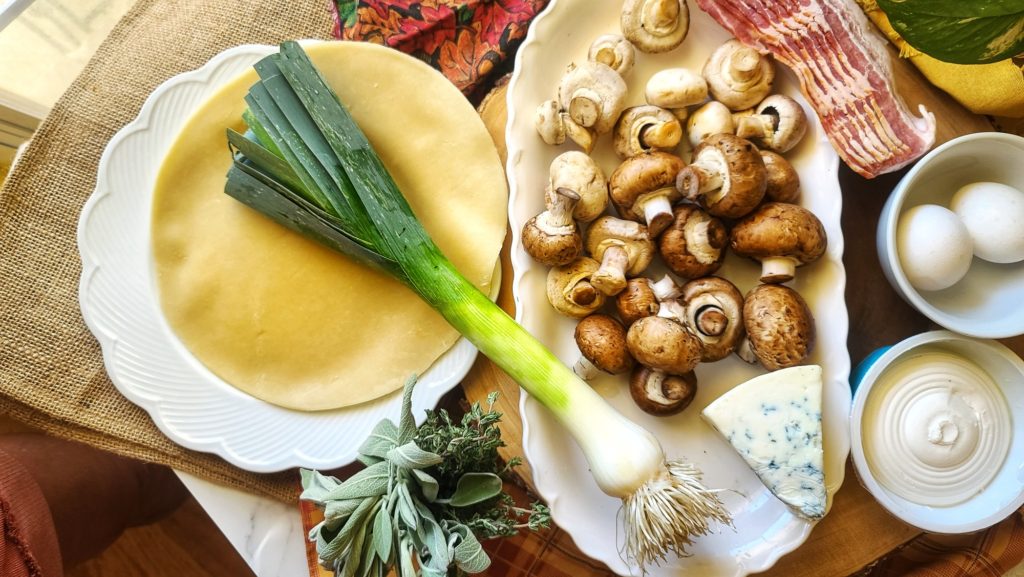
Eating pie for dinner is where it’s at! This is one of the best savory tarts I have ever made and is brimming with mushrooms, leeks, bacon and fresh herbs on a bold layer of creamy blue cheese.

Oh, and the crust! Let’s talk about the crust! Delicate, tender, flakey yet oh-so convenient! It’s a frozen pie crust from Wick’s Pies. I am NOT a pastry chef, and having the time and skill to make a pie crust worthy to envelope all the delicious ingredients in this mushroom tart stresses me out!

A glimpse at how easy this “use a froze pie crust” recipe actually is!

Using a frozen (and thawed) 8” Raw Circle of rolled out dough from Wick’s Pie, make my life so much easier – and I can spend my culinary talents focusing on the fillings and overall flavor of my tart rather than worrying about a dry, soggy, or otherwise lackluster crust.

So bold and beautiful, this mushroom blue cheese tart is filled with flavor and easy to make thanks to a frozen pie crust! Sever with a green salad for a brunch or light dinner -- or as an appetizer for your fall-season party!
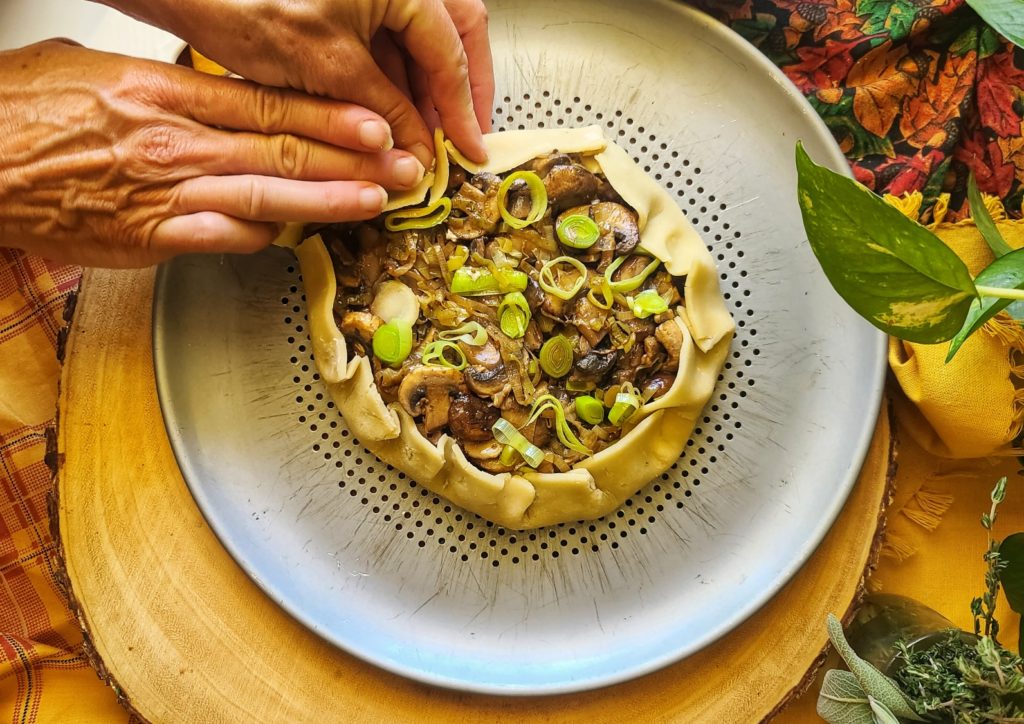
Fold up the sides, easy-peasy – you can’t make a mistake!

Also, I making a “rustic” tart, NOT in a pie pan with fancy lattice work, pinching or braiding also makes easy savory tart recipe a winner. Just put fillings in the middle, leaving about a 1-inch border, and then fold up the edges to secure. This mushroom pie CAN’T be messed up and any imperfections in executing the crust “fold up” just adds to the rustic, country charm.

So bold and beautiful, this mushroom blue cheese tart is filled with flavor and easy to make thanks to a frozen pie crust! Sever with a green salad for a brunch or light dinner -- or as an appetizer for your fall-season party!

Because I’m so addicted to this delicious, tender convenience pie crust, I decided to use a leaf-shaped cookie cutter to make extra savory pie-crust pastries. You can NEVER have too much crust, am I right?! I simply sprinkled these pie dough cut outs with garlic salt and pressed in a bit of fresh thyme decoratively. Feeling so fancy serving this casual yet pretty darnclassy meal to my mom and dad this weekend!

So bold and beautiful, this mushroom blue cheese tart is filled with flavor and easy to make thanks to a frozen pie crust! Sever with a green salad for a brunch or light dinner -- or as an appetizer for your fall-season party!
Use a cookie cutter to punch out your favorite shape and sprinkle with garlic salt!

Mushroom Tart Pro Tips:

After sautéing mushrooms, slightly tilt pan to pool up excess liquid and mop off with a paper towel. This will prevent the crust from getting soggy.

Don’t skip the egg wash step in the recipe, this helps the crust turn a beautiful golden brown with a nice gloss.

If you are not a blue cheese fan, you can substitute another type of cheese (maybe crumbled Feta or even grated sharp white cheddar) instead.

I like to use a vented pizza pan, I think it keeps the crust crispier and flaker.

Check out Wick’s Pies wholesaler page for the source of the 8” Raw Circles used in my recipe . . . or you can also order whole pies of the dessert type to be delivered to your door– what a fabulous way to minimize upcoming holiday entertaining stress!

  1. Website: https://www.wickspies.com/
  2. Facebook: https://www.facebook.com/WicksPies
  3. Instagram: https://www.instagram.com/wickspies/
  4. Twitter: https://twitter.com/WicksPies

Learn more about Wicks Pies!

o bold and beautiful, this mushroom blue cheese tart is filled with flavor and easy to make thanks to a frozen pie crust! Sever with a green salad for a brunch or light dinner -- or as an appetizer for your fall-season party!
Pin this for later!
5 from 3 votes
o bold and beautiful, this mushroom blue cheese tart is filled with flavor and easy to make thanks to a frozen pie crust! Sever with a green salad for a brunch or light dinner -- or as an appetizer for your fall-season party!
Rustic Mushroom Bacon Blue Cheese Tart with Garlic-Thyme Pastry “Leaves”
Prep Time
10 mins
Cook Time
36 mins
Total Time
35 mins
 

So bold and beautiful, filled with flavor and easy to make thanks to a frozen pie crust! Sever with a green salad for a brunch or light dinner — or as an appetizer for your fall-season party!

Course: Appetizer, brunch, dinner
Cuisine: American, country, French
Keyword: bacon, blue cheese, mushroom, pie crust, tart
Servings: 4 servings
Ingredients
  • 4- ounce bacon
  • 10 ounces mushrooms of choice I used Cremini and White Button
  • 1 cup sliced leeks whites and light greens
  • 1/4 teaspoon black pepper
  • ¼ teaspoon sea salt
  • 4 ounces cream cheese softened
  • 2 ounces blue cheese crumbled
  • 1 teaspoon fresh thyme leaves plus extra for garnish and crust “leaves”
  • 1 whisked egg for wash
  • ½ teaspoon garlic salt
  • 2 frozen Wick’s Pie crusts, thawed 1 for tart, 1 for extra crust “leaves” (optional
Instructions
  1. Heat 12-inch stainless steel skillet over medium-high and cook bacon for several minutes each side, until browning and crispy. Remove to paper towel-lined plate to drain, reserving about 1 tablespoon bacon fat in pan (discarding the rest).
  2. Add sliced leeks to pan, and sauté for 2 minutes and then add mushrooms and continue to cook for a 4 to 5 more minutes until softened and liquid released. Season with salt and pepper. Remove from heat and slightly tilt pan to pool up any remaining mushroom liquid and carefully pour off or sop up with paper towel. This will help prevent tart from getting soggy.
  3. Preheat oven to 400F.
  4. Allow mushroom mixture to cool for a few minutes. Meanwhile, make cheese filling by coarsely mashing together 2 ounces of crumbled blue cheese with 4 ounces cream cheese.
  5. Place thawed Wick’s Pie crust on a baking sheet (I prefer a vented pizza pan), coated with non-stick spray.

  6. Using spatula, spread on cheese mixture eaving a 1” border. Next pile on mushroom mixture over cheese and lightly pat down.

  7. Fold up edges of pie crust “rustically,” pinching excesses in the folds together as needed. Brush exposed edges of pie crust with egg wash.
  8. Top with crumbled bacon.
  9. Bake at 400F for 25 minutes or until crust golden and cheese bubbling.

  10. Once you stick tart in oven, start preparing the optional garlic-thyme “leaves” which will bake in the same oven as the tart for the last 5 to 6 minutes of baking.

  11. Spread thawed Wick’s crust on a baking sheet and sprinkle with garlic salt. Use leaf shaped cookie cutter (or other cutter design of choice) to make impressions that cut through – slightly wiggle the cut crust from them, but leave on the pan to cook as “extra” snacking material for later! Press on some of the fresh thyme into to dough decoratively. Bake at 400F for 5 to 6 minutes or until golden. Remove to cool on pan for 5 minutes before handling.
  12. Serve garlic-thyme leaves alongside the tart, if desired (making the leaves is an optional step).