No-Crust Tomato Pie – Lower Carb, Gluten-free

Crustless Tomato Pie is a low-carb spin on one of my favorite southern dishes. Such a yummy way to use up a bumper crop of sweet, ripe tomatoes.

Most southern tomato pies have a pastry crust, but I personally like mine without! Tomatoes tend to get watery and seep all over a crust and make it unpleasantly soggy, especially you have leftovers. But a crustless tomato tart or pie doesn’t have nearly the same issue.

Watch it – 15-second tutorial!

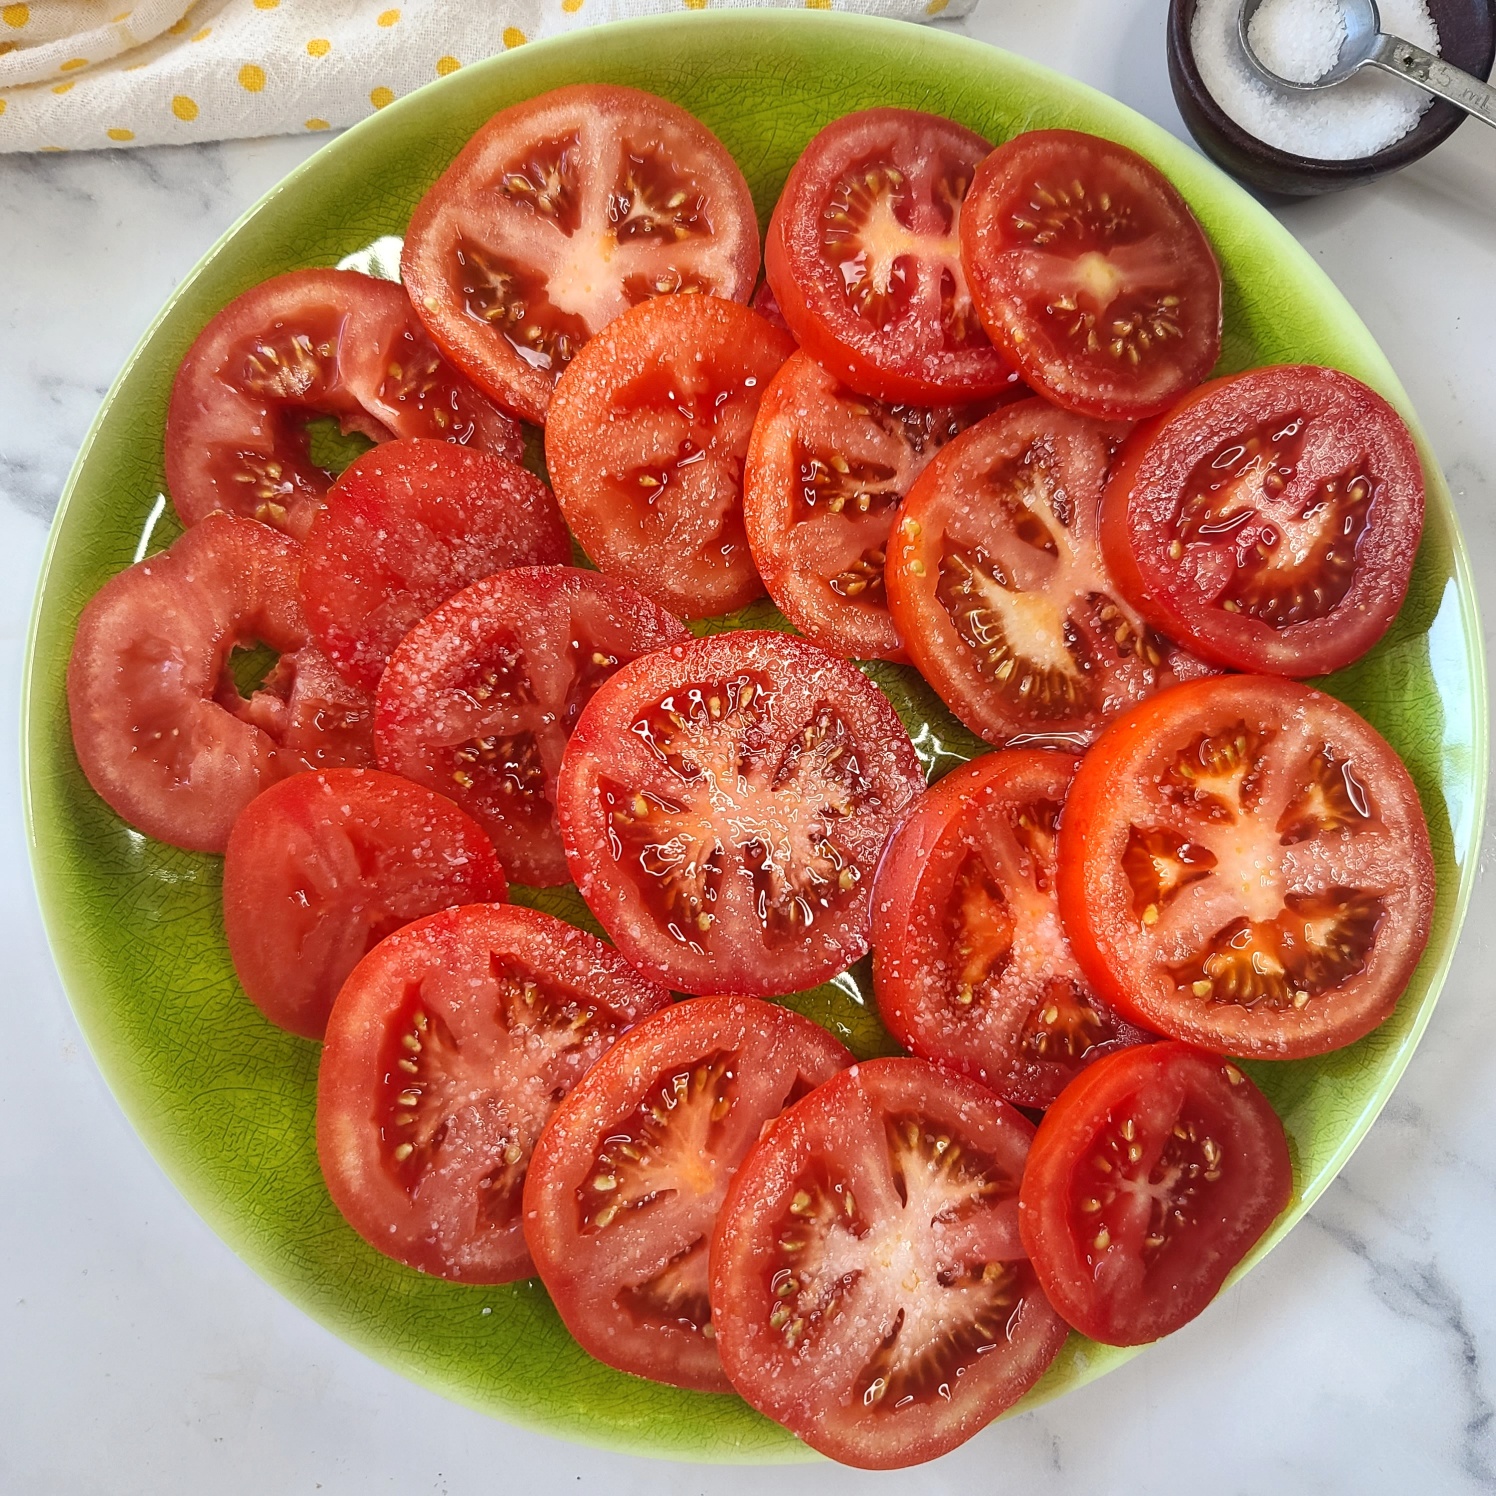
However, one of the most important preparation steps you’ll want to take for this tomato mozzarella pie is to “sweat” the tomatoes. To do this simple task, just sprinkle your slice tomatoes with a little salt and let them rest on a plate for about 30 minutes. Afterward, drain off any liquid released onto the plant and use paper towels to blot up any excess moisture (this also helps remove some of the salt so that it doesn’t overpower). Sweating tomatoes like this helps keep them from making dishes watery and also makes the tomato flavor more intense – win-win!

Sweat the tomatoes with a little sale for 30 minutes - this helps remove excess moisture so recipe doesn't get soggy and also intensify flavor.
Don’t skip the 30-minute tomato “sweat” session!

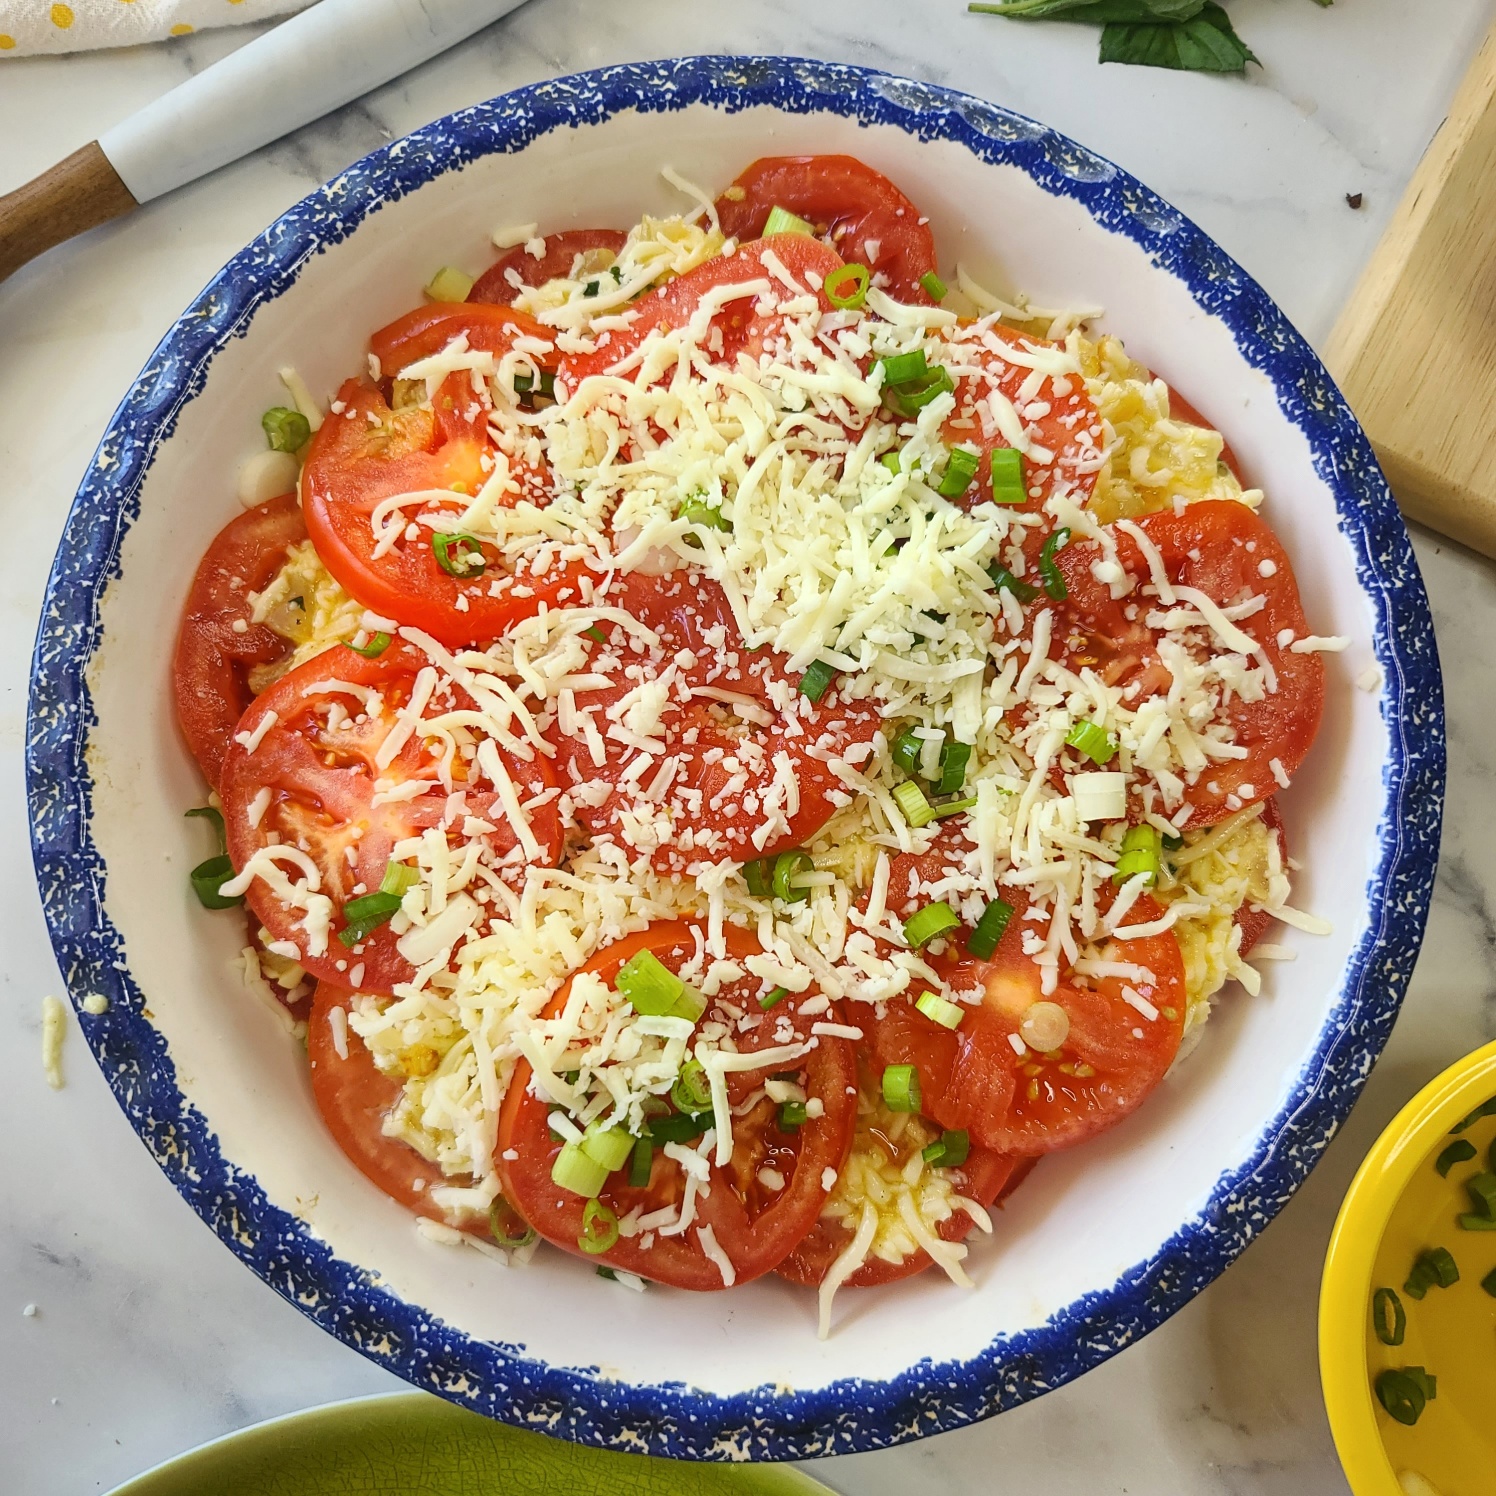
To assemble the tomato pie, you just layer tomato slices and half of the egg-cheese mixture, and then repeat those layers again, and finish with a final tomato layer – so 3 layers of tomatoes and two layers of filling. The recipe does call for two eggs in it, but only to serve as a binder to help keep everything together – it’s definitely not eggy like a quiche or frittata.  It’s all about the tomatoes!

Ready to pop in the oven for 30 minutes!

Serve a side dish to dinner or light lunch – it’s even delicious as summery breakfast. My husband says it’s a casserole with tomatoes, but I say it’s a low carb tomato pie since it’s in a pie dish – he does agree it’s delicious. My kids say the low carb tomato casserole slash pie tastes like a pizza! Any way you slice it, we gobble it all up.

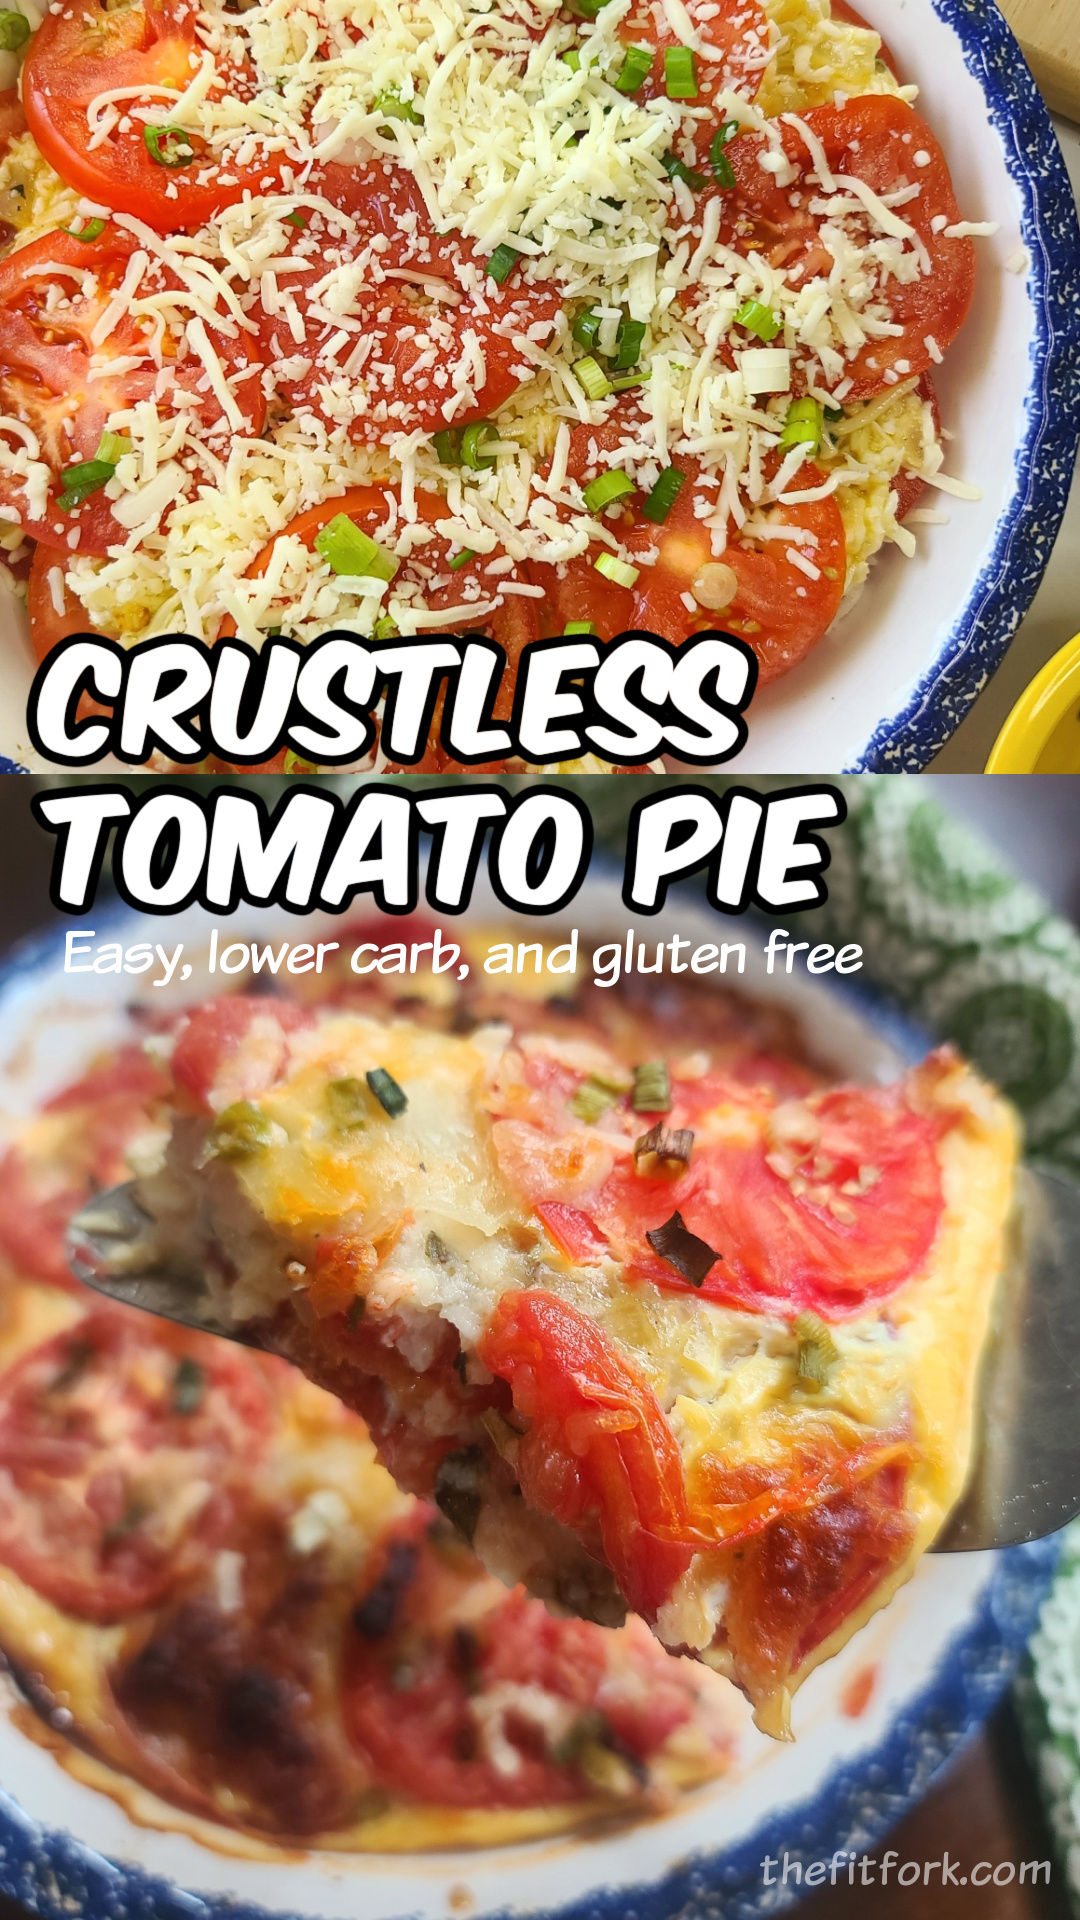
Pin this for later!

However, if you do want to heat leftovers up the next day, you can microwave a slice for about 45 seconds. Or, if you have an air-fryer, I prefer to set my slice in a small dish and air fry at 390F for about 6 minutes – this returns the cheese to more of the original gooey-crispy state.

Makes 6 servings, each with 178 calories, 9g carb, 12g fat, 13g protein

Disclaimer: My post contains affiliate links. I earn a small commission on products purchase, however the price to you remains the same. Thank you!

5 from 7 votes
Crustless Tomato Pie: No crust means the intense flavor of vine-ripe tomatoes shines through in this recipe whether you want to call it a pie, tart or casserole. Simple ingredients, lower carb, gluten-free and sure to delight for breakfast, brunch or as a side dish any night.
No Crust Tomato Pie – Low Carb and Gluten Free
Prep Time
10 mins
Cook Time
30 mins
“Sweating” tomatoes
30 mins
Total Time
1 hr 10 mins
 

Crustless Tomato Pie: No crust means the intense flavor ofvine-ripe tomatoes shines through in this recipe whether you want to call it apie, tart or casserole. Simple ingredients, lower carb, gluten-free and sure todelight for breakfast, brunch or as a side dish any night.

Course: Appetizer, Breakfast, brunch, lunch, Side Dish
Cuisine: American, Southern
Keyword: brunch, pie, tart, tomato
Servings: 6 servings
Calories: 178 kcal
Ingredients
  • 1 ½ lbs. tomatoes about 5 to 6 medium
  • 1 tsp salt
  • 1 cup chopped sweet onion
  • 1 tablespoon butter
  • 2 eggs
  • ½ tsp black pepper
  • 2 tablespoons fresh chopped basil
  • 2 cups shredded mozzarella reserve 1/3 cup
  • 2 green onions tops and whites chopped
Instructions
  1. Slice tomatoes and sprinkle with salt. Let sit 30 minutes, then pour off juices and blot excess with paper towels.
  2. While tomatoes are “sweating,” saute onion in butter. Let cool of a bit.
  3. Mix together cooled sauteed onions, eggs, pepper, fresh basil, and 1 2/3 cups of the mozzarella.

  4. Layer pie dish with tomatoes, then dollop and spread ½ of the cheese-egg mixture on top.
  5. Sprinkle with green onions. Layer with tomatoes and remaining cheese mixture.
  6. There should be enough tomatoes left for the top. Arrange these and sprinkle with remaining cheese.
  7. Bake at 375F for 30 to 40 minutes, or until cheese bubbling and starting to brown in places.
  8. Let rest for 15 minutes before cutting into 6 wedges.
Recipe Notes

Makes 6 servings, each with 178 calories, 9g carb, 12g fat, 13g protein

Addictive Honey Ginger Broccoli for Two in Air-Fryer

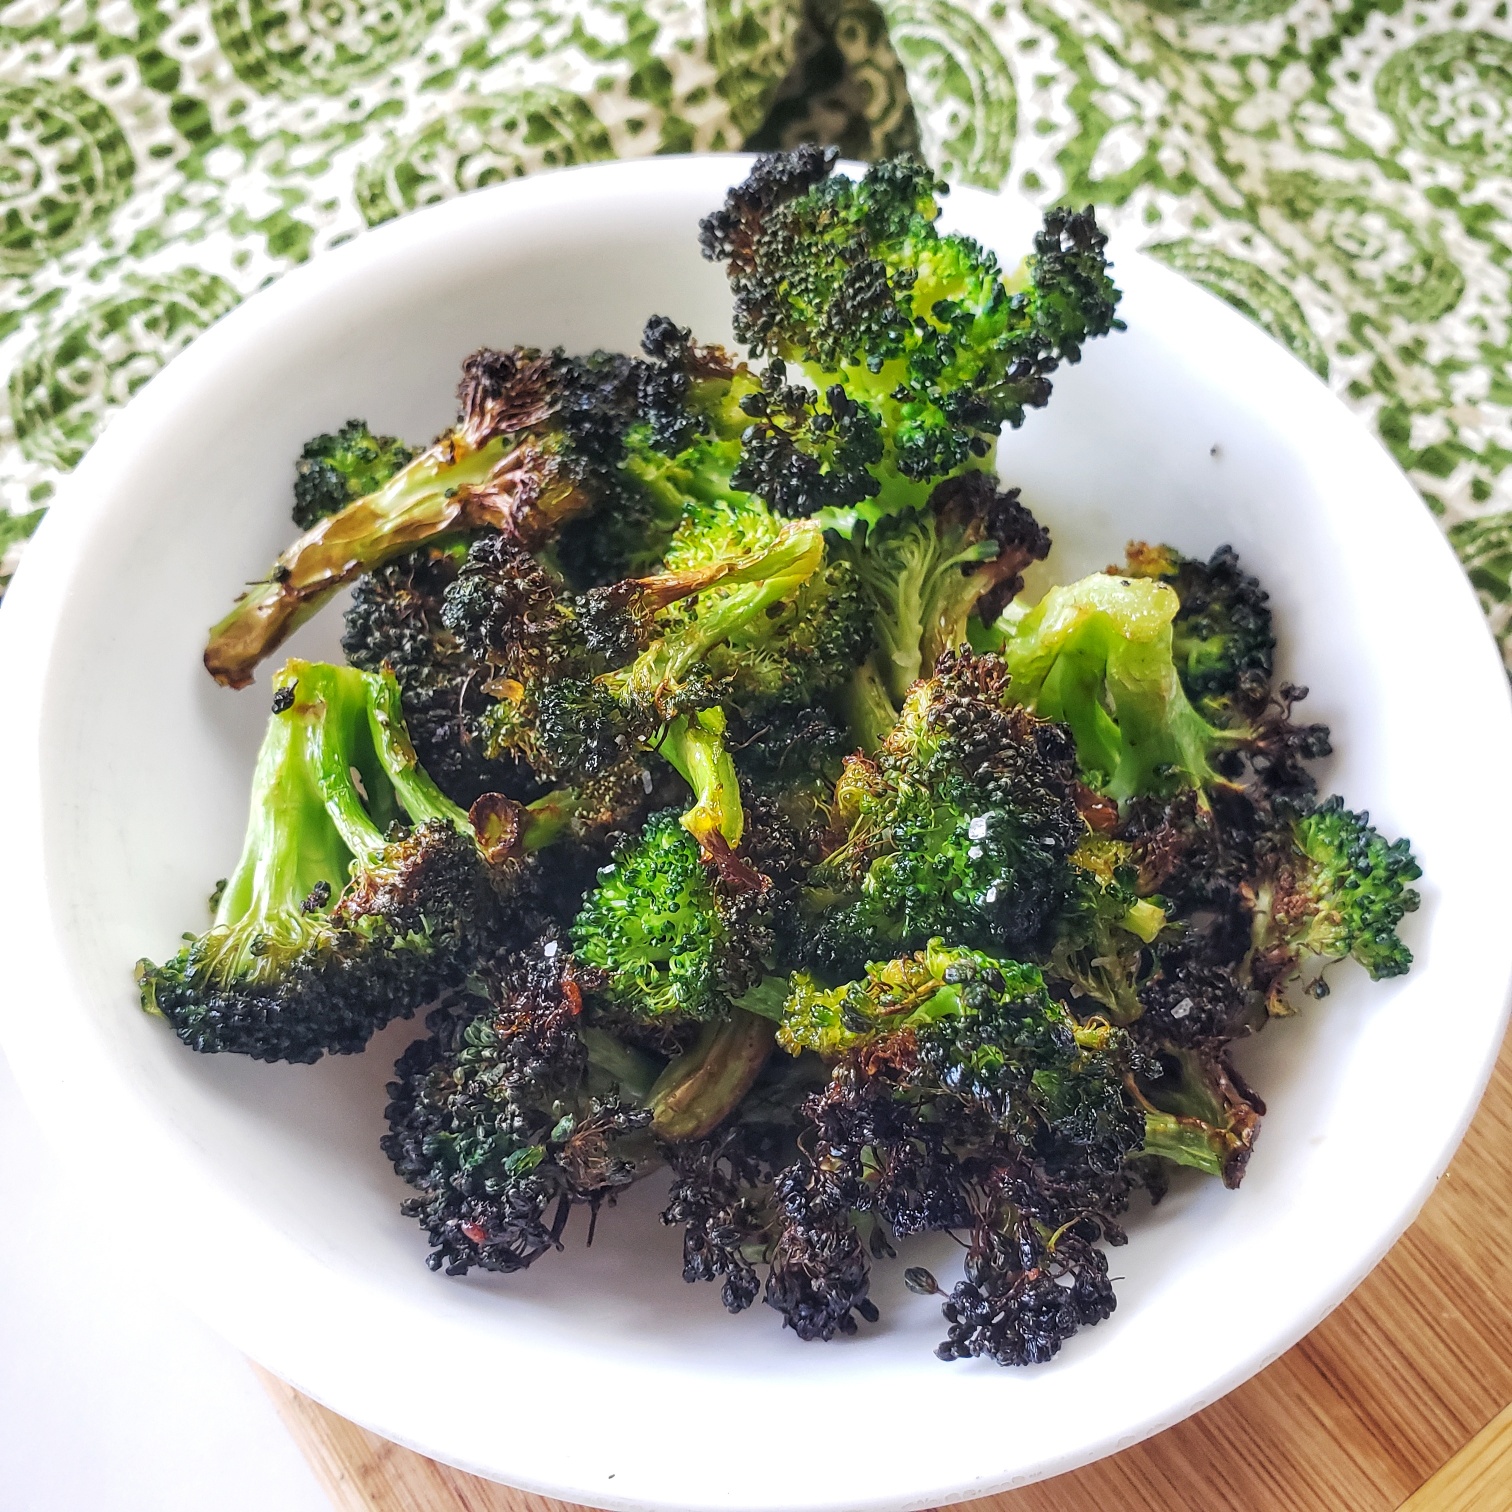
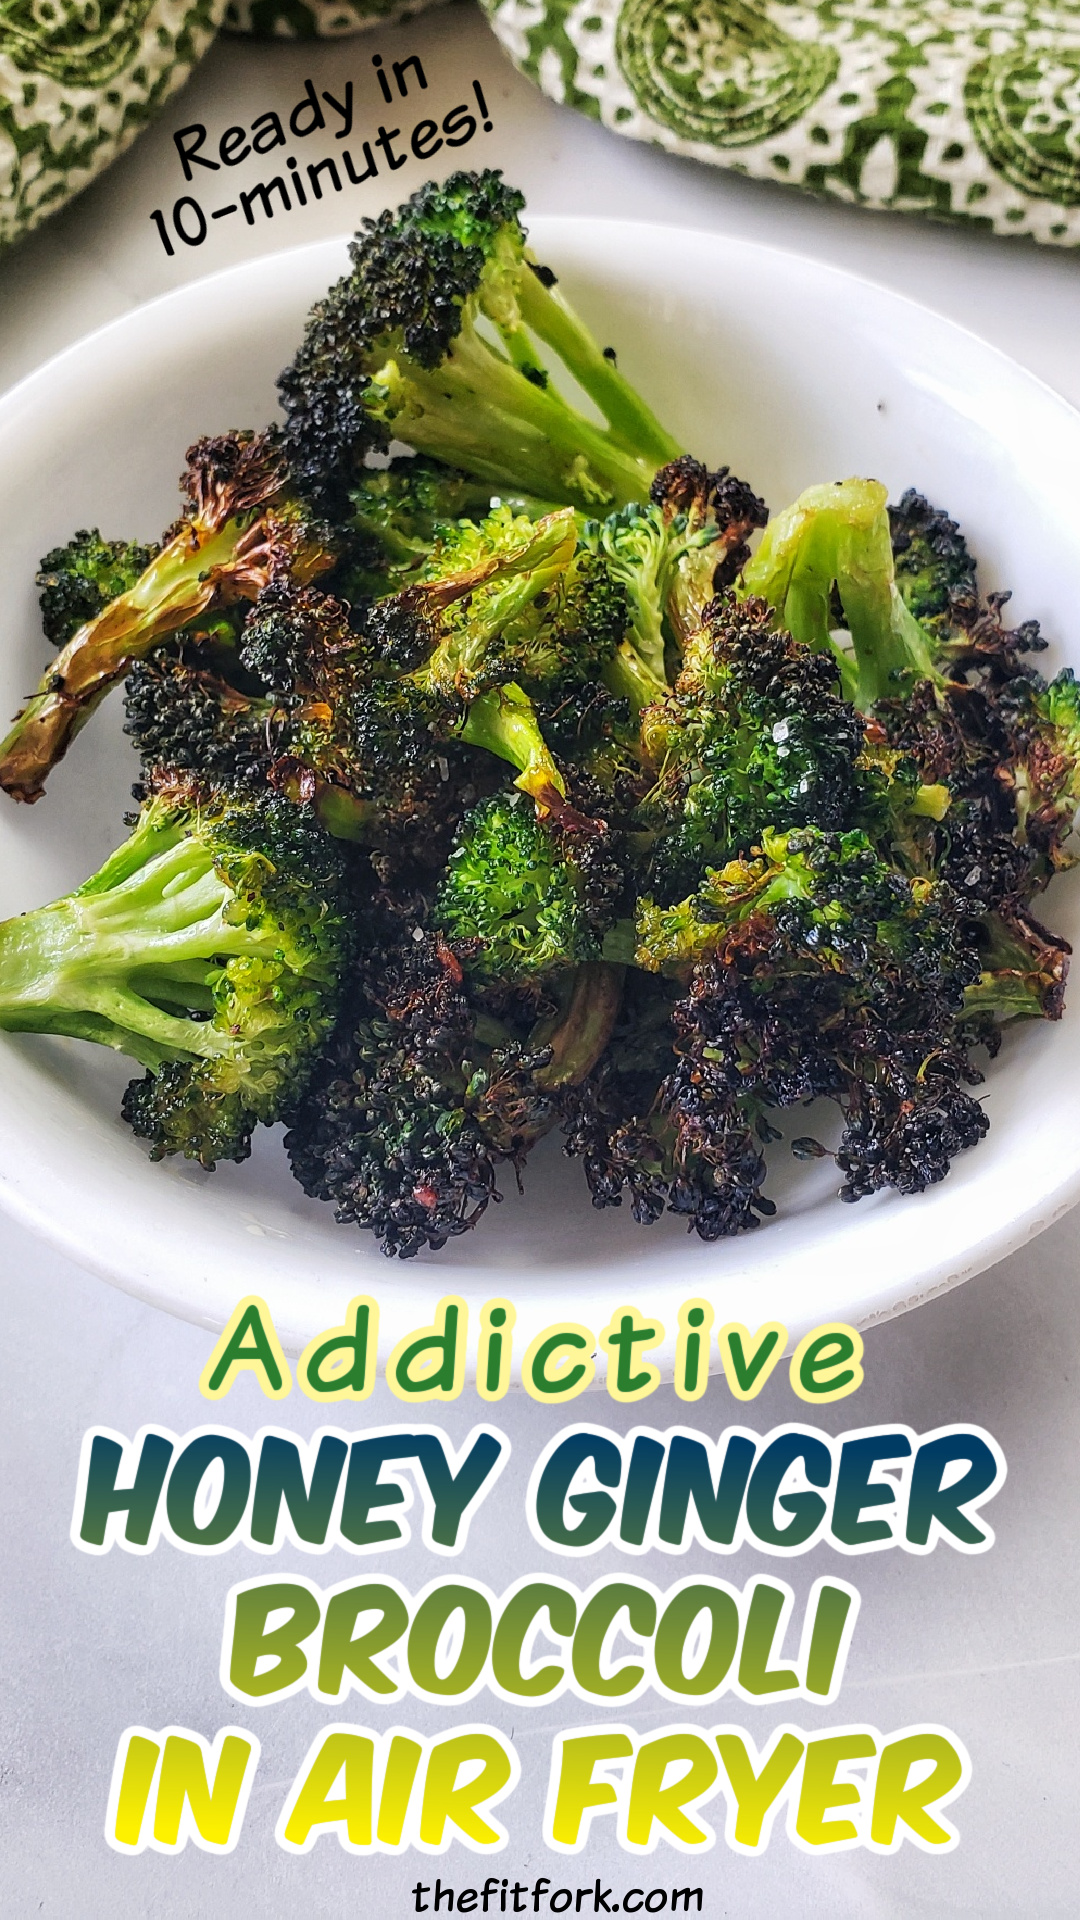
When I’m looking for a fast vegetable side dish, this easy broccoli recipe is a winner. A quick roast in the air fryer makes those little buds on the top “tree” part of the stalk deliciously crispy and lightly salty-sweet, while the stalk remains mostly tender. So delicious, it is seriously addictive!

A quick vegetable side dish in the air fryer that the whole family will love!  Slightly salty-sweet, crispy so delicious it's addictive!

This air fryer broccoli recipe only requires a few simple ingredients, takes less that 15 minutes prep to plate, and pairs deliciously with everything from fish, beef, chicken or to pile up in a nourishing grain bowl. My family thinks it’s the best broccoli recipe ever and will often eat it as a snack!

This broccoli recipe is SO EASY!

Choosing Broccoli for this Air Fryer Side Dish

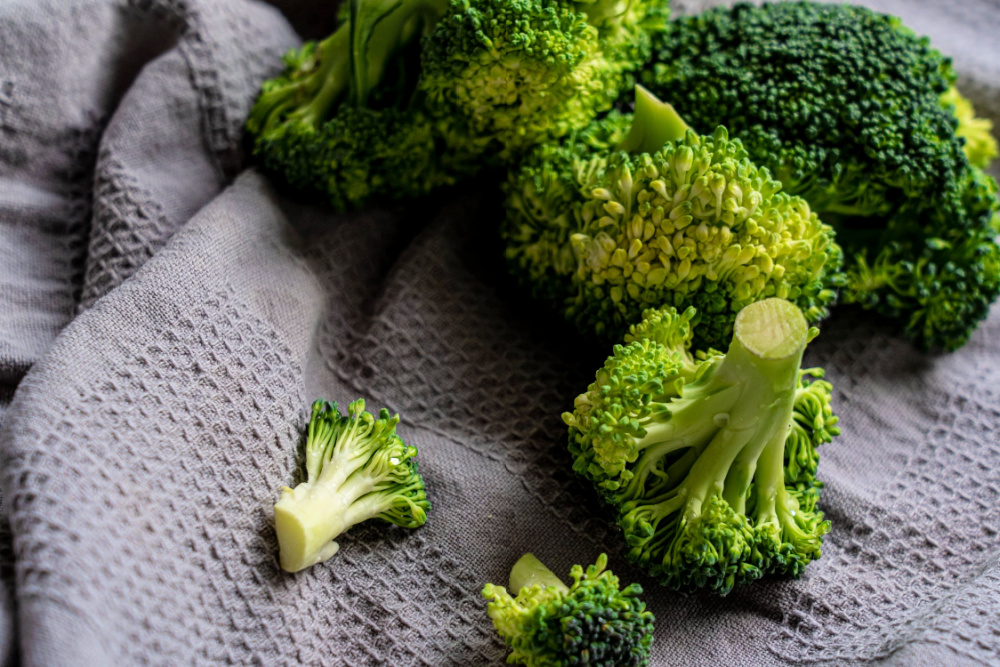
Select broccoli with for tightly closed, dark green florets and firm, thinner stalks. Thick stalks mean the plant is older and can yield a woody texture. Also, skip over heads of broccoli with yellowing or tiny yellow flowers, this also means they are over-mature and not the best for eating. Fresh broccoli will last about 3 to 5 days in the fridge, properly stored.

One shortcut I use on busy nights is to use pre-washed and bagged broccoli florets from the produce department, rather than cutting up the whole thing. Also, in a pinch, you can grab fresh broccoli florets off the salad bar offerings if your grocery store has one. However, I definitely don’t recommend using frozen broccoli for this air fryer broccoli recipe – that just won’t work. You’ll get a soggy, mushy result.

Can I Swap the Ginger Paste?

Another convenience I use in this air fryer broccoli is ginger paste, making my own rather than using the microplane grater on fresh gingerroot (although that’s a very fresh and vibrant option if you have a few extra minutes). Ginger paste is simply finely blended or minced ginger with a bit of oil and usually comes in a toothpaste-like tube or squeeze bottle so it’s easy to portion what you need. I would not recommend using dried ground ginger in this recipe, it just doesn’t lend the same zip! For another flavor option, you can also swap out the ginger for garlic! Or, for picky eaters, simply olive oil, salt and pepper.

What Air Fryer is Best for this Broccoli Recipe for Two?

Because this makes a small-batch of crispy broccoli intended for two people, it will fit in a standard, smaller “drawer” type air-fryer. I’ve also made it in my Instant Pot Duo Crisp (which has an air fryer function). If you are looking to double up the recipe to make more, then I would suggest using a larger toaster-oven style air fryer. I have the Instant Pot Omni Pro XL Air Fryer Toaster Oven, it has a large capacity cooing space, trays pull in and out like a traditional oven; and bakes, broils, air-frys, roasts, toasts and does nearly everything but wash dishes. Seriously, I love that think. However, if you don’t even have an air fryer at all, just bake at 400F degrees in a traditional oven for about 12-14 minutes, turning once with a spatula.

Storing Leftover Honey Ginger Broccoli

Store leftovers (if any!) in an air-tight container in the fridge for up to 3 days. However, it will lose its crispness to a degree. The best way I have found to reheat is to pop in microwave on “defrost” for up to a minute to take the chill off, and then crisp back up in a pre-heated air fryer for 2 or 3 more minutes, taking care not to burn the already browned parts.  This air-fryer broccoli isn’t suitable for freezer meal prep – it’s best enjoyed immediately.

Pin this for later!

Disclaimer: This post contains affiliate links. I may earn a small commission on purchases generated through links, however price to you remains the same. Proceeds help offset operating costs for The Fit Fork. Thank you!

5 from 5 votes
Honey Ginger Broccoli (for two) in Air Fryer
Prep Time
5 mins
Cook Time
10 mins
Total Time
15 mins
 

A simple, speedy, and super-tasty wat to prepare broccoli in the air fryer that the whole family will love!

Course: side, Side Dish, Snack, Vegetable
Keyword: air fryer, broccoli, paleo
Servings: 2 servings
Calories: 120 kcal
Ingredients
  • 6 ounces broccoli florets
  • 1 Tbsp olive oil
  • 2 tsp honey
  • 1/2 tsp ginger paste
  • 1/8 tsp salt
  • Dash pepper
Instructions
  1. Pre-heat air fryer to 390 F degrees.
  2. Wash, dry and chop broccoli into approximate 1-inch florets. Try to keep florets about the same size to promote even cooking.
  3. In bowl, whisk together olive oil, honey, ginger, salt and pepper
  4. Add florets and toss until well coated.
  5. Spread coated broccoli florets out into single layer in air fryer basket or tray.
  6. Air fry for 7 to 10 minutes, turning once, until “tree” part of broccoli is turning light brown and crispy.
Recipe Notes

Notes:

  • For a short cut, use bagged, pre-washed florets or purchase from the salad bar.
  • Smaller florets will cook faster than large florets.

Nutrition:

  • 120 cal, 8g fat, 25g carb, 3g fiber, 3g protein per serving

Cheddar Zucchini Chips in Air Fryer | Low Carb

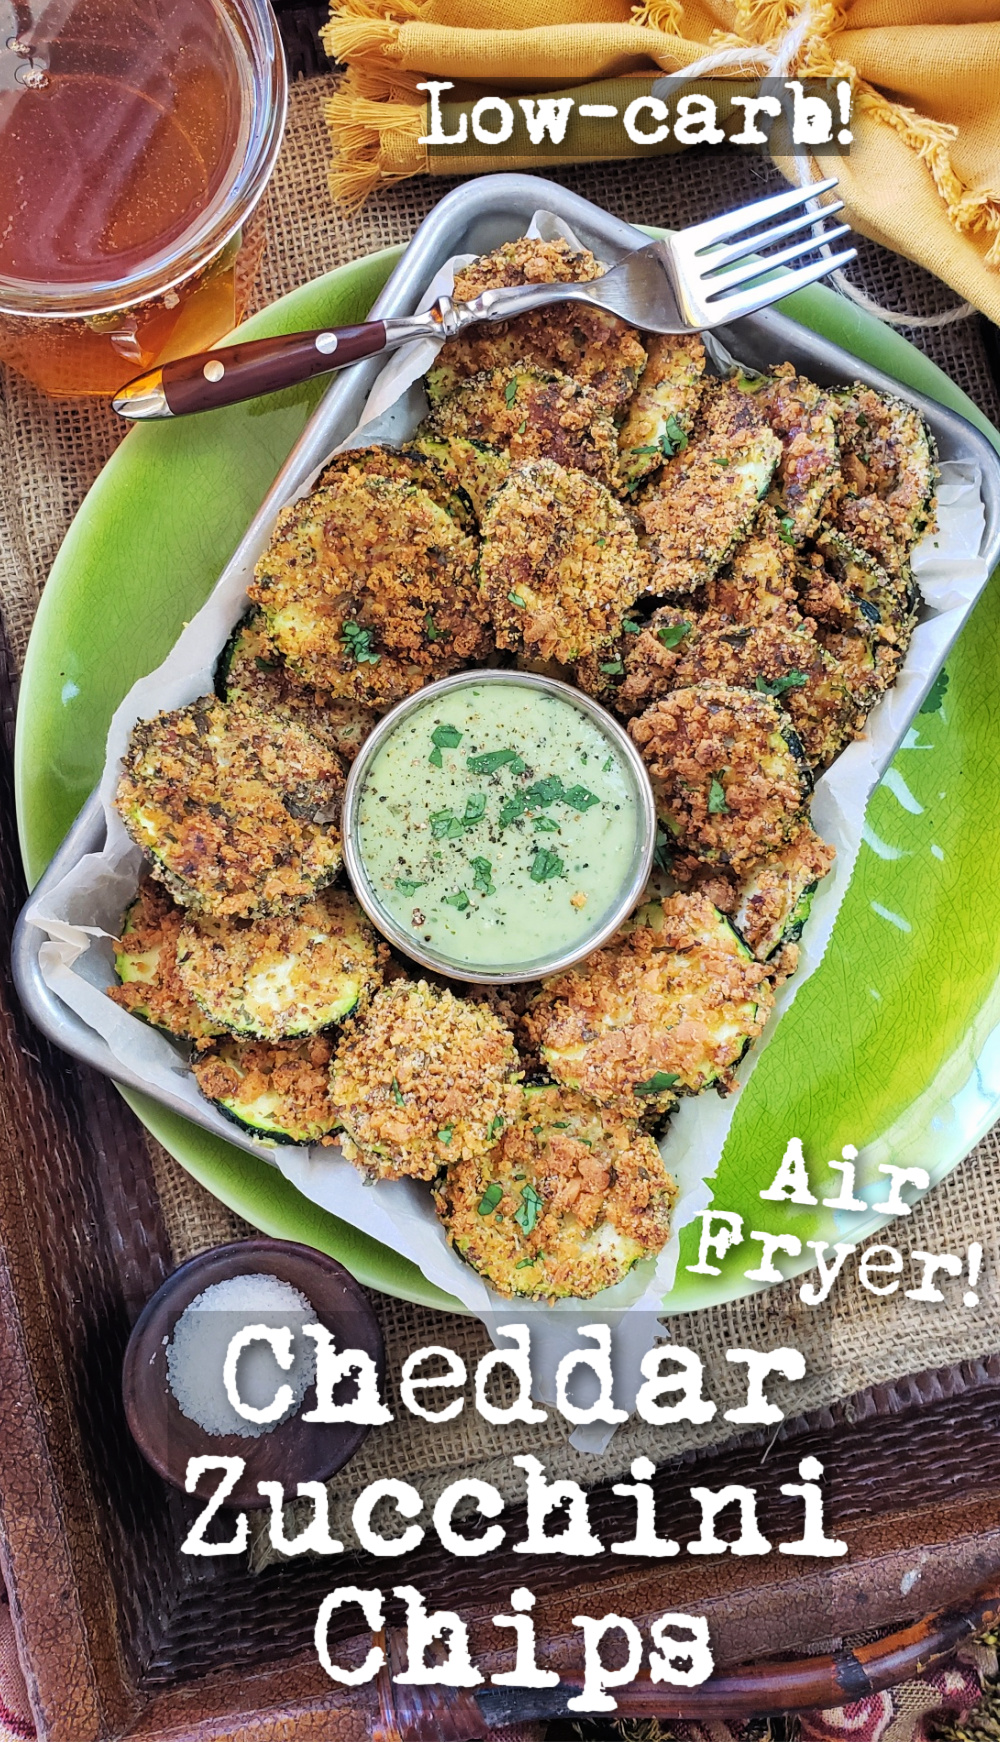
Cheddar Zucchini Chips in the air fryer are a quick, easy and flavor-packed appetizer to serve with your favorite dip or side dish that pairs with most everything.

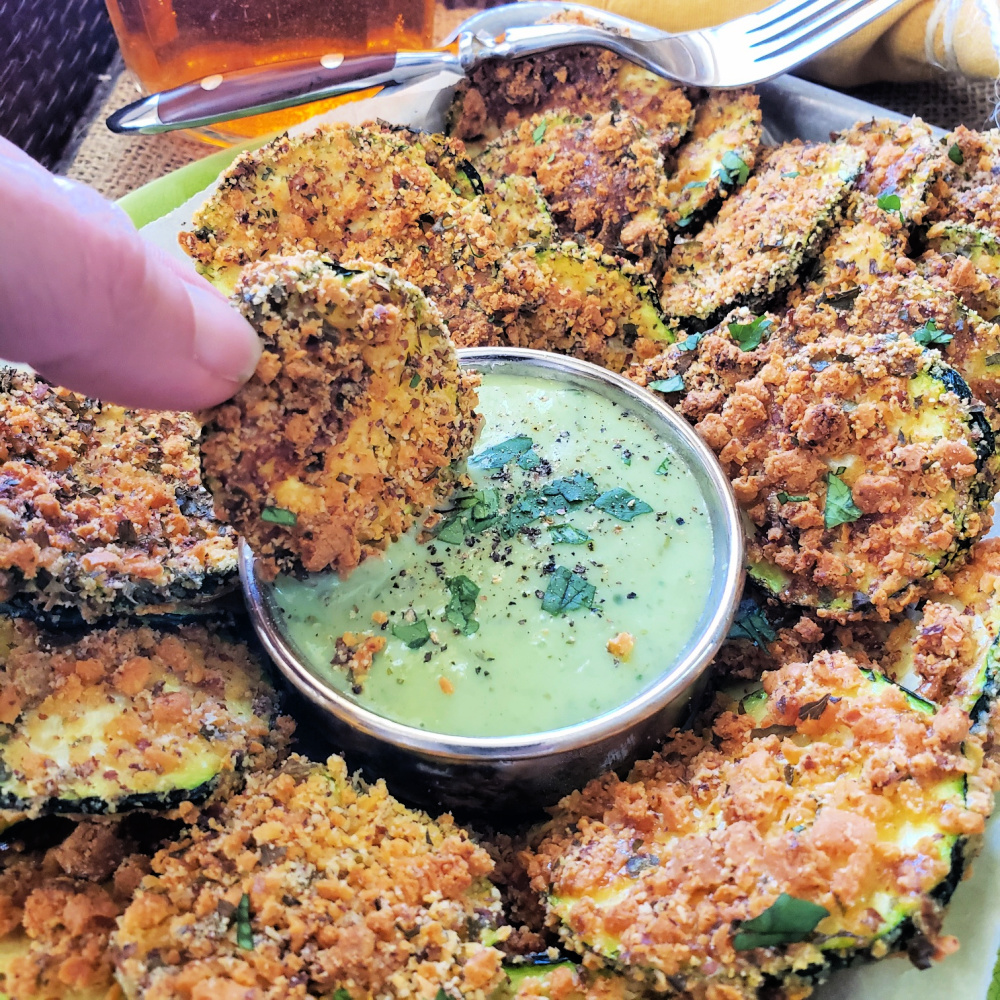
A low-carb, gluten-free and keto-friendly way to snack and get more vegetables in your day! These easy air fryer zucchini chips use just a few simple ingredients and are done in minutes – perfect for game day entertaining or a delicious side dish and alternative to fries.

This zucchini snack is is also low-carb, gluten-free, and keto-friendly – plus, it only made with a few wholesome ingredients.

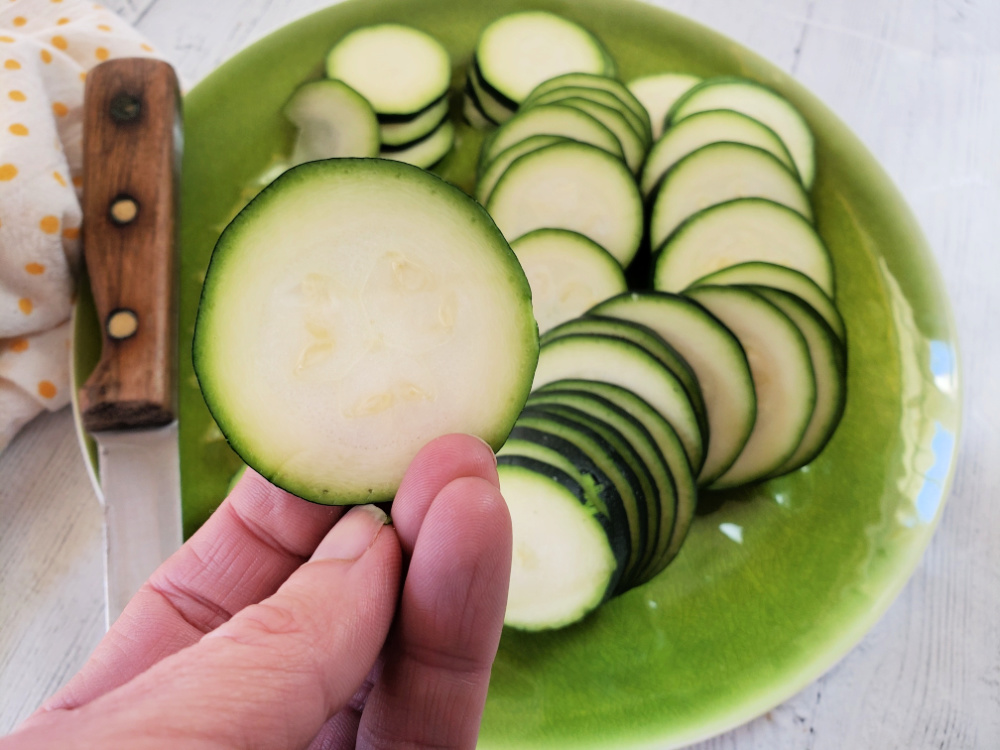
zucchini sliced think for air fryer

For the best, crispy zucchini chips, make sure that the vegetable is cut thiny in about ¼” inch crosswise slices. If you notice excess moisture on the cut zucchini, pat dry with a paper towel. This is how to keep zucchini chips from getting soggy.

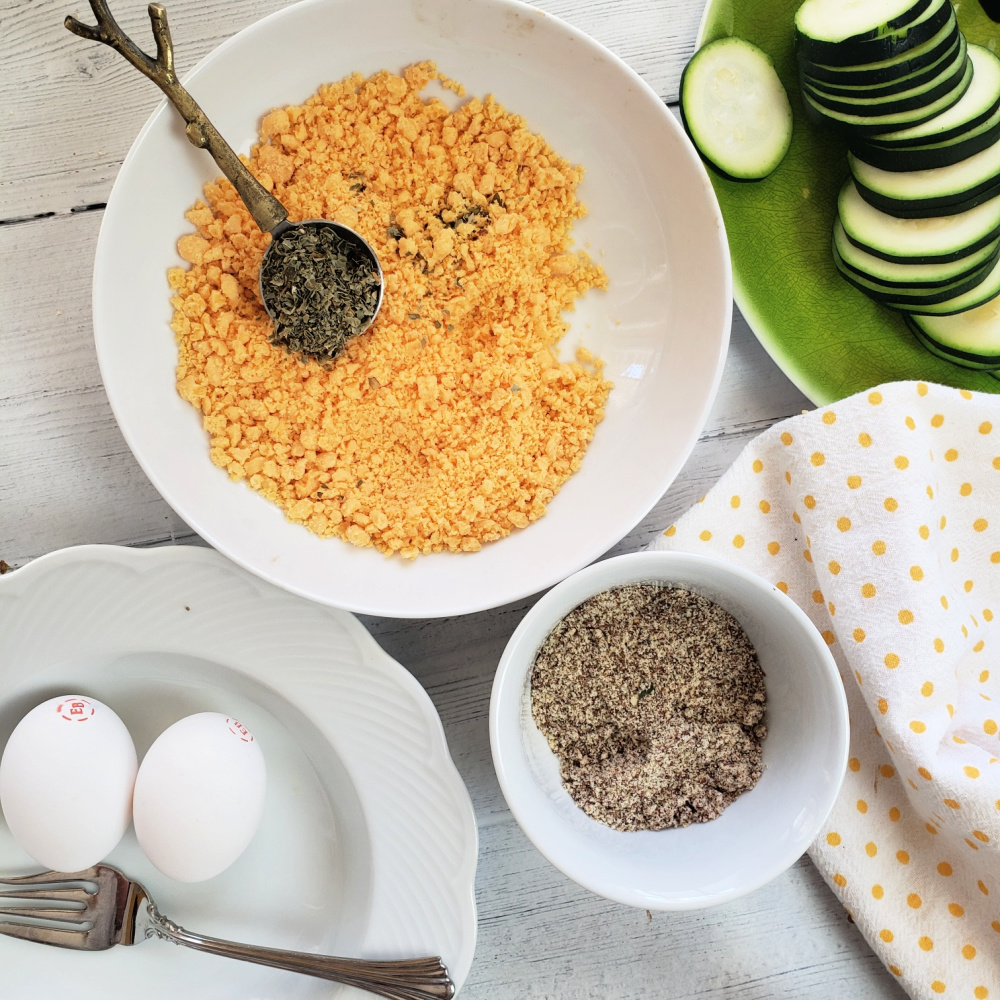
The “breading” isn’t the traditional flour or panko – it’s crushed all-cheese snacks (popular brands are Moon Cheese Snack, Just the Cheese and Whisps Cheese Crisps) along with almond meal and dried herbs. These simple ingredients, held on with an egg wash, ensure these remain low carb zucchini chips – with a surprise bonus of more than 10 grams of protein per serving!

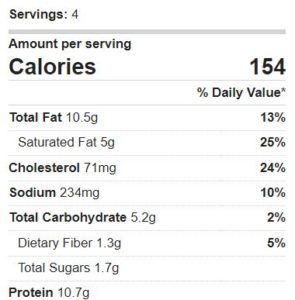
This keto cheddar zucchini chip recipe makes four servings – that’s about 10 “chips” give or take. It’s a satisfying way to use up zucchini and each portion comes in at 154 caloires, 3.9g net carb, 10.5g fat, 10.7g protein.

A low-carb, gluten-free and keto-friendly way to snack and get more vegetables in your day! These easy air fryer zucchini chips use just a few simple ingredients and are done in minutes – perfect for game day entertaining or a delicious side dish and alternative to fries. For more low carb recipes and heal inspo to fuel an active lifestyle visit thefitfork.com
Pin for later!

I used my Omni Pro Air Fryer from from Instant Pot to make my favorite zucchini recipe. In just about 6 to 8 minutes, an air fryer gets everything nice and crisp. You CAN use a traditional oven at 400F degrees for about 10 to 12 minutes, carefully flipping the chips halfway through.

Note: This post contains affiliate links. I may earn a small commisison from purchase, however the price to you remains the same. Proceeds are used to help operate The Fit Fork – thank you!

5 from 2 votes
A low-carb, gluten-free and keto-friendly way to snack and get more vegetables in your day! These easy air fryer zucchini chips use just a few simple ingredients and are done in minutes – perfect for game day entertaining or a delicious side dish and alternative to fries.
Cheddar Zucchini Chips in Air Fryer
Prep Time
10 mins
Cook Time
8 mins
Total Time
18 mins
 
A low-carb, gluten-free and keto-friendly way to snack and get more vegetables in your day! These easy air fryer zucchini chips use just a few simple ingredients and are done in minutes – perfect for game day entertaining or a delicious side dish and alternative to fries.
Course: Appetizer, Side Dish, Snack
Keyword: cheddar, gluten free, keto, low carb, zucchini
Servings: 4 servings
Calories: 154 kcal
Ingredients
  • ¾ lb. zucchini
  • ½ cup almond flour
  • 3 ounces all-cheese snack Moon Cheese, Whisps, etc.. Or, may substitute a very dry cheese like Parmesan
  • 1 tablespoon dried parsley
  • 2 eggs
  • Optional: dipping sauce
Instructions
  1. Cut zucchini into ¼” slices crosswise. Pat dry if excess moisture.
  2. In baggie, crush cheese snack into a coarse powder.
  3. In a bowl, mix “cheddar crumbs” with almond flour and dried parsley.
  4. Whisk eggs in shallow bowl. Dip each slice in egg and then dredge in cheese coating.
  5. Place crumb-coated zucchini slices on basket of air fryer and cook 390F degree air fryer (pre heated) for 6 to 8 minutes.
  6. Depending on the size of your air fryer, you may have to make in two batches.
  7. Remove from air fryer and serve with dipping sauce of choice.
  8. Store covered leftovers in fridge. To reheat, place cold zucchini chips in the air fryer basket and reheat for a couple minutes – good as new!
Recipe Notes

Oven Butternut Squash Risotto with Shrimp – Under 30-minute Meal

Oven Butternut Squash Risotto with Shrimp makes a comforting, delicious and arguably balanced meal-in-a-pot boasting a whole grain, vegetable and protein.

Oven Butternut Squash Risotto with Shrimp makes a comforting, delicious and arguably balanced meal-in-a-pot boasting a whole grain, vegetable and protein. It’s so simple and easy to make, an under 30 minute meal with little hand-on effort, many call this oven method “cheater’s risotto” – but it’s totally legit!

Plus, this butternut risotto cooks up fast and with much less hands-on prep than a traditional risotto recipe – there is no endless stirring at the stove top. Instead, the rice bakes up in the oven for 20-minutes, being stirred up with Parmesan cheese just as serving.  

Oven Butternut Squash Risotto with Shrimp makes a comforting, delicious and arguably balanced meal-in-a-pot boasting a whole grain, vegetable and protein. It’s so simple and easy to make, an under 30 minute meal with little hand-on effort, many call this oven method “cheater’s risotto” – but it’s totally legit!

With olive oil and simple spices, the oven-roasted shrimp only take 10 minutes to make and can be popped into the oven on a baking sheet, at the second half of the rice timer. This way, the shrimp and risotto and done at the same time!

Ingredients for Butternut Squash Risotto in the Oven
Ingredients for the butternut risotto are simple and easy!

Learning how to make oven butternut squash risotto is a game changer. Use a Dutch oven pot in the oven and just walk away until done – this method has freed me up to finish other dinner chores and/or just have more time to connect with family members who have gathered in the kitchen to investigate the inviting, comfort food aromas wafting about.

Plus, elevating oven risotto with butternut squash helps keep the dish creamy, adds an earthy, lightly sweet flavor, and increases the nourishing benefits with dietary fiber, vitamin A, and more.  To keep the oven butternut squash with shrimp recipe simple, I purchase fresh-cubed butternut squash in the produce department. However, you can also cut up your own squash and/or use a bag of thawed frozen butternut chunks.

Oven Butternut Squash Risotto with Shrimp makes a comforting, delicious and arguably balanced meal-in-a-pot boasting a whole grain, vegetable and protein. It’s so simple and easy to make, an under 30 minute meal with little hand-on effort, many call this oven method “cheater’s risotto” – but it’s totally legit!

If you are just learning how to make risotto in the oven or traditionally (or you’ve had a risotto fail in the past), please note that you should NOT use a long-grained rice. A short-grained rice offers the signature creamy results of a classic risotto and Arborio rice is a common variety used. Some medium-grain rice may be used, too.

Oven Butternut Squash Risotto with Shrimp makes a comforting, delicious and arguably balanced meal-in-a-pot boasting a whole grain, vegetable and protein. It’s so simple and easy to make, an under 30 minute meal with little hand-on effort, many call this oven method “cheater’s risotto” – but it’s totally legit!

Some people call this method “cheater’s risotto,” however I see nothing suspect about it, lol! It’s just a smart way to get a nourishing meal on the table fast! I typically pair my cheater’s butternut squash risotto with an apple kale salad for extra fall-season flair.

 If you want to keep the recipe non-dairy, you can swap a non-dairy butter alternative for the butter and use an alternative to Parmesan cheese, like Parma.

Easy Roasted Shrimp in the Oven

Making the shrimp is just as easy, toss together olive oil, garlic salt and paprika and bake alongside the risotto during the last 8 minutes.

Disclaimer: This post contains affiliate links. I earn a small commission from products purchase, however the price to you remains the same. Proceeds are used to offset operating expenses for The Fit Fork – thank you for your support.

5 from 2 votes
Oven Butternut Squash Risotto with Shrimp makes a comforting, delicious and arguably balanced meal-in-a-pot boasting a whole grain, vegetable and protein. It’s so simple and easy to make, an under 30 minute meal with little hand-on effort, many call this oven method “cheater’s risotto” – but it’s totally legit!
Oven Butternut Squash Risotto and Shrimp
Prep Time
5 mins
Cook Time
20 mins
Total Time
25 mins
 

Oven Butternut Squash Risotto withShrimp makes a comforting, delicious and arguably balanced meal-in-a-pot boastinga whole grain, vegetable and protein. It’s so simple and easy to make, an under30 minute meal with little hand-on effort, many call this oven method “cheater’srisotto” – but it’s totally legit!

Course: dinner, dinner, entree, entree
Cuisine: American
Keyword: butternut squash, rice, risotto, shrimp
Servings: 4
Ingredients
  • 2 tablespoons olive oil
  • 1 tablespoon minced garlic
  • 1 cup arborio rice or other short to medium grain rice
  • 1/3 cup white wine can omit
  • 3 ½ cups reduced sodium chicken broth
  • 1 10- ounce bag chopped butternut squash produce dept shelf or frozen and thawed
  • ½ teaspoon sea salt
  • ½ teaspoon ground white pepper
  • 1 tablespoons butter or non-dairy butter alternative
  • 2/3 cup grated Parmesan cheese or non-dairy Parmesan alternative
  • 20 large shrimp shelled and veined (thawed if frozen)
  • 1 tablespoon olive oil
  • 2 teaspoons paprika
  • 1 teaspoon garlic salt
Instructions
  1. Preheat oven to 400F degrees.
  2. In 3.5-quart Dutch oven with lid, heat oil over medium heat on stove top. Add garlic and rice and stir around for 2 minutes to toast rice.
  3. Pour in wine to deglaze pan, stirring around over heat, stirring until mostly evaporated. Add chicken broth and butternut squash cubes and bring to a boil for 1 minutes.
  4. Put lid on pot and place on middle rack of oven, baking for 20-mintues.
  5. Meanwhile, quickly prepare shrimp by placing on rimmed baking sheet and tossing with olive oil, salt, and paprika.
  6. In the last 6 to 8 minutes of cooking the risotto, place pan of prepared shrimp in the oven. Roast until the shrimp are pink and just cooked through, about 6 to 8 minutes.
  7. Remove rice from oven, most of the water should have been absorbed. If it still looks a little watery, let cool for 5 minutes with lid off before stirring in butter and cheese.
  8. Serve risotto with shrimp and garnish with finely chopped fresh sage and a little extra Parmesan cheese, if desired.
Recipe Notes

Watermelon Quinoa Summer Salad

This post is part of a blogger recipe challenge sponsored by Sam’s Fresh Salsa.

Watermelon Quinoa Summer Salad is a delight for lunch or a light dinner this hot weather time of year! It’s a delicious watermelon quinoa salad that is a little bit sweet, a little bit savory, a little bit salty and just a tiny bit spicy – so many flavors that shine bright!

Celebrate summer with this cool, refreshing vegetarian salad that offers enough protein to make it a meal! Watermelon, corn, spinach, seeds, queso fresco and cheese come together with a dressing made from olive oil and fresh watermelon jicama salsa.

Watermelon and quinoa are namesake ingredients, but it’s also loaded with corn, fresh spinach, seeds, green onions and crumbled queso fresco. The whole entrée salad comes together in minutes if you’ve pre-cooked the quinoa and is flavorfully festive with a dressing made from Sam’s Fresh Salsa and a bit of olive oil.

Celebrate summer with this cool, refreshing vegetarian salad that offers enough protein to make it a meal! Watermelon, corn, spinach, seeds, queso fresco and cheese come together with a dressing made from olive oil and fresh watermelon jicama salsa.

If you know me AT ALL, have used the search bar to look for watermelon recipes here, or follow my Instagram, you know that I am a mega super-fan and advocate of watermelon. It’s hydrating, it’s packed with vitamin C, natural sugars to fuel my active lifestyle, the amino acid l-citrulline said to possibly reduce post workout soreness are among the many reasons I love watermelon – -and, oh yeah, it’s delicious!

Celebrate summer with this cool, refreshing vegetarian salad that offers enough protein to make it a meal! Watermelon, corn, spinach, seeds, queso fresco and cheese come together with a dressing made from olive oil and fresh watermelon jicama salsa. For more clean eating recipes and salad ideas, visit thefitfork.com
Pin this for later!

I also love an easy, healthy recipe that doesn’t require me to turn on the oven in the summer. Watermelon Quinoa Summer Salad can be made a bit ahead too, and served later that day – perfect for pool parties, summer celebrations like July 4th, and outdoor entertaining and potlucks (so glad these are all coming back)!

Celebrate summer with this cool, refreshing vegetarian salad that offers enough protein to make it a meal! Watermelon, corn, spinach, seeds, queso fresco and cheese come together with a dressing made from olive oil and fresh watermelon jicama salsa.

Watermelon Quinoa Summer Salad also can be layered up in a jar for a pretty presentation, or to take to work and then shake up right before eating. The trick is to layer the dressing made from Watermelon Jicama Salsa on the bottom of the jar and then load up in order of “delicateness” – so like watermelon, corn, quinoa and seeds, spinach, and cheese!

Celebrate summer with this cool, refreshing vegetarian salad that offers enough protein to make it a meal! Watermelon, corn, spinach, seeds, queso fresco and cheese come together with a dressing made from olive oil and fresh watermelon jicama salsa.

This watermelon salad fits with vegetarian diets – and if you leave the cheese off it is suitable for a vegan lifestyle. As written, the vegetarian version recipe (with cheese) offers 19 grams of protein – but if you are looking for more protein, it is also delicious paired with grilled shrimp or fish. It also has more that 100% DV for vitamin A, 54% DV for vitamin C, 37% DV iron, and 21% DV calcium.

I am really loving these new refrigerated salsas from Sam’s Fresh Salsas with a thumbs-up clean label featuring fresh fruits and veggies with absolutely no preservatives or anything artificial. In addition to the Watermelon Jicama Salsa there is also Salsa Verde and Cantina Medium Salsa. You can purchase Sam’s Fresh Salsa at: ShopRite, Acme, and Safeway or ask your store to stock it!

You can also learn more about Sam’s Fresh Salsa at SamsSalsa.com on Facebook and Instagram!

5 from 3 votes
Watermelon Quinoa Summer Salad
Prep Time
20 mins
Cook Time
25 mins
cooling
10 mins
Total Time
45 mins
 

Celebrate summer with this cool, refreshing vegetarian salad that offers enough protein to make it a meal! Watermelon, corn, spinach, seeds, queso fresco and cheese come together with a dressing made from olive oil and fresh watermelon jicama salsa.

Course: entree salad, Salad, Side Dish
Keyword: quinoa, watermelon
Servings: 2 servings
Calories: 443 kcal
Ingredients
  • ½ cup uncooked quinoa
  • 1 ½ cups water to cook quinoa
  • 1 ½ cup diced watermelon
  • 2 cups chopped fresh spinach
  • ½ cup frozen corn thawed
  • ¼ cup chopped green onions whites and greens
  • 2 tablespoons toasted hemp hearts or can use sunflower seeds or pepitas
  • ½ cup crumbled queso fresco cheese
  • 2/3 cup Watermelon Jicama salsa from Sam’s Fresh Salsa
  • 2 teaspoons olive oil
  • ½ tsp. salt
Instructions
  1. Place rinsed quinoa in medium pot and add water. Cook, with lid on, for approximately 15 minutes or until water has been absorbed and it is tender.
  2. Let quinoa cool to at least room temperature. Spread out on a cookie sheet and stick in the fridge to quick cool for 10 minutes.
  3. Add diced watermelon, spinach, corn, green onions, hemp hearts (or seeds), and crumbled cheese to a large bowl with quinoa.
  4. In small bowl, whisk together salsa, olive oil and salt.
  5. Pour over salad and mix well.
Recipe Notes