Apple Walnut Quinoa Crunch + More Healthy Candy Recipes

Apple Walnut Quinoa Crunch
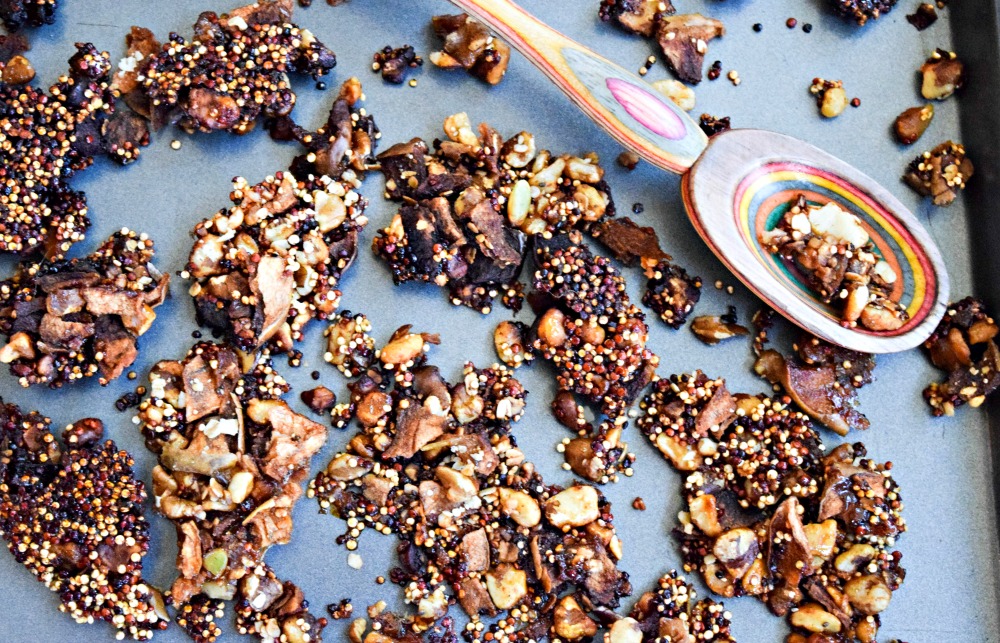
Ready for a curiously crunchy treat? My recipe for Apple, Walnut & Quinoa Crunch will satisfy sweet crispy cravings while filling you up longer thanks to an unexpected punch of protein from the quinoa and black walnuts– it’s a balanced candy for your “healthy tooth”!

Apple Walnut Quinoa Crunch is a healthy alternative to peanut brittle candy -- it packs a bit of protein from the ancient grain Quinoa and is dairy-free, gluten-free and made without traditional corn syrup (only a touch of coconut sugar and 100 percent apple cider)
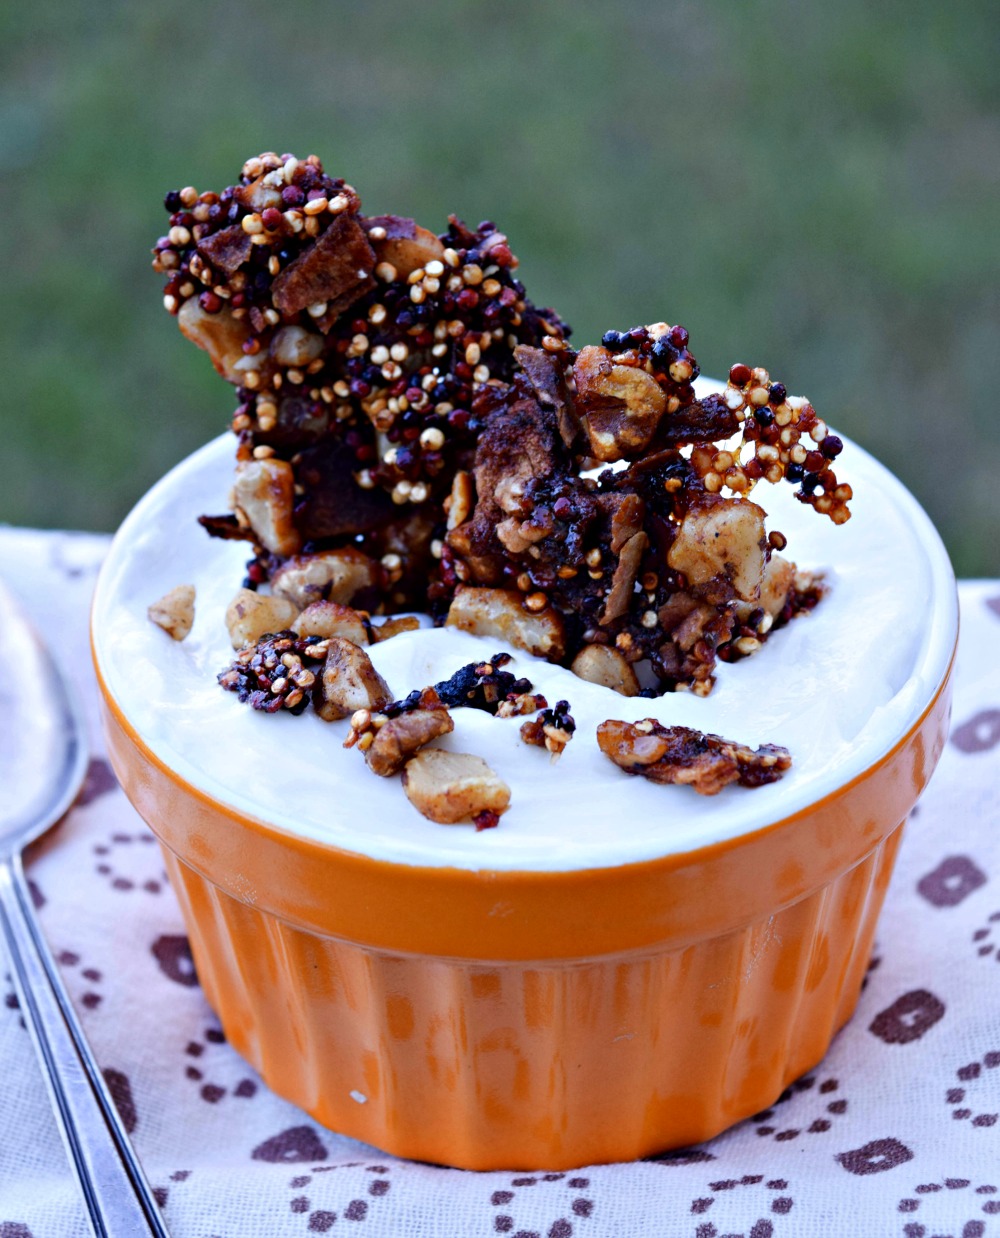
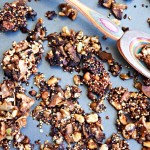
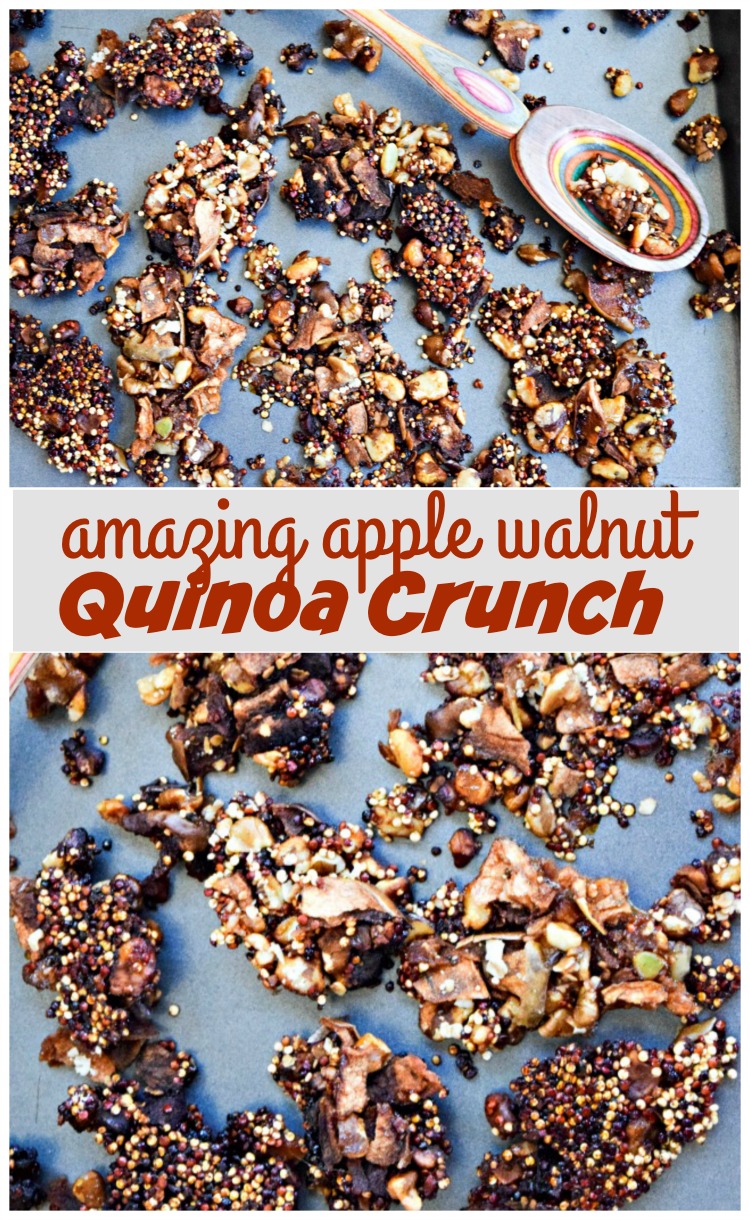
I like to eat it straight off the baking sheet or break up into shards of sweetness to top my Greek yogurt.

Apple Walnut Quinoa Crunch on Greek Yogurt

Apple Walnut Quinoa Crunch made with apple ciderI almost hesitate to even call this easy-to-make recipe “candy,” although it is a take on old-fashioned “nut brittle.” However, the typical peanut brittle or nut brittle uses a boatload of butter, table sugar and corn syrup – gasp! Instead, my healthy candy recipe is packed with wholesome ingredients like 100 percent juice apple cider, ancient grains, dried fruit and nuts, and just a touch of coconut sugar.

I also choose to use Black Walnuts instead of standard english walnuts. Why? The black walnut has the most protien of any tree nut and imparts a more intense, earthy, nutty flavor to recipes. I discovered this news I can definitely use at the Produce Marketing Associations recent Fresh Summit in Orlando when, I auspiciouslly bumped into Hammon Black Walnuts on my way out the door to fly home.

As far as sugars go, coconut sugar (derived from Palm) is a much healthier sweetener in moderation as it doesn’t spike blood sugar as dramatically as traditional sugars. Also, if a concern for you are a loved one, this recipe is gluten-free and dairy-free.

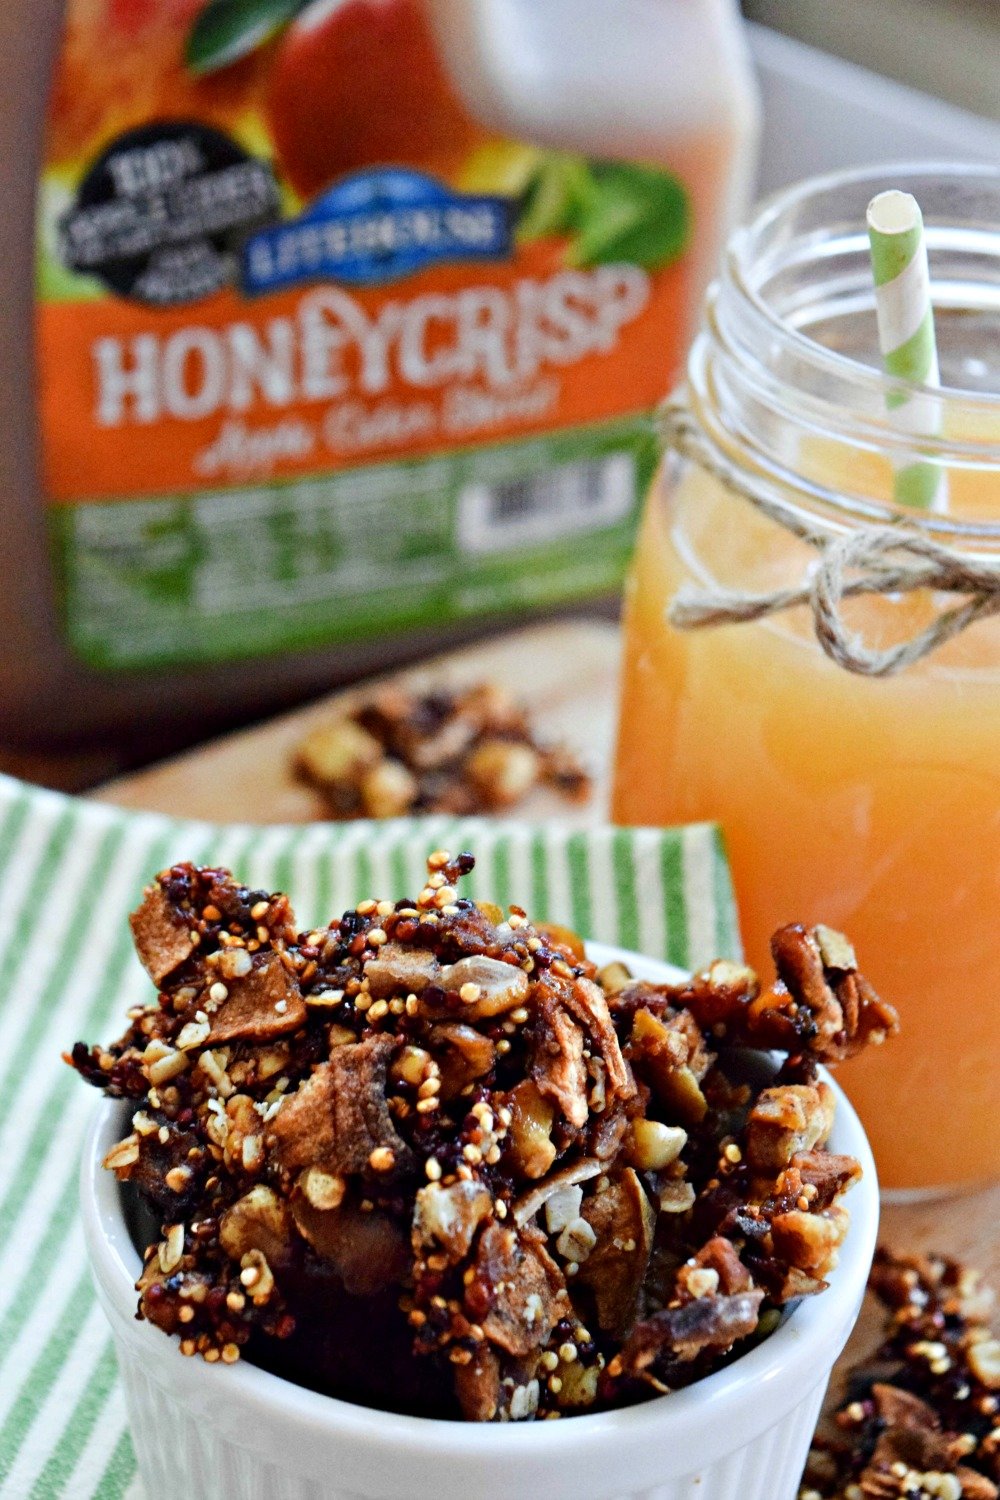
I originally made this recipe for Litehouse Foods and used the Honey Crisp Apple Cider, you can find it in the produce section this time of year. This Cold Pressed, 100 percent pure apple juice has a unique tart taste that is wonderfully balanced with sweet. It’s perfect poured straight from the container, served hot or cold, and also makes a great ingredient in recipes where you would prefer natural sweetness.

Some things to note when making this recipe — you need to keep an eye on it so it doesn’t burn, your oven temperature may vary affecting the overall cook time. Also, it will be soft when removed from oven — give it plenty of time to set up and harden, stick in the fridge to expidite. If it still doesn’t seem crispy, then you can put it back in the oven for several minutes at a time until done.

jennifer fisher - thefitfork.com - chocolate date candy barsAnother healthier “candy” I’m pulling from the archives to share with you today is my recipe for Sweet Date Chocolate Candy Bar Bites. These are so yummy and I love how the dates provide extra iron in my diet.

Hazelnut Pecan Protein FudgeI also like to make a batch of my Hazlenut Fudge Protein Balls to stash in the freezer and thaw out one at a time to quell my dessert cravings. These no-bake energy bits are ideal for a healthy little dessert or as pre and post workout fuel.

now-foods-ingredients-for-quinoa-crunch-candy
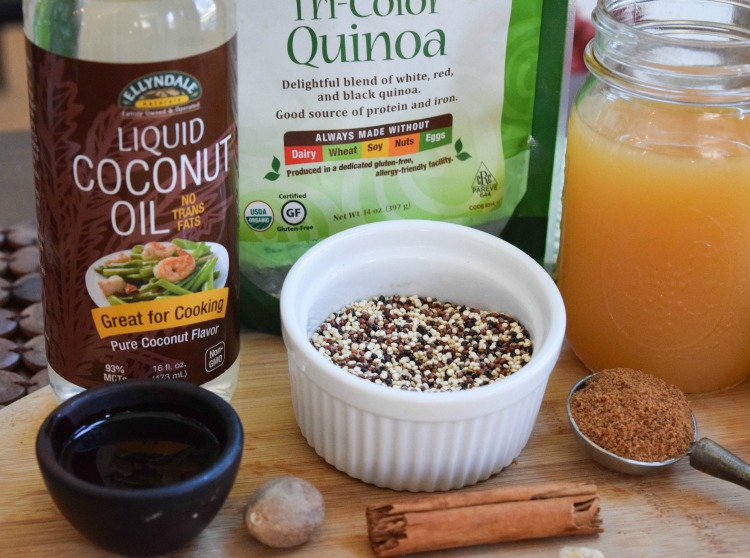
In addition to the Honey Crisp Apple Cider from Litehouse Foods, which you can conveniently find in your market’s produce section this time of year, here are some other ingredients used in my Quinoa Crunch.a

Do you have a “healthy” candy recipe? What is your go-to when you are craving something sweet? Please share in the comments – XOXO, Jennifer

Apple Walnut Quinoa Crunch
Prep Time
10 mins
Cook Time
50 mins
Total Time
1 hr
 
This healthier alternative to candy is easy to make and packs a bit of protein thanks to the ancient grain Quinoa.
Course: Dessert
Cuisine: American
Servings: 4 servubgs
Ingredients
  • 1/3 cup uncooked quinoa I like the "tri-color" from NOW foods
  • 1/2 cup chopped black walnuts can use regular walnuts
  • 1/2 cup dehydrated baked apple chips, crumbled
  • 1/4 cup rolled or instant oats processed in gluten-free facility
  • 1/4 teaspoon sea salt
  • 2 tablespoons coconut oil
  • 1 1/2 cups apple cider
  • 2 tablespoons coconut sugar aka palm sugar
  • 1 teapsoon ground cinnamon
  • 1/4 teaspoon nutmeg
Instructions
  1. Preheat oven to 325 degrees F (160C) and line a rimmed baking sheet with parchment paper (or use a silicone baking liner as I did)
  2. Using a fine-mesh sieve, rinse the quinoa well under cold running water and spread out on a paper towel to dry. This will prevent bitterness.
  3. Add quinoa, walnuts, oats, crumbled dehydrated apples, and salt to small mixing bowl, stirring to combine.
  4. To a small saucepan, 1 ½ cups apple cider and bring to a boil over medium-high heat. Reduce heat and simmer for approximately 20 minutes, until volume has been reduced to ½ cup liquid. Add coconut oil, coconut sugar, cinnamon and nutmeg and simmer for an additional 2 minutes, stirring frequently.
  5. Pour apple cider “syrup” over the dry ingredients and stir to thoroughly coat. Arrange on parchment-lined baking sheet and spread into a uniform layer with a metal spoon. Uniformity in thickness will promote even cooking and keep edges from burning.
  6. Bake for approximately 30 minutes, rotating the pan around on the oven rack at the halfway point. When removing from oven, color should be deep golden brown in color. Allow to cool completely so that it hardens up before breaking into bite-sized pieces.
  7. If you realize, after cooling that still soft in the center, you can return it to the oven for another 5 to 10 minutes, keeping a close eye.
  8. Store leftovers in a sealed bag or container at room temperature up to one week, or in the freezer for up to three months.

Holiday How To – Easy Beef Tenderloin Roast with Root Veggies

Holiday Roast Tips - TheFitFork.com‘Tis the season for eating well and enjoying the experience with family and friends. Serving a perfectly prepared beef roast is always a showstopper at holiday celebrations and dinner parties. It can be our little secret, but roasting beef actually requires very little time and effort! I learned everything I need to know from my dad (who does a tenderloin roast every Christmas) and my friends at the Texas Beef Council.

With my easy-to-follow tips that follow, you can transform a large hunk of beef into a delicious roast ready to be carved into succulent slices — there probably won’t be a leftover morsel in sight, so consider making two roasts! Also, if you’d like to test out your skills and don’t have a recipe, try the mouth-watering recipe for Garlic and Rosemary Rubbed Tenderloin Roast with Roasted Root Vegetables featured at the bottom of this post.

BTW, if you are on the Beef Team and are still in possession of your holiday Chateau Loin (which is center cut sirloin), it will easily substitute without modifications in this roast recipe.  

Tips for the Perfect Roast Beef:

1) Choose the right cut. We’re demonstrating roasting tips with a beef tenderloin roast, but the same process will work with other cuts including ribeye and tri tip roasts and more economical cuts like sirloin and round roasts. The way to ensure perfect outcomes when preparing beef is to pair a cut with the appropriate cooking method – and also your budget. The Interactive Butcher Counter  helps take the uncertainty out of selecting the right cut of beef to roast – check it out!

garlic rosemary rubbed tenderloin - pick cut and ingredients - jennifer fisher

2) You can’t flub a rub. Dry rubs are an easy way to add flavor to a roast and can be as simple as salt and pepper or as complex and spicy as you want to get – chili powder, herbs, brown sugar and even ground coffee beans are all ingredients I’ve seen used in rubs.  Really, the only must-do for a rub is to apply it generously – rub in the mixture thickly on the top, bottom and every side (including the ends) and your reward will be a crusty, caramelized exterior that adds flavor and helps to hold in juices. A variant of dry rubs is to massage olive oil, spices and even fresh aromatic herbs into the beef – that’s what we’re doing with the recipe below.

Seasoning beef tenderloin with salt and olive oil.

3) Use the proper roasting gear. Actually, very little gear is required for roasting beef in the oven. When it comes to cookware, choose a metal pan with an approximate 2 to 3-inch rim. Metal conducts heat better than other materials and yields a more evenly browned roast. You won’t need a lid, as oven roasting is a dry heat cooking method.  Also, use a roasting rack to elevate the meat above the pan so that the heat can circulate underneath. If you don’t have a roasting rack or fancy silicon roasting laurel, simply substitute heavy-duty aluminum foil that has been scrunched up and twisted into a figure-8 shape.  A reliable meat thermometer is also needed to ensure you cook your roast to perfect doneness – those inexpensive instant-read thermometers found at most grocery stores will do the job fine.

Tale your beef roast out at 135F degrees and let rest for 10 minutes for medium-rare doneness

4) Learn how to tell when your roast is done. If you’re not following a recipe, get familiar with the suggested cooking times and oven temperatures for your selected cut of beef.  I like to reference this useful chart on Beef Roast Table Times. Abiding by this chart will ensure you rule the roast every time; however, remember that temperatures vary from oven to oven making cooking times approximate. You’ll know when your roast is “done” for your taste preferences when the thermometer is stuck into the center, thickest part of the roast (but not near a bone) and reads 10 degrees LESS than the time indicated for medium-rare, medium, or well-done. When you take a roast out of the oven early like this, the temperature will continue to rise and cook the roast for a few more minutes out of the oven.For example, a medium-rare roast is finished at 145 F degrees, but should be removed at 135 F degrees. See the chart below for more details.

Temperature guidelines for beef roasts.

5) Give it a rest. As tempting as it is to cut into a roast or steak right as it comes off the heat, you must let it rest on the countertop for at least 10 minutes as just mentioned. This allows the juices time to redistribute between the relaxing muscle fibers and ultimately create a more tender and enjoyable eating experience. If you’re not sure if the roast has rested long enough, it should be ready to carve when the temperature drops to 120 F degrees or below.


Garlic & Rosemary Rubbed Tenderloin and Roasted Root Vegetables - TheFitFork.com


Are you a roast-cooking newbie — or do you have well seasoned skills? Do you like the food pun?  Feel free to share a “funny,” too!  A steak pun is a rare medium well done — heehee, another pun!  XOXO, Jennifer 

Garlic and Rosemary Tenderloin Roast with Roasted Root Vegetables Recipe
Prep Time
10 mins
Cook Time
45 mins
Total Time
55 mins
 
• 2 to 3 lbs. assorted root vegetables (like sweet potatoes, fingerling potatoes, onions, beets, parsnips) • 1 large sweet yellow onion • 2 tablespoons olive oil • 1 teaspoons coarse sea salt • 1 teaspoon coarsely ground black pepper • 1 tablespoon fresh or dried parsley
Course: Main Dish
Cuisine: American
Servings: 6 servings
Ingredients
for roast beef
  • 1 2lb beef tenderloin or chateau loin
  • 2 teaspoons olive oil
  • 1 teaspoon garlic paste
  • 3 springs fresh rosemary
  • 2 tablespoons coarse sea salt
  • 3 tablespoons coarse ground black pepper
for roast vegetables
  • 2 to 3 pounds assorted root vegetables like sweet potatoes, fingerling potatoes, onions, beets, parsnips
  • 1 large yellow onion
  • 2 tablespoons olive oil
  • 1 teaspoon coarse sea salt
  • 2 teaspoons coarse gound pepper
  • 1 tablespoon fresh chopped parslet
Instructions
  1. Preheat oven to 425°F. Massage beef with olive oil and then rub rosemary springs enthusiastically onto entire surface to release aromatic oils. Next, rub garlic paste over tenderloin and then rub in salt and pepper to entire surface. Place rosemary spring on top of roast.
  2. Place roast on rack in shallow roasting pan. Do not add water or cover.
  3. Cut vegetables into 1 to 2-inch chunks and place on rimmed baking sheet. Drizzle with olive oil. Chop up remaining rosemary and toss with vegetables along with salt, pepper, and parsley. Spread out vegetables into a single layer. Roast vegetables for approximately 45 minutes in 425F degree oven, stirring and rearranging halfway through cooking.
  4. Roast tenderloin in 425°F oven for approximately 40 – 45 minutes for medium rare (pull out at 135F degrees and will rise to 145F degrees) or 45 to 55 minutes for medium doneness (pull out at 145F degrees and will rise to 160F degrees). Tent with foil. Let stand 10 - 20 minutes until temperature has dropped to 120 F degrees or below. Slice roast across the grain and serve with roasted vegetables.

5 Easiest Ever Almond Ideas for Holiday Party

Blue Diamond Almonds on treeTime to get serious about last minute holiday preparations; it’s the final countdown to Christmas! I still have some shopping and wrapping to do, cookie baking with the kids, and prepping for my contributions to the huge family feast on Christmas Eve — oh and the brunch I’m hosting on Christmas Day.

Enjoy family movie night with Pop Secret popcorn and this genius container hack for serving up the snack!In between all this, we’re squeezing in a Star Wars movie marathon of past prequels and sequels – even though we’ve seen these classic flicks numerous times, it’ll be good to be fresh for the new Star Wars – The Force Awakens.

So, we’ll need snacks – lots and lots of snacks, and preferably healthy things to nosh and nibble on that won’t make a mess in my media room! Almonds are one of my go-to choices for healthy appetizers and snacks – they punch a nice little pack of protein and are great source of other nutrients, especially iron, vitamins A and C, and dietary fiber. Another great thing about almonds (Blue Diamond Almonds are my favorite) is just how easy they are to incorporate into entertaining.  Today, I’m sharing five fun and easy ways to crunch and much on almonds this holiday season – and into the New Year, too!

  1. Simply eat almonds straight out of the can (or fancy serving bowl). I’ve never seen a soul walk past delicious almonds and not stop to pick up a few! A one-ounce serving (about 23 almonds) pairs perfectly win a light cocktail or glass of sparkling water.Almonds for Holiday Entertaining
  2. This idea is for the kids (of any age) – Almond Lover Gingerbread Men! To keep it easy, use store-bought cookies and simply melt a chocolate chip on one hand (or pipe a dot of frosting) and press down gently with an olive. Use a piping bag filled with frosting to decorate with a little edible bow!Almonds for Holiday EntertainingEasy Almond Lover Gingerbread Men
  3. This is one of my favorite snacks with almonds — Almond Chocolate Apricot Bites! Just layer up the three ingredients (melt the chocolate chip if you want to be fancy so that all the ingredients stick together) and, viola, a yummy 20-calorie treat in mere minutes.20 Calorie Apricot Almond Chocolate Bites
  4. Chocolate Almond Popcorn – could this be easier?! Air pop some kernels and then, while still warm, top with your favorite flavor of Blue Diamond Almonds and chocolate chips. Toss together so the chocolate slightly melts – it’s like being at the movie theater and dumping candy into your big tub, but healthier!Popcorn with Chocolate Chips and Almonds makes a healthy salty-sweet snack!
  5. Almond Lover Cookies are a favorite with my boys and only take a few minutes to whip up a batch and 12 minutes to bake – if short on time, double up a batch the week before and keep in the freezer!jennifer fisher- thefitfork- almond lover cookies

What are your stress-free ways to enjoy almonds, aside from straight out of the can?! Oh, and have you seen the new Star Wars movie yet — just a thumbs up or down, no spoilers! Let me know in the comments below — XOXO, Jennifer 

This post was sponsored by Blue Diamond Almonds. However, all comments, ideas and enthusiasm are my own. 

Life of Party! 5-min Blue Cheese and Orange Gingersnap Appetizer

Blue Cheese & Orange Gingersnap BitesInvited to a holiday party, you dutifully ask “can I bring anything,” fully assuming the host will not want you to risk ruining her celebratory spread of nibbles and noshes. But this time (gasp) you to “it would be so lovely for you to bring an appetizer or dessert . . . if it isn’t too much trouble.” 

sweet treat personalityYou’re thinking –

“It really IS too much trouble, why’d I have to open my big mouth.”


As I see it, you have several options to this potluck-ish predicament. First, you could skip the party and save yourself the trouble. Second, you could show up empty-handed and blame it on the dog or dropping your dish on the way to the car. Third, you could attempt a fancy recipe seen in a gourmet cookbook and spend precious free-time hours in the kitchen with no guarantees of the results. Fourth, you could grab anything left on the store shelf like a bag of chips and onion dip and end up looking like an uninspired slacker. Or, fifth, and the obvious winning choice – make this proven to be insanely delicious app in a snap  — Gingersnap Blue Cheese & Orange Bites.

Gingersnap Blue Cheese Orange Bites

So many things to love about Gingersnap Blue Cheese & Orange Bites – the taste is insane with “pows” of sweet, spicy, pungent, salty and zesty citrus tastes with every bite. You also get pretty much every texture in the textbook too – crunchy, smooth, juicy and chewy. But, drum roll, one of the most amazing things about this appetizer recipe with a complex flavor profile yet simple presentation is that it can be made in 5 minutes or less. You don’t need a culinary school certificate to make this easy and elegant appetizer recipe — in fact, you don’t even need to know how to cook!

I originally made this hors d’oeuvre recipe for Litehouse Food as a way to feature their deliciously rich and creamy Artisan Reserve Center Cut Blue Cheese.

cooking light appetizer gallerLooking for more quick, easy and healthy nibbles for your party? Check out Cooking Light’s gallery of Top Rated Party Appetizers!

What is your favorite 5 minute appetizer? Please share in the comments below – XOXO, Jennifer


Blue Cheese and Orange Gingersnap Bites
Prep Time
5 mins
Total Time
5 mins
 
Razzle dazzle holiday guests with this 5 minute appetizer that mixes and mingles orange segments, blue cheese, honey and crunchy ginger cookies into a festive flavor experience worth celebrating any time of the year.
Cuisine: American, Italian
Servings: 36 appetizers
Ingredients
  • 36 2" diameter gingersnap cookies
  • 5 ounces center cut blue cheese, coarsely crumbled or cut into 36 chunks
  • 5 mandarin oranges, peeled and segmented
  • 3 tablespoons honey
  • 1 tablespoon chopped fresh mint or "Instantly Fresh" Mint from Litehouse Foods
Instructions
  1. Lay gingersnaps out on serving platter. Top each with an orange slice and chunk of blue cheese. Drizzle with honey and sprinkle with mint.

Winter Workouts – 40 Fitness Hacks for the Holidays

40 Fitness Hacks for the HolidaysRaise your hand if you love the holiday season as much as me!  Now, raise the other hand and jump up and then down to the ground in a burpee – yay, now we’re exercising! Between parties, shopping, baking and volunteering, I sometimes find my self fa-la-la-ing too much and forgetting about my normally-scheduled sweat sessions. Well, I never really “forget” to run or workout, rather I just just can’t figure out how to fit a fitness session into the whirlwind of winter celebrations. Even sneaking in a quick run can be unpredictable when the weather won’t cooperate, traveling is on the agenda, or you’re hosting overnight holiday company.

But, I’ve found that just doing ANYTHING is SOMETHING – fit in a holiday fitness hack wherever you can!  As a firm believer that “all the little things” add up, I’ve made a list (and checked it twice) of exercises you can sneak in when life gets busy. Don’t worry about getting side-glances doing some of the crazy-sounding moves in public — soon you’ll be get getting ALL the attention with your super fit New Year’s body. By the way, I originally came up with these 40 Holiday Fitness Hacks for Core Power High Protein Shakes — an excellent way to power up with 20 – 26g of protein and keep your belly from shaking like jelly!

At home:

  • Wrapping Paper Roll High Knee: Lay out a series wrapping paper rolls on the ground about 2 feet apart. Quickly move laterally, pulling knees up to waist while moving between rolls with each step.
  • Rake Yard: Work up a sweat rounding up all those fallen fall leaves – offer to do the neighbor’s yard, too!
  • Shovel Snow: No leaves left, but have snow? Clear a path for company with this heart-pumping chore!
  • Front Box Carry: Take that heavy box of holiday decorations and hold it at your chest. Walk down the longest hall in your house and back.
  • Ladder Side Plank Dips: After putting up holiday lights, use lower rungs of ladder for a challenging side plank. Rest feet on a rung that is even with your hips and dip down and back up to a side plank.
  • Kitchen Squat Jumps: Take a break from slicing and dicing with a few sets of squat jumps. Put your knife down, lower into a squat and jump upward explosively; repeat.
  • Bar Stool Pistols: Stand side-by-side to bar stool and lower down into a pistol using bar stool for balance; repeat on opposite leg.
  • Yoga Tree Pose: Stop and admire your holiday tree with a classic yoga pose that will challenge and improve your balance. Stand with feet together; bend one leg up at the knee, resting foot anywhere between knee and crotch. Extend arms upward or to sides for balance. Hold until failure and repeat on opposite side.
  • Ab Rolling Pin Roll Outs: While on knees, use rolling pin to extend forward while keeping core engaged; roll back up and repeat. This is proof abs ARE made in the kitchen!
  • Commercial Break Cardio: When watching holiday classics with the kids, get everyone moving with jumping jacks, burpees, mountain climbers or other heart-pumping exercises until the show comes back on. No fast-forwarding with the DVR!


In a hotel:

  • Ice Bucket Goblet Squats: Fill ice bucket up to give more weight and hold at chest while dropping down into squats; repeat.
  • Towel Hop: Lay out a series of hand towels 5 or 6 feet apart in a line and use them as your target for standing long jumps.
  • Bed Decline Push-ups: Put feet up on bed and lower down into push-ups; repeat.’
  • Wall Sit: Find an uncluttered wall and slide back down wall until thighs parallel with ground and knees bent at 90 degree angle. Hold as long as you can.
  • Burpees: Knock out as many traditional burpees as you can before hotel room guests below start complaining.
  • Water Bottle Tricep Extension: Grab that one-liter water bottle by the mini bar and get after one-arm tricep extensions. Hold bottle overhead and bending backward at the elbow. A liter only weighs about 2.25 lbs. so ramp up your reps.
  • Bed Bridge: In a room with two beds, see how long you can hold a plank with feet on one bed, arms on the other.
  • Hallway Handstands: Practice handstands in the small hallway inside the hotel room. Kick up to a handstand and balance against the door, or place a folded towel on the ground for headstand modification.
  • Luggage Sumo High Pull: Grab a duffel or small carry-on at the handle with both hands and pull to chin moving elbows upward; lower and repeat.
  • Polar Bear Swim: Head to the hotel pool and knock out a few laps! If not heated, you’ll be motivated to swim fast!

At the mall:

  • Mall Walk: Not just for seniors, you can rack up extra daily steps by taking a couple bonus laps around the stores.
  • Stair Climb: Always choose the stairs over the escalator or elevator – it’s less crowded too!
  • Fitting Room Stretch: Loosen up before sliding into those new skinny jeans with toe touches, windmills and arms-behind-back stretching.
  • Food Court Booty Squeezes: No one will be the wiser if you are flexing and relaxing your glutes repeatedly with this isometric exercise.
  • Park in the Boonies: Leave your car in the furthest away spot from the mall entrance.
  • Shopping Sherpa: Volunteer to carry the entire family’s load of purchases. Distribute weight in bags evenly between both arms for a farmer’s carry type workout.
  • Bench Hops: Find and empty, backless bench and grab sides firmly with both hands. Starting with feet together on one side, jump legs and torso to clear bench and land on the opposing side, with hands staying in place; repeat to other side.
  • Santa Line Lunges: While waiting in the long line to see St. Nick, take every step forward with a lunge. Repeat as the line permits.
  • Ice Skate: Most malls put up rinks during the holiday season, take advantage of the fun and burn around 362 calories per hour.
  • Grand Total Jumping Jacks: When back in the parking lot, tally up your receipts and bust out the same number of jumping jacks. For example, $250 spent means 250 jumping jacks – you’ll warm up as a bonus!

At the market:

  • Top Shelf Calf Raises: Extend up onto your tip-toes for 10 to 20 reps as if reaching to grab a can from the top shelf.  
  • Lower Shelf Squats: Rather than bending over to get an item squat and hold for 15 seconds; repeat.
  • Cart Rows: Hold handle bar of shopping cart with both arms extended and legs shoulder. Pull cart toward you and then push away, without letting go of handle. Fill cart with big bags of dog food for an extra challenge!
  • Milk Jug Side Bends: With legs shoulder-width apart, hold milk jug by handle, hanging arm downward at side. Bend torso at side; return upright and repeat on opposing side.
  • Freezer Aisle Agility: Park cart at one end and run high knees to last freezer door. Stop, do a tuck jump, get anything you need from the freezer and side skip back to cart.
  • Shopper Wood Choppers: Grab heavier items for your holiday recipes (like 5lb. bag of sugar) and set on ground near feet. Pick up with both hands and rotate upward with arms overhead; repeat 10 to 20 times before putting in your cart.
  • Line-Wait Leg Circles: While waiting in line to check out, lift one leg about 8-inches off ground. Keep leg straight, point toe and rotate around in small, imaginary circles.
  • Chest Opener Stretch: Also good while waiting in line, stand with back straight and shoulders pulled back. Reach behind and clasp both hands together while bringing hands up towards head as far as possible. Hold for 15 seconds.
  • Bag It Bicep Curls: Bag your groceries and then hold by handles and knock out a few bicep curls on each side.
  • Homeward-Bound Quad Pulses: While driving home in car, pulse your quads alternating left and right for the duration of each stop light.

Jingle Bell 5k AUstin 2015

I woke up early this weekend to run in the Jingle Bell Dash 5k with a friend. Done by 9 am and still out and about, I was able to tackle last minute holiday shopping!

How are you sneaking in fitness this holiday season? Please share in the comments below – XOXO, Jennifer