Apple Walnut Quinoa Crunch + More Healthy Candy Recipes

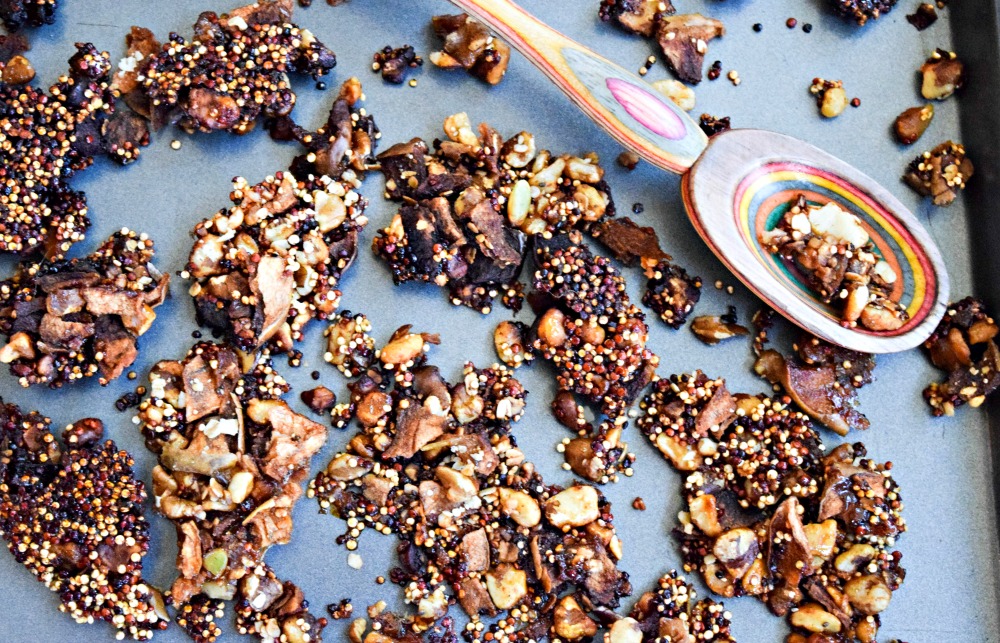
Apple Walnut Quinoa CrunchReady for a curiously crunchy treat? My recipe for Apple, Walnut & Quinoa Crunch will satisfy sweet crispy cravings while filling you up longer thanks to an unexpected punch of protein from the quinoa and black walnuts– it’s a balanced candy for your “healthy tooth”!
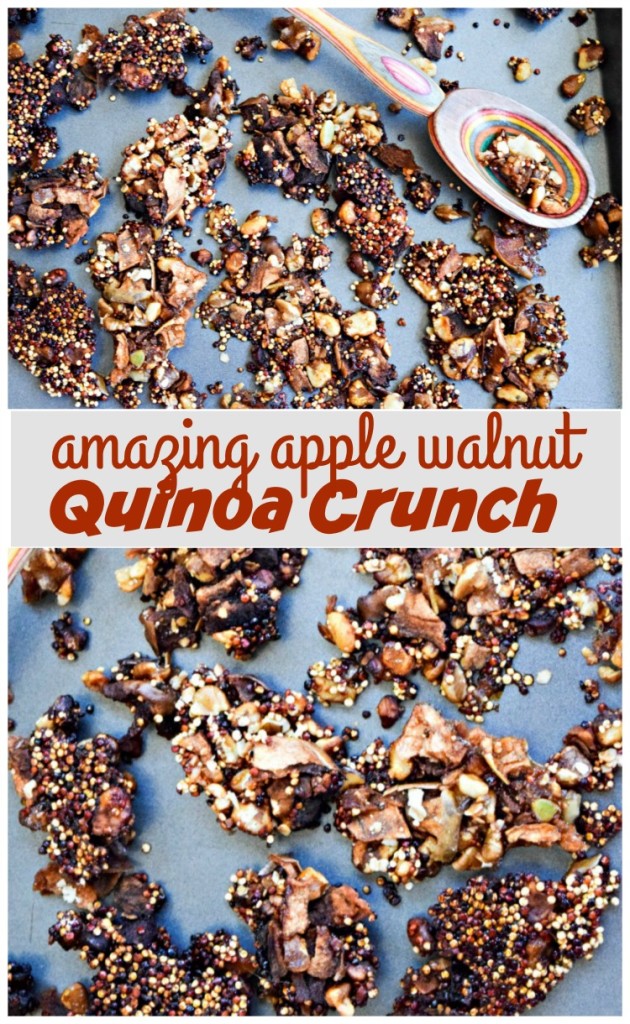
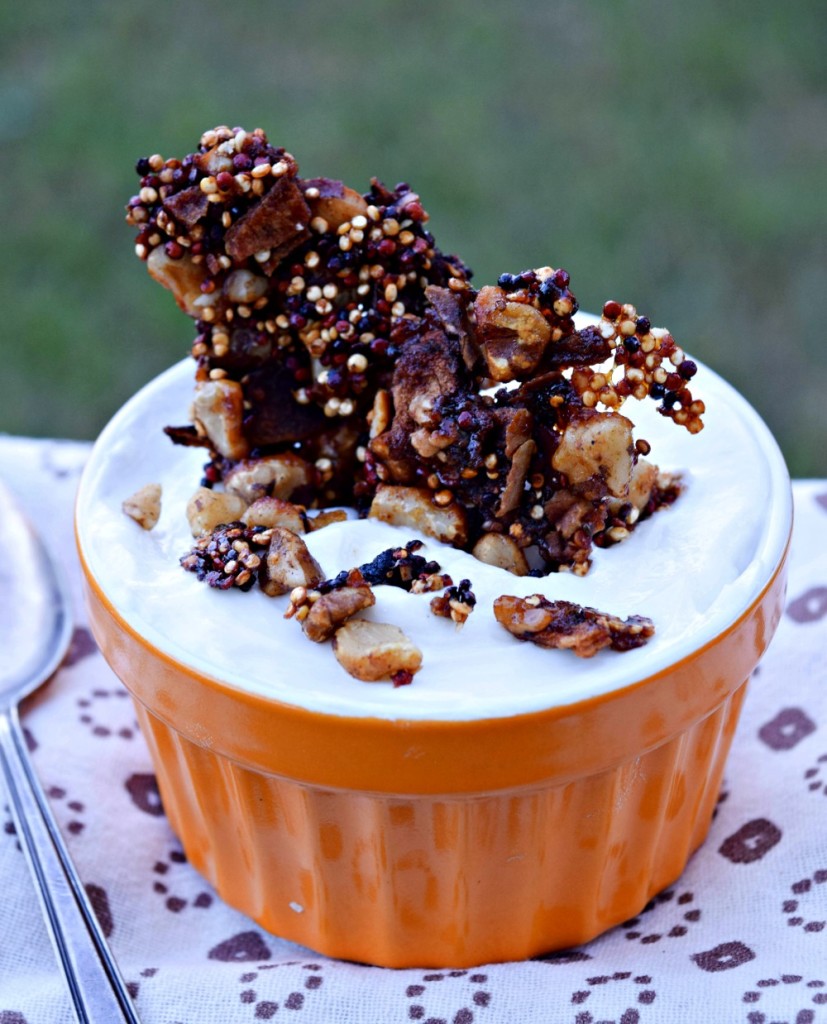
Apple Walnut Quinoa Crunch is a healthy alternative to peanut brittle candy -- it packs a bit of protein from the ancient grain Quinoa and is dairy-free, gluten-free and made without traditional corn syrup (only a touch of coconut sugar and 100 percent apple cider)I like to eat it straight off the baking sheet or break up into shards of sweetness to top my Greek yogurt.
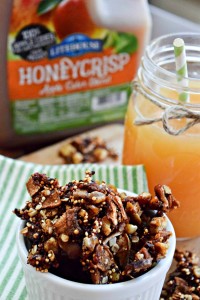
Apple Walnut Quinoa Crunch on Greek Yogurt

Apple Walnut Quinoa Crunch made with apple ciderI almost hesitate to even call this easy-to-make recipe “candy,” although it is a take on old-fashioned “nut brittle.” However, the typical peanut brittle or nut brittle uses a boatload of butter, table sugar and corn syrup – gasp! Instead, my healthy candy recipe is packed with wholesome ingredients like 100 percent juice apple cider, ancient grains, dried fruit and nuts, and just a touch of coconut sugar.

I also choose to use Black Walnuts instead of standard english walnuts. Why? The black walnut has the most protien of any tree nut and imparts a more intense, earthy, nutty flavor to recipes. I discovered this news I can definitely use at the Produce Marketing Associations recent Fresh Summit in Orlando when, I auspiciouslly bumped into Hammon Black Walnuts on my way out the door to fly home.

As far as sugars go, coconut sugar (derived from Palm) is a much healthier sweetener in moderation as it doesn’t spike blood sugar as dramatically as traditional sugars. Also, if a concern for you are a loved one, this recipe is gluten-free and dairy-free.

I originally made this recipe for Litehouse Foods and used the Honey Crisp Apple Cider, you can find it in the produce section this time of year. This Cold Pressed, 100 percent pure apple juice has a unique tart taste that is wonderfully balanced with sweet. It’s perfect poured straight from the container, served hot or cold, and also makes a great ingredient in recipes where you would prefer natural sweetness.

Some things to note when making this recipe — you need to keep an eye on it so it doesn’t burn, your oven temperature may vary affecting the overall cook time. Also, it will be soft when removed from oven — give it plenty of time to set up and harden, stick in the fridge to expidite. If it still doesn’t seem crispy, then you can put it back in the oven for several minutes at a time until done.
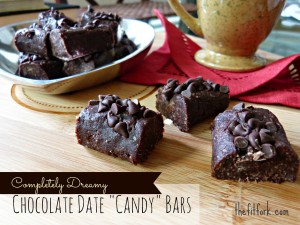
jennifer fisher - thefitfork.com - chocolate date candy barsAnother healthier “candy” I’m pulling from the archives to share with you today is my recipe for Sweet Date Chocolate Candy Bar Bites. These are so yummy and I love how the dates provide extra iron in my diet.
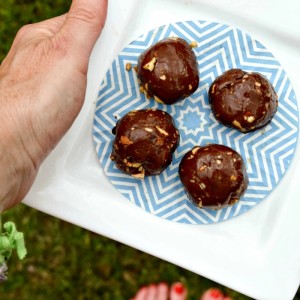
Hazelnut Pecan Protein FudgeI also like to make a batch of my Hazlenut Fudge Protein Balls to stash in the freezer and thaw out one at a time to quell my dessert cravings. These no-bake energy bits are ideal for a healthy little dessert or as pre and post workout fuel.
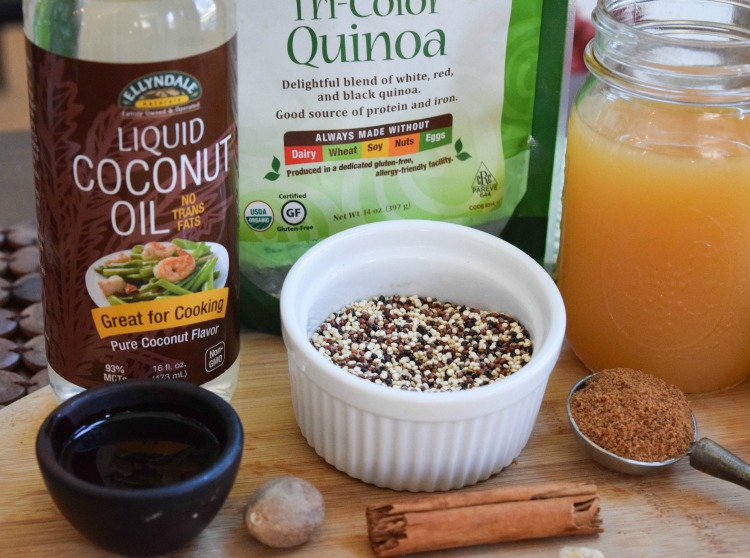
now-foods-ingredients-for-quinoa-crunch-candyIn addition to the Honey Crisp Apple Cider from Litehouse Foods, which you can conveniently find in your market’s produce section this time of year, here are some other ingredients used in my Quinoa Crunch.a

Do you have a “healthy” candy recipe? What is your go-to when you are craving something sweet? Please share in the comments – XOXO, Jennifer
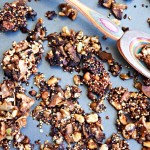
Apple Walnut Quinoa Crunch
Prep Time
10 mins
Cook Time
50 mins
Total Time
1 hr
 
This healthier alternative to candy is easy to make and packs a bit of protein thanks to the ancient grain Quinoa.
Course: Dessert
Cuisine: American
Servings: 4 servubgs
Ingredients
  • 1/3 cup uncooked quinoa I like the "tri-color" from NOW foods
  • 1/2 cup chopped black walnuts can use regular walnuts
  • 1/2 cup dehydrated baked apple chips, crumbled
  • 1/4 cup rolled or instant oats processed in gluten-free facility
  • 1/4 teaspoon sea salt
  • 2 tablespoons coconut oil
  • 1 1/2 cups apple cider
  • 2 tablespoons coconut sugar aka palm sugar
  • 1 teapsoon ground cinnamon
  • 1/4 teaspoon nutmeg
Instructions
  1. Preheat oven to 325 degrees F (160C) and line a rimmed baking sheet with parchment paper (or use a silicone baking liner as I did)
  2. Using a fine-mesh sieve, rinse the quinoa well under cold running water and spread out on a paper towel to dry. This will prevent bitterness.
  3. Add quinoa, walnuts, oats, crumbled dehydrated apples, and salt to small mixing bowl, stirring to combine.
  4. To a small saucepan, 1 ½ cups apple cider and bring to a boil over medium-high heat. Reduce heat and simmer for approximately 20 minutes, until volume has been reduced to ½ cup liquid. Add coconut oil, coconut sugar, cinnamon and nutmeg and simmer for an additional 2 minutes, stirring frequently.
  5. Pour apple cider “syrup” over the dry ingredients and stir to thoroughly coat. Arrange on parchment-lined baking sheet and spread into a uniform layer with a metal spoon. Uniformity in thickness will promote even cooking and keep edges from burning.
  6. Bake for approximately 30 minutes, rotating the pan around on the oven rack at the halfway point. When removing from oven, color should be deep golden brown in color. Allow to cool completely so that it hardens up before breaking into bite-sized pieces.
  7. If you realize, after cooling that still soft in the center, you can return it to the oven for another 5 to 10 minutes, keeping a close eye.
  8. Store leftovers in a sealed bag or container at room temperature up to one week, or in the freezer for up to three months.

Healthier Maple Pumpkin Pecan Popcorn + More Fall Favs

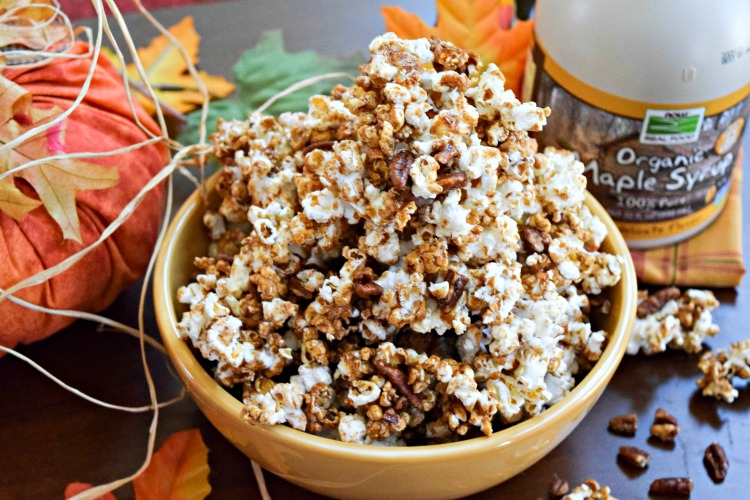
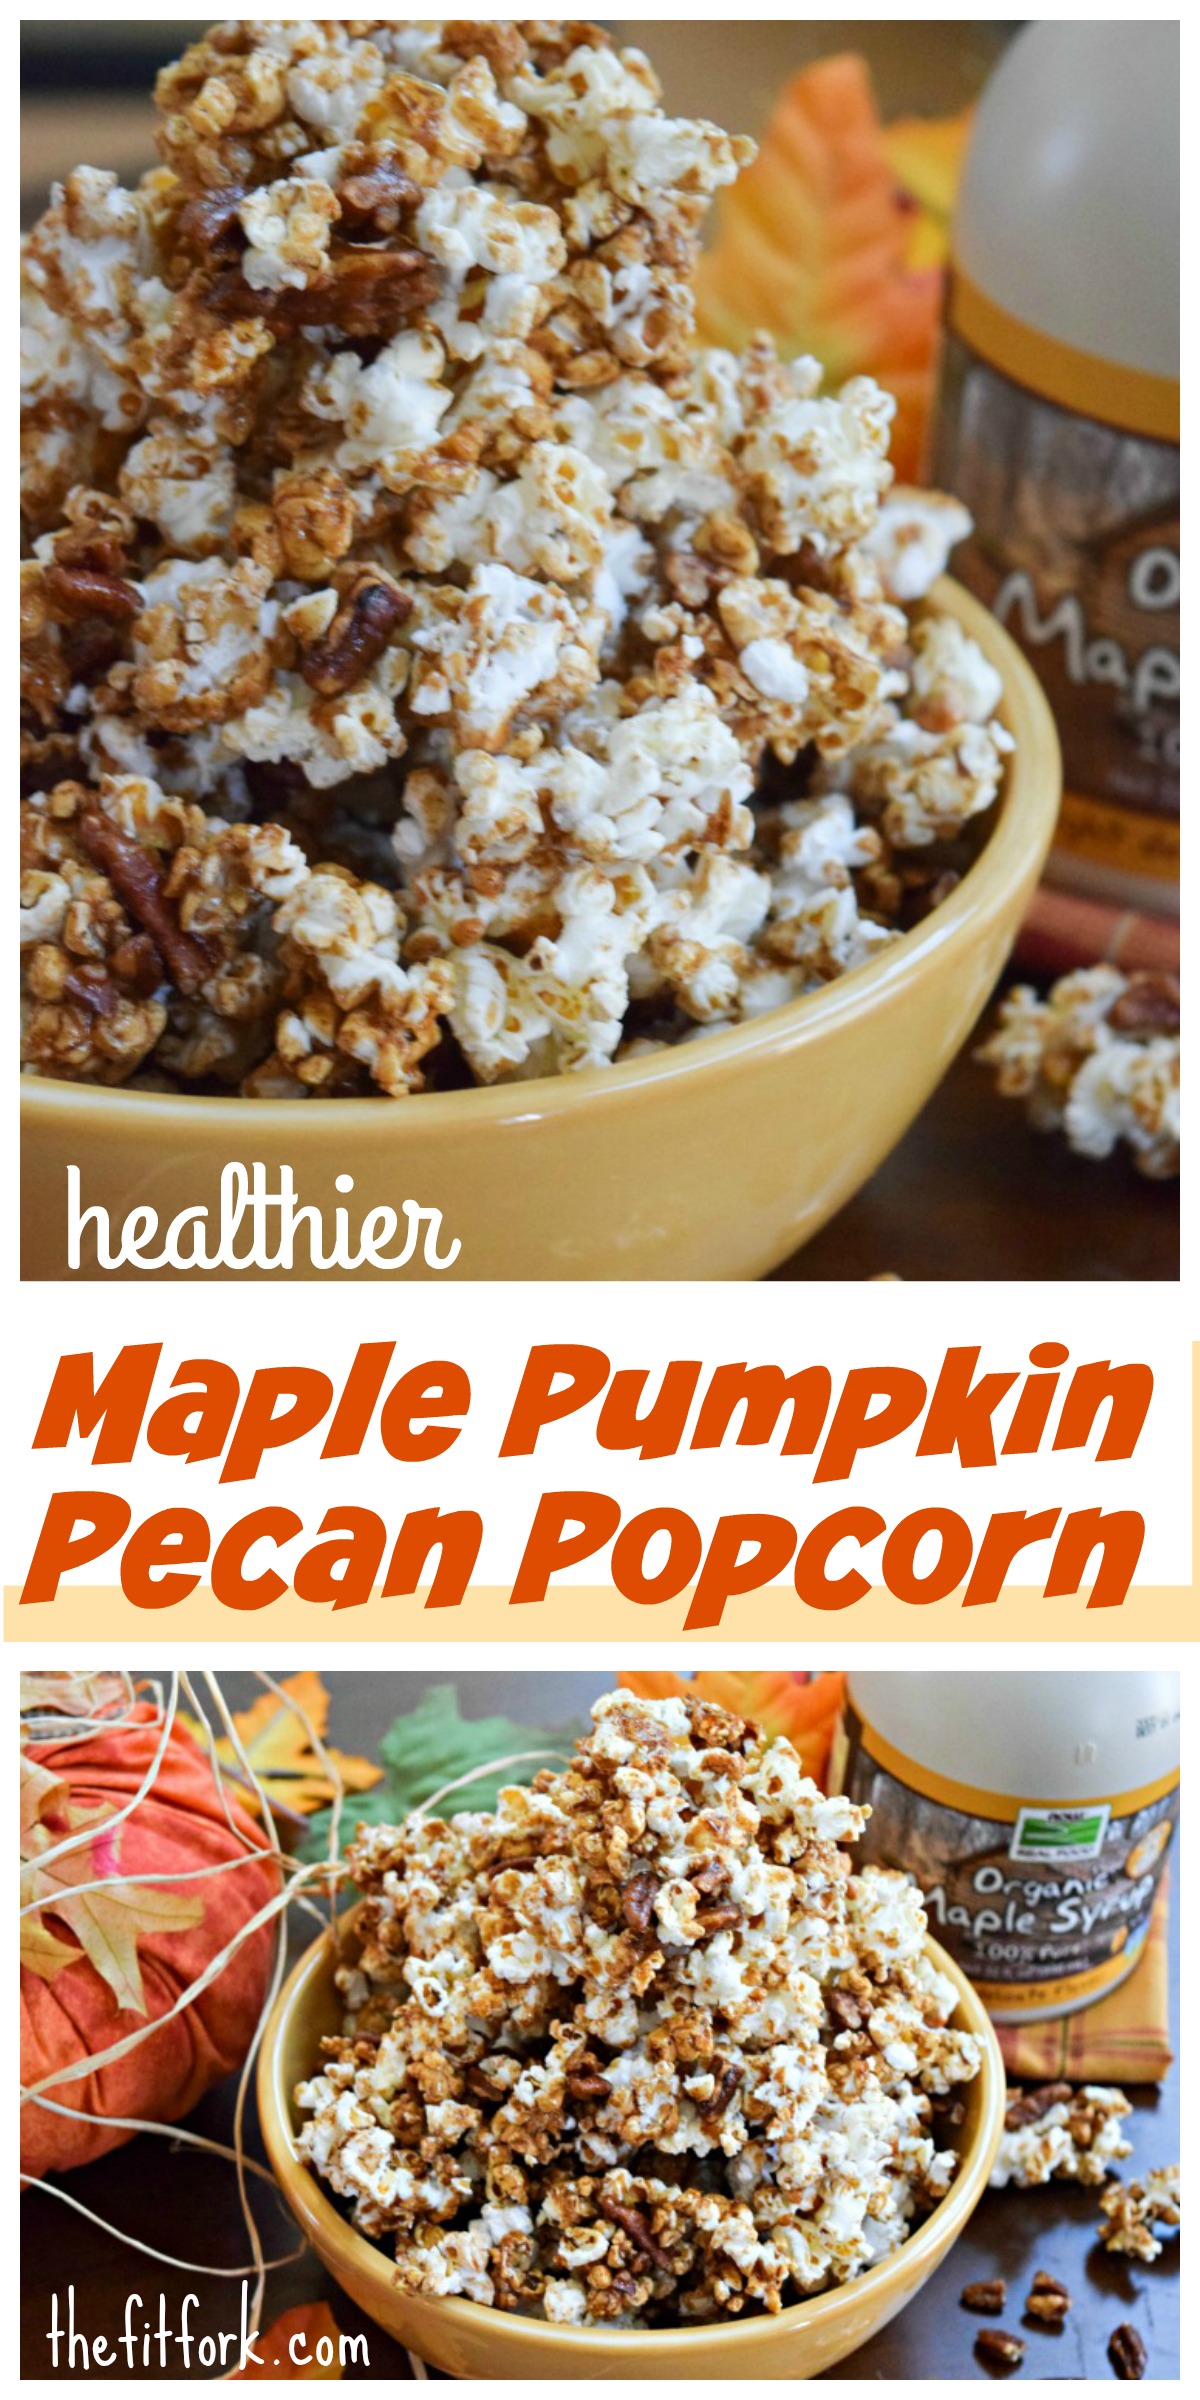
Maple Pumpkin Pecan PopcornMaple Pecan Pumpkin Popcorn: So much goodness here, this is a delicious and easy-to-make fall snack. Forget about Cracker Jacks, make your own healthier autumn-inspired version with real maple syrup, a bit of butter and real pumpkin along withthe right spices. Also, did you know you can make your own “clean” popcorn right in the microwave with nothing more than a brown paper lunch sack – that’s how I’ve been doing it for years!  Also, do NOT use maple FLAVORED syrup for this recipes, that would be a nasty, corn-syrupy shame. I love the 100% Organic Maple Syrup from NOW Real Food – it’s a light and delicate-tasting amber syrup that makes me think of a crisp, cool breeze and rustle of leaves with every taste! Recipe for the Healthier Maple Pecan Pumpkin Popcorn at the bottom of the post!

Maple Pumpkin Pecan Popcorn features all the flavors of fall an healthier sugar alternatives!

September PopSugar Must Have Box

September PopSugar Must Have Box

Also wanted to shout out some other this I’m loving this fall season. First, yay for the POPSUGAR, they sent me the September Must Have Box and, it’s definitely a must have! This awesome lifestyle subscription box always knows how to win me over with products that I’ll obviously love (like the GFB Dark Chocolate Coconut Bites) to unexpected surprises (like the Jack & Lucy Black Felt Hat) that I never knew I needed, but now wonder how I ever lived without! And this specially curated box of goodies even makes the practical contents (like the MANI E.R. purse manicure repair kit) super hip and cool.

Jack & Lucy Hat - TheFitFork.com Jennifer Fisher

Jack & Lucy Hat – TheFitFork.com Jennifer Fisher

If you are looking for a unique gift that gives for a month or e even all year, consider giving your bestie a subscription to the POPSUGAR Must Have Box. Use code SHOP5 (which never expires) at checkout to save $5 off your FIRST Must Have Box!

Tommie Copper Compression elbow sleeve

Second, I’m loving Tommie Copper Compression, again . . . as usual!  But this time I’m focused on their compression “sleeves” made for nearly every part and parcel of our limbs! Sometimes I ask a little too much of my bod and not even a rest day can  resolve my minor aches and pains. However, I really dislike being sidelined from training – – that’s why you’ll typically see me in some sort of compression gear. If you’ve ever seen my Instagram feed, you’ll see that I’m a huge fan of compression socks. But I also wear compression sleeves for ankle, knee, wrists, elbow and quads when needed for both during exercise support and post-workout recovery. Personally, I really like the Tommie Copper brand – the targeted compression sleeves are low-profile, unobtrusive and make my muscles, tendons and joints feel good (or at least lessen the feeling that I’ve been run over by a truck)!

Tweet “Maple Pecan Pumpkin Popcorn + Fall Faves @nowfoods @tommiecopper @PopsugarMH #ad”]

Of all the fall foods, what is your favorite? Or at least, favorite fall flavor? Ever try compression gear for anywhere other than your legs or rear? Please share in the comments, XOXO — JEnnifer

Healthier Maple Pumpkin Pecan Popcorn + More Fall Favs
Prep Time
5 mins
Cook Time
1 hr
Total Time
1 hr 5 mins
 
Fall into fall with Maple Pumpkin Pecan Popcorn, it freatures nearly every iconic flavor of the season! Healthier than store bought caramel corn thanks to wholesome ingredients like maple syrup and stevia baking blend. Also, find out two companies that I've been loving later.
Course: Dessert, Snack
Cuisine: American
Servings: 10 servings
Ingredients
  • 1/2 cup 100% real maple syrup
  • 1/3 cup measure for measure stevia baking blend
  • 2 tablespoons butter
  • 2 tablespoons pumpkin purree can omit if not available (pumpkin pie spice adds a lot of flavor)
  • 1 1/2 teaspoons pumpkin pie spice
  • 1/2 teaspoon salt
  • 1/4 teaspoon baking soda
  • 10 cups air popped popcorn about 1/2 cup kernals
Instructions
  1. Preheat oven to 250 F degrees.
  2. In small saucepan over medium high, add sugar and syrup and heat for 1 minute until combined. Continue to heat and add butter, pumpkin, salt and pumpkin pie spice, stirring until butter melted and spices incorporated.
  3. Bring to boil, reduce heat and let simmer for approximately 2 minutes until slightly thickening but not turning dark brown
  4. .Add baking soda and stir. It will foam up a bit, continue to stir over the heat for 1 minute.
  5. Remove from heat and immediately pour into large bowl containing popped popcorn. Add pecans. Stir well to coat as evenly as possible.
  6. Spread out mixture on Silpat or parchment covered rimmed baking sheet. Bake at 250F degrees for approximately 45 minutes or until crunchy.
  7. Let cool for 10 minutes and transfer to serving bowl. Store leftovers in airtight container.

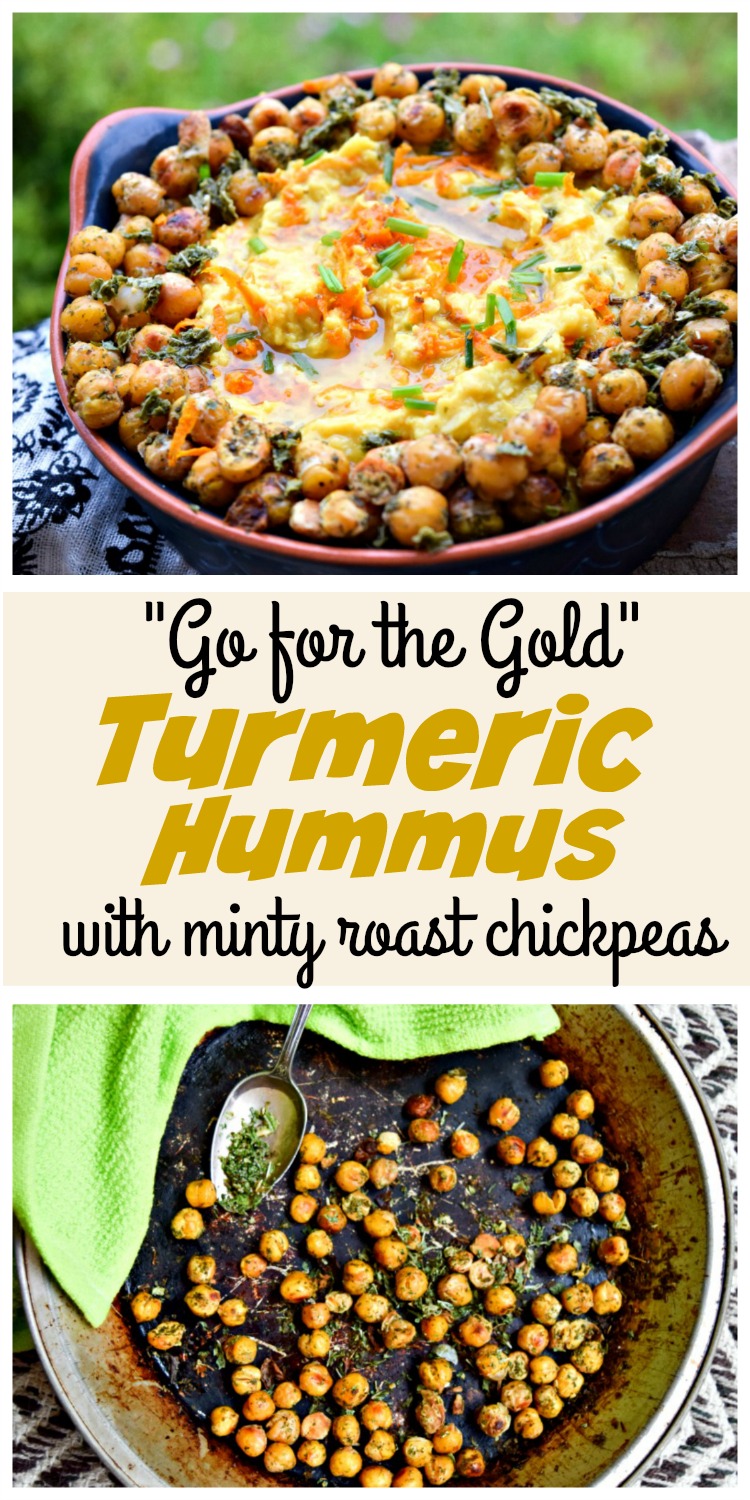
“Go For The Gold” Turmeric Hummus Served 3 Ways

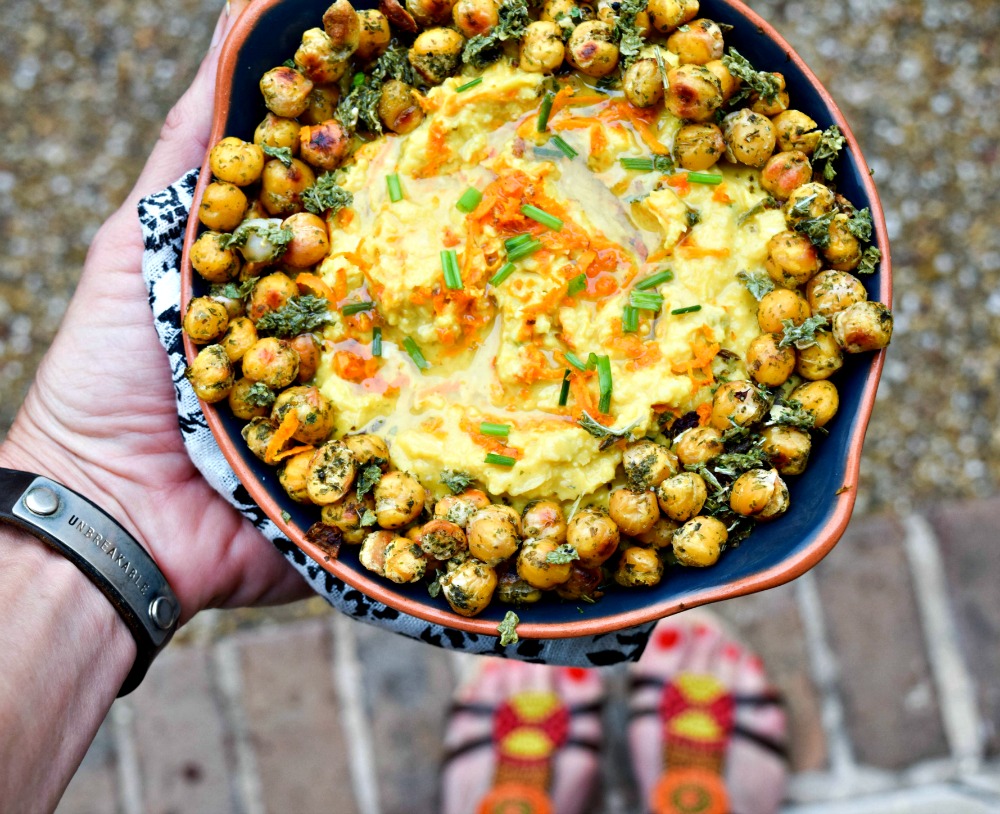
Turmeric Curry HummusWhen I want a satisfying snack that tastes super yummy, has loads of health benefits, and won’t have me hungry again in an hour, my “Go for Gold” Turmeric Curry Hummus with Minted Roast Chickpeas is a winner! It’s definitely what to bring to a football tailgate or sports watching party to show that you are the decided victor of dips and champion of chickpeas.Turmeric Hummus with Minty Roast Chickpeas is creamy and crunchy at the same time! A healthy snack with protein and fiber, perfect for post workout of for a party appetizer.

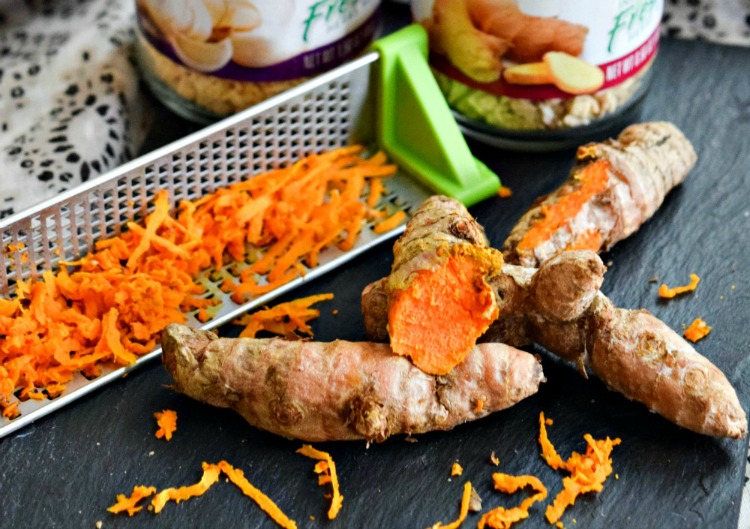
If you’re not familiar with turmeric, you need to get acquainted ASAP. I’ve featured it before in many recipes — my Turmeric Honey “Health” Shots have been popular! While it’s the primary spice in many Indian dishes (such as curry) and lends everything it touches (including hands) a golden yellow to orange hue, turmeric is consumed not just for its warm and mildly peppery taste, but also for the many purported health benefits.

For example, numerous studies suggest that turmeric’s active component, curcumin, helps alleviate or reduce the incidence of everything from certain cancers to depression – and it’s is highly touted as a natural pain-killer and anti-inflammatory. I take turmeric often to recover from hard workouts faster, I’m a fan of these Curcumin Capsules (from Turmeric Root Extract) sold by NOW Foods.

Turmeric.
I do advise using fresh turmeric along with the dried ground turmeric as directed in the recipe. The fresh has a more pleasingly distinctive aroma, flavor and health benefits in root form (technically a rhizome like ginger) than from the ground powder.  However, the ground turmeric helps distribute the golden-orange color evenly. If you’re looking for fresh turmeric, ask your produce manager to stock it from Frieda’s.
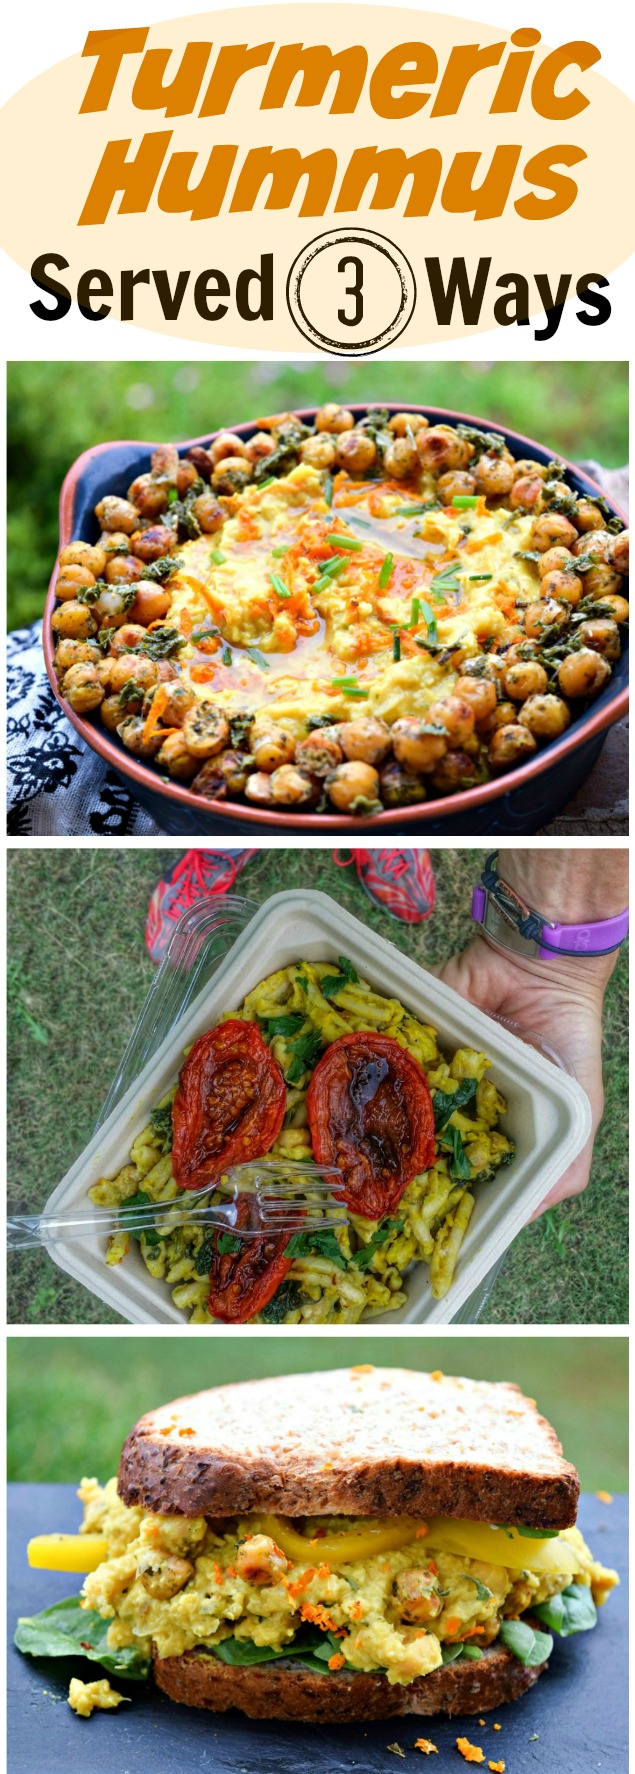
Turmeric Hummus Served 3 Ways - appetizer dip, pasta toss and veggie sandwich!

Make a big batch and portion into individual grab-and-go containers to stash in lunchboxes, backpacks and gym bags along with veggie sticks or crackers. However, dipping stuff INTO hummus isn’t the only way to enjoy it! My two other serving suggestions are to 1) pile up high on whole grain bread or a wrap along with other veggies to make a filling sandwich and 2) to toss with warm pasta or vegetable noodles (like “zoodles”) as a creative sauce.  I wasn’t sure if the sauce idea would work one night when fixing a “clear the fridge” dinner in a pinch — but it most certainly did!

roast chickpeas for a crunch healthy snackAlso, if you love a crunchy, salty snack the roasted mint chickpeas that I’ve used to garnish the top make a fantastic snack on their own.

Just double up that part of the recipe and keep the extra batch for snacking right off the pan – or to use as grain-free “croutons

By the way, I originally developed this recipe for Litehouse Foods using their Instantly Fresh Herbs! Check it out.


Do you use turmeric in your diet, what is a favorite recipe? If you’re at a party, do you go for the dips or the desserts? What’s on your upcoming fall season race season? Please share in the comments, XOXO — Jennifer  

"Go For The Gold" Turmeric Hummus Served 3 Ways
Prep Time
40 mins
Total Time
40 mins
 
Cuisine: Indian, Mediterranean
Servings: 6 servings
Ingredients
  • 2 cups canned chickpeas, rinsed, dried and “skinned” (divided)
  • 1 teaspoon olive oil
  • 2 tablespoons chopped fresh mint or nstantly Fresh Mint
  • 1 1/2 teaspoons salt (divided)
  • 1/2 cup tahini (sesame paste)
  • 1/4 cup extra virgin olive oil
  • 2 tablespoons lime juice
  • 1 tablespoon minced garlic or Instantly Fresh Garlic
  • 1 tablespoon grated fresh ginger or Instantly Fresh Ginger
  • 1 teaspoon curry powder
  • 1 teaspoon dried, ground turmeric
  • 1 tablespoon fresh grated turmeric root *if not available, substitute and additional 1 TBSP dried turmeric
  • 1/2 teaspoon ground black pepper
  • additional olive oil for serving
Instructions
  1. Preheat oven to 400 F degrees.
  2. After draining and rinsing chickpeas, place them on a paper towel and fold over, gently rubbing them. This will remove any remaining “skins.”
  3. Toss mint and salt together in small bowl. Take ½ cup of chickpeas and toss around with olive oil until coated. Add chickpeas to bowl with mint and shake around until dusted.
  4. Place chickpeas in oven and bake, tossing occasionally, for 30 to 40 minutes or until golden and crunchy.  Remove from oven and set aside to cool on pan.
  5. Place remaining chickpeas, tahini, olive oil, lime juice, garlic, ginger, curry powder, dried turmeric, fresh turmeric, remaining salt and pepper in a food processor and blend till smooth and creamy. If needed, add a bit of additional lime juice or water to adjust the consistency.
  6. Serve with a drizzle of olive oil and roasted chickpeas.

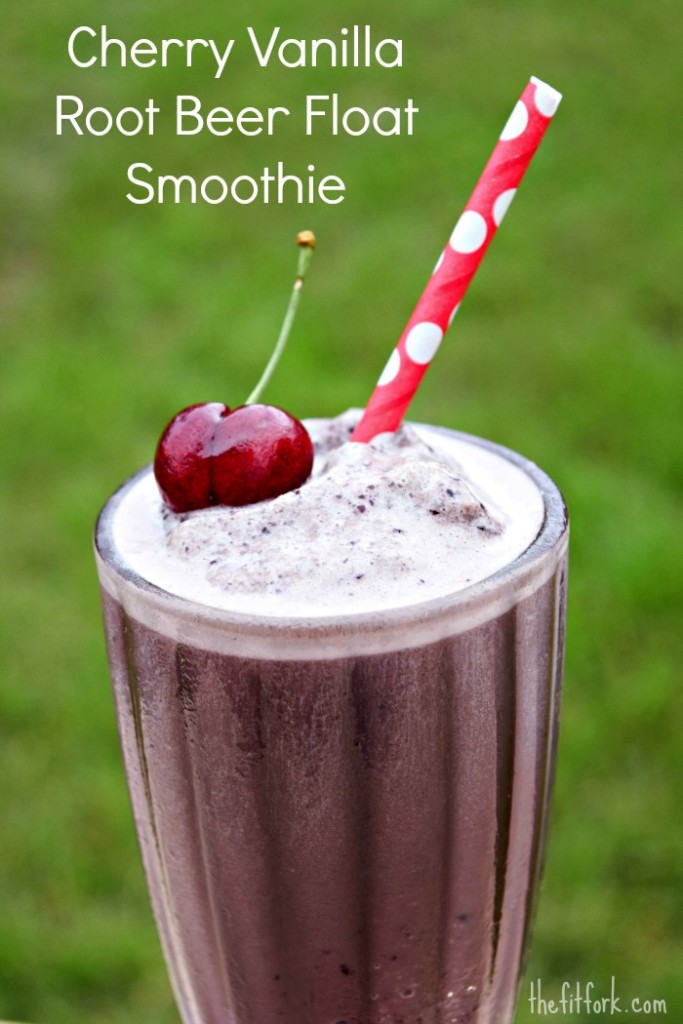
Cherry Vanilla Root Beer Float Smoothie

This Cherry Vanilla Root Beer Float only has 250 calories and serves up 22 grams of protein and 87% of your daily requirement for calcium!Sweet news,it’s National Root Beer Float Day! Celebrate without ruining your workout gains with my nutritious and delicious Cherry Vanilla Root Beer Float SmoothieGet the recipe HERE

Cherry Vanilla Root Beer Float looks indulgent, but it's really super healthy!  Enjoy for breakfast, a workout snack or sensible dessert!


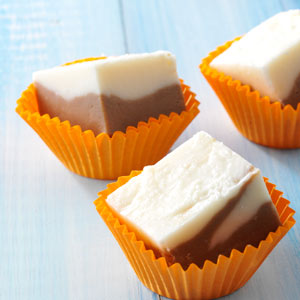
2013_07 rootbeer float fudgeIf you’re looking for something a little more over-the-top and decadent, lemme just share my recipe for Root Beer Float Fudge that was once featured in Simple & Delicious Magazine! Get recipe HERE


Are you a root beer fan? What is your favorite beverage of summer? Whatcha doing this weekend? Please share in the comments below – XOXO, Jennifer 

Steak and Quinoa Squachos – NachOMG!

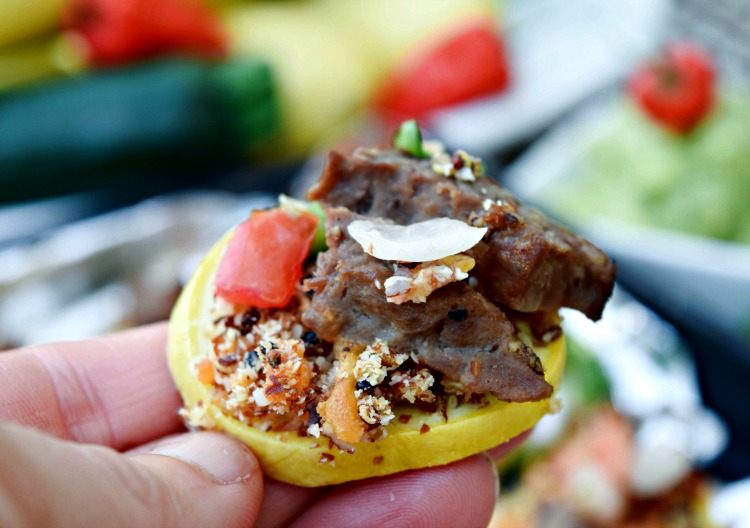
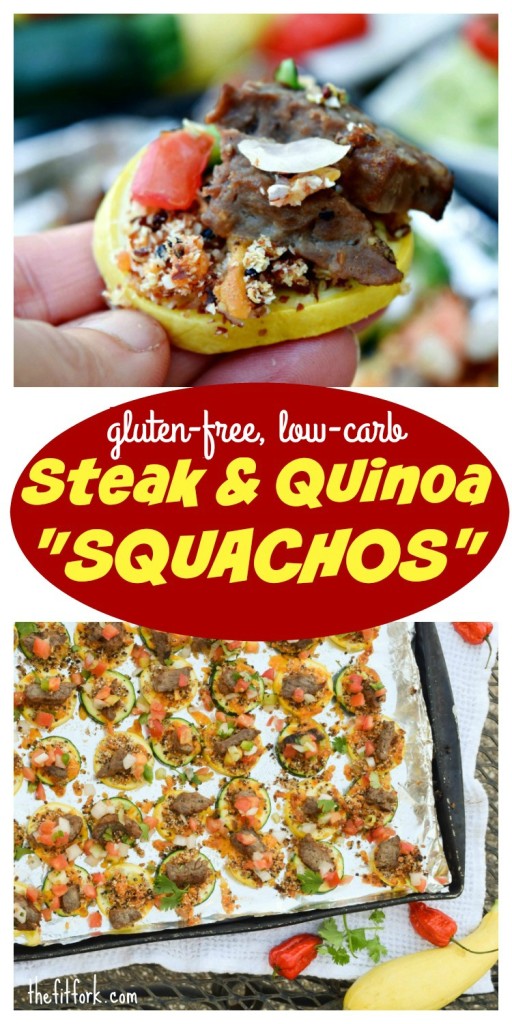
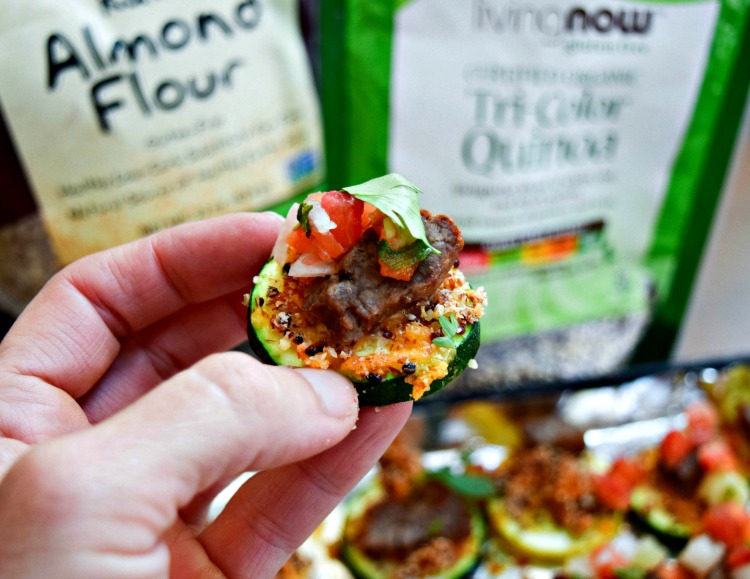
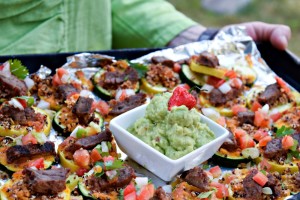
Steak and Quinoa Squachos are a healthy take on nachos and gluten-free, low-carb appetizer optionlYou may be thinking, “Ummmm, excuse me . . . but what the heck on God’s green Earth are SQUACHOS”? This quick and easy appetizer is a healthy swap for traditional nachos made with tortilla chips which are typically fried, overly salted and plentiful in carbs (if you’re counting).  Made on slices of summer’s finest squash, my Steak & Quinoa Squachos are, in two simple words, “life changing!”

Steak & Quinoa Squachos - gluten-free and low carb appetizer!

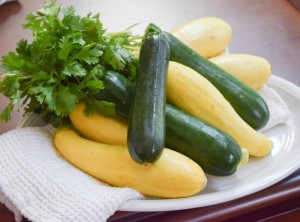
Zucchini and Summer SquashThe farmer’s markets (and personal gardens of you green-thumbers) are exploding with green zucchini and yellow summer squash this time of year — and this fun and fit finger food is a tasty way to take advantage of a bumper crop and squeeze a few extra veggies into the day.


Recipes similar to this use panko bread crumbs to create that familiar nacho crunch — but that defeats to purpose of my low-carb, higher protein mission. So, instead, I tossed together almond meal and cooked quinoa with a bit of cheese to create a tasty texture on top of each squash disc.

Steak and Quinoa Squachos -- a low carb, gluten free appetizer!

I used two of my go-to non-GMO, gluten-free and certified organic pantry staples from NowFoods.com Tri-Colored Quinoa  and Raw Almond Flour. This tri-color quinoa a blend of white, red and black seeds and is a great source of protein and iron — I typically serve it as a side dish or salad, but freeze leftovers for speedy recipes like this! Raw Almond Flour (or Almond Meal, as some people call it) is simply finely ground almonds and it makes a great low-carb swap for flour in many recipes. If you can’t find these products in your market, I’ve dropped the Amazon links below.
 

More Protein, More PowerNow, if you’ve been following along on the blog or social media, you know I’ve been sharing my (numerous time) journey on the Protein Challenge and encouraging others to join. This free 30-day challenge sponsored by BeefLovingTexans.com (who I also originally developed the Squacho recipe for) shows you how to tweak your daily protein intake for optimal heath — to be very succinct, you should be getting about 25 – 30 grams of protein at each of your three meals — and also protein rich snacks throughout the day and possibly at bedtime, depending on your activity level. You can register for the Protein Challenge and get tips, support and recipes HERE.

Join the 30 day Protein Challenge

Steak & Quinoa SquachosSo, are you making these Squachos this weekend, or what?!

What are your other plans – a race, a vacation, just catching up on the to-do list? Let’s chat in the comments below – XOXO, Jennifer 


Steak & Quinoa Squachos
You'll exclaim "squash-OMG" when you taste these unique beef nachos that swap tortilla chips for discs of zucchini -- almond meal and quinoa create a crunch texture while keeping the appetizer gluten-free and low carb.
Course: Appetizer, Snack
Cuisine: American
Servings: 8 as appetizer
Ingredients
  • baking spray
  • 2 lbs summer squash (such as zucchini, crookneck etc.)
  • 1/2 cup raw almond flour I like Now Foods "Living Now" brand
  • 1 tablespoon dry fajita seasoning
  • 1 cup shredded sharp cheddar cheese
  • 1/2 cup cooked quinoa I like Now Foods "Living Now" brand
  • 2/3 cup prepared Pico de Gallo, drained of any excess juice
  • 1/2 cup fresh chopped cilantro leaves
  • garnishes salsa, guacamole, sour cream or others as desired
Instructions
  1. Preheat broiler on high. 2. Line two rimmed baking sheets with foil, coat with baking spray.
  2. lice squash into ¼” slices. Place squash, with edges touching each other, onto baking sheets.
  3. In bowl, toss together almond meal with dry fajita seasoning. Stir in cheese, cooked quinoa and almond meal until combined.
  4. Use a tablespoon to pile a big dollop of this cheese mixture on top of each squash slice. If leftover topping in bowl at end of dolloping, sprinkle evenly across tops.
  5. Cut leftover steak or fajita meat into bite-sized pieces. Place a piece of two of beef on top of each Squacho.
  6. Place oven rack on second to top position. Broil Squachos for 2 to 4 minutes, or until cheese mixture bubbling and turning golden brown on edges Watch carefully to prevent burning.
  7. Remove from oven and sprinkle with drained Pico de Gallo. Serve with other desired accompaniments such as guacamole, sour cream or salsa.