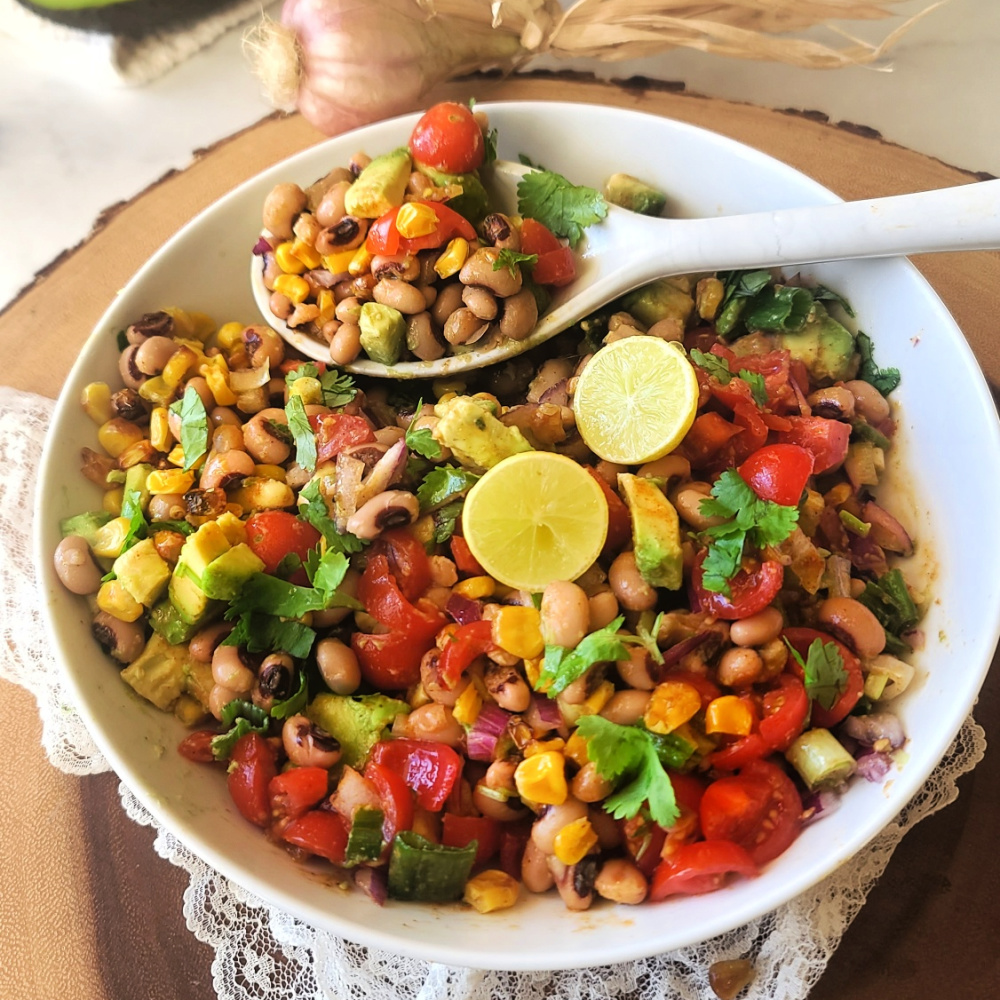
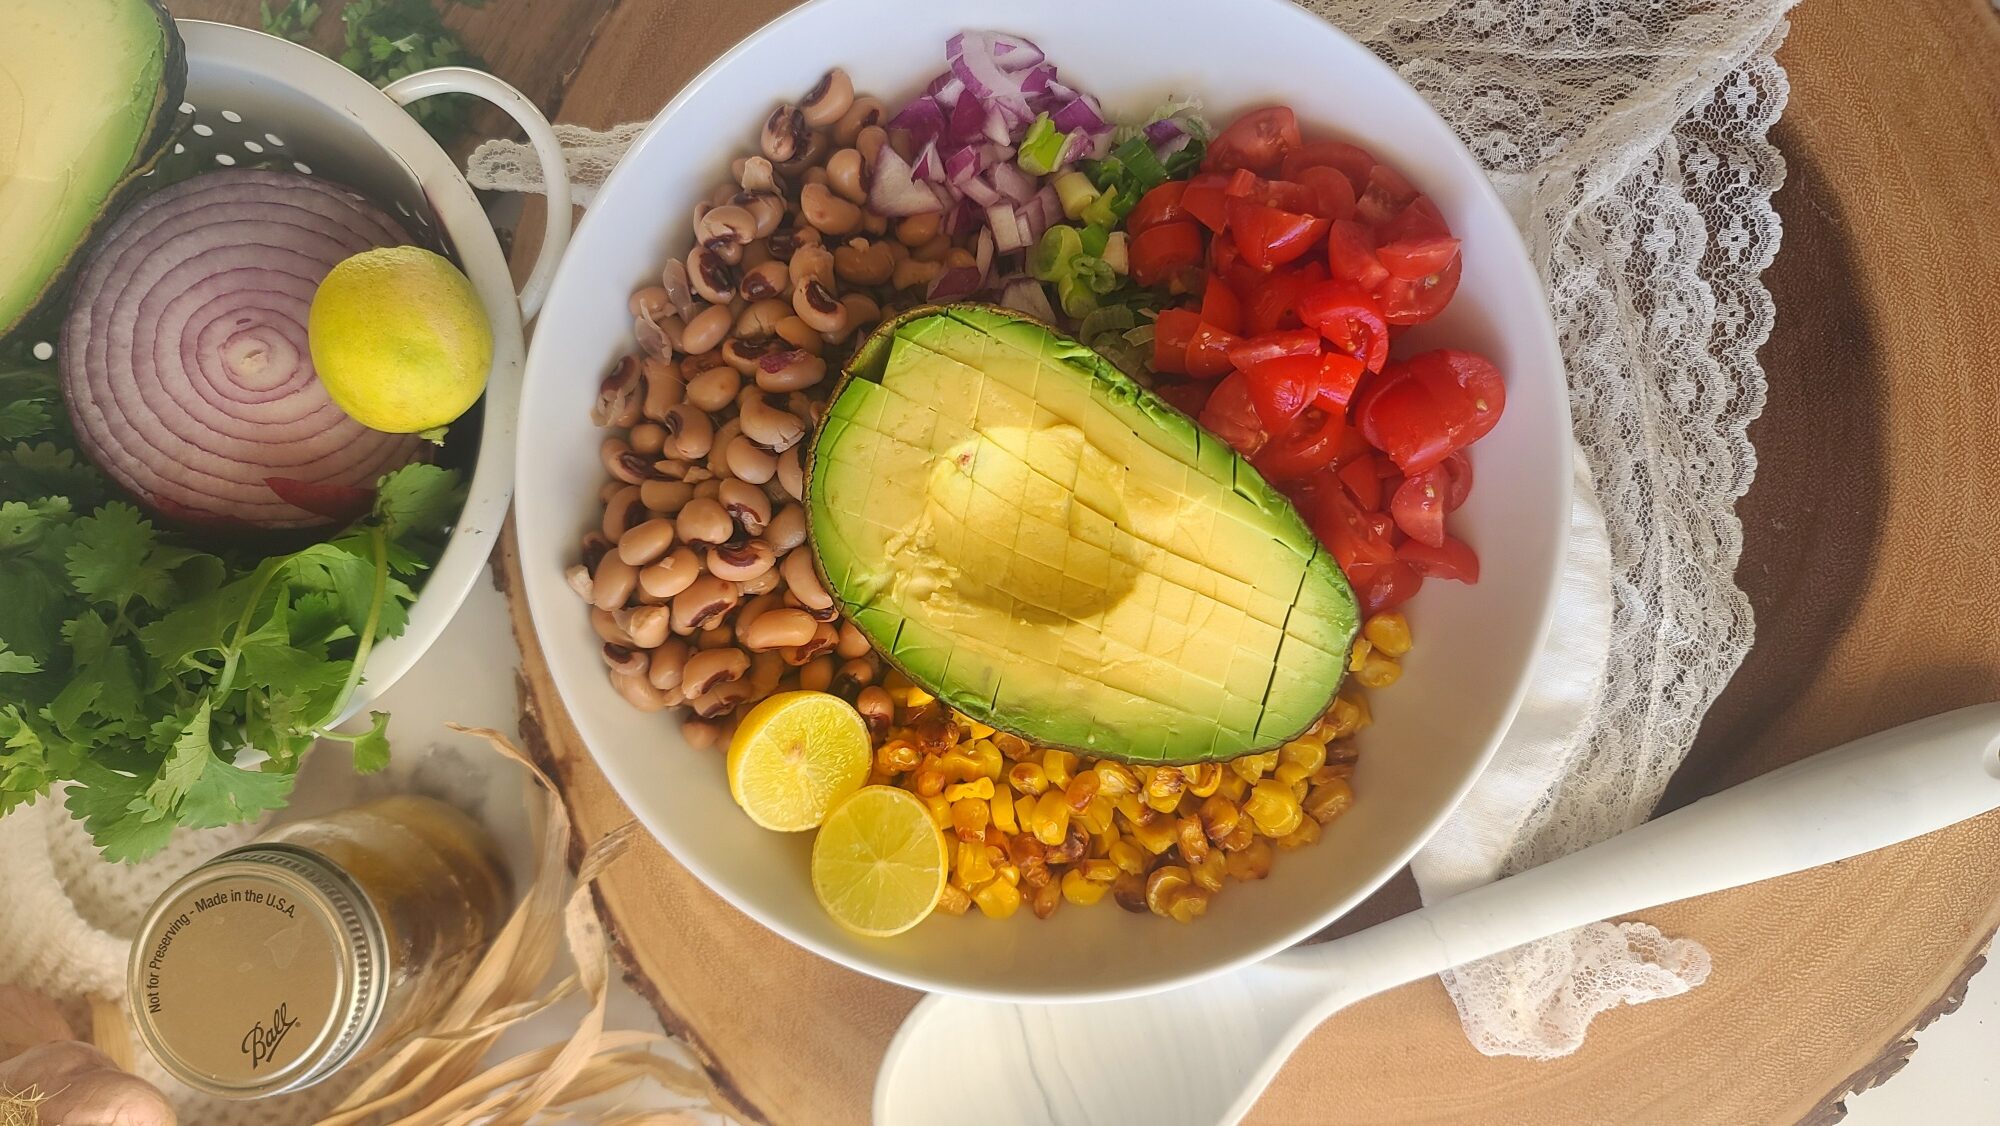
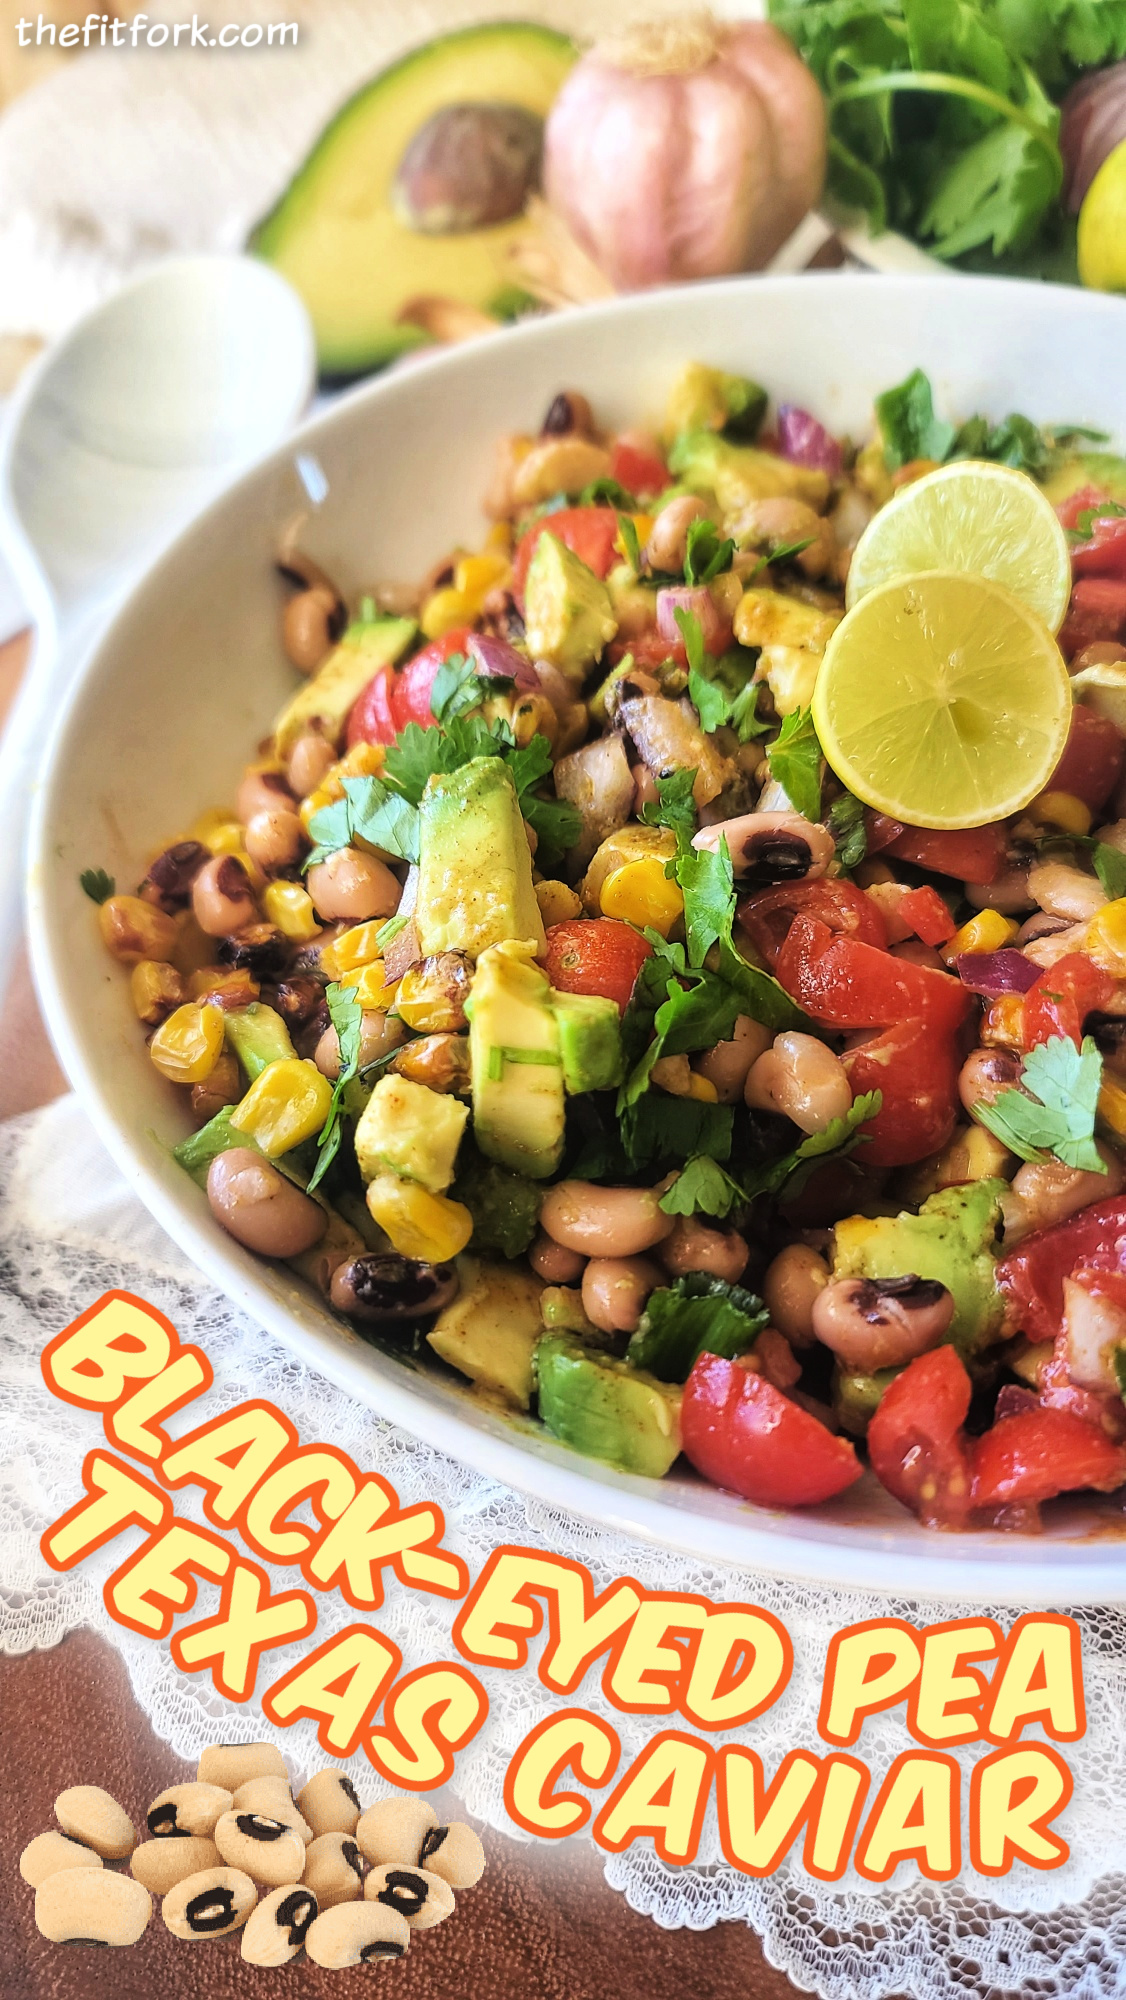
There’s something special about traditions that carry both delicious flavors and a dash of good fortune into the New Year. For my family, one dish that checks all those boxes is Texas Caviar. This bold and beautiful mix of black-eyed peas, roasted corn, tomatoes, avocado, red onion, and cilantro tossed in a zippy lime vinaigrette has been a staple on our New Year’s Day table for as long as I can remember. It’s said that black-eyed peas bring prosperity, but honestly, with a dish this good, we’re already starting the year rich—in flavor!
A Dish for Every Occasion
While Texas Caviar holds a special spot in our New Year’s traditions, it’s too good to reserve for just one day. Its versatility makes it a favorite all year long. Serve it as a vibrant side dish at barbecues and potlucks, or spoon it over a bed of greens for an easy, satisfying salad. And if you’re hosting game day or a casual gathering, pair it with tortilla chips for a dip that disappears faster than you can say, “Pass the salsa.”
Fresh, Healthy, and Oh-So-Texan
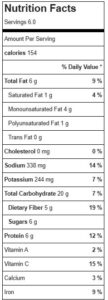
What makes Texas Caviar stand out is its balance of bold flavors and wholesome ingredients. The black-eyed peas provide fiber and protein, while roasted corn and tomatoes bring sweetness. Creamy avocado adds a luxurious texture, and red onion and cilantro deliver that signature Tex-Mex kick. The tangy lime vinaigrette ties everything together, creating a dish that’s as nourishing as it is delicious.
Make it Your Own
One of the best things about Texas Caviar is how adaptable it is. Want some heat? Add diced jalapeños or a sprinkle of chili powder. Craving more crunch? Toss in diced bell peppers. And if you’re looking to up the protein, grilled shrimp or shredded chicken make excellent additions.
Ring in the New Year with Flavor
Whether you’re carrying on the tradition of black-eyed peas for luck or just looking for a vibrant, crowd-pleasing dish, Texas Caviar delivers. It’s fresh, flavorful, and a little zesty—everything you want when you’re starting a new chapter.
Here’s to a bright and prosperous New Year, full of health, happiness, and plenty of Texas Caviar! If you like this recipe, I have another similar version from my early blog days – this version has bell peppers, jalapeno peppers and chipotle chili powder (it’s a little spicier)!

- 1 15- oz can black-eyed peas drained and rinsed
- 4- oz avocado chopped
- 2/3 cup chopped cherry or grape tomatoes
- 2/3 cups corn frozen and thawed, canned and drained, or fresh and roasted*
- 2-3 Tablespoons chopped scallions greens and whiles
- ¼ cup finely chopped red onion
- 2 Tablespoons chopped cilantro
- Dressing:
- 1 Tablespoon olive oil
- 1 Tablespoon fresh lime juice
- 2 tsp apple cider vinegar
- ½ teaspoon garlic powder
- ½ teaspoon paprika
- ½ teaspoon cumin
- ¼ teaspoon salt
- 1 tablespoon honey
-
Add salad ingredients to a bowl. In small jar, shake together the dressing ingredients until combined. Pour dressing over salad, stir gently to coat evenly. Store in fridge until ready to serve. Leftovers keep for up to 3-4 days.