Best Ever Super Secret Chili Recipe + Beef Browning Tip

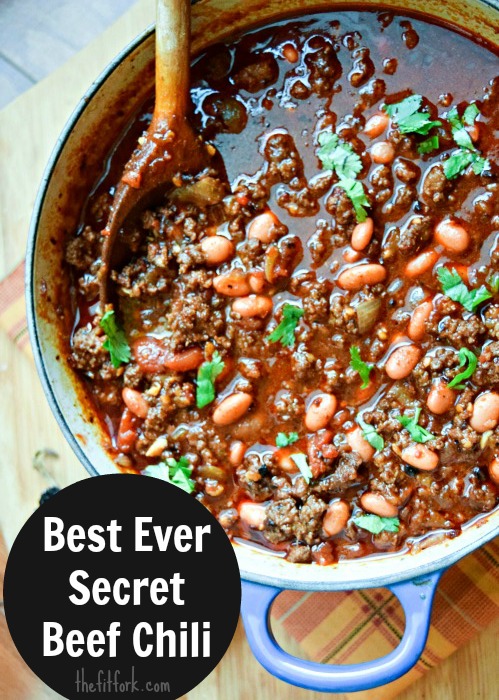
Best Ever Secret Beef Chili

I hope you have a big spoon at the ready, my recipe for Best-Ever Beef Chili is, well, THE BEST! With freezing temperatures and heated football bowl games going down, this big pot of spicy, rich and blissfully beefy chili is what to serve by the mug, bowl or trough.

Southwestern Steak Chile - TheFitFork.comI typically make chili by breaking down a roast into bite-sized chunks, my kitchen stampeded causing Southwestern Steak Chili is a family favorite. However, the kids love ground beef (and so does my food budget) and requested a chili made with their favorite food group — hamburger meat!

Won’t lie, I was a little worried that the ground beef would come out dry and the beefy taste might get downed out by bold chili spices. After reading an article in Cooks Illustrated on achieving “better browning through science,” I knew I had to try their technique of using a baking solution on meat to enable proteins to attract more water and hold onto it during cooking and also create a higher pH level to speed up the desirable Maillard reaction (basically, the harbinger of caramelization). My dad reported success using this method to keep steaks juicy and tender, and I hoped this easy hack would help improve the taste and texture of my chili’s ground beef.

So, how does this baking soda beef hack work? Typically, when ground beef is cooked on the stove top, so much water and liquid is expelled that the beef chunks just end up steaming in their own juices  — very little actually browning happens.  When cooked to the point of most water evaporating, the batch of beef will be unpleasantly overdone. However, by gently tossing a baking soda solution with the meat (about ¾ teaspoon baking soda to 2 tablespoons water for 2lbs of grind) and letting sit for 15 to 20 minutes before cooking , beef loses less liquid, browns faster and tastes better. Ground Beef browned traditionallyI tried it myself with 80/20 Chuck Ground Beef and I must say, I was impressed! The ground beef cooked “as-is” was almost immediately was sitting in a pool of liquids (as you can see from the picture) and when taste-tested seemed a little rubbery and bland.
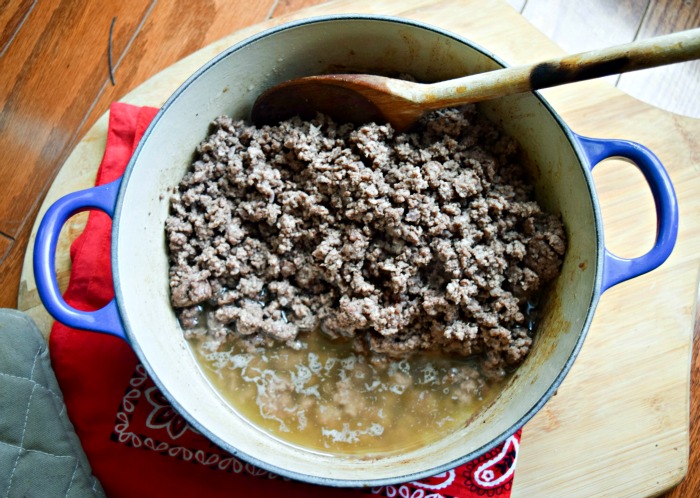
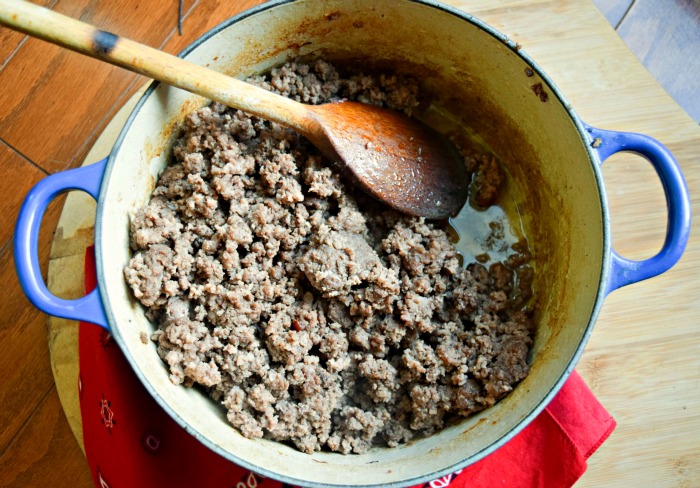
Ground Beef browned with baking soda

However, the baking soda treated beef immediately started to brown in the pot. And, while there was still a fair deal of liquid released, it was noticely less so than the previous batch (Cook’s illustrated said about 10% less liquid, I felt like maybe even a little more).  More noticeable though, was the taste – the baking-soda treated batch had a richer, more complex caramelized flavor and was markedly juicier. In fact, the cooked beef was so yummy; I worried about taste-testing my way through the whole pile before I even started the rest of the chili!

So, my final recommendation on this “baking soda treatment” is definitely try it and see what you think! It does take little bit of pre-planning because you have to let the solution sit on the meat for 20 minutes, but you can have that going while you prep the other ingredients.

Best Ever Secret Beef ChiliSo, here is my  Best Ever Ground Beef Chili recipe, – every spoon is a mouthful of meaty goodness. It’s rich and spicy, without being too heavy or too “hot” for kids – I think you’ll really like it. But, feel free to use this baking soda technique with any beef chili recipe!

Mugs of Super Secret Ground Beef Chili -horiz

If you’re looking for other delicious chili recipes, check out this collection I curated for Mode! And, also head over to the Texas Beef Council for more inspiration.


Check out Life-Changing Beef Chili Recipes to Warm Winter

by The Fit Fork at Mode

Do tell, do you put beans in your chili? Do you like spicy or mild? What toppings do you put on top?  Please share in the comments below – XOXO, Jennifer

Super-Secret Ground Beef Chili Recipe
Prep Time
15 mins
Cook Time
2 hrs
Total Time
2 hrs 25 mins
 
Course: Main Dish, Soup
Cuisine: American, Southwestern
Servings: 8 servings
Ingredients
  • 2 pounds 80 percent lean Ground Beef Chuck
  • 2 tablespoons water
  • 3/4 teaspoon baking soda
  • 1 medium yellow onion, finely chopped
  • 2 tablespoons minced garlic
  • 2 tablespoons chili powder
  • 2 teaspoons ground cumin
  • 2 teaspoons paprika
  • 1 teaspoon dried oregano
  • 2 teaspoons salt
  • 1/3 cup finely crushed tortilla chips
  • 14.5 ounce can beef broth
  • 14.5 ounce can tomato sauce
  • 14.5 ounce can fire roasted diced tomatoes
  • 15 ounce can pinto beans with liquid
  • 2 teaspoons brown sugar
Instructions
  1. Add ground beef to bowl and drizzle with solution of 2 tablespoons water and ¾ teaspoon baking soda. Gently break apart beef with hands to distribute, but do not over knead (causes toughness). Let sit for 15 to 20 minutes.
  2. Meanwhile, heat oil in large Dutch oven pot over medium high. Add onions and cook for about 5 minutes until softened, stirring as needed. Mix in garlic and cook for another minute.
  3. Add treated ground beef to pot and cook, while stirring and breaking up into chunks. Brown beef for approximately 12 to 15 minutes or until no longer pink.
  4. Add chili powder, cumin, paprika, oregano and salt to beef mixture and continue to cook, stirring constantly, until spices begin to bloom and become fragrant, about 2 minutes.
  5. To pot of beef, add finely crushed tortilla chips, beef broth, tomato sauce, diced tomatoes, beans with liquid, and sugar. Bring to a boil and then put lid on Dutch oven and transfer to a 275 F degree oven for approximately 1 to 2 hours, or until flavors have developed and sauce is thickened. .
  6. Remove from oven and let cool, uncovered for 10 minutes. Season with additional salt and pepper, if needed, to taste.
  7. Serve with rice or tortilla chips and other toppings of choice including cheese, avocado, red onion, cilantro, etc

Dreamy Orange Vanilla Protein Fluff #1UpYourCup

We are several weeks into 2016 and I’m checking in to report how I’m sticking with my New Year’s health and wellness best intentions.  Increasing my flexibility? Taking baby steps, but to say I’m there is a stretch! Sleeping better?  Still just day dreaming about it. Drinking more water? That’s a check!  Keeping with my fitness routine? Of course, that’s the fun part of my day!  Whipping up creative protein-rich meals and snacks? Naturally – some good things never change!


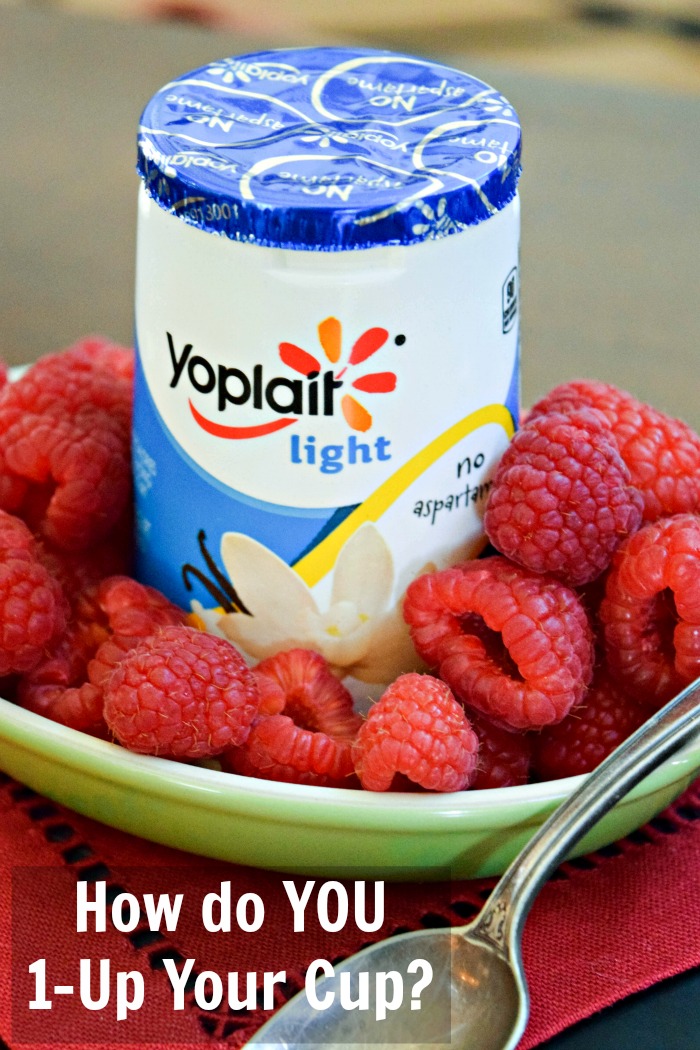
One thing that hasn’t changed for me over many, many years is my love for Yoplait® yogurt. I have my “old friend” flavors, like Vanilla that is yummy just as it is or as the base for my many fit foodie creations, and new favorites like Plenti already packed with wholesome ingredients.  I don’t think my taste buds will ever get bored with Yoplait®  — with 125 flavors in the Yoplait® family and my imagination, I think I could come up with a new way to “1-Up My Cup” of yogurt every day for the rest of my life!  Yoplait 1-Up Your Cup

yoplait walmart

Love the Everyday Low Price on Yoplait at Walmart!

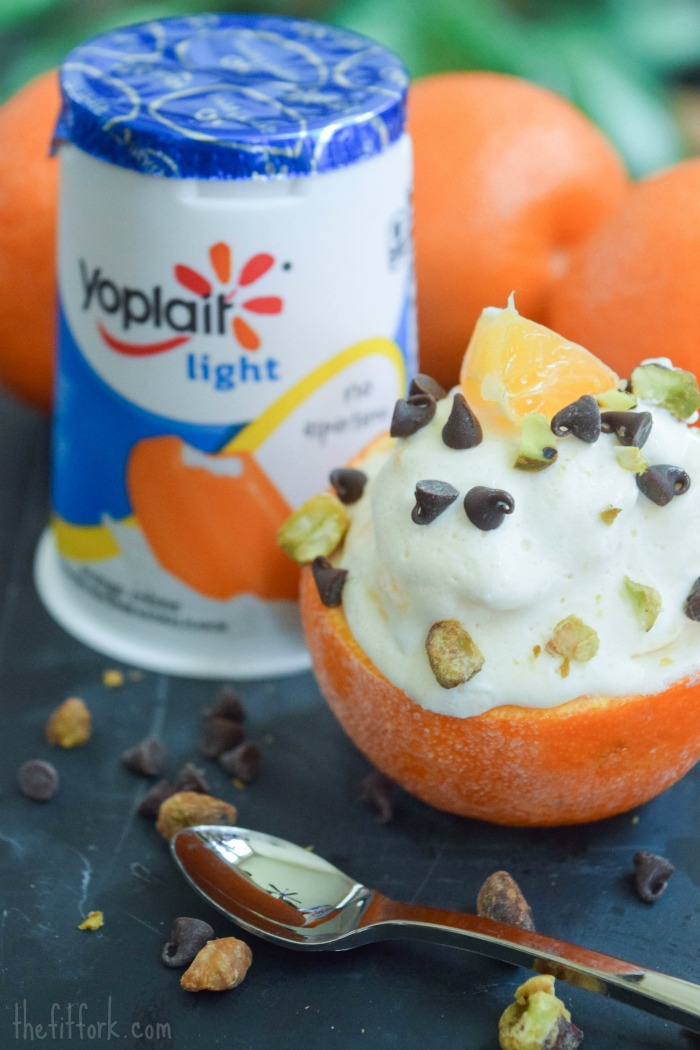
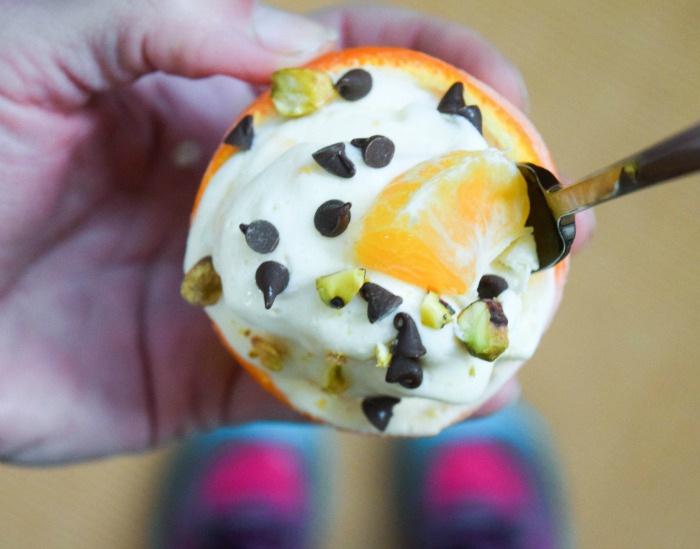
For example, adding a little carton of Greek 100 is a great way to pump up my smoothies with a creamy texture and boost of protein. Adding berries, bananas, chocolate chips and some sugar-free chocolate syrup makes a healthy sundae I would feel good about eating every day of the week!  Oh, and I’ve made a million yogurt parfaits, put yogurt atop my pancakes, and dipped fruit slices into dessert-like flavors such as Red Velvet Cupcake, Strawberry Cheesecake and Boston Cream Pie! Dreamy Orange Vanilla FluffSo, are you ready to 1-Up YOUR Cup? Today, I’m sharing Dreamy Orange Vanilla Fluff in an Orange Bowl — a frosty and fit treat made with Orange Crème Light Yoplait®.  The Orange Crème is from the “Light” line which is one of my favorite as I’m always looking for ways to avoid added sugar.

Love I can count on the Everyday Low Price on Yoplait®  at Walmart.

Love I can count on the Everyday Low Price on Yoplait® at Walmart.


I’m also happy to report that Yoplait® now adds NO aspartame to any of their flavors and they are easy to stock up on at your local Walmart —  that’s where I find all the best flavors!

Dreamy Orange Vanilla Protein Fluff


My recipe for Dreamy Orange Vanilla Fluff in an Orange Bowl incorporates vanilla protein powder to provide even more protein– after intense workouts and long runs, I need to PUMP IT UP with 20 to 25 grams of protein to help my taxed muscles recover.   Yoplait® helps me get a good start on that goal as I 1-Up my Cup!  This easy recipe doesn’t necessarily need to be served in an orange “bowl” and be tweaked to work with any of the yogurt flavors that appeal to you – how amazing would Chocolate Cherry Cupcake Fluff be?!


Dreamy Orange Vanilla Protein Fluff with Yoplait perfect for post workout treat.

How do you 1-up your cup? Do you make any special recipes with yogurt or use unusual mix-ins? Please share in comments, XOXO — Jennifer

This is a sponsored conversation written by me on behalf of General Mills. The opinions and text are all mine.

Dreamy Orange Vanilla Fluff in an Orange Bowl
Prep Time
5 mins
Total Time
20 mins
 
2 small oranges or tangerines 1 scoop ( 2 cartons Orange Crème Light Yoplait® 2 teaspoons mini chocolate chips 1 tablespoon chopped pistachios
Course: Breakfast, Dessert, Snack, Worout
Cuisine: American
Servings: 2 servings (2 halves each)
Ingredients
  • 2 small oranges or tangerines
  • 1/3 cup vanilla protein powder of choice (casein works best)
  • 2 small cartons Orange Crème Light Yoplait®
  • 2 teaspoons mini chocolate chips
  • 1 tablespoon chopped pistachios
Instructions
  1. Slice oranges (or tangerines) in half crosswise. Use serrated spoon to carefully remove segments, leaving outer peel intact. Set scooped out “bowls” aside.
  2. Squeeze juice out of extracted citrus segments (approximately ¼ cup). Use whisk to incorporate protein powder, adding a bit more juice or water if mixture gets too thick – but it should be pudding like.
  3. Gently fold in yogurt until just combined. Spoon into orange cups.
  4. Place in freezer to set up along with any excess “fluff” still in bowl. To serve, top filled oranges with remaining semi-frozen fluff and a sprinkling of chocolate chips and pistachios.

Willpower Rest Day – Bacon & Blue Cheese Mac

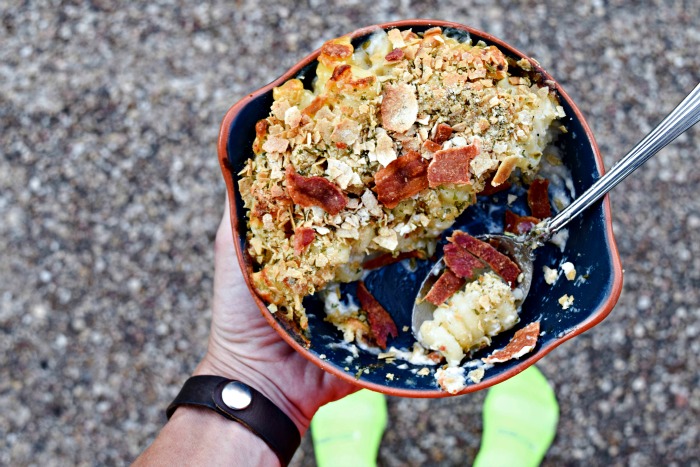
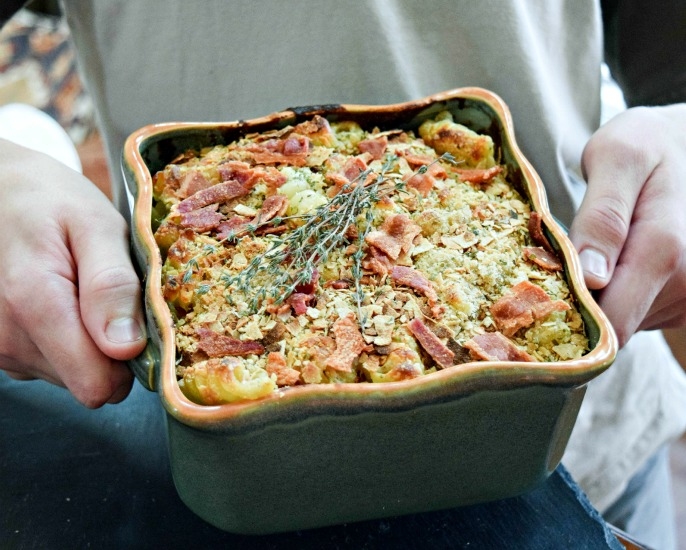
Bacon & Blue Cheese MacI try to eat green and eat clean, but sometimes I need to give it a rest! And, now I have the science to prove that it’s okay to indulge in my Bacon & Blue Cheese Mac recipe every once in a while. A recent study says that our willpower is like a muscle, after use it becomes fatigued and is no longer able to perform at peak levels. After a lot of use, your needs to take a break, just like you need to recover after a hard run or workout!  The scientists studying decision making called it “self-regulation failure,” and people in the food and fitness world call it a “cheat day” when these decisions come to food – I don’t like those terms and am rebranding the idea a Willpower Rest Day!

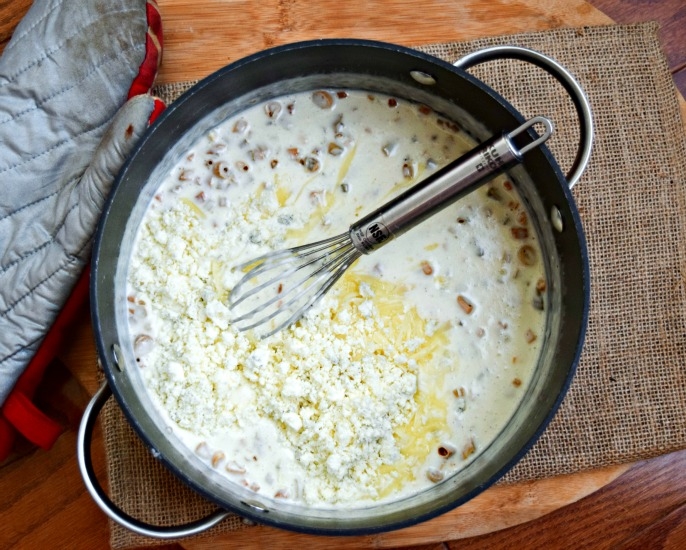
 sauce for blue cheese mac

This pot of cheesy goodness is about to be poured onto noodles.

I first developed this rich and creamy recipe for macaroni and cheese for Litehouse Foods using blue cheese crumbles from their Simply Artisan Reserve line of cheese. It’s become famous with friends, family and readers of the Living Litehouse Blog. And, also beloved by the thousands of people who have sampled it at Fresh Summit in Atlanta and recently the Winter Fancy Food Show in San Francisco. I’m not trying to brag (oh, who am I kidding?!), but I’m heard exclamations like, “OMG, this is the BEST macaroni and cheese I’ve EVER eaten.”

BAco

Smoky, salty bacon complement bold blue cheese – there is a lot of umami action going on with this fancy mac and cheese. However, the flavors aren’t so over the top that the kids will be freaked out. However, maybe you WANT to keep them out of it (more for you) so just double up on the blue cheese! Have I convinced you to give your willpower a rest day and make up a batch of this delicious baked macaroni and cheese recipe?  This baked pasta recipe can even be made ahead and then popped into the oven an hour before serving.

Bacon and Blue Cheese Mac


Also, check out these macaroni and cheese making tips from from Cooking Light — everything you need to know to satisfy your mac madness!

What is your favorite comfort food? Do you rest your willpower every now and then? Fan of blue cheese? Please share in the comments below, XOXO — Jennifer 

Willp
Prep Time
15 mins
Cook Time
1 hr
Total Time
1 hr 15 mins
 
Treat yourself to this rich and creamy baked macaroni and cheese made with blue cheese and bacon -- delicious as a side dish to steak, a casserole for your pot luck or just straight out of the dish.
Course: Main Dish, Pasta, Side Dish
Cuisine: American, Italian
Servings: 8 servings
Ingredients
  • 1 pound radiatore pasta mini ziti or elbow noodles
  • 2 tablespoons unsalted butter
  • 2 tablespoons all-purpose flour
  • 2 1/2 cups whole milk
  • 2/3 cup blue cheese dressing I used Litehouse brand
  • 8 ounces white cheddar, freshly grated
  • 5 ounces blue cheese, crumbled I used Simply Artisan Reserve Brand
  • 1/4 cup Instantly Fresh Herbs, or fresh chopped
  • 1 teaspoon ground black pepper
  • 1 teaspoon salt
for topping
  • 1 tablespoon melted butter
  • 1/2 cup unsalted panko
  • 1 tablespoon Instantly Fresh Parsley, or fresh chopped
  • 6 strips center cut bacon, cooked and crumbled
Instructions
  1. Preheat oven to 400 F degrees. Spray a baking dish with nonstick spray.
  2. Bring water to a boil and prepare pasta according to directions, but shaving 1-2 minutes off of the cooking time to keep al dente.
  3. Meanwhile, heat butter in medium saucepan over medium heat. When butter begins to sizzle, quickly add flour and whisk constantly until roux is golden, about 2 minutes.
  4. Pour in milk and whisk constantly, stirring until the mixture slightly thickens.
  5. Reduce heat to low and add in white cheddar and blue cheese a couple handfuls at a time until cheese melts and sauce is thickened.
  6. Stir in Blue Cheese Dressing. Stir in Instantly Fresh chives and season with salt and pepper.
  7. Add cooked pasta to baking dish. Pour cheese sauce over top, tossing to coat all the noodles.
  8. Cover top in panko bread crumb mixture.
  9. Bake for 30-35 minutes, or until top is golden and crunchy and sauce is bubbling. Top with crumbled bacon

Plenty of Reasons to Eat Breakfast + #PlentiYogurt Coupon

I rarely, if ever, miss my morning meal. I just love food too much and usually wake up hungry, thinking about what I’m making or grabbing (like Plenti) long before my feet even hit the ground.

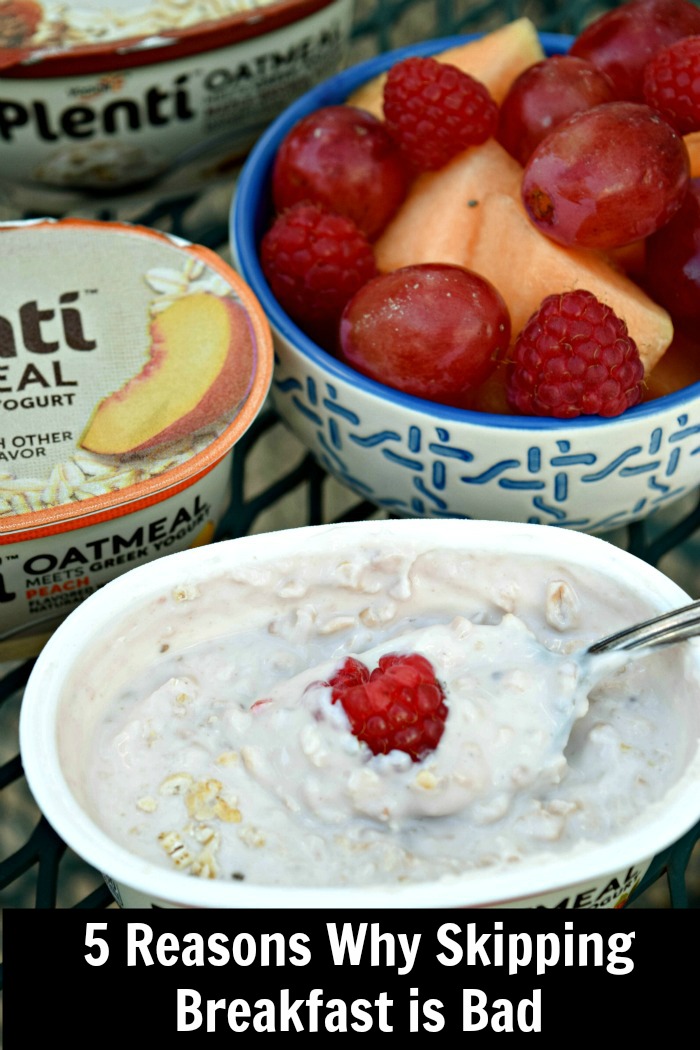
Jennifer Eating Plenti Greek Yogurt Meets Oatmeal

Back in the day, skipping breakfast was a way to “cut calories” in an effort to lose or maintain weight – and it still is with some friends today. This “intermittent fasting” idea seems to be trending again today, based on some diets and nutritional plans I have seen floating around. However, missing meals can have quite the opposite effect, eventually adding on pounds in places you don’t want. And, for runners and other athletes, bypassing breakfast can quickly bring quality training (and recovery) in its tracks.

5 reasons why skipping breakfast is bad

Lose Muscle – While skipping breakfast and other meals cuts calories and create weight loss, research shows that these dropped pounds come more from muscle tissue than fat stores.

Gain Belly Fat: Ohio State University scientists suggest skipping meals may invite any weight lost to come back eventually as dangerous belly fat.

Energy Drop:  Avoiding breakfast keeps the body from important nutrients like quality complex carbohydrates, protein, vitamins, minerals and fatty acids needed for optimal functioning and general get-up-and-go.

Disease Risk: Harvard School of Public Health researchers report that women who regularly missed breakfast where 20% more likely to get type 2 diabetes and men were at increased risk of heart disease. Insulin resistance and blood pressure issues arise when the body’s blood lipids get out of whack – something that can be kept in check with a healthy, balanced breakfast.

Unhealthy Snacking: Saying “no” no to a sustaining breakfast very often translates into saying “yes” to unhealthy processed snack foods, fast food and other sugary and bad-fat foods. Blood sugar drops and the resulting “hangry” feeling causes people to make poor food choices.

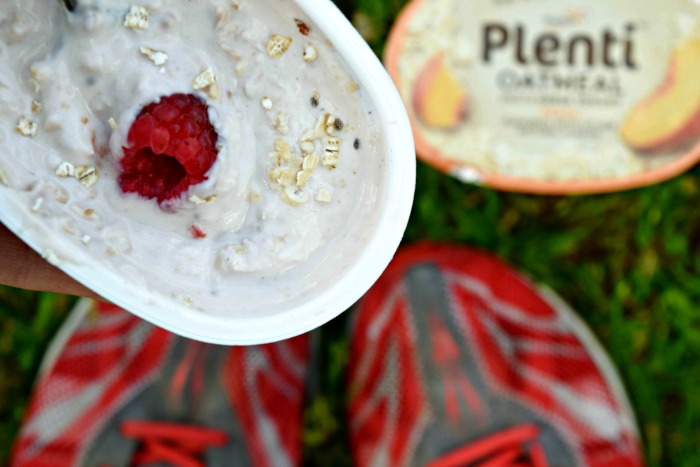
Plenti Greek Yogurt Meets Oatmeal great way to fuel a runner's morning.

Whether you are an athlete or not, your body needs “gas in the tank” to get going in the morning —  Plenti Oatmeal Meets Greek Yogurt is a quick and convenient way to fill up! Plentí, a wholesome yogurt already packed with fruit, seeds and other yumminess, kicks up its morning game by adding oatmeal to the mix.

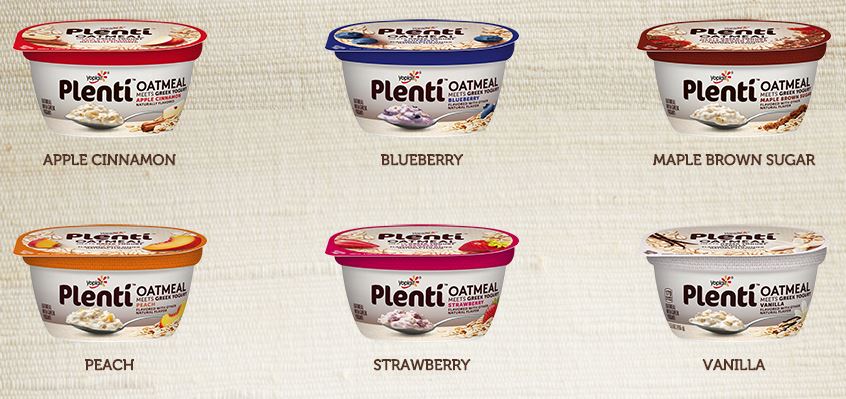
Found in the yogurt aisle, Plenti Oatmeal Meets Greek Yogurt, comes in six tasty flavors including Apple Cinnamon, Maple Brown Sugar, Peach, Blueberry, Strawberry, and Vanilla. I love the thick and creamy Greek yogurt goodness mixed with the texture and nutritional benefits of oatmeal. Unlike oatmeal, no messy cookin – just grab a spoon and enjoy cold.

6 Flavors of Plenti Greek Yogurt Meets Oatmeal

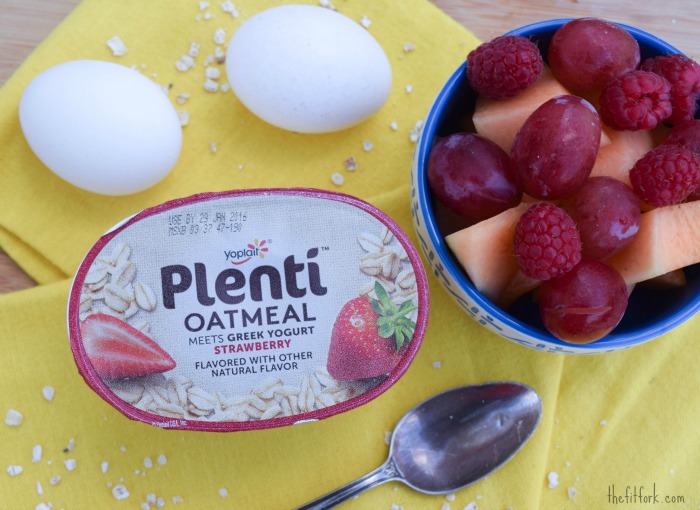
Each cup has 16 grams of whole grain and 11 grams of protein – I aim to get 25 to 30 grams of protein four times a day, so I would make my morning meal by supplementing a cup of Plenti Oatmeal Meets Greek Yogurt with two scrambled (or hard-boiled eggs if in a hurry) and a piece of fruit.

Plenti Yogurt Oatmeal with full meal

Coupon for Plenti Greek Yogurt Meets OatmealTry Plenti Oatmeal Meets Greek Yogurt for yourself! Print a coupon good for $.35 off one cup.

Are you an oatmeal fan, a Greek yogurt fan or both? What is your favorite “quick grab” for breakfast? Please share in the comments below, – XOXO, Jennifer  

Warm Overnight Java Brownie Chia-Oats – More From Your Morning Mug

My mornings can’t be complicated. I have a hard enough time getting out of bed at 5:15 am and then am greeted by a dog extremely needy for attention, kids to get ready for school, email to respond to, social media to monitor and loads of other things – like dishes and laundry! All this needs to happen before I head out the door for my run or gym time– and, believe me, that’s non-negotiable. I need a breakfast that is pretty much ready and waiting for me!

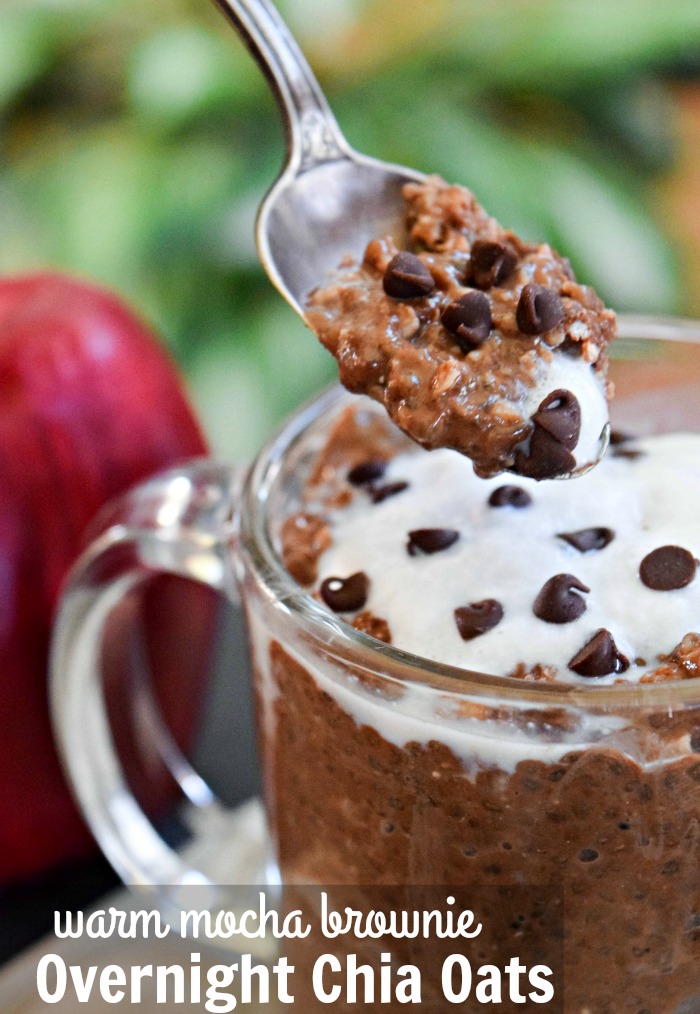
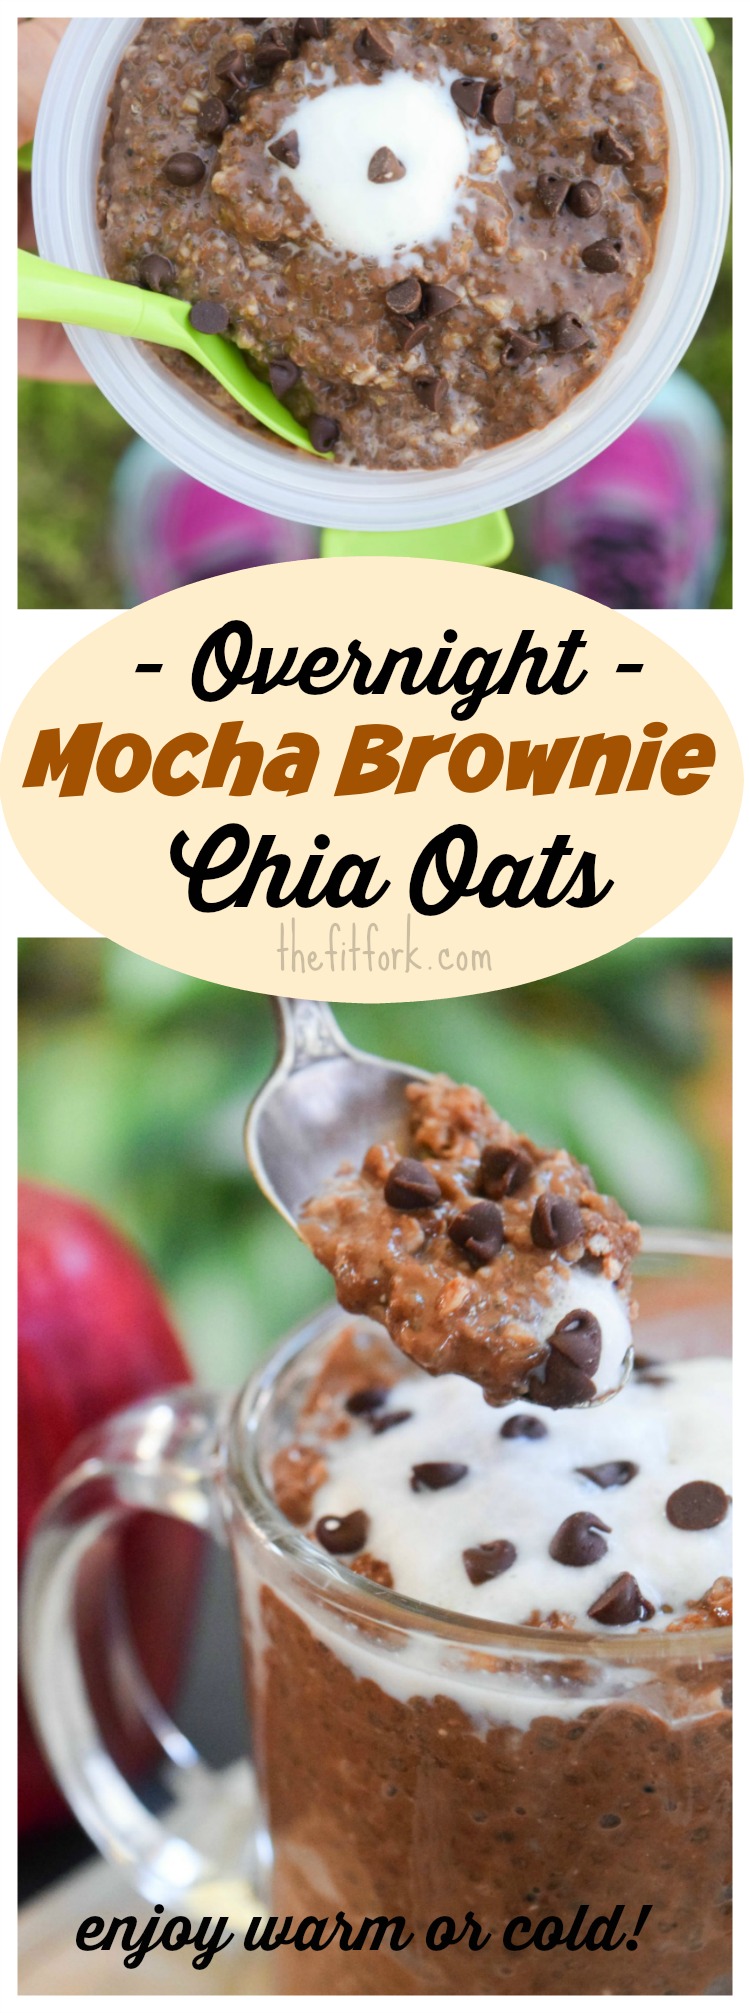
Warm Mocha Brownie Overnight Chia Oats


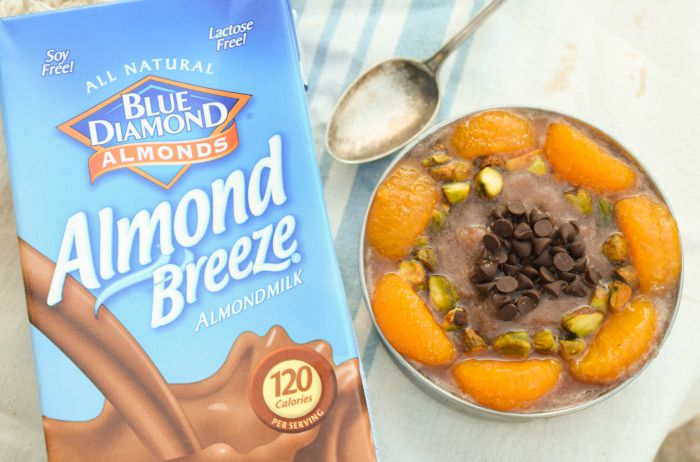
chocolate orange pistachio smoothie bowl with almond breezeIn the summer, a smoothie bowl (like my Orange Pistachio Almond Bowl one make with Almond Breeze Chocolate Almondmilk) or cold Greek yogurt and fruit are just fine, but in the winter, I need and easy, quick breakfast that will fuel me through my workout and warm me up from the inside. My recipe for Warm Overnight Java Brownie Chia-Oats to the rescue – it’s my hybrid take on traditional overnight oats and chia puddings.

This healthy breakfast recipe takes just a few minutes to prep  – I do it after dinner when I’m making the kids’ lunchboxes because it needs at least 3 hours to sit in the fridge and do its thing. In the morning, the nutritious ingredients absorbed the liquid and await a quick blast in the microwave to warm. I can usually barely wait to get my hands on that hot mug of goodness! You can also eat this the chia oats cold too, I just prefer hot!

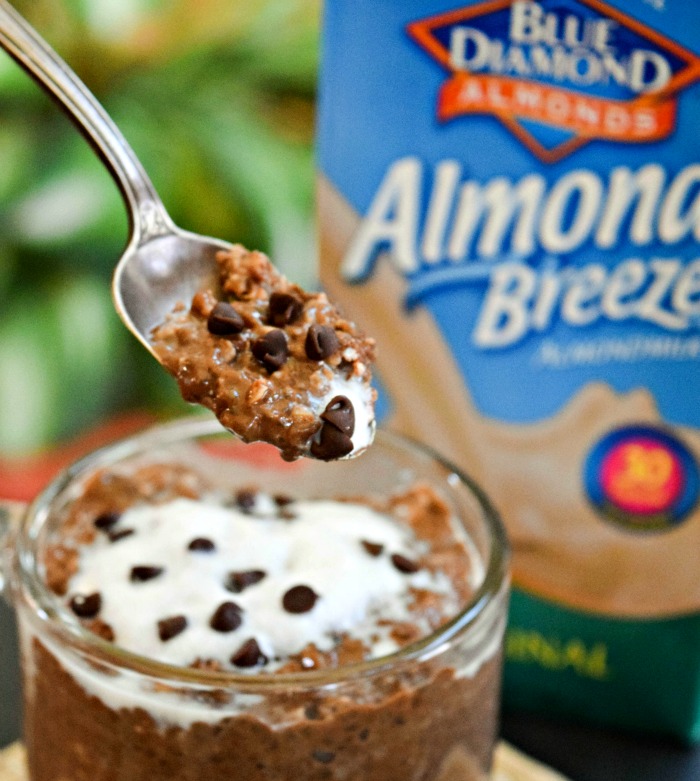
Time saving tip: Mix up everything in the microwave-safe mug or bowl you plan to eat from – who has time for extra dish washing?!Warm Mocha Brownie Overnight Chia Oats

Since you know I’m a healthy food and fitness nerd, let me just tell you about some of the awesome ingredients in this easy overnight oat recipe and how each helps support optimal health and peak performance for your sport.

Almond Milk*: With just 30 calories per 8-ounce serving, almondmilk is a sensible addition to any meal or recipe. It also has 50% more calcium than 2% dairy milk, is an excellent s source of vicatims D and E and is low on the Glycemic index.  Key for athletes is, adequate vitamin D levels promote good bone density, innate immunity, muscle wasting, and exercise-related inflammation and immunity. It is also suggested, this nutrient could help prevent stress fractures.

Whole Grain Oats: Oats are whole grain by nature add fill you up with lots of fiber, have been shown to reduce cholesterol levels and help stabilize blood sugar. Athletes can count on the quality complex carbs in oats to provide non-crashing energy and to refuel muscles after a taxing workout. I really love the Nuts and Seeds Super Oats by LoveGrownFoods.com.

Chia Seeds: The industrious Aztecs had a good thing going with chia seeds. This ancient superfood is loaded with nutrition despite it’s teeny-tiny size. Just two tablespoons of chia seeds contains 10 grams of fiber, 6 grams of protein, more calcium than milk, more Omega-3s than salmon, more iron than spinach, and more antioxidants than blueberries.

Maca Powder: Nearly magical maca powder is derived from a root vegetable indigenous to Peru – don’t confuse it with Macha green tea powder. This natural boost has been prized for thousands of years for its ability to boost stamina, endurance and hormonal balance. It includes vital nutrients such fatty acids, fiber, proteins, carbohydrates and minerals. Don’t miss my past Maca Mint Chip Smoothie.

Cacao Powder: Cacao (or cocoa) powder has been linked to lower blood pressure, a boost in blood flow to the muscles, and reduced cardiovascular demand during exercise. Cacao powder also lowers an athletes perception of fatigue and the boost of caffeine has been shown to improve performance. The higher percentage of cacao in your powder, the better. Try this one.

Coffee: This essential morning elixir has been suggested to reduce the incidence of Alzheimer’s and Parkinson’s disease and boost metabolism. It also actually has some beneficial nutrients like B vitamins, manganese and potassium and the natural epinephrine kick from the caffeine can improve focus and athletic performance.

*Typically, I purchase the chilled almond milk from the “dairy” aisle – however, I always like to stock the pantry with shelf-stable Almond Breeze Almondmilk so that I always have a supply on hand for emergency rations and 11th hour recipe inspirations.  

This single-serve make-ahead breakfast with chia and oats can be enjoyed warm or cold! With cocoa and coffee and a few chocolate chips, you'll be smiling in the morning! Let's get ready to meal prep!

Jennifer Fisher trail running Davis Mountans

What are your eating for breakfast these days?  Are you a fan of overnight oat or chia puddings? Did you run a race this weekend or do something fun in winter wonderland? Please share in the comments below – XOXO, Jennifer

This post is sponsored by Blue Diamond Almond Breeze Almondmilk. However, the recipes, opinions and enthusiasm are all my own. 

Warm Mocha Brownie Overnight Chia Oats
Prep Time
5 mins
Total Time
3 hrs 5 mins
 
A welcomed wake-up call and boost of sustaining morning energy, this easy make-ahead breakfast recipe gives you more out of your mug and more out of your day!
Course: Breakfast, Snack
Cuisine: American
Servings: 1 serving
Ingredients
  • 1/2 cup strong brewed coffee cooled a bit
  • 3/4 cup Almond Milk I used Almond Breeze Oiginal Almondmilk
  • 3 to 4 packets stevia
  • 2 tbsp chia seeds
  • 2 tsp maca powder
  • 5 tsp cacao powder
  • 1/3 cup oats
  • Optional Garnish chocolate chips & dollop of whipped cream or non-dairy alternative
Instructions
  1. Add coffee, almondmilk and stevia to mug, small bowl or mason jar and stir to combine.
  2. Add chia seeds, maca powder, cacao powder and oats and vigorously stir to combine well. Or, if using a lidded container, top with lid and simply shake to combine.
  3. Chill over night, or at least 3 hours, so that oats and chia absorb liquid.
  4. Before serving, microwave on 50% power to warm up, stirring as needed. If mixture seems to thick, stir in an additional splash of coffee or almond milk.
  5. If desired, top with a sprinkling of mini chocolate chips and dollop of whipped cream. May be eaten cold. Will stay good in the fridge for several days if you want to make ahead several batches.