“Go For The Gold” Turmeric Hummus Served 3 Ways

Turmeric Curry Hummus
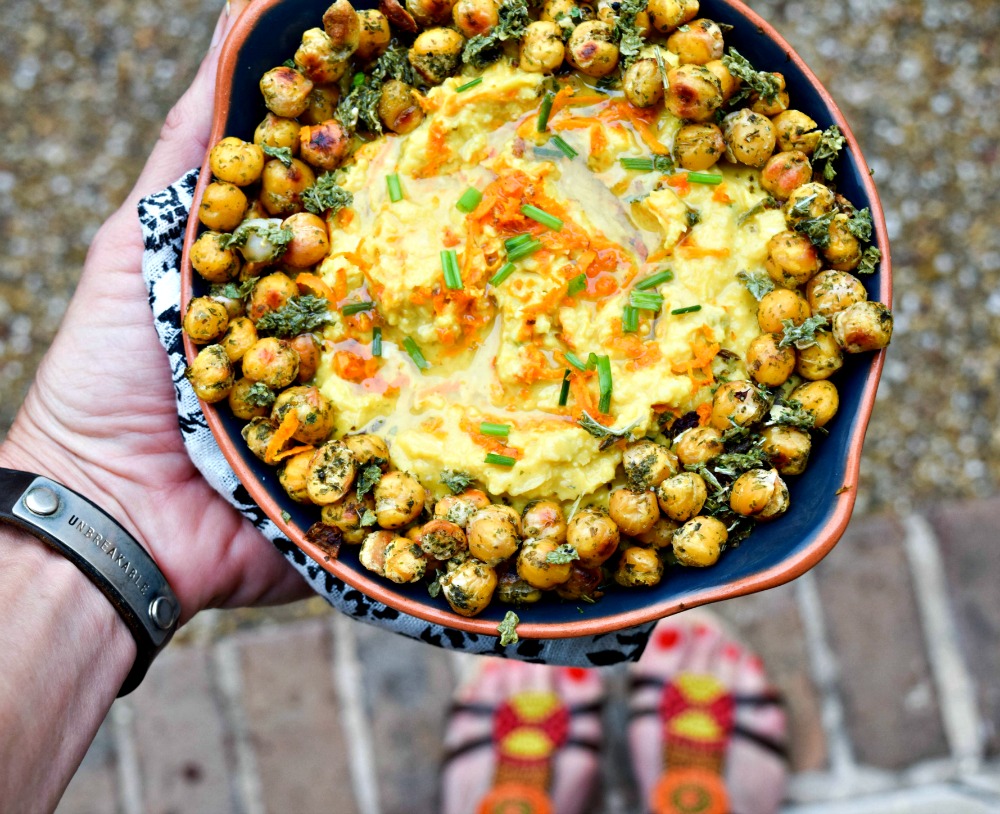
When I want a satisfying snack that tastes super yummy, has loads of health benefits, and won’t have me hungry again in an hour, my “Go for Gold” Turmeric Curry Hummus with Minted Roast Chickpeas is a winner! It’s definitely what to bring to a football tailgate or sports watching party to show that you are the decided victor of dips and champion of chickpeas.Turmeric Hummus with Minty Roast Chickpeas is creamy and crunchy at the same time! A healthy snack with protein and fiber, perfect for post workout of for a party appetizer.

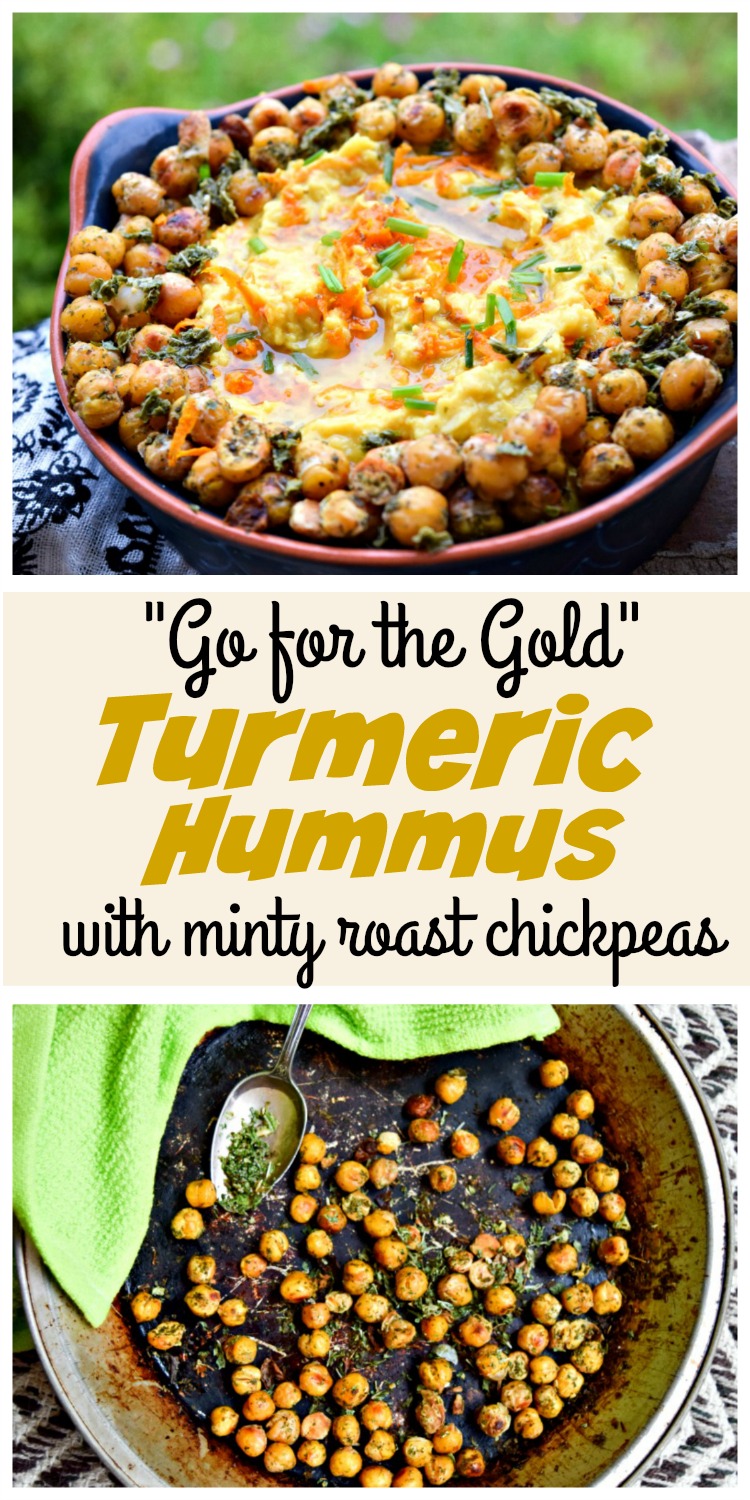
If you’re not familiar with turmeric, you need to get acquainted ASAP. I’ve featured it before in many recipes — my Turmeric Honey “Health” Shots have been popular! While it’s the primary spice in many Indian dishes (such as curry) and lends everything it touches (including hands) a golden yellow to orange hue, turmeric is consumed not just for its warm and mildly peppery taste, but also for the many purported health benefits.

For example, numerous studies suggest that turmeric’s active component, curcumin, helps alleviate or reduce the incidence of everything from certain cancers to depression – and it’s is highly touted as a natural pain-killer and anti-inflammatory. I take turmeric often to recover from hard workouts faster, I’m a fan of these Curcumin Capsules (from Turmeric Root Extract) sold by NOW Foods.

Turmeric.
I do advise using fresh turmeric along with the dried ground turmeric as directed in the recipe. The fresh has a more pleasingly distinctive aroma, flavor and health benefits in root form (technically a rhizome like ginger) than from the ground powder.  However, the ground turmeric helps distribute the golden-orange color evenly. If you’re looking for fresh turmeric, ask your produce manager to stock it from Frieda’s.
Turmeric Hummus Served 3 Ways - appetizer dip, pasta toss and veggie sandwich!

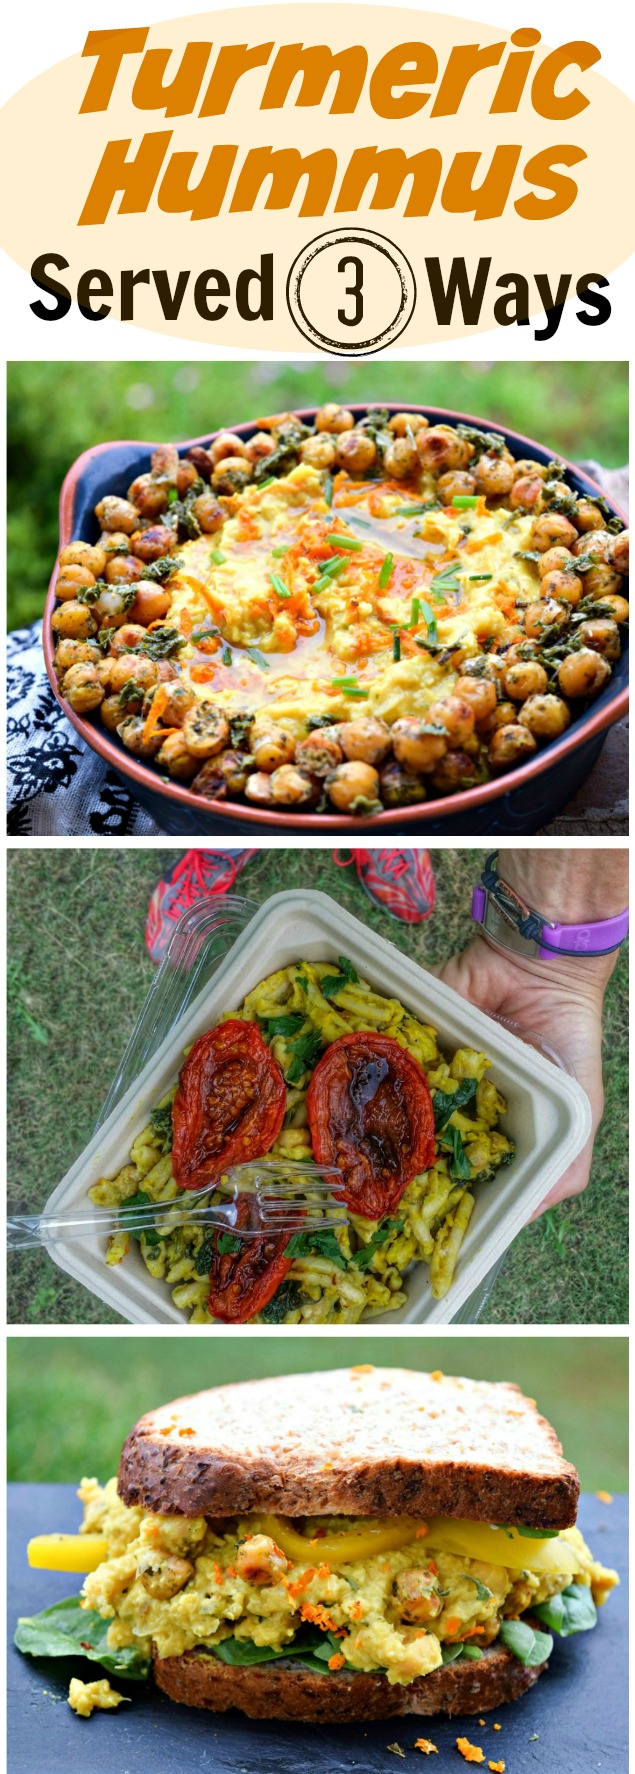
Make a big batch and portion into individual grab-and-go containers to stash in lunchboxes, backpacks and gym bags along with veggie sticks or crackers. However, dipping stuff INTO hummus isn’t the only way to enjoy it! My two other serving suggestions are to 1) pile up high on whole grain bread or a wrap along with other veggies to make a filling sandwich and 2) to toss with warm pasta or vegetable noodles (like “zoodles”) as a creative sauce.  I wasn’t sure if the sauce idea would work one night when fixing a “clear the fridge” dinner in a pinch — but it most certainly did!

roast chickpeas for a crunch healthy snack
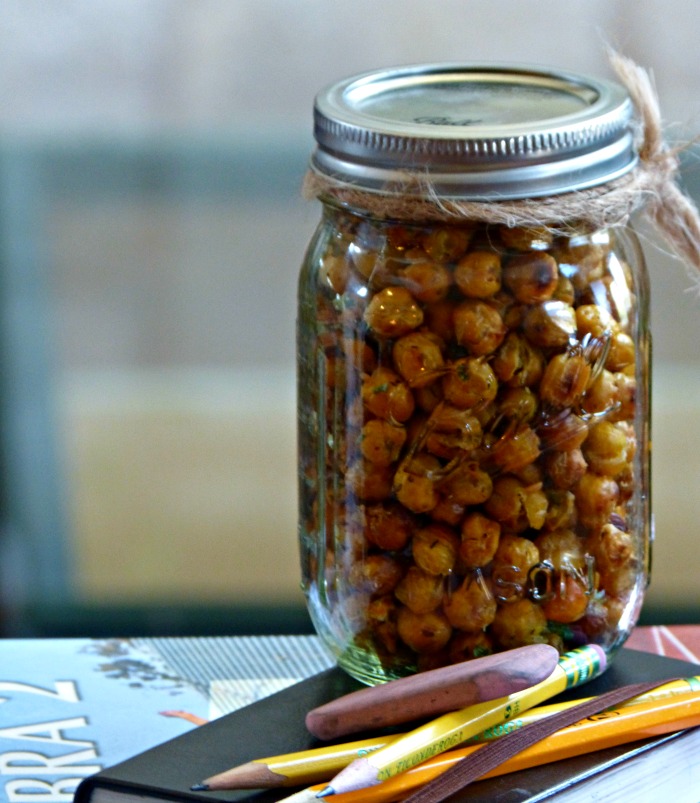
Also, if you love a crunchy, salty snack the roasted mint chickpeas that I’ve used to garnish the top make a fantastic snack on their own.

Just double up that part of the recipe and keep the extra batch for snacking right off the pan – or to use as grain-free “croutons

By the way, I originally developed this recipe for Litehouse Foods using their Instantly Fresh Herbs! Check it out.


Do you use turmeric in your diet, what is a favorite recipe? If you’re at a party, do you go for the dips or the desserts? What’s on your upcoming fall season race season? Please share in the comments, XOXO — Jennifer  

"Go For The Gold" Turmeric Hummus Served 3 Ways
Prep Time
40 mins
Total Time
40 mins
 
Cuisine: Indian, Mediterranean
Servings: 6 servings
Ingredients
  • 2 cups canned chickpeas, rinsed, dried and “skinned” (divided)
  • 1 teaspoon olive oil
  • 2 tablespoons chopped fresh mint or nstantly Fresh Mint
  • 1 1/2 teaspoons salt (divided)
  • 1/2 cup tahini (sesame paste)
  • 1/4 cup extra virgin olive oil
  • 2 tablespoons lime juice
  • 1 tablespoon minced garlic or Instantly Fresh Garlic
  • 1 tablespoon grated fresh ginger or Instantly Fresh Ginger
  • 1 teaspoon curry powder
  • 1 teaspoon dried, ground turmeric
  • 1 tablespoon fresh grated turmeric root *if not available, substitute and additional 1 TBSP dried turmeric
  • 1/2 teaspoon ground black pepper
  • additional olive oil for serving
Instructions
  1. Preheat oven to 400 F degrees.
  2. After draining and rinsing chickpeas, place them on a paper towel and fold over, gently rubbing them. This will remove any remaining “skins.”
  3. Toss mint and salt together in small bowl. Take ½ cup of chickpeas and toss around with olive oil until coated. Add chickpeas to bowl with mint and shake around until dusted.
  4. Place chickpeas in oven and bake, tossing occasionally, for 30 to 40 minutes or until golden and crunchy.  Remove from oven and set aside to cool on pan.
  5. Place remaining chickpeas, tahini, olive oil, lime juice, garlic, ginger, curry powder, dried turmeric, fresh turmeric, remaining salt and pepper in a food processor and blend till smooth and creamy. If needed, add a bit of additional lime juice or water to adjust the consistency.
  6. Serve with a drizzle of olive oil and roasted chickpeas.

Wholly Cannoli Protein Mug Cake #NextLevelNaked

Cannoli Protein Mug Cake with Naked WheyMaybe I don’t do desserts as decadently as the Italians, but after digging into one of my Cannoli Protein Mug Cakes, your taste buds will be exclaiming, “Batta Bing, Batta Boom! And, with 20 grams of protein per serving of cake (yay, the entire cake), so will your biceps – BOOM! Cannoli Protein Mug Cake takes only about 1 1/2 minutes to cook and is a healthy dessert option, post-workout snack, or even breakfast!

I keep the signature chocolate and pistachio garnish of cannoli, but ditch the custard-filed fried shells for a light and tender “cake” made with protein power, a bit of gluten –free baking mix, an egg, and skosh of coconut oil. It’s a healthy option for dessert, post-workout, or even breakfast – and, did I mention it takes less than 90 seconds to cook?

Vanilla Protein Mug CakeAfter “baking” in the microwave, your mug cake is going to look pretty “plain vanilla,” but that’s okay. It is vanilla, after all, made with Less Naked Vanilla Whey Protein from Naked Nutrition. The Cannoli Protein Mug Cake recipe at the bottom of the post, without the garnishes, makes a versatile basic mug cake base that other ingredients (like fruit or peanut butter) can be stirred into before cooking or sprinkled on afterward. But, today we are going healthy CANNOLI all the way, and you’ll soon forget about any diet-busting cravings you may be having – FUHGEDDABOUTIT!

Naked Whey protein powder over Cannoli Mug Cake

So, as I just name-dropped, this recipe uses protein powder from Naked Nutrition. It’s definitely “nutrition with nothing to hide.” Naked Nutrition has a variety of products, but I’m focusing on the whey protein today, because that is what I use in my daily routine. This quality whey protein comes from grass-fed cows’ milk sourced from small dairy farms and state-of-the-art manufacturing process that ensures that the product has what it needs, and doesn’t have what it shouldn’t – it’s clean, lean protein with no artificial anything! For example, the Less Naked Vanilla Whey Protein is made with just three ingredients -grass fed whey protein, vanilla, and organic coconut sugar and each serving has 25 grams protein and 5.9 grams BCAAs. And, of course, it’s non-GMO, soy free, growth hormone free, and gluten-free.

I like that Naked Whey is sweetened with Organic Coconut Sugar, sometimes I need a bit of quality carb energy to fuel my workouts, but white table sugar is definitely out of the question for me and zero-calories substitutes don’t put any gas in the proverbial tank.  Coconut sugar is a great option as an energy-providing sweetener because it is lower on the glycemic-index (preventing dramatic rises and falls in blood sugar) – refined white sugar has a glycemic index of 99 and coconut sugar only 35. In addition, coconut sugar (also called palm sugar by some) is inherently loaded with nutritional benefits, notably a high level of inulin (a dietary fiber) that serves as a prebiotic to support the growth of healthy bacteria in your gut. Studies have shown that a healthy digestive tract can reduce the incidence of certain cancers and diabetes while increasing fat metabolism and encouraging a healthy body weight. Sign me up.

jennifer naked whey I find the unflavored and vanilla whey proteins to be a great base for my protein-based baking, like protein pancakes, power muffins, and mug cakes like the Cannoli Protein Mug Cake I am sharing today. Oooh, but this girl sure does love chocolate, and a massive 5-pound tub of Less Naked Chocolate Whey Protein makes my mind start spinning with smoothie and healthy dessert-like creations, like protein brownies, protein pops, protein truffles, and more. Thanks to my stash from Naked Protein, I’m sure you’ll be seeing more chocolate protein recipes from me soon.

Less Naked Chocolate Pudding

In the meantime, check out this Chocolate Protein Pudding recipe from the Naked Nutrition Instagram profile. Seriously simple and insanely delicious, just peel the lid off a 6-ounce Greek yogurt and stir in a scoop of powder.  I ALWAYS take a protein-rich snack at bedtime because 1) I’m hungry and 2) muscle most muscle growth and repair happens while we sleep!

In addition to Vanilla and Chocolate whey protein powder, Strawberry and Unflavored are also available. Naked Protein also makes so many other quality protein options to meet a variety of dietary, recipe and taste requirements including Grass-Fed Whey, Goat Whey, Casein Protein, Pea Protein, Egg White Protein, Organic Rice Powder Protein, Peanut Butter Powder and more. CHECK OUT ALL THE PROTEIN OPTIONS HERE.

When you need something sweet, what do you usually grab? To you make mug cakes or mug muffins, what is your favorite mix-in or topping? Racing this weekend? Please share in the comments below – XOXO, Jennifer 

Cannoli Protein Mug Cake
Prep Time
2 mins
Cook Time
1 hr 30 mins
Total Time
1 hr 32 mins
 
Coconut oil cooking spray 2 tablespoons Vanilla Protein Powder 1 tablespoon + 1 teaspoon gluten-free baking mix 4 teaspoons zero-calorie measure-for-measure sweetener 1/8 teaspoon baking soda ¼ teaspoon cinnamon 1 large egg 1 teaspoon lemon juice 1 tablespoon water 1 teaspoon coconut oil 2 teaspoons chopped pistachios ¼ cup “coco whip” or non-dairy whipped topping 1 teaspoon mini chocolate chips ½ teaspoon lemon zest (optional)
Course: Breakfast, Dessert, Worout
Cuisine: American, Italian
Servings: 1 serving
Ingredients
  • Coconut oil cooking spray
  • 2 tablespoons vanilla protein powder I used Less Naked Vanilla Whey from Naked Nutrition
  • 4 teaspoons gluten free baking mix please note this is 1 tablespoon + 1 extra teaspoon
  • 4 teaspoons measure-for-measure sugar baking substitute
  • 1/8 teaspoon baking soda
  • 1 large egg
  • 1 teaspoon lemon juice
  • 1 tablespoon water
  • 1 teaspoon coconut oil
  • 2 teaspoons chopped pistachios
  • 1 teaspoon mini chocolate chips
  • 1/4 cup "coco" whip or dairy free whipped topping
  • 1/2 teaspoon lemon zest, if desired
Instructions
  1. Spray a large microwave-safe coffee mug with cooking spray, set aside.
  2. In small bowl, combine protein powder, gluten-free baking mix, sugar substitute, cinnamon and baking soda. Stir together until combine well.
  3. Mix in egg, lemon juice, water, and coconut oil until combined.
  4. Pour into sprayed coffee mug and microwave 1 minute 15 seconds, or until cooked through. Microwave times may vary depending on your appliance.
  5. Remove mug and invert onto plate, gently slide out cake. Let cool for 2 minutes. Using serrated knife, carefully slice cake crosswise through center, remove top and set aside. Put ½ of whipped topping on one cake piece, sprinkle with a few of the pistachios and chocolate chips. Add top layer of cake and add remaining whipped topping, sprinkle with remaining toppings including lemon zest, if desired.

Steak and Quinoa Squachos – NachOMG!

Steak and Quinoa Squachos are a healthy take on nachos and gluten-free, low-carb appetizer optionlYou may be thinking, “Ummmm, excuse me . . . but what the heck on God’s green Earth are SQUACHOS”? This quick and easy appetizer is a healthy swap for traditional nachos made with tortilla chips which are typically fried, overly salted and plentiful in carbs (if you’re counting).  Made on slices of summer’s finest squash, my Steak & Quinoa Squachos are, in two simple words, “life changing!”

Steak & Quinoa Squachos - gluten-free and low carb appetizer!

Zucchini and Summer SquashThe farmer’s markets (and personal gardens of you green-thumbers) are exploding with green zucchini and yellow summer squash this time of year — and this fun and fit finger food is a tasty way to take advantage of a bumper crop and squeeze a few extra veggies into the day.


Recipes similar to this use panko bread crumbs to create that familiar nacho crunch — but that defeats to purpose of my low-carb, higher protein mission. So, instead, I tossed together almond meal and cooked quinoa with a bit of cheese to create a tasty texture on top of each squash disc.

Steak and Quinoa Squachos -- a low carb, gluten free appetizer!

I used two of my go-to non-GMO, gluten-free and certified organic pantry staples from NowFoods.com Tri-Colored Quinoa  and Raw Almond Flour. This tri-color quinoa a blend of white, red and black seeds and is a great source of protein and iron — I typically serve it as a side dish or salad, but freeze leftovers for speedy recipes like this! Raw Almond Flour (or Almond Meal, as some people call it) is simply finely ground almonds and it makes a great low-carb swap for flour in many recipes. If you can’t find these products in your market, I’ve dropped the Amazon links below.
 

More Protein, More PowerNow, if you’ve been following along on the blog or social media, you know I’ve been sharing my (numerous time) journey on the Protein Challenge and encouraging others to join. This free 30-day challenge sponsored by BeefLovingTexans.com (who I also originally developed the Squacho recipe for) shows you how to tweak your daily protein intake for optimal heath — to be very succinct, you should be getting about 25 – 30 grams of protein at each of your three meals — and also protein rich snacks throughout the day and possibly at bedtime, depending on your activity level. You can register for the Protein Challenge and get tips, support and recipes HERE.

Join the 30 day Protein Challenge

Steak & Quinoa SquachosSo, are you making these Squachos this weekend, or what?!

What are your other plans – a race, a vacation, just catching up on the to-do list? Let’s chat in the comments below – XOXO, Jennifer 


Steak & Quinoa Squachos
You'll exclaim "squash-OMG" when you taste these unique beef nachos that swap tortilla chips for discs of zucchini -- almond meal and quinoa create a crunch texture while keeping the appetizer gluten-free and low carb.
Course: Appetizer, Snack
Cuisine: American
Servings: 8 as appetizer
Ingredients
  • baking spray
  • 2 lbs summer squash (such as zucchini, crookneck etc.)
  • 1/2 cup raw almond flour I like Now Foods "Living Now" brand
  • 1 tablespoon dry fajita seasoning
  • 1 cup shredded sharp cheddar cheese
  • 1/2 cup cooked quinoa I like Now Foods "Living Now" brand
  • 2/3 cup prepared Pico de Gallo, drained of any excess juice
  • 1/2 cup fresh chopped cilantro leaves
  • garnishes salsa, guacamole, sour cream or others as desired
Instructions
  1. Preheat broiler on high. 2. Line two rimmed baking sheets with foil, coat with baking spray.
  2. lice squash into ¼” slices. Place squash, with edges touching each other, onto baking sheets.
  3. In bowl, toss together almond meal with dry fajita seasoning. Stir in cheese, cooked quinoa and almond meal until combined.
  4. Use a tablespoon to pile a big dollop of this cheese mixture on top of each squash slice. If leftover topping in bowl at end of dolloping, sprinkle evenly across tops.
  5. Cut leftover steak or fajita meat into bite-sized pieces. Place a piece of two of beef on top of each Squacho.
  6. Place oven rack on second to top position. Broil Squachos for 2 to 4 minutes, or until cheese mixture bubbling and turning golden brown on edges Watch carefully to prevent burning.
  7. Remove from oven and sprinkle with drained Pico de Gallo. Serve with other desired accompaniments such as guacamole, sour cream or salsa.

Sweet & Salty Four-Seed Popcorn Bars

This is a sponsored conversation written by me on behalf of JOLLY TIME Pop Corn.  The opinions and text are all mine.

Sweet & Salty Four-Seed Popcorn Bars make a nutritious snack!

Jolly Time Popcorn healthy snack
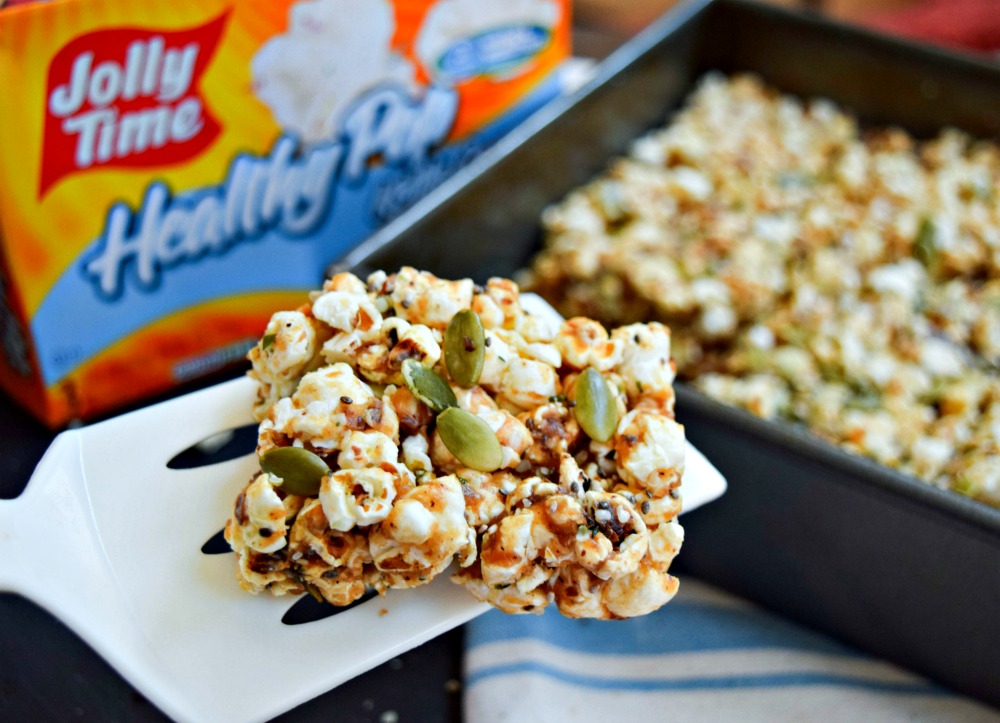
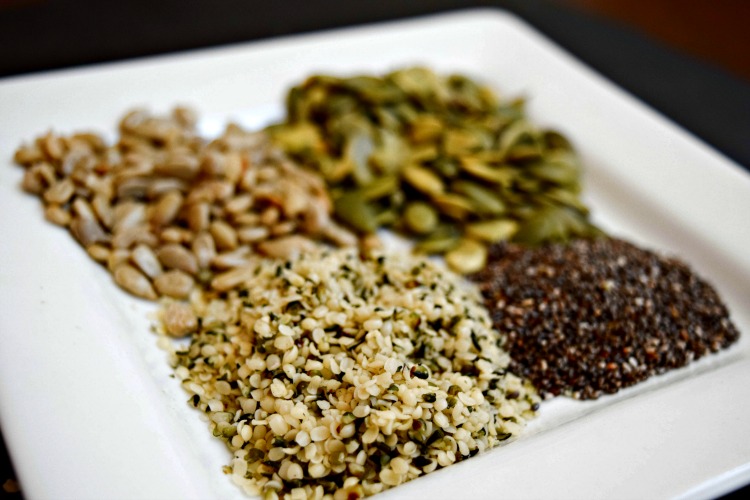
Popcorn makes a super on-the-go snack swap, especially as a replacement for common convenience options like granola bars, chips, and cookies that can be higher sugar and fat. Naturally gluten-free and considered a whole grain, popcorn is high in dietary fiber and low in calories – plus for the visual eater, a serving of popped corn looks like a whole LOT of food!  I’m especially fond of JOLLY TIME Pop Corn, their Healthy Pop line gets the thumbs up from Weight Watchers and most products are 94% fat-free and have just around 100 calories per serving (give or take) – that’s about 20 calories per cup!

Seeds may be tiny, but they pack a super-sized nutritional punch!

So, y’all know I’m big on getting protein into my snack too! A bag (5 cups) of JOLLY TIME Pop Corn has about 4 grams of protein, which actually surprised me – I thought it would have zip, nada, none! I was wrong, popcorn does have protein! But, I like to pump it up with additional whole food add-ins – especially seeds! Tiny little seeds are powerhouses of nutrition – they are an excellent source of heart-healthy fats, protein and essential vitamins and minerals. For example, hulled hemp seeds are one of the most nutritionally complete sources of plant-protein – containing every essential amino acid an fatty acid the body needs for optimal health.Sweet & Salty Four Seed Popcorn Bars make a nutritious snack that is nut-free and gluten-free.

Check out my recipe for Sweet & Salty Four-Seed Pop Corn Balls made with Healthy Pop Kettle Corn hemp seeds, pumpkin seeds and chia seeds. Instead of a caramel to hold it together like you’d find in a traditional popcorn ball, I’ve whipped up a nutritious binder made from sunflower butter and agave syrup, a low-glycemic index, natural sweetener.  This great snack or healthy dessert recipe is gluten-free, nut-free and has no added refined sugar – so enjoy and #haveaJOLLYTIME !

Trail Mix Pop Corn is also a family-approved winner at my house!

Trail Mix Popcorn

Also, please check out the Healthy Pop Challenge – get a free workout band, enter to win a FitBit Altra and grab coupons for JOLLY TIME Pop Corn. I love the idea that they have to workout while waiting for popcorn to pop – even little bursts of exercise add up. Depending on the length of your popping session and microwave settings (plan on an average of 4 minutes), you can get quite a few exercises done. Try these simple exercises in the kitchen while you wait:

Perform each exercise for 1 minute, as many times as you can safely, while you wait for  JOLLY TIME Pop Corn to cook:

jolly time exercise

  • Overhead band pulls (or pushup against wall, if no band)
  • Air Squats
  • Alternating Leg Lunges (in place)
  • Jumping Jacks


Sweet and Salty Four-Seed Popcorn BarsAre you a regular popcorn snacker, or only at the movies? Favorite popcorn mix-ins? Butter or no butter?

Please share in the comments below, XOXO, Jennifer 


Sweet & Salty Four-Seed Popcorn Bars #HPChallenge
Prep Time
10 mins
Total Time
10 mins
 
Course: Dessert, Snack
Cuisine: American
Servings: 9 servings
Ingredients
  • 1 package Jolly Time Healthy Pop Kettle Corn (5 cups)
  • 2 tablespoons hulled hemp seeds (often called “hemp hearts”)
  • 2 tablespoons roasted, salted sunflower seeds
  • 2 tablespoons roasted pepitas (pumpkin seeds)
  • 1 tablespoon chia seeds
  • 1/3 cup sunflower seed butter**** Or the nut butter of your choice, I love Power Fuel from Nuttzo.com
  • 1/4 cup agave syrup or honey
  • baking spray
Instructions
  1. Prepare popcorn according to package instructions. Pour in large mixing bowl and let cool.
  2. In small bowl, mix together hemp seeds, sunflower seeds, pepitas and chia seeds. Set aside.
  3. In small sauce pan, add sunflower seed butter and agave syrup, stir to combine. Bring to medium heat, stirring continuously. Once mixture begins to bubble, keep cooking and stirring for an additional 30 seconds.
  4. Drizzle hot sunflower-agave mixture over popcorn and quickly stir to combine as evenly as possible. Sprinkle in seed mixture into popcorn mixture in about 3 batches, stirring quickly each time to distribute.
  5. Spray 8 x 8-inch brownie pan with baking spray and fill with popcorn mixture. Using a piece of wax paper and hands or back of spoon, press down over entire top to compact firmly.
  6. Cut into 9 squares.
Recipe Notes

****Or the nut butter of your choice, I love Power Fuel from Nuttzo.com

Clean Apple Pie with Protein Bar Crust to #KeepOnTrack

This blog post has been compensated by Collective Bias, Inc. and Pure Protein. All opinions are mine alone. #KeepOnTrack #CollectiveBias

Summer has been busier than a gym in January but I’m not letting my hectic schedule sabotage my good intentions. I’m keeping on track with my higher-protein diet by keeping my pantry, purse, gym bag, and mobile snack station (haha, the car) stocked with the new Pure Protein Plus Bars. Considering I’m out of the house most of the day working, running errands, shuttling my teen boys to their sports practices, and finding time for my own fitness routine, having a few of these insanely delicious protein bars at the ready has kept me from getting so hangry that I have the mother of all mother meltdowns.  In addition, the bars can be used to make quick nutritious desserts, like my recipe for Clean Apple Pie on Protein Bar Crust that I’m sharing in this post.   

Clean Apple Pie with Protein Bar Crust

To make this nearly sugar-free pie, I used one of the NEW Pure Protein Plus Bars that I purchased at Walmart. When you shop Walmart for Pure Protein Plus Bars, be sure to use Ibotta to earn $1.50 back.

Pure Protein Plus #KeepOnTrack

For more Pure Protein Plus Bars inspiration, visit this website. Make sure to enter the sweepstakes below too for a chance to win prizes to help #KeepOnTrack!

Pure Protein Plus Bars #KeepOnTrack Sweepstakes

These bars are available in four flavors (Cookies and Cream, Mocha Brownie, Apple Pie, Chocolate Chip Cookie Dough) that all sound ultra-decadent, but after checking the nutrition label, I found they actually make a quite balanced and sensible snack solution. I’ve been grabbing one for a quick breakfast, bedtime snack or for post workout recovery.

You can find these bars at Walmart on the nutrition aisle near the Pharmacy!

The preferred amount of protein I look for in a nutrition bar is around 20 grams with low sugar content and, ching-ching-ching, this new product delivers. Additionally, the NEW Pure Protein Plus Bars have that soft and pleasantly chewy texture I crave plus they are GMO-free, gluten free, have no artificial sweeteners and are high fiber (15 – 16g).

Oh, and the super delicious flavors are worth shouting out again (and again!) Hello, Cookies and Cream, Mocha Brownie, Apple Pie, Chocolate Chip Cookie Dough — welcome to my life.  But, unlike the real deal desserts, these bars are mindful of my mission to #KeepOnTrack with a higher protein, lower carb diet.    Making "crust" out of Pure Protein Plus Bars

So, ready for that apple pie I mentioned earlier?! My recipe for Clean Apple Pie on Protein Bar Crust takes all of five minutes and is made with an Apple Pie Pure Protein Plus Bar.  It’s a super speedy, protein-packed and no-sugar-added version of my favorite, all-American summer dessert. It’s almost magical how, after the bar is soften for a few seconds in the microwave, it becomes malleable enough to roll out or break in bits and press into the bottom of a pan.

While “making” the crust, slicing and softening your favorite variety of apple tossed with a sprinkling of cinnamon in the microwave takes just mere minutes. No added sugar required – apples are a great source of naturally sweet, complex carbohydrates that can be quickly accessed by the body as fuel for running, workouts or the relentless demands of a hectic life.  

Cinnamon Apples for Clean Protein Pie
Go ahead and pin or print out this protein dessert recipe to #KeepOnTrack and satisfy your sweet tooth at a moment’s notice.

Clean Apple Pie on Protein Bar Crust is a healthy option for dessert or a post workout snack.

Clean Apple Pie with Protein Bar Crust
Prep Time
5 mins
Cook Time
5 mins
Total Time
10 mins
 
All-American and all good for you, this cleaned up apple pie is packed with protein and real fruit -- the perfect healthy dessert or post workout snack.
Course: Dessert, Fruit, Snack, Worout
Cuisine: American
Servings: 1 serving
Ingredients
  • 1 1 Pure Protein Plus Bar – Apple Pie Flavor
  • 1 medium apple
  • 1/4 to 1/2 teaspoon ground cinnamon depending on preference
  • 1 tablespoon chopped pecans
  • 3 tablespoons Greek yogurt vanilla or plain
Instructions
  1. Unwrap one Apple Pie Pure Protein Plus Bar and set on microwave-safe plate. Microwave on “defrost” setting for 20 seconds, or until warm and malleable but not too hot to handle.
  2. Break up warm bar into bits and place in the bottom of an approximate 6” diameter tart pan, skillet or ceramic dish. Using fingers or back of spoon, press down until formed into a crust that covers bottom of pan. Lightly coat fingers or spoon in coconut oil if beginning to stick.
  3. Cut medium apple into thin slices and place in microwave-safe bowl. Microwave apple slices on high for three minutes, stirring halfway through. Drain off any excess liquid.
  4. Drizzle with coconut oil, sprinkle with cinnamon and stir until coated.
  5. Place apples on top of protein bar “crust.” Sprinkle with pecans and top with yogurt.