High Protein Banana Pudding with Cottage Cheese

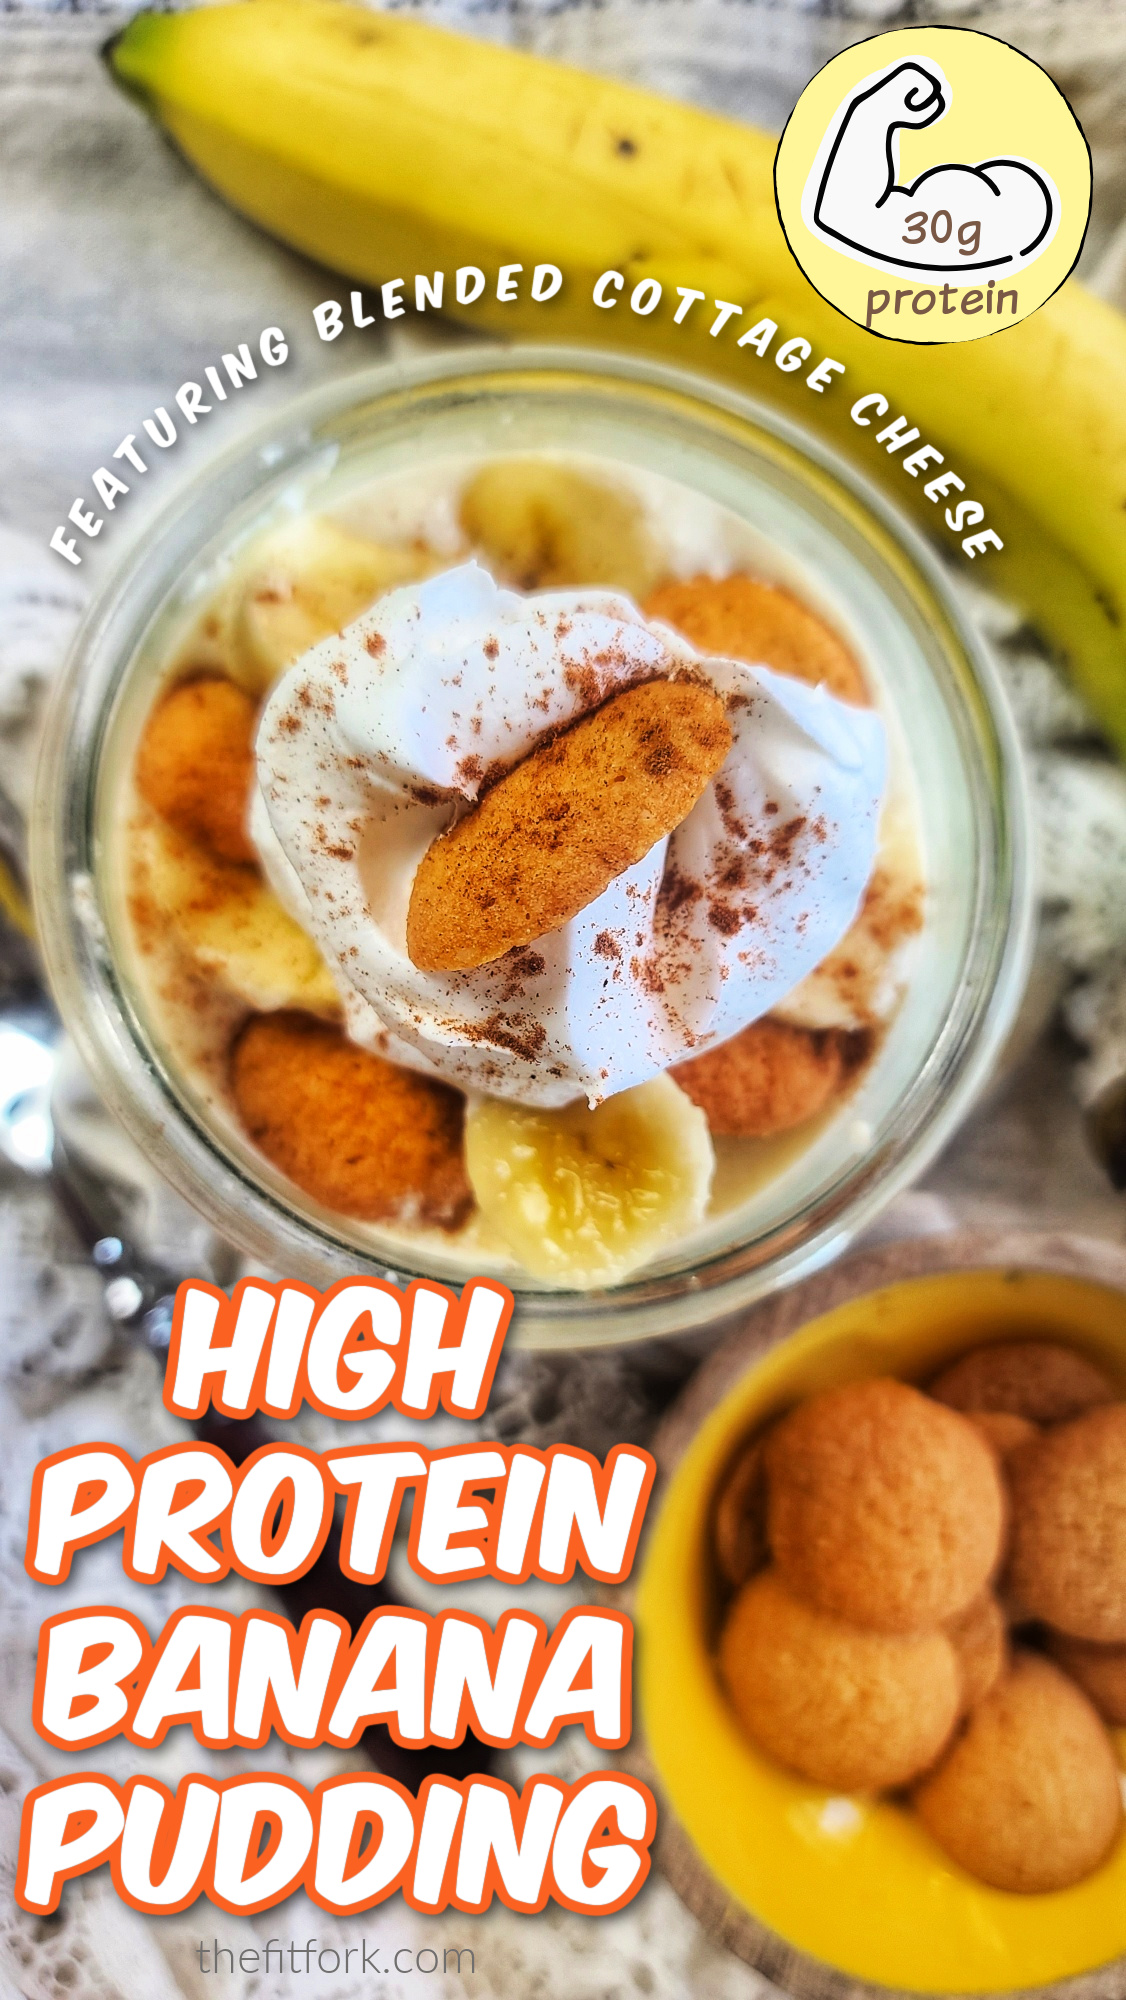
Every time I eat a bite of my High Protein Banana Pudding recipe, it’s like a nostalgic trip down memory lane – except with less sugar, less fat, and more protein! That’s very “a-peeling” to my fitness nutrition goals!

High Protein Banana Pudding: A healthy twist on this classic comfort food allows you to enjoy dessert with no guilt while making gains on your daily protein goals! Only 285 calories per serving, with 30g protein! Lower carb, lower, sugar, gluten-free.

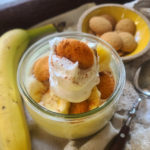
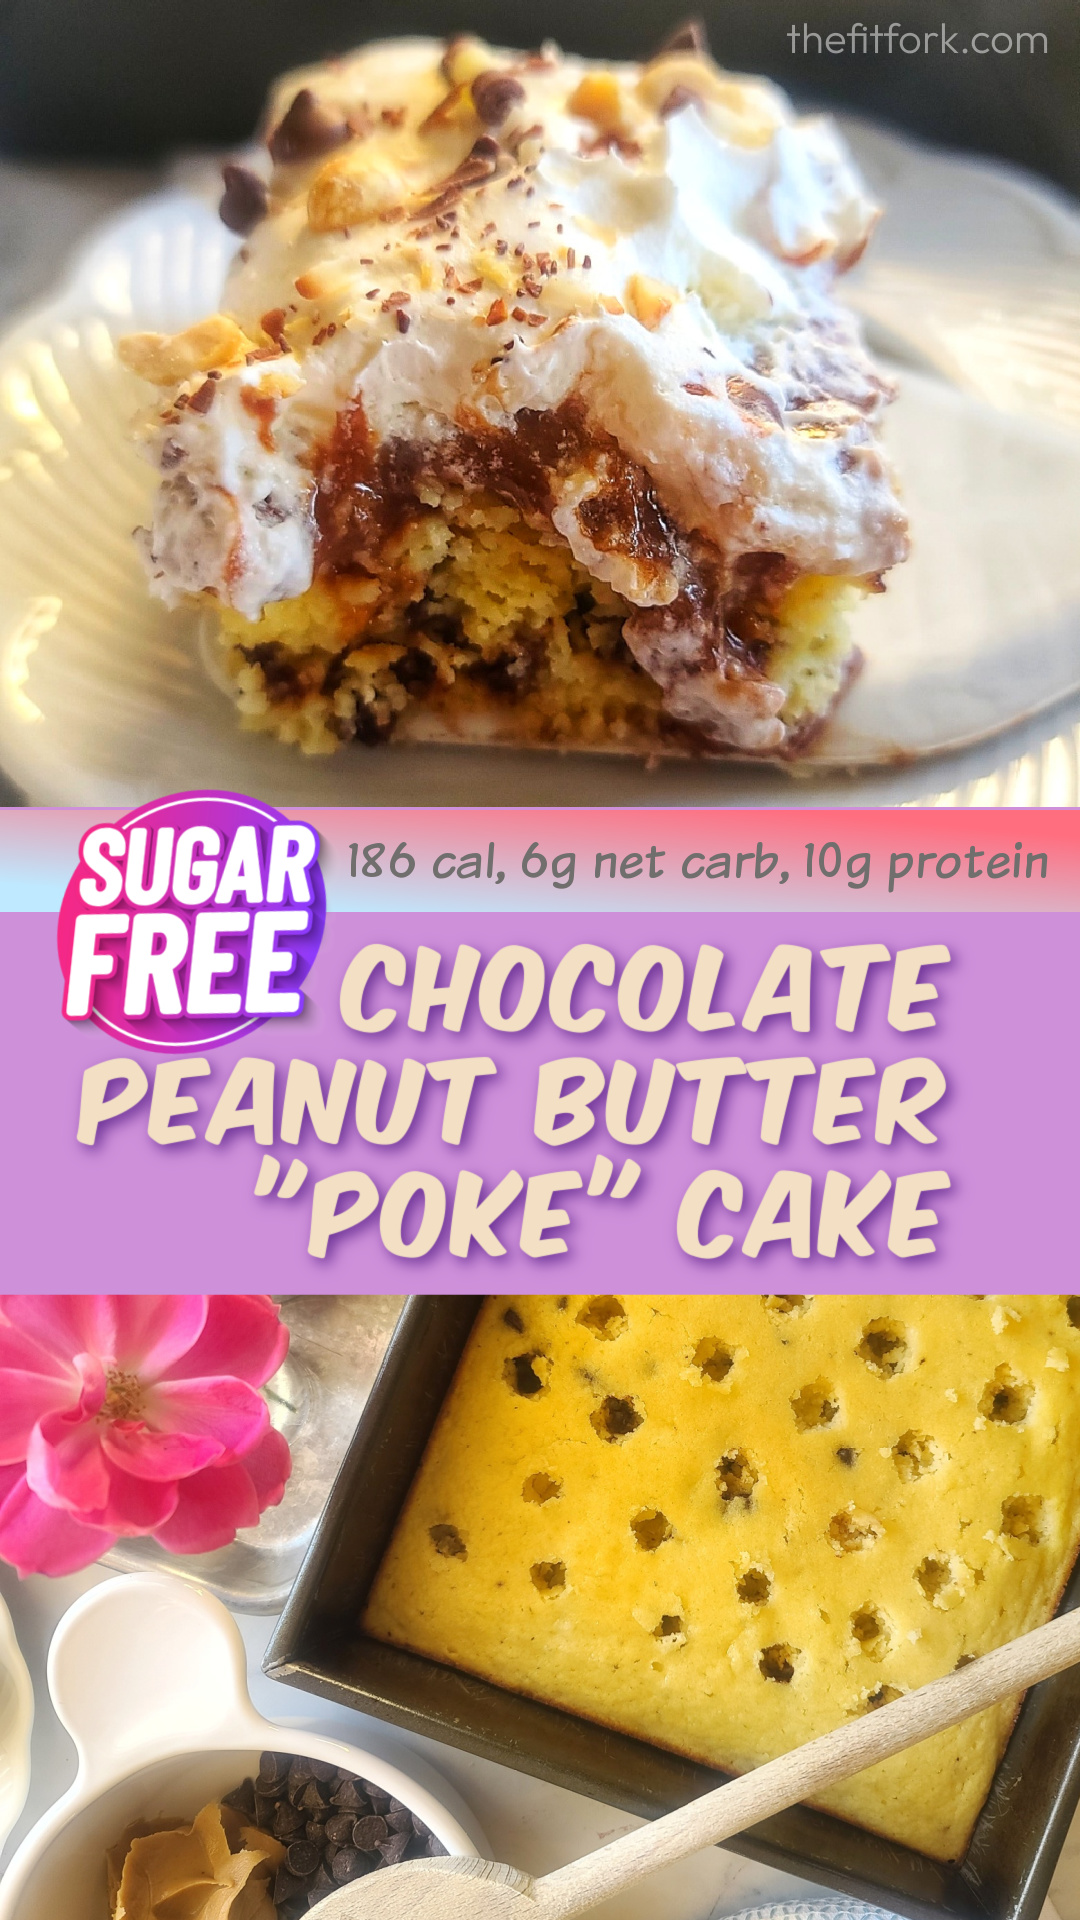
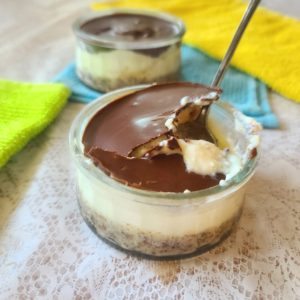
Indulge in guilt-free dessert-eating, all while making gains on your daily protein intake. Cottage cheese and protein powder, blended with a banana creates pudding-like mixture that can be layered with banana slices and low-carb vanilla wafers.

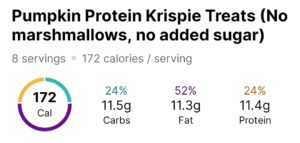
Each serving of this cottage cheese banana pudding has 30g protein and 285 calories! A bowl full makes a great workout snack, healthy dessert – or even balanced breakfast (hey, there’s fruit in it!!)

 This lower carb banana pudding blends up easily in a smoothie-sized, smaller personal blender – the recipe yields two servings.


High Protein Banana Pudding: A healthy twist on this classic comfort food allows you to enjoy dessert with no guilt while making gains on your daily protein goals! Only 285 calories per serving, with 30g protein! Lower carb, lower, sugar, gluten-free.

You can use the protein powder of your choice: whey, casein, plant-based, or whatever. You may have to add a splash more milk, depending on what type you use – the way it thickens up varies by product.

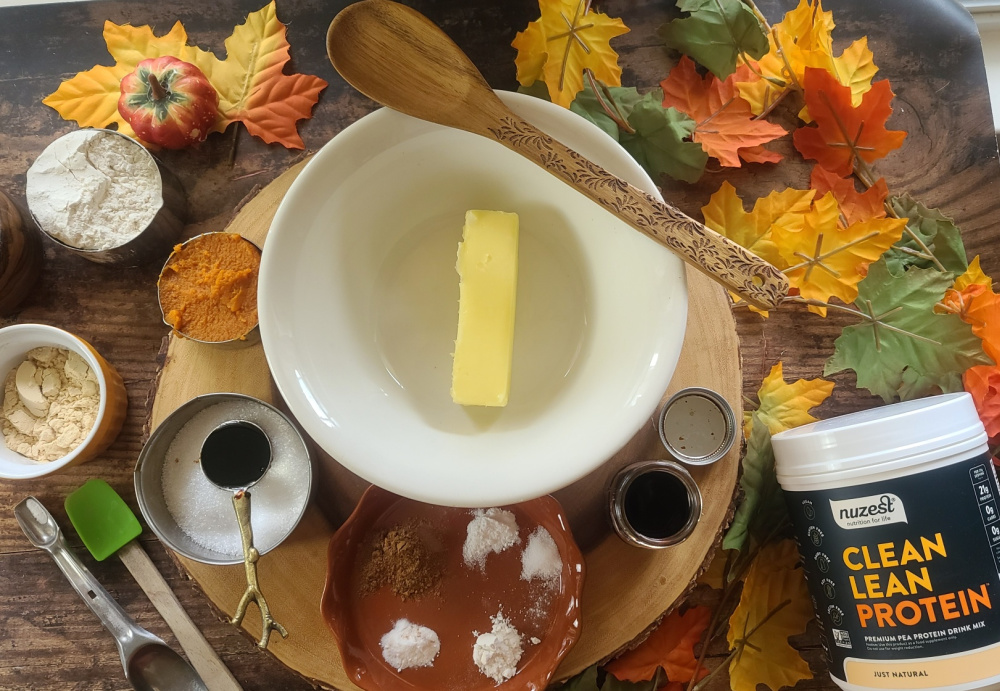
I used a plant-based protein powder from Nuzest and my milk suggestion in recipe is based on that.  Save 15% on Nuzest with discount code: FITFORK

High Protein Banana Pudding: A healthy twist on this classic comfort food allows you to enjoy dessert with no guilt while making gains on your daily protein goals! Only 285 calories per serving, with 30g protein! Lower carb, lower, sugar, gluten-free.
I used Highkey Vanilla Wafers which are low carb and gluten free.

Whip up this banana cottage cheese recipe quickly – it only takes about 5 minutes, start to finish. No need to let it thicken in the fridge like a boxed pudding mix. It’s best eaten within a few hours after preparation (keep chilled, of course). Any leftovers may be also be kept covered in the fridge for a couple days. However, the banana blended into the cottage cheese and the banana slices may turn slightly light brown. It’s still perfectly fine to eat, the fruit has just come into contact with air and oxidized.

As an Amazon Influencer and Nuzest Affiliate, I earn from qualifying purchases.

4.67 from 6 votes
High Protein Banana Pudding: A healthy twist on this classic comfort food allows you to enjoy dessert with no guilt while making gains on your daily protein goals! Only 285 calories per serving, with 30g protein! Lower carb, lower, sugar, gluten-free.
High Protein Banana Pudding with Cottage Cheese
Prep Time
5 mins
Total Time
5 mins
 

A healthy twist on this classic comfort food allows you to enjoy dessert with no guilt while making gains on your daily protein goals! Only 285 calories per serving, with 30g protein! Lower carb, lower, sugar, gluten-free.

Course: Dessert, Snack, workout
Cuisine: American, Southern
Keyword: banana, cottage cheese, high protein, protein powder
Servings: 2 servings
Calories: 285 kcal
Ingredients
  • 1 cup 2% cottage cheese
  • 1 to 2 tablespoons milk as needed
  • 1 large ripe banana divided
  • 1 scoop protein powder vanilla
  • ¼ cup sugar-free fat-free non-dairy topping
  • 1 ounce low-carb gluten-free vanilla wafers
Instructions
  1. Add cottage cheese, 1/2 banana, 1 Tbs. of milk, and protein powder to blender and process until smooth, scraping down sides as needed.
  2. If mixture seems too thick (which may happen depending on type of protein powder used), then add in the remaining 1 Tbsp milk. However, it is better to have too thick than too runny, so use extra milk sparingly.
  3. Add to bowl and layer ½ of cookies and ½ of the remaining banana slices. Pour in “pudding” mixture and top with remaining cookies and banana slices. Dollop with non-dairy topping. If desired, sprinkle with cinnamon.
Recipe Notes

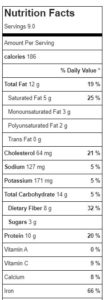
Makes 2 servings, each serving: 285 cal, 9g total fat (5g saturated), 29g total carb (7g fiber, 12g sugar), 30g protein

No-Sugar Peanut Butter-Chocolate Protein Poke Cake

No-Sugar Peanut Butter-Chocolate Protein Poke Cake is a quick and easy dessert that works with a lower carb, less sugar lifestyle. It’s a favorite for nearly every occasion! Each serving has 186 calories, 6g net carb, 12g fat and 10g protein when prepared as directed. That’s winning!

Poke cakes bring up nostalgic memories of baking up batter in a sheet pan, poking holes in the top, and then pouring on a sauce that gets sopped up by the holes. Traditionally though, the sauces have leaned toward the high-sugar side – sweetened condensed milk, chocolate sauce, pudding, and such. This makeover poke cake recipe uses peanut butter, sugar-free chocolate chips, milk (and some protein powder!) to create a better-for-you yet still decadent cake filling.

Quick, easy and makes 9 servings!

TIPS FOR MAKING PROTEIN POKE CAKE

Cake Mix: For convenience, I used a Fit Bake low-carb yellow cake mix (7-ounce pouch) sized to make a single round layer cake or 8”X8” square cake. You can use any cake mix that you like, just be aware that the Nutrition Facts will change. ALSO, if you are using a mainstream cake mix (like Betty Crocker, etc), those are typically 15-oz for two layers (so you will need to measure out ½ of dry mix for this recipe)

Pan Size: As noted, 8×8” brownie pan will work and is my preference. A 9” round cake pan works too! Anything bigger, the cake becomes too thin. I’ve never made as cupcakes, but the recipe should yield about 12 traditional-sized cupcakes or 6 jumbo cupcakes.

Filling: Use the creamy nut putter of your choice. I did peanut butter, but you can do almond butter, etc. Sugar-free chocolate chips helped keep the carb content down, and a scoop of protein powder added some extra nutrition (really any flavor will work – chocolate, vanilla, cake batter, etc. – as long as you think it sounds good)! I used Nuzest (see below for savings)

Toppings: For convenience, I used a sugar-free non-dairy whipped topping, but you could make your own whipped cream and sweeten with stevia drops. Extra sugar-free chocolate chips and some chopped peanuts for texture and flair!

This post contains affiliate links.

5 from 4 votes
Fun and flavorful, this easy-to-make poke cake will delight peanut butter and chocolate lovers. It's a lower carb and higher protein, so you can enjoy without guilt! A sugar-free and gluten-free dessert for any occasion
Sugar-Free Peanut Butter Chocolate Poke Cake
Prep Time
5 mins
Cook Time
25 mins
Cooling
10 mins
Total Time
40 mins
 

Fun and flavorful, this easy-to-make poke cake will delight peanut butter and chocolate lovers. It's a lower carb and higher protein, so you can enjoy without guilt! Sugar free and gluten free!

Course: desesrt
Cuisine: American
Keyword: cake, chocolate, gluten free, low carb, peanut butter, protein powder, sugar-free
Servings: 9 servings
Calories: 186 kcal
Ingredients
Cake:
  • 1 7- ounce package Fitbake Yellow Low-carb Cake Mix or similar
  • 3 eggs
  • ½ cup Greek yogurt 0% fat
  • 2 tbsp water
Filling:
  • 1/3 cup creamy peanut butter
  • ½ sugar-free chocolate chips divided
  • ½ cup milk of choice
  • 1/3 cup protein powder either vanilla or chocolate will work
Topping:
  • 4- oz Sugar Free Non-Dairy Topping like SF Cool Whip – ½ the container
  • 1 tbsp chopped peanuts
Instructions
  1. Preheat oven to 350F.

  2. In mixing bowl, mix up cake ingredients and pour out into an 8×8” baking pan that has been sprayed with cooking spray. Bake for 25 minutes. Remove from oven and let cool in pan for 5-10 minutes.

  3. While cake is cooling, make peanut butter chocolate filling. In microwave-safe bowl, add milk, peanut butter and 1/3 cup of the chocolate chips (reserving the remaining for topping). Microwave in 20 second increments, stirring between, until chocolate melted and a smooth consistency achieved. Stir in protein powder.

  4. With end of a wooden spoon, poke holes in cake approximately ¾” apart, all over cake. Pour filling over cake, spreading around with spatula. Let cool a few minutes before spreading around whipped topping and then sprinkling with remaining chocolate chips and chopped peanuts.
  5. Cut into 9 squares. Store leftovers, covered, in fridge for up to 5 days.

Recipe Notes

Protein Pumpkin Krispie Treats – Sugar, Dairy & Nut Free!

Protein Pumpkin Krispie Treats are a healthy interpretation on one of my most-loved childhood snacks. They are made without marshmallows (or any added sugar at all) or butter – instead I use a sugar-free syrup swap and a seed and oat butter.

You’ll feel a wave of nostalgia with every bite of these better-for-you rice krispie treats, mixed up with real pumpkin to celebrate the season. No marshmallows or added sugar, plus protein for a balanced snack – this easy recipe is a winner and works for gluten-free, nut-free, vegan diets and more.

While you can use peanut butter, or any nut butter of your choosing, I like to use the Seed & Oat Butter from Garnish because it’s free of the Top 9 Allergens. Thankfully, I don’t have food allergies, but when you have someone in your house who does and/or you want to share dishes with others who might (but you don’t know) . . . . this spread is a great option. A great solution when there are peanut allergies around. Save 20% at EatGarnish.com with my code FITFORK

Garnish Seed & Oat Butter is a tasty alternative spread if you can do peanut butter or other nut butters. It's free of the Top 9 Allergens.

The protein rice krispies are a very satisfying snack that won’t leave you hungry or in a sugar-crash 30 minutes later – they have 11g protein thanks to the addition of some protein powder and the protein in the Seed & Oat Butter.

You’ll feel a wave of nostalgia with every bite of these better-for-you rice krispie treats, mixed up with real pumpkin to celebrate the season. No marshmallows or added sugar, plus protein for a balanced snack – this easy recipe is a winner and works for gluten-free, nut-free, vegan diets and more.

TIPS FOR MAKING PUMPKIN PROTEIN RICE KRISPIE TREATS

Nut Butter: Discussed above, but you can use any nut butter you prefer. The Seed & Oat Butter is a great solution if you or your guests have any peanut or tree nut allergies.

Sweetener: I used a zero-carb simple syrup. You can also use a honey substitute or maple syrup substitute. Also using real honey or 100% maple syrup is fine too, just note that the macros of the recipe will change.

Why Flaxseed?: If you notice that the syrup is more watery than thick, use the recipe suggestion to mix in 1 tablespoon of flax seed meal into the recipe to serve as a binder/thickener. In vegan recipes, flaxseed mixed with water is often referred to as a flax egg.

Protein Powder: Again, you have the leeway in this protein krispie treat recipe to use the type of protein powder you prefer – plant-based, whey, etc. Also, there are a few flavors that will work best including vanilla, cake batter, pumpkin and even unflavored. Today I used Clean Lean Protein from Nuzest, you can save 15% with code: FITFORK

Pan Size: This no marshmallow rice crispie recipe fits into an 8”x8” brownie pan, 9”x5.5” toaster oven pan, 9”x5” load pan, or even in 8 of the tins of a muffin pan.

Storing Leftovers: This recipe is the crispiest served right upon making. However, if you have leftovers to save, keep them in an air-tight container in the fridge for up to 5 days. They will be a little softer in texture, but still delicious.

You’ll feel a wave of nostalgia with every bite of these better-for-you rice krispie treats, mixed up with real pumpkin to celebrate the season. No marshmallows or added sugar, plus protein for a balanced snack – this easy recipe is a winner and works for gluten-free, nut-free, vegan diets and more.
Pin this for later!
Protein Pumpkin Krispie Treats
Prep Time
5 mins
Total Time
20 mins
 

You’ll feel a wave of nostalgia biting into these rice krispie treats, mixed up with real pumpkin to celebrate the season. No marshmallows or added sugar, plus protein for a balanced snack – this easy recipe is a winner and works for gluten-free, nut-free, vegan diets and more.

Course: Dessert, Snack
Keyword: fall, gluten free, pumpkin, pumpkin dessert, pumpkin spice, vegan
Servings: 8 servings
Calories: 172 kcal
Ingredients
  • cup canned pumpkin puree not pumpkin pie filling
  • ½ cup Oat & Seed Butter from Garnish or nut butter of your choice
  • 1/3 cup zero-carb “syrupy” sweetener like a honey substitute or maple syrup substitute – or the real stuff if you don’t mind a higher calorie/carb count
  • 1 tbsp ground flax seed optional
  • 2/3 cup protein powder either vanilla, cake batter or pumpkin flavor
  • cup plain puffed rice cereal like Rice Krispies
Optional Chocolate Drizzle:
  • 3 Tbsp sugar-free chocolate chips
  • ½ tsp coconut oil
Instructions
  1. Line an 8”x8” brownie pan or 9”x 6” rimmed pan with parchment paper; or spray with cooking spray.
  2. Add pumpkin, oat/pumpkin butter and syrup to bowl and mix until combined. If your seed butter is thick, warm up in microwave for 10 seconds until an easier-to-stir consistency.
  3. Stir in flax seed meal. This can be omitted if you are using a thick syrup consistency sweetener. But if your sweetener is thinner, this helps serve as a thickener/binder.
  4. Stir in protein powder until combined. Mixture will be thick and pasty.
  5. Next stir in rice cereal until thoroughly coated and press down with fingers or spatula into prepared pan. Stick in freezer for 10 minutes to firm up before cutting.
  6. If you’d like to do the chocolate drizzle, add chocolate chips and coconut oil to small microwave-safe bowl and microwave/stir in 15-second increments until smooth. Drizzle over treats.
  7. Transfer back to freezer to firm up for 5 minutes before cutting into 8 bars/squares. Serve immediately.
  8. Store leftovers in air-tight container in fridge for up to 5 days. Note that the texture will be less crunchy on leftovers – but still yummy!
Recipe Notes

Note: Nutrition info w/o drizzle included

Pumpkin Protein Snickerdoodle Cookies | gluten-free option

Pumpkin Protein Snickerdoodle cookies are a delightful treat that captures the very vibe of fall with every bite. Trust me, it was my pleasure to give seasonal and smart-ingredient updates to one of my favorite childhood cookies – a simple snickerdoodle rolled in cinnamon-sugar and baked with buttery-crisp edges and a soft, chewy center.

These snickerdoodle protein cookies will become nostalgic in a new way. Make them a new fall baking tradition and savor the goodness of pumpkin and a delightful blend of warm seasonal spices.

One of the best advantages of pumpkin protein cookies is their nutritional profile. Each cookie has only 68 calories and 3g of protein – I like to use protein powder in lieu of some of the flour found in traditional recipes to provide a protein boost. 

I like to use Clean Lean Protein from Nuzest, but most any type of vanilla, pumpkin or unflavored protein powder can be substituted (like a whey) in the same measurement.

Save 15% at Nuzest with code FITFORK

This infusion of protein makes pumpkin protein snickerdoodles a fantastic cookie selectin for various occasions throughout the day. Whether you’re looking for a wholesome breakfast option, a post-workout replenishment, or a guilt-free bedtime snack that will help allay any feelings of hunger in the night, these cookies fit the bill.

To make these cookies even healthier, you can opt for your preferred sugar substitute to keep the carb content in check – make sure you are using a cup-for-cup substitute (today I used Xylitol, a natural substitute that has 1/3 fewer calories than sugar, no bad aftertaste, and is low on the GI index). This low-carb adaptability allows you to savor the sweet, rich flavors of fall without compromising your dietary goals or requirements. Additionally, if you don not want to use all-purpose flour, swap in a gluten-free baking flour.

Pumpkin spice makes me nice so I'm all about these pumpkin protein snickerdoodle cookies! Easy to make, nostalgic, yummy and only 67 cal, 6.5g carb with 3g protein per cookie!
5 from 5 votes
Pumpkin spice makes me nice so I'm all about these pumpkin protein snickerdoodle cookies! Easy to make, nostalgic, yummy and only 67 cal, 6.5g carb with 3g protein per cookie!
Pumpkin Protein Snickerdoodle Cookies
Prep Time
10 mins
Cook Time
12 mins
cooling
10 mins
Total Time
32 mins
 

Pumpkin spice makes me nice so I'm all about these pumpkin protein snickerdoodle cookies! Easy to make, nostalgic, yummy and only 67 cal, 6.5g carb with 3g protein per cookie!

Course: cookie, Dessert, Snack
Keyword: cookie, fall, protein powder, pumpkin, snickerdoodle
Servings: 24 cookies
Calories: 67 kcal
Ingredients
For Cookies:
  • 1/2 cup butter, softened
  • 2/3 cup granulated sweetener with a 1:1 measure equivalent with white sugar I used xylitol
  • 1 tbsp molasses
  • ½ cup unsweetened pumpkin from can
  • 1 teaspoon vanilla extract
  • ½ cup protein powder, vanilla OR can use pumpkin flavor or unflavored protein powder
  • 1/2 teaspoon cream of tartar
  • 1/2 teaspoon baking soda
  • 1/4 teaspoon baking powder
  • 1/4 teaspoon salt
  • ½ tablespoon pumpkin pie spice
  • 1 cup all-purpose flour gluten-free baking flour
For rolling:
  • 1/4 cup granulated sweeter the same type used for your dough
  • 1/2 teaspoon ground cinnamon
Instructions
  1. Soften butter, whisk with granulated sweetener and molasses. Whisk in pumpkin and vanilla extract until smooth.
  2. Next stir in cream of tartar, baking soda, baking powder, salt, and pumpkin pie spice. Next stir in protein powder until combine, and then flour. Chill for 30 minutes.
  3. When ready to bake, preheat the oven to 350F degrees and line two baking sheets with parchment paper or silpat mats. In a shallow dish or bowl, stir together the 1/4 cup granulated sweetener and 1/2 teaspoon cinnamon for rolling.
  4. With measuring spoon, portion the dough by 1 1/2 tablespoons and roll into balls. Roll the dough in the cinnamon-sweetener mixture to coat, then arrange on the prepared baking sheet. Flatten the balls slightly (the cookies only spread a little bit as they bake). Bake for 12 – 14 minutes, until the edges are slightly golden. Cool 10 minutes on pan, then remove the cookies to a wire rack and let cool completely.
  5. Makes about 24 cookies. 67 cal, 6.5g carb, 4g fat, 3g protein per cookie

Recipe Notes

Sugar-free “Like Magic” Shell Dessert Topping for Healthy Sweets

If you were a kid in the 80s and 90s, you surely remember “Magic Shell”, a popular dessert topping known for its ability to harden quickly when poured onto cold surfaces. In fact, Magic Shell can still be purchased in-store and online today.

Drizzle, dunk or dip! This Sugar-free “Like Magic” Shell Dessert Topping with have you fondly reminiscing about being a kid! A simple, two-ingredient chocolate sauce recipe with unlimited uses for your dessert creations.

However, as a now grown-up girl-at-heart, who likes to manage both her carb count and pocketbook, I like to make my own no-sugar like magic shell chocolate sauce using just two ingredients – sugar free chocolate chips and coconut oil!  THAT’S IT!

Drizzle, dunk or dip! This Sugar-free “Like Magic” Shell Dessert Topping with have you fondly reminiscing about being a kid! A simple, two-ingredient chocolate sauce recipe with unlimited uses for your dessert creations.

To make a generous, 2-serving batch just add 1-ounce sugar free chocolate chips (about 3 tbsp) to a small microwave-safe bowl and add 1 teaspoon of coconut oil – it’s fine if still in solid form, it all melts together! Next, microwave for about 35-45 seconds until melting, then stir together until glossy and smooth. If you want a bigger batch, simply use the same 1 oz chocolate to 1 tsp coconut oil ratio – you may need to microwave a little longer to accommodate the larger volume.

.So, now that the chocolate sauce that hardens is done, it will work its “magic” by solidifying on contact with cold items – the coconut oil helps make it easy to drizzle, but then reverts back to its solid state after cooling! You can speed up the hardening process further by sticking your drizzled, dunked and dipped items into the fridge for a minute or two afterward.

FUN WAYS TO USE SUGAR-FREE “LIKE MAGIC” SHELL TOPPING 

Frozen Treats: Pour over ice cream and frozen yogurt. Even dunk popsicles into it!

Cold Desserts: Yogurt parfaits, trifles, frozen pies, cheesecakes and more.

Drink Rims: Add to the rim of a cold cocktail glass before filling – what a fun and delicious surprise!

Decorative Designs: Write a name or “draw” a design on a chilled plate or serving dish before placing ice cream or desserts on them.

Dipped & Drizzled Treats: Dip cookies, pretzels, marshmallows, or other snacks into hardening chocolate sauce quick chocolate coating. Try drizzling on popcorn that’s cooled and then tossing on coarse sea salt – -so good!

Fruit: Dip fresh fruits like strawberries, bananas, and apple slices into the sugar-free chocolate topping or drizzle across a bowl or tray full of fruit.

Drizzle, dunk or dip! This Sugar-free “Like Magic” Shell Dessert Topping with have you fondly reminiscing about being a kid! A simple, two-ingredient chocolate sauce recipe with unlimited uses for your dessert creations.

 TIPS FOR MAKING & STORING SUGAR-FREE HARDENING CHOCOLATE SAUCE

No water. Don’t add any water to this recipe to thin it out — that’s going to mess it up. In fact, ensure that the bowl you are using to melt chocolate chips in is completely dry and free of moisture.

Choosing Chocolate Chips: You can use any chocolate chip that works for your dietary eating pattern – sugar-free or dairy-free or traditional style made with sugar. You can also choose another flavor of chip such as white chocolate, butterscotch, peanut butter, and such.

Oil Substitutions: NO! Do not substitute coconut oil for another oil – it will not harden back up in the same way and sauce will remain runny.  Also, do NOT use coconut oil that has been “fractionated”, a processing step that keeps it in a liquid state at room temperature. Only use regular coconut oil that will appear solid at room temperature (under 78 degrees). 

Application: Simply spoon the sugar-free magic shell onto its final destination or use a small drizzle bottle. I personally like to use a mini mason jar (2-oz), because I can also use that jar to melt the chocolate – so less mess!

Storage: Do not store leftovers in the fridge. Instead, cover tightly and keep on counter or pantry, until needed – it really doesn’t go bad (or, I’ve always gobbled mine up before it has – I’m sure it would take months). If it’s a colder day, you may need to pop it in the microwave for 5-10 seconds to make more pourable.

I like to use this sugar-free magic shell sauce on my protein cheesecakes, it adds a lot of fun, flavor and flair — and I don’t have to worry about excess sugar.

Get the recipe for Boston Cream Pie Protein Cheesecake.

Note: This post contains affiliate links and I may earn a small commission on purchases — which I use to offset operating expense for The Fit Fork. Thank you!

Drizzle, dunk or dip! This Sugar-free “Like Magic” Shell Dessert Topping with have you fondly reminiscing about being a kid! A simple, two-ingredient chocolate sauce recipe with unlimited uses for your low carb dessert creations.