Giant Peanut Butter Protein Cookie for One

A great way to keep your hand mindless out of the cookie jar is to bake up a single serve cookie — when it’s gone, it’s gone! My Giant Peanut Butter Protein Cookie for One tastes nostalgically amazing, yet is packed with protein so that it fills you up and you CAN be satisfied with just one.

Actually, you may even be happy and your sweet tooth satisfied with just half a cookie — it’s HUGE! I typically eat half and save the other half for later in the day, for double the yum time!

In order to avoid heating up a big oven to bake just one cookie, I made this protein peanut butter cookie in the toaster oven — I use the Instant Oven™ 18L Air Fryer Toaster Oven which is an air fryer and multi-purpose toaster oven. Only a few minutes to put the batter together and about 9 to 10 minutes to bake. In less than 15 minutes you’ll be enjoying a fresh-from-the-oven protein dessert.

Giant Peanut Butter Protein Cookie for One is HUGE, big enough to share (or not)!

Ingredients are natural peanut butter (you could swap for almond butter or, better yet, homemade sunflower seed butter), butter, egg white, coconut flour, baking soda, granulated stevia blend and a plant-based protein powder.

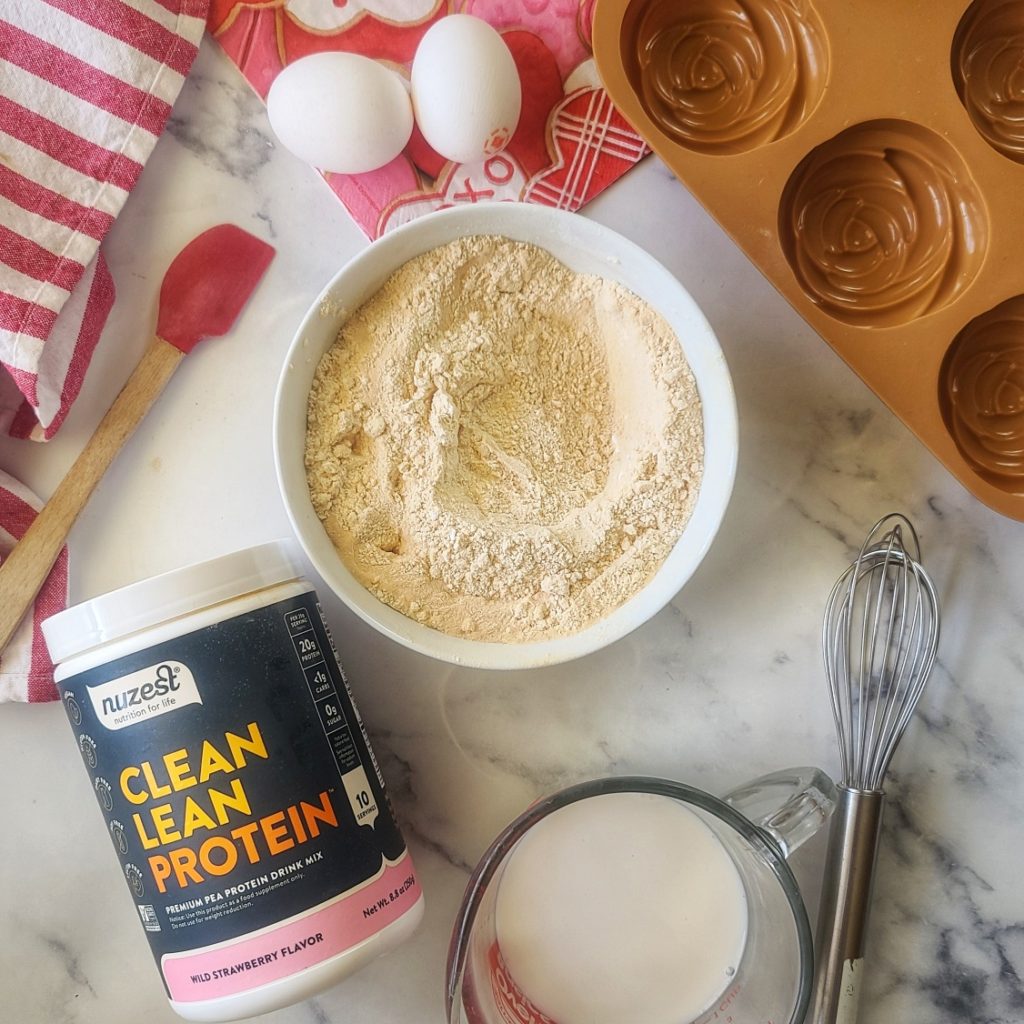
In terms of the best plant-based protein powder, I like the Clean Lean Protein Powder from Nuzest –it has a great nutrient profile and works for vegan, vegetarian and paleo diets. I love it for this protein powder cookie recipe and smoothies and other uses too! You can save `15% with my discount code: FITFORK .

Before baking the cookie, you want to press the dough ball out into an approximate 5″ diameter circle, and then make the fork marks which as SO nut butter cookie important. Because this protein cookie is bigger that an standard old fashioned peanut butter cookie, you can’t really to the criss-cross hatch marks. Instead, I used the tins of the for to go around the edges of the cookie with points of for going up almost to center of cookie, but not quite — this made a “center” that I then used the tips of the fork to make a bunch of little pock marks. It all looked like a flower to me in the end and didn’t puff out the design during baking either!

Pin this for later!

Note: This post contains affiliate links. I may earn a small commission from purchases made through links, however price to you remains the same. Proceeds help offset operating costs for The Fit Fork. Thank you!

5 from 4 votes
This ginormous cookie made with protein powder is a A delicious, low-carb peanut butter that will make you feel nostalgic for the treats of your childhood, but offers 20g of protein and only 7g net carb. Bake it in a toaster oven! Big enough to share, but you may not want too
Giant Peanut Butter Protein Cookie for One
Prep Time
5 mins
Cook Time
10 mins
Total Time
15 mins
 

A delicious, low-carb peanut butter that will make you feel nostalgic for the treats of your childhood, but offers 20g of protein and only 7g net carb. Bake it in a toaster oven! Big enough to share, but you may not want too!

Course: Dessert, Snack, treat
Keyword: cookie, cooking for one, peanut butter, protein powder
Servings: 1 serving
Calories: 343 kcal
Ingredients
  • 2 tbsp. butter softened
  • 2 tbsp natural-style peanut butter
  • 2 tbsp granulated stevia blend baking sweetener
  • 1 tbsp liquid egg white
  • 1/8 tsp baking soda
  • 1 scoop Nuzest Lean Clean Protein Powder (chocolate or vanilla) or 2tbsp other protein powder
  • 1 tbsp coconut flour
Instructions
  1. Mix together butter, peanut butter, stevia and egg white.
  2. Stir in baking soda, protein powder and coconut flour. Shape into big dough ball. Press out into thick circle with clean hands.
  3. Use tins of fork to press out remainder of way to about 1/3” thickness and approx. 5” diameter.
  4. Bake for 9 to 10 minutes. Let cook for 5 minutes on baking sheet
Recipe Notes

Vegetarian Mini BBQ “Meat” Loaf Muffins

Vegetarian Mini BBQ “Meat” Loaf Muffins are so good even without the ground beef (and, goodness, you know I love my beef). We all can benefit from eating more plants in our diet, whether a confirmed carnivore, adventurous omnivore, or full-fledged vegetarian.

Not your grandma's meatloaf but just as delicious make with lentils and oats! The spicy BBQ sauce gives this satisfying vegetarian meal some zing! So delicious, easy and suitable for meal prep. 398 calories and 21g per serving of two.

A balanced plate that varies from day to day, is best in my opinion. This vegetarian meatloaf is one of the dishes I like to prepare on nights when I’m not doing chicken, beef, or fish.  The protein count is still great, 21 grams per serving and 398 calories for TWO. Very filling and a good source of essential nutrients, especially dietary fiber (33% RDA) and iron (25% RDA).

Not your grandma's meatloaf but just as delicious make with lentils and oats! The spicy BBQ sauce gives this satisfying vegetarian meal some zing! So delicious, easy and suitable for meal prep. 398 calories and 21g per serving of two.

I use a jumbo muffin tin to create this meatloaf alternative, because I just prefer the crisper outside texture that the extra surface area of a muffin tin creates rather that smashing it all up in a loaf pan. Plus, the meatless muffins turn out great for making ahead in this manner and hold up well for freezer storage. This is a great vegetarian meal prep recipe, just double or triple your batch!

Check out the 15-second mini tutorial!

Putting this no meat meatloaf recipe together is as easy as cooking a pot of lentils and then smooshing it all up with the other ingredients before baking.

I don’t know why we don’t eat more lentils over here in the US. These little edible seeds in the legume family area food staple in so many other parts of the world – economical, nutritious and versatile! I used red lentils in this lentil loaf recipe, mainly I felt the color was best for an alternative meatloaf and they are already split, which means they cook faster than whole brown lentils. But no worries if you want to swap!

Not your grandma's meatloaf but just as delicious make with lentils and oats! The spicy BBQ sauce gives this satisfying vegetarian meal some zing! So delicious, easy and suitable for meal prep. 398 calories and 21g per serving of two.
Pin this for later!

A bit Reduced Sugar BBQ Sauce in the “meat” mixture as well as brushed on top in the last 5 minutes of baking, gives these lentil loaves a little zing! Use whatever bottled sauce you prefer, or make your own – if you are a traditionalist, then ketchup!

NOTE: This is also a gluten-free recipe, however to make suitable for vegan lifestyle you need to swap out egg and cheese for non-dairy alternatives.

Disclaimer: This post contains affiliate links. I may receive a small commission, but the price to you remains the same. Proceeds offset operating costs for The Fit Fork, thank you!

5 from 7 votes
Not your grandma's meatloaf but just as delicious make with lentils and oats! The spicy BBQ sauce gives this satisfying vegetarian meal some zing! So delicious, easy and suitable for meal prep. 398 calories and 21g per serving of two.
Vegetarian Mini BBQ “Meat” Loaf Muffins
Prep Time
10 mins
Total Time
45 mins
 

Not your grandma's meatloaf but just as delicous make with lentils and oats! The spicy BBQ sauce gives this satisfing vegetarian meal some zing! So delicious, easy and suitable for meal prep. 398 calories and 21g per serving of two.

Course: dinner, dinner, entree, lunch
Cuisine: American, gluten free, vegetarian
Keyword: barbecue sauce, bbq, meatless
Servings: 2 servings (2 muffins each)
Calories: 398 kcal
Ingredients
  • 1 cup water
  • ½ cup red lentils
  • 1/4 cup diced white onion
  • ¼ cup diced white mushrooms
  • 1 tsp. minced garlic
  • ½ cup quick cooking oats
  • 3 oz. shredded cheddar cheese 2 tbsp reserved
  • 2 tbsp liquid egg product
  • 1/4 cup bottled BBQ sauce
  • 1/2 salt
  • 1/4 teaspoon black pepper
Instructions
  1. Bring water to boil in small sauce pan. Add lentils and simmer, covered, for 25 minutes or until lentils are soft and most water is evaporated.
  2. Drain and excess water from lentils and coarsely mash with a fork.
  3. Transfer lentils to mixing bowl; cool slightly.
  4. Mix in onion, mushrooms, garlic, oats and cheese.
  5. Mix in egg, 2 oz. of BBQ sauce, salt and pepper.
  6. Spoon evenly among 4 spots in jumbo muffin pan that has been prepped with cooking spray.
  7. Bake at 350 degrees for 20 minutes; remove and spread remaining BBQ sauce and reserved cheese over each. Cook 5 more minutes.
  8. Cool 5 minutes, loosens sides with knife to release from pan.

  9. A serving is TWO! Enjoy warm or keep in fridge up to 4 days, or freezer for 3 months.

Recipe Notes

Spicy-Sweet Orange Beef Stir Fry with Sugar Snap Peas

Spicy-Sweet Orange Beef Stir Fry with Sugar Snap Peas is proof you can make an amazing, delicious, nutritious beef dinner in 15 minutes. I used a strip steak, but sirloin or even flank steak would be amazing too!

Vibrant and citrus-y, this lightly spicy-sweet orange beef stir-fry made with steak is sure to please on busy nights! It comes together in just 15 minutes, lots of veggie goodness with the sugar snap peas, and 100% beats going for takeout!

Portioned to serve two generously, this steak stir fry recipe can easily be doubled for a family of four. Also, it’s not very spicy, so the kids should love it. If you crave spicy heat, just add extra dried red pepper and Sriracha to the sauce step.

steak sliced thin for stir fry - thefitfork.com
Slice the steak thinly, between 1/8 and 1/4-inch thick!

Another reason why I love this beef and vegetable stir fry is that the macros are just so great to fuel my active lifestyle. One very generous sized portion fills me up and has 336 calories, 15g fat, 23g net carb, 30g protein. This 15-minute beef dinner isn’t including the macros (or time) for the rice/quinoa blend I usually serve it on. However, I love to meal prep that and have these cooked whole grains on hand in the freezer. Restaurant preparation of a similar orange beef recipe would come in at typically 3x the calories, fat and sugar – they usually coat the beef in cornstarch and use more oil (basically frying.

Check out the 15-second video tutorial!

PRO TIPS FOR ORANGE BEEF STIR FRY:

  • Have all ingredients before starting. Once you turn on the heat, the cooking process happens very fast
  • Slice beef across grain thinly, into 1/8-inch to ¼-inch slices are best.
  • For easier slicing, use a sharp knife and set meat in freezer for 10 minutes beforehand to firm up.
  • If following recipe as written for 2, use a 10-inch skillet. If doubling, use a 12-inch or larger skillet OR a 14-inch wok. If halving the recipe to just serve one, use an 8″ skillet.
  • Cook meat first and remove from skillet to rest while cooking vegetables.
  • Cook meat quickly in a single layer, flipping strips once until pink is JUST gone (because will continue to cook while resting on the plate).
  • Substituting similar vegetables is allowed! If you don’t have sugar snap peas, use something similar like green beans or snow peas. Broccoli would be amazing too!
  • If you MUST, you can use orange juice from a carton and skip the zesting step, but the fresh juice and zest really adds a huge splash of flavor.
Vibrant and citrus-y, this lightly spicy-sweet orange beef stir-fry made with steak is sure to please on busy nights! It comes together in just 15 minutes, lots of veggie goodness with the sugar snap peas, and 100% beats going for takeout!
Pin this for later!

Disclaimer: This post contains affiliate links. I earn a small commission on sales, however price to you remains the same. Proceeds offset operating costs for The Fit Fork. Thank you!

5 from 3 votes
Vibrant and citrus-y, this lightly spicy-sweet orange beef stir-fry made with steak is sure to please on busy nights! It comes together in just 15 minutes, lots of veggie goodness with the sugar snap peas, and 100% beats going for takeout!
Spicy-Sweet Beef Stir Fry with Sugar Snap Peas (for Two)
Prep Time
5 mins
Cook Time
8 mins
Total Time
13 mins
 

Vibrant and citrus-y, this lightly spicy-sweet beef stir-fry made with steak is sure to please on busy nights! It comes together in just 15 minutes and 100% beats going for takeout!

Course: dinner
Cuisine: Asian, Chinese
Keyword: 15 minute dinner, beef, snap peas, stir fry
Servings: 2 people
Calories: 336 kcal
Ingredients
  • 1 medium orange
  • 2 tbsp soy sauce or coconut aminos
  • 2 tbsp coconut sugar
  • ½ tsp red pepper flakes
  • ½ tsp minced ginger
  • ½ tsp minced garlic
  • 8 oz strip or sirloin steak sliced across grain to 1/8” thickness
  • 4 tsp sesame oil
  • 2 green onion bulb + stalk sliced thinly
  • 8oz sugar snap peas (1 1/2 to 2 cups(
Instructions
  1. Wash and dry orange; use zesting tool or microplaner to remove 1 to 2 teaspoons of zest from peel. Set aside. Slice orange in half; squeeze out 1/3 cup of juice into small bowl. Add soy sauce, brown sugar, red pepper flakes, ginger, garlic and ½ of orange zest. Stir to combine and set aside.
  2. Add oil to a 10 to 12” skillet and bring to medium-high heat. Add steak strips and sear for 2 minutes without turning. Use tongs to flip strips and cook on opposite side for about 2 more minutes until “just” cooked. Transfer to plate to rest.
  3. Reduce heat to low and add sugar snap peas and sauce mixture to skillet. Stir to combine and let simmer for approximately 3 to 4 minutes until thickened and snap peas crisp-tender. Toss back in cooked beef and stir for another 1 minute until warmed. Sprinkle sliced green onion and remaining orange zest over beef, serve with rice if desired.
Recipe Notes

Watermelon Gazpacho (with Feta) for One

Say YES to this watermelon soup in the summer, it’s so refreshing – naturally light and sweet-spicy and hydrating – a good way to “eat” your water. The cucumber and watermelon in the recipe are loaded with water (96% water and almost 93% water respectively) which makes it no surprise the pair up are actually botanic siblings.

Refreshing and just for you! Whip up a single-serving batch of this hydrating, delicious cold soup made with watermelon, cucumbers and tomato -- no-cook and ready in minutes.

In addition to staying hydrated on a hot day, I like slurping up a bowl of this cold soup because it doesn’t make me feel bloated and heavy — in fact, it’s detoxing after an indulgent weekend thanks to robust levels of water, fiber, important vitamins, minerals and antioxidants.

Watch this 15-second tutorial!

 I have been on a binge of “recipes for one” lately and have been working behind the scenes on a cooking for one cookbook. Making soup for one, may seem like too much effort, but trust me this simple and speedy recipe is almost no effort at all. And, even with college kids at home this summer, I still like to make this single-serve gazpacho and other recipes for one because I hate food waste, and they are most often always going their separate ways at the dinner area (such social lives)!

Refreshing and just for you! Whip up a single-serving batch of this hydrating, delicious cold soup made with watermelon, cucumbers and tomato -- no-cook and ready in minutes.

Making this cold soup with watermelon is easy-breezy – just gather up the ingredients (a little chopping involved, but it’s not intense), and then drop most everything in the blender (except reserve some extra watermelon that’s be diced up really find to stir into the blended soup for texture). And, top with crumbled feta cheese and extra fresh herbs, if desired.  

BTW, for single-batch recipes like this watermelon gazpacho, I like to use a mini-blender for effective blending. Often in my larger blender, the ingredients don’t rise high enough over the blade level.

Pin this for later!

Fruit soups make a good substitute for dessert when I’m being mindful of my diet.  The recipe makes about 12-ounces and has 219 calories, 15g fat, 19g carb, 3g dietary fiber, and 4g protein. If you want to cut down the fat and calorie count, you can trim down the olive oil from 1 tablespoon to 2 teaspoons and by omit the tablespoon of crumbled feta cheese as the topping.  Together this is about a 60-calorie reduction – it’s still a tasty recipe, however, I think the recipe is more satisfying how originally written.

Detoxing Cranberry Gazpacho makes a lovely light chilled soup for your meal. Blended with healthful ingredients like cranberries, watermelon, cucumber to flush the body of excess water and toxins.

If you love cold fruit soups and watermelon, I think you’ll be berry excited about a past recipe of mine — Cranberry Watermelon Gazpacho.

Note: This post contains affiliate links. I earn a small commission from products purchased, but price to you remains the same. Proceeds help offset operating costs for The Fit Fork. Thank you!

5 from 5 votes
Watermelon Gazpacho! Refreshing and just for you! Whip up a single-serving batch of this hydrating, delicious cold soup made with watermelon, cucumbers and tomato -- no-cook and ready in minutes.
Watermelon Gazpacho (with Feta) for One
Prep Time
5 mins
Total Time
5 mins
 

Refreshing and just for you! Whip up a single-serving batch of this hydrating, delicious cold soup made with watermelon, cucumbers and tomato — no-cook and ready in mintues.

Course: Snack, Soup
Keyword: watermelon
Servings: 1 serving
Calories: 219 kcal
Ingredients
  • 1 cup chopped cold watermelon reserve ¼ cup
  • 1 5- ounce ripe tomato
  • ½ cup chopped cucumber peeled and seeded
  • 1 tablespoon olive oil
  • 1 teaspoons lime juice
  • ½ teaspoon red wine vinegar
  • 1/8 teaspoon red pepper flakes
  • 1/8 teaspoon black pepper
  • 1/8 teaspoon salt more or less to taste
  • 1 tablespoon chopped fresh cilantro or other fresh herb like mint or basil divided
  • 1 tablespoon crumbled feta cheese
Instructions
  1. Set aside 1/4 cup of watermelon and dice down into small bits (will be stired in at the end).

  2. Add watermelon, tomato, cucumber, olive oil, lime juice, vinegar, red pepper, most of the fresh herbs (save some for garnish), red and black pepper, and pinch of salt to blender. Blend for about 30 seconds or until mostly smooth.

  3. Best served cold, so if you did not start with cold watermelon, chill gazpacho for at least 30 minutes.

  4. Pour into bowl and stir in diced watermelon. Top with crumbled feta cheese and herbs.

Recipe Notes

No-Crust Tomato Pie – Lower Carb, Gluten-free

Crustless Tomato Pie is a low-carb spin on one of my favorite southern dishes. Such a yummy way to use up a bumper crop of sweet, ripe tomatoes.

Most southern tomato pies have a pastry crust, but I personally like mine without! Tomatoes tend to get watery and seep all over a crust and make it unpleasantly soggy, especially you have leftovers. But a crustless tomato tart or pie doesn’t have nearly the same issue.

Watch it – 15-second tutorial!

However, one of the most important preparation steps you’ll want to take for this tomato mozzarella pie is to “sweat” the tomatoes. To do this simple task, just sprinkle your slice tomatoes with a little salt and let them rest on a plate for about 30 minutes. Afterward, drain off any liquid released onto the plant and use paper towels to blot up any excess moisture (this also helps remove some of the salt so that it doesn’t overpower). Sweating tomatoes like this helps keep them from making dishes watery and also makes the tomato flavor more intense – win-win!

Sweat the tomatoes with a little sale for 30 minutes - this helps remove excess moisture so recipe doesn't get soggy and also intensify flavor.
Don’t skip the 30-minute tomato “sweat” session!

To assemble the tomato pie, you just layer tomato slices and half of the egg-cheese mixture, and then repeat those layers again, and finish with a final tomato layer – so 3 layers of tomatoes and two layers of filling. The recipe does call for two eggs in it, but only to serve as a binder to help keep everything together – it’s definitely not eggy like a quiche or frittata.  It’s all about the tomatoes!

Ready to pop in the oven for 30 minutes!

Serve a side dish to dinner or light lunch – it’s even delicious as summery breakfast. My husband says it’s a casserole with tomatoes, but I say it’s a low carb tomato pie since it’s in a pie dish – he does agree it’s delicious. My kids say the low carb tomato casserole slash pie tastes like a pizza! Any way you slice it, we gobble it all up.

Pin this for later!

However, if you do want to heat leftovers up the next day, you can microwave a slice for about 45 seconds. Or, if you have an air-fryer, I prefer to set my slice in a small dish and air fry at 390F for about 6 minutes – this returns the cheese to more of the original gooey-crispy state.

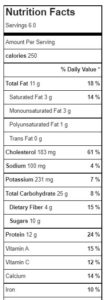
Makes 6 servings, each with 178 calories, 9g carb, 12g fat, 13g protein

Disclaimer: My post contains affiliate links. I earn a small commission on products purchase, however the price to you remains the same. Thank you!

5 from 6 votes
Crustless Tomato Pie: No crust means the intense flavor of vine-ripe tomatoes shines through in this recipe whether you want to call it a pie, tart or casserole. Simple ingredients, lower carb, gluten-free and sure to delight for breakfast, brunch or as a side dish any night.
No Crust Tomato Pie – Low Carb and Gluten Free
Prep Time
10 mins
Cook Time
30 mins
“Sweating” tomatoes
30 mins
Total Time
1 hr 10 mins
 

Crustless Tomato Pie: No crust means the intense flavor ofvine-ripe tomatoes shines through in this recipe whether you want to call it apie, tart or casserole. Simple ingredients, lower carb, gluten-free and sure todelight for breakfast, brunch or as a side dish any night.

Course: Appetizer, Breakfast, brunch, lunch, Side Dish
Cuisine: American, Southern
Keyword: brunch, pie, tart, tomato
Servings: 6 servings
Calories: 178 kcal
Ingredients
  • 1 ½ lbs. tomatoes about 5 to 6 medium
  • 1 tsp salt
  • 1 cup chopped sweet onion
  • 1 tablespoon butter
  • 2 eggs
  • ½ tsp black pepper
  • 2 tablespoons fresh chopped basil
  • 2 cups shredded mozzarella reserve 1/3 cup
  • 2 green onions tops and whites chopped
Instructions
  1. Slice tomatoes and sprinkle with salt. Let sit 30 minutes, then pour off juices and blot excess with paper towels.
  2. While tomatoes are “sweating,” saute onion in butter. Let cool of a bit.
  3. Mix together cooled sauteed onions, eggs, pepper, fresh basil, and 1 2/3 cups of the mozzarella.

  4. Layer pie dish with tomatoes, then dollop and spread ½ of the cheese-egg mixture on top.
  5. Sprinkle with green onions. Layer with tomatoes and remaining cheese mixture.
  6. There should be enough tomatoes left for the top. Arrange these and sprinkle with remaining cheese.
  7. Bake at 375F for 30 to 40 minutes, or until cheese bubbling and starting to brown in places.
  8. Let rest for 15 minutes before cutting into 6 wedges.
Recipe Notes

Makes 6 servings, each with 178 calories, 9g carb, 12g fat, 13g protein