Spicy Avocado Noodles with Egg

This post is part of a blogger’s recipe contest sponsored by JSL Foods.

An egg, green noodles and tomatoes, oh my! It sounds kinda Dr. Suess-y, but your taste buds will enjoy the flavor fun! Spicy Avocado Noodles with Egg makes a well-round, hearty, delicious breakfast or, for that matter, lunch or dinner!  

Make a nourishing, balanced noodle bowl for breakfast in just 10 minutes! Thanks to pre-cooked, fresh noodles and a no-cook sauce featuring spinach and avocado! Also perfect for lunch or dinner! Serves one, great on those solo days!

Nothing easier than making noodles for a meal . . .  especially when they’re already cooked for you! I had a crazy, busy week and definitely needed to simply life and shave time of meal making – yet still eat well to fuel all my sports activities.

Fortune Noodles from JSL Foods - thefitfork.com

I started this breakfast noodle bowl with packaged fresh noodles from Fortune — the Hot & Spicy Yakisoba noodles. These fresh noodles are available in the refrigerated shelves of the grocery store. There are other flavors and noodle types available and these single-serve packages of noodle goodness come along with spice packets to add flavor (I actually incorporated the packet in my special sauce for this recipe).  To prep the noodles, they simply need to be steamed in the fridge or stove for a minute or two with a bit of water – so easy and tender fresh!

Make a nourishing, balanced noodle bowl for breakfast in just 10 minutes! Thanks to pre-cooked, fresh noodles and a no-cook sauce featuring spinach and avocado! Also perfect for lunch or dinner! Serves one, great on those solo days!
Check out the IDEA PIN for the video instruction.

The avocado sauce for pasta is uncooked and blends up in seconds. The spicy avocado sauce that coats these noodles is simply water, the “hot & spicy” spice packet, spinach, lemon juice and ripe avocado!

The roasted grape tomatoes are thrown down in a toaster oven. Just slice them in half, spray with olive oil and let roast for about 8 to 10 minutes until softened. If you don’t have the 10 minutes to spare, throw on fresh grape tomatoes or even sun-dried tomatoes. This green noodle and egg recipe finishes up with a sunny side up egg placed on top – cook it to your preference hard yolk or runny!

Make a nourishing, balanced noodle bowl for breakfast in just 10 minutes! Thanks to pre-cooked, fresh noodles and a no-cook sauce featuring spinach and avocado! Also perfect for lunch or dinner! Serves one, great on those solo days!

This breakfast noodle bowl is a wonderful morning meal that offers veggies, protein and carbs to get you up and charging ahead for the day! You can use the same spicy avocado sauce and top with roasted shrimp for a fabulous dinner noodle bowl! The Fortune noodles from JSL Foods are so easy and versatile – and perfect for making meals for singles or couples (I’m a new empty-nester, so getting used to cooking on a smaller scale)! But, if you have a bigger family, they offer a larger-sized bags of pre-cooked plain yakisoba noodles, too!  

With Fortune noodles and a few simple ingredients, a wonderful breakfast, lunch or dinner bowl can be made in minutes!
Make a nourishing, balanced noodle bowl for breakfast in just 10 minutes! Thanks to pre-cooked, fresh noodles and a no-cook sauce featuring spinach and avocado! Also perfect for lunch or dinner! Serves one, great on those solo days!

You can purchase Fortune products at: Safeway, Fred Meyer, QFC, Albertson’s, Associated Stores, Cub Foods, United Supermarkets, Roche Bros, Meijer, Shaw’s, Stop N Shop, Price Rite, Shop Rite, Wakefern, Price Chopper, Giant, HEB, Walmart and Grocery Outlet.

Learn more about JSLfoods.com  and follow along on Facebook,  Twitter, and Instagram!

Spicy Avocado Noodles with Egg
Cook Time
10 mins
Total Time
10 mins
 

Make a nourishing, balanced noodle bowl for breakfast in just 10 minutes! Thanks to pre-cooked, fresh noodles and a no-cook sauce featuring spinach and avocado! Also perfect for lunch or dinner! Serves one, great on those solo days!

Course: Breakfast, lunch
Cuisine: Asian, fusion
Keyword: avocado, egg, pasta, rice noodles
Servings: 1 serving
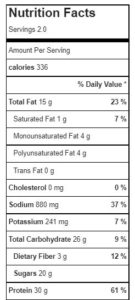
Calories: 468 kcal
Ingredients
  • 6 grape tomatoes halved*
  • Olive oil cooking spray
  • 1 large egg
  • Salt and pepper to season
  • 2 oz. avocado flesh about ½ of a small avocado
  • ¼ cup water
  • 1 cup loose-packed spinach leaves
  • 2 teaspoons fresh lemon juice
  • 1 single-serve package of fresh stir-fry noodles like Fortune with seasoning packet.
Instructions
  1. Place halved tomatoes on toaster oven pan, spray with olive oil spray and roast at 400F for about 10 minutes. This is the longest step, so start first. *Can skip and use fresh tomatoes, sun-dried tomatoes from jar, or marinated tomatoes from the olive bar at store.
  2. Make sauce in small blender with spice packet from noodles. Add ¼ cup water, spinach, lemon juice, and avocado to blender pitcher. Blend for about 30 seconds until smooth.
  3. Cook noodles according to manufacturer’s instructions (but without spice packet as it’s already been used ;-). Drain noodles if there is residual water.
  4. Cook single egg, sunny side up, to desired yolk doneness, in small skillet. Season with salt and pepper.
  5. Pour sauce over hot noodles. Top with roasted tomatoes and egg.
Recipe Notes

7-Layer Italian Pesto Quinoa Dip – Easy Appetizer

Seven Layer Italian Pesto Quinoa Dip is a quick, easy and elegant appetizer for holiday entertaining or just everyday munching. Made with flavorful, nourishing items convenient to keep on hand in the pantry and fridge, this simple-to-assemble party dip can be ready to serve in under 10 minutes – and stores beautifully overnight if you want to make ahead.

This quick and easy layered dip makes a show-stopping appetizer in just a few minutes thanks to bottled pesto sauces (I used Sea Asparagus Pesto - but feel free to get creative). You can also serve mixed up in a bowl for an easier presentation. Great scooped onto crackers, or with chips -- also leftovers fantastic on a green salad for lunch or a light dinner.

Inspired by easy party dips my mom used to make in the 80s as well as elegant molded and stacked tartare dishes, this layered dish features strata upon strata of marinated and bold flavors and various textures that play well together when scooped up with a chip, dolloped on a cracker or just eaten by the spoon! I like to use up any leftovers sprinkled on a green salad!

This quick and easy layered dip makes a show-stopping appetizer in just a few minutes thanks to bottled pesto sauces (I used Sea Asparagus Pesto - but feel free to get creative). You can also serve mixed up in a bowl for an easier presentation. Great scooped onto crackers, or with chips -- also leftovers fantastic on a green salad for lunch or a light dinner.

Many of the ingredients (such as the hummus, marinated artichokes, and sun-dried tomatoes) can be conveniently purchased pre-prepared in the deli or gourmet aisle of your favorite market. To make things speedy, you can also pick up a pouch of pre-cooked quinoa on the grain aisle – or defrost a bag of frozen cooked quinoa that has been meal prepped (that is my economical way – see quinoa freezer and meal prep post here).

This quick and easy layered dip makes a show-stopping appetizer in just a few minutes thanks to bottled pesto sauces (I used Sea Asparagus Pesto - but feel free to get creative). You can also serve mixed up in a bowl for an easier presentation. Great scooped onto crackers, or with chips -- also leftovers fantastic on a green salad for lunch or a light dinner.

The flavor cornerstone of this Italian layered dip is pesto – but not just any ole pesto! I used Sea Artichoke Pesto from Foraged & Found. I must admit, when I was sent some jars to try out, I did have to Google “What is Sea Asparagus.” What I found out is that Sea Asparagus (Salicornia) is a sea succulent that has a salty, ocean taste when eaten raw and brined, mellower flavor when cooked — used as an ingredient it really maximizes the umami taste in so many dishes from pasta and pizza to seafood and grilled meats.

Sea Asparagus sustainably harvested in Alaska.

What I love about the Foraged & Found company is that they have found a way to share healthful Alaskan foods from the wild that have been sustainably harvested and transformed into some of my favorite kitchen staples – like this Sea Asparagus Pesto. The sea asparagus pesto tastes very similar to a traditional pesto (but better) made with additional ingredients such as almonds, Parmesan cheese, olive oil, garlic and lemon. So clever and eco-conscious!

Sea Asparagus Pesto
Sea Asparagus Pesto from Foraged & Found is mixed into quinoa.

Turning this pesto layered dip is a snap! Most of the pesto is soaked into the quinoa, and a generous dollop is saved for the top.

This quick and easy layered dip makes a show-stopping appetizer in just a few minutes thanks to bottled pesto sauces (I used Sea Asparagus Pesto - but feel free to get creative). You can also serve mixed up in a bowl for an easier presentation. Great scooped onto crackers, or with chips -- also leftovers fantastic on a green salad for lunch or a light dinner.
Use a 16-oz. container for a mold.

You’ll need a 16-ounce container to use as a mold – it can be cylinder-shaped (like a yogurt or sour cream container) or even a bowl – just make sure that the bottom (which will be the “top” when inverted) is narrower than the opening. I simply used the square plastic container that was provided at the olive bar when I loaded up on marinated tomatoes and artichokes for the recipe!

When layering this creative Italian dip, remember that each level loaded in goes in reverse of how it will look when presented. When inverting on a plate and releasing from a mold, the first ingredients put in at the bottom of the container become the items on top.

Order for Layers (press down lightly, as needed, after each layer):

Note: Start with 1 Tbsp. of reserved oil from the marinated artichokes or tomatoes (this helps release from the mold)

  • Pecans, chopped
  • Blue Cheese, crumbled
  • Garlic Hummus
  • Sun-dried Tomatoes, chopped
  • Marinated Artichokes, chopped
  • Fresh Spinach, shredded
  • Quinoa Mixed with Pesto

Chill a bit if needed to firm up and then, invert by placing a plate on top and flipping over quickly.

This quick and easy layered dip makes a show-stopping appetizer in just a few minutes thanks to bottled pesto sauces (I used Sea Asparagus Pesto - but feel free to get creative). You can also serve mixed up in a bowl for an easier presentation. Great scooped onto crackers, or with chips -- also leftovers fantastic on a green salad for lunch or a light dinner.
If your mold fails, just serve it jumbled up in a bowl — it still tastes great!

The cool thing about this Italian quinoa recipe is that if you have a “fail” when trying to release the mold, and it falls all over the place, you can just throw it all into a bowl and stir up! It tastes just the same, and still looks pretty because it’s so colorful – in fact, I’ve made it this way on purpose before! Also, you can just skip the inverting and stand-alone presentation – just layer it up how you want in a dish. The only downside here is that all the pretty ingredients can’t be seen at once.

Learn more about Foraged & Found and get more sea asparagus recipes:

Note: This post is sponsored by Foraged & Found as part of a bloggers recipe contest. #foragednfoundak #eatwild #wildalaskanprovisions

5 from 3 votes
This quick and easy layered dip makes a show-stopping appetizer in just a few minutes thanks to bottled pesto sauces (I used Sea Asparagus Pesto - but feel free to get creative). You can also serve mixed up in a bowl for an easier presentation. Great scooped onto crackers, or with chips -- also leftovers fantastic on a green salad for lunch or a light dinner.
7-Layer Italian Pesto Quinoa Dip
Prep Time
10 mins
Total Time
10 mins
 

r a light dinner.

Course: Appetizer, entree salad, Snack
Cuisine: Italian
Keyword: appetizer, dip, party food, pesto, quinoa
Calories: 187 kcal
Ingredients
  • ¼ cup chopped pecans
  • 2 oz. blue cheese crumbled
  • 4 oz. garlic hummus
  • 1 cup fresh spinach chopped
  • 4 oz. sun-dried tomatoes packed in oil (mostly drained*) chopped
  • 4 oz. artichokes packed in oil mostly drained, chopped
  • 4 oz. Sea Asparagus Pesto from Found & Foraged reserve 2 Tbsp. for garnish
  • 1 cup cooked quinoa
  • * Reserve 1 tbsp oil from marinated tomatoes or artichokes to use as a “lube” for the mold.
Instructions
  1. Use a 16-ounce square or round “mold” that is slightly tapered, meaning the bottom is narrower than the top – this will allow layered dip to slide out easily when inverted. A sour cream or yogurt container works nicely.
  2. In medium bowl, mix together cooked quinoa with most of the 4 ounces of pesto (save about 2 tablespoons for garnish).
  3. Add the approximate 1 Tbsp. of reserved oil from the marinated artichokes or tomatoes to bottom of mold container and swirl around. This helps release layers later).
  4. Add layers in this order: Chopped Pecans, Crumbled Blue Cheese, Hummus, Chopped Sun-dried Tomatoes, Chopped Marinated Artichokes, Shredded Spinach, Pesto Quinoa Mixture.
  5. If needed, stick in fridge for 10 minutes to firm up (sometimes the hummus gets too soft at room temperature).
  6. Remove from fridge and carefully run knife around edges of container to help release layers when inverted (but taking care not to “smear” it all together).
  7. Place plate on top of mold opening and quickly invert, gently pulling off mold container. ***
  8. Dollop with remaining pesto.
  9. *** If you have a failure when trying to release the mold, the nice thing about this recipe is that it can be served in a bowl stirred together as a jumble! It tastes just the same, and still looks pretty because it’s so colorful!
Recipe Notes

Low-carb Pumpkin Spice Latte Cookies (gluten-free)

Who wouldn’t love a low-carb, gluten-free cookie inspired by the most coveted coffee shop drink of autumn – pumpkin spice latte!?  Easy to make, using almond flour and natural sweetener alternatives to keep the carbs down, these pumpkin spice cookies turn out soft, chewy and heavenly-scented every time!

Whip up a batch of these amazing autumn-inspired pumpkin spice cookies in under 30 minutes! Lower carb, gluten-free plus, soft, chew and amazing flavorful -- especially with the coffee glaze!

Ready in under 30 minutes from mixing up to munching down! So, let’s get going!

The first step in these table sugar-free pumpkin cookies is to mix up the dough. With the butter softened, I found it easy enough to mix up by hand – but a mixer is fine too! 

First the butter and sugar substitute are creamed. I used a monk fruit-erythritol granulated baking blend that has a 1:1 sugar replacement equivalency. So, for this matter, you can swap back in any type of sugar that you care for (like coconut sugar or a stevia blend), but be aware that it will change the nutritional value. Also note, the cookies are one the lighter sweet side because the glaze is very sweet – so you might consider adding an additional ¼ cup if you are planning to make the cookies WITHOUT glaze.

Whip up a batch of these amazing autumn-inspired pumpkin spice cookies in under 30 minutes! Lower carb, gluten-free plus, soft, chew and amazing flavorful -- especially with the coffee glaze!
Pin this for later!

Next beat in egg. Then pumpkin and vanilla. Finally mix in the dry ingredients including raw almond flour and 1:1 gluten-free baking blend.  Three cups of total flour is used in this low carb pumpkin spice cookie recipe – 2 cups of almond flour and 1 gluten-free flour mix.  The gluten-free flour mix bumps up the carb count a bit, you can also substitute back in all almond flour, but I suggest using a super fine ground almond meal for better consistency that won’t crumble apart after baking. Using all almond meal will also lower the per-cookie net carb count, making it officially a compliant with keto pumpkin cookie.

Whip up a batch of these amazing autumn-inspired pumpkin spice cookies in under 30 minutes! Lower carb, gluten-free plus, soft, chew and amazing flavorful -- especially with the coffee glaze!
Portion dough into approximate 2 Tablespoon balls.

While the gluten-free pumpkin cookies are baking in the oven (on a sheet lined with parchment or silicone baking mat) for 15 minutes, whip up the easy coffee-spiked glaze. It’s a bit of heavy cream, along with espresso powder, vanilla and POWDERED confectioner’s erythritol (or similar powdered product).  Achieving the perfect glaze consistency is the trickiest part of this recipe, so I always hold back just a TINY amount of my cream until I have the powdered sugar substitute, espresso powder and vanilla mixed it. If it’s too thick, I add it back in, plush a few more drops if needed. If it’s too thin, I mix in more confectioner’s sugar substitute until just right. The consistency should not be runny or stiff – somewhere in between!

Whip up a batch of these amazing autumn-inspired pumpkin spice cookies in under 30 minutes! Lower carb, gluten-free plus, soft, chew and amazing flavorful -- especially with the coffee glaze!

Once the cookies have cooled on the pan to “almost” room temperature (about 5 or 10 minutes), I put a dollop of the glaze/frosting on top – the small amount of warmth left on the cookie will help it spread. However, if the low carb pumpkin spice cookies are too hot still, it will run right off. After glazing the pumpkin coffee cookies, let it set up fore 5 minutes before serving or storing.

Whip up a batch of these amazing autumn-inspired pumpkin spice cookies in under 30 minutes! Lower carb, gluten-free plus, soft, chew and amazing flavorful -- especially with the coffee glaze!

Store these gluten-free pumpkin cookies layered between wax paper in an air-tight container. Should stay fresh for up to a week, or also freezes well.

Whip up a batch of these amazing autumn-inspired pumpkin spice cookies in under 30 minutes! Lower carb, gluten-free plus, soft, chew and amazing flavorful -- especially with the coffee glaze!
5 from 3 votes
Whip up a batch of these amazing autumn-inspired pumpkin spice cookies in under 30 minutes! Lower carb, gluten-free plus, soft, chew and amazing flavorful -- especially with the coffee glaze!
Low Carb Pumpkin Spice Latte Cookies (gluten-free)
Prep Time
10 mins
Total Time
25 mins
 

Whip up a batch of these amazing autumn-inspired cookies in under 30 minutes! Lower carb, gluten-free and amazing flavorful — especially with the coffee glaze!

Servings: 20 cookies
Calories: 183 kcal
Ingredients
  • 1/4 cup salted butter
  • 1/3 cup monk fruit–erythritol granulated sweetener (or other 1:1 cup equivalency sweetener0
  • 1/2 cup pumpkin puree
  • 1 large egg
  • 1 tsp vanilla extract
  • 2 cups almond flour
  • 1 cup gluten-free baking blend 1:1 cup equivalency or additional almond flour
  • 1 tbsp pumpkin pie spice
  • 1/2 tsp baking powder
For glaze/frosting
  • 1/4 – 1/3 cup powdered confectioner’s monk fruit- erythritol granulated sweetener
  • 1 tablespoon espresso powder
  • 2 tablespoons cup heavy cream
  • 1/4 tsp vanilla extract
Instructions
  1. Preheat the oven to 350 F degrees. Line a large baking sheet with silicone baking sheet or parchment paper.
  2. In large bowl, beat together the butter and sweetener, until creamy
  3. Beat in the pumpkin puree, egg, and vanilla.
  4. Beat in the almond flour, gluten-free flour blend, pumpkin pie spice, and baking powder until a uniform cookie dough forms.
  5. Use a cookie scoop to scoop balls of dough, about 2 tablespoons per cookie. Release onto the lined baking sheet, 2 inches apart.
  6. Use bottom of a glass to flatten cookies to about 1/4 inch thick.
  7. Bake approximately 15, until set and turning lightly golden brown at edges.
  8. Meanwhile, make the glaze/frosting, if using. In a small bowl, whisk together the glaze ingredients, until smooth. If too thin, add additional sweetener, if too thick, add a few drops more of cream – however, will melt some on warm cookies, so you don’t want it to be too thin at beginning.
  9. When the cookies are done, let cook for 5 or so minutes until just slightly warm. Spread a teaspoon of glaze on top of each cookie and let set to completely cool for another 10 minutes.
  10. Store in an air tight container.
Recipe Notes

Oven Butternut Squash Risotto with Shrimp – Under 30-minute Meal

Oven Butternut Squash Risotto with Shrimp makes a comforting, delicious and arguably balanced meal-in-a-pot boasting a whole grain, vegetable and protein.

Oven Butternut Squash Risotto with Shrimp makes a comforting, delicious and arguably balanced meal-in-a-pot boasting a whole grain, vegetable and protein. It’s so simple and easy to make, an under 30 minute meal with little hand-on effort, many call this oven method “cheater’s risotto” – but it’s totally legit!

Plus, this butternut risotto cooks up fast and with much less hands-on prep than a traditional risotto recipe – there is no endless stirring at the stove top. Instead, the rice bakes up in the oven for 20-minutes, being stirred up with Parmesan cheese just as serving.  

Oven Butternut Squash Risotto with Shrimp makes a comforting, delicious and arguably balanced meal-in-a-pot boasting a whole grain, vegetable and protein. It’s so simple and easy to make, an under 30 minute meal with little hand-on effort, many call this oven method “cheater’s risotto” – but it’s totally legit!

With olive oil and simple spices, the oven-roasted shrimp only take 10 minutes to make and can be popped into the oven on a baking sheet, at the second half of the rice timer. This way, the shrimp and risotto and done at the same time!

Ingredients for Butternut Squash Risotto in the Oven
Ingredients for the butternut risotto are simple and easy!

Learning how to make oven butternut squash risotto is a game changer. Use a Dutch oven pot in the oven and just walk away until done – this method has freed me up to finish other dinner chores and/or just have more time to connect with family members who have gathered in the kitchen to investigate the inviting, comfort food aromas wafting about.

Plus, elevating oven risotto with butternut squash helps keep the dish creamy, adds an earthy, lightly sweet flavor, and increases the nourishing benefits with dietary fiber, vitamin A, and more.  To keep the oven butternut squash with shrimp recipe simple, I purchase fresh-cubed butternut squash in the produce department. However, you can also cut up your own squash and/or use a bag of thawed frozen butternut chunks.

Oven Butternut Squash Risotto with Shrimp makes a comforting, delicious and arguably balanced meal-in-a-pot boasting a whole grain, vegetable and protein. It’s so simple and easy to make, an under 30 minute meal with little hand-on effort, many call this oven method “cheater’s risotto” – but it’s totally legit!

If you are just learning how to make risotto in the oven or traditionally (or you’ve had a risotto fail in the past), please note that you should NOT use a long-grained rice. A short-grained rice offers the signature creamy results of a classic risotto and Arborio rice is a common variety used. Some medium-grain rice may be used, too.

Oven Butternut Squash Risotto with Shrimp makes a comforting, delicious and arguably balanced meal-in-a-pot boasting a whole grain, vegetable and protein. It’s so simple and easy to make, an under 30 minute meal with little hand-on effort, many call this oven method “cheater’s risotto” – but it’s totally legit!

Some people call this method “cheater’s risotto,” however I see nothing suspect about it, lol! It’s just a smart way to get a nourishing meal on the table fast! I typically pair my cheater’s butternut squash risotto with an apple kale salad for extra fall-season flair.

 If you want to keep the recipe non-dairy, you can swap a non-dairy butter alternative for the butter and use an alternative to Parmesan cheese, like Parma.

Easy Roasted Shrimp in the Oven

Making the shrimp is just as easy, toss together olive oil, garlic salt and paprika and bake alongside the risotto during the last 8 minutes.

Disclaimer: This post contains affiliate links. I earn a small commission from products purchase, however the price to you remains the same. Proceeds are used to offset operating expenses for The Fit Fork – thank you for your support.

5 from 2 votes
Oven Butternut Squash Risotto with Shrimp makes a comforting, delicious and arguably balanced meal-in-a-pot boasting a whole grain, vegetable and protein. It’s so simple and easy to make, an under 30 minute meal with little hand-on effort, many call this oven method “cheater’s risotto” – but it’s totally legit!
Oven Butternut Squash Risotto and Shrimp
Prep Time
5 mins
Cook Time
20 mins
Total Time
25 mins
 

Oven Butternut Squash Risotto withShrimp makes a comforting, delicious and arguably balanced meal-in-a-pot boastinga whole grain, vegetable and protein. It’s so simple and easy to make, an under30 minute meal with little hand-on effort, many call this oven method “cheater’srisotto” – but it’s totally legit!

Course: dinner, dinner, entree, entree
Cuisine: American
Keyword: butternut squash, rice, risotto, shrimp
Servings: 4
Ingredients
  • 2 tablespoons olive oil
  • 1 tablespoon minced garlic
  • 1 cup arborio rice or other short to medium grain rice
  • 1/3 cup white wine can omit
  • 3 ½ cups reduced sodium chicken broth
  • 1 10- ounce bag chopped butternut squash produce dept shelf or frozen and thawed
  • ½ teaspoon sea salt
  • ½ teaspoon ground white pepper
  • 1 tablespoons butter or non-dairy butter alternative
  • 2/3 cup grated Parmesan cheese or non-dairy Parmesan alternative
  • 20 large shrimp shelled and veined (thawed if frozen)
  • 1 tablespoon olive oil
  • 2 teaspoons paprika
  • 1 teaspoon garlic salt
Instructions
  1. Preheat oven to 400F degrees.
  2. In 3.5-quart Dutch oven with lid, heat oil over medium heat on stove top. Add garlic and rice and stir around for 2 minutes to toast rice.
  3. Pour in wine to deglaze pan, stirring around over heat, stirring until mostly evaporated. Add chicken broth and butternut squash cubes and bring to a boil for 1 minutes.
  4. Put lid on pot and place on middle rack of oven, baking for 20-mintues.
  5. Meanwhile, quickly prepare shrimp by placing on rimmed baking sheet and tossing with olive oil, salt, and paprika.
  6. In the last 6 to 8 minutes of cooking the risotto, place pan of prepared shrimp in the oven. Roast until the shrimp are pink and just cooked through, about 6 to 8 minutes.
  7. Remove rice from oven, most of the water should have been absorbed. If it still looks a little watery, let cool for 5 minutes with lid off before stirring in butter and cheese.
  8. Serve risotto with shrimp and garnish with finely chopped fresh sage and a little extra Parmesan cheese, if desired.
Recipe Notes

Watermelon Facts & Snacks for Your Active Lifestyle

This post is sponsored by Watermelon.org. However, all content, opinions, and enthusiasm for watermelon remain my own!

Runners, triathletes, hybrid athletes, gym rats, fitness enthusiasts, parents with kids in sports, and everyday active folks who are always on the go – I’m talking to YOU!

Watermelon is more than just the quintessential fruit of summer – it’s a highly functional food that can (and should) be enjoyed all year ‘round in an athletes training diet including those who are striving to optimize their health and wellness though consistent physical activity.

So, why watermelon? What are watermelon health benefits and why is watermelon for runners, athletes and everyone on a fitness journey such a good thing?

different ways to cut watermelon thefitfork.com

Fresh and Economical: Watermelon is a fresh, whole food that doesn’t come processed and wrapped up in consumer packaging. Ounce for ounce, watermelon is also the most economical fruit purchase in the produce department. You can even eat the entire watermelon – flesh, seeds, juice, AND rind! All of these perks a win for your body, budget, and the environment.

Full of Fluid: Watermelon has a water content of 92 percent! This means watermelon is a fast way to hydrate before a run or workout or top off your tank afterward. Compared to some of my other favorite snacks (which all have their own inherent benefits, BTW), watermelon is the winner of nearly holding its own weight in water. For example, a banana is 75 percent water, raisins are just 20 percent water, and most nuts only have a water content of 5 percent water.

Watermelon Facts & Snacks for Your Active Lifestyle - Watermelon is Refreshing Fuel

Functional Fuel: Watermelon is extremely functional when it comes to providing nutrients to support a balanced and active lifestyle. For example, two cups of watermelon (80 calories) offer 21 grams of carbohydrates to help you power through any day, whether running a marathon or just running errands around town. In some circles, carbs get a bad rap, and while I’m not a fan of most highly-processed and refined-sugar carbs, I do rely carbohydrates sourced primarily from fruits, vegetables and whole grains. Endurance athletes need properly-timed carbs to provide sustained energy for the long haul.  

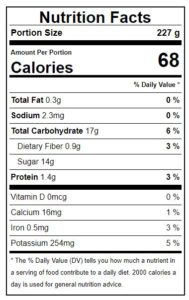
However, if you are not logging massive miles and need less carb energy (or perhaps are on a lower-carb diet for your lifestyle), watermelon REMAINS a fruit that can be enjoyed. Because it’s a big volume fruit (big serving size versus a denser fruit like, say, dates), the carbohydrates are “spread out.” So, many consider watermelon a low-carb fruit, especially when enjoyed mindfully. A small portion of watermelon can even be eaten and still kept compliant with a keto diet! For me, the little bit of natural sugars from watermelon help soothe my sweet tooth and curb cravings.

Watermelon Facts & Snacks for Your Active Lifestyle

Watermelon Electrolytes: Endurance athletes (and everyone, in fact), need electrolytes in their diet to help balance water in the body. Electrolytes are found in body fluids like blood, urine, and tissues and also keep pH level in check, move nutrients into cells, move waste out of cells, keep you from muscle cramping, help your nerves and brain, and ultimately ensure that all bodily systems are operating optimally.

Watermelon Facts & Snacks for Your Active Lifestyle - watermelon has protein in both the seeds AND flesh!

Watermelon Protein: Believe it or not, watermelon is a source of plant protein. YES! There is protein in watermelon, whoohoo! Protein supports an active lifestyle by promoting tissue repair, exercise recovery, injury prevention, immune function and the production of oxygen-carrying red blood cells.

One ounce of sprouted, shelled and dried watermelon seeds contains 10 grams of protein – that’s a nice amount for a post-workout snack! The flesh of watermelon also has a more modest amount, but still more that you’d guess! Two cups of watermelon provide 2 grams of protein and, for a boost, can be paired with other protein-choices like yogurt, cottage cheese, chia seeds, quinoa, seafood, and more.

Better Workout Recovery with Watermelon: Two cups of watermelon also provide between 286mg to 1266mg of L-citrulline, an amino that boosts nitric oxide production in the body. Nitric oxide helps arteries relax and work better, which improves blood flow throughout your body. For athletes, research is suggesting that the juice from watermelon can help to reduce recovery heart rate and muscle soreness in the 24-hour window after exercise.

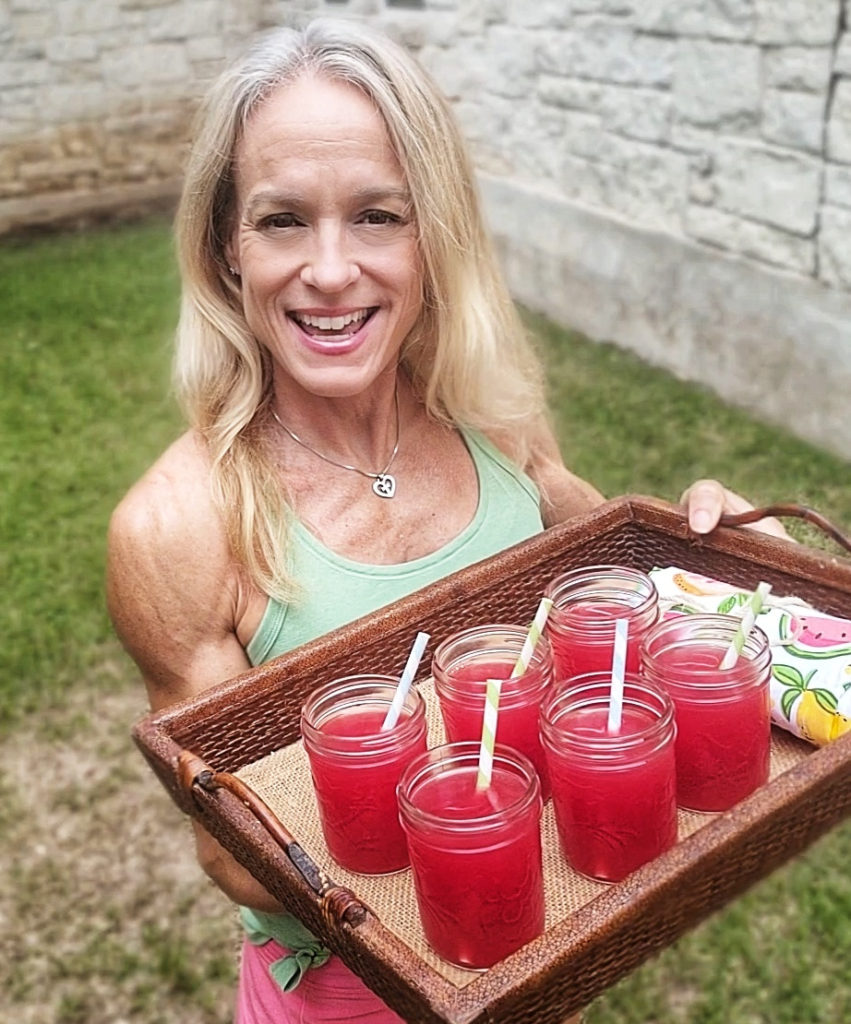
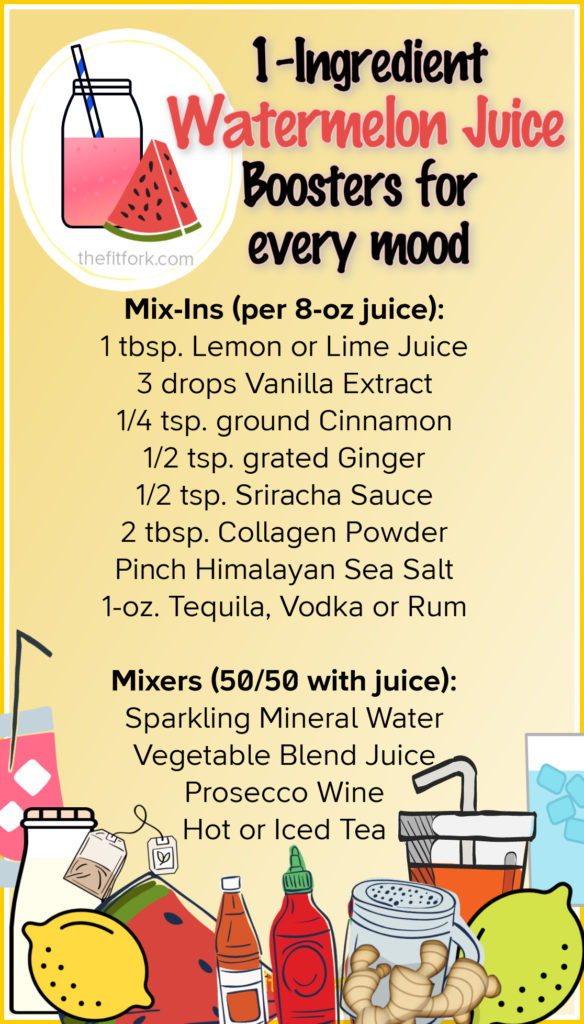
Watermelon is Simple: Some of my favorite ways to enjoy watermelon in a manner that supports my nutrition goals as a runner and athlete are SO SIMPLE. Eat it plain with salt and lime juice, freeze chunks to use in smoothies, make watermelon seed trail mix, and drink the juice!

I’ve also created and used other watermelon race fuel and watermelon recovery recipes for runners:

Concentrated Electrolyte Ice Cubes for Runners

Warm spiced Watermelon Lemonade for Winter Workout Recovery

Watermelon, Beet and Chia Shot Blocks for Endurance Fuel

And, finally, you can actually WORKOUT WITH WATERMELON – did you see my recent Fit & Fresh Freestyle Watermelon Workout?

For EVERYTHING you ever needed to know about watermelon and MORE, visit Watermelon.org and @watermelonboard on Instagram!