Low-carb Pumpkin Spice Latte Cookies (gluten-free)

Who wouldn’t love a low-carb, gluten-free cookie inspired by the most coveted coffee shop drink of autumn – pumpkin spice latte!?  Easy to make, using almond flour and natural sweetener alternatives to keep the carbs down, these pumpkin spice cookies turn out soft, chewy and heavenly-scented every time!

Whip up a batch of these amazing autumn-inspired pumpkin spice cookies in under 30 minutes! Lower carb, gluten-free plus, soft, chew and amazing flavorful -- especially with the coffee glaze!

Ready in under 30 minutes from mixing up to munching down! So, let’s get going!

The first step in these table sugar-free pumpkin cookies is to mix up the dough. With the butter softened, I found it easy enough to mix up by hand – but a mixer is fine too! 

First the butter and sugar substitute are creamed. I used a monk fruit-erythritol granulated baking blend that has a 1:1 sugar replacement equivalency. So, for this matter, you can swap back in any type of sugar that you care for (like coconut sugar or a stevia blend), but be aware that it will change the nutritional value. Also note, the cookies are one the lighter sweet side because the glaze is very sweet – so you might consider adding an additional ¼ cup if you are planning to make the cookies WITHOUT glaze.

Whip up a batch of these amazing autumn-inspired pumpkin spice cookies in under 30 minutes! Lower carb, gluten-free plus, soft, chew and amazing flavorful -- especially with the coffee glaze!
Pin this for later!

Next beat in egg. Then pumpkin and vanilla. Finally mix in the dry ingredients including raw almond flour and 1:1 gluten-free baking blend.  Three cups of total flour is used in this low carb pumpkin spice cookie recipe – 2 cups of almond flour and 1 gluten-free flour mix.  The gluten-free flour mix bumps up the carb count a bit, you can also substitute back in all almond flour, but I suggest using a super fine ground almond meal for better consistency that won’t crumble apart after baking. Using all almond meal will also lower the per-cookie net carb count, making it officially a compliant with keto pumpkin cookie.

Whip up a batch of these amazing autumn-inspired pumpkin spice cookies in under 30 minutes! Lower carb, gluten-free plus, soft, chew and amazing flavorful -- especially with the coffee glaze!
Portion dough into approximate 2 Tablespoon balls.

While the gluten-free pumpkin cookies are baking in the oven (on a sheet lined with parchment or silicone baking mat) for 15 minutes, whip up the easy coffee-spiked glaze. It’s a bit of heavy cream, along with espresso powder, vanilla and POWDERED confectioner’s erythritol (or similar powdered product).  Achieving the perfect glaze consistency is the trickiest part of this recipe, so I always hold back just a TINY amount of my cream until I have the powdered sugar substitute, espresso powder and vanilla mixed it. If it’s too thick, I add it back in, plush a few more drops if needed. If it’s too thin, I mix in more confectioner’s sugar substitute until just right. The consistency should not be runny or stiff – somewhere in between!

Whip up a batch of these amazing autumn-inspired pumpkin spice cookies in under 30 minutes! Lower carb, gluten-free plus, soft, chew and amazing flavorful -- especially with the coffee glaze!

Once the cookies have cooled on the pan to “almost” room temperature (about 5 or 10 minutes), I put a dollop of the glaze/frosting on top – the small amount of warmth left on the cookie will help it spread. However, if the low carb pumpkin spice cookies are too hot still, it will run right off. After glazing the pumpkin coffee cookies, let it set up fore 5 minutes before serving or storing.

Whip up a batch of these amazing autumn-inspired pumpkin spice cookies in under 30 minutes! Lower carb, gluten-free plus, soft, chew and amazing flavorful -- especially with the coffee glaze!

Store these gluten-free pumpkin cookies layered between wax paper in an air-tight container. Should stay fresh for up to a week, or also freezes well.

Whip up a batch of these amazing autumn-inspired pumpkin spice cookies in under 30 minutes! Lower carb, gluten-free plus, soft, chew and amazing flavorful -- especially with the coffee glaze!
5 from 3 votes
Whip up a batch of these amazing autumn-inspired pumpkin spice cookies in under 30 minutes! Lower carb, gluten-free plus, soft, chew and amazing flavorful -- especially with the coffee glaze!
Low Carb Pumpkin Spice Latte Cookies (gluten-free)
Prep Time
10 mins
Total Time
25 mins
 

Whip up a batch of these amazing autumn-inspired cookies in under 30 minutes! Lower carb, gluten-free and amazing flavorful — especially with the coffee glaze!

Servings: 20 cookies
Calories: 183 kcal
Ingredients
  • 1/4 cup salted butter
  • 1/3 cup monk fruit–erythritol granulated sweetener (or other 1:1 cup equivalency sweetener0
  • 1/2 cup pumpkin puree
  • 1 large egg
  • 1 tsp vanilla extract
  • 2 cups almond flour
  • 1 cup gluten-free baking blend 1:1 cup equivalency or additional almond flour
  • 1 tbsp pumpkin pie spice
  • 1/2 tsp baking powder
For glaze/frosting
  • 1/4 – 1/3 cup powdered confectioner’s monk fruit- erythritol granulated sweetener
  • 1 tablespoon espresso powder
  • 2 tablespoons cup heavy cream
  • 1/4 tsp vanilla extract
Instructions
  1. Preheat the oven to 350 F degrees. Line a large baking sheet with silicone baking sheet or parchment paper.
  2. In large bowl, beat together the butter and sweetener, until creamy
  3. Beat in the pumpkin puree, egg, and vanilla.
  4. Beat in the almond flour, gluten-free flour blend, pumpkin pie spice, and baking powder until a uniform cookie dough forms.
  5. Use a cookie scoop to scoop balls of dough, about 2 tablespoons per cookie. Release onto the lined baking sheet, 2 inches apart.
  6. Use bottom of a glass to flatten cookies to about 1/4 inch thick.
  7. Bake approximately 15, until set and turning lightly golden brown at edges.
  8. Meanwhile, make the glaze/frosting, if using. In a small bowl, whisk together the glaze ingredients, until smooth. If too thin, add additional sweetener, if too thick, add a few drops more of cream – however, will melt some on warm cookies, so you don’t want it to be too thin at beginning.
  9. When the cookies are done, let cook for 5 or so minutes until just slightly warm. Spread a teaspoon of glaze on top of each cookie and let set to completely cool for another 10 minutes.
  10. Store in an air tight container.
Recipe Notes

Oven Butternut Squash Risotto with Shrimp – Under 30-minute Meal

Oven Butternut Squash Risotto with Shrimp makes a comforting, delicious and arguably balanced meal-in-a-pot boasting a whole grain, vegetable and protein.

Oven Butternut Squash Risotto with Shrimp makes a comforting, delicious and arguably balanced meal-in-a-pot boasting a whole grain, vegetable and protein. It’s so simple and easy to make, an under 30 minute meal with little hand-on effort, many call this oven method “cheater’s risotto” – but it’s totally legit!

Plus, this butternut risotto cooks up fast and with much less hands-on prep than a traditional risotto recipe – there is no endless stirring at the stove top. Instead, the rice bakes up in the oven for 20-minutes, being stirred up with Parmesan cheese just as serving.  

Oven Butternut Squash Risotto with Shrimp makes a comforting, delicious and arguably balanced meal-in-a-pot boasting a whole grain, vegetable and protein. It’s so simple and easy to make, an under 30 minute meal with little hand-on effort, many call this oven method “cheater’s risotto” – but it’s totally legit!

With olive oil and simple spices, the oven-roasted shrimp only take 10 minutes to make and can be popped into the oven on a baking sheet, at the second half of the rice timer. This way, the shrimp and risotto and done at the same time!

Ingredients for Butternut Squash Risotto in the Oven
Ingredients for the butternut risotto are simple and easy!

Learning how to make oven butternut squash risotto is a game changer. Use a Dutch oven pot in the oven and just walk away until done – this method has freed me up to finish other dinner chores and/or just have more time to connect with family members who have gathered in the kitchen to investigate the inviting, comfort food aromas wafting about.

Plus, elevating oven risotto with butternut squash helps keep the dish creamy, adds an earthy, lightly sweet flavor, and increases the nourishing benefits with dietary fiber, vitamin A, and more.  To keep the oven butternut squash with shrimp recipe simple, I purchase fresh-cubed butternut squash in the produce department. However, you can also cut up your own squash and/or use a bag of thawed frozen butternut chunks.

Oven Butternut Squash Risotto with Shrimp makes a comforting, delicious and arguably balanced meal-in-a-pot boasting a whole grain, vegetable and protein. It’s so simple and easy to make, an under 30 minute meal with little hand-on effort, many call this oven method “cheater’s risotto” – but it’s totally legit!

If you are just learning how to make risotto in the oven or traditionally (or you’ve had a risotto fail in the past), please note that you should NOT use a long-grained rice. A short-grained rice offers the signature creamy results of a classic risotto and Arborio rice is a common variety used. Some medium-grain rice may be used, too.

Oven Butternut Squash Risotto with Shrimp makes a comforting, delicious and arguably balanced meal-in-a-pot boasting a whole grain, vegetable and protein. It’s so simple and easy to make, an under 30 minute meal with little hand-on effort, many call this oven method “cheater’s risotto” – but it’s totally legit!

Some people call this method “cheater’s risotto,” however I see nothing suspect about it, lol! It’s just a smart way to get a nourishing meal on the table fast! I typically pair my cheater’s butternut squash risotto with an apple kale salad for extra fall-season flair.

 If you want to keep the recipe non-dairy, you can swap a non-dairy butter alternative for the butter and use an alternative to Parmesan cheese, like Parma.

Easy Roasted Shrimp in the Oven

Making the shrimp is just as easy, toss together olive oil, garlic salt and paprika and bake alongside the risotto during the last 8 minutes.

Disclaimer: This post contains affiliate links. I earn a small commission from products purchase, however the price to you remains the same. Proceeds are used to offset operating expenses for The Fit Fork – thank you for your support.

5 from 2 votes
Oven Butternut Squash Risotto with Shrimp makes a comforting, delicious and arguably balanced meal-in-a-pot boasting a whole grain, vegetable and protein. It’s so simple and easy to make, an under 30 minute meal with little hand-on effort, many call this oven method “cheater’s risotto” – but it’s totally legit!
Oven Butternut Squash Risotto and Shrimp
Prep Time
5 mins
Cook Time
20 mins
Total Time
25 mins
 

Oven Butternut Squash Risotto withShrimp makes a comforting, delicious and arguably balanced meal-in-a-pot boastinga whole grain, vegetable and protein. It’s so simple and easy to make, an under30 minute meal with little hand-on effort, many call this oven method “cheater’srisotto” – but it’s totally legit!

Course: dinner, dinner, entree, entree
Cuisine: American
Keyword: butternut squash, rice, risotto, shrimp
Servings: 4
Ingredients
  • 2 tablespoons olive oil
  • 1 tablespoon minced garlic
  • 1 cup arborio rice or other short to medium grain rice
  • 1/3 cup white wine can omit
  • 3 ½ cups reduced sodium chicken broth
  • 1 10- ounce bag chopped butternut squash produce dept shelf or frozen and thawed
  • ½ teaspoon sea salt
  • ½ teaspoon ground white pepper
  • 1 tablespoons butter or non-dairy butter alternative
  • 2/3 cup grated Parmesan cheese or non-dairy Parmesan alternative
  • 20 large shrimp shelled and veined (thawed if frozen)
  • 1 tablespoon olive oil
  • 2 teaspoons paprika
  • 1 teaspoon garlic salt
Instructions
  1. Preheat oven to 400F degrees.
  2. In 3.5-quart Dutch oven with lid, heat oil over medium heat on stove top. Add garlic and rice and stir around for 2 minutes to toast rice.
  3. Pour in wine to deglaze pan, stirring around over heat, stirring until mostly evaporated. Add chicken broth and butternut squash cubes and bring to a boil for 1 minutes.
  4. Put lid on pot and place on middle rack of oven, baking for 20-mintues.
  5. Meanwhile, quickly prepare shrimp by placing on rimmed baking sheet and tossing with olive oil, salt, and paprika.
  6. In the last 6 to 8 minutes of cooking the risotto, place pan of prepared shrimp in the oven. Roast until the shrimp are pink and just cooked through, about 6 to 8 minutes.
  7. Remove rice from oven, most of the water should have been absorbed. If it still looks a little watery, let cool for 5 minutes with lid off before stirring in butter and cheese.
  8. Serve risotto with shrimp and garnish with finely chopped fresh sage and a little extra Parmesan cheese, if desired.
Recipe Notes

Watermelon Facts & Snacks for Your Active Lifestyle

This post is sponsored by Watermelon.org. However, all content, opinions, and enthusiasm for watermelon remain my own!

Runners, triathletes, hybrid athletes, gym rats, fitness enthusiasts, parents with kids in sports, and everyday active folks who are always on the go – I’m talking to YOU!

Watermelon is more than just the quintessential fruit of summer – it’s a highly functional food that can (and should) be enjoyed all year ‘round in an athletes training diet including those who are striving to optimize their health and wellness though consistent physical activity.

So, why watermelon? What are watermelon health benefits and why is watermelon for runners, athletes and everyone on a fitness journey such a good thing?

different ways to cut watermelon thefitfork.com

Fresh and Economical: Watermelon is a fresh, whole food that doesn’t come processed and wrapped up in consumer packaging. Ounce for ounce, watermelon is also the most economical fruit purchase in the produce department. You can even eat the entire watermelon – flesh, seeds, juice, AND rind! All of these perks a win for your body, budget, and the environment.

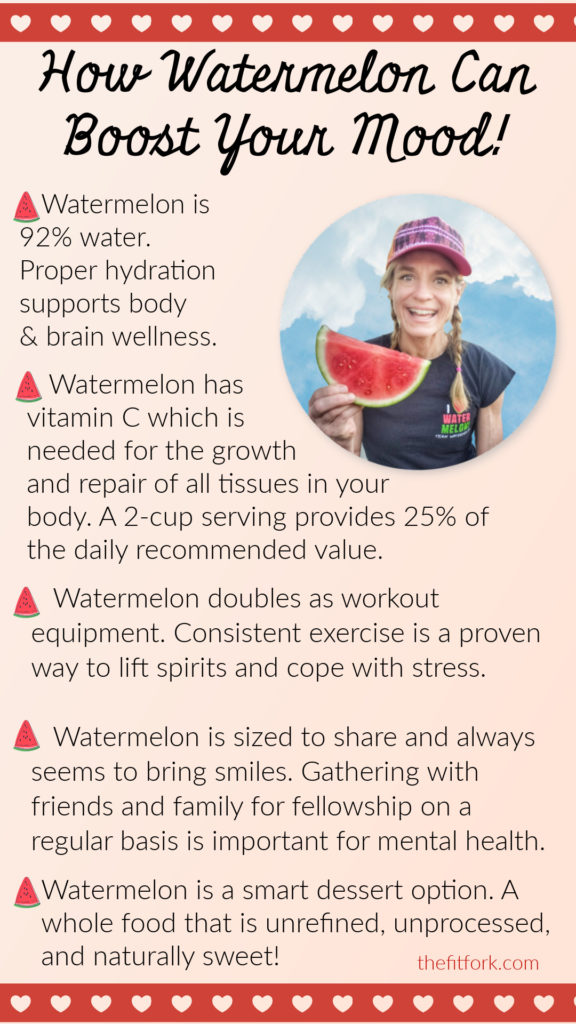
Full of Fluid: Watermelon has a water content of 92 percent! This means watermelon is a fast way to hydrate before a run or workout or top off your tank afterward. Compared to some of my other favorite snacks (which all have their own inherent benefits, BTW), watermelon is the winner of nearly holding its own weight in water. For example, a banana is 75 percent water, raisins are just 20 percent water, and most nuts only have a water content of 5 percent water.

Watermelon Facts & Snacks for Your Active Lifestyle - Watermelon is Refreshing Fuel

Functional Fuel: Watermelon is extremely functional when it comes to providing nutrients to support a balanced and active lifestyle. For example, two cups of watermelon (80 calories) offer 21 grams of carbohydrates to help you power through any day, whether running a marathon or just running errands around town. In some circles, carbs get a bad rap, and while I’m not a fan of most highly-processed and refined-sugar carbs, I do rely carbohydrates sourced primarily from fruits, vegetables and whole grains. Endurance athletes need properly-timed carbs to provide sustained energy for the long haul.  

However, if you are not logging massive miles and need less carb energy (or perhaps are on a lower-carb diet for your lifestyle), watermelon REMAINS a fruit that can be enjoyed. Because it’s a big volume fruit (big serving size versus a denser fruit like, say, dates), the carbohydrates are “spread out.” So, many consider watermelon a low-carb fruit, especially when enjoyed mindfully. A small portion of watermelon can even be eaten and still kept compliant with a keto diet! For me, the little bit of natural sugars from watermelon help soothe my sweet tooth and curb cravings.

Watermelon Facts & Snacks for Your Active Lifestyle

Watermelon Electrolytes: Endurance athletes (and everyone, in fact), need electrolytes in their diet to help balance water in the body. Electrolytes are found in body fluids like blood, urine, and tissues and also keep pH level in check, move nutrients into cells, move waste out of cells, keep you from muscle cramping, help your nerves and brain, and ultimately ensure that all bodily systems are operating optimally.

Watermelon Facts & Snacks for Your Active Lifestyle - watermelon has protein in both the seeds AND flesh!

Watermelon Protein: Believe it or not, watermelon is a source of plant protein. YES! There is protein in watermelon, whoohoo! Protein supports an active lifestyle by promoting tissue repair, exercise recovery, injury prevention, immune function and the production of oxygen-carrying red blood cells.

One ounce of sprouted, shelled and dried watermelon seeds contains 10 grams of protein – that’s a nice amount for a post-workout snack! The flesh of watermelon also has a more modest amount, but still more that you’d guess! Two cups of watermelon provide 2 grams of protein and, for a boost, can be paired with other protein-choices like yogurt, cottage cheese, chia seeds, quinoa, seafood, and more.

Better Workout Recovery with Watermelon: Two cups of watermelon also provide between 286mg to 1266mg of L-citrulline, an amino that boosts nitric oxide production in the body. Nitric oxide helps arteries relax and work better, which improves blood flow throughout your body. For athletes, research is suggesting that the juice from watermelon can help to reduce recovery heart rate and muscle soreness in the 24-hour window after exercise.

Watermelon is Simple: Some of my favorite ways to enjoy watermelon in a manner that supports my nutrition goals as a runner and athlete are SO SIMPLE. Eat it plain with salt and lime juice, freeze chunks to use in smoothies, make watermelon seed trail mix, and drink the juice!

I’ve also created and used other watermelon race fuel and watermelon recovery recipes for runners:

Concentrated Electrolyte Ice Cubes for Runners

Warm spiced Watermelon Lemonade for Winter Workout Recovery

Watermelon, Beet and Chia Shot Blocks for Endurance Fuel

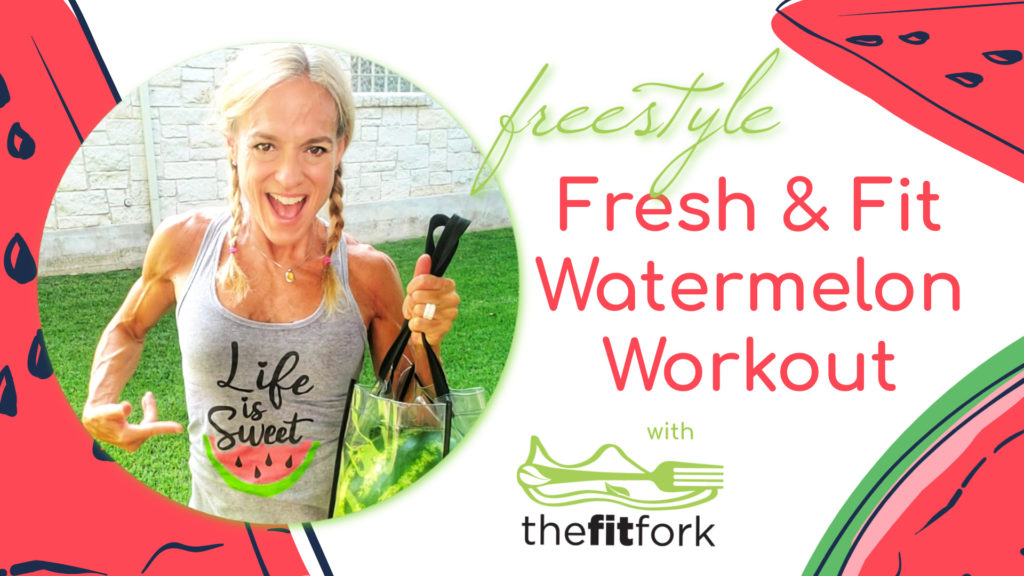
And, finally, you can actually WORKOUT WITH WATERMELON – did you see my recent Fit & Fresh Freestyle Watermelon Workout?

For EVERYTHING you ever needed to know about watermelon and MORE, visit Watermelon.org and @watermelonboard on Instagram!

How to Make the Best Popped Quinoa

Toasting quinoa gives it a great texture, fabulous aroma, and magnifies the nutty flavor. Plus, it’s a great way to add more of this ancient grain (which is actually a seed), into your diet – the health benefits of quinoa are plentiful. It’s a good source of plant protein, fiber, and heart-healthy fats, just to name a few.

Popping quinoa gives it a wonderful aroma, crunchy yet chewy texture, and nutty flavor -- eat like popcorn, toss on everything from yogurt to salads, or use as an ingredient in recipes like energy balls or granola bars.
Whether you call it Toasted, Puffed or Popped, prepping quinoa this way will make you smile.

 The process of toasting quinoa is also referred to as “popping” or “puffing.” Store-bought puffed quinoa (like quinoa cereal) is very light and crispy. This is achieved through commercial-grade equipment and not 100-percent replicable at home. But just throwing quinoa kernels into a skillet (as is the usual method mentioned on internet sources), yields a very dry, hard result – almost like chewing on sand.

The best method for popping quinoa at home, in my opinion, is to cook it first, dry it out in the oven, and then pop on the skillet for a few minutes. I think you get a bigger “finished” kernel with better textures – it’s crunchy-chewy, but doesn’t feel like a mouthful of pea gravel.

Popping quinoa gives it a wonderful aroma, crunchy yet chewy texture, and nutty flavor -- eat like popcorn, toss on everything from yogurt to salads, or use as an ingredient in recipes like energy balls or granola bars. For more meal prep tips and quinoa recipes visit thefitfork.com

Here is the step-by-step on how to pop quinoa (you can also check out my PIN TUTORIAL).

Rinse quinoa in bowl of water and drain off in an extra fine-mesh strainer to remove the natural coating which can have a soapy, bitter taste. However, some people don’t notice an unpleasant taste, then lucky you – skip this somewhat tedious step!

Simmer 1 cup of rinsed quinoa with 1 ¼ cups of water for 15 minutes, with lid on – or until water is absorbed.

Popping quinoa gives it a wonderful aroma, crunchy yet chewy texture, and nutty flavor -- eat like popcorn, toss on everything from yogurt to salads, or use as an ingredient in recipes like energy balls or granola bars.

Dry out quinoa (which will have expanded to 3 cups) by spreading out on a rimmed, standard-sized sheet pan. Bake for 30 minutes 175F degrees to further dry out excess moisture. Every 10 minutes, use spatula to stir up quinoa, break apart any clumps, and keep from sticking on the pan.

Popping quinoa gives it a wonderful aroma, crunchy yet chewy texture, and nutty flavor -- eat like popcorn, toss on everything from yogurt to salads, or use as an ingredient in recipes like energy balls or granola bars.

Skillet pop quinoa after you remove it from oven. Work in 1-cup batches, toast in large non-stick skillet, stirring constantly (no oil needed). Quinoa will be toasted properly when you hear the tiny popping sounds and it is turning golden brown and developing a crunchy texture.

Popping quinoa gives it a wonderful aroma, crunchy yet chewy texture, and nutty flavor -- eat like popcorn, toss on everything from yogurt to salads, or use as an ingredient in recipes like energy balls or granola bars.

You can use popped quinoa or toasted quinoa in a variety of ways. For example, add salt and eat like popcorn, sprinkle on salads or on yogurt, use in granola-bar type recipes. It’s one of my favorite ways to meal prep quinoa.  What you don’t use can be kept in the fridge in a zip top bag for a week.

Pumpkin Seed Popped Quinoa Balls
Popped Quinoa (also called Puffed Quinoa or Toasted Quinoa)

Popping quinoa gives it a wonderful aroma, crunchy yet chewy texture, and nutty flavor — eat like popcorn, toss on everything from yogurt to salads, or use as an ingredient in recipes like energy balls or granola bars.

Course: meal prep, side, Snack
Keyword: meal prep, quinoa, whole grains
Ingredients
  • 1 cup dry uncooked quinoa, any color
  • 1 1/4 cup water
Instructions
  1. Rise quinoa in bowl of water and drain off in a fine-mesh strainer to remove the natural coating which can have a soapy, bitter taste. However, some people don’t notice an unpleasant taste, then lucky you – skip this somewhat tedious step!
  2. Simmer 1 cup of rinsed quinoa with 1 ¼ cups of water for 15 minutes, with lid on – or until water is absorbed.
  3. Spread out quinoa (which will have expanded to 3 cups) out on a rimmed, standard-sized sheet pan.
  4. Bake for 30 minutes 175F degrees to further dry out excess moisture. Every 10 minutes, use spatula to stir up quinoa, break apart any clumps, and keep from sticking on the pan.
  5. Remove quinoa from oven and, working in 1-cup batches, toast in large non-stick skillet, stirring constantly (no oil needed).
  6. Quinoa will be toasted properly when you hear the tiny popping sounds and it is turning golden brown and developing a crunchy texture.
  7. You can use popped quinoa or toasted quinoa in a variety of ways. For example, add salt and eat like popcorn, sprinkle on salads or on yogurt, use in granola-bar type recipes. What you don’t use can be kept in the fridge in a zip top bag for a week.

Air Fryer Chicken Alfredo Quinoa Balls

My Air Fryer recipe for Chicken Alfredo Quinoa Balls is inspired by one of my favorite indulgent creamy Chicken Alfredo and hot, crispy Arancini (those delicious little balls of deep-fried rice or risotto) – but made more nutritious.

Chicken Alfredo Quinoa Balls are inspired by one of my favorite indulgent Italian meals, creamy Chicken Alfredo and hot, crispy Arancini (those delicious little balls of deep-fried rice or risotto) – but made more nutritious. So quick and simple to make, and definitely kid-friendly, these delicious morsels can be served as an appetizer or served on sauce as a meal. Visit thefitfork.com for more Instant Pot and Air Fryer recipes with great nutrition to fuel a busy and active lifestyle.

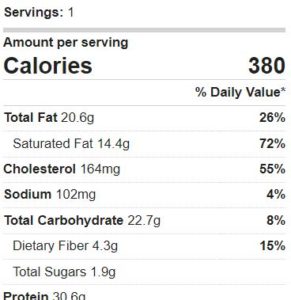
Instead of heavy sauces, super carby-carbs, and cooking methods I shy from (like traditional deep frying of rice balls), Air Fryer Chicken Alfredo Quinoa Balls keep all the decadent flavor served up in fun, nourishing “two-bite” morsels. For me, one Chicken and Quinoa appetizer or dinner is easy to portion – one makes a snack and three quinoa balls make a dinner (especially yummy on the sauce of your choice or on a spinach salad).  A three-piece serving has 364 calories, 16g fat, 28g net carb, 27g protein.

Chicken Alfredo Quinoa Balls are inspired by one of my favorite indulgent Italian meals, creamy Chicken Alfredo and hot, crispy Arancini (those delicious little balls of deep-fried rice or risotto) – but made more nutritious. So quick and simple to make, and definitely kid-friendly, these delicious morsels can be served as an appetizer or served on sauce as a meal. Visit thefitfork.com for more Instant Pot and Air Fryer recipes with great nutrition to fuel a busy and active lifestyle. -- The Instant Pot Duo Crisp  (that's also an air fryer) is the perfect appliance to make this simple recipe even more quick and convenient.

This air fryer quinoa arancini recipe is surprisingly simple to make, especially if you already have cooked, shredded chicken breast on hand. I always make a big batch in Instant Pot® Duo Crisp™ + Air Fryer and shred up when cooled, and keep portioned in various serving sizes in the freezer – for recipes like this Chicken Quinoa Balls in Air Fryer. Or, just to thaw and throw on a salad. While this post is all about Quinoa Balls, and not so much how to cook chicken in an Instant Pot – there are several ways. I prefer the slow-cooking function, and really don’t use an official recipe – just about ½ cup of chicken broth, and 1 tablespoon of my favorite freeze-dried herb poultry seasoning per every 1 pound of boneless, skinless chicken breast. I just throw it all in there and let it cook low and slow for 8 hours before shredding up.

Chicken Alfredo Quinoa Balls are inspired by one of my favorite indulgent Italian meals, creamy Chicken Alfredo and hot, crispy Arancini (those delicious little balls of deep-fried rice or risotto) – but made more nutritious. So quick and simple to make, and definitely kid-friendly, these delicious morsels can be served as an appetizer or served on sauce as a meal. Visit thefitfork.com for more Instant Pot and Air Fryer recipes with great nutrition to fuel a busy and active lifestyle. 

The Instant Pot Duo Crisp  (that's also an air fryer) is the perfect appliance to make this simple recipe even more quick and convenient.
Pin this for later!

The rest of the air fryer chicken quinoa meal recipe is a snap. First, cook quinoa according to package directions (takes about 15 minutes) and let cool down to room temperature – another 10 to 15 minutes (faster if you spread out on a baking sheet). You can also use pre-cooked, frozen and defrosted quinoa – check out this quinoa meal prep post.

The it’s just a matter of mixing the seasonings into the softened cream cheese, followed by the shredded chicken and quinoa (btw, I used tri-color quinoa, but any type will do).

Rolling Chicken Alfredo Quinoa Balls in panko.

Next grab a handful of the mixture, and roll into golf ball-sized portions, making about a dozen. Then roll each ball in panko bread crumbs (or if needed gluten free bread crumbs) until nice and coated, no longer sticky to picky up.

- The Instant Pot Duo Crisp  (that's also an air fryer) is the perfect appliance to make this simple recipe even more quick and convenient.
Love the convenience of this “shelf” that can be added to Air Fryer basket to
double the cooking capacity!

Stick in the Air Fryer basked of the Instant Pot® Duo Crisp™+ Air Fryer, layering half on the bottom of the basket and using the metal, circular insert to make a shelf to hold the remaining half-dozen. Air fry on 400F degrees for approximately 8 to 10 minutes. They will be done when crunchy and golden brown on the outside, and heated through and a bit, soft and gooey on the inside.

Chicken Alfredo Quinoa Balls are inspired by one of my favorite indulgent Italian meals, creamy Chicken Alfredo and hot, crispy Arancini (those delicious little balls of deep-fried rice or risotto) – but made more nutritious. So quick and simple to make, and definitely kid-friendly, these delicious morsels can be served as an appetizer or served on sauce as a meal. Visit thefitfork.com for more Instant Pot and Air Fryer recipes with great nutrition to fuel a busy and active lifestyle. -- The Instant Pot Duo Crisp  (that's also an air fryer) is the perfect appliance to make this simple recipe even more quick and convenient.

Serving suggestion:  Make a creamy tomato sauce by mixing in a splash of heavy cream into warmed tomato pasta sauce. Place three Chicken Alfredo Quinoa Balls in the center and garnish with fresh basil.

Chicken Alfredo Quinoa Balls are inspired by one of my favorite indulgent Italian meals, creamy Chicken Alfredo and hot, crispy Arancini (those delicious little balls of deep-fried rice or risotto) – but made more nutritious. So quick and simple to make, and definitely kid-friendly, these delicious morsels can be served as an appetizer or served on sauce as a meal. Visit thefitfork.com for more Instant Pot and Air Fryer recipes with great nutrition to fuel a busy and active lifestyle. -- The Instant Pot Duo Crisp  (that's also an air fryer) is the perfect appliance to make this simple recipe even more quick and convenient.

Also, don’t forget to check out the Instant Pot® Duo Crisp™ + Air Fryer, an 11-in-1 pressure cooker, slow cooker, steamer, sauté pan, food warmer, sous vide, air fryer, roaster, mini oven, broiler, and dehydrator. It comes with two lids so you can instantly transform it into an Air Fryer with proprietary air flow technology that gives the crunch and tenderness of deep-frying with 95% less oil! Plus, I personally LOVE having just ONE countertop appliance that does it all, instead of a whole closet full! Stay tuned for more Instant Pot Duo Crisp recipes from The Fit Fork!

By the way, this recipe is my own, but was inspired by The Complete Quinoa Cookbook by Catherine Gill, that was recently sent to me by the publisher. Check it out, fabulous stuff in there.

This post contains affiliate links. I earn a small commission on products purchased, however price to you remains the same. Proceeds are used to offset operation expense for The Fit Fork. Thank you!

4.8 from 5 votes
Chicken Alfredo Quinoa Balls are inspired by one of my favorite indulgent Italian meals, creamy Chicken Alfredo and hot, crispy Arancini (those delicious little balls of deep-fried rice or risotto) – but made more nutritious. So quick and simple to make, and definitely kid-friendly, these delicious morsels can be served as an appetizer or served on sauce as a meal. Visit thefitfork.com for more Instant Pot and Air Fryer recipes with great nutrition to fuel a busy and active lifestyle.
Air Fryer Chicken Alfredo Quinoa Balls
Prep Time
15 mins
Cook Time
10 mins
Total Time
25 mins
 

Chicken Alfredo Quinoa Balls are inspired by one of my favorite indulgent Italian meals, creamy Chicken Alfredo and hot, crispy Arancini (those delicious little balls of deep-fried rice or risotto) – but made more nutritious. So quick and simple to make, and definitely kid-friendly, these delicious morsels can be served as an appetizer or served on sauce as a meal. Visit thefitfork.com for more Instant Pot and Air Fryer recipes with great nutrition to fuel a busy and active lifestyle. — The Instant Pot Duo Crisp (that's also an air fryer) is the perfect appliance to make this simple recipe even more quick and convenient.

Course: Appetizer, dinner, dinner, entree
Cuisine: Italian
Keyword: air fryer, alfredo, chicken, quinoa
Ingredients
  • 8 ounces Neufchatel cheese
  • 1 ½ cups COOKED quinoa
  • 8 ounces shredded chicken breast already cooked
  • 1 teaspoon garlic powder
  • 1 teaspoon onion powder
  • ½ teaspoon ground black pepper
  • ½ teaspoon salt
  • ¾ cup panko
  • 1 tablespoon fresh chopped parsley if desired
  • Optional: pasta sauce for serving.
Instructions
  1. Cook quinoa and chicken breast beforehand, if needed.
  2. Soften Neufchatel cheese and stir in garlic power, onion powder, ground black pepper and salt.
  3. Next stir in cooked quinoa and shredded chicken until mixed thoroughly into the cheese.
  4. Use hands to form golf ball-sized balls (about ¼ cup) of mixture, before rolling each into panko crumbs, patting crumbs on to create a thick coating.
  5. Should make about 12 balls.
  6. Set Air Fryer to 400F degrees and set 6 balls on bottom of basket, and 6 balls on top of tray or 2nd tier metal insert. Or, if smaller capacity air fryer, then do in two batches.
  7. Air fry for 8 – 10 minutes or until turning golden grown and heated well throughout.
  8. Serve as appetizer, or set three in a bowl of pasta sauce for a meal.
Recipe Notes

Nutrition for THREE balls: