
If you’ve ever opened the fridge, said “I’m hungry,” and wanted something right now that actually fuels you… this bowl is for you. No stove. No complicated prep. Just real food, layered in a bowl, and lunch is handled. My Tex-Mex Cottage Cheese Bowl is one of those magical meals that checks all the boxes:
- Assemble-and-eat easy
- High in protein
- Loaded with fiber
- Big flavor, minimal effort
Why I’m Loving This Protein Bowl Lately
This isn’t just a “throw-some-things-together” meal (although it totally can be). It’s a balanced, nourishing bowl that keeps me full and energized—whether I’m coming from a workout, heading into a busy afternoon, or just trying to avoid the mid-day snack spiral.
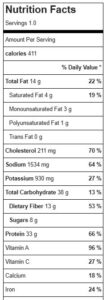
With about 400 calories and 33 grams of protein, it delivers serious staying power. And thanks to beans, veggies, and avocado, it also brings something most of us desperately need more of… 👉 Dietary fiber.
So many quick lunches are either 1) high carb and low protein or 2) low fiber with low fullness – both leave you hungry an hour later. But, this bowl is different – you get 33g protein mention above, plus13g fiber, healthy/satiating fats from avocado and volume form veggies. It’s designed to satisfy, provide energy and minimize cravings – I tweaked and ran the macros over and over to ensure this type of win!
Let’s Talk Fiber (Because Most of Us Need More)
Here’s the truth: most adults are woefully low in fiber. A good general guideline is to aim for about 14 grams of dietary fiber per 1,000 calories in your diet. So if you’re eating around 2,000 calories per day, that’s roughly 28 grams of fiber.
This bowl delivers about 13 grams of fiber in a ~400 calorie meal—nearly half of what many people get in an entire day. And we can thank beans (and veggies!) for that. More fiber means better digestion, better blood sugar control, better fullness, and better overall health.
Easy Hacks to Make This Quick Lunch Even Faster
One of my favorite things about this recipe is how customizable and convenience-friendly it is. Here are a few shortcuts I use all the time that keep me from turning on the stove:
1️⃣ Go “Virtually No-Cook”: If time (or energy) is low, lean on smart shortcuts:
- Use canned beans (just rinse and drain)
- Grab store-bought hard-boiled eggs if you don’t have meal-prepped ones
- Use pre-cooked bacon crumbles OR Make microwave bacon (it takes about 30 seconds). Or, just use any leftover protein you have in the fridge like chicken, beef or pork.
2️⃣ Make a Semi-Homemade Salsa Ranch: This is my little flavor hack that takes two seconds:
Mix together: A little salsa + your favorite light ranch dressing. That’s it! You get creamy + tangy + Tex-Mex vibes without buying another specialty sauce.
3️⃣ Meal Prep Without the Sog Factor
If you’re packing this for work or making it ahead, it’s key to keep the cottage cheese and dressing in separate containers. Add them right before eating. This keeps everything fresh and prevents soggy spinach or watery bowls. Nobody wants that.
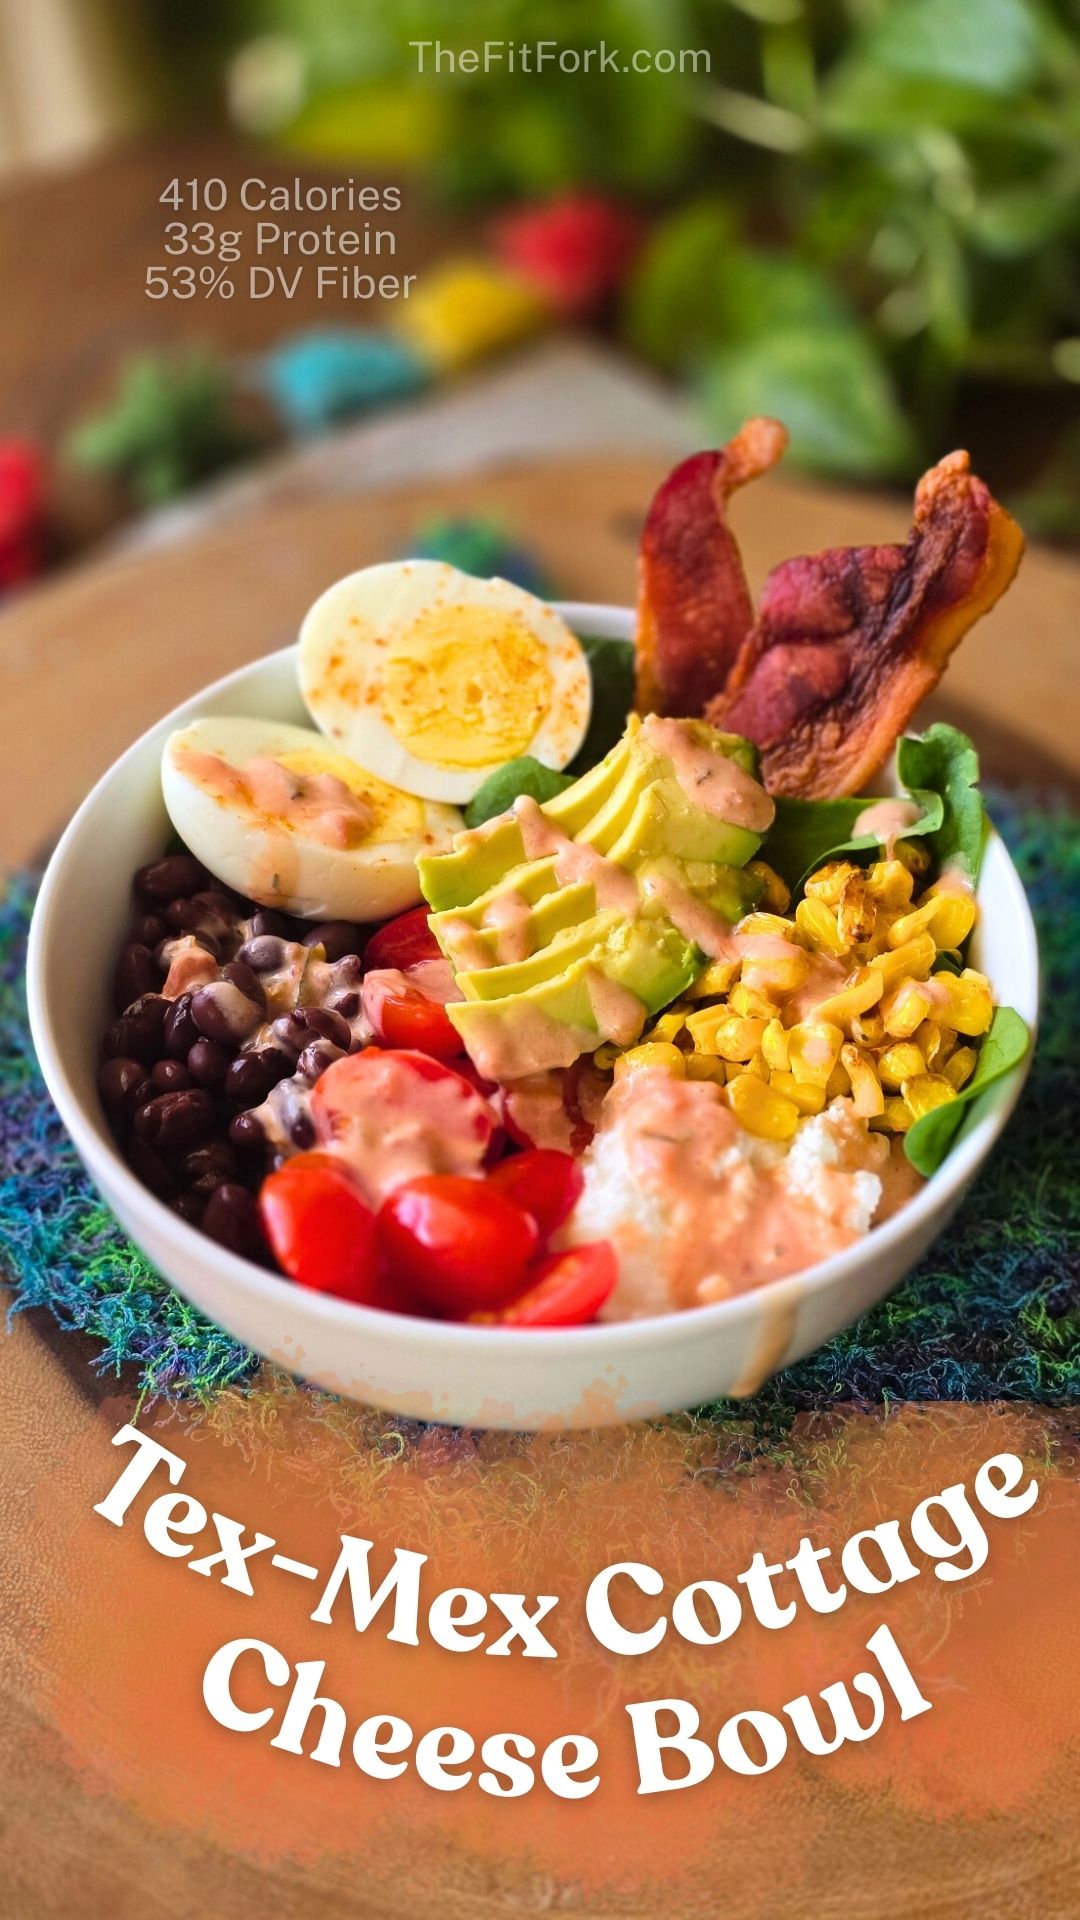
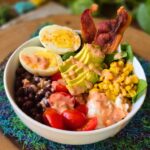
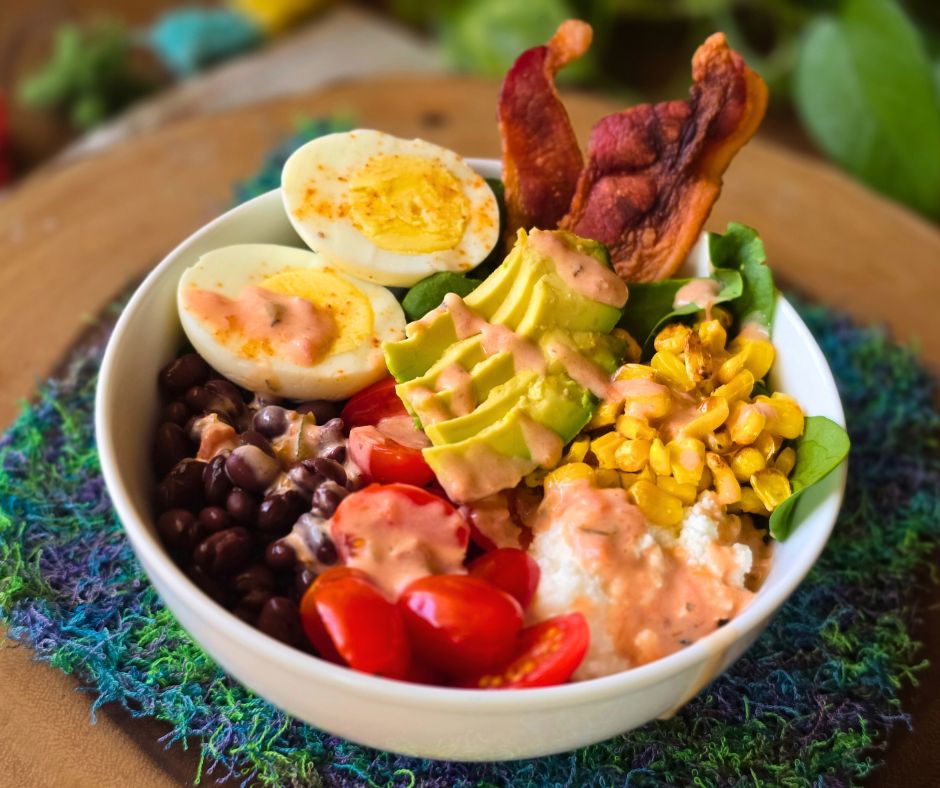
- 1 cup baby spinach
- ½ cup 2% cottage cheese
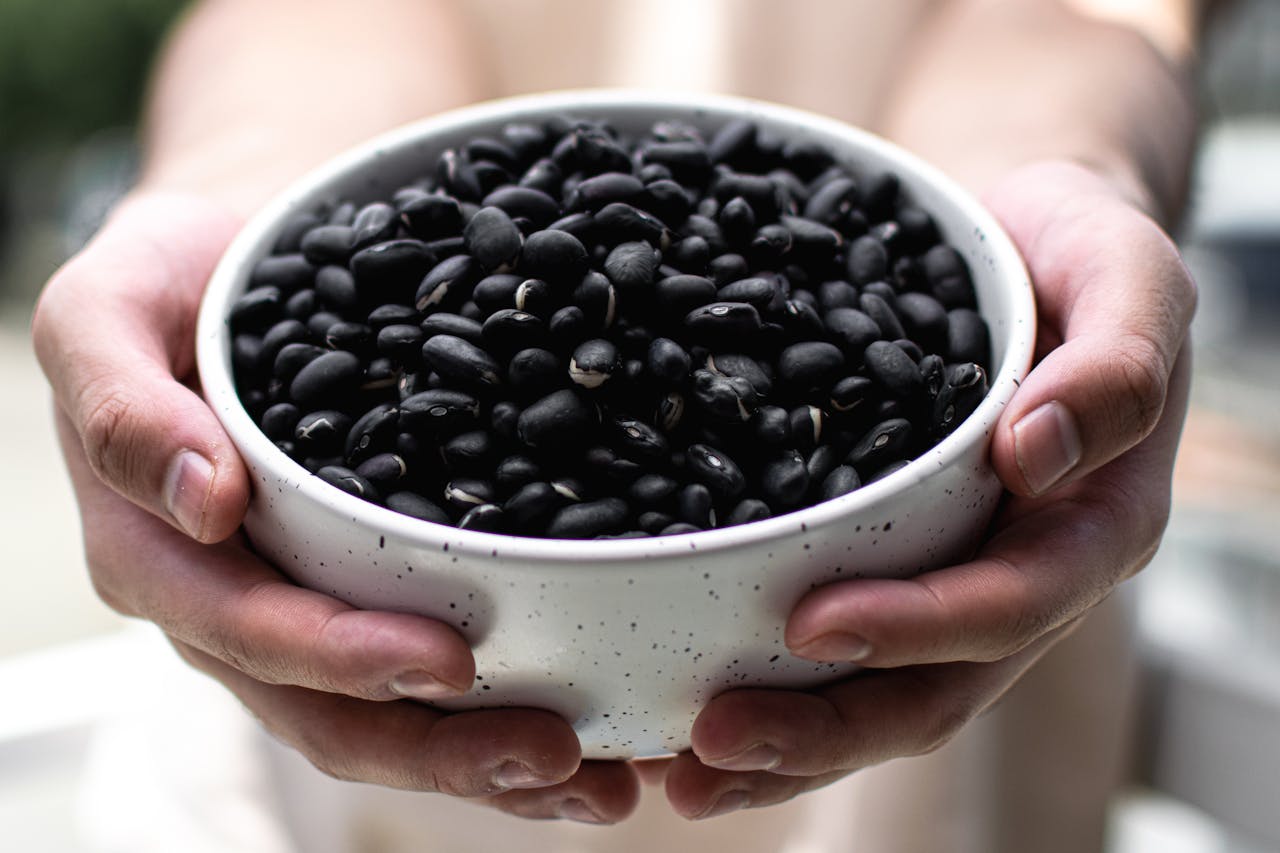
- ½ cup black beans from can drained
- ¼ cup corn kernels I like to roast my for a few minutes in air fryer with garlic salt
- 8 grape tomatoes sliced
- 1 hardboiled egg halved
- 1 piece of cooked bacon optional but worth it.
- ¼ small avocado sliced
- 2 tbsp favorite salsa
- 1 tbsp favorite light ranch
-
Add first 8 ingredients to bowl. Then in small ramekin, mix together salsa and ranch for the dressing. Pour over bowl – enjoy all the goodness!


