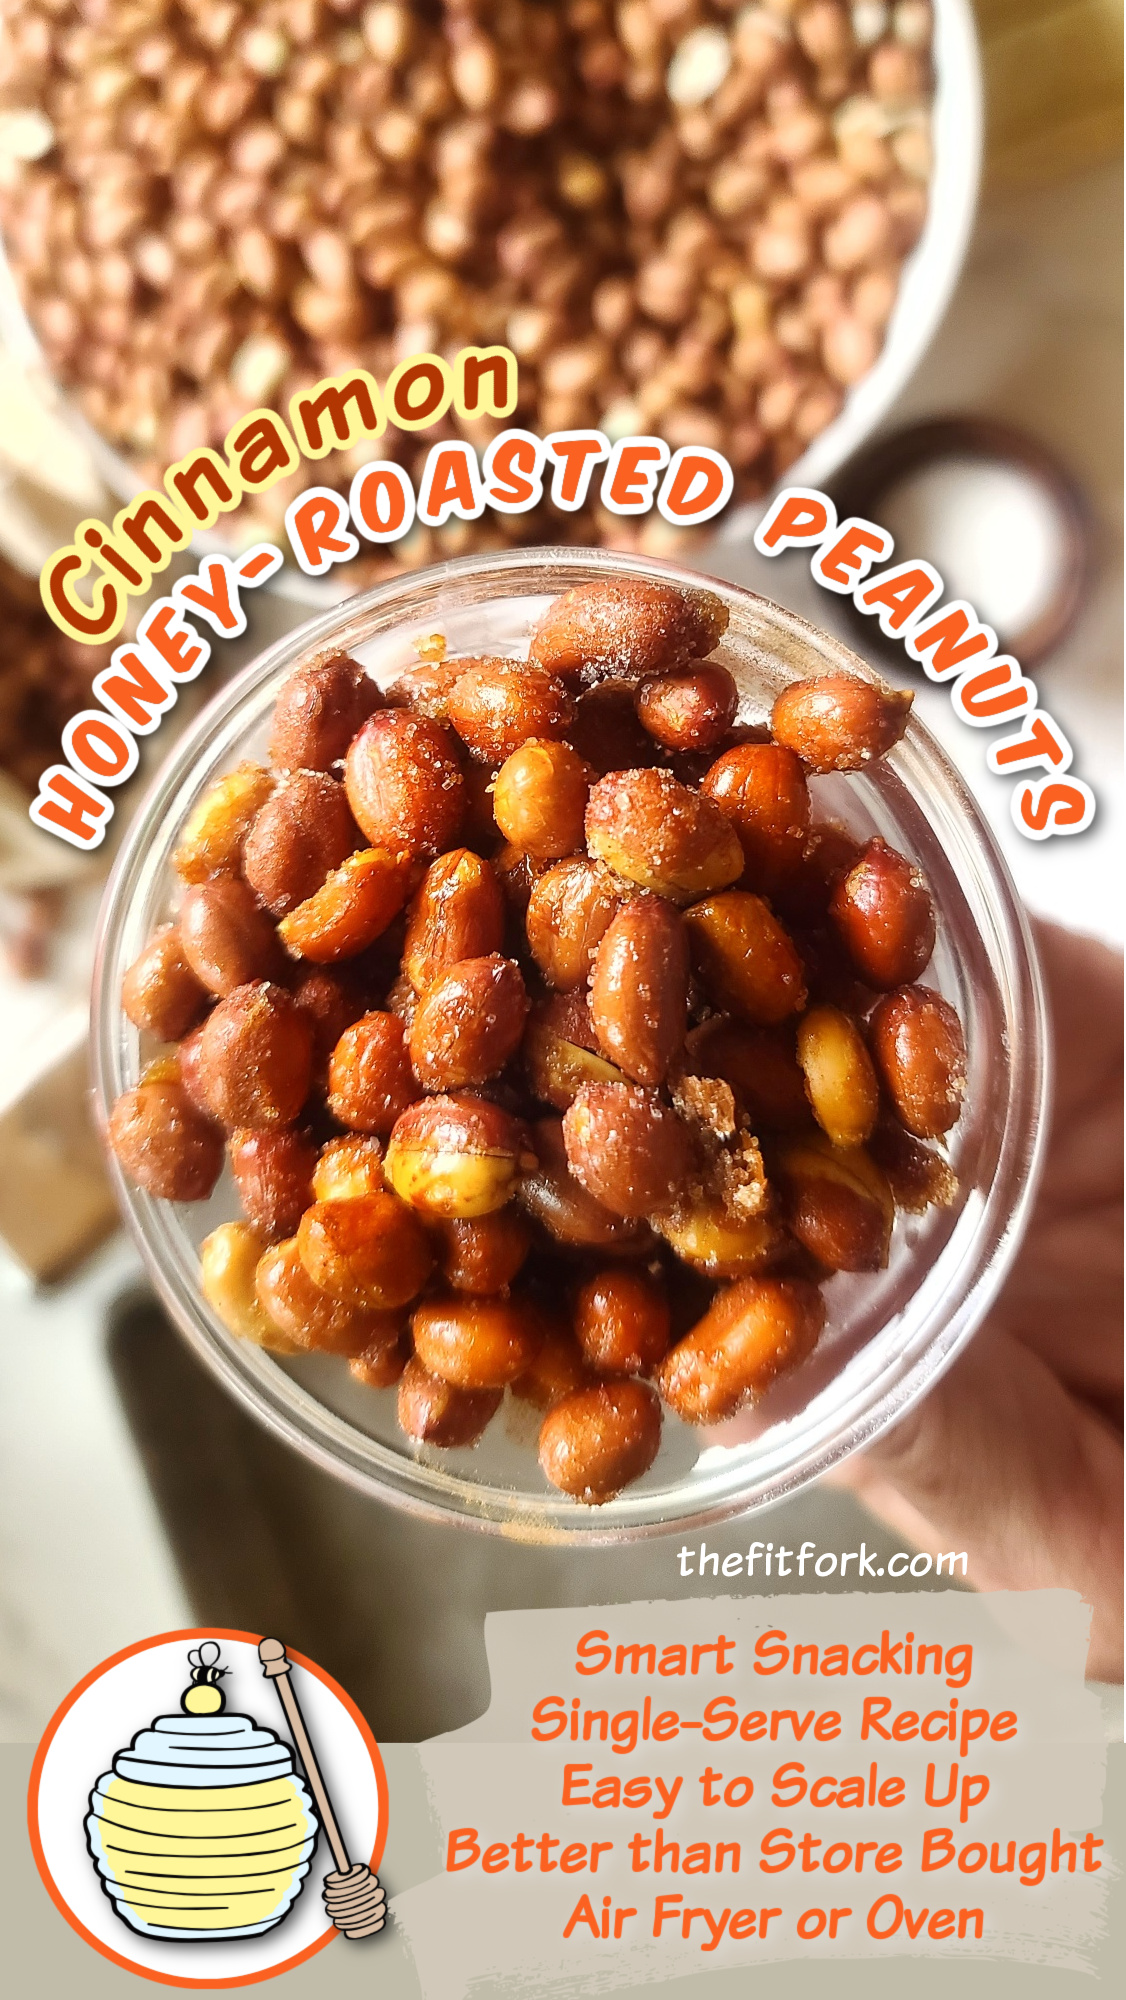
Nuts, nuts, get your hot peanuts here! Heavenly Cinnamon Honey Roasted Peanuts is a quick and easy snack recipe from my Cooking for One for Dummies cookbook that will satiate and satisfy those salty-sweet cravings.
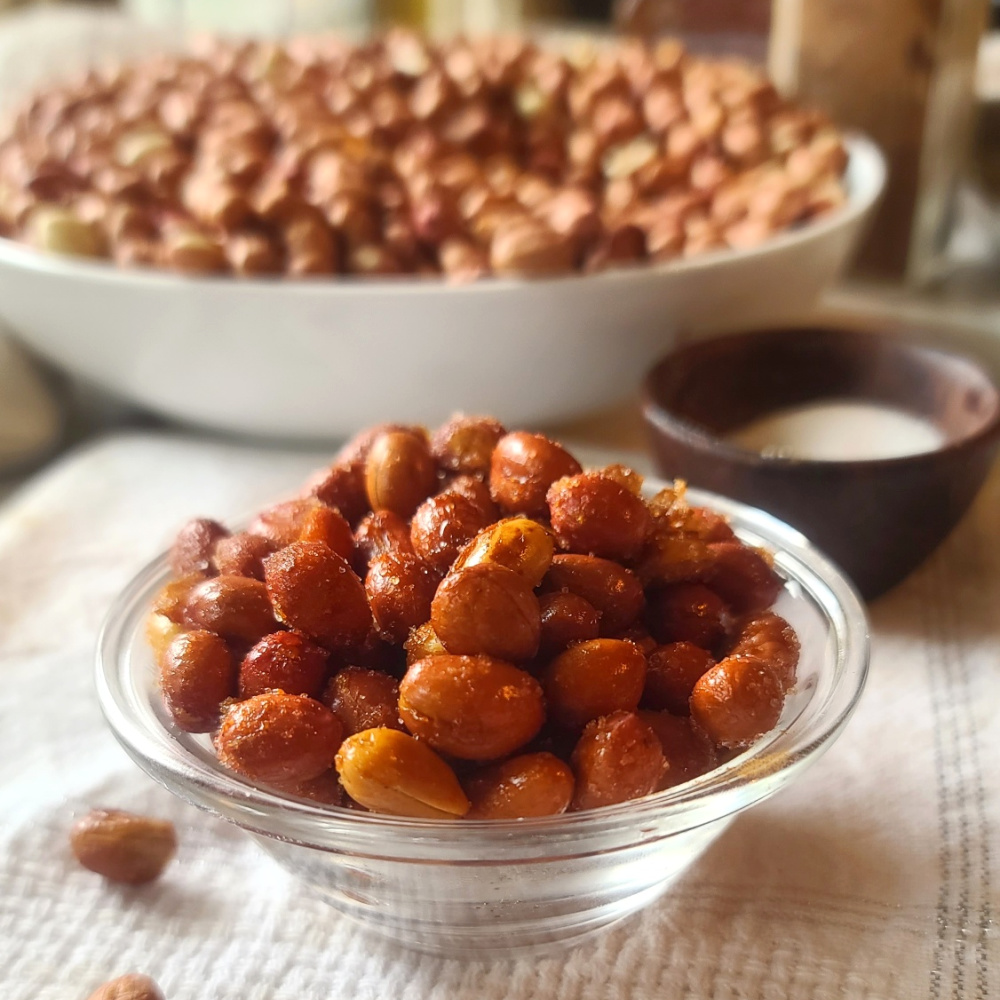
This honey-roasted peanut recipe is so much better than store-bought varieties, so fresh and warm and addictive – nothing like the smell of hot nuts in the air-fryer or oven. plus ready in under 10 minutes to snack on whenever the craving hits! I like the fact that the recipe is a single serve portion, so I don’t mindless snack on more than I intended.
Just a few simple ingredients, like melted butter and honey, are mixed up with raw Spanish peanuts. (Note: use raw peanuts for the best result). Spanish peanuts (aka: redskin peanuts) are a great source of protein and fiber, plus they also have resveratrol, a plant compound shown to regulate blood sugar.
After coating the peanuts in the honey butter mixture, just roast ‘em up in an oven or air fryer (I really love my oven-style air fryer) Then, while still warm, they are tossed with a mixture of sugar, cinnamon and salt. My original recipe calls for sugar, today I made them with a granulated sugar substitute (in a 1:1 measure equivalency) and they turned out great. The purpose of the sugar-cinnamon-salt coating is to add a bit more flavor, add texture and keep them from being too sticky.
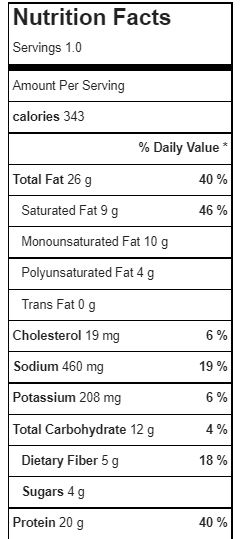
The portion size is pretty generous on this honey-roasted peanuts for one (1/2 cup), so if you have leftovers, they will stay fresh for a few days in an air-tight container or baggie. On the flip side, if you want a bigger batch, this is an easy, no-fail recipe to multiply up – no need to change any cooking time, just make sure peanuts are spread out in a single layer.

Treat yourself to a single-serve batch of honey-roasted peanuts dusted in cinnamon — all for you, you don't have to share (although, it's a generous portion, if you'd like too). This all-American snack satisfies those salty-sweet cravings, offers protein and fiber and tastes so much better than store-bought — made in only 10 minutes!
- 1 tsp butter melted
- 1 tsp honey
- ½ cup raw Spanish peanuts also called redskin
- 2 tsp sugar or granulated sugar substitute 1:1 measure equivalency
- ¼ tsp ground cinnamon
- ¼ tsp salt
-
Preheat air-fryer or oven to 325F.
-
Stir honey into melted butter. Pour peanuts; stir until evenly coated and then spread out on small rimmed baking sheet lined with foil, parchment or a silicone baking sheet (to make clean up easier).
-
Air fry for 5-6 minutes or bake for 8-10 minutes, stirring up halfway through. Watch closely near the end, as sugared nuts will start burning fast once they reach the “tipping point.”
-
Remove from heat. In small bowl, stir together sugar (or sugar substitute, cinnamon and salt); sprinkle over peanuts while still warm; toss to coat. Let cool a couple minutes before eating.