Steak & Mushrooms in Creamy Bourbon Sauce – Quick & Easy

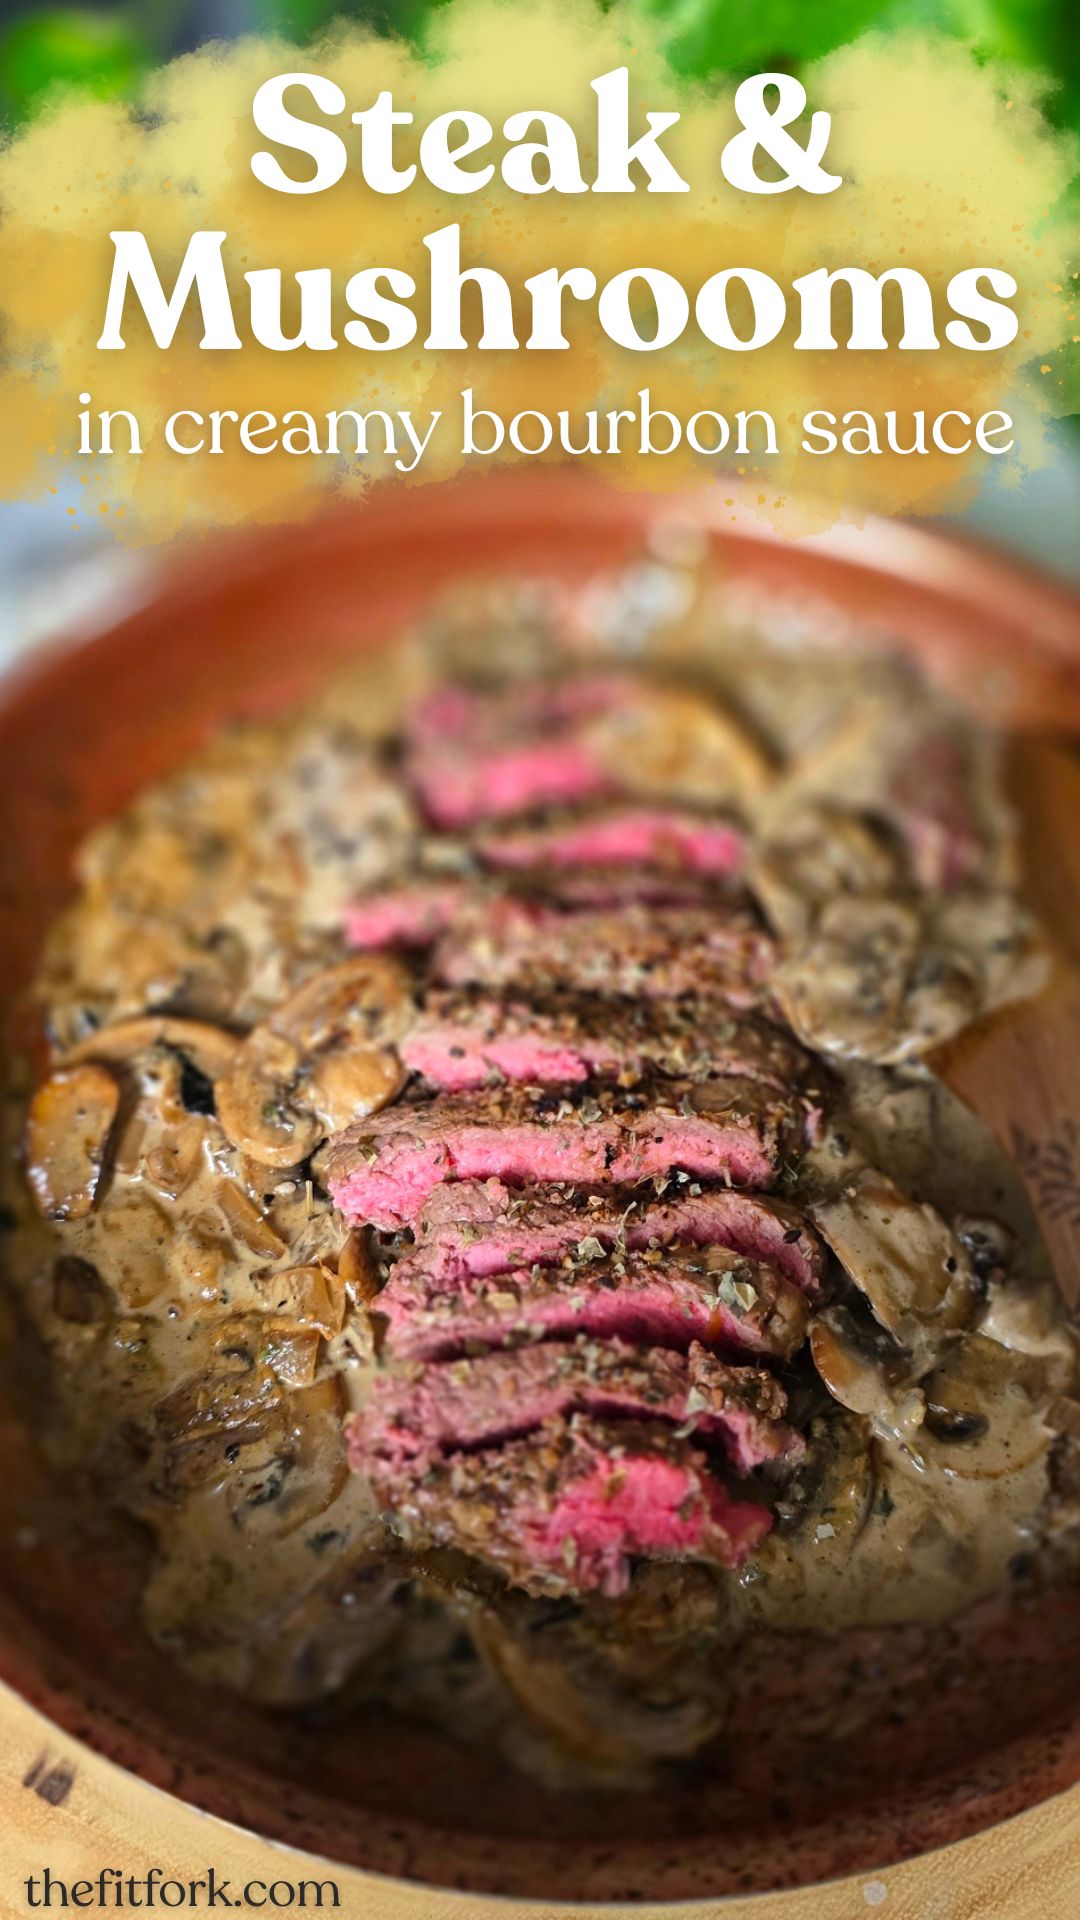
Life gets busy — but that doesn’t mean you have to skip a delicious, cozy beef dinner for two. This Steak & Mushrooms in Creamy Bourbon Sauce is proof that you can pull off a restaurant-worthy meal in about 20 minutes, start to finish. When the evening gets hectic or it’s too late to grill, this quick stovetop recipe comes to the rescue.

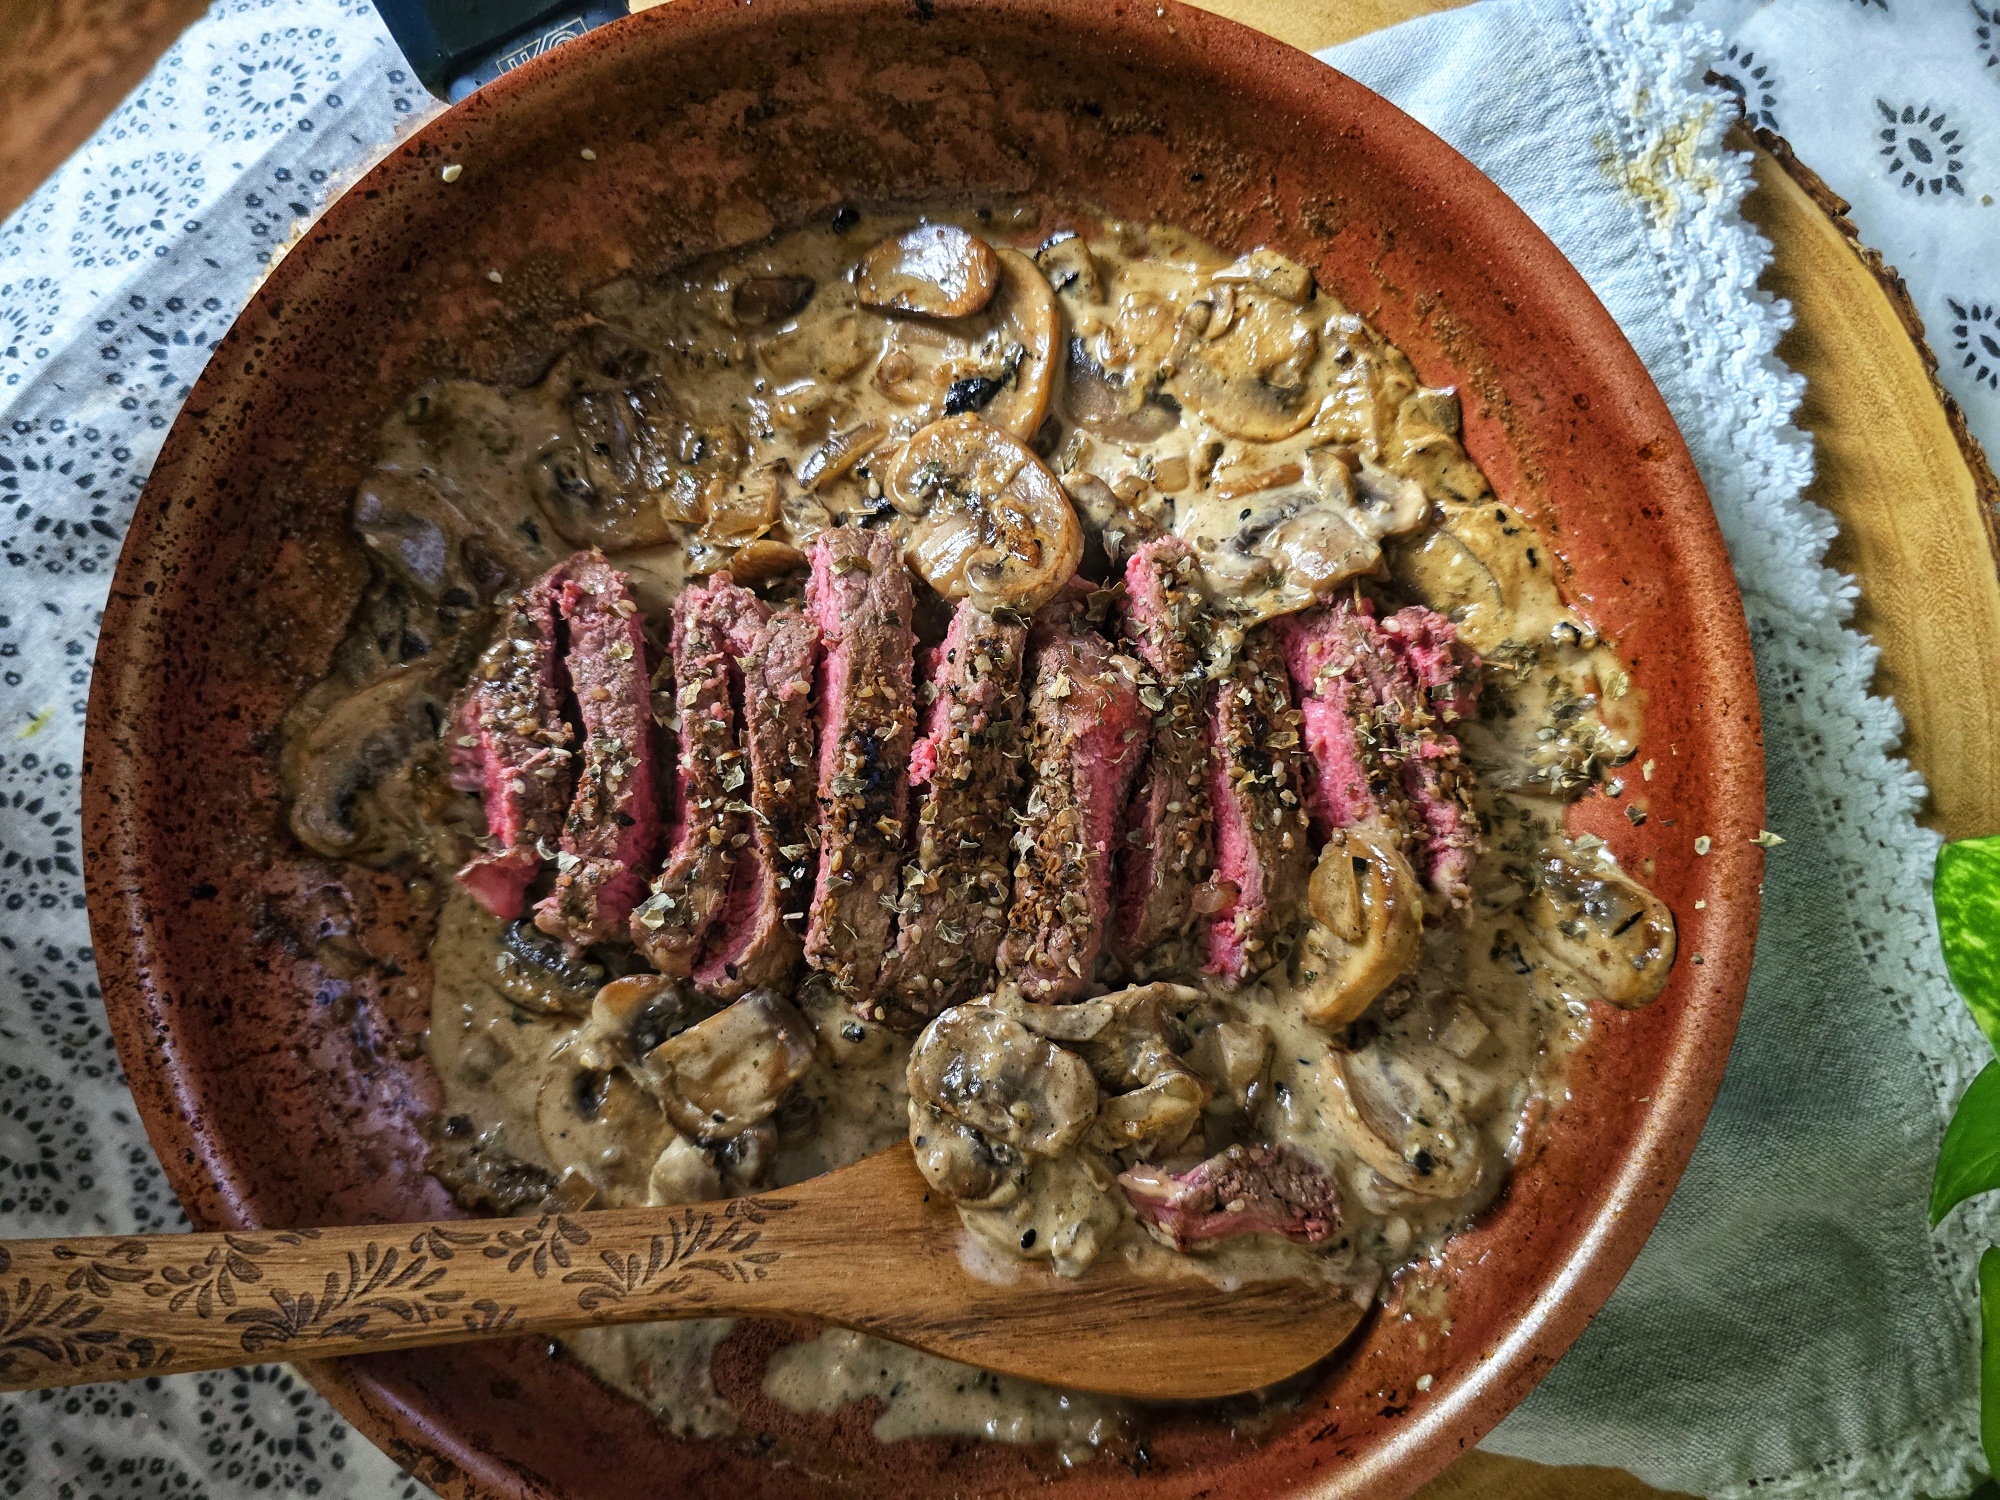
Sear a juicy steak, sauté a few mushrooms, and let a splash of bourbon and cream work their magic in the pan — that’s all it takes to turn an ordinary night into something special. The result is a tender, flavorful steak with a velvety, savory sauce that tastes like it took all day.

Why You’ll Love This Recipe

  • Fast: About 20 minutes from prep to plate.
  • Romantic: Perfect for a date night at home.
  • Flexible: Works with your favorite steak cut and seasoning blend.
  • Comforting: Rich, creamy, and deliciously satisfying.

Steak Choices

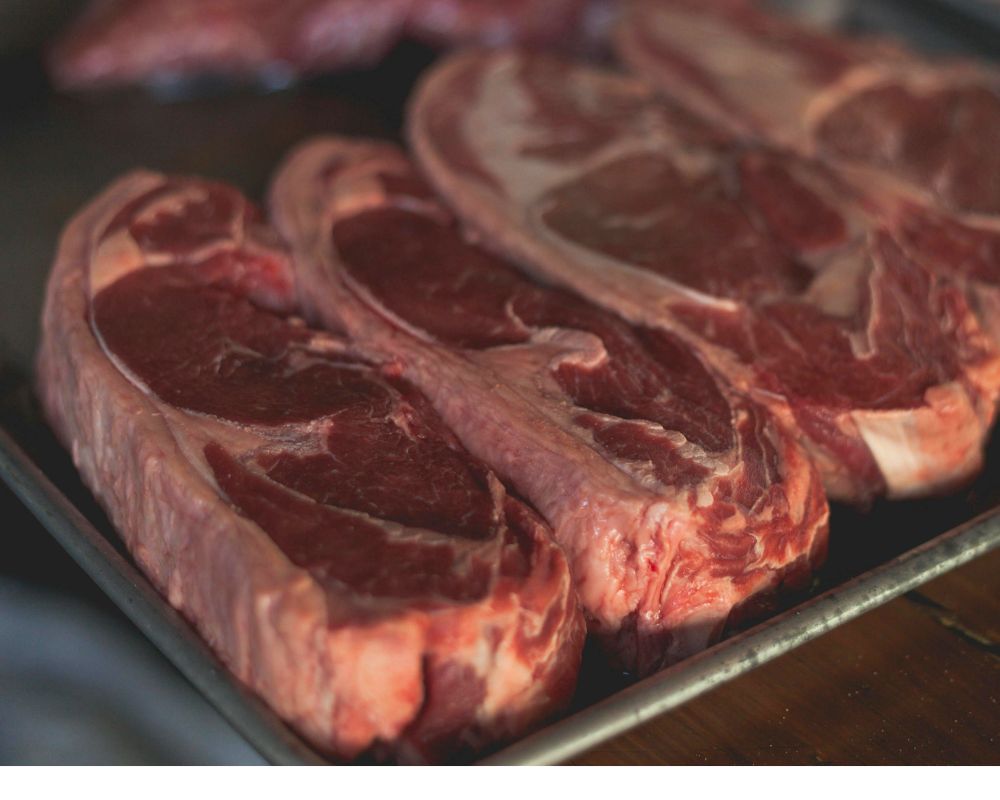
I used boneless ribeye, but this recipe works beautifully with other cuts like flat iron, top sirloin, or tenderloin. Choose what fits your taste and budget — the creamy bourbon sauce will make any cut shine.

boneless ribeye

Seasoning Tips

This is where you can have fun and customize the flavor – no matter which you choose, the bourbon and cream pull it all together in the end.

  • For classic flavor: stick with salt and cracked black pepper.
  • For a little zip: try lemon pepper or Montreal steak seasoning.
  • For a bold kick: go with your favorite spicy steak rub or Cajun blend.

Serving Suggestions

This dish pairs beautifully with just about any hearty base — think mashed potatoes, grits or polenta, buttered egg noodles, or rice to soak up all that luscious sauce. Add a simple green salad or roasted veggies on the side, light a candle or two, and you’ve got a romantic dinner in minutes.

Steak & Mushrooms in Creamy Bourbon Sauce (Quick & Easy)
Prep Time
8 mins
Cook Time
12 mins
Total Time
20 mins
 
Create a romantic steak night in just 20 minutes with this easy Steak & Mushrooms in Creamy Bourbon Sauce recipe. Simple ingredients, customizable seasonings, and restaurant-quality flavor — perfect for two!
Course: dinner
Keyword: beef, mushrooms, steak
Servings: 2 servings
Ingredients
  • 2 tbsp avocado oil divided
  • 8 oz button mushrooms sliced
  • ½ cup finely chopped yellow onion
  • 12- oz boneless ribeye
  • 1 tbsp steak seasoning of choice
  • ¼ cup bourbon
  • ½ cup heavy cream
  • 1 tbsp Worcestershire sauce
  • Salt and pepper to taste
Instructions
  1. In heavy skillet, heat 1 tbsp of the oil to medium-high and sauté mushroom and onions until softened and browning, 3-4 minutes. Remove from skillet and set aside.
  2. Sprinkle seasoning on front and back of steak and in same skillet (no need to wipe down) add the remaining oil. Increase heat to high and sear the meat for 1 to 4 minutes, depending on how thick the steak is.
  3. Turn and sear on the other side steak, continuing to cook until desired doneness is achieved == I would recommend medium rare: 135°F (pull of heat when thermometer reads 125°F and let steak rest on plate for 5-10 minutes).
  4. In same skillet, add bourbon and reduce heat to medium. The alcohol with quickly cook off, stir in mushroom mixture and stir in cream and Worcestershire sauce, stirring for a few minutes until heated through.
  5. Slice steak and serve with mushroom sauce. It’s delicious over mashed potatoes, grits or rice.

Salsa Poached Eggs (Huevos Ahogados-Style) — A Quick, Flavor-Packed 10-Minute Meal

If you’re a fan of shakshuka, you’ll fall in love with these Salsa Poached Eggs — my quick and zesty take on Huevos Ahogados, a classic Mexican dish that translates to “drowned eggs.” Traditionally, the eggs are gently poached in a simmering tomato salsa until tender and flavorful. My version uses a tomatillo-based salsa from one of my favorite craft brands, 505 Southwestern, for a tangy green chile kick that comes together in about 10 minutes.

This simple egg recipe for two proves that a satisfying, restaurant-worthy meal doesn’t have to take all morning. It’s a versatile dish that works with nearly any type of salsa — red or green — so go ahead and use your favorite salsa verde, roasted green chile salsa, or even that half jar of leftover salsa sitting in your fridge.

Each serving is warm, comforting, and layered with Southwestern flavor — perfect for breakfast, brunch, lunch, or dinner. And the toppings? Endless possibilities! Try spooning on black beans or leftover taco meat for extra protein, or finish with sour cream, guacamole, crumbled tortilla chips, jalapeños, or cilantro for a fresh, hearty touch.

So grab your skillet and your favorite salsa — you’ll have a bold, nourishing meal on the table in no time.

Salsa Poached Eggs (Huevos Ahogados-Style)
Prep Time
2 mins
Cook Time
8 mins
Total Time
10 mins
 
Whip up these easy Salsa Poached Eggs in just 10 minutes! Inspired by Mexican Huevos Ahogados, this healthy, flavorful recipe uses tomatillo salsa for a zesty twist that’s perfect for breakfast, lunch, or dinner.
Course: Breakfast, brunch
Cuisine: Mexican, Southwestern
Keyword: eggs, salsa
Servings: 2 servings
Ingredients
  • 1 ½ cups 505 Southwestern Tomatillo Salsa or, really, any type of salsa
  • 1/3 cup UP TO 1/3 cup chicken broth or vegetable stock may not be needed
  • 4 large eggs feel free to squeeze in 1 or 2 more eggs
  • sea salt and ground black pepper to taste
  • 1/2 cup crumbled queso fresco cheese or cheese of choice
  • 1/2 ripe but firm avocado sliced
  • handful of fresh cilantro leaves chopped
  • Extra topping ideas for serving: more salsa, sliced jalapenos, crumbled tortilla chips, sour cream, leftover taco meat, black beans or whatever else sounds good!
Instructions
  1. Add salsa to generously cover the bottom of a 8” to 9” skillet. IF your variety of salsa seems extra thick, thin it down with the optional broth, starting a couple tablespoons at a time and stirring in until it makes a nice sauce.
  2. Bring mixture to medium high heat until just starting to boil, then turn down to medium.
  3. Carefully crack an egg and slide it in whole into salsa. Repeat for remaining eggs. Sprinkle tops of egg white and yolk with a bit of salt and pepper.
  4. Lower heat to medium-low and let eggs simmer in the salsa for approximately 7-9 minutes.
  5. Add crumbled cheese and for last couple minutes, add lid to skillet to help warm up/melt the cheese and set the yolk further.
  6. Once the eggs have cooked to your preferred yolk doneness, remove from heat and top with cilantro, avocado slices and any other toppings you desire.

Small Batch Hummus to Serve One or Two

Buying a big tub of hummus can seem like such a commitment, especially if you’re snacking solo or with a just friend or two.  My Small Batch Hummus recipe is perfectly proportioned so that you can finish it off in two sittings (or one snack session if super hungry) – or share it with a buddy and have no leftovers clogging up the fridge!   

Small Batch Hummus - Cooking for One

Exciting News:

This small batch dip (or spread) is featured in my upcoming cookbook, Cooking for One for Dummies (which can be pre-ordered now, ships on March 7, 2023)

Plus, when you make homemade hummus, you’re in total control of the ingredients – there’s no weird preservatives, additives, or yucky stuff.  Plus, you get all the benefits of chickpeas, they are abundant in dietary fiber and also a good source of plant protein, iron, folate and other essential nutrients.

It’s fast, it’s easy, there is no cooking – you start with a can of chickpeas. Of course, you can make your own chickpeas, but that adds a lot of time and hassle to what is an easy-peasy snack recipe for one or two.

skin on chickpeas
Gently rub any remaining skins off your chickpeas for smoother hummus.

After draining the chickpeas (a legume sometimes referred to as garbanzo beans), pour them out onto a clean dishcloth or paper towels and lightly rub dry. In addition to drying the chickpeas, the other goal here is to remove any lingering skins. The light patting dry will encourage stragglers to fall off, simply pick the skins out and discard. The skins will do no harm if they end up in your hummus, it will just be not quite as smooth and creamy.  

Then, it’s just a matter of whipping everything up in a food processor or blender. Since this is a small batch appetizer recipe, a mini food processor or personal sized blender will work best.

How to Serve Small Batch Hummus

  • Simply paired with raw veggies like carrots, celery, radishes, squash rounds are my favorite way to eat hummus.
  • Serve with pita wedges for dipping, smear on crackers, or spread on slices of toasted baguette.
  • Elevate sandwiches, wraps and quesadillas by spreading around as part of the filling.
  • Get creative and toss with hot pasta or zoodles for an instant chickpea sauce.
Pin this for later!

Leftover Chickpeas in Can? While this homemade hummus for two uses just half a can of chickpeas, don’t throw the remainder out — you have options. First, you could easily double the homemade dip recipe, it scales up beautifully (however, do note the capacity of your mini food processor and use a bigger processor or blender, if needed). I also have another “1/2 can chickpea” recipe — Air-Fryer Crispy Chickpeas for One which also make a fabulous, heathy snack or salad topper.

Air Fryer Crispy Chickpeas for One a=is a quick, easy and healthy snack with lots of dietary fiber plus protein, iron, and folate.

Make both the Small Batch Hummus and the Air-Fryer Crispy Chickpeas for Ones and kill off the whole can at once making healthy snacks.

This post contains affiliate links.

5 from 9 votes
Small Batch Hummus - Cooking for One
Small Batch Hummus
Prep Time
5 mins
Total Time
5 mins
 

Make just enough homemade hummus to get your through a couple health snack sessions — or to share with a friend. Easy, healthy, and homemade, a fantastic snack and spread to add to your active lifestyle. Lots of dietary fiber and a good source of plant protein, dietary fiber, iron, folate and other important nutrients.

Course: appetizers, dips, snacks, spreads
Cuisine: Mediterranean
Keyword: appetizer, chickepeas, dip, garbanzo beans, snacks, spread
Servings: 2 servings
Ingredients
  • ¾ cup canned chickpeas drained and rinsed (about half a 15.5-ounce can)
  • 3 tbsp olive oil plus an additional 1 teaspoon for topping, if desired
  • tbsp tahini
  • 1 tbsp lemon juice
  • ½ tsp garlic or garlic paste
  • ¼ teaspoon salt
  • ¼ teaspoon ground black pepper
  • 1/2 teaspoon smoked paprika
Instructions
  1. Place all the ingredients in a personal-sized blender or mini food processor; process until smooth. If the consistency seems too pasty or thick, blend in 1 teaspoon of water at a time until desired texture is achieved.
  2. Transfer the hummus to serving bowl and drizzle with 1 teaspoon of olive oil and a sprinkle of paprika.
Recipe Notes

NOTE: Store the leftovers in an airtight container in fridge for up to 4 days.
VARY IT! Extra chickpeas from can be kept in an airtight container in fridge for a few days and added to salads, soups, and wraps

LEARN MORE! This small batch dip (or spread) is featured in my upcoming cookbook, Cooking for One for Dummies (which can be pre-ordered now, ships on March 7, 2023)