Addictive Honey Ginger Broccoli for Two in Air-Fryer

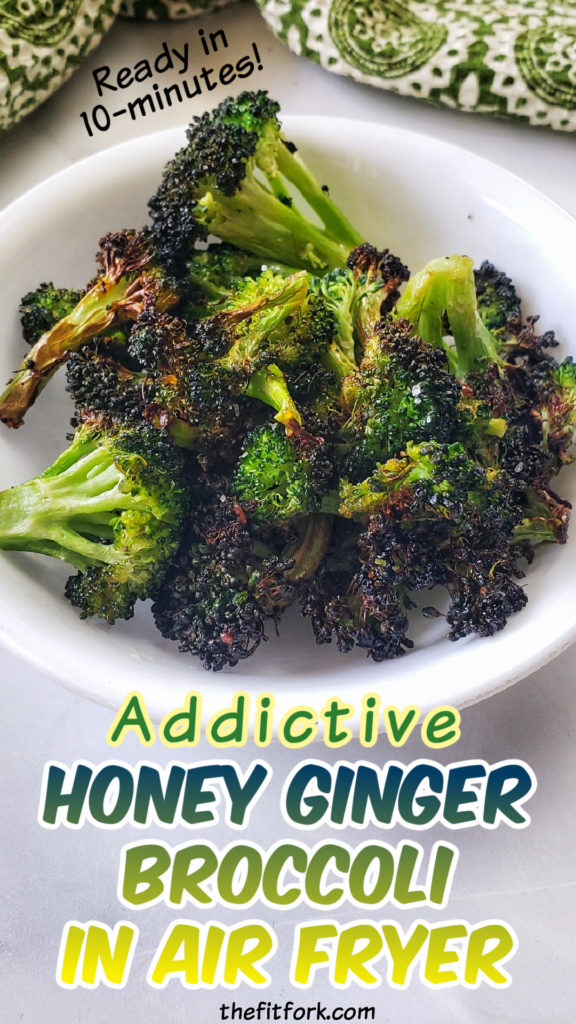
When I’m looking for a fast vegetable side dish, this easy broccoli recipe is a winner. A quick roast in the air fryer makes those little buds on the top “tree” part of the stalk deliciously crispy and lightly salty-sweet, while the stalk remains mostly tender. So delicious, it is seriously addictive!

A quick vegetable side dish in the air fryer that the whole family will love!  Slightly salty-sweet, crispy so delicious it's addictive!

This air fryer broccoli recipe only requires a few simple ingredients, takes less that 15 minutes prep to plate, and pairs deliciously with everything from fish, beef, chicken or to pile up in a nourishing grain bowl. My family thinks it’s the best broccoli recipe ever and will often eat it as a snack!

This broccoli recipe is SO EASY!

Choosing Broccoli for this Air Fryer Side Dish

Select broccoli with for tightly closed, dark green florets and firm, thinner stalks. Thick stalks mean the plant is older and can yield a woody texture. Also, skip over heads of broccoli with yellowing or tiny yellow flowers, this also means they are over-mature and not the best for eating. Fresh broccoli will last about 3 to 5 days in the fridge, properly stored.
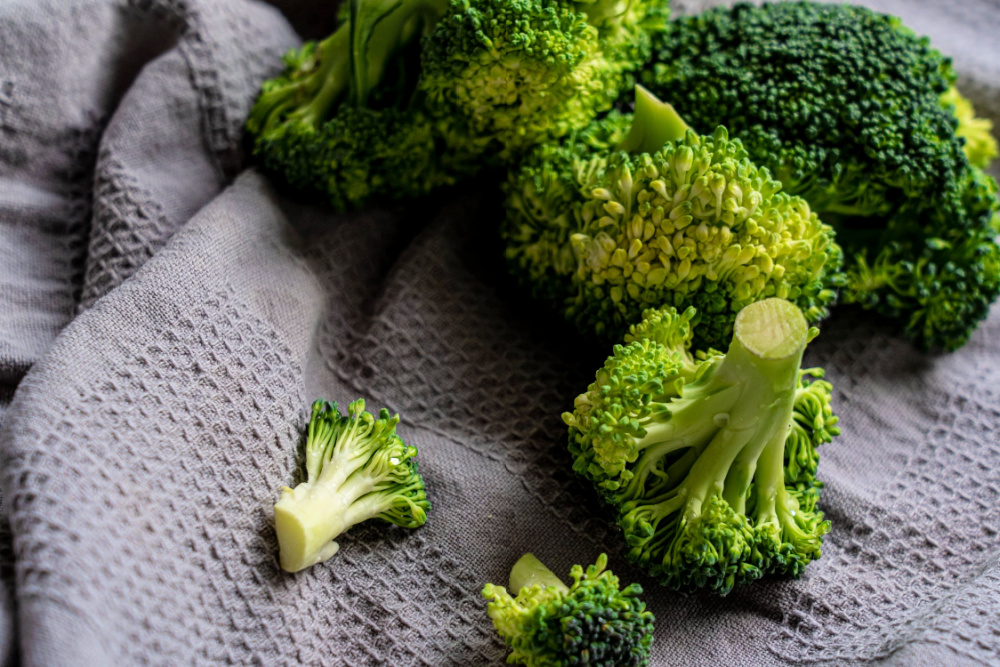
One shortcut I use on busy nights is to use pre-washed and bagged broccoli florets from the produce department, rather than cutting up the whole thing. Also, in a pinch, you can grab fresh broccoli florets off the salad bar offerings if your grocery store has one. However, I definitely don’t recommend using frozen broccoli for this air fryer broccoli recipe – that just won’t work. You’ll get a soggy, mushy result.

Can I Swap the Ginger Paste?

Another convenience I use in this air fryer broccoli is ginger paste, making my own rather than using the microplane grater on fresh gingerroot (although that’s a very fresh and vibrant option if you have a few extra minutes). Ginger paste is simply finely blended or minced ginger with a bit of oil and usually comes in a toothpaste-like tube or squeeze bottle so it’s easy to portion what you need. I would not recommend using dried ground ginger in this recipe, it just doesn’t lend the same zip! For another flavor option, you can also swap out the ginger for garlic! Or, for picky eaters, simply olive oil, salt and pepper.

What Air Fryer is Best for this Broccoli Recipe for Two?

Because this makes a small-batch of crispy broccoli intended for two people, it will fit in a standard, smaller “drawer” type air-fryer. I’ve also made it in my Instant Pot Duo Crisp (which has an air fryer function). If you are looking to double up the recipe to make more, then I would suggest using a larger toaster-oven style air fryer. I have the Instant Pot Omni Pro XL Air Fryer Toaster Oven, it has a large capacity cooing space, trays pull in and out like a traditional oven; and bakes, broils, air-frys, roasts, toasts and does nearly everything but wash dishes. Seriously, I love that think. However, if you don’t even have an air fryer at all, just bake at 400F degrees in a traditional oven for about 12-14 minutes, turning once with a spatula.

Storing Leftover Honey Ginger Broccoli

Store leftovers (if any!) in an air-tight container in the fridge for up to 3 days. However, it will lose its crispness to a degree. The best way I have found to reheat is to pop in microwave on “defrost” for up to a minute to take the chill off, and then crisp back up in a pre-heated air fryer for 2 or 3 more minutes, taking care not to burn the already browned parts.  This air-fryer broccoli isn’t suitable for freezer meal prep – it’s best enjoyed immediately.
Pin this for later!

Disclaimer: This post contains affiliate links. I may earn a small commission on purchases generated through links, however price to you remains the same. Proceeds help offset operating costs for The Fit Fork. Thank you!
5 from 5 votes
Honey Ginger Broccoli (for two) in Air Fryer
Prep Time
5 mins
Cook Time
10 mins
Total Time
15 mins
 

A simple, speedy, and super-tasty wat to prepare broccoli in the air fryer that the whole family will love!

Course: side, Side Dish, Snack, Vegetable
Keyword: air fryer, broccoli, paleo
Servings: 2 servings
Calories: 120 kcal
Ingredients
  • 6 ounces broccoli florets
  • 1 Tbsp olive oil
  • 2 tsp honey
  • 1/2 tsp ginger paste
  • 1/8 tsp salt
  • Dash pepper
Instructions
  1. Pre-heat air fryer to 390 F degrees.
  2. Wash, dry and chop broccoli into approximate 1-inch florets. Try to keep florets about the same size to promote even cooking.
  3. In bowl, whisk together olive oil, honey, ginger, salt and pepper
  4. Add florets and toss until well coated.
  5. Spread coated broccoli florets out into single layer in air fryer basket or tray.
  6. Air fry for 7 to 10 minutes, turning once, until “tree” part of broccoli is turning light brown and crispy.
Recipe Notes

Notes:

  • For a short cut, use bagged, pre-washed florets or purchase from the salad bar.
  • Smaller florets will cook faster than large florets.

Nutrition:

  • 120 cal, 8g fat, 25g carb, 3g fiber, 3g protein per serving

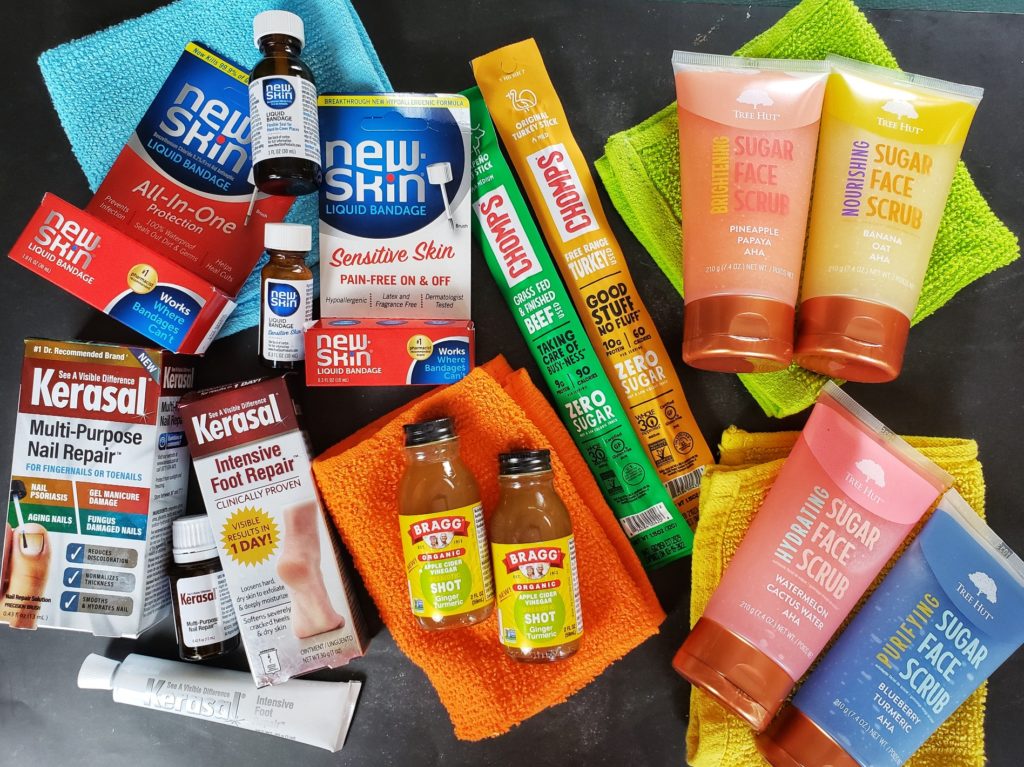
5 Health & Wellness Brands to Upgrade Fitness Self-Care Routine

This post is sponsored by BabbleBoxx

Running, obstacle course racing plus all the gym, boot camp and other fitness stuff I do, can really take a toll on my body! But, even though I’m in my 50s, I’m not about to give any of it up soon. That’s why I place a premium on eating well to refuel my body, taking proper care of minor injuries that come, and general workout recovery and some self-pampering.

I’m always on the lookout for new-to-me products to help me stay at the top of my game as an athlete and enthusiast of adventurous living. Today, I’m sharing five wellness and fitness finds that are perfect additions to my self-care routine.

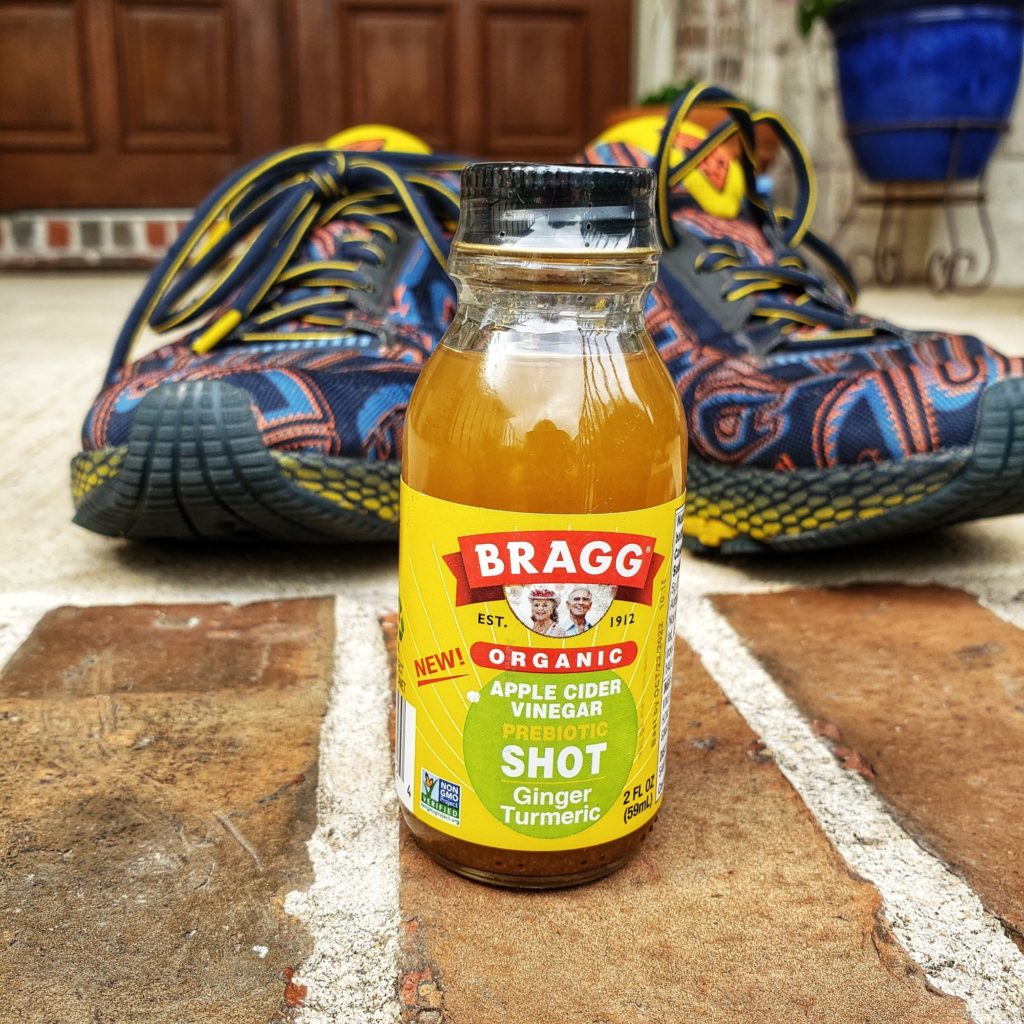
Bragg Apple Cider Vinegar Prebiotic Shots (Ginger Turmeric): Gut health is so important for athletes and apple cider vinegar is one well-known way to cleanse and rebalance the body. Bragg Apple Cider Vinegar (raw and unfiltered) is such a well-loved product and has been providing wellness benefits to consumers for more than a century. One of their convenient and very nutritionally functional products is Apple Cider Vinegar Prebiotic Shot which also features turmeric and ginger (and a bit of honey) to help reduce inflammation – which is something I personally manage as an older athlete. Check out the Bragg’s product line up at Bragg.com and save 20% on your order with code BRAGG20

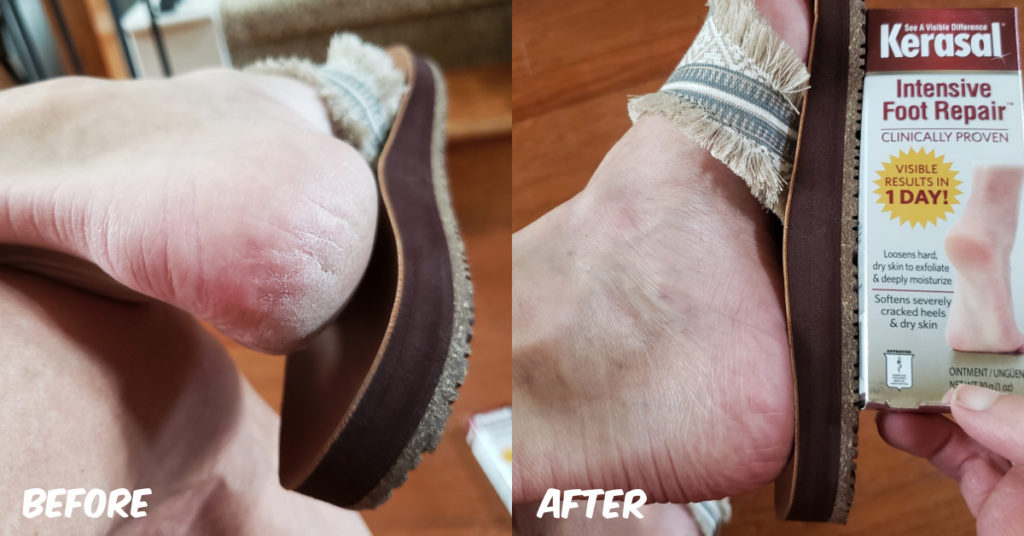
Intensive Foot Repair and Multi-Purpose Nail Repair from Kerasal: If I’m not in running shoes, I’m in flip flops – and sometimes that can be embarrassing due to all my runner foot problems including calluses, dry, cracked heels and toe-nail fungus -ugh. Kerasal Intensive Foot Repair makes my heels (and rough big toe) much more presentable with visible results in just ONE day! It’s an exfoliating moisturizer and callus remover with Salicylic acid that hydrates and moisturizes dry while exfoliating away dead skin. I like to apply it and wear overnight with cotton socks, for best results!

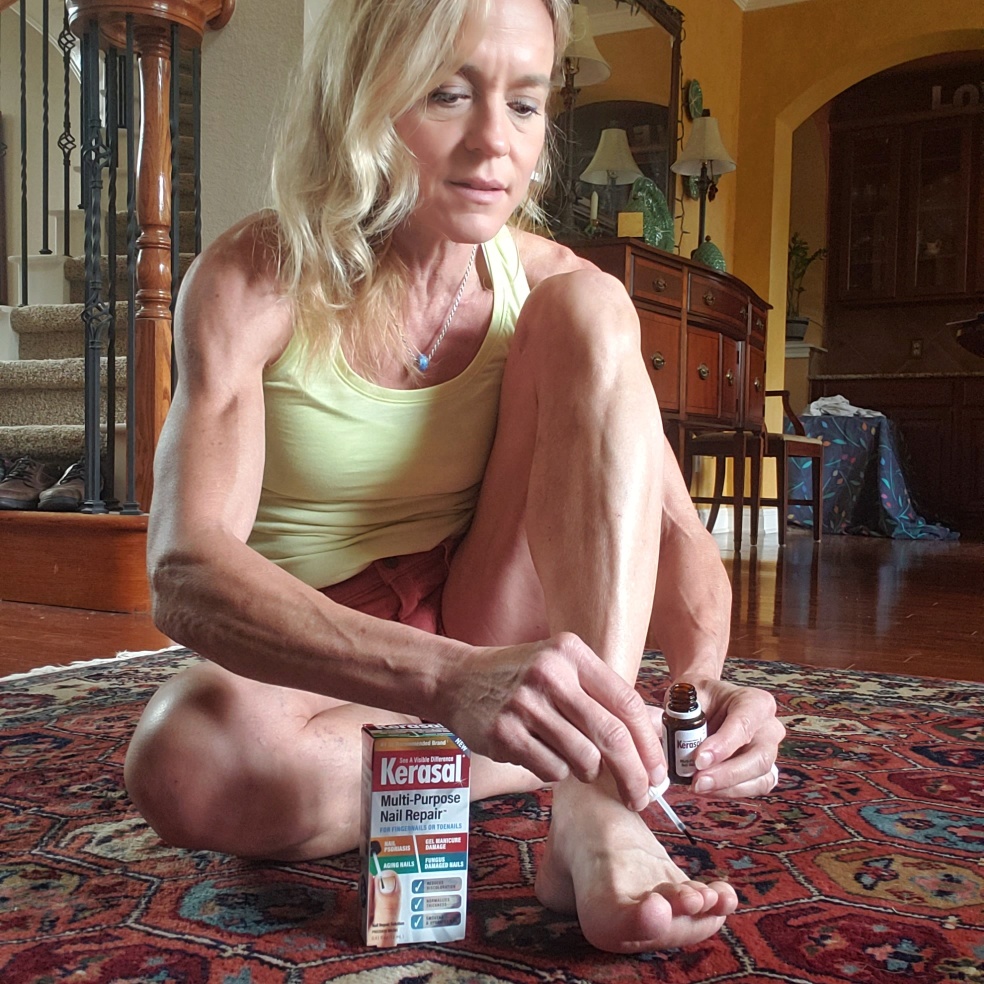
I’ve also been using Kerasal Multi-Purpose Nail Repair to help lessen the “shock and horror” reactions people have when they see my feet and the nail fungus damage.  Many of my toenails have been damaged from running, creating a hospitable environment for fungus, which in turn has also made my nails thick and discolored. The patented formula penetrates through the nail’s surface to help restore a healthy appearance – it can also be used on fingernails! It’s the #1 doctor recommended brand, and initial results can start to be seen in a week (although, expect to treat for 3 to 6 months for best results). Try it out and SAVE with this Kerasal coupon.

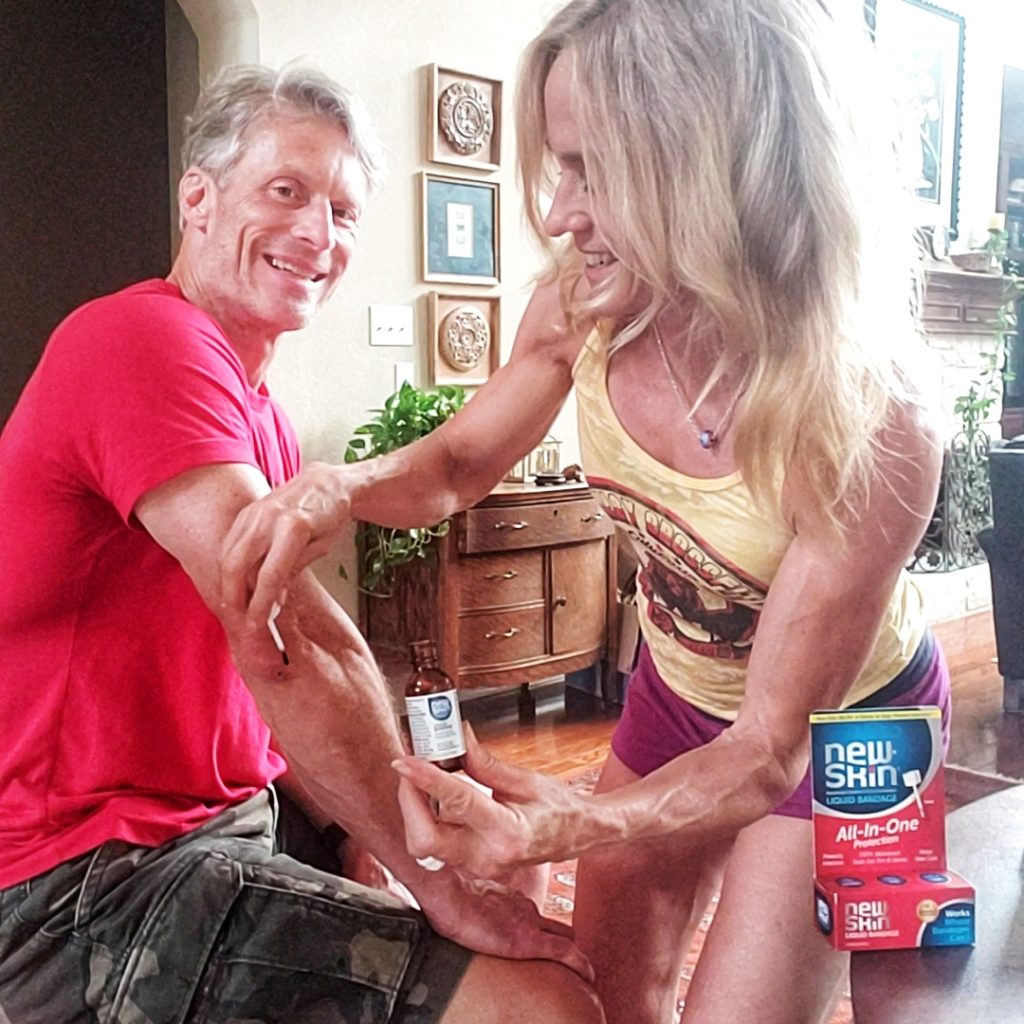
ll-In-One and Sensitive Skin Liquid Bandage from New Skin®: If you’ve ever run an obstacle course race or are considering it, TRUST ME, you want to have any minor cuts, scrapes, calluses, blisters, and dry cracked skin you have at the start line protected with the liquid bandages from this brand (because SERIOUSLY, who knows WHAT is in that mud)! Unlike traditional bandages that fall off easily when wet, dislodged from vigorous athletic activities, or just won’t work in an awkward and hard-to-cover areas (like between fingers, knees, or long scrapes). These bandages kill 99.9% of germs by providing a flexible seal that keeps out water, dirt, mud, and harmful bacteria.  The Sensitive New Skin® Liquid Bandage are hypoallergenic and fragrance-free, plus the application and removal is pain-free. These are available at Amazon and Walmart

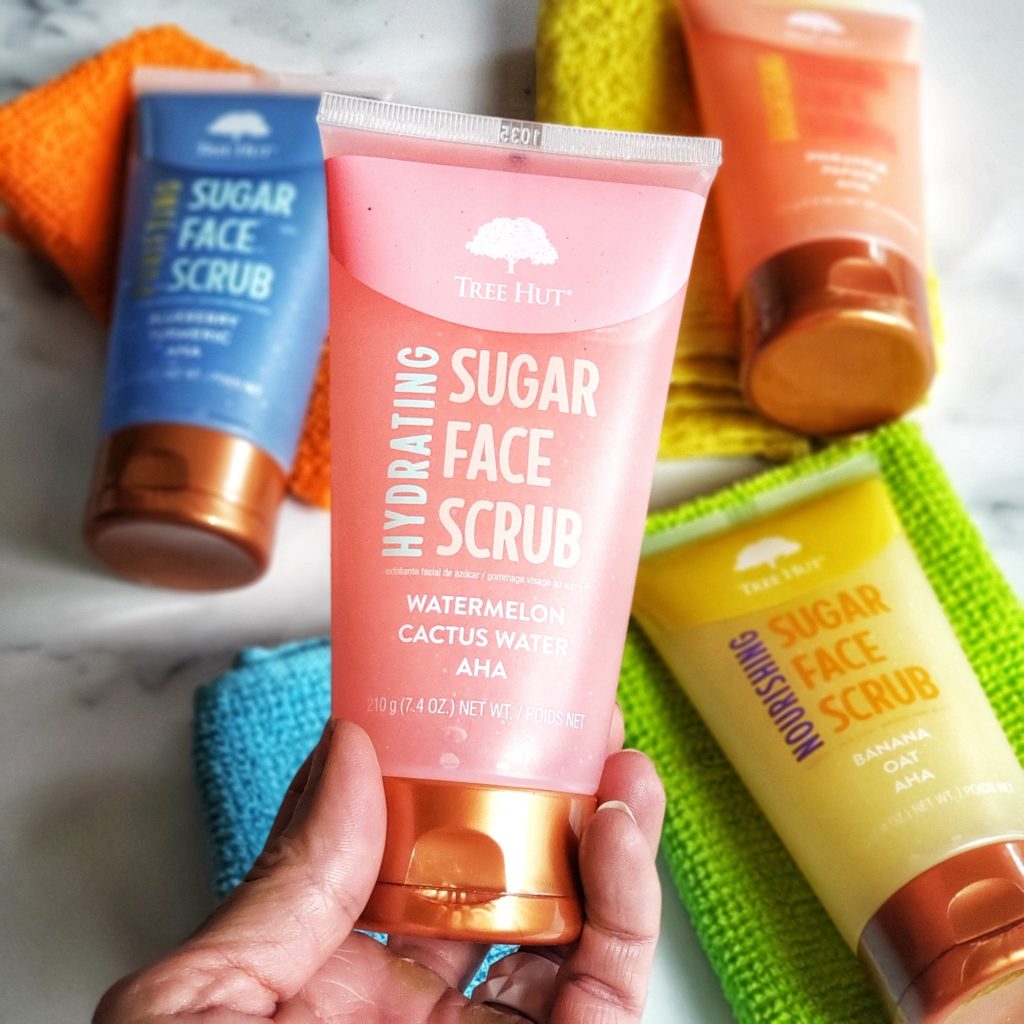
Sugar Face Scrubs from Tree Hut make me feel pampered in my skin care routine – especially after a hard, sweaty workout or race through mud, dirt and rough terrain! Tree Hut uses 100% natural exfoliants to help me buff away all the grime, dead cells and impurities from my skin and pores, and brighten my complexion in the process. Plus, the glycerin-based formula also helps my skin rehydrate and feel fabulous. Tree Hut’s Sugar Face Scrub line is paraben and cruelty free, vegan. They do not contain formaldehyde donors and are made in the USA. The line contains four different scents/formulas (being the watermelon-lover I am, I chose the Watermelon & Cactus Water Sugar Face Scrub first)!

 o Hydrating Watermelon & Cactus Water Sugar Scrub

o Brightening Pineapple & Papaya Face Scrub

o Purifying Blueberry & Turmeric Face Scrub

o Nourishing Banana & Oat Face Scrub

Chomps is not actually a new meat stick brand to me, but one I have loved in the past and was so happy to have again — I’m all about getting enough protein for workout recovery and their 1.15 oz sugar free meat sticks  have 9 to 10g protein each! The products, including Original Beef, Jalapeno Beef, and Original Turkey, are made from the highest-quality, sustainably sourced proteins with no hidden, harmful ingredients. Protein sources are never given hormones or antibiotics and humanely raised. You don’t have to be worried about eating something you don’t want, as Chomps free of added sugar, soy, dairy, and artificial stuff like preservatives, colors, nitrates, binders. Beef is grass-fed and grass-finished and turkey is free-range. If you are Paleo, Keto, have gluten and dairy allergies, or just expect the best – then these meat snacks are for you! I like to keep them stashed in my bag when hitting the gym, a road trip, or just a day of errands so I don’t get hangry and end up eating something lesser to this high-quality brand. Save with code BABBLE20 on chomps.com

Paleo Blackberry Almond Tart (Vegan, Gluten-Free, Lower Carb)

Jump to Recipe

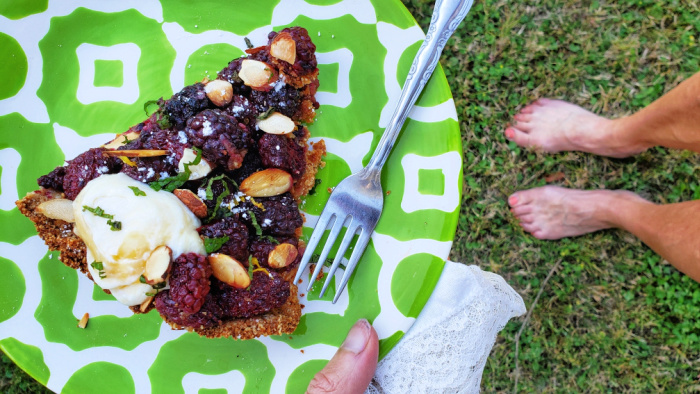
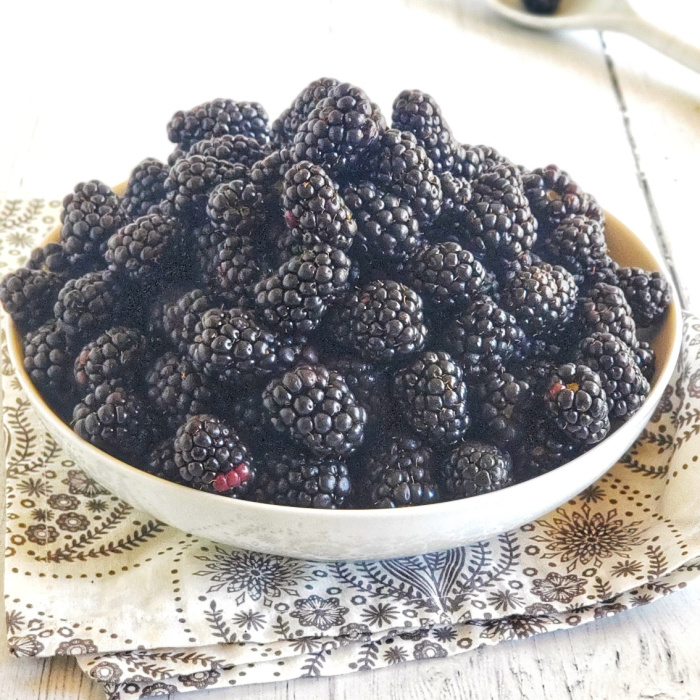
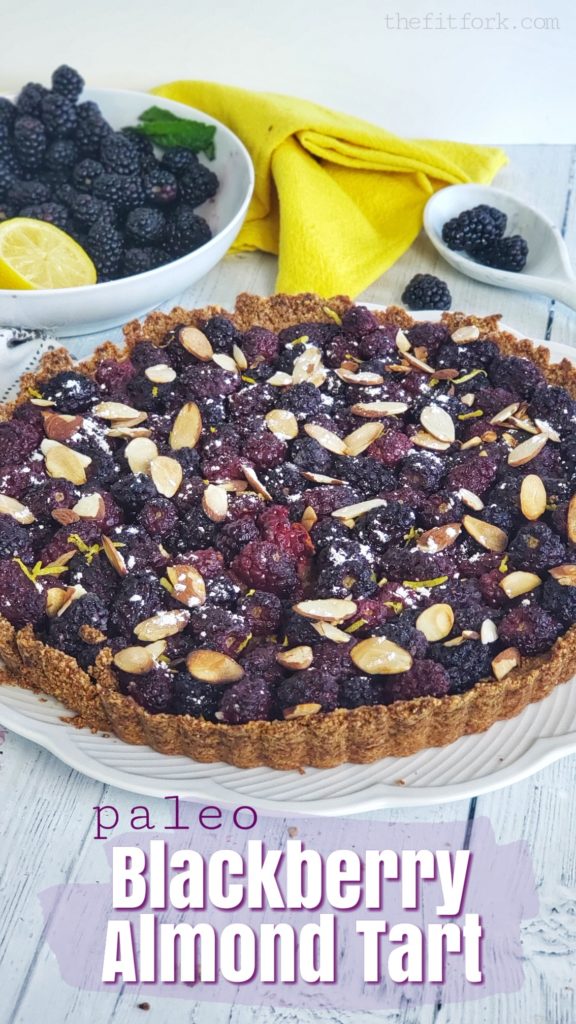
Fresh blackberries, yum! Nothing says toes-in-grass summer dessert more than a berry tart and that’s what I did with a recent windfall of plump, juicy blackberries!

My Paleo Blackberry Almond Tart is also gluten-free, vegan-friendly, made lower carb with some sweetener swaps. It’s a healthy berry dessert recipe that fits with so many dietary eating patterns!

Blackberries are rich in antioxidants, fiber, and a variety of other health promoting nutrients. If this, plus their sweet taste, isn’t enough motivation to eat them, check out the blackberry macros: just 6.1g of carbs 0.7g of fat, and 61.9 calories (plus, surprise – 2g protein)!

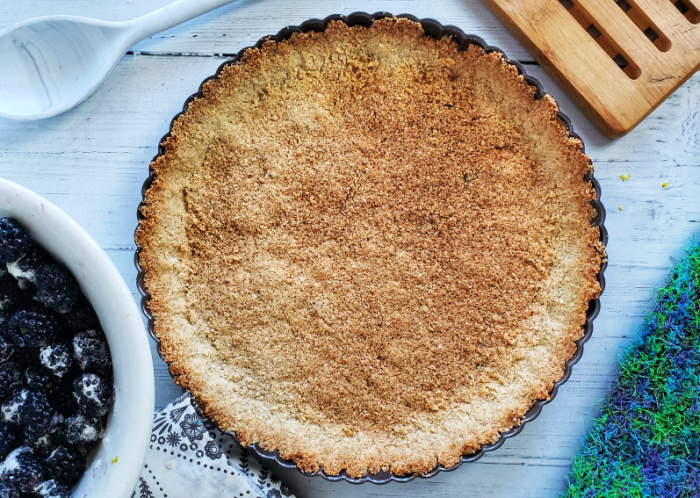
This is a super simple recipe, and starts with super-fine ground almond flour and coconut flour crust made without dairy, egg, or high calorie sweeteners (instead I used granulated Monk Fruit sweetener to moderate the carbohydrates and make it a (not LOW) but lower carb blackberry tart).

After baking the crust in an 11” Tart Pan, the fresh berries are simple tossed with a little more sugar substitute along with lemon juice and lemon zest. It’s popped back into the oven for 30 minutes until the berries are nearly bursting with juices.

Pin for Later!

Or, check out the Pinterest Story on how-to make this paleo blackberry tart with video demonstration.

Best served warm, as is – or with the creamy topping of your choice. I used a non-dairy yogurt mixed with lemon curd.

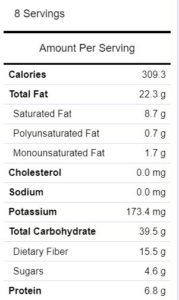
Each serving of this Paleo Blackberry Tart has 309 calories, 22g fat, 24g net carb (39 total with 15g fiber), and about 7g protein.
Do you have a favorite healthy berry dessert or Paleo blackberry recipe?! Please share – in need inspo for the rest of my fresh blackberries (which, BTW, were about $0.80 per pound where I picked them up!!!! A super deal!)

Also, another perfect blackberry recipe for summer entertaining: Skinny Blackberry Nectarine Margaritas!

This post contains affiliate links. I earn a small commission on any sales, however price to you remains the same. Proceeds help to offset operating expenses for The Fit Fork — thank you!

5 from 8 votes
BLACKBERRY ALMOND TART (PALEO, GLUTEN-FREE, VEGAN, LOWER CARB)
Prep Time
10 mins
Cook Time
40 mins
Total Time
50 mins
 

This delicious berry recipe is simple and perfect for summer entertaining!

Course: Dessert
Keyword: blackberry, blueberry, gluten free, paleo, tart
Servings: 8 servings
Calories: 309 kcal
Ingredients
  • 1 ½ cup super fine almond flour
  • ½ cup coconut flour
  • 1/3 cup cup-for-cup sugar substitute like Monk fruit or stevia
  • ¼ tsp baking soda
  • ¼ tsp salt
  • ½ tsp ground cinnamon
  • 1/3 cup coconut oil melted
  • ½ tsp vanilla extract
  • 4 to 5 cups fresh blackberries
  • ¼ cup cup-for-cup sugar substitute like Monk fruit or Stevia
  • 1 tablespoon fresh lemon juice
  • 2 ounces toasted almond slivers
Instructions
  1. Preheat oven to 350F degrees.
  2. Mix together dry ingredients: almond flour, coconut flour, sugar substitute, baking soda, salt, ground cinnamon. Mix in coconut oil and vanilla. Mixture will be crumbly, use hands to shape into ball.
  3. Set ball into middle of non-stick tart pan (11”) and press down and around with fingers until flattened and going up sides of tart pan. Bake for 10 to 12 minutes until turning golden on top.
  4. While crust baking, in bowl toss together blackberries, sugar substitute, lemon juice and lemon zest.
  5. Remove crust from oven and pour fresh berry mixture over rust. Return to oven and bake for 30 to 35 additional minutes, or until fruit starts to bubble.
  6. Remove at top with toasted almond slivers. Serve warm.
Recipe Notes

Paleo Coconut Fish Sticks with Spicy Peach Sauce – Paleo, Gluten-free

Jump to Recipe

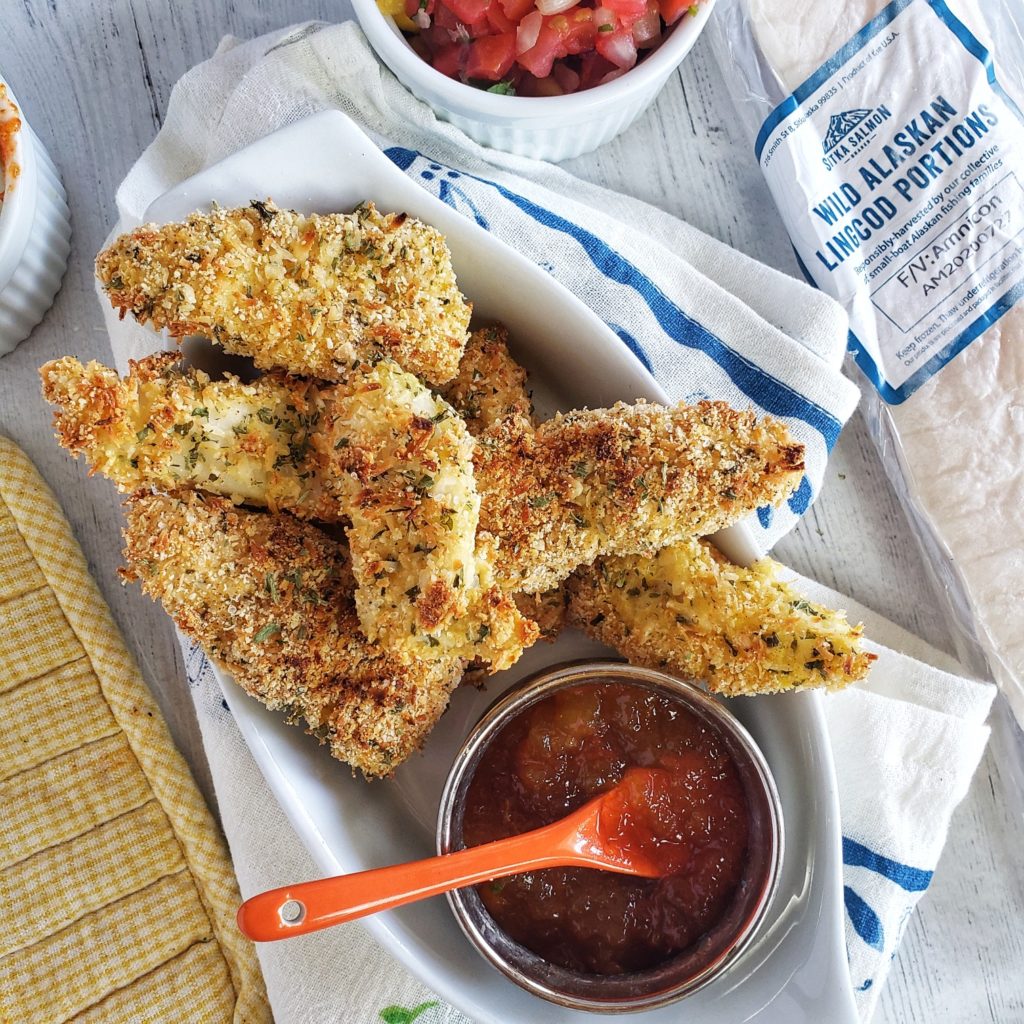
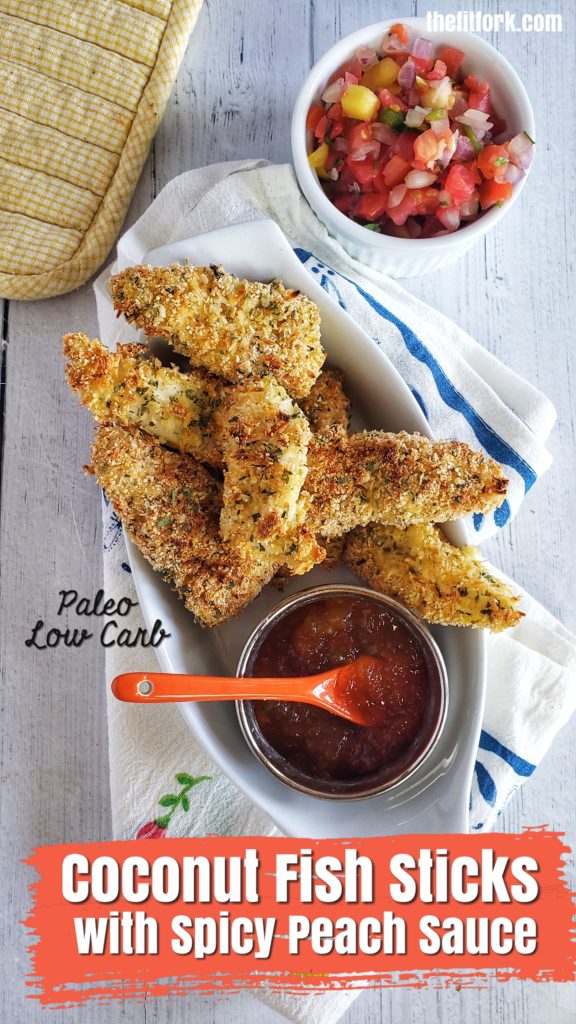
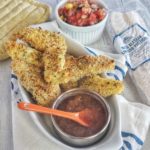
Crunchy, tender fish sticks are always a family favorite – especially with yummy dipping sauce to elevate the experience. My recipe for Paleo Coconut Fish Sticks with Spicy Orange Sauce are a quick healthy fish fix and sure to be requested again and again.

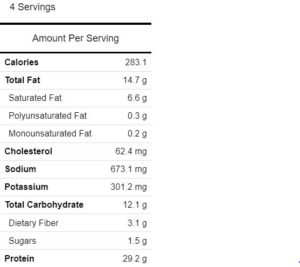
Crispy fish sticks are a family favorite and this easy fish dinner is made with lingcod, cold, pollock, halibut or other firm white fish and served with a simple three ingredient sauce. Paleo friendly, low carb and gluten-free -- perfect for Lent and also busy week night meals as only 25 minutes prep to  plate.

I like making my fish sticks at home with fish from Sitka Salmon Shares because I KNOW, I’m getting the good stuff. Whole chunks of responsibly-caught, wild-caught fish flash-frozen at the peak of freshness, not some questionable highly-processed fish product, minced up in tiny pieces and filled with all kinds of bready binders and yuck. To me, many store-bought (but not all) fish sticks are like the seafood version of hotdogs, ewww.

Crispy fish sticks are a family favorite and this easy fish dinner is made with lingcod, cold, pollock, halibut or other firm white fish and served with a simple three ingredient sauce. Paleo friendly, low carb and gluten-free -- perfect for Lent and also busy week night meals as only 25 minutes prep to  plate.
Pin this for later!

But kids love crispy fish sticks, am I right? And, adults too – they remind me of childhood, comfort and a time when things were just simpler. My boys who are now grown and off to college or first jobs are always calling me to as how to make homemade fish sticks. And, talking about simple, these Paleo Coconut Fish Sticks are success-guaranteed for beginner cooks. With a short ingredient list, simple instructions, and total of 30 minutes (max) prep to plate, you can have a heathy fish dinner on the table that is low-carb, Paleo-friendly, and gluten-free.

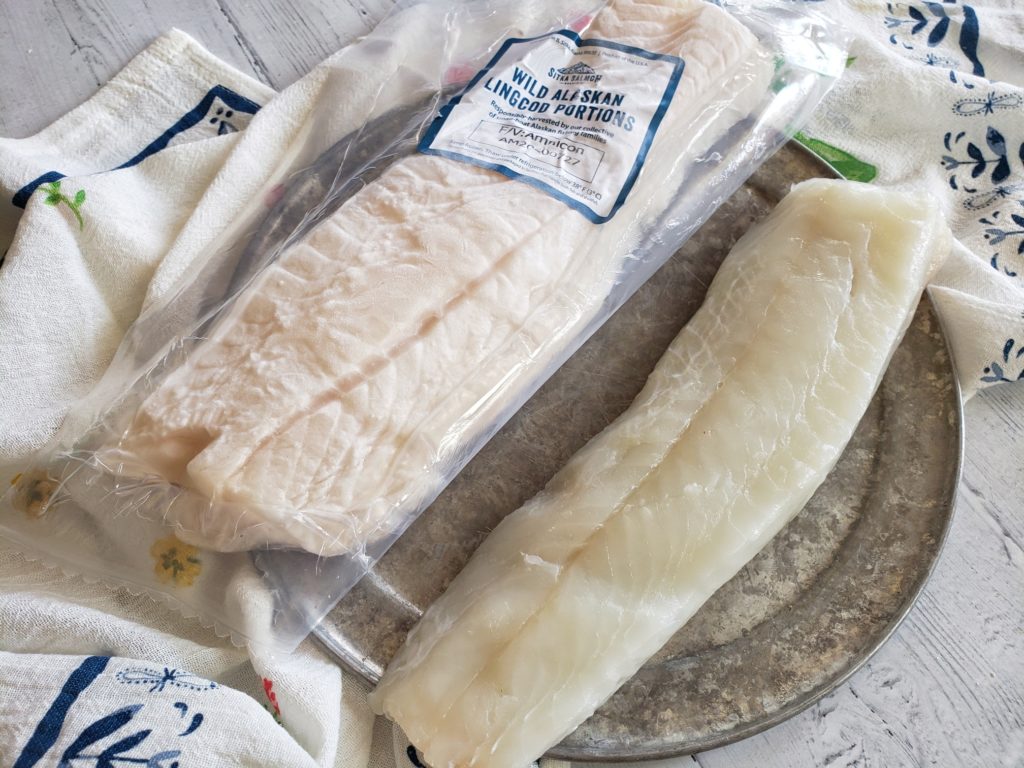
Lingcod fish from Sitka Salmon Shares - save $25 with code FitFork at SitkaSalmonShares.com

First things first, you’re going to need an approximate 1-lb. skinless filet from a firm, white fish. I used lingcod from a fisherman’s co-op called Sitka Salmon Shares, it’s a mild white fish that actually isn’t cod at all, but a relative of the greenling family. It has a dense flesh, with large flakes and slightly sweet taste – many say it reminds them of halibut. Halibut would be another good choice, as would less expensive choices like pollock, haddock, and cod. Stock your freezer with a premium share of Sitka Salmon Share’s wild fish and seafood options responsibly-caught from cold Alaskan waters and save $25 with discount code: FitFork

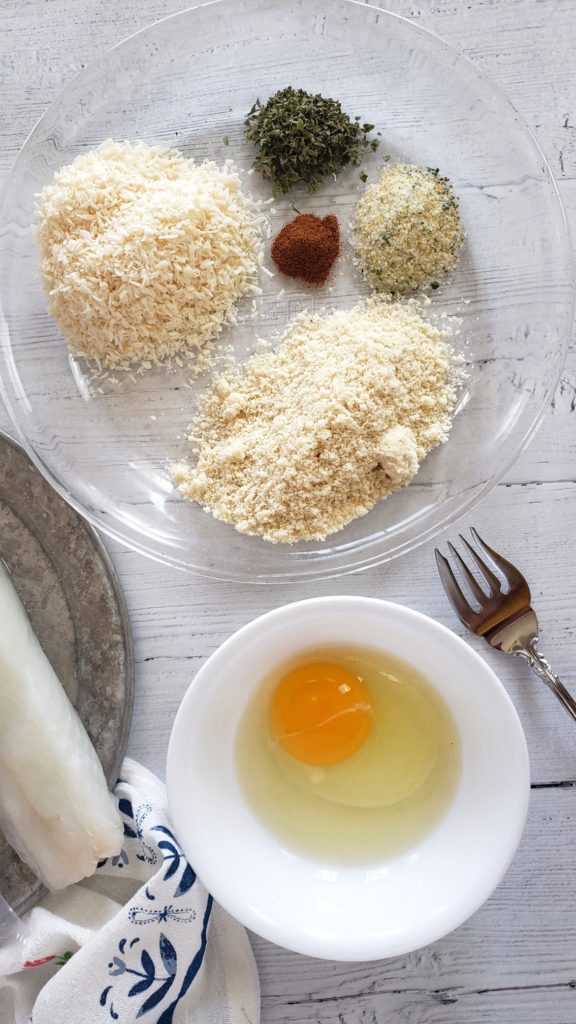
Paleo and gluten0free dredge ingredients for Crispy Coconut Fish Sticks (with Lingcod)

The recipe for lingcod fish sticks (or any other white fish) couldn’t be any easier and fast, rendering it a busy weeknight dinner solution. Make a simple egg wash and dredge with shredded coconut, almond meal and a few herb/spices (bonus, the coating is gluten free and Paleo). Then bake for approximately 15 minutes at the same time what you whip-up a simple, 3-ingredient dipping sauce that warms in the microwave. Boom, bam – that’s it!

Pro tips:

  1. When dipping and dredging fish, use one hand for the egg and the other hand for the coconut mixture to keep fingers from getting overly gunked up.
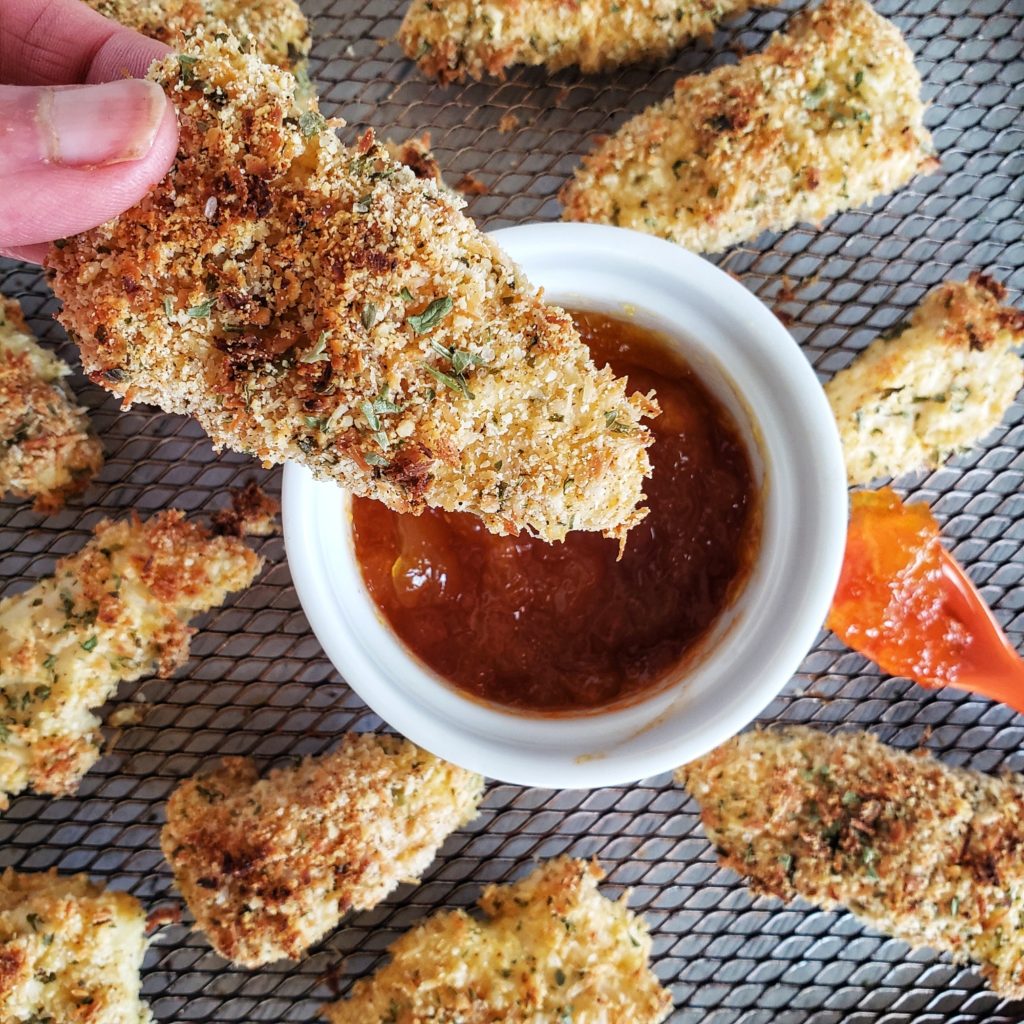
  2. Achieve maximum crunch on these crispy coconut fish sticks by baking on a mesh crisping tray designed for the oven. This allows hot air to circulate all around and make both top and bottom of the coconut fish sticks crispy.
  3. Meal prep more than one batch and freeze in a single layer, in freezer-proof container. To reheat from frozen, place on crisping tray for approximately 10 minutes in a 400F degree oven, or until warmed through.
  4. Don’t forget to visit Sitka Salmon Shares, they are a great resource for healthy fish recipes, including lingcod recipes and easy white fish recipes like these coconut crusted fish sticks (and use my code FitFork for $25 off a premium share)
Sitka Salmon Shares: Save $25 on most shares with code: FitFork

This post sponsored by Sitka Salmon Shares and contains affiliate links, however all content, opinions and enthusiasm remain my own. Thank you for visiting and supporting companies that partner with The Fit Fork.

5 from 5 votes
Crispy fish sticks are a family favorite and this easy fish dinner is made with lingcod, cold, pollock, halibut or other firm white fish and served with a simple three ingredient sauce. Paleo friendly, low carb and gluten-free -- perfect for Lent and also busy week night meals as only 25 minutes prep to plate.
CrispyCoconut Fish Sticks with Spicy Peach Sauce – Paleo, Gluten-free
Prep Time
10 mins
Cook Time
15 mins
Total Time
25 mins
 

Crispy fish sticks are a family favorite and this easy fish dinner is made with lingcod, cold, pollock, halibut or other firm white fish and served with a simple three ingredient sauce. Paleo friendly, low carb and gluten-free — perfect for Lent and also busy week night meals as only 25 minutes prep to plate.

Course: dinner, entree
Keyword: black cod, family friendly, fish, gluten free, lingcod, paleo
Servings: 4 servings
Ingredients
  • 1 lb skinless filet of firm white fish like lingcod halibut, tilapia, cod, pollock, haddock
  • ½ cup unsweetened shredded coconut
  • ½ cup almond meal
  • 1 tbsp freeze-dried parsley or dried
  • 2 tsp garlic salt
  • 1 tsp sweet paprika
  • ¼ cup sugar-free peach preserves
  • 1 tbsp coconut aminos can substitute soy sauce if not Paleo or gluten-free
  • 1 to 2 tsp sriracha sauce paleo version preferably
Instructions
  1. reheat oven to 375F degrees
  2. Cut fish into approximate ¾” wide x 1 ½” long sticks or nuggets. Try to make pieces even in size and thickness so that it cooks evenly.
  3. In shallow dish, mix together coconut, almond meal, parsley, garlic salt and paprika.
  4. In small bowl, whisk egg.
  5. Dip fish pieces, one at a time, into egg wash and then roll into coconut mixture, pressing to stick on if needed. Place on baking sheet, preferably with mesh cooking rack inside to elevate and allow heat circulate. Repeat with all fish chunks.
  6. Bake at 375F for approximately 12 to 15 minutes or until fish white and flaky and turning lightly golden brown on top.
  7. While fish baking, mix together preserves, coconut aminos and sriracha and warm up in microwave for about 30 seconds.
  8. Remove fish from oven and serve with warmed sauce!
Recipe Notes

“Shake It Up” Paleo Watermelon Ice Cream

This post is sponsored by Watermelon.org, however all opinions, comments and enthusiasm remain my own!

Jump to Recipe

Warmer weather is on the way and I’m craving all the watermelon things and quite literally working my appetite up! Check out my “Shake It Up” Paleo Watermelon Ice Cream that is fun to make as it is to eat! 

Do you have memories of making “kick the can” ice cream at summer camp or spring break gathering as a kid? Back in the day, my mom would pour in the ingredients for ice cream into a can and then stick that can into a bigger can filled with ice and salt. Then my brother and I would kick, roll and throw that can around until a creamy sweet treat formed from our hard work!

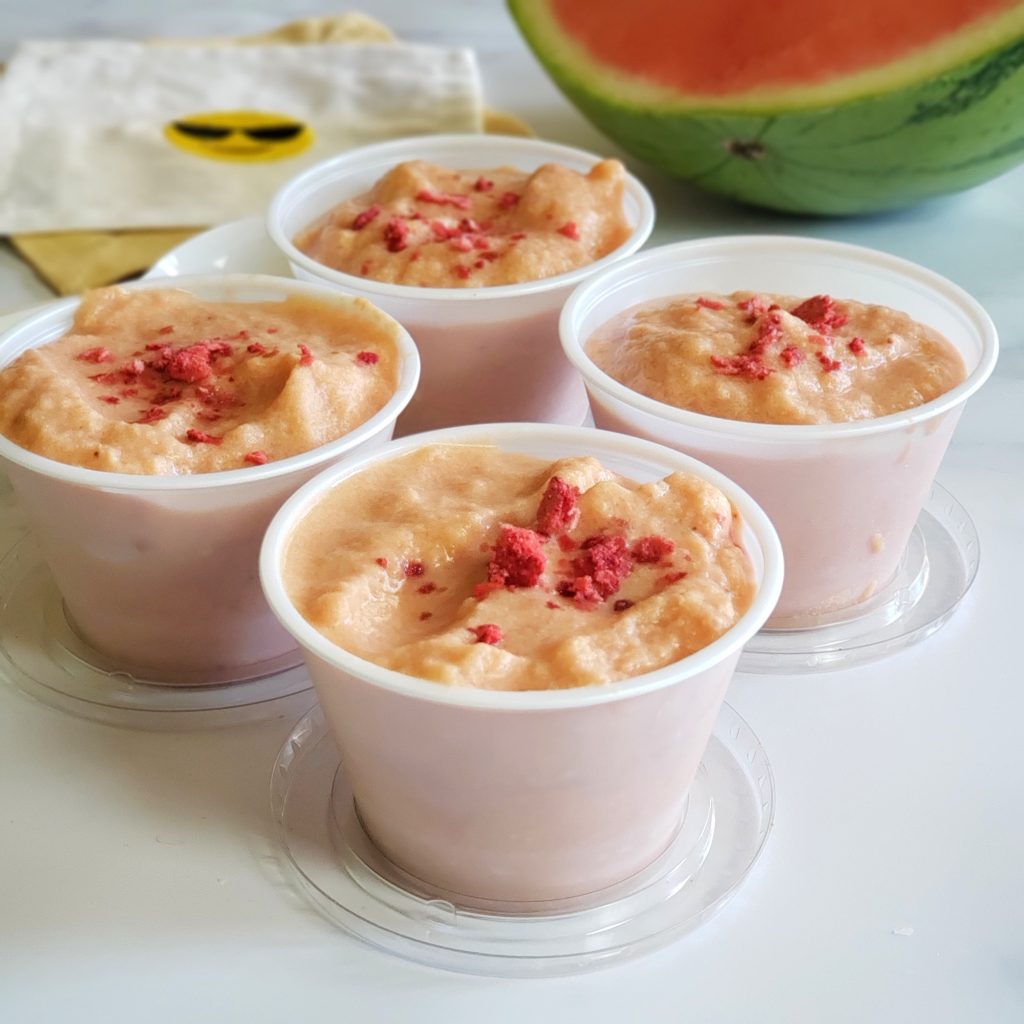
“Shake It Up” Paleo Watermelon Ice Cream - no ice cream machine or freezer necessary. Simple ingredients poured into a zip-top baggie and then place into a container with ice and salt. Then, it’s a 15-minutes of shake-shake-shaking to create a creamy frozen dessert treat that is added sugar free, lower carb, Paleo-friendly and with a vegan option. A fun family activity and way to sneak exercise into your day. #Ad
Pin this for later!

I took the same idea for this no-machine-needed, no-churn ice cream and turned it into a healthier version with fewer carbs and suitable for Paleo diets – and, of course, it features my favorite fruit – WATERMELON! Plus, you get a little 15-minute workout during the human-powered freezing process.

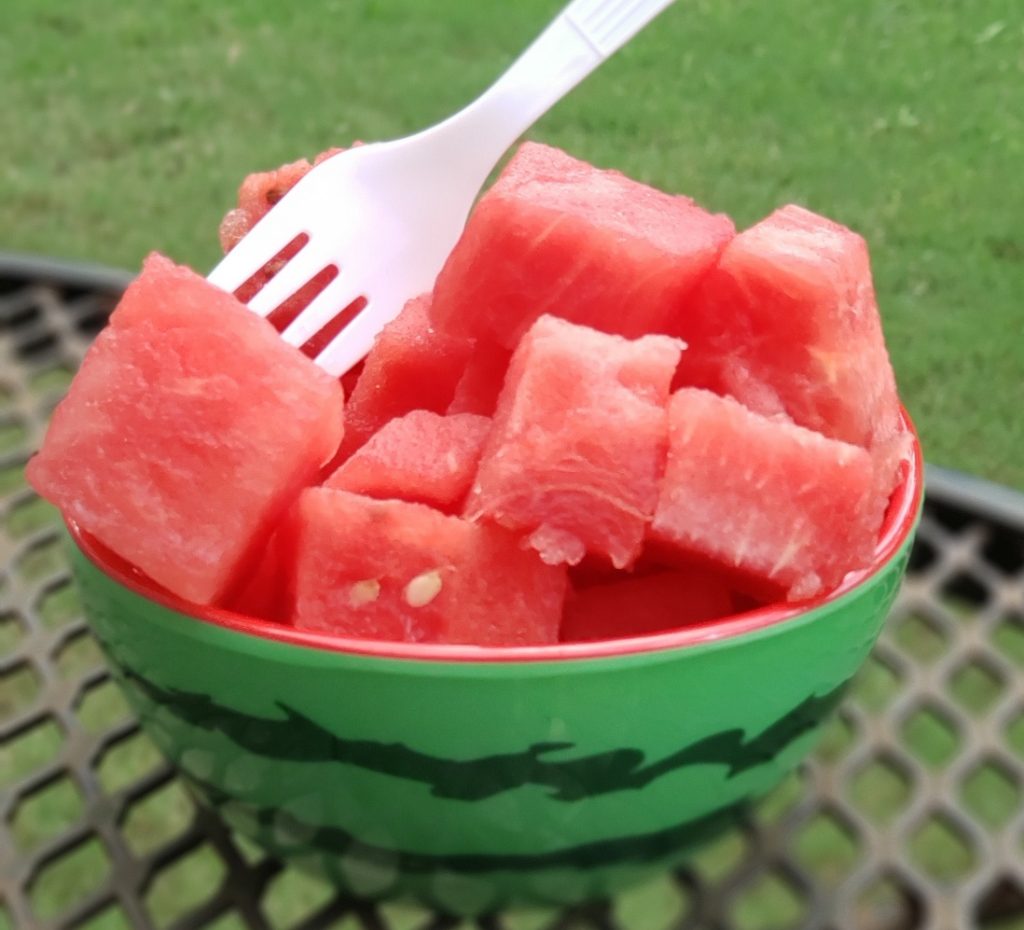
3 cups of watermelon has only 120 calories!
3 cups of chopped watermelon has only 120 calories!

Technically, you can make “kick the can” ice cream (or in this case, “shake the container” ice cream) with any type flavor profile you desire. However, for me, watermelon was a non-negotiable featured ingredient – the amount and volume of watermelon used (3 cups cubed) helped me to cut some of the extreme richness and displace some of the calories used with the second main ingredient – full-fat coconut cream. Did you know that three cups of cubed watermelon have just 120 calories?!  

Watermelon also adds natural sweetness and a bumper crop of health benefits for my active lifestyle like vitamin C and A, lycopene for heart health, and the amino acid l-citrulline which studies show may help move blood through the body, lower blood pressure, and help lessen muscle soreness after a workout. Plus, watermelon always puts me in a happy mood.

Watermelon is deliciously sweet, but I added a few drops of stevia to bring up the coconut cream. Collagen powder from Great Lakes Wellness (save 10% code: THEFITFORK10OFF) is also added for a protein boost and other functional nutrition.

save 10% Great Lakes Wellness collagen and products with code THEFITFORK10off

For me specifically as an older runner and athlete, I use collagen to help support my joints, ligaments, bones and overall wellness. Collagen combined with the l-citrulline in watermelon is a big win-win for my workout recovery. Feel free to use an animal or plant-based collagen powder depending on your dietary needs – or, the collagen powder can be omitted completely without any change to the recipe.

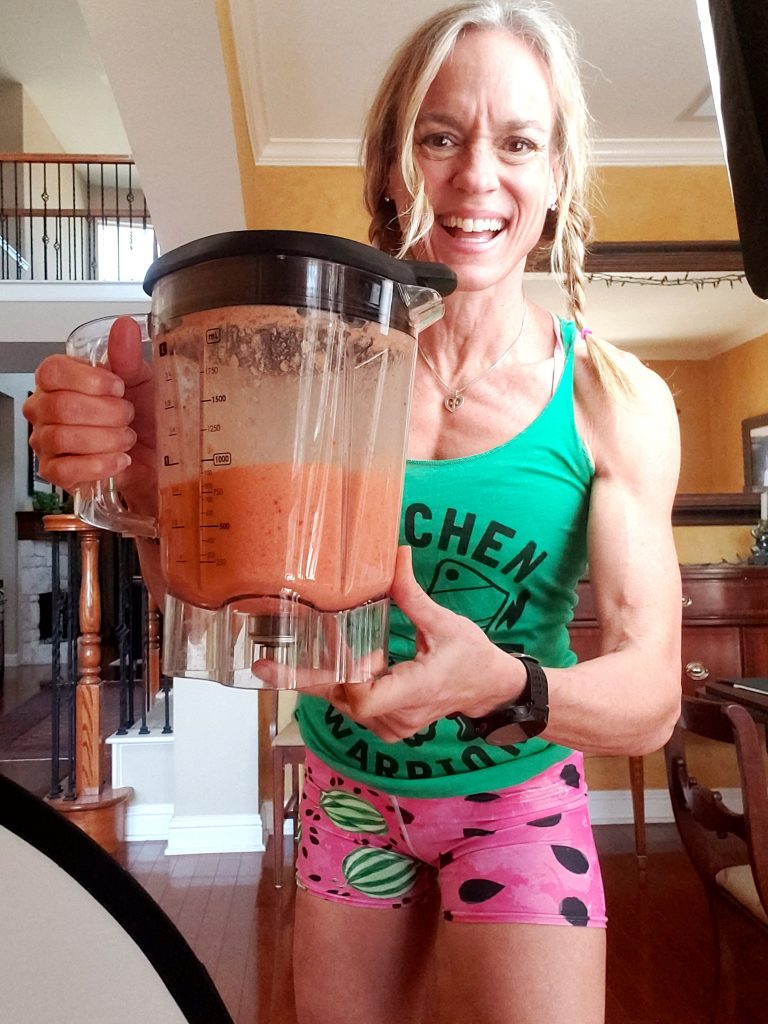
This low carb watermelon ice cream is super easy to make – let the kids make their own batch and have a family “shake off” to see who can get theirs to freeze first! Simply toss cubed watermelon in a blender with full-fat coconut cream, and puree it all up.

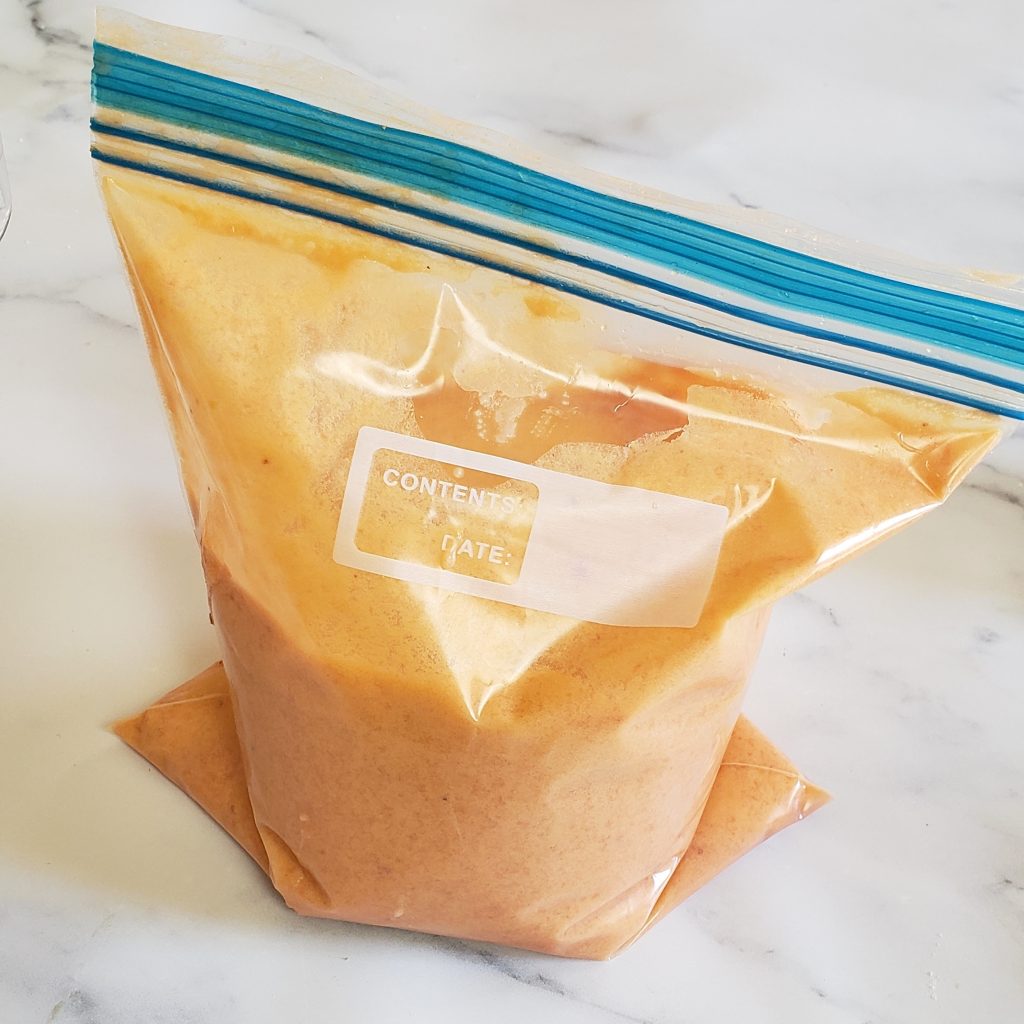
Next, pour watermelon coconut ice cream mixture in a heavy-duty zip-top bag and set inside a larger container filled with ice and 1/2 cup salt. Salt will typically be labeled “ice cream salt” or “rock salt,” in in a pinch you can use COARSE sea salt (but not regular table salt). I had to go this route as the rush on rock salt cause by the recent Texas storm. Now it is in the 80s – crazy Texas weather!

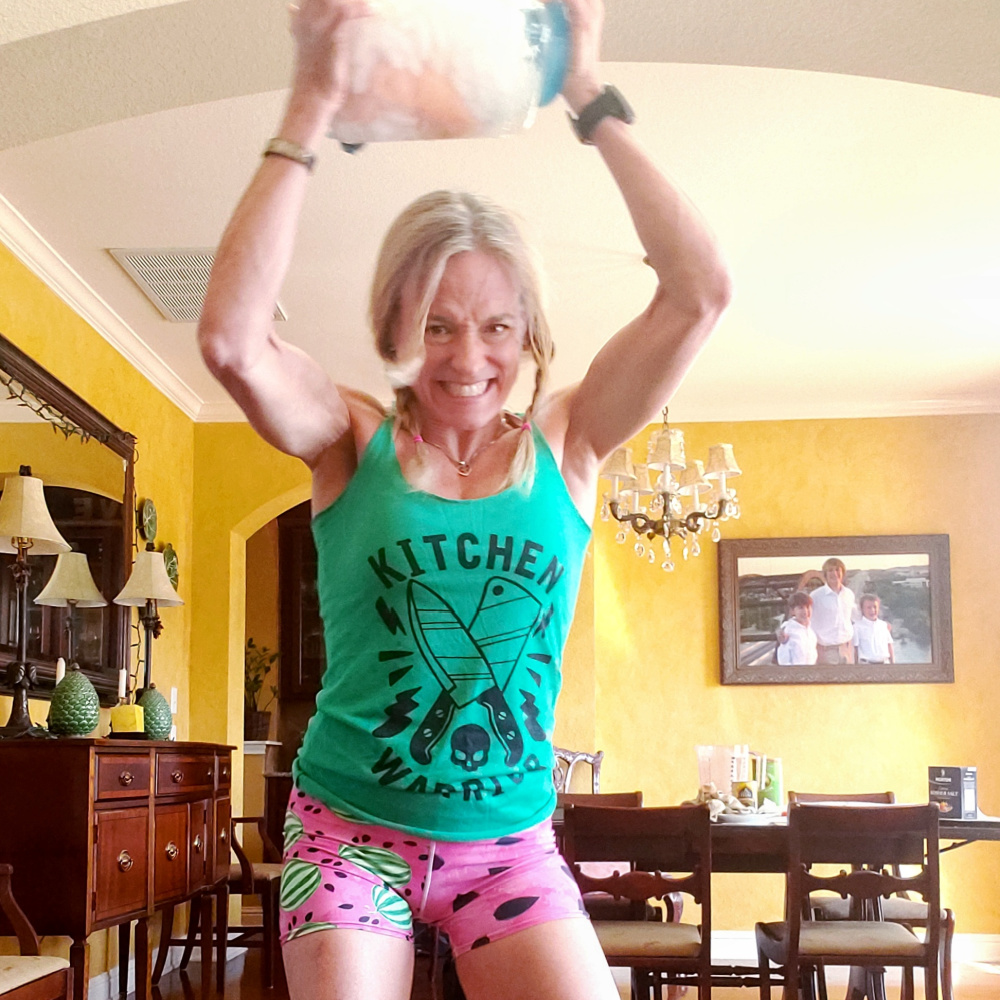
When choosing your container, you can use a big old coffee can like my mom did (if they even sell coffee like that anymore). I preferred to use a big-mouthed water jug with handle so that I could swing it around! In a pinch, you can also put the ice and salt in a bigger gallon-sized baggie.

Then all that’s left is shaking, swinging, kicking or rolling it around for about 15 minutes until the coldness of the ice (kept colder by the salt) and constant motion of the container creates a creamy sweet reward for your work!

“Shake It Up” Watermelon Ice Cream Exercise Ideas

Shake it Up Watermelon Ice Cream is a fun activity for kids of all ages — sneaking that exercise in is a win-win. Stock the freezer with frozen watermelon cubes for year-round enjoyment.

For a complete demo on how to make Shake it Up (Kick the Can) Watermelon Ice Cream, watch my IGTV video HERE.

Check out the other amazing and creative watermelon recipes at Watermelon.org like Creamy Watermelon Sherbet  and Watermelon Ice Cream Bars.

watermelon ice cream bars
5 from 3 votes
“Shake It Up” Paleo Watermelon Ice Cream
Prep Time
5 mins
Cook Time
15 mins
Total Time
20 mins
 
Work up a hunger for this simple and naturally sweet watermelon ice cream that is friendly for lower carb and Paleo diets. No churning required, simply shake the ice and salt filled outer container for 15 minutes until you create a sweet reward! Fun for kids and whole family.
Servings: 4
Calories: 232 kcal
Ingredients
  • 3 cups chopped watermelon frozen if you want a head start, but not necessary
  • 1 13.5-oz can full-fat unsweetened coconut milk
  • ½ cup unflavored collagen powder optional
  • 5 – 15 drops liquid stevia
  • 5 to 6 cups ice cubes
  • ½ cup rock salt or coarse salt
  • Topping of choice
Instructions
  1. Add chopped watermelon to blender. Use cold watermelon chunks or if you want a head start, use frozen chunks.
  2. Add full-fat coconut milk to pitcher. Other milk options can be used (like almond milk, light coconut milk, or whole milk), but will create a less creamy result.
  3. If desired, add a plant-based or animal-based unflavored collagen powder to blender. This may be omitted completely without need to swap for another ingredient.
  4. Blend everything up until smooth, about 30 seconds. Taste test the mixture and add stevia drops to achieve your level of sweet preference.
  5. Pour mixture into a 1-quart freezer-style zip-top baggie; seal tightly.
  6. Fill container with half of the ice and salt. Use a container similar to a large coffee can, handled wide-mouth jug, or even gallon sized heavy-duty zip-top bag.
  7. Add tightly sealed smaller baggie of watermelon mixture in center. Top with remaining ice and salt. Close container lid or seal tightly.
  8. Shake vigorously for approximately 15 minutes, constantly moving the ice around ice cream mixture.
  9. Remove ice cream bag from container and snip off end. Pipe into four small bowl or cones. Enhance with toppings as desired (I used crushed freeze-dried strawberries).
Recipe Notes

Save at GreatLakesGelatin.com with code: THEFITFORK10OFF
Save 10% Code: THEFITFORK10OFF