Best Low Carb Side Dishes in Air Fryer

Although I prioritize fitness and healthy eating, I still find myself susceptible to cravings for delicious, crispy “fried” treats. Thankfully, my air-fryer has emerged as my guilt-free solution, transforming indulgent side dishes into wholesome alternatives – these are some of the best vegetables in the air fryer! Explore these low carb air fryer side dish recipes to elevate tonight’s dinner to a new level of satisfaction – even when time is tight!

A low-carb, gluten-free and keto-friendly way to snack and get more vegetables in your day! These easy air fryer zucchini chips use just a few simple ingredients and are done in minutes – perfect for game day entertaining or a delicious side dish and alternative to fries.

Cheddar Zucchini Chips in the Air Fryer stay low carb, thanks to a coating made from crushed cheddar crisps and almond meal, instead of breadcrumbs and flour. Dunk in your favorite dipping sauce, so addictive!

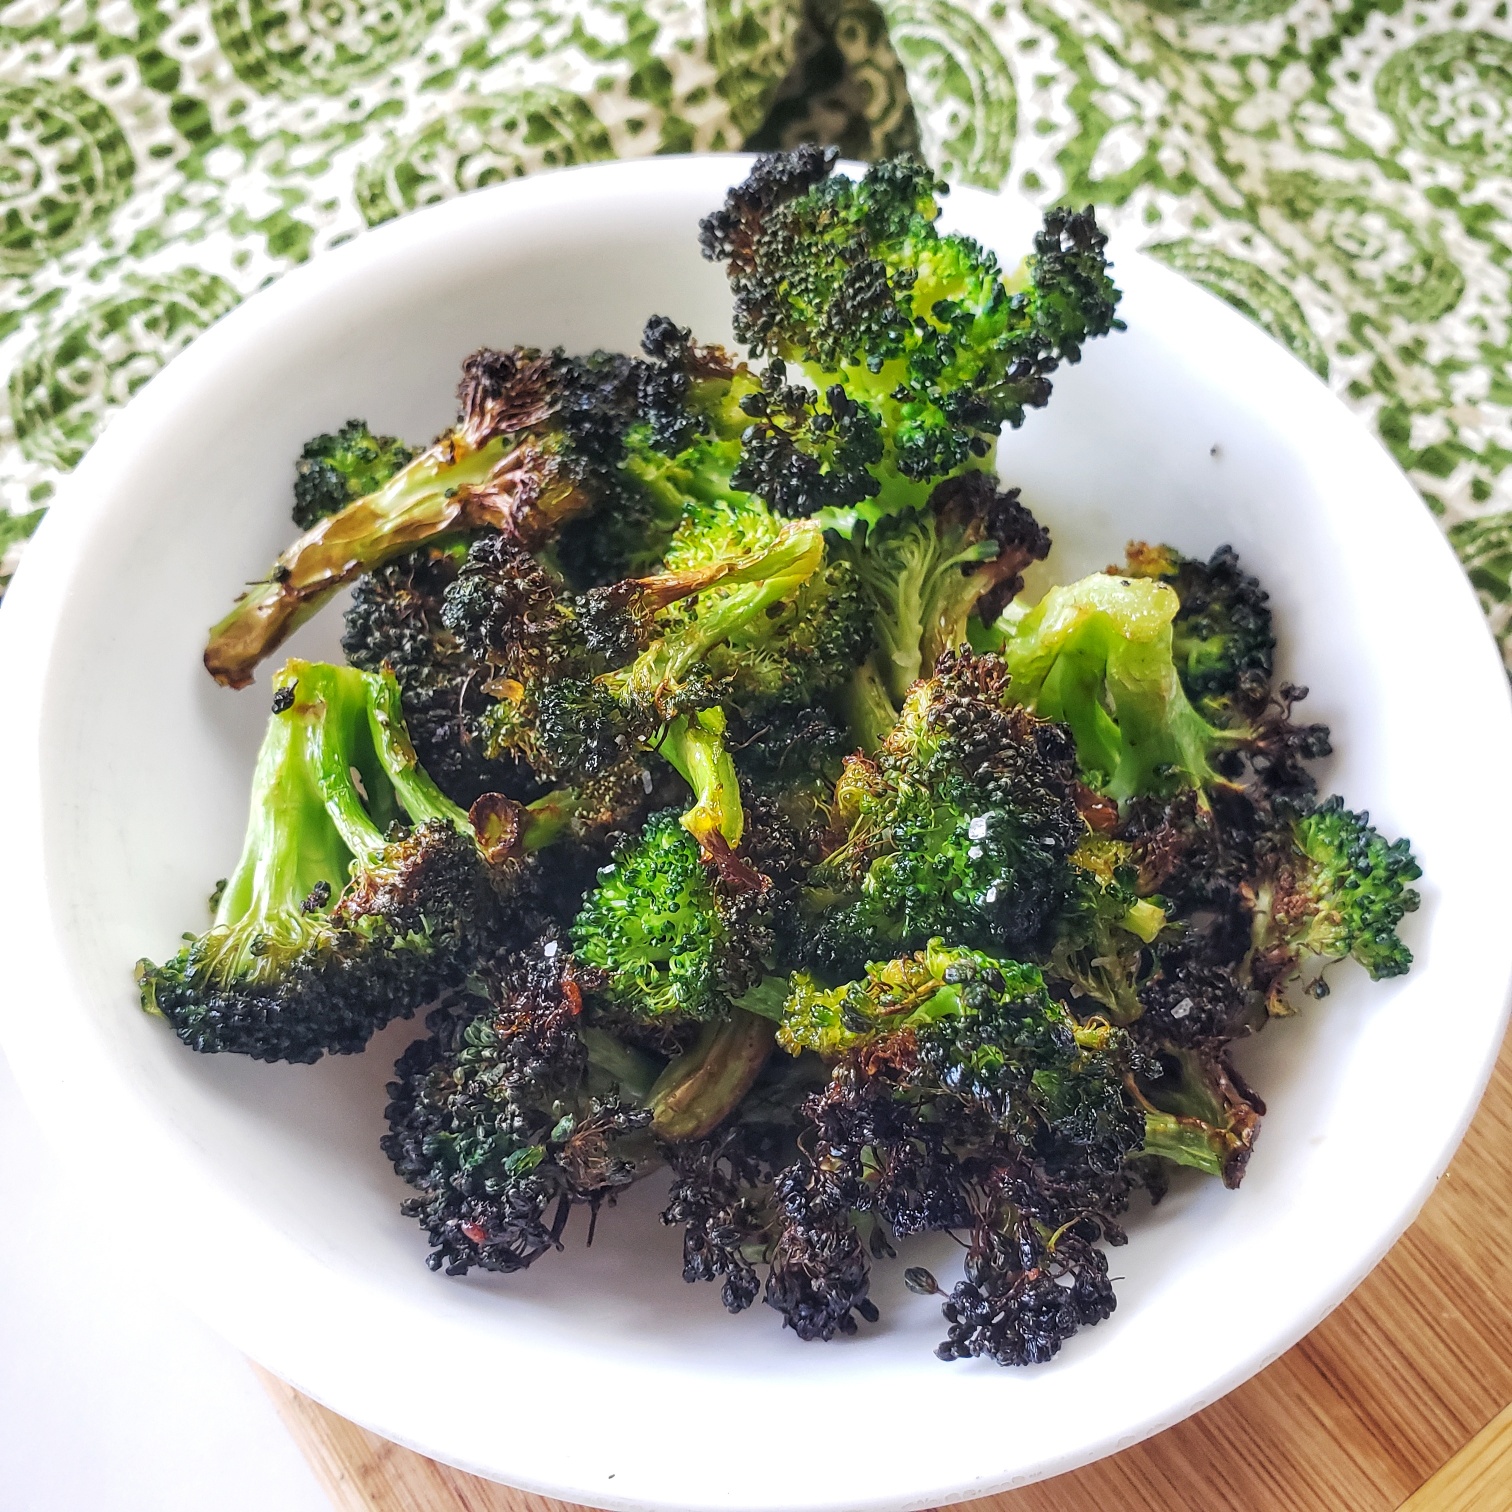
 Honey Ginger Broccoli for Two in Air Fryer is my delicious spin on “crack” broccoli – my kids beg for it and will eat up the whole batch!

Crispy, crunchy and quick, these baked onion rings are lower in carbs thanks to a coating that includes keto-friendly ingredients like crushed pork rinds, Parmesan cheese and coconut flour. A delicious appetizer, game day snack or side dish for steak, burgers and more!

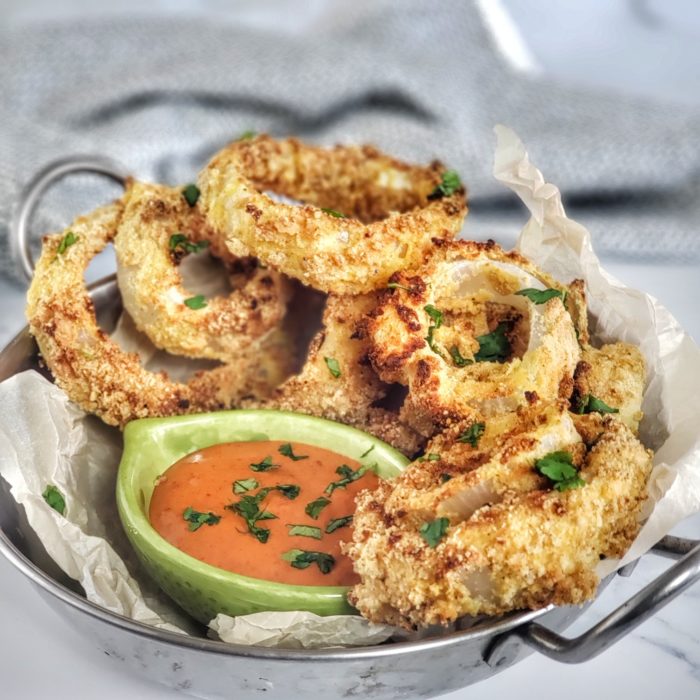
Crispy Low Carb Onion Rings in Air Fryer are a clever way to avoid eating carbs or staying gluten-free. The onions are coated in topping made with crushed pork rinds – a smart and flavorful way to use this old-school snack!

Hatch green chile fries are a quick and easy air fryer recipe suitable for paleo, whole30, gluten free and low carb diets.

Hatch Green Chili Fried in Air Fryer make mage with this popular, milder New Mexico pepper. Of course, you can use any type pepper (even hot ones, if you dare) and even bell pepper strips!

Let cool a couple minutes. Sprinkle with salt and drizzle with honey, toss gently. Sprinkle with granola!

Granola Honey Sweet Potato Fries hit the spot – crunch on the outside, soft on the interior and drizzled with honey, sprinkled with sea salt and upgraded with a lightly spicy granola. Upgraded comfort food to pair up with almost any main dish protein.

TIPS FOR CRISPY AIR FRYER SIDE DISHES

Type of Air Fryer: You can use whatever air fryer you prefer – a smaller “drawer” style one may require you to make some of these recipes in two batches. I prefer a larger oven-style air fryer with a door that pulls downward. That makes it easy for me to check on food, flip it, see what’s going on through the door winder, and also typically cook up the whole batch at once to serve my hungry family.

Can I Use an Oven? Yes, but it will take a little longer. Preheat the oven temperature to the same temperature and increase cooking time by about 33% longer, flipping halfway through. So if an air-fryer recipe says 10 minutes, bake in oven for 15 minutes. Also, it is preferable to use a mesh rack or over the baking sheet or a crisping tray sheet to help promote crispiness.

How do I Reheat Leftovers? It’s best to reheat leftovers in a pre-heated air-fryer (375F) for just a few minutes until crisped up and warmed. Reheating in a microwave is not recommended, as it will made the food soggy.

This post contains Amazon affiliate links.

Heavenly Cinnamon Honey Roasted Peanuts for One

Nuts, nuts, get your hot peanuts here! Heavenly Cinnamon Honey Roasted Peanuts is a quick and easy snack recipe from my Cooking for One for Dummies cookbook that will satiate and satisfy those salty-sweet cravings.

This honey-roasted peanut recipe is so much better than store-bought varieties, so fresh and warm and addictive – nothing like the smell of hot nuts in the air-fryer or oven. plus ready in under 10 minutes to snack on whenever the craving hits!  I like the fact that the recipe is a single serve portion, so I don’t mindless snack on more than I intended.

Cinnamon Honey-Roasted Peanuts for One are a quick and easy snack, so much better than store-bought.

Just a few simple ingredients, like melted butter and honey, are mixed up with raw Spanish peanuts. (Note: use raw peanuts for the best result). Spanish peanuts (aka: redskin peanuts) are a great source of protein and fiber, plus they also have resveratrol, a plant compound shown to regulate blood sugar.

After coating the peanuts in the honey butter mixture, just roast ‘em up in an oven or air fryer (I really love my oven-style air fryer) Then, while still warm, they are tossed with a mixture of sugar, cinnamon and salt. My original recipe calls for sugar, today I made them with a granulated sugar substitute (in a 1:1 measure equivalency) and they turned out great. The purpose of the sugar-cinnamon-salt coating is to add a bit more flavor, add texture and keep them from being too sticky.

The portion size is pretty generous on this honey-roasted peanuts for one (1/2 cup), so if you have leftovers, they will stay fresh for a few days in an air-tight container or baggie. On the flip side, if you want a bigger batch, this is an easy, no-fail recipe to multiply up – no need to change any cooking time, just make sure peanuts are spread out in a single layer.

5 from 5 votes
Treat yourself to a single-serve batch of honey-roasted peanuts dusted in cinnamon -- all for you, you don't have to share (although, it's a generous portion, if you'd like too). This all-American snack satisfies those salty-sweet cravings, offers protein and fiber and tastes so much better than store-bought -- made in only 10 minutes!
Heavenly Cinnamon Honey Roasted Peanuts
Prep Time
2 mins
Cook Time
8 mins
Total Time
10 mins
 

Treat yourself to a single-serve batch of honey-roasted peanuts dusted in cinnamon — all for you, you don't have to share (although, it's a generous portion, if you'd like too). This all-American snack satisfies those salty-sweet cravings, offers protein and fiber and tastes so much better than store-bought — made in only 10 minutes!

Course: Snack
Cuisine: American
Keyword: air fryer, honey, peanuts, walnuts
Servings: 1 serving
Calories: 395 kcal
Ingredients
  • 1 tsp butter melted
  • 1 tsp honey
  • ½ cup raw Spanish peanuts also called redskin
  • 2 tsp sugar or granulated sugar substitute 1:1 measure equivalency
  • ¼ tsp ground cinnamon
  • ¼ tsp salt
Instructions
  1. Preheat air-fryer or oven to 325F.
  2. Stir honey into melted butter. Pour peanuts; stir until evenly coated and then spread out on small rimmed baking sheet lined with foil, parchment or a silicone baking sheet (to make clean up easier).
  3. Air fry for 5-6 minutes or bake for 8-10 minutes, stirring up halfway through. Watch closely near the end, as sugared nuts will start burning fast once they reach the “tipping point.”
  4. Remove from heat. In small bowl, stir together sugar (or sugar substitute, cinnamon and salt); sprinkle over peanuts while still warm; toss to coat. Let cool a couple minutes before eating.
Recipe Notes

No-Bake Beet Protein Cheesecakes with Sugar-Free Chocolate

This easy, no-bake dessert delivers pretty-in-pink style and lots of smiles because it’s so delicious – and No-Bake Beet Protein Cheesecakes are still nutritious featuring lots of protein (39g) and the benefits of beetroot powder.

No added sugar in this beet cheesecake recipe and, depending on the type of sugar-free cookies used for the “crust,” it can also be gluten-free.  

First, let’s jump into the benefits of beetroot powder. The vibrantly-hued supplement contains micronutrients and phytonutrients that studies show may benefit heart, gut, and brain health. Specific benefits link to beet root power include lower blood pressure, reduce inflammation, and increased stamina in athletic performance.

Ding, ding, ding – did that athlete part get your attention?  I’m always looking for a way to naturally optimize my athletic performance.  I learned that upon eating or drinking beets or beetroot powder, your saliva converts the nitric oxide is activated, which relaxes and expands blood vessels. In turn, this increases blood flow and allows more oxygen to be delivered to your muscles to help get the job done – and it could help you perform better for longer. Increased blood flow also helps you recover faster!

Of course, you can get the benefits from fresh beets, too – but that’s not often convenient (or you may not care for the earthy taste). Plenty of pills and tonics available that capitalize on beet benefits, but I personally just prefer to do a scoop of beetroot powder in water, a smoothie or even my oatmeal about an hour or two before I hit the ground running. I use Force Factor’s Total Beets Organic Powder. It provides all the functional superfood benefits of fresh beets, but much more conveniently — and it has a very lightly sweet taste with no added sugar, or anything artificial.

TIPS FOR MAKING NO-BAKE BEET PROTEIN CHEESECAKES

Beetroot Powder: I recommend Force Factor Total Beets Organic Beet Root powder – no added sugar, nothing artificial or yucky, and a good price point. My main suggestion if you are using another powder is just to read the label to avoid added sugar or flavorings. I just love the pink hue, you can get so creative with beetroot powder recipes!

Protein Powder: Use the vanilla protein powder of your choice, that you like and fits your dietary eating patterns. I like the plant-based Clean Lean Protein from Nuzest. Save 15% with code FITFORK.

Cottage Cheese Type & Blending: Using 2% cottage cheese helps keep the fat down a bit. But, if you like a richer taste, this no-bake cheesecake is made very luxurious with full-fat cottage cheese. To get the smooth taste of a cheesecake, the cottage cheese must be blended. For the 1 ¾ cups that this recipe calls for, I use a personal-sized blender. Scoop out the cottage cheese into the blender, including any liquids (eg: the whey) –don’t drain it off, you need that bit of liquid to encourage a smooth consistency. Be patient blending, it will seem very thick and require several iterations of stopping to scrape sides with a spatula.

Containers: I prefer 8-ounce glass canning jars, because the lids make it easy to store for later. However, small bowls will work too, but if the opening is too wide – there may not be enough chocolate topping to cover the area.

Cookie Crust: I use the term “crust” loosely, as cookies are just crumbled and piled in the bottom of the jar. This keeps the recipe no-bake. It’s a simple, no-bake crust but just NOT a crust that will slice up and serve in cheesecake slices without falling apart.  Use the cookies of your liking – I used the wafers from sugar-free chocolate sandwich cookies.

As an Amazon Influencer, I earn from qualifying purchases.

These No-Bake Beet Protein Cheesecakes are not only pretty in pink and very delicious, but also include the functional benefits of eating beets and lots of protein thanks to blended cottage cheese and protein powder! A healthy dessert or post workout snack.
No-Bake Beet Protein Cheesecakes
Prep Time
5 mins
Total Time
15 mins
 

This quick and easy dessert offers lots of muscle-making protein and the functional benefits of beets. No added sugar and can be made gluten-free, depending on the type of cookie chosen for the crust. Balanced enough to eat for breakfast or a post-workout snack!

Course: Dessert, Snack
Keyword: beet, beet powder, cheesecake, cottage cheese, protein powder
Servings: 2 servings
Calories: 354 kcal
Ingredients
  • 1 ounce sugar-free cookies, crushed any flavor – chocolate, graham, vanilla wafer, etc
  • 1 ¾ cup 2% cottage cheese, blended smooth
  • 1/3 cup vanilla protein powder of choice type of protein source your choice
  • 2 tablespoons beetroot powder
  • 2 tablespoons sugar-free dark chocolate chips
  • ½ teaspoon coconut oil
Instructions
  1. Crush up cookies and divide among the bottom of two 8-oz jars or bowls. Set aside.
  2. Blend cottage cheese until smooth, mix in protein powder and beet root powder.
  3. Divide cheesecake mixture evenly between cookie crust in jars.
  4. In small bowl, melt chocolate chips and coconut oil in microwave for 20-25 seconds. Remove to stir. If not totally melted yet, microwave for 10 more seconds until stirs up glossy and smooth.
  5. Immediately pour chocolate topping over cheesecake mixture, spreading gently around with spoon to cover, if needed.
  6. Set in fridge for 10 minutes for chocolate to set up and become hard.
Recipe Notes

354 calories, 24g carb (11g dietary fiber), 13g fat, 39g protein

Five Fruit and Quinoa Salads to Put on Repeat

We were all so quinoa crazy a few years about and I’m bringing back the love! Check out these beautiful, nutritious and amazingly nutritious fruit and quinoa salads. Most have enough protein to make a balanced and satisfying meal, but you can also add your favorite protein — like shrimp, salmon, or beef – to the toss!

A collection of quinoa salads featuring fruit that will add beauty and nutrition to your plate!

Actually, I’ve never given up my love for this ancient grain (which is actually a seed) that boosts your diet with  nutrients like B-vitamins, magnesium, phosphorus, potassium, calcium, vitamin E, and fiber. Additionally, quinoa is also one of only a few plant foods considered a complete protein, containing all nine essential amino acids.

Transform plain quinoa into something to celebrate for the holiday season! Pomegranate, orange segments and pistachios bejewel this quick, easy and nourishing vegetarian salad that is equally beautiful for a dinner party or quick lunch!

Pomegranate Orange Quinoa Salad: This festive quinoa salad featuring pomegranate and orange is lovely for seasonal celebrations but can be made year-round for weeknight dinners thanks to those little tubs of pomegranate arils. The simple creamy dressing has a vinaigrette vibe but with Greek yogurt and date syrup for even more flavor.

Hydrate and invigorate with this juicy fresh salad featuring watermelon, raspberries and quinoa! The zingy ginger mint dressing is amazing. It’s a stunningly colorful side dish or add shrimp or salmon for a main dish.

Watermelon Raspberry Quinoa Salad with Ginger Mint Dressing: This fully-loaded watermelon quinoa salad is made hearty enough for a full meal with quinoa, sunflower seeds, feta cheese, loads of greens, juicy watermelon and raspberries. The Ginger Mint Dressing is so aromatic and invigorating, and easy to make in a personal blender.

Clementine Quinoa Kale Salad with Minty Poppy seed Dressing

Clementine Quinoa Kale Salad with Minty Poppy Seed Dressing: Clementines or any other type of “easy-peeler” tangerines (like Halos, Cuties, etc.) are fun to eat – even in a fruit quinoa salad! Get your boost of vitamin C (from the citrus + kale) in this fiber-loaded salad.

Maple Pecan Raisin Malasses Crusted Steak and Butternut Squash Quinoa

Maple, Pecan, Raisin Butternut Squash Quinoa Salad:  While this quinoa salad might be screaming fall, it’s a taste sensation to make year-round. If you can’t source butternut squash, you can usually find a bag of cubed quash in the freezer aisle. If you’re not a fan of raisins (but trust me, that add so much YUM to this recipe), they can be left out.

Super Clean Strawberry Apple Spinach Salad is perfect for your next party, picnic or potluck . .it's also great for meal-prepping for healthy lunches. Walnuts and spinach add extra texture, heart-healthy fats and protein.

Super Clean Strawberry Spinach Quinoa Salad with Zingy Vinaigrette: This strawberry quinoa salad is crave-worthy with baby spinach tossed into nutty quinoa and walnuts. It’s all balanced with a subtle sweet-tart flavor thanks to juicy berries and crispy Granny Smith apples and zingy vinaigrette

Super Clean Strawberry Apple Spinach Salad is perfect for your next party, picnic or potluck . .it's also great for meal-prepping for healthy lunches. Walnuts and spinach add extra texture, heart-healthy fats and protein.

No-Bake Jam Oat Cups – Lower Carb Snack Idea

No-Bake Jam Oat Cups are a smart way to satisfy your sweet tooth! Customizable to your mood of the moment, by using any flavor sugar-free jam, jelly, preserves or even smashed fresh fruit like berries or banana.

We all have those times when we need something sweet, and these jam-filled oat cups are easy-to-make, require no baking — it’s really just a few simple steps.

Go ahead ad cave to the craving for something without guilt. Just a little natural sugar from banana, and the rest of this no-bake dessert recipe is put together with smart swaps.

Here are some of the better-for-me ingredients I like to use in this healthy snack recipes and lower carb treats:

.Sugar-Free Dark Chocolate Chips (if you need dairy-free, make that swap, too!) https://amzn.to/48kozhq

Sugar-Free Jam (or you can even just use mashed fresh berries)

Eat Garnish Oat & Seed Butter is a great seed-allergy option, but ANY nut or seed butter will work. Use code FITFORK975 to save 10%.

Plant-Based Protein Powder in the crust mixture gives these treats a little more oomph. Clean Lean Protein from Nuzest is my go-to. Save 15% with code FITFORK.

TIPS TO MAKE OAT JAM CUPS

Banana Guidance: “Half of a medium banana” called for in this recipe can be subjective, but it’s about 60g of banana without peel. Or, if you’re eyeballing it, about 3 1/2 to 4-inches in length. However, if you think the mixture looks too sticky (like you used too much banana), just add a few more oats to the mixture, you really can’t mess this up.

Filling Ideas: Sugar-free jam with chia seeds mixed in is what my recipe calls for, but you can test around with other fillings — like smashed banana, smashed berries, tangerine slices, a dollop of nut or seed butter — really whatever floats your boat.

What to Make In: I really recommend silicone muffin cups, this makes them easy to pop out when frozen. Also, bonus, they are reusable. I wouldn’t use paper liners, they get soggy and/or stuck to the treat. You can skip liners all together and freeze in the actual muffin tins, just let soften for a few minutes on counter before trying to remove.

Freezing Step: Don’t skip it! These oat jam cuts need to set up in the freezer for about 30 minutes, otherwise it will just be a big sticky mess. Afterward you can store in the fridge OR freezer, depending on your preference on how to heat them (softer vs harder).

Note: This post contains affiliate links. I earn a small commission for any sales generated through the link. This helps me offset overhead for The Fit Fork, thank you!

5 from 5 votes
No-Bake Jam Oat Cups – Lower Sugar and Gluten-Free
Prep Time
5 mins
Total Time
30 mins
 

Enjoy a sweet treat with none of the guilt – or baking! For the filling, use the sugar-free jam of your choice or even smashed fruit!

Servings: 6 servings
Calories: 180 kcal
Ingredients
  • 1/2 medium banana, sliced about 60g, after peeling
  • 30 g vanilla protein powder or can substitute a flour
  • ¼ cup nut butter
  • 1/2 cup rolled oats
  • ¼ cup sugar free jam
  • 1 tbsp chia seeds
  • 1/3 cup sugar-free chocolate chips
  • 1 ½ tbs coconut oil
Instructions
  1. In a medium bowl, mash together banana, protein powder and rolled oats Press into 6 cavities of a regular sized muffin pan lined with silicone liners. Pushing oat mixture up the sides a bit to form an indention for the jam.
  2. Stir together the jam and chia seeds. Place a skosh under 1 tablespoon of jam mixture into indention of oat cup.
  3. Melt chocolate and coconut oil in 30 sec increments in the microwave, stirring between until all chocolate is melted. Pour on the cups, dividing equally. Freeze 25 minutes to set.
  4. Enjoy your treats! Keep them in the refrigerator for up to 1 week or frozen up to 3 months.
Recipe Notes

Nutrition per serving: 180 calories, 12g fat, 11g carb (2g fiber, 2g sugar), 7g protein