No-Bake Protein Brownies with Real Strawberry “Sprinkles”

Satisfy your sweet tooth in a lower-carb and protein-boosted way with this easy recipe for No-Bake Protein Brownies with Real Strawberry “Sprinkles.”

It’s a seemingly decadent strawberry chocolate brownie is actually a homemade brownie protein bar that is low in sugar and higher in protein. Macros for each generous slice of this homemade protein brownie: 219 calorie, 16g fat, 14g carb (6g net carb), 8g dietary fiber, 12g protein.

 Almond meal, unsweetened cocoa powder, and protein powder make the low-carb, protein-rich base that is held together by sugar-free syrup (or the sticky sweetener of your choice like real maple syrup or honey). There is no need to bake this homemade protein brownie, you simply press into the pan (I used a 1/8th sheet pan size with dimensions of about 9” x 6” – you can also use an 8”-diameter cake pan).

I came up with this chocolate protein powder recipe idea at the beginning of the year, as I was clearing out all our holiday treats but still craving a healthy sweet treat – I’m a chocolate lover for sure! You can use most any variety of chocolate protein powder (for example whey or plant-based).

I use Clean Lean Protein in Rich Chocolate flavor, a plant protein powder from Nuzest that is easy to digest, has a great texture, and can work with most types of diets including keto, gluten-free, paleo and more.

Here’s a don’t-miss-deal: you can always save 15% at Nuzest HERE with my code FITFORK

What makes this fudgy protein brownie extra special is the rich chocolate ganache topping. Making a ganache (a shiny thin layer of chocolate icing) seems so fancy and like you need major chocolatier skills – but it’s easy. The standard ganache formula is 2:1 chocolate to heavy cream. So, for a heaping ¼ cup chocolate chips, that would be 2 tablespoons of cream. It’s as easy as putting both in a microwave safe small bowl and heating at 70% power for about 1 minute, and stirring quickly afterward until smooth and glossy (return to microwave in 15 second increments if not melted thoroughly).

And, the strawberries on top! I’m calling them sprinkles – I took freeze-dried strawberries and coarsely crushed them before sprinkling on top of the still-warm ganache. You could substitute any other type of freeze-dried fruit, or swap out for nuts, seeds, and/or coconut.

Nuzest Plant-Based Protein Powder - save 15% with code THEFITFORK15

These no-bake protein brownies should be placed in the fridge for 30 minutes to set up before slicing. Store any leftovers in the fridge too, for up to 1 week. ENJOY!

Pin this for later!

Note: This post contains affiliate links.

5 from 6 votes
Satisfy your sweet tooth mindfully with this easy recipe for No-Bake Protein Brownies with Real Strawberry “Sprinkles.” Deliciously chocolate and seemingly decadent dessert or snack, but only 219 calories, plus low carb with 6g net carb, and 12g protein.
No-Bake Chocolate Protein Brownies with Real Strawberry “Sprinkles”
Course: Dessert, Snack
Keyword: brownies, chocolate, fudge, protein powder
Servings: 6 servings
Calories: 219 kcal
Ingredients
  • 1 cup almond meal
  • ¼ cup unsweetened cocoa powder
  • ½ cup chocolate protein powder
  • ¼ cup sugar-free maple syrup or can sub real syrup, just more carbs
  • 3 to 4 tbsp water
Topping
  • 2 ounces sugar free chocolate chips about heaping ¼ cup
  • 2 tbsp heavy cream
  • ½ to 1/3 cup freeze-dried strawberries* or other freeze dried fruit (or nuts, seeds and coconut for a swap)
Instructions
  1. In bowl, mix together almond meal, cocoa powder and protein powder. Add syrup and 3 tablespoons of water. Stir until combined and making a cohesive dough. If too crumbly (like because of super thick syrup, mix in the additional 1 tbsp water).
  2. Press dough into approximate 9” x 6” rimmed pan. In ramekin, add chocolate chips and cream. Microwave for 1 minute on High. Stir until smooth and spread over top of protein mixture. Place freeze-dried strawberries in plastic bag and crush with bottom of cup or rolling pin until coarsely powdered. Sprinkle of chocolate topping. Set in fridge for 30 minutes before cutting into 6 squares.

  3. Store leftovers in air-tight container in fridge for up to 7 days

Recipe Notes

Small Batch Hummus to Serve One or Two

Buying a big tub of hummus can seem like such a commitment, especially if you’re snacking solo or with a just friend or two.  My Small Batch Hummus recipe is perfectly proportioned so that you can finish it off in two sittings (or one snack session if super hungry) – or share it with a buddy and have no leftovers clogging up the fridge!   

Small Batch Hummus - Cooking for One

Exciting News:

This small batch dip (or spread) is featured in my upcoming cookbook, Cooking for One for Dummies (which can be pre-ordered now, ships on March 7, 2023)

Plus, when you make homemade hummus, you’re in total control of the ingredients – there’s no weird preservatives, additives, or yucky stuff.  Plus, you get all the benefits of chickpeas, they are abundant in dietary fiber and also a good source of plant protein, iron, folate and other essential nutrients.

It’s fast, it’s easy, there is no cooking – you start with a can of chickpeas. Of course, you can make your own chickpeas, but that adds a lot of time and hassle to what is an easy-peasy snack recipe for one or two.

skin on chickpeas
Gently rub any remaining skins off your chickpeas for smoother hummus.

After draining the chickpeas (a legume sometimes referred to as garbanzo beans), pour them out onto a clean dishcloth or paper towels and lightly rub dry. In addition to drying the chickpeas, the other goal here is to remove any lingering skins. The light patting dry will encourage stragglers to fall off, simply pick the skins out and discard. The skins will do no harm if they end up in your hummus, it will just be not quite as smooth and creamy.  

Then, it’s just a matter of whipping everything up in a food processor or blender. Since this is a small batch appetizer recipe, a mini food processor or personal sized blender will work best.

How to Serve Small Batch Hummus

  • Simply paired with raw veggies like carrots, celery, radishes, squash rounds are my favorite way to eat hummus.
  • Serve with pita wedges for dipping, smear on crackers, or spread on slices of toasted baguette.
  • Elevate sandwiches, wraps and quesadillas by spreading around as part of the filling.
  • Get creative and toss with hot pasta or zoodles for an instant chickpea sauce.
Pin this for later!

Leftover Chickpeas in Can? While this homemade hummus for two uses just half a can of chickpeas, don’t throw the remainder out — you have options. First, you could easily double the homemade dip recipe, it scales up beautifully (however, do note the capacity of your mini food processor and use a bigger processor or blender, if needed). I also have another “1/2 can chickpea” recipe — Air-Fryer Crispy Chickpeas for One which also make a fabulous, heathy snack or salad topper.

Air Fryer Crispy Chickpeas for One a=is a quick, easy and healthy snack with lots of dietary fiber plus protein, iron, and folate.

Make both the Small Batch Hummus and the Air-Fryer Crispy Chickpeas for Ones and kill off the whole can at once making healthy snacks.

This post contains affiliate links.

5 from 9 votes
Small Batch Hummus - Cooking for One
Small Batch Hummus
Prep Time
5 mins
Total Time
5 mins
 

Make just enough homemade hummus to get your through a couple health snack sessions — or to share with a friend. Easy, healthy, and homemade, a fantastic snack and spread to add to your active lifestyle. Lots of dietary fiber and a good source of plant protein, dietary fiber, iron, folate and other important nutrients.

Course: appetizers, dips, snacks, spreads
Cuisine: Mediterranean
Keyword: appetizer, chickepeas, dip, garbanzo beans, snacks, spread
Servings: 2 servings
Ingredients
  • ¾ cup canned chickpeas drained and rinsed (about half a 15.5-ounce can)
  • 3 tbsp olive oil plus an additional 1 teaspoon for topping, if desired
  • tbsp tahini
  • 1 tbsp lemon juice
  • ½ tsp garlic or garlic paste
  • ¼ teaspoon salt
  • ¼ teaspoon ground black pepper
  • 1/2 teaspoon smoked paprika
Instructions
  1. Place all the ingredients in a personal-sized blender or mini food processor; process until smooth. If the consistency seems too pasty or thick, blend in 1 teaspoon of water at a time until desired texture is achieved.
  2. Transfer the hummus to serving bowl and drizzle with 1 teaspoon of olive oil and a sprinkle of paprika.
Recipe Notes

NOTE: Store the leftovers in an airtight container in fridge for up to 4 days.
VARY IT! Extra chickpeas from can be kept in an airtight container in fridge for a few days and added to salads, soups, and wraps

LEARN MORE! This small batch dip (or spread) is featured in my upcoming cookbook, Cooking for One for Dummies (which can be pre-ordered now, ships on March 7, 2023)

Air Fryer Crispy Chickpeas (for One)

Air Fryer Crispy Chickpeas make snack time a happy time and a healthy experience, especially when that craving for something salty-crunchy hits but are trying to stay away from chips.

If you’re like me, you’ll want to eat theses roasted chickpeas warm, right off the air-fryer and pop the lightly-seasoned, crispy delights into your mouth, one after one! Definitely one of my favorite single-serve snack ideas!

The good news is that unlike typical crunchy snack foods, you control the fats, the sodium, and the flavor. Nothing is processed or yucky, it’s just the goodness of garbanzo beans (the other common name for this legume) simply dressed up with a hint of flavor.  

This quick snack recipe for one makes a single serving (as hinted, lol) and uses ¾ cup of chickpeas (also called garbanzo), about half a can. To use up the other half of the can, check out this Small Batch Hummus recipe (or just easily double the ingredient list for the Air Fryer Crispy Chickpeas below).

PRO TIPS:

Remove skins from chickpeas to help oil & spices adhere.

Remove Skins:  Often canned chickpeas still loosely have their “skins” on. Most fall off during rinsing but any remaining can be removed by patting dry on a paper towel and loosely rubbing around until removed. You CAN eat chickpeas with the skins still hanging on, there is no harm! But removing helps the oil and spices cling onto the legume better in this recipe and for hummus recipes, it creates a smoother outcome.

Oven Option: If you don’t have an air fryer (I LOVE my Omni Pro Plus 18L), the general rule of thumb for crisping up garbanzo beans in the regular oven is to use the same temperature, but double the cooking time (shaking pan around every 10 minutes to promote even cooking).

Seasonings: Instead of smoked paprika, try curry powder, chili powder, Italian seasoning, Everything Bagel spice, or any other spice or blend you can dream up. Even homemade gingerbread spice with a pinch of stevia would make a delicious, unique chickpea snack.

How to Serve: Of course, eating warm off the pan is the obvious way to serve roasted chickpeas! They are also delightful tossed on a salad for extra nutrition and texture. Also try soups (instead of croutons) and as a garnish atop dips (like hummus) or your main entrée (like so yummy with salmon and greens)

How to Store: To maintain crunch, store roasted chickpeas covered at room temperature, for up to a couple days. If desired, pop back into a pre-heated 350F air fyer for 1 to 2 minutes to warm and re-crunch.

This post contains affiliate links.

5 from 5 votes
Air Fryer Crispy Chickpeas for One is a quick, easy and healthy snack with lots of dietary fiber plus protein, iron, and folate. A mindful way to satisfy that salty-crunchy craving when trying to stay away from chips and processed foods.
Air Fryer Crispy Chickpeas for One
Prep Time
5 mins
Cook Time
15 mins
Total Time
20 mins
 

Crunchy, crispy and addictive! This fun and easy-to-make snack offers lots of dietary fiber and also is a good source of plant protein, iron, folate and other essential nutrients. Note: If you want to use up the entire can 15-ish ounce can of chickpeas, just double the recipe!

Course: Snack
Cuisine: healthy, Indian, Mediterranean
Keyword: air fryer, chickpeas, garbanzo beans, legumes
Servings: 1 serving
Ingredients
  • ¾ cup canned chickpeas about half a 15.5-ounce can
  • 2 tsp olive oil
  • 1/2 tsp lemon juice
  • 1/8 teaspoon salt
  • ¼ teaspoon ground black pepper
  • ½ teaspoon smoked paprika
Instructions
  1. Pre-heat air fryer to 390 F degrees.
  2. Drain and rinse chickpeas.
  3. Pour out on paper towel and dry, gently rubbing to release any skins; discard skins.
  4. Add chickpeas to small bowl and drizzle on olive oil and lemon juice, stirring to coat evenly.
  5. Sprinkle with salt, pepper, and smoked paprika and stir around to adhere to chickpeas.
  6. Pour chickpeas out on rimmed baking sheet that fits in air fryer.
  7. Stick in preheated air fryer for about 15 minutes, stopping to shake around once halfway through. Chickpeas should be toasted and crunchy when finished. IF needed (because air fryer models vary in heating), cook for another 2 to 4 minutes.

  8. Remove and let cook a couple minutes before eating. Store leftovers in air-tight container at room temperature, for up to 3 days. If desired, you can warm up in air fryer preheated to 350 for 1 to 2 minutes.

  9. Note: For a conventional oven, cook at 390-400F degrees for 30 minutes, or until golden brown and crispy, stirring up every 10 minutes.

Recipe Notes

10-Minute Pomegranate Korean BBQ Beef

This post is sponsored by Kevin’s Natural Foods as part of a blogger recipe challenge.

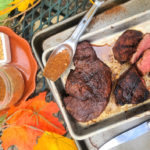
Hmmm, how to save dinner on the craziest of pre-holiday prep days?! I had so much shopping, wrapping, decorating, and last-minute elf-ing around that “what’s for dinner” was the last thing on my mind. Plus, I was just plain tuckered out.

But the quick and easy meal pouches from Kevin’s Natural Foods were the fit foundation for some last-minute refueling and feasting! I used the Korean Beef BBQ to make a holiday-inspired meal — 10-Minute Pomegranate Korean Beef BBQ. 

Pin this for later!

This 10-Minute Pomegranate Korean Beef BBQ recipe is made with a Kevin’s Natural Foods meal pouch that includes sous vide cooked beef and Bulgogi-style sauce. I put my own spin on the already delicious meal by adding a little pomegranate juice and ginger to the sauce and adding pomegranate arils, spinach, and pistachios. SO DARN EASY and it makes an easy-peasy, beautiful, flavorful and festive holiday meal (which also makes dinner any day of the year). I served this pomegranate bulgogi inspiration on rice (use a frozen rice pouch to keep it quick – I actually batch cook my rice and grains and freeze in the portions I need to save time and $$).  But, if you’re not into rice, this festive bulgogi recipe is also yummy on cauliflower rice, smashed sweet potatoes, or with veggie noodles of your choice.

Beef is 100-percent pasture-raised, grass-fed, and grass-finished and cook in sous-vide method, so it stays super tender and juicy.

Real talk: I have been eating and enjoying the chicken meals from Kevin’s for a while but have shied away from trying a beef meal kit. Why? Because I’m definitely a beef snob and was worried that the beef steak tips would be stringy and chewy, as the beef cuts in these types of convenience meals usually are.  But, color me IMPRESSED! The beef steak tips remain super tender thanks to the sous-vide cooking method that is used to prep them. Just a couple minutes in the skillet to warm up and they are still juicy and tender. The beef that Kevin’s natural foods recipes source 100-percent pasture-raised, grass-fed, and grass-finished.

In the past, I’ve picked up my meals from Kevin’s Natural Foods at my local grocery store. But now the meals can be ordered in bundled assortments from the comfort and convenience of your home online. And, actually you can order from whatever vacay adventure you may be crushing so that they are delivered straight to your door, frozen in a cooler, when you roll back from the airport or road trip. No worrying about getting to the grocery store STAT or caving into fast take-out food because you’re starving.

For convenience, use prepped pomegranate arils from a tub!

Today’s recipe used the Korean BBQ-style Beef meal pouch, but there are SO MANY varieties like and Creamy Coconut Chicken and Cilantro Lime Chicken. It’s never boring and ALWAYS easy and delicious. Plus, all meal pouches from Kevin’s are nutritionally built to be compliant with keto, paleo and gluten free diets too!

Check out the Creamy Chicken Coconut Soup (like Tom Kha Gai) recipe I came up with using their Thai-style Coconut Chicken meal kit.

Enjoy a rich, creamy, amazingly flavorful Thai-inspired Creamy Coconut Chicken Soup in just 10 minutes thanks to entree kits from Kevin's Natural Foods! Paleo, So satisfying . . plus Keto, and gluten-free!
Creamy Thai Coconut Chicken Soup

Find additional details about Kevin’s Natural Foods their backstory, and their amazing clean-eating focused products (entrees, sides, sauces, stir-frys and more!)  which can find a place in your diet – whether Keto, Paleo, Gluten-free . . or Mediterranean, like me!  Order online or find in a store near you.

Also check them out on Facebook, Instagram and Pinterest!  AND – give my 10 minute recipe for Pomegranate Korean Barbeque a try, it’s so delicious and festive!

10-Miute Pomegranate Korean BBQ Beef
Prep Time
5 mins
Cook Time
5 mins
Total Time
10 mins
 

Succulent beef tips with spinach in a slightly sweet, slightly spicy sauce that is bejeweled with pomegranate arils and pistachios! It's festive, flavorful and a fit for your clean eating meal.

Servings: 3 servings
Ingredients
  • 1 pouch Korean Beef BBQ from Kevin’s Natural Foods
  • 2 teaspoons olive oil
  • 1 teaspoon finely minced or grated ginger
  • 2 tablespoons 100% pomegranate juice *hack: if using a ready-to-eat tub of arils, just drain off the juice for this use.
  • 3 cups chopped fresh baby spinach
  • 1/3 cup pomegranate arils
  • 3 scallions both white bulbs and greens finely sliced
  • 3 tablespoons chopped pistachios
  • 3 cups pre-cooked rice white, brown, cauliflower rice, etc
Instructions
  1. Open sous-vide pouch of beef and drain of broth from beef tips.
  2. In medium skillet, heat olive oil over medium high; add beef tips and stir-fry for 2 minutes.
  3. Reduce heat to medium and add ginger, pomegranate juice, and SAUCE POUCH from meal kit, and simmer uncovered for 2 minutes, until slightly reduced.
  4. Stir in baby spinach and pomegranate arils and stir around for 30 to 60 seconds until spinach is par-wilted.
  5. Remove from heat and sprinkle with pistachios. Serve with rice or other desired side.
  6. Serves 3.

10-Miute Thai-Style Creamy Coconut Chicken Soup

This post is sponsored by Kevin’s Natural Foods as part of a blogger recipe challenge.

Winter weather in Texas always keeps me guessing! Today I’m in shorts, but I’m still have a hankering for soup – and whipped up an amazing 10-Miute Thai-Style Creamy Coconut Chicken Soup starting with an entrée kit from Kevin’s Natural Foods.

Enjoy a rich, creamy, amazingly flavorful Thai-inspired Creamy Coconut Chicken Soup in just 10 minutes thanks to entree kits from Kevin's Natural Foods! Paleo, So satisfying . .  plus Keto, and gluten-free!

Did I mention this soup only takes 10 minutes to make start to finish? Yup, it’s so perfect for crazy busy days (like today where I was squeezing in a run, workout, holiday shopping and working on a book deadline)! Kevin’s Natural Foods also comes to the rescue on those days when I have warm fuzzy feelings about cooking something awesome from scratch, but in the end — just can’t pull my life together!

I think of these keto, paleo and gluten-free friendly products from Kevin’s Natural Foods as “meal starters” for lack of a better term. The packets come refrigerated (you can store in freezer) and include a pre-cooked protein and delicious sauce. The proteins are cooked sou-vide style and simply need heating up in a skillet or microwave (or in my soup recipe, just chopping up cold and tossing in the pot).  They you can choose exactly how to serve it – on rice, on a sweet potato, in a wrap, or in a recipe creation – like my soup!

Check out this 30-sec video to see how easy & tasty life is with Kevin’s Natural Foods!

So, back to the soup! 10-Miute Thai-Style Creamy Coconut Chicken Soup is made with a pouch of Thai-style Coconut Chicken. It reminds me of Tom Kha Gai soup – so delicious. As you can see from the quick video, the steps are easy-peasy.

Enjoy a rich, creamy, amazingly flavorful Thai-inspired Creamy Coconut Chicken Soup in just 10 minutes thanks to entree kits from Kevin's Natural Foods! Paleo, So satisfying . .  plus Keto, and gluten-free!

Just sauté mushrooms and cauliflower rice with garlic in soup pot (add other veggies if you like), chop up sous-vid chicken packet, toss chicken, broth, coconut milk and lime juice in pot, warm up, and garnish with scallions and cilantro!!!

Enjoy a rich, creamy, amazingly flavorful Thai-inspired Creamy Coconut Chicken Soup in just 10 minutes thanks to entree kits from Kevin's Natural Foods! Paleo, So satisfying . .  plus Keto, and gluten-free!

These meals can be ordered online and shipped straight to your door and I’ve seen in many flavors in my local market too. I love the Korean Beef Barbeque and Cilantro Lime Chicken too – but there are so many varieties to suit any mood or taste preference.  Everything from Kevin’s can work with keto, paleo and gluten free diets too!

Learn more about Kevin’s Natural Foods, get Kevin’s Natural Foods recipes, and their amazing clean-eating focused products (entrees, sides, sauces, stir-frys and more!)  which can find a place in your diet – whether Keto, Paleo, Gluten-free . . or Mediterranean, like me!  Order online or find in a store near you.

Also check them out on Facebook, Instagram and Pinterest!  AND – make the 10 minute Thai soup, you won’t regret it!

Enjoy a rich, creamy, amazingly flavorful Thai-inspired Creamy Coconut Chicken Soup in just 10 minutes thanks to entree kits from Kevin's Natural Foods! Paleo, So satisfying . .  plus Keto, and gluten-free!
10-minute Thai-Style Creamy Coconut Chicken Soup
Prep Time
2 mins
Cook Time
8 mins
Total Time
10 mins
 

Enjoy a rich, creamy, amazingly flavorful Thai-inspired Creamy Coconut Chicken Soup in just 10 minutes thanks to entree kits from Kevin's Natural Foods! Paleo, So satisfying . . plus Keto, and gluten-free!

Course: dinner, entree, entree soup, Soup
Cuisine: thai
Keyword: chicken, coconut, gluten free, keto, meal kit, paleo
Servings: 3 servings
Ingredients
  • 1 package Kevin’s Natural Foods Thai-style Coconut Chicken
  • 2 teaspoons olive oil
  • 1 cup sliced Baby Bella mushrooms
  • 1 cup cauliflower rice
  • 2 teaspoons minced garlic
  • 3 cups chicken broth
  • 1 cup coconut cream from can
  • 2 tablespoons fresh lime juice about 1 lime
  • 1/3 cup chopped scallions white bulbs and greens
  • ¼ cup chopped fresh cilantro
Instructions
  1. Add olive oil to soup pot and bring to heat over medium-high. Add mushrooms and cauliflower rice, sauté, stirring frequently, for 3 to 4 minutes until softened; add minced garlic and sauté for 1 additional minute.
  2. Open cold sous vide bag of chicken; chop into bite sized pieces. Add to soup pot.
  3. Pour chicken broth and coconut cream into pot and bring just to a boil, about 3 to 4 minutes. Add contents of sauce pack into soup. Reduce heat and simmer for 1 minutes longer.
  4. Remove from heat; squeeze in lime juice. Stir in chopped scallions and cilantro.
Recipe Notes

#kevinsrecipechallenge