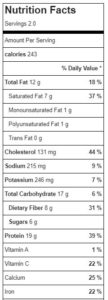
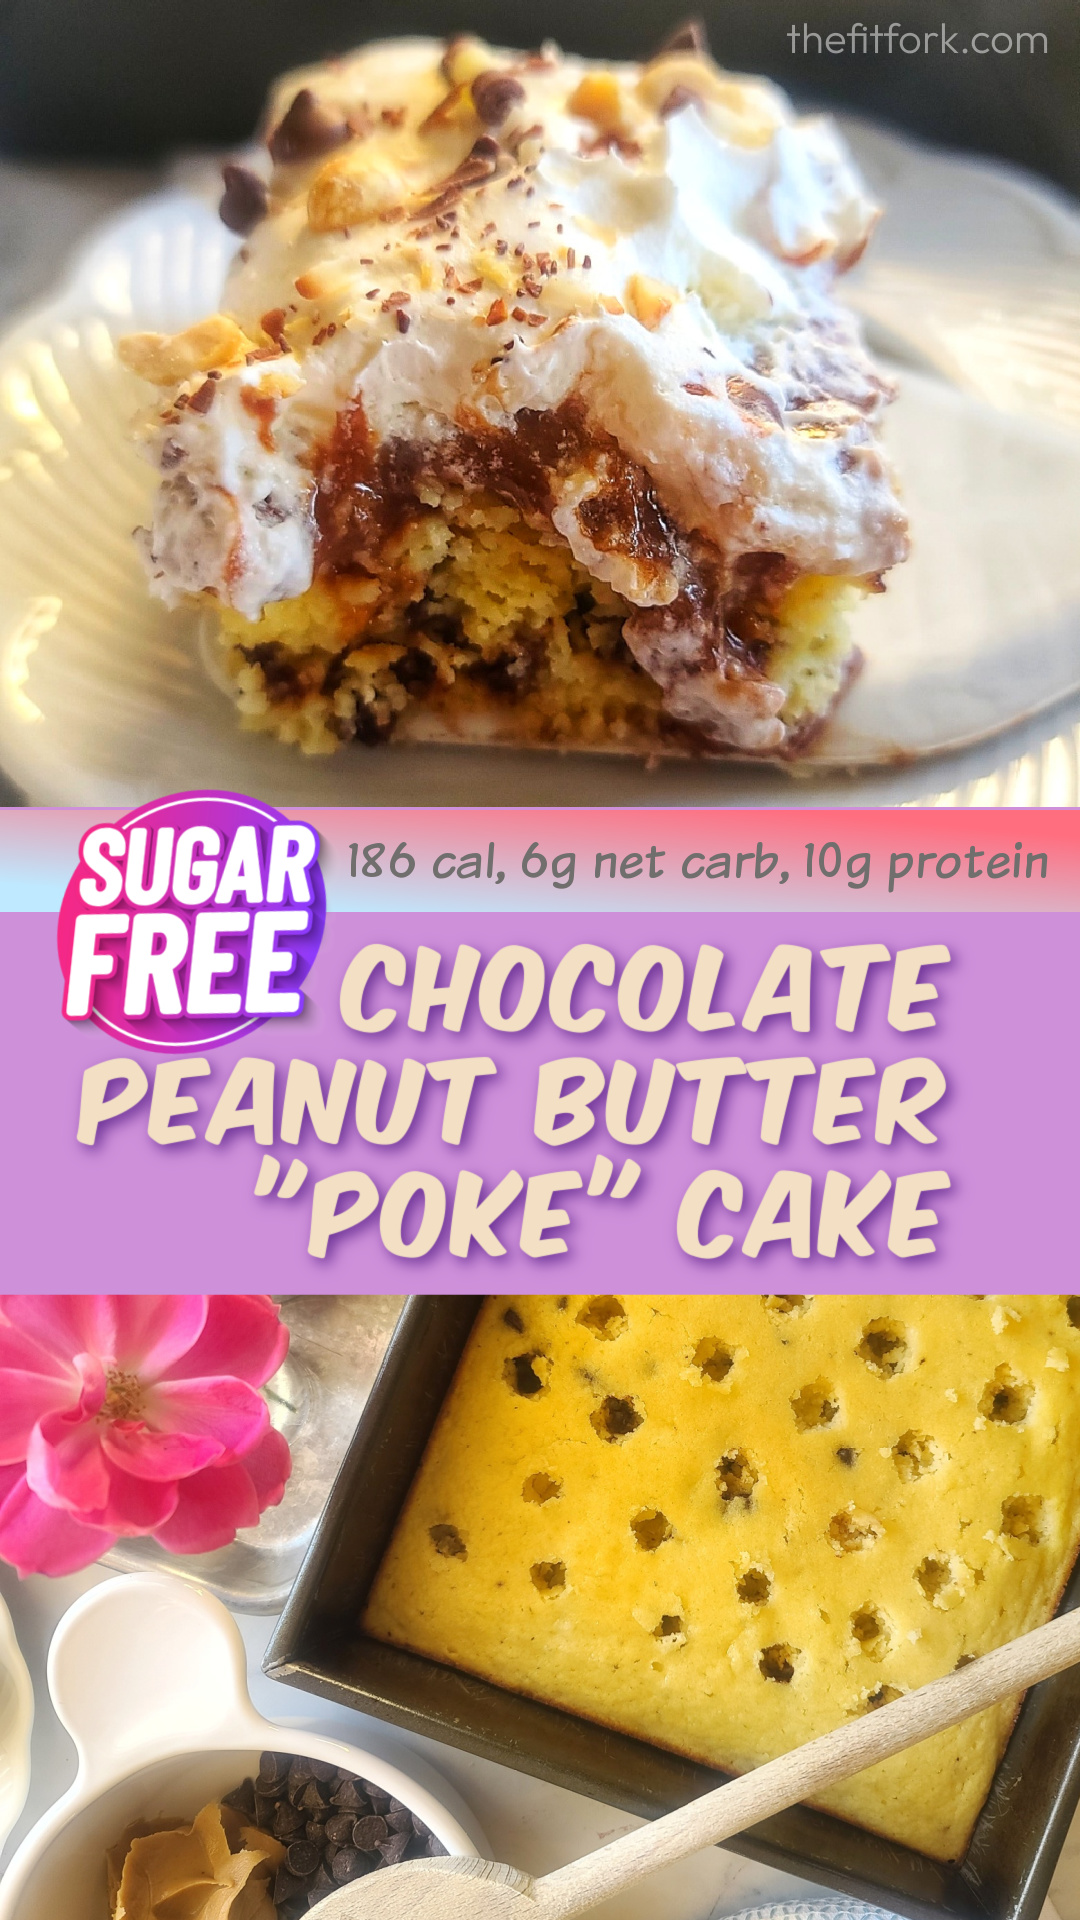
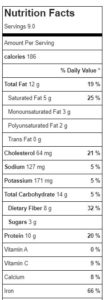
Sundays are for rest, recharging, and really yummy things. Raspberry Protein Pancakes with Cheesecake Topping makes a tasty breakfast that feels indulgent, but is actually “no worries” at just 243 calories and 19g protein per serving* Lower carb and gluten-free too.

Very simple to make these protein pancakes with raspberries, just mash up the fresh berries into a jam-like consistency and then mix in coconut milk, coconut flour, protein powder* and a pinch of baking soda. Then batter up a non-stick skillet (I used this skillet, it’s inexpensive & effective) and get to flipping and stacking! This protein pancake recipe is ready in a snap – only 4 pancakes to make (two pancakes for each serving, or eat them all for a really big appetite).
Use the protein power variety of your choices, like whey, plant-based or casein, etc. IF the batter starts to seem too thick (which can, based on the powder), then just mix in a splash more of milk. I used Clean Lean Protein from Nuzest in Smooth Vanilla. A cake batter or even chocolate protein powder would be yummy to.

*Nutrition can vary some based on the protein powder you choose. Try Nuzest, a plant-based protein powder, and save 15% with my discount code FITFORK-15
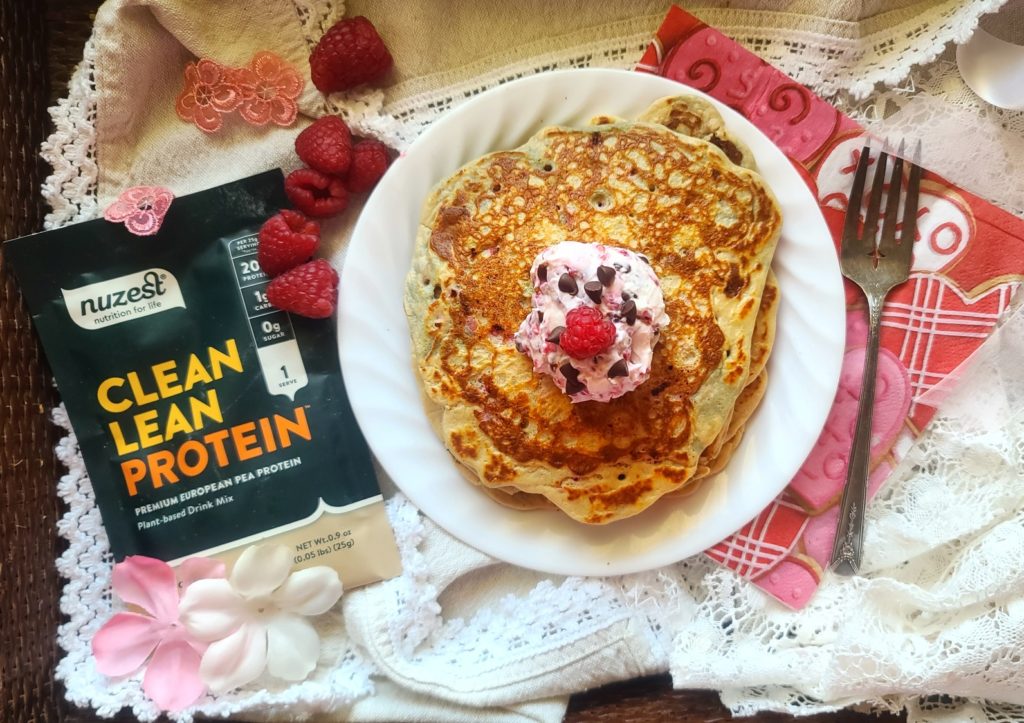
The crown on top of these raspberry pancakes is the Cheesecake Topping – it is simple softened low-fat cream cheese mixed together with a few more raspberries and sugar-free mini chocolate chips. Dollop it on top of your warm pancakes and it will begin to melt – just smear it around for the most delicious pancake topping (no syrup or butter required)!
This raspberry protein pancakes recipes makes two servings – if you don’t polish them all off, keep covered in the fridge for up to 3 days, microwaving for 15-20 seconds to reheat. They can also be frozen (without the topping).
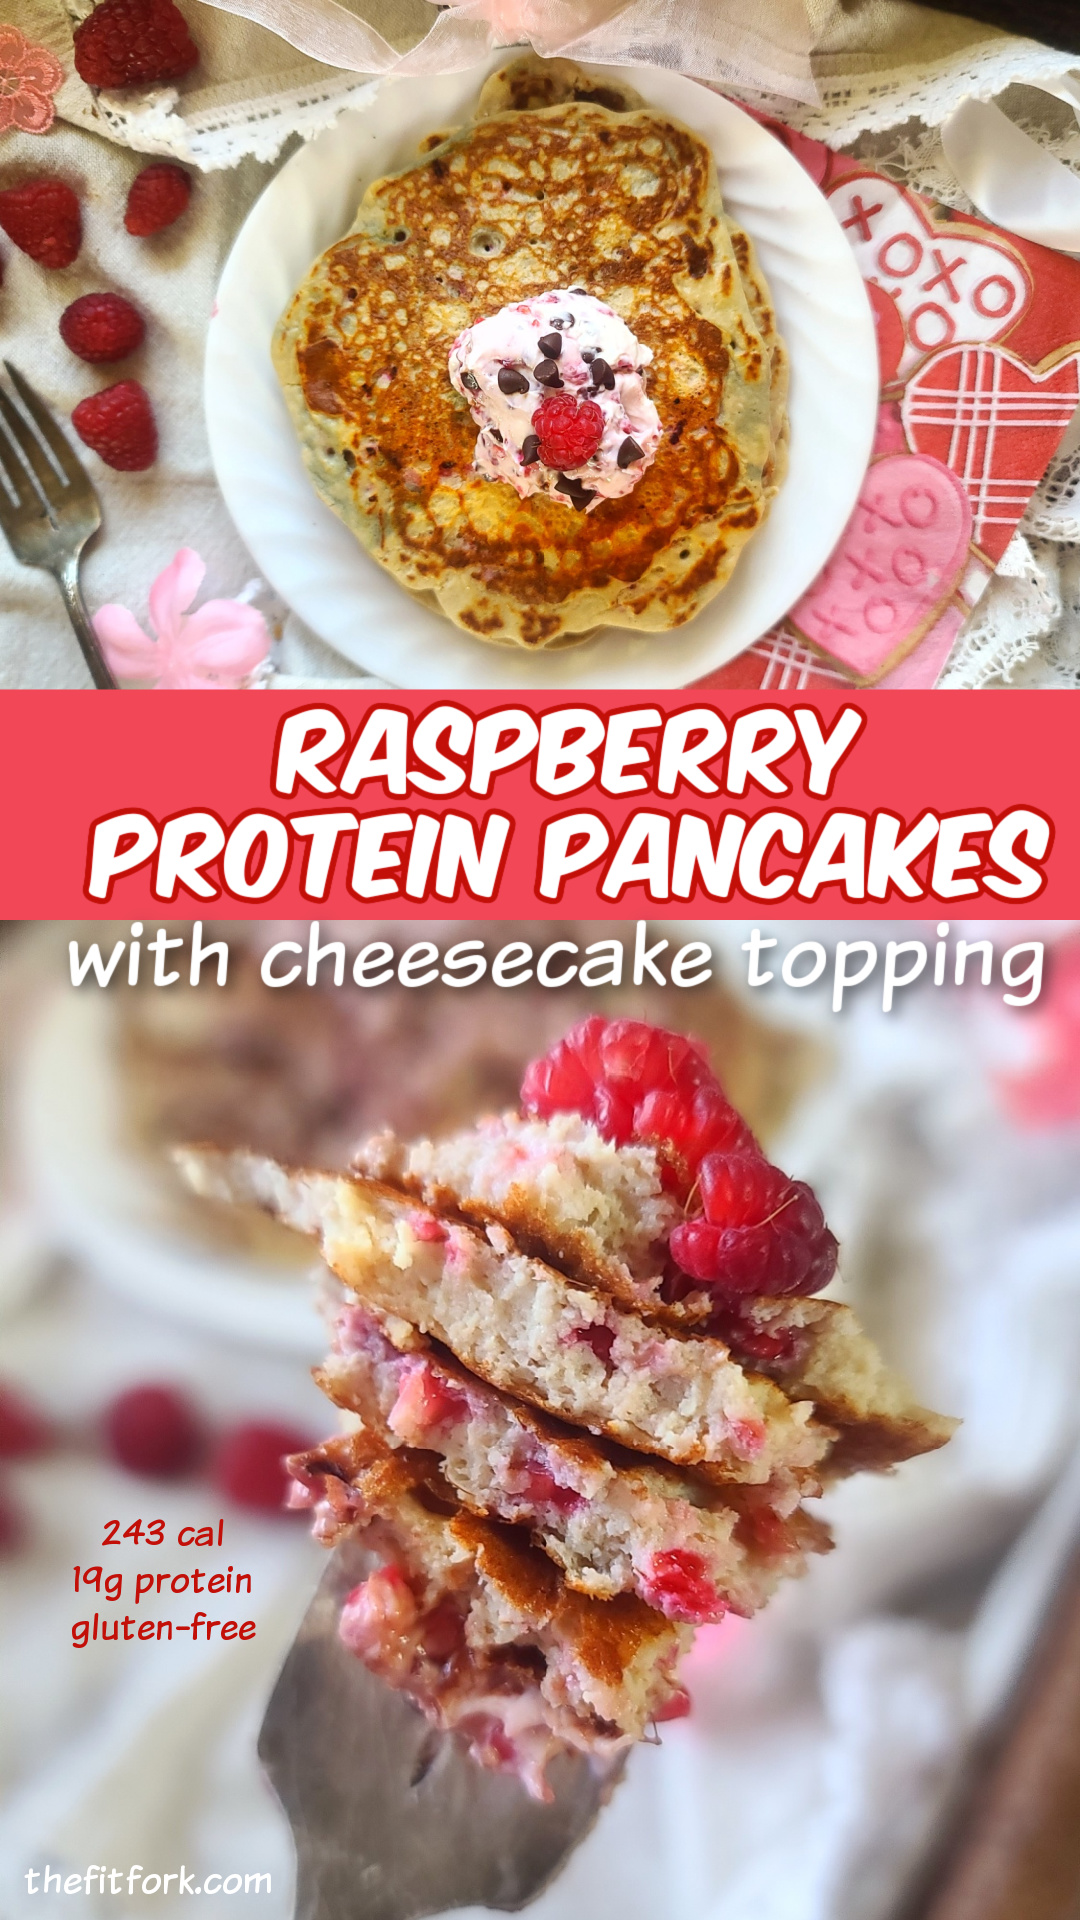

Indulge in a healthy, protein-packed stack of berry-studded pancakes featuring a cheesecake like topping to smear around on top, instead of syrup and butter. Only 243 calories per serving, 19g protein — plus lower carb and gluten free.
- 2/3 cup fresh raspberries divided
- 1 egg
- 1/2 cup unsweetened coconut milk from carton splash more, if batter too thick
- 1/3 cup vanilla protein powder your choice of variety
- 3 tbsp coconut flour
- 1/4 tsp baking soda
- 2 Tbsp low-fat cream cheese softened
- 2 tsp sugar free chocolate chips
-
Add ½ cup raspberries into bowl (Reserving remainder for the topping). Use a fork to smash them up into a jam-like consistency.
-
Stir in egg and coconut milk into raspberries, whisking together with a fork until combined.
-
Next, mix in coconut flour, protein powder, and baking soda until combined.
-
Heat non-stick skillet over medium heat.
-
Pour 1/3 cup batter in center of skillet. Cook for 3 minutes or until mostly set and no longer runny. Slide spatula underneath and flip