Red Velvet Sheet Pan Protein Pancakes: A No-Fuss Breakfast to Love

 Looking for a fun, festive, and fueling breakfast? These Red Velvet Sheet Pan Protein Pancakes check all the boxes! Whether you’re celebrating Valentine’s Day or just craving a little extra indulgence in your morning routine, this easy-to-make recipe brings all the nostalgic flavors of red velvet cake—without the sugar crash.

Why You’ll Love Red Velvet Protein Sheet Pan Pancakes

  • Starts with a Mix: Just use 2 cups of your favorite pancake mix, traditional or gluten free.
  • Baked All at Once – No standing over the stove flipping pancakes one by one! Just blend, pour, bake, and slice. 
  • High-Protein & Satisfying – Each pancake packs 15g of protein and 235 calories, making them a great way to fuel your day. Thanks to protein powder, eggs, and cottage cheese.
  • Naturally VibrantBeet root powder gives these pancakes that signature red velvet hue without artificial coloring. Plus, you get extra beetroot benefits for heart health and energy.
  • Customizable Toppings – I went with Greek yogurt (with extra beet powder for a pop of pink!) and sugar free chocolate chips, but you can get creative with your favorite toppings. Try nut butter, berries, or even a drizzle of maple syrup!  

 Perfect for Meal Prep & Busy Mornings

If you’re someone who loves pancakes but doesn’t have time to make them fresh every morning, this sheet pan method is a game-changer. Bake a batch, slice them up, and store leftovers in the fridge or freezer. Just reheat and enjoy—no skillet required just a standard size rimmed baking sheet.

 Fall in love with these Red Velvet Sheet Pan Protein Pancakes made with pancake mix, chocolate protein powder, and beet root powder for that classic red velvet vibe . . . but with better-for-you ingredients. No flipping, no fuss—just bake and enjoy! Each pancake has 15g protein and 235 calories to fuel your day.

Red Velvet Pancakes for Special Breakfast or Brunch

Whether you’re planning a Valentine’s Day breakfast, a weekend brunch, or meal prepping for a busy week, these Red Velvet Sheet Pan Protein Pancakes make a delicious and nutritious choice that can be made ahead. Everyone loves pin pancakes for Valentine’s Day breakfast and brunch food!

Note: This post contains affiliate links. I may earn a small commission for purchases made through links. Process help to offset operating expenses for The Fit Fork. Thank you!

Red Velvet Sheet Pan Protein Pancakes
Prep Time
5 mins
Cook Time
15 mins
Total Time
20 mins
 

Fall in love with these Red Velvet Sheet Pan Protein Pancakes made with pancake mix, chocolate protein powder, and beet root powder for that classic red velvet vibe . . . but with better-for-you ingredients. No flipping, no fuss—just bake and enjoy! Each pancake has 15g protein and 235calories to fuel your day.  

Course: Breakfast, brunch
Keyword: beet powder, cottage cheese, pancakes, protein powder, sheetpan
Servings: 8
Calories: 235 kcal
Ingredients
  • 3 eggs
  • 1 1/12 cups water
  • 1 cup 2% cottage cheese
  • 2 Tablespoons melted coconut oil or melted butter
  • ¾ cups chocolate protein powder of choice
  • 2 Tablespoons beet root powder
  • 2 cups gluten free pancake mix of choice
  • Optional toppings
Instructions
  1. Preheat oven to 400F degrees.
  2. In blender, add eggs, cottage cheese, water melted butter or oil. Blend for 20-30 seconds to combine until smooth.
  3. Next blend in protein powder and beet powder.
  4. Finally, blend in pancake mix, 1 cup at a time, scraping down sides as needed. If mixture seems too thick (can vary based on pancake mix used) then add up to ¼ cup water.
  5. Spray standard rimmed baking sheet with cooking spray and pour in batter. Bake for 12-15 minutes or until set and lightly browning on top.
  6. Remove and let cool in pan a couple minutes, cut into 8 rectangles and enjoy with the toppings of your choice.
Recipe Notes

Gingerbread Protein Waffles for a Festive Fitmas!

Enjoy festive flavors and fuel our body right in the morning with these Gingerbread Protein Waffles – a seasonal, easy-to-make, and downright delicious way to keep your health goals in check without feeling deprived.

This high-protein holiday breakfast treat is not only packed with classic gingerbread spices that scream holiday vibes, but they’re also a powerhouse of protein thanks to cottage cheese and protein powder. Cottage cheese gives the batter creaminess while delivering a big protein punch, and protein powder amps things up even more.

My favorite protein powder for gingerbread recipes with protein powder (and making protein baked treats in general) is Clean Lean Protein from Nuzest – use my discount code FITFORK to save on your next purchase!)

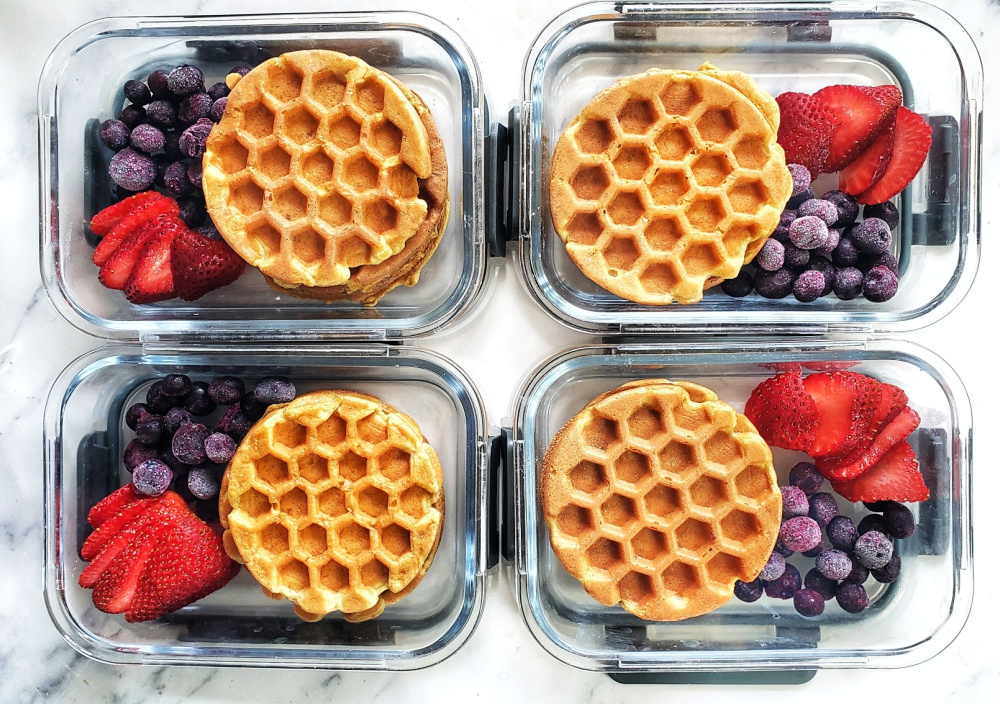
Making these waffles couldn’t be simpler. Just blend up cottage cheese, protein powder, eggs, spices, and a handful of other easy ingredients to create a smooth batter. Then, let your waffle iron do the rest! Whether you use a mini waffle iron to cook them one at a time (makes about 12 waffles) or a larger 4-square waffle maker to knock them out quicker (done in three rounds!), you’ll have warm, spiced waffles ready in no time.

One serving of three waffles has just 240 calories and a whopping 23 grams of protein (full macros in the recipe card below). They’re perfect for breakfast, post-workout refueling, or even a holiday-inspired snack. I love topping mine with warm sugar-free lemon curd that’s been thinned out to a syrupy consistency. The bright citrusy zing pairs so well with the rich gingerbread flavor. A sugar-free maple syrups is a yummy pairing, too!

If you’re looking for holiday meal prep ideas, this recipe is a game changer. I often double or even triple the batch and freeze the extras for busy mornings or grab-and-go snacks. Just pop them in the toaster or air fryer for the best results, and they’ll taste as good as fresh off the iron.

So, this holiday season, don’t let all the treats derail your goals. These Gingerbread Protein Waffles let you indulge in festive flavors while staying on track. Whip up a batch (or three) and enjoy every healthy, seasonal bite!

This gingerbread waffle recipe is based on my original and very popular Cottage Cheese Waffles recipe! You can check it this yummy protein waffle with cottage cheese recipe here: Easy Protein Powder Cottage Cheese Waffles.

IF you’re here for the gingerbread and are a gingerbread head like me, check out this post: Holiday Inspired Healthy Gingerbread Recipes

Note: This post contains affiliate links. I earn a small commission from purchases made through links. This helps offset operating expenses for The Fit Fork, thanks!

Gingerbread Protein Waffles
Prep Time
5 mins
Cook Time
15 mins
Total Time
20 mins
 

Gingerbread Protein Waffles area flavorful and festive addition to your morning routine with all those holidayspices you love, but none of the sugar overload. Each serving has 23g protein,thanks to protein powder and cottage cheese. Freezer friendly for breakfastmeal prep.

Course: Breakfast, brunch, Snack
Keyword: 10 minute meal, christmas, cottage cheese, gingerbread, holiday, protein powder, waffles
Servings: 4 3 waffles per serving
Calories: 240 kcal
Ingredients
  • 3 eggs
  • 1/3 cup unsweetened milk of choice
  • 2 tsp coconut oil or oil of choice
  • ½ tsp vanilla extract
  • ½ cup 2% cottage cheese
  • 1 Tbsp molasses
  • 1/4 tsp baking powder
  • 1 tsp cinnamon
  • 1 tsp ground ginger
  • ¼ tsp nutmeg
  • ¼ tsp cloves
  • 1/2 cup 60g vanilla Nuzest protein powder (or powder of choice)
  • ½ cup all-purpose flour or gluten-free baking flour like bob’s red mill gluten free baking blend
Instructions
  1. In blender, add eggs, milk, oil, vanilla, cottage cheese and molasses. Blend until smooth.
  2. Add baking soda, spices, and protein powder to blender, pulse in.
  3. Blend in flour, a little at a time, scraping down sides of blender as needed, until smooth batter created.
  4. If sweeter waffles desired, add stevia or monk fruit drops until desired level of sweetness achieved.
  5. Heat waffle iron (either a mini waffle iron or larger 4-square iron).
  6. Pour in batter and cook for several minutes, until indicator light goes off.
  7. Repeat for remaining batter.
  8. Should make 12 single waffles (or three 4-square waffles).
Recipe Notes

Easy Protein Gingerbread – a Quick Bread with Benefits

When the air turns crisp and the holidays approach, there’s nothing quite like the smell of warm gingerbread wafting from the oven. This Protein Gingerbread is a modern twist on a traditional favorite, offering all the nostalgic flavors of cinnamon, ginger, allspice, and nutmeg—with a boost of protein to keep you fueled through the busy season.

With 10g of protein and just 231 calories per serving, this gingerbread is as versatile as it is delicious. Enjoy it warm as a healthy holiday breakfast (I dollop mine with Greek yogurt for even more protein), as an afternoon snack to keep you energized, or dress it up with whipped cream or a scoop of ice cream for a dessert that will leave everyone smiling.

This gingerbread with protein powder recipe is so simple you can whip it up in 30 minutes or less, from mixing bowl to table. Use your favorite protein powder to make it uniquely yours (I used a plant-based protein powder from Nuzest – save 15% code FITFORK) and bake it in either a small 6×6” brownie pan or 8” round cake pan— or make it a skillet gingerbread with an 8” cast-iron skillet.

Whether you’re treating yourself after a long day or sharing it with loved ones as a Christmas protein dessert, this sweet and spicy gingerbread will bring the cozy holiday vibes to your kitchen. So, preheat that oven, and let’s make the season a little sweeter (and stronger).

DIY Homemade Gingerbread Spice

Also, I list out easy gingerbread spices below, but this time of season, when I’m making so many high protein holiday desserts, I like to prepare my own Homemade Gingerbread Spice Blend. If you use ,this recipe, substitute 1 Tablespoon total for the cinnamon, ginger, allspice and nutmeg measurements listed in the recipe card.

Note: This post contains affiliate links. I earn a small commission on purchases made through the links which helps me offset operating costs for The Fit Fork. Thank you!

Easy Protein Gingerbread
Prep Time
10 mins
Cook Time
18 mins
Total Time
28 mins
 
Servings: 6 servings
Calories: 231 kcal
Ingredients
  • ¼ cup butter
  • ½ cup unsweetened applesauce for convenience: a 4-oz, single-serve tub
  • ¼ cup molasses
  • 1 large egg
  • 1 tsp ground cinnamon
  • 1 tsp ground ginger
  • ½ tsp ground nutmeg
  • ½ tsp ground allspice
  • ¾ tsp baking soda
  • ¼ tsp salt
  • 1 cup vanilla protein powder tested with whey and plant-based
  • 2/3 cup all-purpose flour or gf baking blend
Instructions
  1. Preheat oven to 350F.
  2. Place butter and applesauce in medium microwave-safe mixing bowl and warm up on defrost mode of microwave for about 1 minute or until softened and warm.
  3. Add molasses to mixture and stir until combined. Whisk in egg.
  4. Next whisk in cinnamon, ginger, nutmeg, allspice, baking powder and salt until combined. Next stir in protein powder, followed by flour, until a thick batter is formed.
  5. Pour batter into an 8” cast-iron skillet or small 6”x6” brownie pan that has been sprayed with cooking spray.

  6. Bake for 18-20 minutes, or until toothpick pulls clean from the center. If desired, dust with powdered sugar.
  7. Cut into 6 pieces, serve warm. Store leftovers in air-tight container on counter for up to 4-5 days, or in the freezer for up to 6 months.

Protein Pumpkin Peanut Butter Cups – Healthy Halloween Candy

Protein Pumpkin Peanut Butter Cups are proof that Halloween candy DOES NOT have to be full of sugar to satisfy your sweet tooth? Rich and delicious, you can enjoy a seasonal treat that not only tastes indulgent but also fuels your body with quality ingredients. These homemade peanut butter cups cups have everything you love about traditional peanut butter cups like Reese’s Cups —with a fall-inspired twist—and none of the tricks that can derail your healthy eating habits.

The filling combines your favorite protein powder, pumpkin puree, and a creamy nut butter (peanut, almond, or whatever you love), providing a perfect balance of flavor and nutrition. And the best part? Each bite is wrapped in a layer of rich, melted sugar-free chocolate that hardens in the freezer for an easy, no-fuss treat. They’re the perfect combination of creamy and crunchy, sweet and salty, and they deliver all the seasonal goodness of pumpkin without any added sugar.

Whether you’re looking for a healthier way to enjoy your favorite candy (Reese’s Peanut Butter Cups are one of America’s most beloved candies) or just need a high-protein snack to keep your cravings at bay, these cups have got you covered. Plus, at 139 calories, 12 grams of fat, 10 grams of net carbs, and 6 grams of protein per piece, you can feel good about indulging. Of course, those numbers might vary a little depending on which protein powder you use, but the end result is always a crave-worthy treat you won’t regret.

These nearly sugar free peanut butter cups are the ultimate Halloween treat or smart snack any time of the year, and the best part is, you can make them right at home—no need to wait for trick-or-treating season. Keep a stash in the freezer for when the cravings hit, and you’ll be ready with a healthier, protein-packed snack that tastes like a festive indulgence. It’s a healthy Halloween candy idea.

These easy protein pumpkin peanut butter cups are the perfect nearly sugar-free swap for Reese’s Cups, one of America’s favorite candies. Rich chocolate envelops a creamy center filled with protein and seasonal flavors. No bake, no guilt and a favorite homemade swap for Halloween candy.

Q & A FOR PROTEIN PEANUT BUTTER CUPS

What if I’m allergic to peanut butter? It is easy to swap the peanut butter for your favorite nut butter (almond butter works well), a seed butter, or even a nut-free spread like granola butter.

Do I have to use pumpkin? No, if you don’t care for pumpkin, you can just swap out for the same measurement of nut butter. However, note that this will add more calories and change the other macros.

Are there other options for the sugar-free chocolate chips? While I love sugar-free chocolate chips, and find they are very versatile for my protein treats, there are other options. So, yes, you can use traditional chocolate chips, dairy-free chocolate chips or carob chips. Note that the macros will change.

What are my protein powder options? You can use whey, plant-based, or whatever type of protein powder you love – really in any flavor (I have used both vanilla and pumpkin  flavors in whey). Or, you can substitute ¼ cup coconut flour for the 1/3 cup of protein powder. If you use an unflavored protein powder or coconut flour you will need to use a bit of sugar-free sweetener (to taste) in the filling mixture.

How do get cups out of muffin tins? If you don’t use liners, this is hard. You’ll need to freeze the cups almost completely, and then set out on counter for 5 minutes, and then shimmy out with a knife at the edges. The easiest way to prepare these chocolate peanut butter cups is to make this protein candy in reusable silicone cupcake liners or a silicone muffin pan for a no-fuss, no-mess outcome.

Homemade Protein Pumpkin Peanut Butter Cups
Prep Time
20 mins
chill
20 mins
Total Time
40 mins
 
These easy protein pumpkin peanut butter cups are the perfect sugar-free swap for Reece’s Cups, one of America’s favorite candies. Rich chocolate envelops a creamy center filled with protein and seasonal flavors.
Course: Dessert, party, Snack, workout
Keyword: candy, chocolate, peanut butter, protein powder, sugar-free
Servings: 12 servings
Calories: 139 kcal
Ingredients
  • 1/4 cup natural peanut butter
  • 1/3 cup pumpkin puree
  • 1/3 cup vanilla pumpkin or cake batter protein powder can use whey, plant-based, etc
  • 2 cups sugar free chocolate chips
  • 2 teaspoons coconut oil
  • ¼ – ½ tsp coarse sea salt for topping
Instructions
  1. In a large mixing bowl combine peanut butter, pumpkin and protein powder until combined and it is sticky. Set in fridge.
  2. In microwave-safe bowl, melt chocolate chips and coconut oil together. Microwave on high for 30 second increments, stirring well in between. Repeat until chocolate is fully melted, smooth and glossy 2-2.5 minutes total, typically.
  3. Place 1 tablespoon of melted chocolate into each cavity of a lined muffin tin. Use a spoon to gently press chocolate onto the sides of each liner, if it does not ooze over on its own. Place muffin tin in the freezer for 10 minutes to allow the chocolate to harden.
  4. Once the chocolate has set, remove peanut butter pumpkin mixture from fridge and approximately divide into 12 pieces (I just kinda “score” mine on top with the spatula).
  5. Add one section of the filling onto the top of the hardened chocolate, slightly pressing down with spatula to flatten some. Make that the filling does NOT reach the edges of the muffin cup, there should be a small bord.
  6. Next, top the filling with an even portion of the remaining chocolate. If needed, reheat it in the microwave for 10-15 seconds. Sprinkle with sea salt and place in freezer to set for 10 more minutes.
  7. Store leftovers in the fridge!
Recipe Notes

Pumpkin Protein Mug Cake: Quick & Easy Fall Treat for One

Pumpkin season is here, and what better way to indulge than with a cozy, protein-packed treat that’s ready in minutes?

This single-serve pumpkin protein mug cake is the ultimate quick-fix for when you’re craving a sweet fall snack or a post-workout refuel. This pumpkin mug cake with simple, wholesome ingredients, this recipe comes together with just a mug and your microwave.

Why You’ll Love Pumpkin Protein Cake

  • Pumpkin Perfection: Canned pumpkin brings a rich, creamy texture and all the autumn vibes with a dose of fiber and vitamins.
  • Protein Powerhouse: Your favorite protein powder turns this pumpkin cake for one into a functional snack or even a breakfast on the go. Choose a flavor that complements pumpkin, like vanilla, cinnamon, or even pumpkin spice. . . . I used this plant-based protein powder.
  • Coconut Flour Magic: Coconut flour absorbs moisture beautifully, creating a soft, tender crumb without gluten. Plus, it adds a hint of natural sweetness and is a low-carb alternative to regular flour.
  • Microwave Convenience: No need to heat up the oven for this treat. In just a few minutes, you’ll have a warm, fluffy pumpkin protein dessert that satisfies your craving and keeps you on track with your fitness goals. Use a microwave-safe 8 to 12-ounce mug, bowl or ramekin – these ramekins are perfect.
  • Easy to Customize: Add in extras like a sprinkle of cinnamon, a dash of vanilla extract, or a handful of chocolate chips to make this treat truly your own. You could even top it with a dollop of Greek yogurt or whipped cream for extra indulgence.

So, next time you need a healthy pumpkin dessert, grab your mug, mix up a few ingredients, and dig into this warm, protein-packed pumpkin delight. It’s fall in a cup—quick, healthy, and oh-so-satisfying!

PUMPKIN PROTEIN MUG CAKE
Prep Time
2 mins
Cook Time
2 mins
Total Time
5 mins
 

Whippedup a single serve Pumpkin Protein Cake with some canned pumpkin, vanilla protein powder, and few other simple, nourishing ingredients. This fall-season healthy desert will warm your heart and nourish your bod with macros so dialed in, you can even eat it for breakfast (I have). 259 cal, 11g fat, 18g net carb, 18gprotein per 1 cake

Course: Breakfast, Dessert, workout
Keyword: cooking for one, protein powder, pumpkin, single serve
Servings: 1 serving
Ingredients
  • 1 large egg
  • 2 tbsp milk of choice
  • 1/3 cup pumpkin puree from can unsweetened
  • 1/3 cup vanilla protein powder
  • 1 tbsp coconut flour
  • ¼ tsp baking soda
  • ¼ tsp pumpkin pie spice
Instructions
  1. In small bowl, whisk together egg, milk and pumpkin. Next stir in protein powder, coconut flour, baking soda and pumpkin pie spice.
  2. Next, spray 10-12oz microwave-safe mug or bowl with cooking spray. Add batter to mug and microwave, on high, for a total of approximately 2 minutes (in 30-second increments to keep the batter from going too crazy as it rises from the mug like a souffle – it will settle back down when cooling).
Recipe Notes