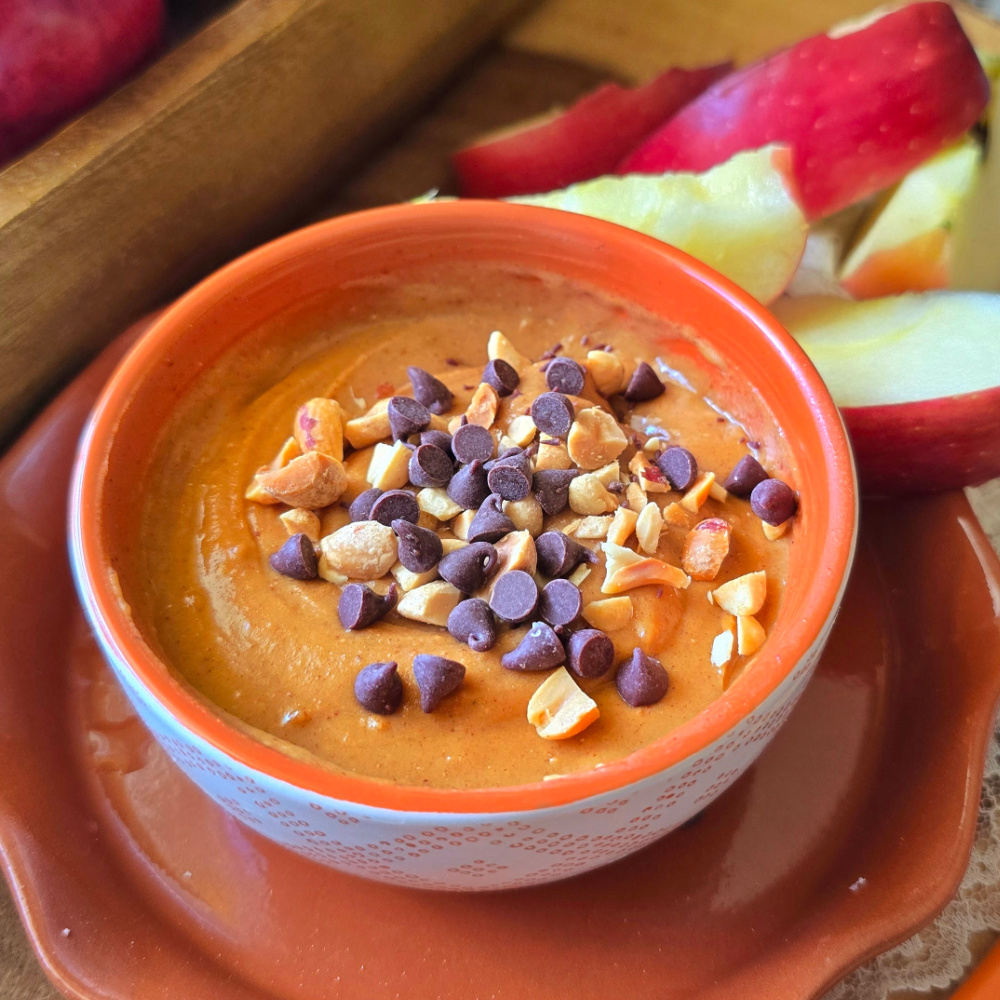
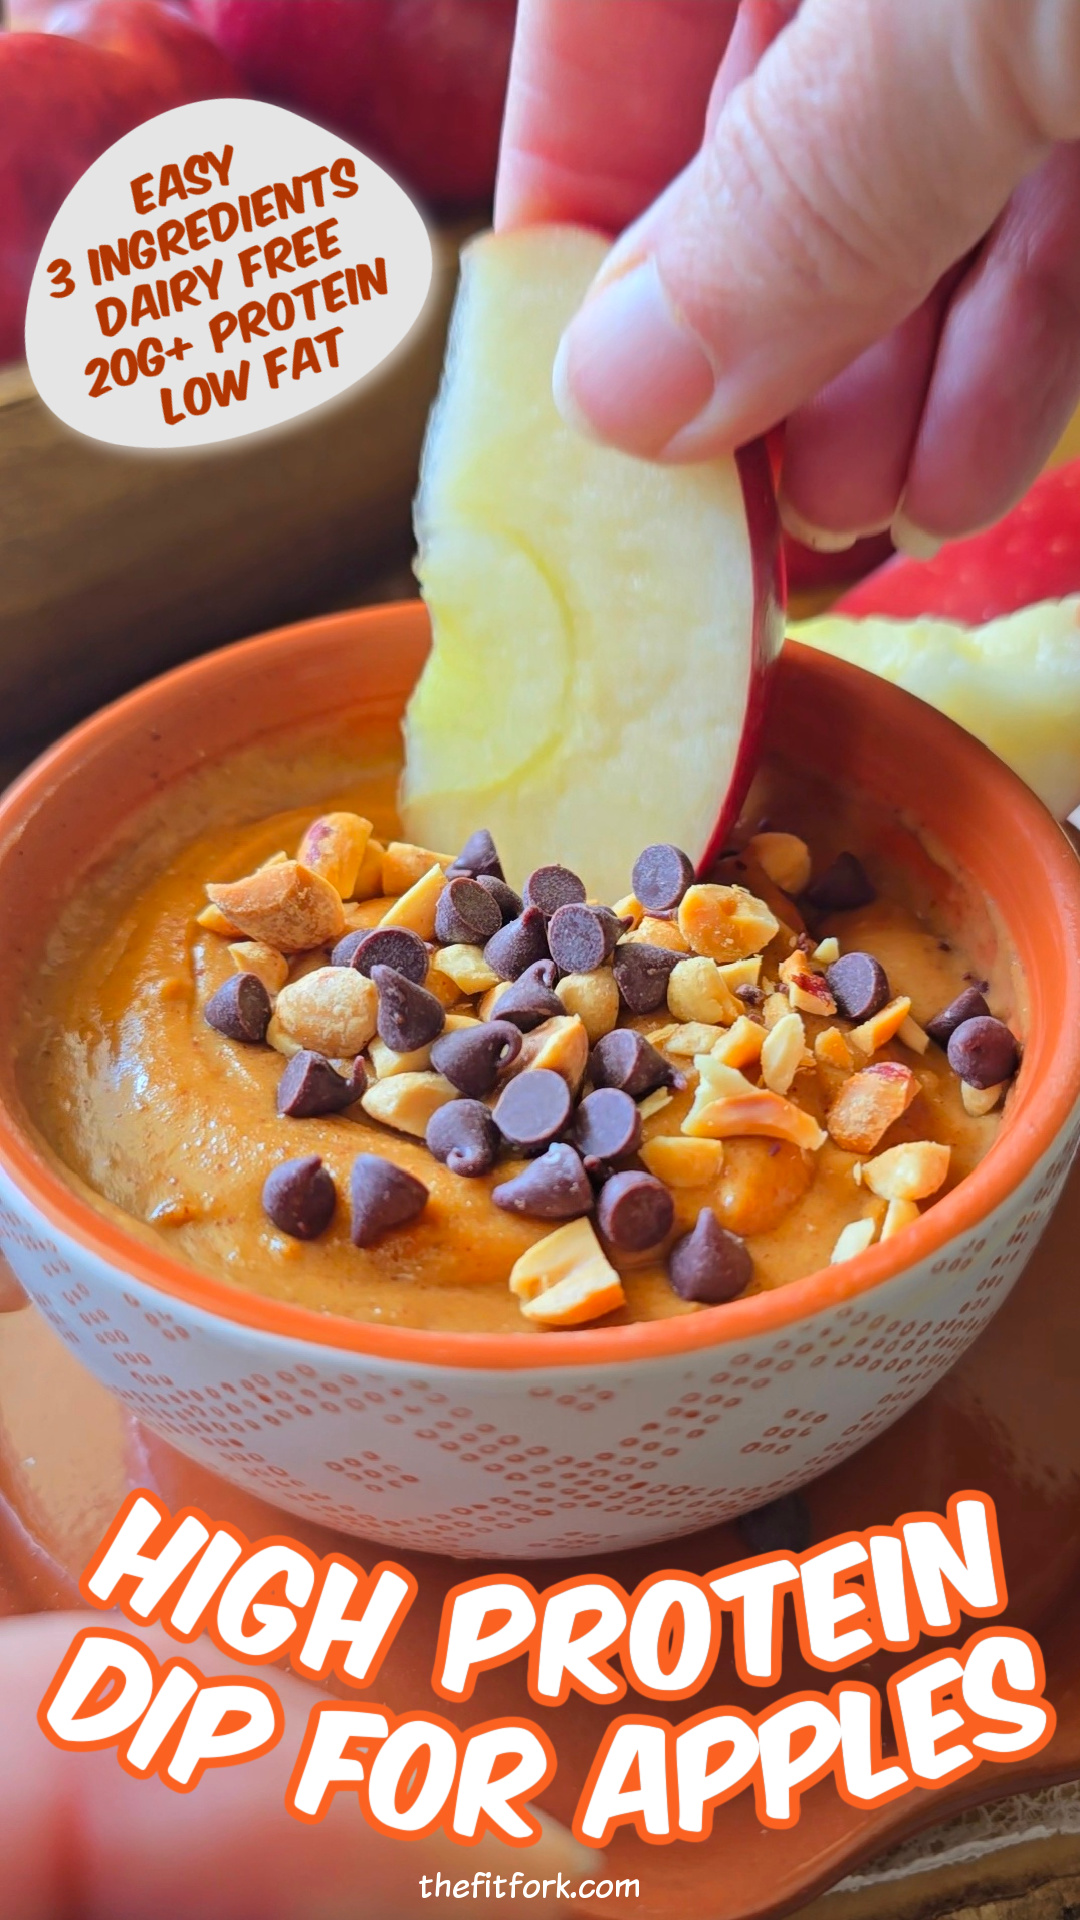
Every time I eat an apple all by itself, I swear my hunger level turns up a notch. That’s why I’m loving this High-Protein Apple Dip—it’s the perfect balance of flavor, satiety, and nutrition. With just three simple ingredients plus water, you can whip up a creamy, satisfying dip that pairs beautifully with crisp apple slices.
Not only is this recipe high-protein, low-fat and dairy-free, but it’s also super customizable. You can swap the nut butter base, play around with different protein powders, and sprinkle on fun toppings for variety.
Why You’ll Love This High Protein Dip
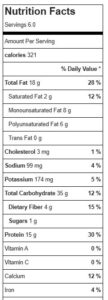
- Protein-Packed: Each serving boasts 20g+ protein, keeping you fueled and satisfied for about 160 calories per serving (this can vary some based on the specific ingredients you use)
- Quick & Easy: Just 3 ingredients (protein powder, peanut butter powder and sugar-free hazelnut spread – I love this white chocolate one!) plus water and optional toppings—no cooking required.
- Dairy-Free Friendly: Works with vegan or plant-based protein powders.
- Versatile: Great with apples, pretzels (boom – protein pretzels!), celery, or as a spread.
This is one of those snacks that makes you feel like you’re indulging, but you’re actually doing something awesome for your body. A better-for-you way to satisfy that sweet tooth while hitting your protein goals!
Whip up this quick High-Protein Apple Dip with just 3 ingredients plus water! A dairy-free, low fat, customizable snack that delivers 20g+ protein per serving—perfect for apples, pretzels, or toast.
- 2/3 cup peanut butter powder
- 2/3 cup protein powder of choice dairy-free or whey, your call
- 1 tablespoon hazelnut spread sugar-free preferred, or swap with almond butter, cookie butter, cashew butter, etc.
- 4-6 oz. water to desired consistency
- OPTIONAL: Optional toppings: chopped nuts, cacao nibs, unsweetened coconut flakes, cinnamon, mini chocolate chips, granola
-
In a bowl, mix together the peanut butter powder, protein powder, and hazelnut spread.
-
Slowly add water, a tablespoon at a time, stirring until the mixture becomes a creamy dip consistency.
-
Taste and adjust with more nut butter or water if needed.
-
Serve immediately with apple slices—or try it with pretzels, rice cakes, or spread on toast! Store leftovers in an air-tight container in the fridge for up to 5 days.
Macros per serving: 161 cal, 10.3 carb, 4g fat, 21.9g protein (note: nutrition facts can vary based on the specific brands/varieties of ingredients you choose)