Easy Gingerbread Granola for Holiday Snacking and Gifting

If you’re craving something crunchy, cozy, and full of festive energy, this Gingerbread Glow Granola is your new holiday hero. It’s packed with seasonal yumminess—think chewy dried cranberries and chopped dates, sustaining nuts and seeds, and those warm holiday spices that make gingerbread so irresistible. Best of all, it’s unbelievably easy to make, totally economical, and doubles as the perfect homemade food gift for friends, neighbors, teachers… or anyone who deserves a little edible holiday cheer.

This whole-grain granola starts with wholesome oats and layers in whatever mix-ins make your season bright. I used pistachios, almonds, sunflower seeds, and festive dried fruit, but you can make it your own with options like pumpkin seeds, walnuts, chia seeds, dried apricots, golden raisins, or even toasted coconut flakes. If it tastes good in a winter trail mix, it’ll taste amazing in this granola. Pro tip: use raw, unroasted, unsalted nuts and seeds for the best result.

Once everything gets coated in a warm, buttery, gingerbread-style syrup, the magic happens in the oven. Pro tip: when the granola first comes out, it will still be slightly soft and damp—that’s exactly what you want. Let it cool completely on the baking sheet and it’ll firm up into those irresistible, snacky clusters everyone loves. Bake on cookie sheets lined with parchment paper or a silicone baking mat for super easy clean-up.

This recipe also scores high on practicality. It stays fresh for a couple of weeks in an airtight container on the counter. Or, stash a batch in the freezer in a zip-top bag and enjoy it for up to six months. This recipe makes a BIG batch, but if you’d like less then simply halve the recipe and bake on one pan instead of two! Whether you’re fueling up for holiday hiking, powering through the season’s high-energy errand running, or just snacking by the handful while wrapping gifts, this granola does it all.

Add it to yogurt, sprinkle it on smoothie bowls, pack it in lunchboxes, or bundle it into cute jars with ribbon for a heartfelt handmade gift. Festive, functional, and full of flavor—holiday snacking doesn’t get better than this.

Gingerbread Glow Granola
Prep Time
10 mins
Cook Time
40 mins
Total Time
50 mins
 
Celebrate the season with this easy, cozy Gingerbread Glow Granola—packed with whole grains, festive dried fruit, nuts, seeds, and warm holiday spices. Easy to customize and perfect for snacking or gifting.
Course: Breakfast, gift, Snack
Keyword: cereal, gifts, gingerbread, granola, homemade
Servings: 32 1/2- up servings
Calories: 224 kcal
Ingredients
  • 8 cups rolled old-fashioned oats
  • 2 ½ cups raw nuts and/or seeds used here: pistachios, sunflower seeds, almond slivers
  • 2 cups dried fruit used here: dried cranberries, chopped dates
  • ½ cup butter
  • ¼ cup brown sugar
  • ¼ cup molasses
  • 1 cup maple syrup
  • 4 tsp. ground cinnamon
  • 2 tsp. ground ginger
  • ½ tsp. ground covers
  • 2 tsp. vanilla extract
Instructions
  1. Preheat oven to 325F.
  2. Add oats, nuts/seeds and dried fruit to a large bowl.
  3. In sauce pan, melt butter over medium heat. Add sugar, molasses, maple syrup and spices, stir untll combined.
  4. Lower heat to simmer and let cook another 2-3 minutes, stirring frequently.
  5. Pour syrup mixture over oat mixture and stir well to combine.
  6. Cover two large cookie sheets in parchment or Silpat silicone baking sheet. Divide mixture among pans.
  7. Bake for 25-45* minutes; stirring up once halfway through. Will be ready to remove from oven when turning lightly golden brown but still a little damp.
  8. Remove from oven, stir up one more time and allow to cool completely on pan.
  9. Store in airtight container for up to a couple weeks. Can also place in air-tight bag and freeze for up to 6 months.
  10. *exact cooking time will vary based on how high you have granola in pan and exact ingredients.
Recipe Notes

*This recipes makes a BIG batch, but it’s easy to scale down – just cut all ingredients in half amount and bake on a single baking sheet.


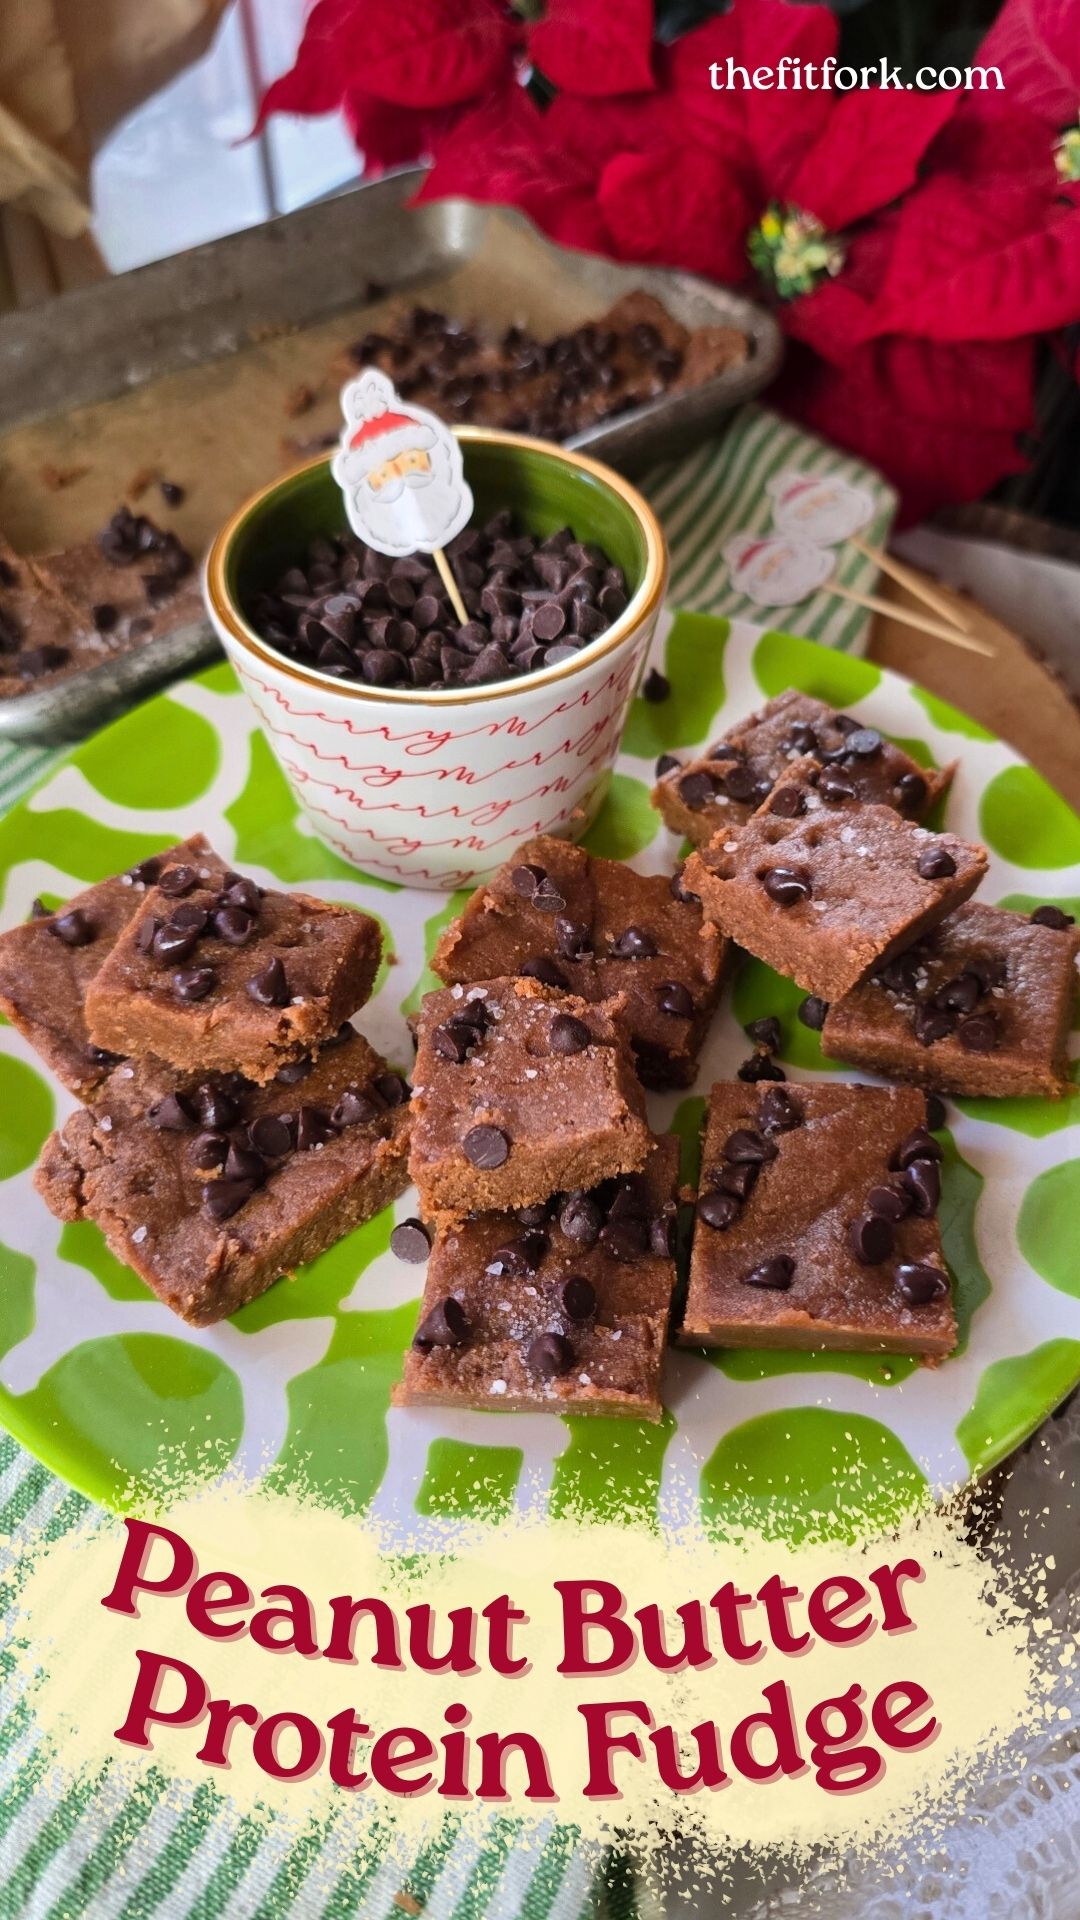
High-Protein Peanut Butter Fudge: Easy, Low-Carb, No-Bake Dessert

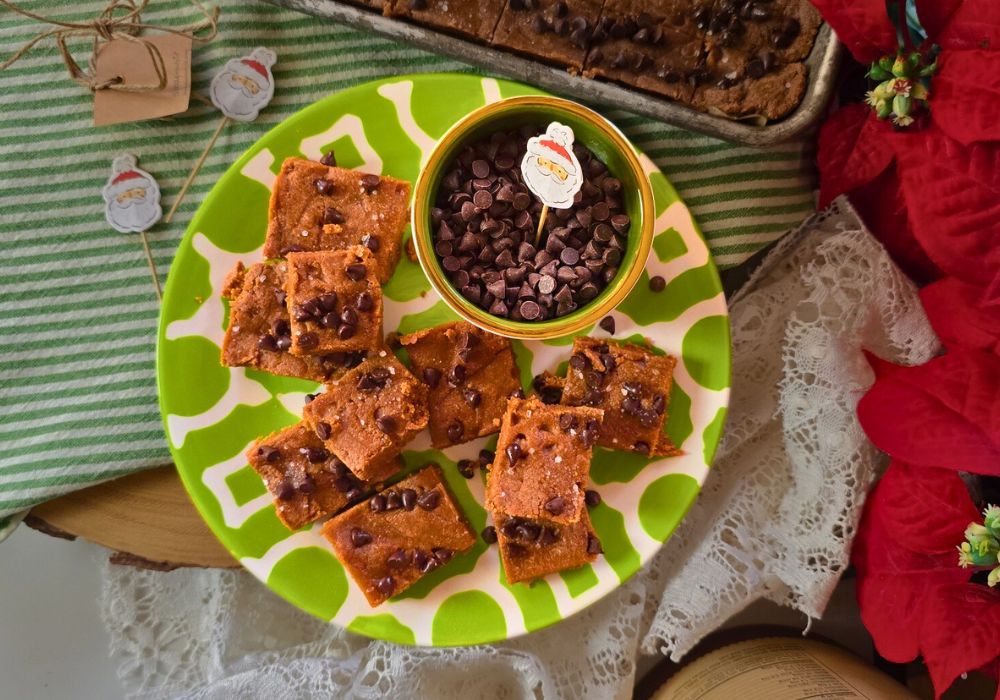
If you’re looking for a holiday treat that satisfies a sweet tooth and keeps your energy steady, this Chocolatey Peanut Butter Protein Fudge absolutely delivers. It’s ridiculously easy to make—no baking, no fuss, no complicated steps—and it still feels like a festive, indulgent bite. Consider it your new go-to for smarter snacking this season.

Why You’ll Love This Protein Fudge

✨ No-Bake & Beginner-Friendly: This fudge comes together with nothing more than a bowl and a spoon. Stir, press, chill—done. During the chaos of the holidays, it’s nice to have a treat that doesn’t require preheating the oven or cleaning half the kitchen.

✨ High Protein, Lower Carb: This isn’t your traditional sugary fudge. Thanks to the combination of nut butter, a touch of low-sugar sweetness, and whey protein powder, each piece packs a surprising punch of protein while staying low in carbs. It keeps you satisfied longer and eliminates that classic holiday sugar crash.

✨ Healthier Sweet Tooth Satisfaction: Think rich peanut butter flavor, a chocolatey boost, and a soft, fudge-like texture you’d never guess is made with wholesome ingredients. It’s perfect when you want something dessert-like… without diving headfirst into a plate of cookies.

✨ Totally Customizable: Make it your own! Depending on the flavor of protein powder you choose—vanilla, chocolate, caramel, mocha—you can shift the vibe of this fudge. Toppings are fair game, too: mini chocolate chips, chopped nuts, crushed peppermints, sprinkles, flaky sea salt… whatever makes it feel festive.

Pro Tips for Perfect Protein Fudge

  • Store in the fridge for the best texture—soft, sliceable, and just fudgy enough.
  • Freeze for long-term snacking! It thaws beautifully and stays fresh for months.
  • Try fun shapes and formats: recipe fits perfectly into an approximate 6″x9″ rimmed baking sheet (like a toaster oven sheet or 1/8th sheet pan size), but you can press into silicone candy molds, roll into truffle-like balls, or even slice into bars for lunchbox or gym-bag snacks.
  • Make it vegan: simply swap the butter for coconut oil and use a plant-based protein powder instead of whey protein powder.
  • Pick your nut butter: peanut, almond, cashew, or even sunflower seed butter all work great and change the flavor profile in delicious ways.

This fudge is the perfect little bite for . . .

  • A quick afternoon pick-me-up
  • A satisfying post-workout snack
  • A healthier holiday dessert option
  • A sweet treat that won’t derail your day
  • A batch-prepped fridge snack you can grab anytime

Whether you’re staying fueled through holiday errands, powering through workouts, or just want something chocolatey that aligns with your goals, this protein fudge is a festive win. Add it to your holiday rotation—you’ll wonder how you ever made it through December (or life) without it!

No-Bake Chocolate Peanut Butter Protein Fudge
Prep Time
5 mins
chill
15 mins
Total Time
20 mins
 
A no-bake Chocolatey Peanut Butter Protein Fudge that’s high-protein, low-carb, and ridiculously easy to make. A healthier way to satisfy your sweet tooth during the holidays—customizable, freezer-friendly, and perfect for snacks, post-workout bites, or dessert.
Course: candy, Dessert, holiday, workout
Cuisine: high protein, low carb, workout
Keyword: candy, fudge, protein powder
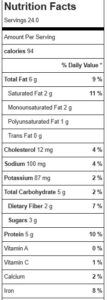
Servings: 24 peices
Calories: 9 kcal
Ingredients
  • ¾ cup peanut butter or nut butter of choice
  • 3 Tbsp butter or coconut oil
  • ¼ cup sugar-free maple syrup or can sub honey, agave or other sticky sweetener
  • ¼ cup coconut flour
  • 1 cup whey chocolate protein powder can sub plant-based
  • 2 Tbsp mini chocolate chips
  • 1/8 tsp coarse sea salt
Instructions
  1. In microwave-safe bowl, add nut butter, butter and syrup. Warm on 50% power in microwave for about 30-45 seconds or until soft enough to stir together until smooth and silky.
  2. Next stir in coconut flour, followed by protein powder; stir until incorporated and has the consistency of dough.
  3. Place onto rimmed baking sheet, approximately 6”x 9”. Use spatula or fingers to press down flat.
  4. Top with chocolate chips and salt; pressing in lightly.
  5. Set in fridge for about 15 minutes to firm up before cutting into 24 pieces. Store leftovers, covered, in fridge.
Recipe Notes

Giant Protein Pumpkin Breakfast Cookie for One (Gluten-Free, Dairy-Free, Egg-Free)

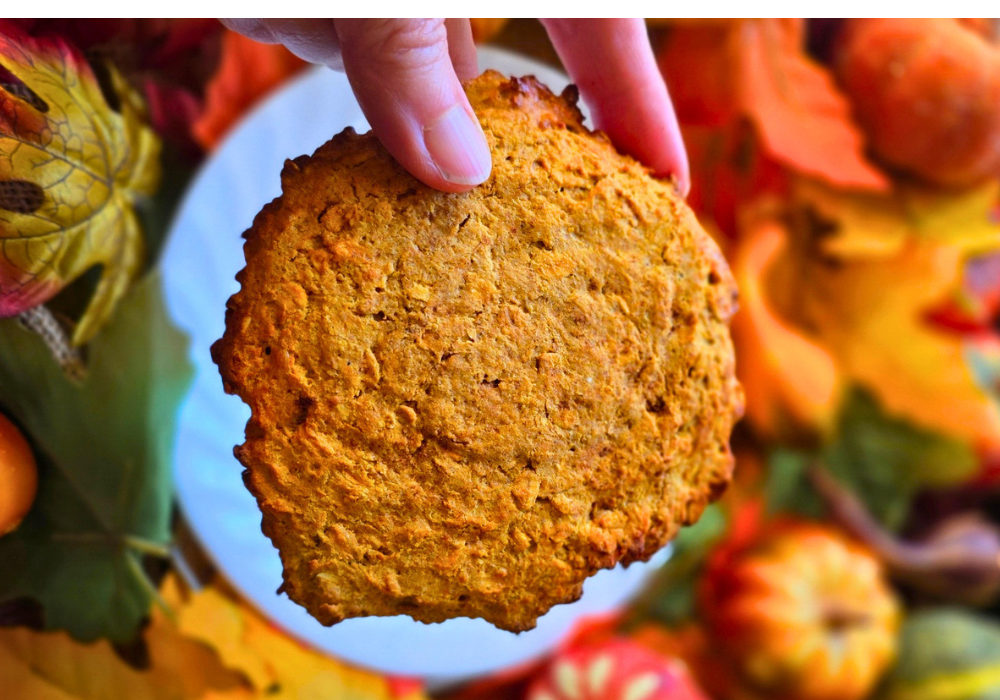
 Ever want just one cookie—but you don’t feel like making a whole batch? Well, I’ve got ya with my Giant Protein Pumpkin Breakfast Cookie for One — a single-serve pumpkin cookie that’s sweet, satisfying, and perfectly portioned.

This cozy fall-inspired treat is the ultimate mash-up of wholesome breakfast ingredients— plus its soft, chewy, and packed with over 30 grams of protein to keep you fueled for hours. It’s a smart way to enjoy a “cookie” for breakfast (or any time) while keeping nutrition goals on track.

Even better, it’s allergy-friendly — completely gluten-free, dairy-free, egg-free, nut-free, and refined sugar-free. I used sunflower seed butter (sun butter) to keep it nut-free, but you can swap in any nut butter if you prefer. The sugar-free maple syrup adds a little more sweetness while moderating the total carb count (of course, use regular maple syrup or honey if you prefer) , and the protein powder gives this cookie its muscle-fueling boost.

Nutrition Snapshot (approximate*):

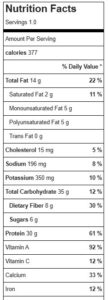
  • 377 calories
  • 35g carbs
  • 14g fat
  • 30g+ protein
  • *macros can ultimately vary based on the ingredients you choose

It’s also a great way to use up that little smidge of canned pumpkin puree leftover from other fall recipes. Mix everything in one bowl, bake (or even air fry on “bake” setting or use toaster oven) for a few minutes, and boom—you’ve got a warm, freshly baked cookie that tastes like pumpkin pie met your favorite protein bar.

Whether you enjoy it as a high-protein breakfast, post-workout snack, or healthy dessert, this Giant Protein Pumpkin Breakfast Cookie delivers big fall flavor in a perfectly single-serving size. Grab that leftover pumpkin puree and whip one up—you’re just one cookie away from a deliciously fit fall morning.

If you love pumpkin cookies, here’s another healthy pumpkin recipe for cookies you will love: Low-Carb Pumpkin Spice Latte Cookies

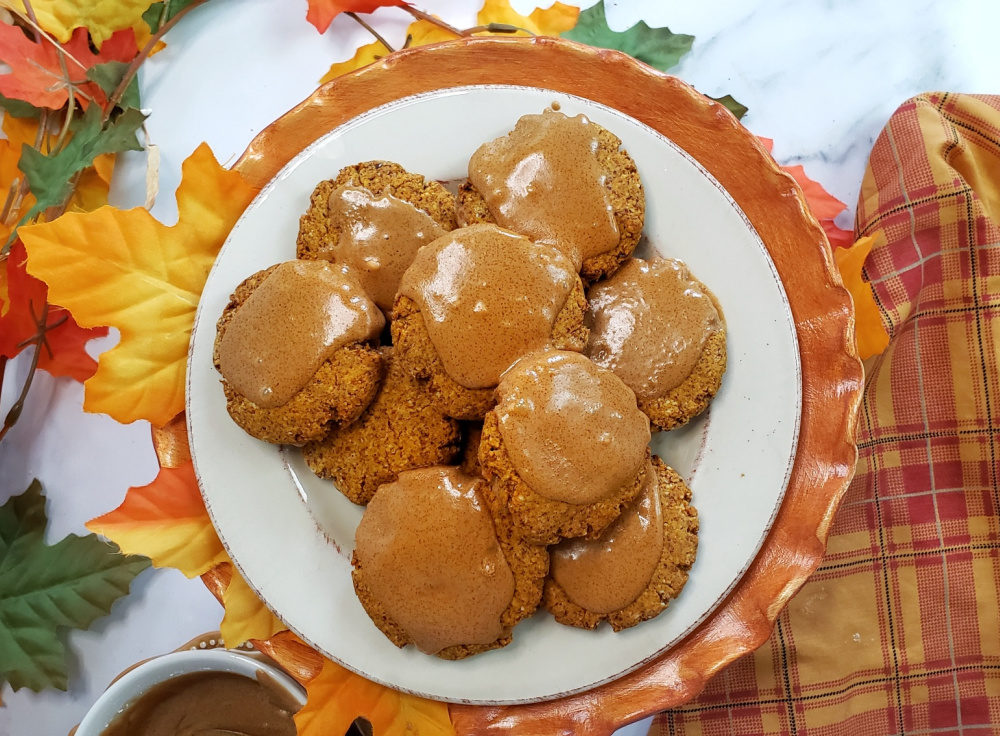
Whip up a batch of these amazing autumn-inspired pumpkin spice cookies in under 30 minutes! Lower carb, gluten-free plus, soft, chew and amazing flavorful -- especially with the coffee glaze!

Note: This post contains affiliate links. I earn a small commission on products purchased through links – these proceeds help offset operating expenses for The Fit Fork. Thank you!

Giant Protein Pumpkin Breakfast Cookie for One (Gluten-Free, Dairy-Free, Egg-Free)
Prep Time
5 mins
Cook Time
12 mins
Total Time
17 mins
 
Satisfy your fall cravings with this Giant Protein Pumpkin Breakfast Cookie for One! Gluten-free, dairy-free, egg-free, and refined sugar-free, this single-serve pumpkin cookie packs 30g+ of protein for a delicious, balanced breakfast or snack.
Course: Breakfast, Snack, workout
Keyword: cookie, dairy-free, egg free, nut free, protein powder
Servings: 1 serving
Calories: 377 kcal
Ingredients
  • 1/4 cup rolled oats gluten-free if needed
  • 1 tbsp oat flour or gluten-free baking blend flour
  • 1 scoop protein powder about 30g, vanilla or pumpkin flavor
  • 1 tbsp ground flaxseed
  • 1/4 tsp pumpkin pie spice
  • tbsp sugar free maple syrup or can sub regular maple syrup or honey
  • 1 tbsp sunflower seed butter or seed or nut butter of choice
  • 3 tbsp pumpkin puree
Instructions
  1. Preheat the oven (or toaster oven/air fryer combo) to 350°F. Line a small cookie sheet or baking tray with parchment paper and set aside.
  2. In medium bowl, combine the oats, gluten-free flour, ground flaxseed, protein powder, and pie spice and mix well. Add the maple syrup, almond butter, pumpkin puree, mix well. If the batter is too thick or crumbly, add another 1 tbsp of pumpkin. If it is too wet (although it will be on sticky side), you can add a little more flour.
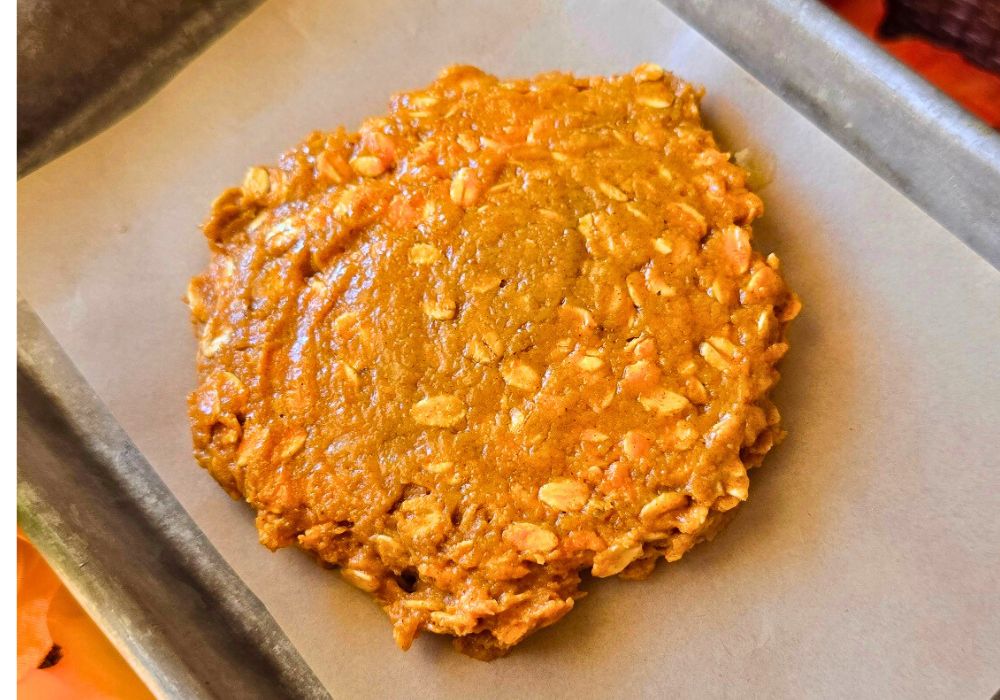
  3. Form a large ball, place on the lined tray. Press down with bottom of drinking glass to flatten into a cookie shape – about 4.5” in diameter.
  4. Bake for 12-14 minutes or until cookies is set.
  5. Remove from the oven and let cool completely.
Recipe Notes

Easy High-Protein Apple Dip (3 Ingredients, 20g Protein!)

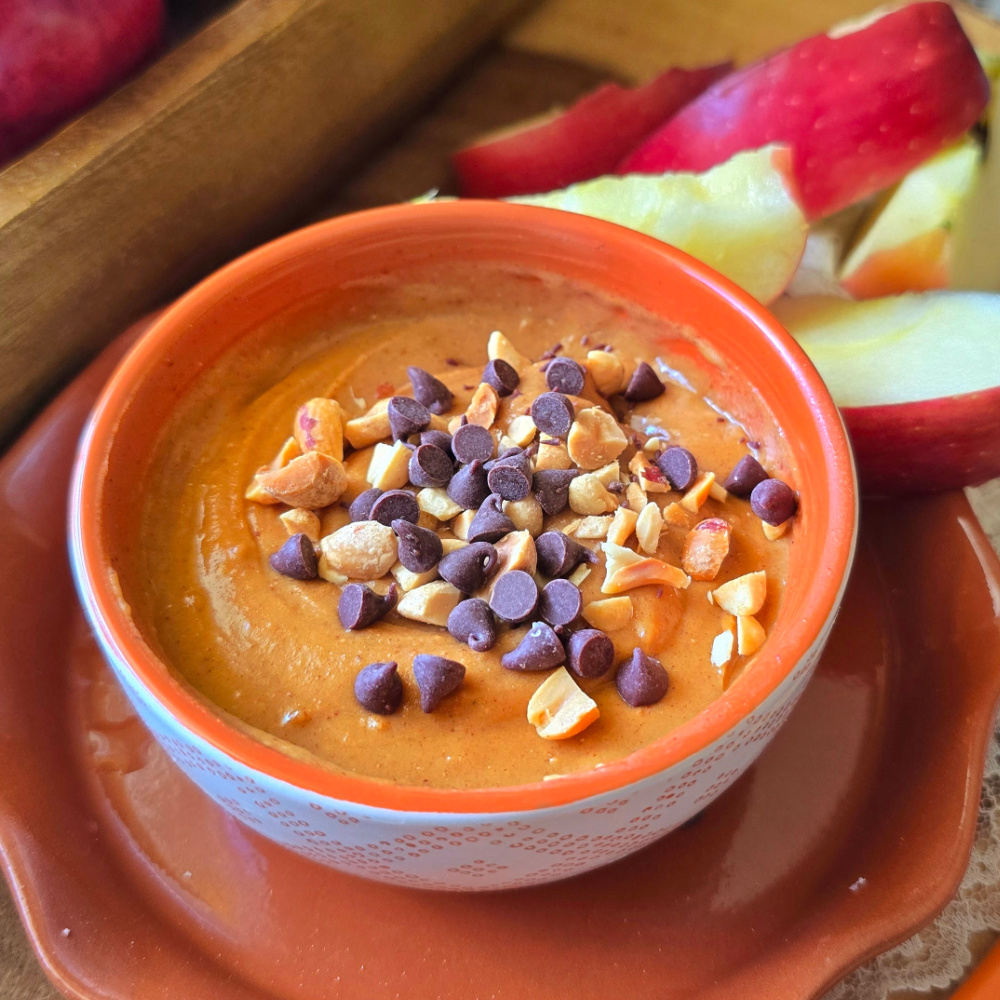
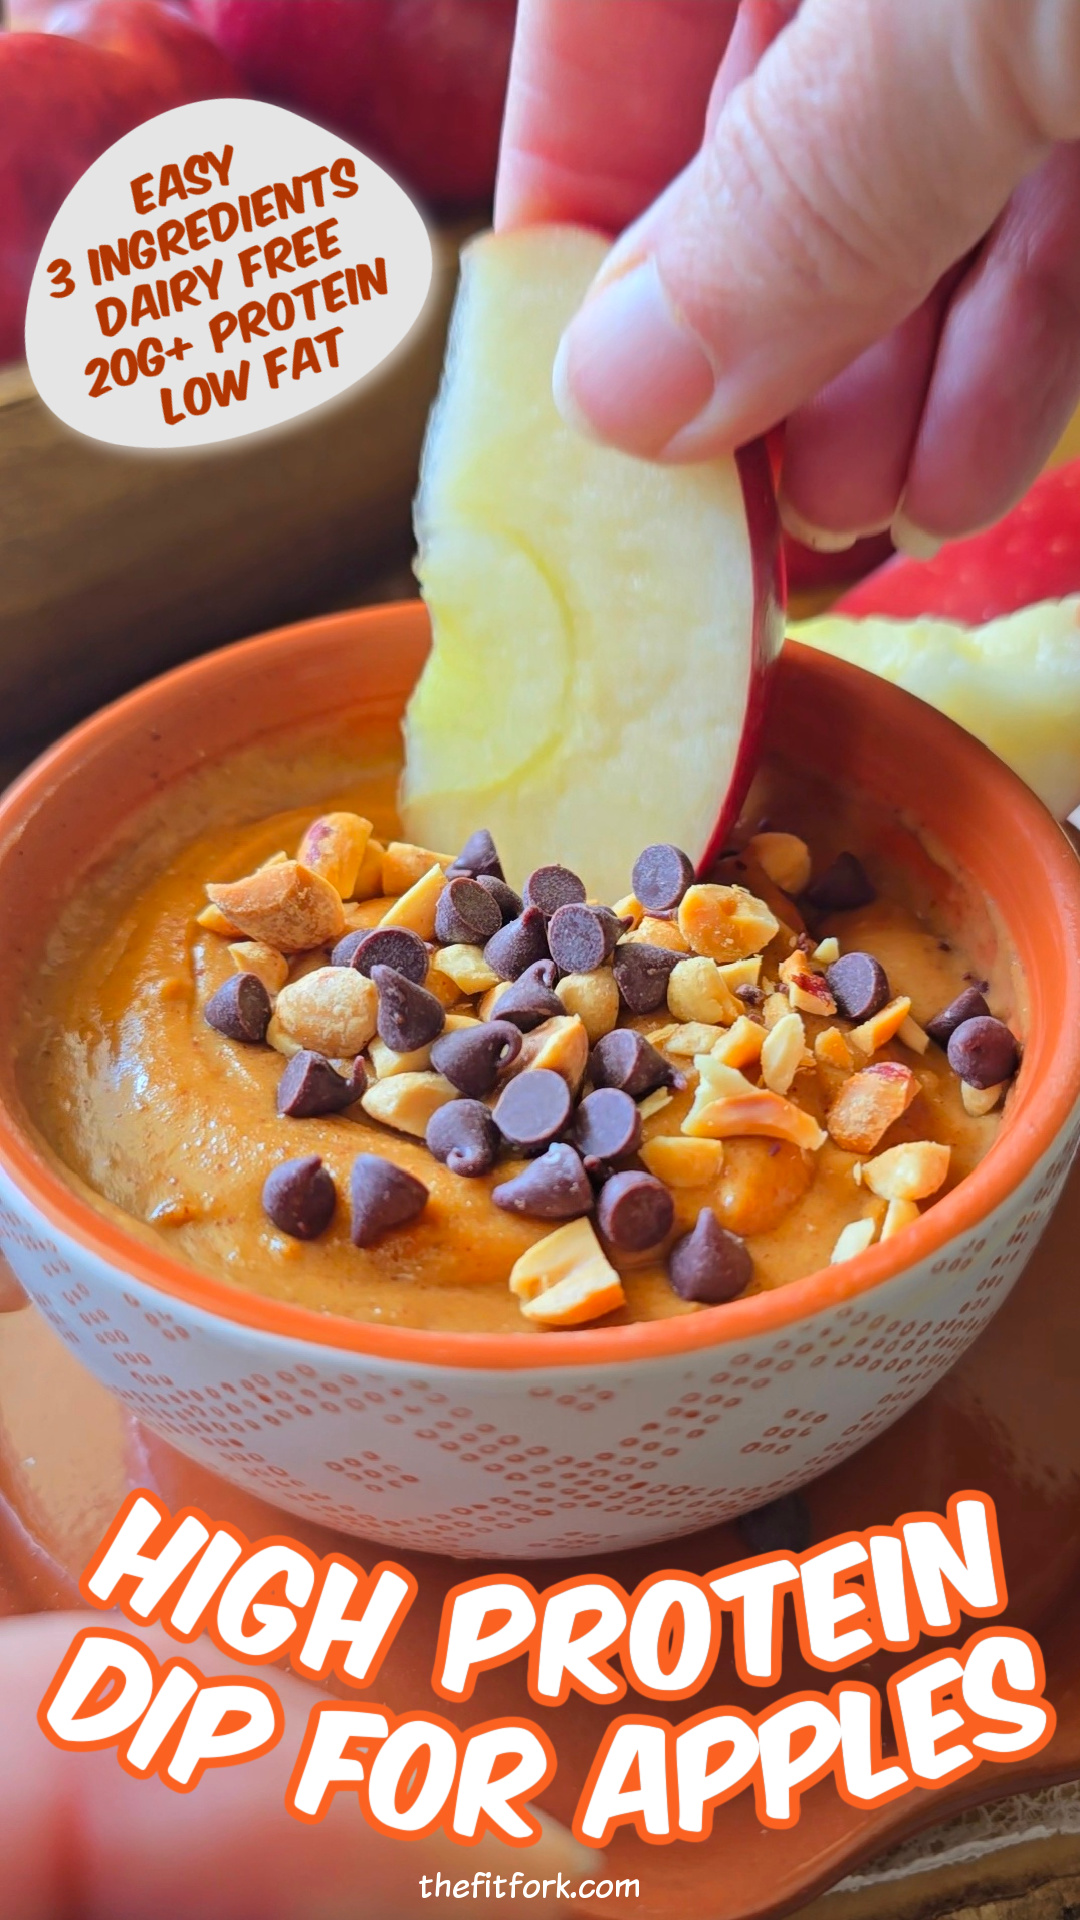
Every time I eat an apple all by itself, I swear my hunger level turns up a notch. That’s why I’m loving this High-Protein Apple Dip—it’s the perfect balance of flavor, satiety, and nutrition. With just three simple ingredients plus water, you can whip up a creamy, satisfying dip that pairs beautifully with crisp apple slices.

Not only is this recipe high-protein, low-fat and dairy-free, but it’s also super customizable. You can swap the nut butter base, play around with different protein powders, and sprinkle on fun toppings for variety.

Why You’ll Love This High Protein Dip

  • Protein-Packed: Each serving boasts 20g+ protein, keeping you fueled and satisfied for about 160 calories per serving (this can vary some based on the specific ingredients you use)
  • Quick & Easy: Just 3 ingredients (protein powder, peanut butter powder and sugar-free hazelnut spread – I love this white chocolate one!) plus water and optional toppings—no cooking required.
  • Dairy-Free Friendly: Works with vegan or plant-based protein powders.
  • Versatile: Great with apples, pretzels (boom – protein pretzels!), celery, or as a spread.

This is one of those snacks that makes you feel like you’re indulging, but you’re actually doing something awesome for your body. A better-for-you way to satisfy that sweet tooth while hitting your protein goals!

High-Protein Apple Dip Recipe (Dairy Free)

Whip up this quick High-Protein Apple Dip with just 3 ingredients plus water! A dairy-free, low fat, customizable snack that delivers 20g+ protein per serving—perfect for apples, pretzels, or toast.

Course: Appetizer, Dessert, Snack
Keyword: apples, peanut butter
Servings: 4 servings
Calories: 161 kcal
Ingredients
  • 2/3 cup peanut butter powder
  • 2/3 cup protein powder of choice dairy-free or whey, your call
  • 1 tablespoon hazelnut spread sugar-free preferred, or swap with almond butter, cookie butter, cashew butter, etc.
  • 4-6 oz. water to desired consistency
  • OPTIONAL: Optional toppings: chopped nuts, cacao nibs, unsweetened coconut flakes, cinnamon, mini chocolate chips, granola
Instructions
  1. In a bowl, mix together the peanut butter powder, protein powder, and hazelnut spread.
  2. Slowly add water, a tablespoon at a time, stirring until the mixture becomes a creamy dip consistency.
  3. Taste and adjust with more nut butter or water if needed.
  4. Serve immediately with apple slices—or try it with pretzels, rice cakes, or spread on toast! Store leftovers in an air-tight container in the fridge for up to 5 days.
Recipe Notes

Macros per serving: 161 cal, 10.3 carb, 4g fat, 21.9g protein (note: nutrition facts can vary based on the specific brands/varieties of ingredients you choose)

Which Watermelon Personality Are You? 14 Ways This Fruit Boosts Your Active Lifestyle

 Note: This post is sponsored by the National Watermelon Promotion Board. You can check out their recipes, tips and nutrition/wellness information at Watermelon.org

Watermelon isn’t just a sweet summer snack—it’s hydrating, nutrient-packed, and surprisingly versatile – and can even be enjoyed year- ‘round. From post-workout refueling to mood-boosting treats, watermelon fits every lifestyle. And let’s be honest… we all have a watermelon personality (or two!) 😉

Check out our reel below to see these 14 types in action, then read on to discover how each one can help fuel your fitness, recovery, or everyday wellness.

 Watermelon Personalities + Benefits

The Fitness Foodie – Gets her flex on with watermelon (exercise equipment you can eat!) and slices it up afterward for a snack.  So smart, because watermelon combines carbs, hydration, vitamins and minerals for workout energy and recovery while keeping snacking fun. Check out this clever Watermelon Core Workout you can do at home with a mini-sized watermelon!

Try these effective core exercises that will strengthen your abs, obliques, back and more. The fun part is using a mini personal watermelon -- and then eating it afterward!

2. The Prep Queen – Cubes, containers, and labels—she’s got a week’s worth of snack boxes stacked in the fridge. It’s smart and economical way to cut/prep your own watermelon ahead for convenient grab-and-go snacking, training session fuel, busy workdays, or kid-friendly lunches. Check out my tips on how to safely and quickly cutup watermelon (it takes me only about 5 minutes for a large one)

3. The Life of the Party – Brings the biggest platter, loves feeding others, and makes watermelon the star of every gathering. She’s super popular, sweet and a real crowd-pleaser! A platter of watermelon is the perfect thing to serve at any celebration or bring along to a pot luck or weekend social. 

4. The Stockpiler – Buys three whole melons at the store “just in case” and also loves stopping at a farm stand to support farmers.  All this watermelon ensures natural hydration and electrolytes are always on hand, making it easy to stay fueled and refreshed. Per the Watermelon Board, an uncut watermelon has a freshness shelf-life of 3-4 weeks after being removed from the vine (but you have to keep in mind there was some travel time to get in into the store). For food safety reasons, a cut watermelon should be consumed in 3 to 5 days from the fridge. If you have leftovers, just cube it and freeze for later!

When considering how long your watermelon will last, you have to consider how long it may have taken that watermelon to get to your grocery store, as some watermelons may travel farther distances during the season. Once cut from the vine, a watermelon has about 3-4 weeks of shelf life.

5. The Mileage Muncher – Knows watermelon (92% water) is nature’s sports “drink” and enjoys it before, after, and sometimes during runs. Watermelon and watermelon juice provides quick-digesting carbs, potassium (6%), and fluid to prevent cramps and improve endurance. Check out my Watermelon-Aid Endurance Sports Drink made with a few simple ingredients including watermelon juice, coconut water, honey and Himalayan sea salt.

6. The Hostess Extraordinaire – Always ready with a watermelon-inspired spread, a sweet toast, and enough charm to make every guest feel like a VIP.  Any which way you slice it, watermelon is welcoming and shows your generosity in turning wellness into a shared experience.

7. The Juice Alchemist – Blends, strains, and pours it into a mason jar like liquid gold. Watermelon juice hydrates deliciously, delivers antioxidants like lycopene and vitamin C, and is easy to customize with other juices and mixers. Watermelon juice also pairs perfectly with smoothies or protein shakes.  Check out my Watermelon Juice 101: How to Make, Store and Serve Watermelon Juice

Make Watermelon-AID, a homemade sports drink featuring watermelon juice that Watermelon-AID is a homemade watermelon sports drink that will help keep you hydrated, cramp-free and provide energy for endurance events. Easy, effective and economical.

8. The Competitive Eater – Always makes eating her favorite fruit competitive, whether entering a contest or making sure she gets the biggest slice at a picnic. You can even use watermelon for a fun physical competition like squat challenges or fun games for the family.

9. The Zero-Waste Mama – Rind pickles, seed roasting, frozen slushies… no part of the melon will be wasted. Most people don’t realize the whole watermelon can be consumed. Doing so maximizes nutrients, reduces food waste, and adds creative protein/fiber-rich snacks like my Cinnamon Churro Watermelon Rind Fries (in Air Fryer) or  Frozen Sprouted Watermelon Seed Bites from Watermelon.org.

eat the whole watermelon flesh, juice, seeds and rind

You can eat the whole watermelon – flesh, juice, rind and seeds!

10. The Seasoning Addict – Sprinkles salt, Tajín, chili, lime, chamoy—you name it—on every bite.  Using simple seasonings like these (and others) can add flavor without processed sugar or other unwanted ingredients. Check out these four ways to season watermelon that will blow your mind!

Watermelon seasoned four ways

11. The Salad Stylist – Tosses it with feta, mint, balsamic… basically makes watermelon haute cuisine.   Adding watermelon to a salad that features additional fruits and veggies, a protein source, and even whole grains creates a balanced meal to fuel adventures and promote wellness.  Watermelonboard.org has so many beautiful salads for you to enjoy all year!

12. The Year-Rounder – Knows it’s watermelon season somewhere in the world and hunts them down (and also hits up her freezer stash of cubes). Eating this hydrating, antioxidant-rich fruit year-round helps to support recovery, immunity, and boost mood – even when the sun isn’t shining. This “Snowman” Watermelon Caprese Salad is a super fun dish for the winter months.

Brighten up your holiday table with this Snowman Watermelon Pomegranate Caprese Salad! Featuring festive ingredients like mozzarella, watermelon balls, grape tomatoes, and pomegranate arils, this colorful and healthy winter salad is as delicious as it is fun to make. Complete with a mozzarella snowman centerpiece, it’s perfect for Christmas parties, family dinners, or any festive occasion. Drizzle with balsamic syrup or pomegranate vinaigrette for the ultimate holiday flavor!

13. The Zen Snacker – Watermelon is her mantra, and she balances chakras with mindful bites.
Encouraging slow, mindful eating can promote better digestion, hydration, and a mental recharge during the eating experience. And, with only 80 calories per 2 cups, watermelon is a mindful way to satiate your taste for something sweet.

14. The Instant Smiler – Proves watermelon cures bad moods faster than therapy. Bright, sweet, and hydrating—perfect for mood-boosting before, during, or after workouts or providing comfort on busy days.  Watermelon is a definite smile!

Watermelon is a happy fruit, there is just no doubt about it. I a recent poll, 100% of consumers said watermelon made them happy. It’s refreshing, hydrating, sweet, a source of beneficial energy for my runs and workouts – and at the root of a bumper crop of my life’s happy moments.

Whether you’re a Prep Queen, a Juice Alchemist, or an Instant Smiler, watermelon has a personality—and a benefit—for everyone. Hydrating, nutrient-rich, and endlessly versatile, it’s the ultimate snack for fitness, recovery, and fun.

Which watermelon personality are you? 🍉 Share your type in the comments, and check out more recipes and tips here at TheFitFork.com and also watermelon.org.