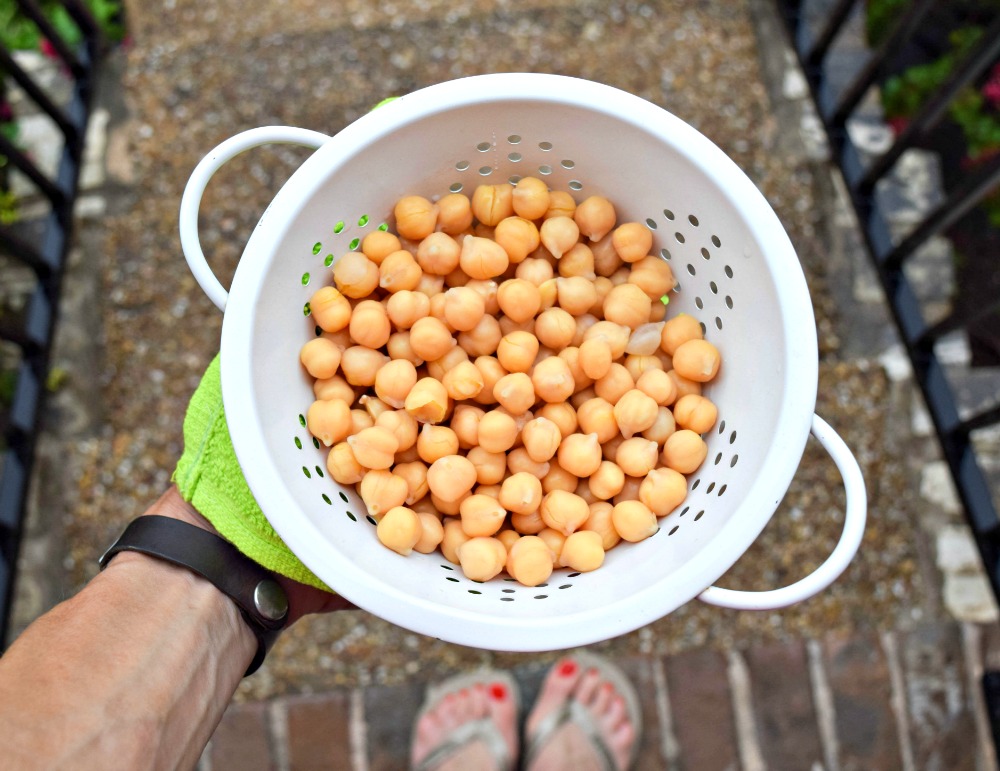
If there were an MVP award for pantry staples, chickpeas (aka garbanzo beans) would be carrying home the trophy every year. Seriously, these humble little legumes have no business being this versatile.
One minute they’re blended into creamy hummus. The next they’re adding plant-based protein to pasta, turning into a crunchy snack for the trail, or somehow ending up in a chocolate peanut butter treat that tastes suspiciously like candy.
As an athlete, I’m always looking for foods that check multiple boxes: nutritious, affordable, satisfying, and easy to keep on hand. Chickpeas hit every single one.
They’re packed with fiber, provide plant-based protein, contain important minerals like iron and magnesium, and can be transformed into everything from savory meals to sweet snacks. Plus, a can costs less than most protein bars.
If you’ve got a few cans sitting in your pantry, here are some of my favorite ways to put them to work.
1. Add Chickpeas to Pasta for a Protein Boost
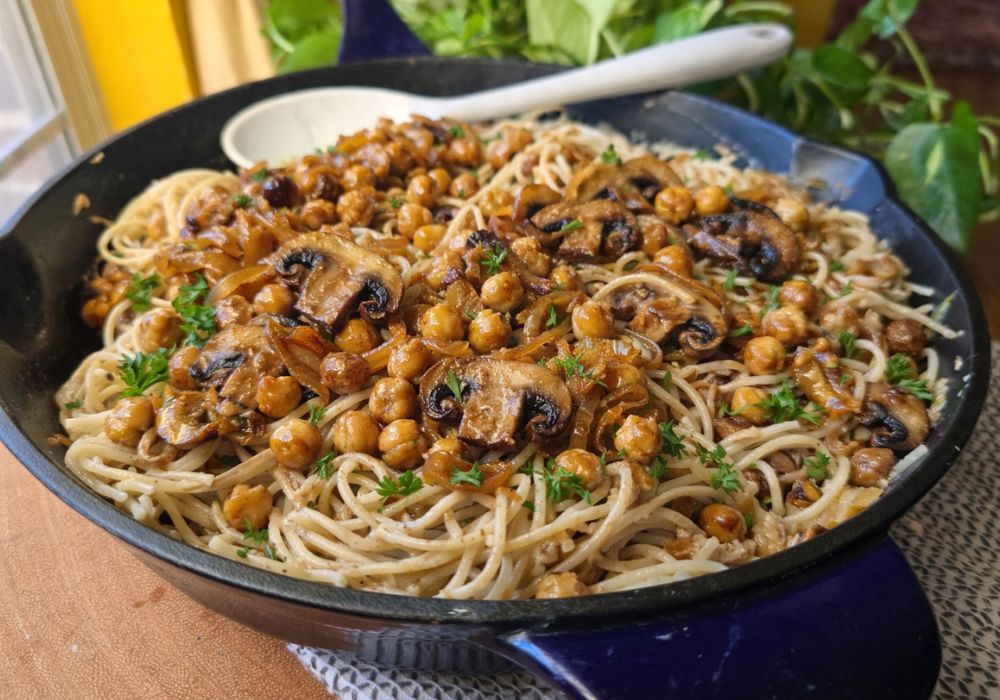
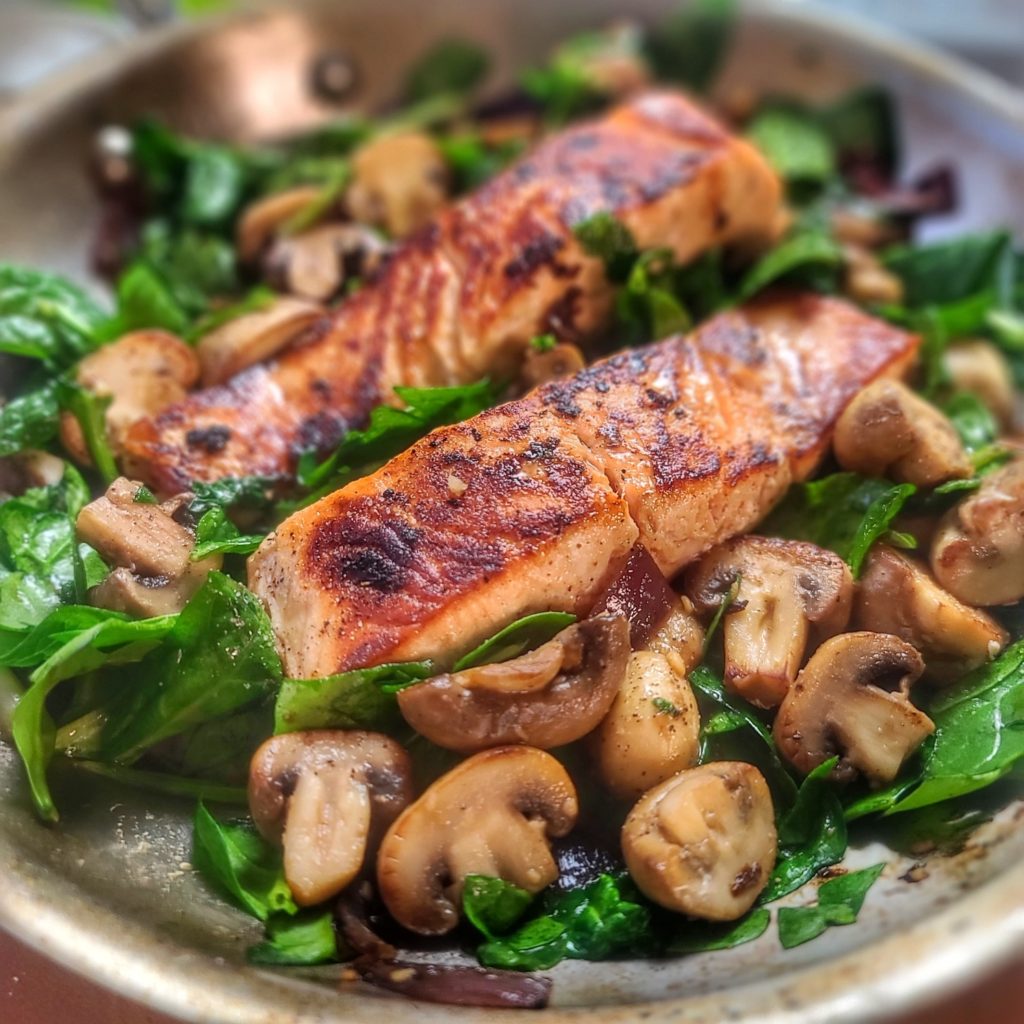
Pasta night doesn’t have to be carb-only territory. In my Creamy Caramelized Onion Mushroom Pasta with Chickpeas, the chickpeas add texture, staying power, and extra protein to help make the meal more satisfying. Combined with sweet caramelized onions and earthy mushrooms, it’s comfort food that actually keeps you full. Perfect for:
- Plant-based, vegetarian meals
- Recovery meals after training
- Cozy family dinners
2. Turn Chickpeas into a Crunchy Chocolate Treat
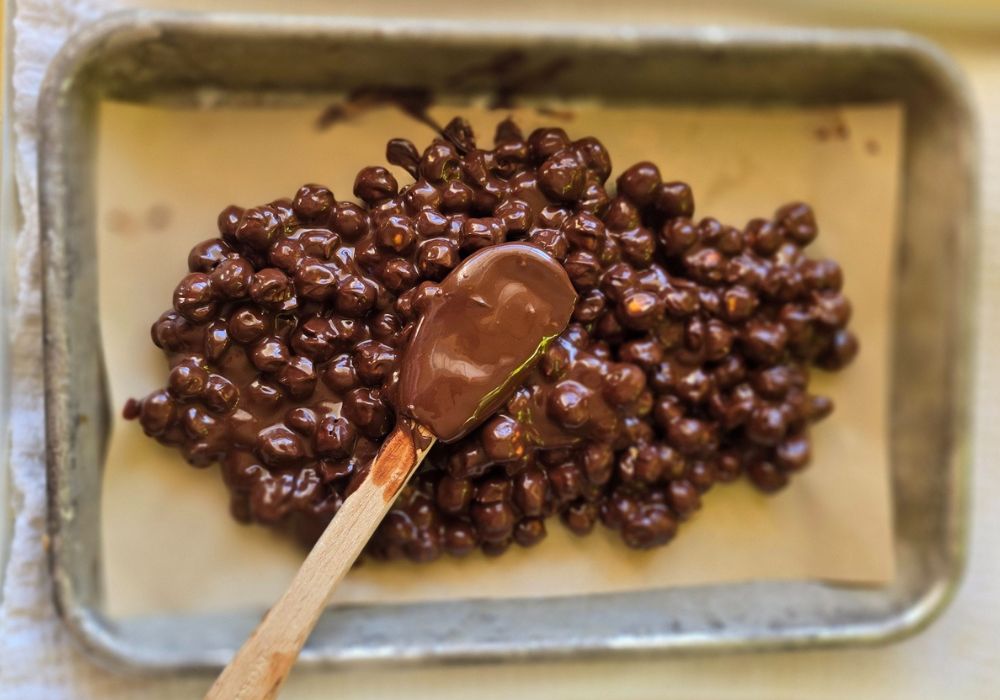
This might be the recipe that surprises people the most! Crunchy Chocolate Peanut Butter Chickpea Bark combines roasted chickpeas, chocolate, and peanut butter into a sweet treat that’s higher in fiber and lower in sugar than traditional candy options.
It’s proof that healthy snacks don’t have to taste healthy. This healthy dessert is perfect for:
- Afternoon snack attacks
- Post-workout treats
- Healthier dessert cravings
3. Upgrade Your Hummus Game
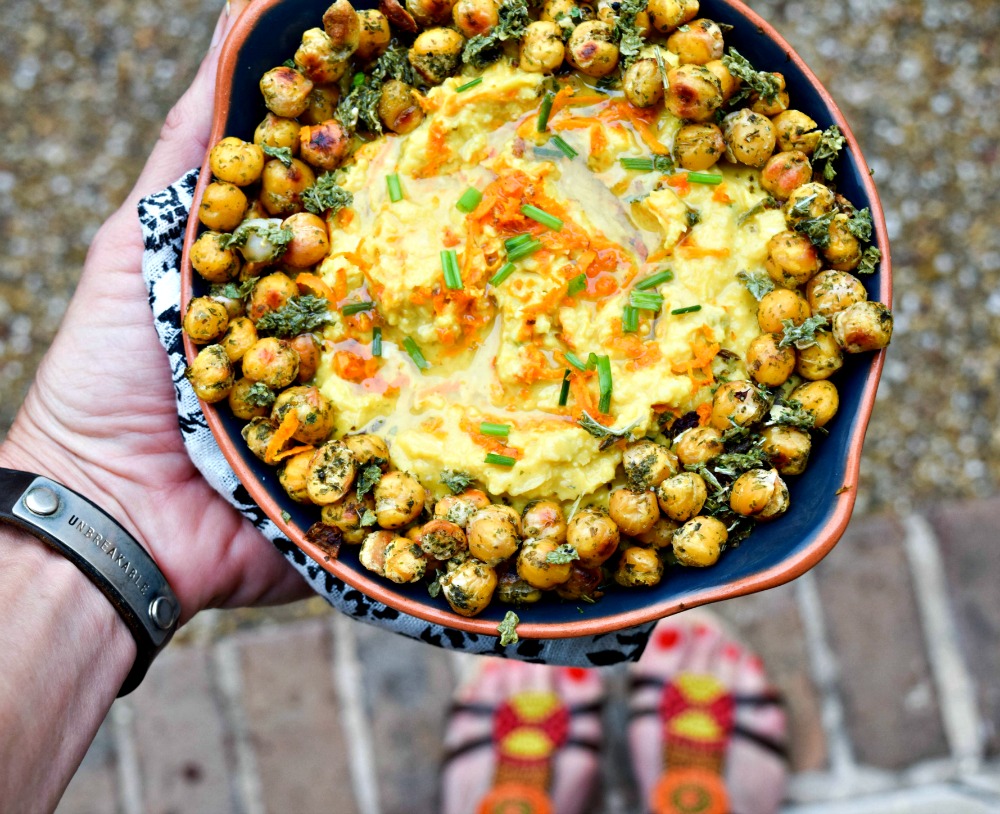
Classic hummus is great. But, Golden Turmeric Hummus is even better when you’re looking to shake things up. The turmeric adds a vibrant color and warm flavor while chickpeas create the creamy base everyone loves. Serve it with vegetables, crackers, sandwiches, wraps, or honestly just a spoon.
4. Roasted Chickpeas for the Ultimate Snack
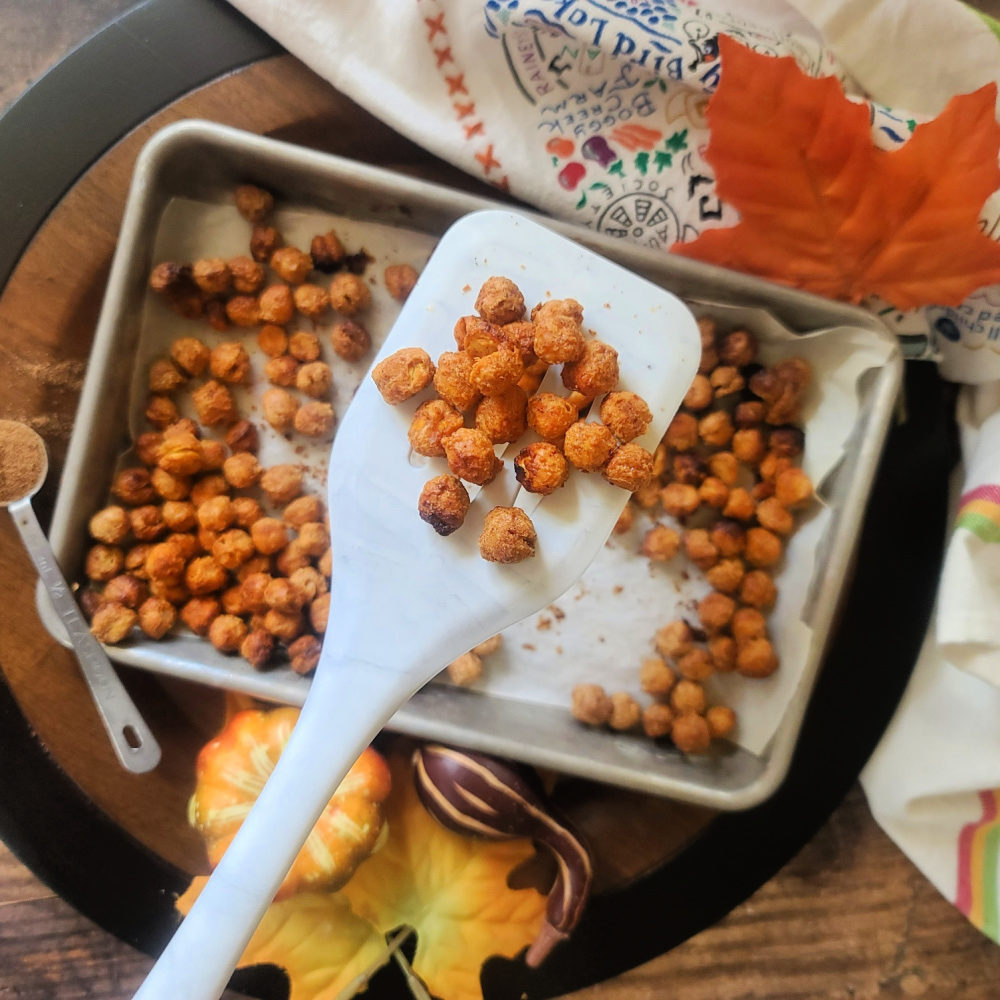
If you’re spending money on fancy packaged crunchy snacks, your air fryer would like a word. Roasted chickpeas are one of the easiest, most affordable snacks you can make. They’re crunchy, customizable, portable, and surprisingly satisfying. These are perfect for tossing into gym bags, desk drawers, hiking packs, or your car for emergency snack situations. My favorites include:
- Pumpkin Spice Peanut Butter Roasted Chickpeas for a sweet-and-savory seasonal snack
- Air Fryer Crispy Chickpeas for a quick everyday option that suits a single snacker!
5. Build Better Salads
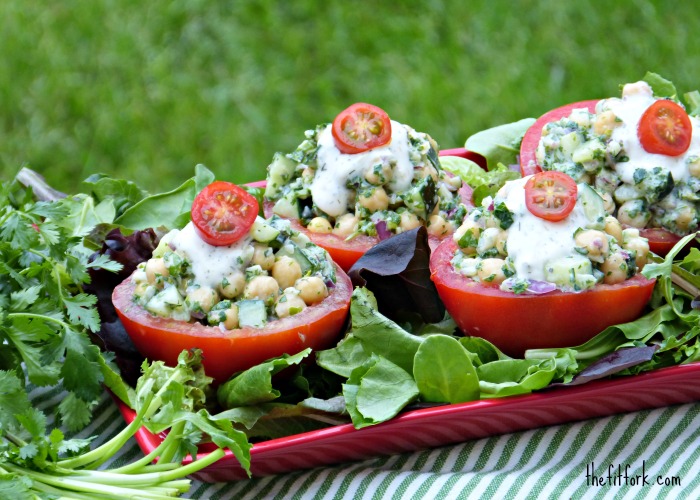
Chickpeas can instantly transform a side salad into an actual meal. My Chickpea Cucumber Kale Salad served in Tomato Bowls combines protein, fiber, fresh vegetables, and healthy fats into one colorful dish that’s substantial enough for lunch or a light dinner. The result is a salad that actually eats like a meal—not a punishment. BTW.. this recipe goes back 12+ years in my archives – just proof of how I have long incorporated these in to my active lifestyle.
6. Sneak More Protein into Your Dips
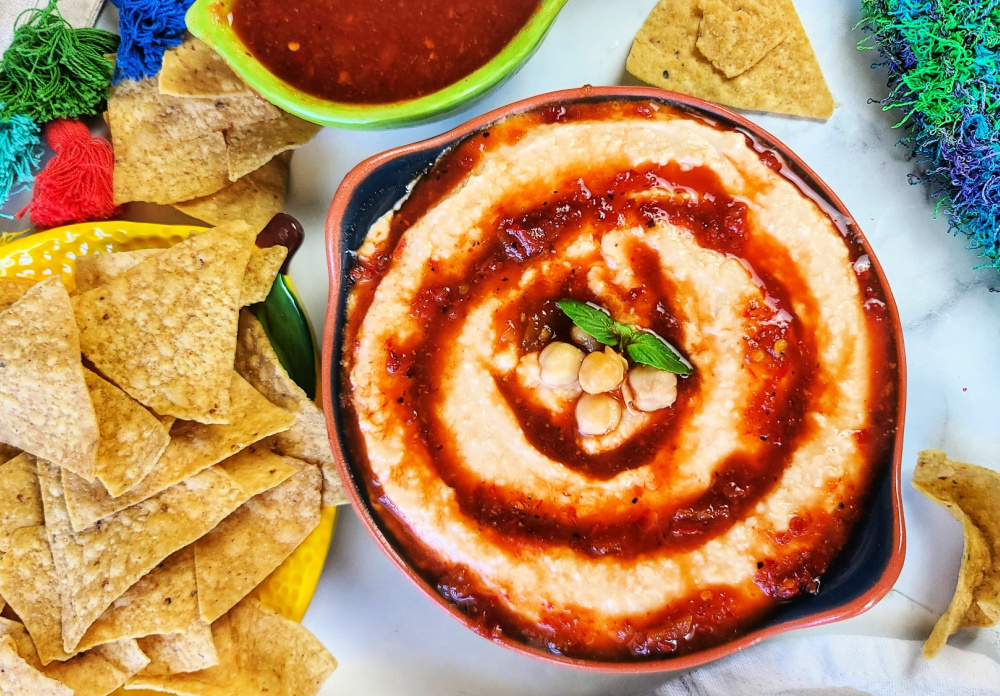
Classic hummus is great. While, Golden Turmeric Hummus was featured at the top of this post, but my Salsa Hummus is also epic and satisfying — just as good when you are looking to shake things up. The turmeric adds a vibrant color and warm flavor while chickpeas create the creamy base everyone loves. Serve it with vegetables, crackers, sandwiches, wraps, or honestly just a spoon.
Why Athletes Should Keep Chickpeas in the Pantry
Whether you’re training for a marathon, lifting weights, tackling obstacle races, or simply trying to stay active and healthy as you age, chickpeas offer several benefits:
- Plant-based protein to support recovery
- Fiber to help keep you full
- Complex carbohydrates for lasting energy
- Budget-friendly nutrition
- Long shelf life in the pantry
- They’re one of the few foods that can legitimately pull double duty as a meal ingredient, snack food, and dessert component.