Protein Pumpkin Peanut Butter Cups – Healthy Halloween Candy

Protein Pumpkin Peanut Butter Cups are proof that Halloween candy DOES NOT have to be full of sugar to satisfy your sweet tooth? Rich and delicious, you can enjoy a seasonal treat that not only tastes indulgent but also fuels your body with quality ingredients. These homemade peanut butter cups cups have everything you love about traditional peanut butter cups like Reese’s Cups —with a fall-inspired twist—and none of the tricks that can derail your healthy eating habits.
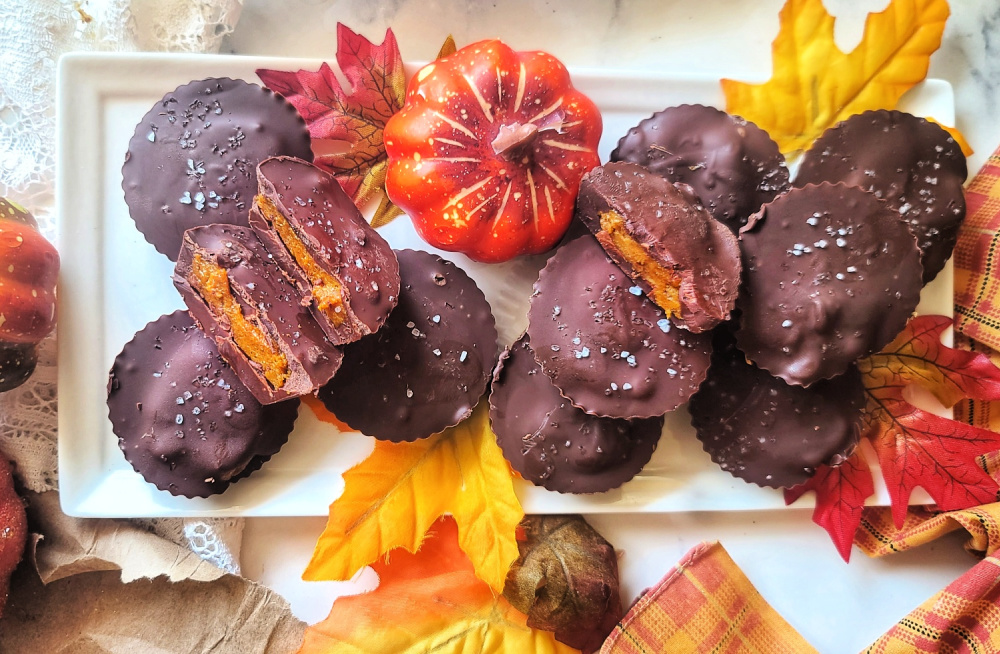
The filling combines your favorite protein powder, pumpkin puree, and a creamy nut butter (peanut, almond, or whatever you love), providing a perfect balance of flavor and nutrition. And the best part? Each bite is wrapped in a layer of rich, melted sugar-free chocolate that hardens in the freezer for an easy, no-fuss treat. They’re the perfect combination of creamy and crunchy, sweet and salty, and they deliver all the seasonal goodness of pumpkin without any added sugar.

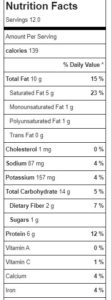
Whether you’re looking for a healthier way to enjoy your favorite candy (Reese’s Peanut Butter Cups are one of America’s most beloved candies) or just need a high-protein snack to keep your cravings at bay, these cups have got you covered. Plus, at 139 calories, 12 grams of fat, 10 grams of net carbs, and 6 grams of protein per piece, you can feel good about indulging. Of course, those numbers might vary a little depending on which protein powder you use, but the end result is always a crave-worthy treat you won’t regret.
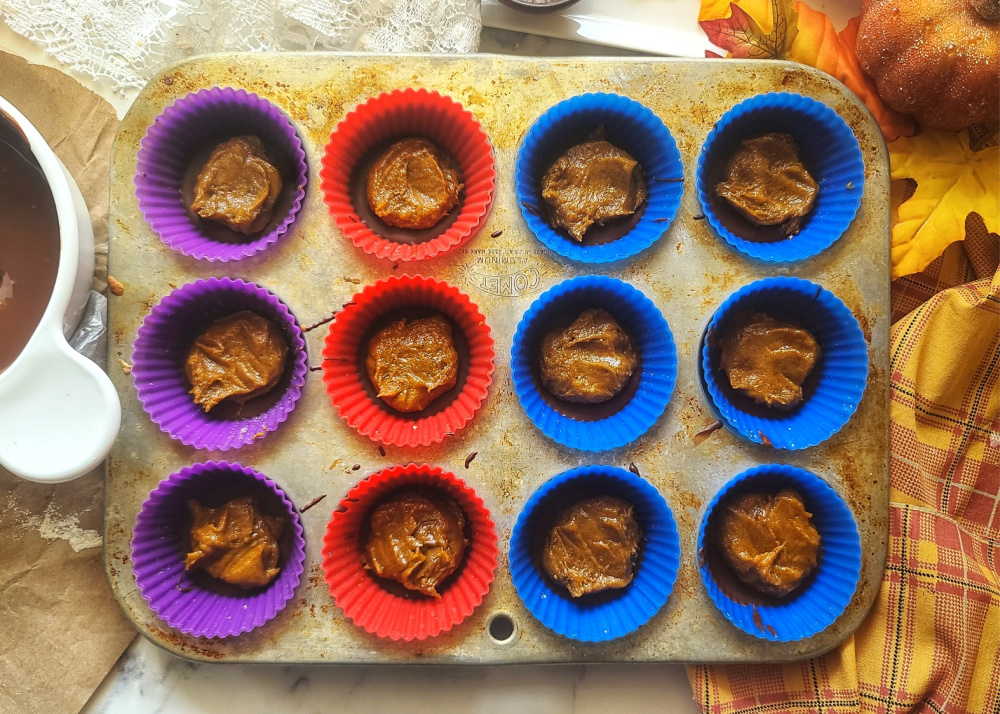
These nearly sugar free peanut butter cups are the ultimate Halloween treat or smart snack any time of the year, and the best part is, you can make them right at home—no need to wait for trick-or-treating season. Keep a stash in the freezer for when the cravings hit, and you’ll be ready with a healthier, protein-packed snack that tastes like a festive indulgence. It’s a healthy Halloween candy idea.
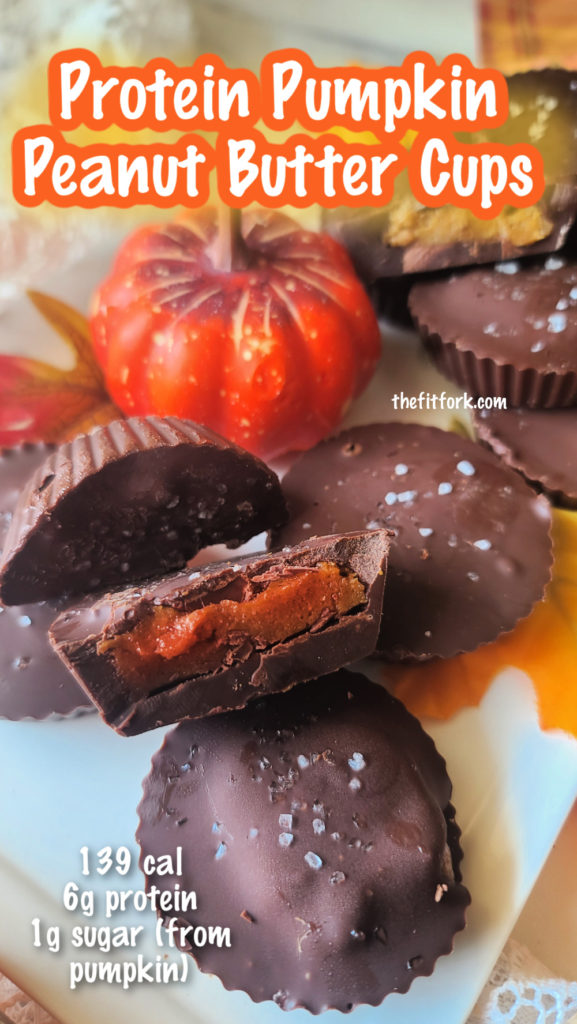
These easy protein pumpkin peanut butter cups are the perfect nearly sugar-free swap for Reese’s Cups, one of America’s favorite candies. Rich chocolate envelops a creamy center filled with protein and seasonal flavors. No bake, no guilt and a favorite homemade swap for Halloween candy.

Q & A FOR PROTEIN PEANUT BUTTER CUPS

What if I’m allergic to peanut butter? It is easy to swap the peanut butter for your favorite nut butter (almond butter works well), a seed butter, or even a nut-free spread like granola butter.

Do I have to use pumpkin? No, if you don’t care for pumpkin, you can just swap out for the same measurement of nut butter. However, note that this will add more calories and change the other macros.

Are there other options for the sugar-free chocolate chips? While I love sugar-free chocolate chips, and find they are very versatile for my protein treats, there are other options. So, yes, you can use traditional chocolate chips, dairy-free chocolate chips or carob chips. Note that the macros will change.

What are my protein powder options? You can use whey, plant-based, or whatever type of protein powder you love – really in any flavor (I have used both vanilla and pumpkin  flavors in whey). Or, you can substitute ¼ cup coconut flour for the 1/3 cup of protein powder. If you use an unflavored protein powder or coconut flour you will need to use a bit of sugar-free sweetener (to taste) in the filling mixture.

How do get cups out of muffin tins? If you don’t use liners, this is hard. You’ll need to freeze the cups almost completely, and then set out on counter for 5 minutes, and then shimmy out with a knife at the edges. The easiest way to prepare these chocolate peanut butter cups is to make this protein candy in reusable silicone cupcake liners or a silicone muffin pan for a no-fuss, no-mess outcome.

Homemade Protein Pumpkin Peanut Butter Cups
Prep Time
20 mins
chill
20 mins
Total Time
40 mins
 
These easy protein pumpkin peanut butter cups are the perfect sugar-free swap for Reece’s Cups, one of America’s favorite candies. Rich chocolate envelops a creamy center filled with protein and seasonal flavors.
Course: Dessert, party, Snack, workout
Keyword: candy, chocolate, peanut butter, protein powder, sugar-free
Servings: 12 servings
Calories: 139 kcal
Ingredients
  • 1/4 cup natural peanut butter
  • 1/3 cup pumpkin puree
  • 1/3 cup vanilla pumpkin or cake batter protein powder can use whey, plant-based, etc
  • 2 cups sugar free chocolate chips
  • 2 teaspoons coconut oil
  • ¼ – ½ tsp coarse sea salt for topping
Instructions
  1. In a large mixing bowl combine peanut butter, pumpkin and protein powder until combined and it is sticky. Set in fridge.
  2. In microwave-safe bowl, melt chocolate chips and coconut oil together. Microwave on high for 30 second increments, stirring well in between. Repeat until chocolate is fully melted, smooth and glossy 2-2.5 minutes total, typically.
  3. Place 1 tablespoon of melted chocolate into each cavity of a lined muffin tin. Use a spoon to gently press chocolate onto the sides of each liner, if it does not ooze over on its own. Place muffin tin in the freezer for 10 minutes to allow the chocolate to harden.
  4. Once the chocolate has set, remove peanut butter pumpkin mixture from fridge and approximately divide into 12 pieces (I just kinda “score” mine on top with the spatula).
  5. Add one section of the filling onto the top of the hardened chocolate, slightly pressing down with spatula to flatten some. Make that the filling does NOT reach the edges of the muffin cup, there should be a small bord.
  6. Next, top the filling with an even portion of the remaining chocolate. If needed, reheat it in the microwave for 10-15 seconds. Sprinkle with sea salt and place in freezer to set for 10 more minutes.
  7. Store leftovers in the fridge!
Recipe Notes

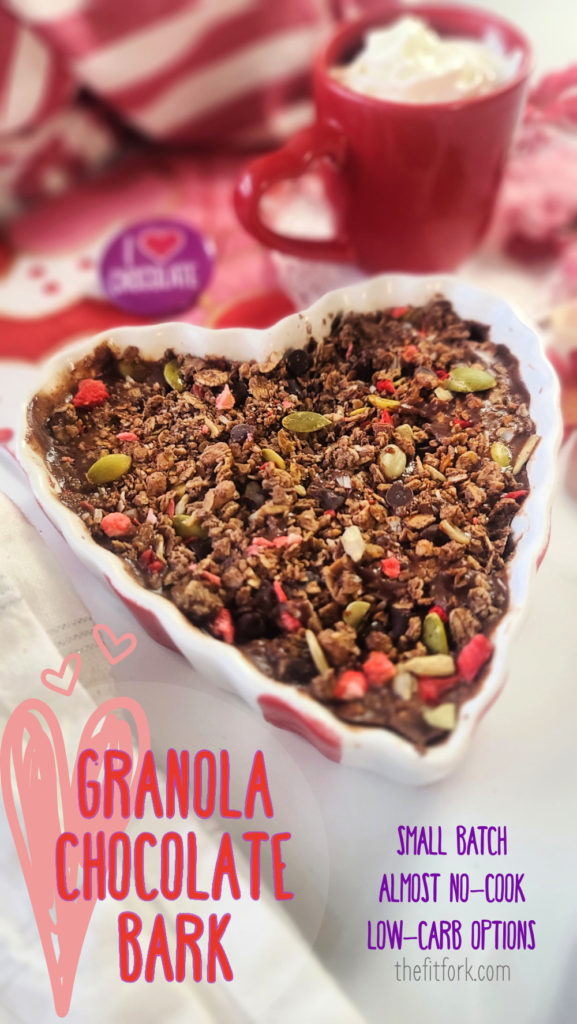
Granola Chocolate Bark (Small Batch with Low Carb Options)

This easy-to-make chocolate nut butter candy will have your heart at first bite! It’s a small batch dessert recipe, but there is plenty to share with your sweetheart (or not)! And, only three ingredients! Visit the 15-sec video HERE!

Treat yourself (and a sweetheart) to this share-sized dessert that features only three ingredients (chocolate, nut butter, and granola)! Easy-peasy, the only ‘cooking’ is melting chocolate chips in the microwave! A fun Valentine’s Day treat, or for chocolate bark any day of the year! Low carb and sugar free options, very flexible.

Rich, creamy, and studded with your favorite granola (use plain packaged granola, a fancy granola with all the fixings, or your special homemade granola recipe).

Treat yourself (and a sweetheart) to this share-sized dessert that features only three ingredients (chocolate, nut butter, and granola)! Easy-peasy, the only ‘cooking’ is melting chocolate chips in the microwave! A fun Valentine’s Day treat, or for chocolate bark any day of the year! Low carb and sugar free options, very flexible.

Basically, a no-bake dessert (except melting chocolate chips in the microwave for about 1 minute), you’ll find this is a quick, easy, and uncomplicated way to soothe a chocolate-lover’s sweet tooth. Plus, you may already have all the ingredients in your pantry!

 This small-batch recipe is featured in my newest book, Cooking for One for Dummies (which can be pre-ordered NOW, and releases March 8, 2023).

In the cookbook, I show the Granola Chocolate Bar spread out thinly, using a silicone sheet or parchment-lined loaf pan or free-form on a lined cookie sheet.

Treat yourself (and a sweetheart) to this share-sized dessert that features only three ingredients (chocolate, nut butter, and granola)! Easy-peasy, the only ‘cooking’ is melting chocolate chips in the microwave! A Low carb and sugar free options, very flexible. Featured in Cooking for One for Dummies by Jennifer Fisher, thefitfork.com

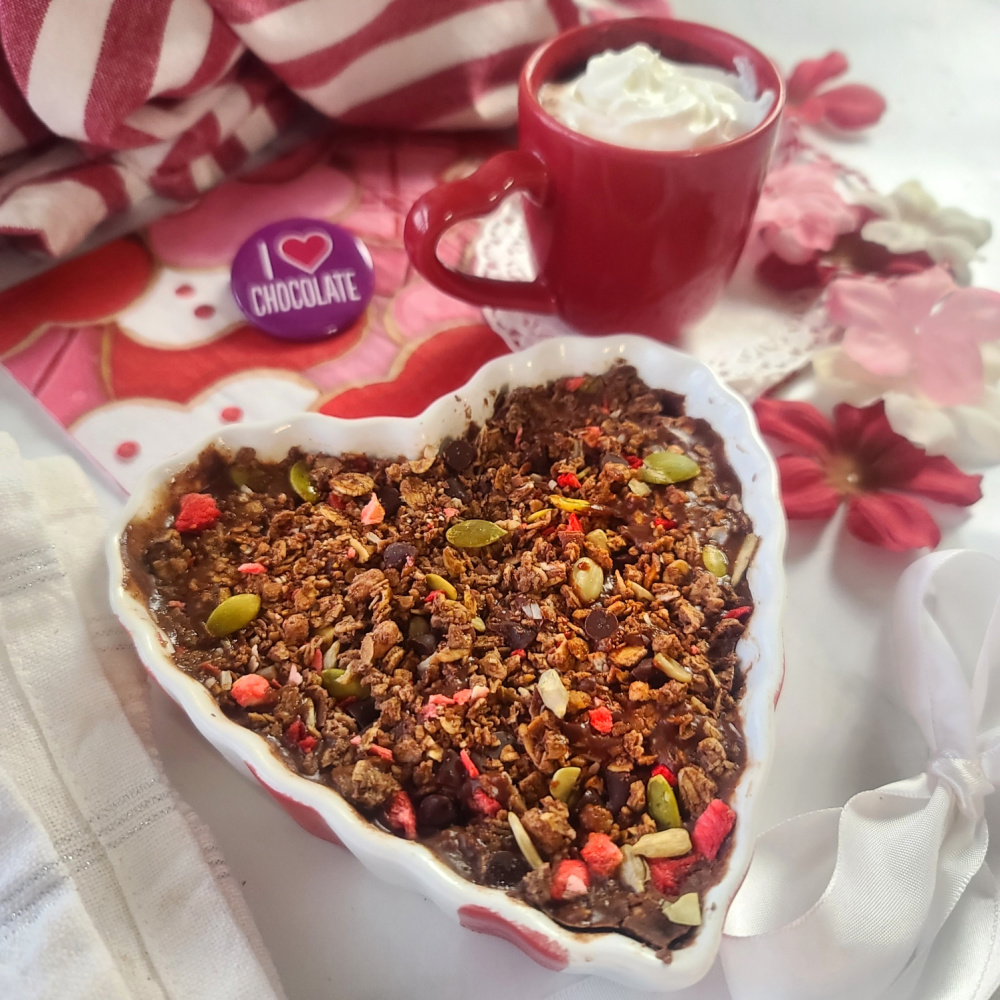
Today, for a Valentine’s treat, I thought it would be cute to do in a heart-shaped ramekin! This creates a “thicker” result. If going this route, use an approximate 10-oz Crème Brulé-style ramekin or two smaller 6-oz low-side ramekins.  I’m kinda a ramekin collector freak, they are so fun and can be used for lots of smaller-scale recipes for one or two; using to hold prepped ingredients while making a recipe; for holding your everyday snacks for portion control.

Approximate macros for sugar-free chip version (will vary some based on nut butter and granola choices): 191 calories, 13g fat, 14g net carb, 3g protein

Treat yourself (and a sweetheart) to this share-sized dessert that features only three ingredients (chocolate, nut butter, and granola)! Easy-peasy, the only ‘cooking’ is melting chocolate chips in the microwave! A fun Valentine’s Day treat, or for chocolate bark any day of the year! Low carb and sugar free options, very flexible.
Pin this for later!

PRO TIPS FOR GRANOLA CHOCOLATE BARK

Tip 1: There is so much flexibility, you can mix and match ingredients to suit your dietary preferences (for example there are lots of swaps if looking for low carb dessert ideas):

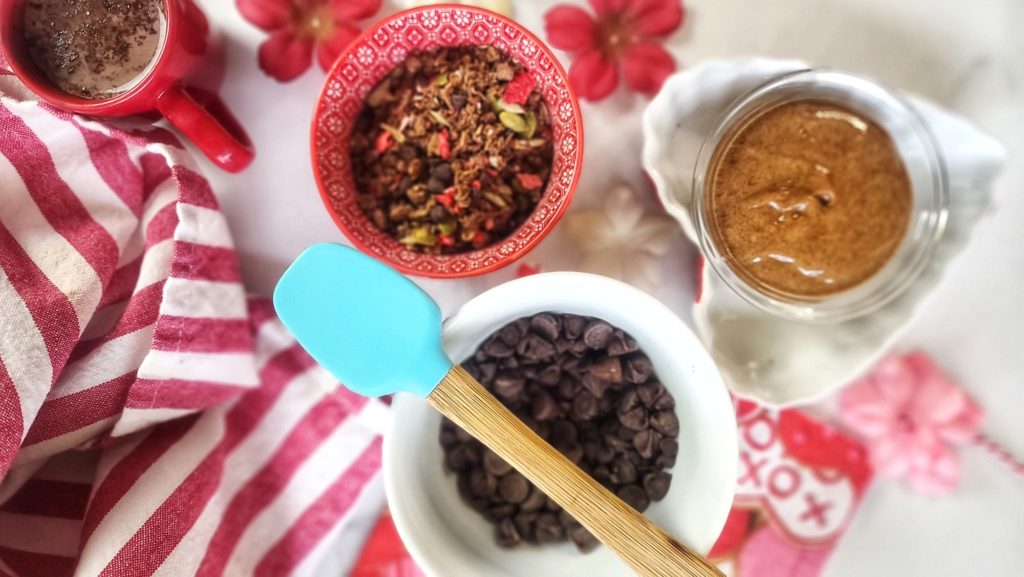
  • Chocolate: I used sugar-free dark chocolate chips, but feel free to substitute traditional chocolate chips. Also, try milk chocolate, white chocolate, cinnamon chip and all the other flavors out there!
  • Nut Butter: The only real requirement is to use a natural-style nut butter and NOT the solid kind with hydrogenated fats and sugars.  I used a cinnamon-flavored almond butter in my recipe today, but peanut butter, walnut butter, cashew butter, protein-boosted nut butters and most all types of blends will work!
  • Granola: For convenience, use packaged granola from your favorite brand. Of course, homemade granola is excellent too! If you don’t want to use granola, swap in an equal portion of things like coconut shreds, toasted chopped nuts, dehydrated or freeze-dried fruit pieces, little candies of choice, etc.

Tip 2: For less mess making granola bark, it’s highly recommended to oil the ramekin or, if using a baking sheet, use parchment paper or a silicone matt. You can also make in silicone candy molds, but I haven’t personally experiment with that.

Tip 3: Don’t skip the sticking in freezer step to firm up the chocolate bark before eating. Store leftovers in fridge.

Disclaimer: This post contains affiliate links.

Granola Chocolate Bark (Small Batch with Low Carb Options)
Prep Time
5 mins
Total Time
35 mins
 

Treat yourself (and a sweetheart) to this share-sized dessert that features only three ingredients (chocolate, nut butter, and granola)! Easy-peasy, the only ‘cooking’ is melting chocolate chips in the microwave! A fun Valentine’s Day treat, or for chocolate bark any day of the year! Low carb and sugar free options, very flexible.

Course: Dessert, Snack
Keyword: candy, chocolate, holiday, low carb, valentines day
Servings: 4
Calories: 191 kcal
Ingredients
  • 1/3 cup chocolate chips sugar-free, if desired
  • ¼ cup natural-style nut butter peanut, almond, cashew, etc.
  • ½ cup of your favorite granola any type or your own toppings
Instructions
  1. In a small microwave-safe bowl, melt the chocolate chips on high in 30-second intervals, stirring between each, until the chocolate is melted and smooth.
  2. Stir in nut butter until smooth. Pour the chocolate mixture into a 10 to 12-ounce low ramekin*
  3. Sprinkle granola evenly over the top of the chocolate mixture and press down lightly so that it stays put. Freeze for 30 minutes to 1 hour, or until the bark has firmed up.
  4. Slice into pieces; store the leftovers in the refrigerator.
Recipe Notes

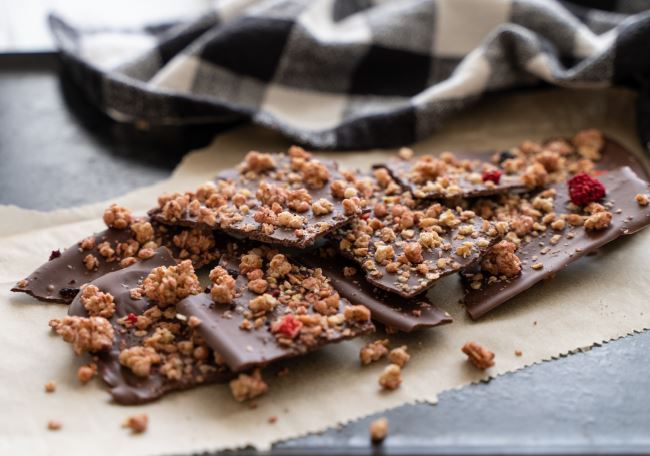
* Instead of a ramekin, spread chocolate mixture out thinly on a silicone mat (on baking sheet) before topping with granola. After freezing, break up into free-form pieces. You can also use silicone baking and candy molds for a different effect.

Approximate macros for sugar-free chip version (will vary some based on nut butter and granola choices): 191 calories, 13g fat, 14g net carb, 3g protein

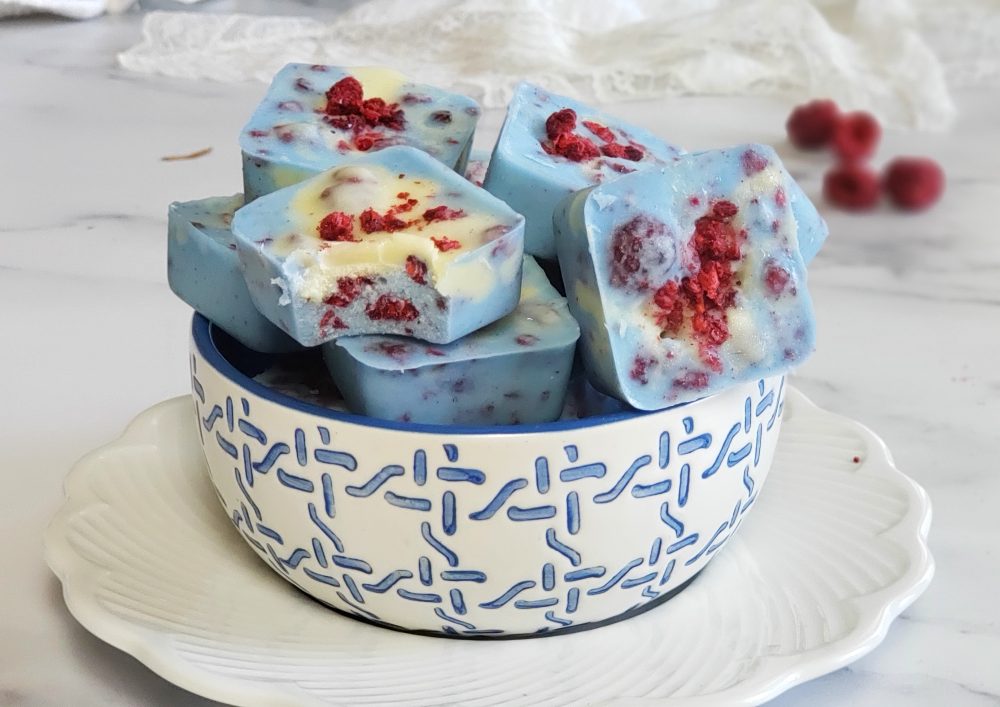
Berry White Chocolate Collagen Fat Bombs | Low Carb

Super-berry-low-carb-white-choc-alicious! My Berry White Chocolate Collagen Fat Bombs so pretty in pink and blue, plus easy to make with only four ingredients. Berry White Chocolate Collagen Fat Bombs

With just 1.3 net carbs, these sugar-free treats can work for a variety of diet types including keto, diabetic, Atkins, gluten-free and others. Plus, with plenty of fat and protein in each one, you’ll be satiated as your sweet tooth is soothed. Read on to get the berry fat bomb recipe and all the details.

Great Lakes Wellness discount code THEFITFORK10OFF

Continue reading

Sugarless, Sugar-Free and Low Sugar Treats for Healthy Christmas Stocking Stuffers

My family’s gifts for a fit Christmas are already wrapped up and under the tree, and I (errr, I mean Santa) have been busy rounding up healthy stocking stuffers. Chocolate, candy canes and sugar plums (what ARE those anyway) don’t really make sustaining fuel for our active lifestyle which collectively includes running, obstacle course racing, hiking, gym workouts, yoga and assorted team sports. So, instead, I’ve rounded up a bunch of Sugarless, Sugar-Free and Low Sugar Treats for Healthy Christmas Stocking Stuffers – check them out for your own family’s festivities.

Sugar Free Treats Snacks and Drinks for Healthy Christmas Stocking Stuffers

Read on to find healthier snacks and drinks suitable for Christmas stockings, some are homemade and others conveniently packaged and ready to go! Continue reading

Apple Walnut Quinoa Crunch + More Healthy Candy Recipes

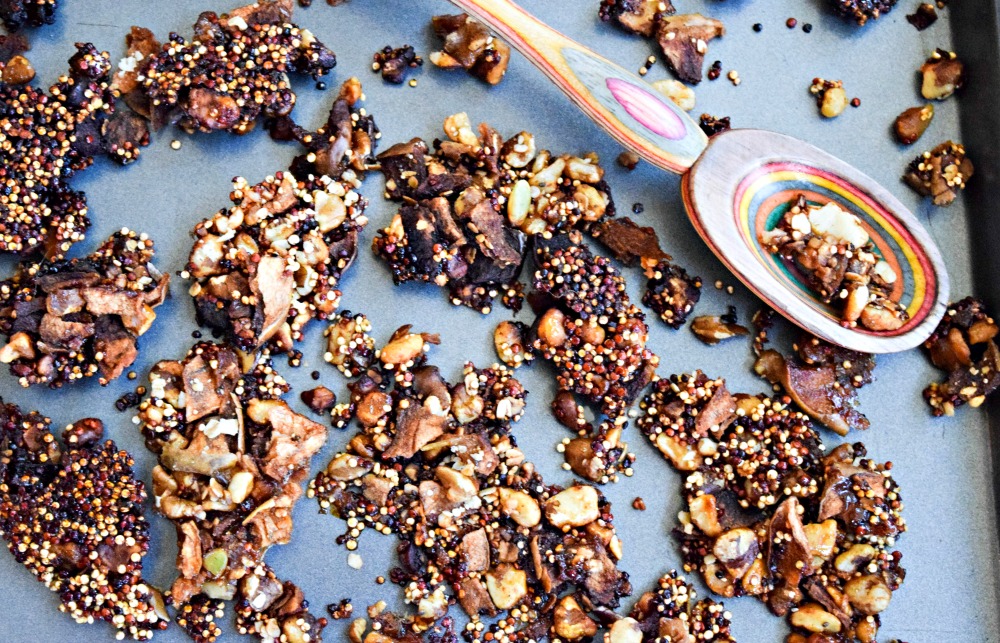
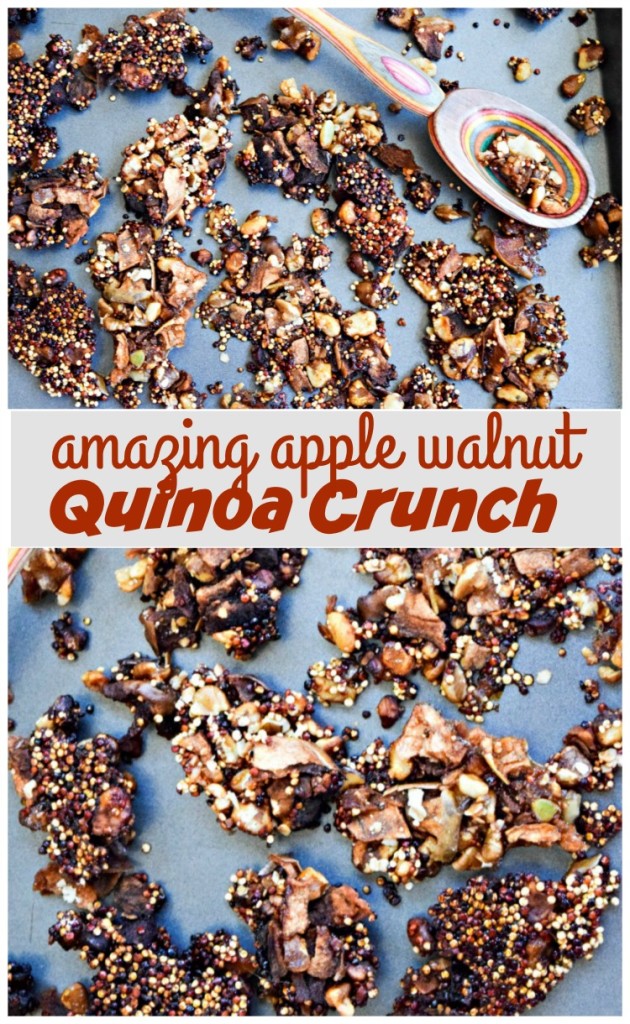
Apple Walnut Quinoa CrunchReady for a curiously crunchy treat? My recipe for Apple, Walnut & Quinoa Crunch will satisfy sweet crispy cravings while filling you up longer thanks to an unexpected punch of protein from the quinoa and black walnuts– it’s a balanced candy for your “healthy tooth”!

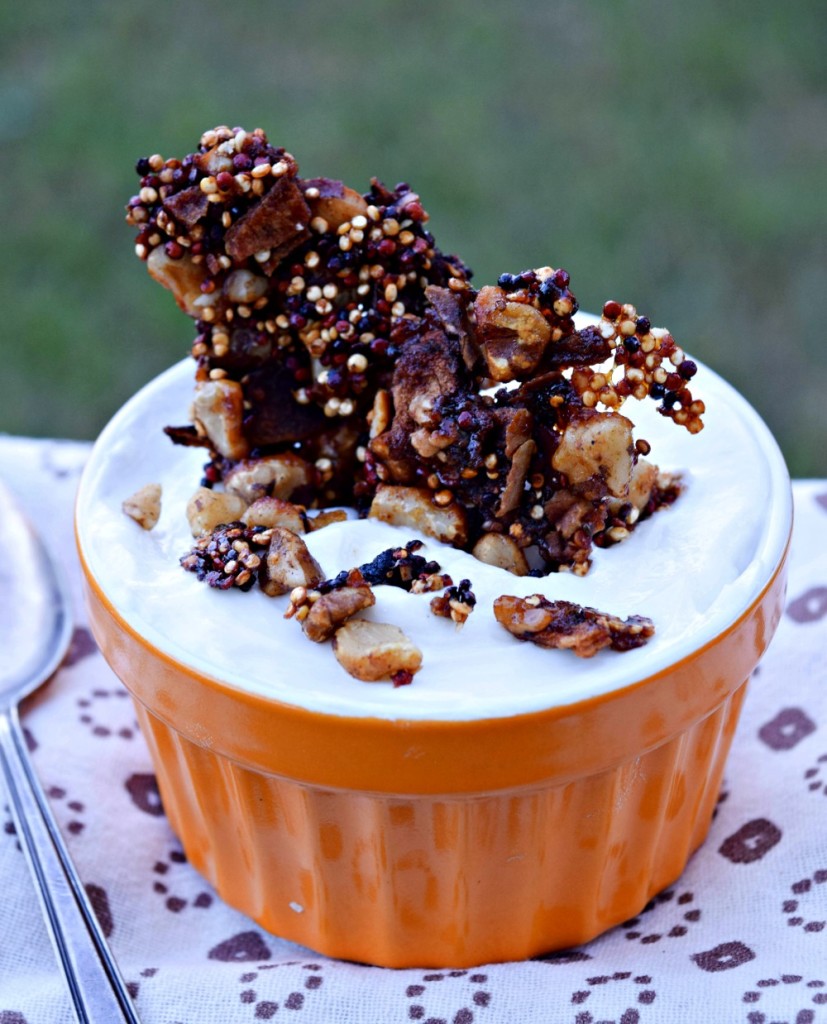
Apple Walnut Quinoa Crunch is a healthy alternative to peanut brittle candy -- it packs a bit of protein from the ancient grain Quinoa and is dairy-free, gluten-free and made without traditional corn syrup (only a touch of coconut sugar and 100 percent apple cider)I like to eat it straight off the baking sheet or break up into shards of sweetness to top my Greek yogurt.

Apple Walnut Quinoa Crunch on Greek Yogurt

Apple Walnut Quinoa Crunch made with apple ciderI almost hesitate to even call this easy-to-make recipe “candy,” although it is a take on old-fashioned “nut brittle.” However, the typical peanut brittle or nut brittle uses a boatload of butter, table sugar and corn syrup – gasp! Instead, my healthy candy recipe is packed with wholesome ingredients like 100 percent juice apple cider, ancient grains, dried fruit and nuts, and just a touch of coconut sugar.

I also choose to use Black Walnuts instead of standard english walnuts. Why? The black walnut has the most protien of any tree nut and imparts a more intense, earthy, nutty flavor to recipes. I discovered this news I can definitely use at the Produce Marketing Associations recent Fresh Summit in Orlando when, I auspiciouslly bumped into Hammon Black Walnuts on my way out the door to fly home.

As far as sugars go, coconut sugar (derived from Palm) is a much healthier sweetener in moderation as it doesn’t spike blood sugar as dramatically as traditional sugars. Also, if a concern for you are a loved one, this recipe is gluten-free and dairy-free.

I originally made this recipe for Litehouse Foods and used the Honey Crisp Apple Cider, you can find it in the produce section this time of year. This Cold Pressed, 100 percent pure apple juice has a unique tart taste that is wonderfully balanced with sweet. It’s perfect poured straight from the container, served hot or cold, and also makes a great ingredient in recipes where you would prefer natural sweetness.

Some things to note when making this recipe — you need to keep an eye on it so it doesn’t burn, your oven temperature may vary affecting the overall cook time. Also, it will be soft when removed from oven — give it plenty of time to set up and harden, stick in the fridge to expidite. If it still doesn’t seem crispy, then you can put it back in the oven for several minutes at a time until done.

jennifer fisher - thefitfork.com - chocolate date candy barsAnother healthier “candy” I’m pulling from the archives to share with you today is my recipe for Sweet Date Chocolate Candy Bar Bites. These are so yummy and I love how the dates provide extra iron in my diet.

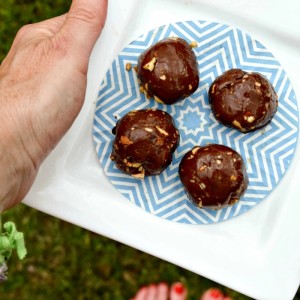
Hazelnut Pecan Protein FudgeI also like to make a batch of my Hazlenut Fudge Protein Balls to stash in the freezer and thaw out one at a time to quell my dessert cravings. These no-bake energy bits are ideal for a healthy little dessert or as pre and post workout fuel.

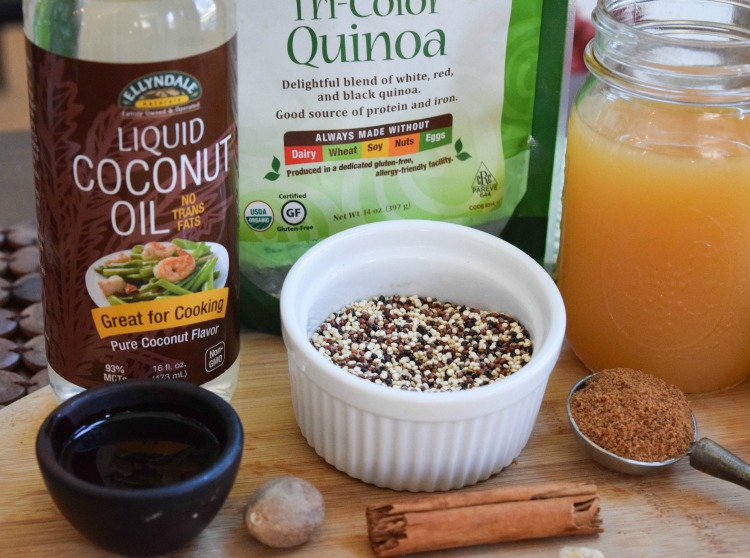
now-foods-ingredients-for-quinoa-crunch-candyIn addition to the Honey Crisp Apple Cider from Litehouse Foods, which you can conveniently find in your market’s produce section this time of year, here are some other ingredients used in my Quinoa Crunch.a

Do you have a “healthy” candy recipe? What is your go-to when you are craving something sweet? Please share in the comments – XOXO, Jennifer

Apple Walnut Quinoa Crunch
Prep Time
10 mins
Cook Time
50 mins
Total Time
1 hr
 
This healthier alternative to candy is easy to make and packs a bit of protein thanks to the ancient grain Quinoa.
Course: Dessert
Cuisine: American
Servings: 4 servubgs
Ingredients
  • 1/3 cup uncooked quinoa I like the "tri-color" from NOW foods
  • 1/2 cup chopped black walnuts can use regular walnuts
  • 1/2 cup dehydrated baked apple chips, crumbled
  • 1/4 cup rolled or instant oats processed in gluten-free facility
  • 1/4 teaspoon sea salt
  • 2 tablespoons coconut oil
  • 1 1/2 cups apple cider
  • 2 tablespoons coconut sugar aka palm sugar
  • 1 teapsoon ground cinnamon
  • 1/4 teaspoon nutmeg
Instructions
  1. Preheat oven to 325 degrees F (160C) and line a rimmed baking sheet with parchment paper (or use a silicone baking liner as I did)
  2. Using a fine-mesh sieve, rinse the quinoa well under cold running water and spread out on a paper towel to dry. This will prevent bitterness.
  3. Add quinoa, walnuts, oats, crumbled dehydrated apples, and salt to small mixing bowl, stirring to combine.
  4. To a small saucepan, 1 ½ cups apple cider and bring to a boil over medium-high heat. Reduce heat and simmer for approximately 20 minutes, until volume has been reduced to ½ cup liquid. Add coconut oil, coconut sugar, cinnamon and nutmeg and simmer for an additional 2 minutes, stirring frequently.
  5. Pour apple cider “syrup” over the dry ingredients and stir to thoroughly coat. Arrange on parchment-lined baking sheet and spread into a uniform layer with a metal spoon. Uniformity in thickness will promote even cooking and keep edges from burning.
  6. Bake for approximately 30 minutes, rotating the pan around on the oven rack at the halfway point. When removing from oven, color should be deep golden brown in color. Allow to cool completely so that it hardens up before breaking into bite-sized pieces.
  7. If you realize, after cooling that still soft in the center, you can return it to the oven for another 5 to 10 minutes, keeping a close eye.
  8. Store leftovers in a sealed bag or container at room temperature up to one week, or in the freezer for up to three months.