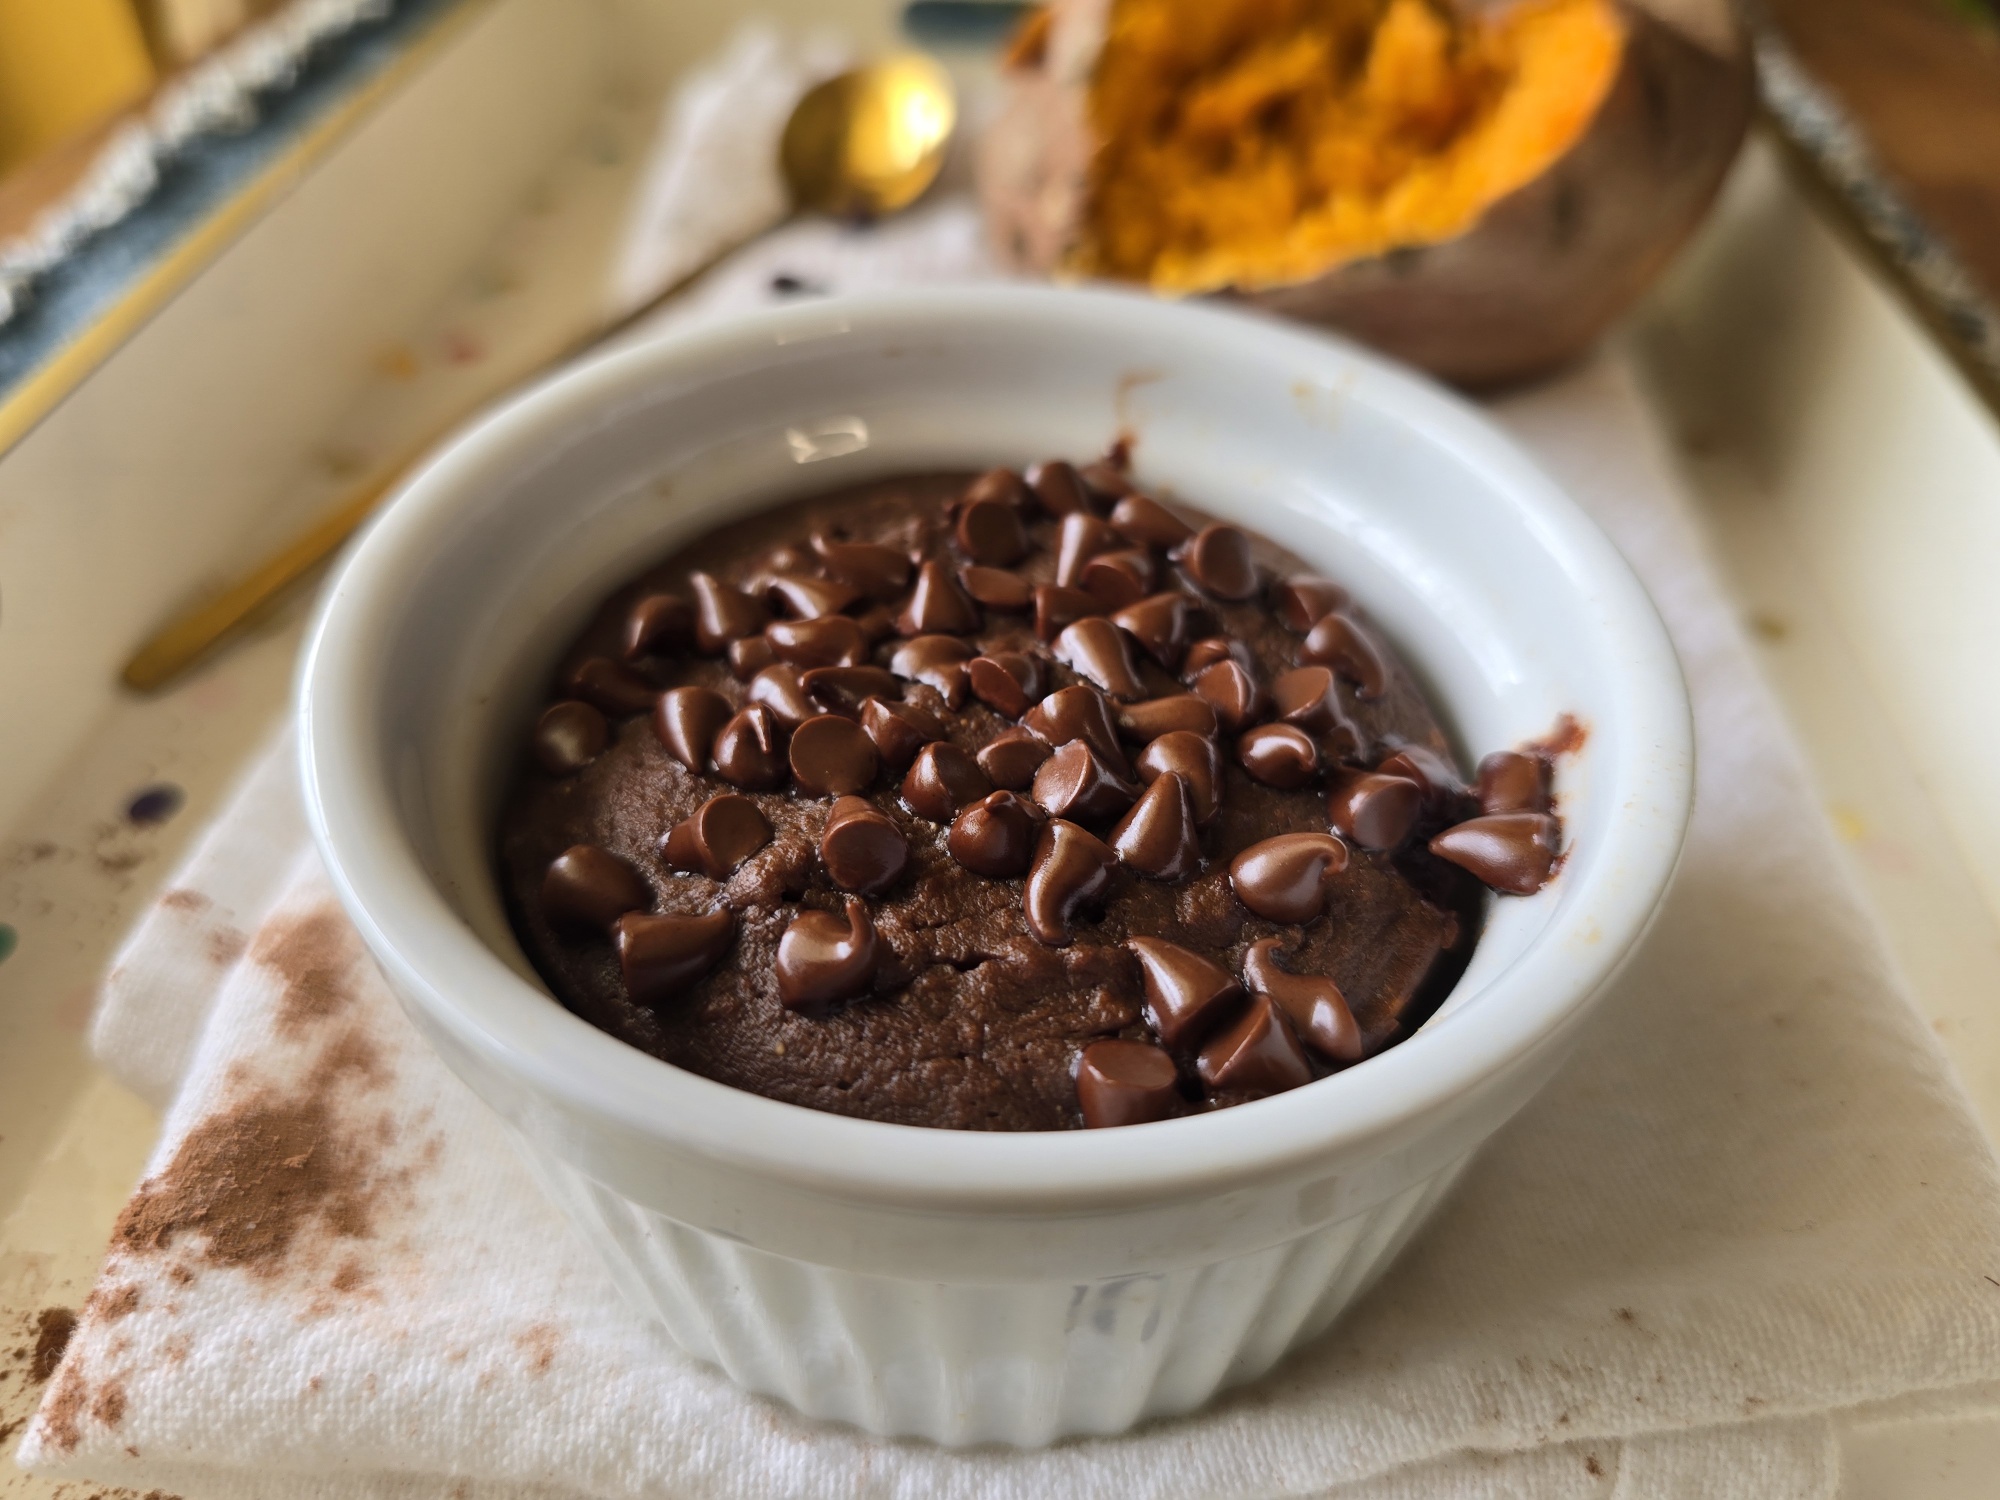
Craving something rich and chocolatey—but still want to stay on track with your nutrition? These sweet potato protein brownies are the kind of dessert that feels indulgent while quietly supporting your goals. They’re soft, fudgy, and satisfying, yet made with simple, wholesome ingredients that deliver protein, fiber-like benefits, and zero added sugar.
Instead of traditional flour, these brownies rely on naturally creamy sweet potato for structure and moisture. The result? A gluten-free treat with a decadent texture—no refined flour needed. Plus, the natural sweetness of the sweet potato means you can skip added sugar while still getting that classic brownie vibe.
Protein is built right in thanks to a trio of ingredients: egg, Greek yogurt, and protein powder. Together, they create a balanced dessert that helps keep you fuller longer and supports muscle recovery—making this just as appropriate post-workout as it is for dessert.
And here’s a little nutrition win—using a sweet potato that’s been cooked and cooled overnight actually boosts its benefits. Some of the carbs convert into resistant starch, which behaves more like dietary fiber. That means better gut health support and a slower digestion rate to help with steady energy.
The Perfect Small-Batch Treat
This recipe makes two servings—perfect for sharing or saving one for later. You’ll need two 6 oz microwave-safe ramekins, custard cups, or mugs. Whether you need a quick weeknight dessert, a post-workout reward, or just something to satisfy a chocolate craving without going off track, these brownies deliver.
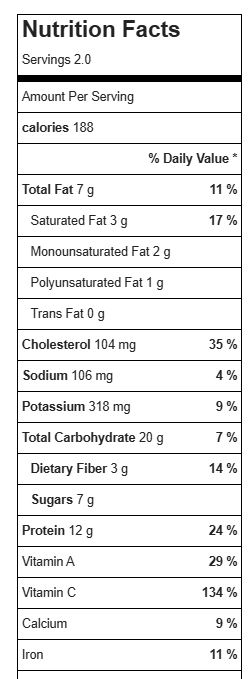
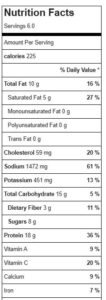
Macros (per serving):
188 calories | 12g protein | 7g fat | 17g net carbs
Why I Use Previnex Nourify Protein Powder
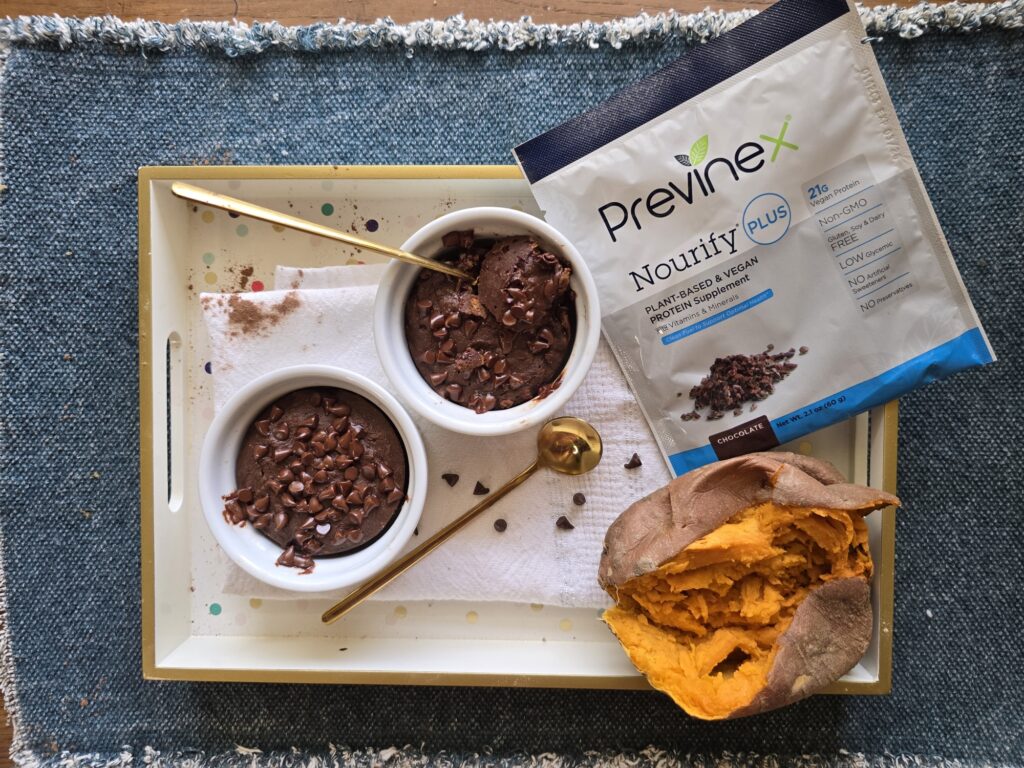
For this recipe, I used Previnex Nourify protein powder, and it’s more than just protein. It’s a thoughtfully formulated plant-based blend that includes balanced macros—protein, carbs, and healthy fats—plus high-quality micronutrients, probiotics, and digestive enzymes to support overall health.
So while you’re enjoying a chocolate treat, you’re also fueling your body with nutrients that go beyond basic protein powder. It’s an easy upgrade that turns a simple dessert into something that truly supports your wellness routine.

Note: This post contains affiliate links. I earn a small commission from purchases made through link which helps offset operating costs for The Fit Fork. Thank you!

- 1/3 cup cooked, cooled and mashed sweet potato
- 1/4 cup 0% Greek yogurt
- 1 egg
- 1 tbsp unsweetened cocoa powder
- 1/3 cup protein powder I used Nourify from Previnex
- (optional) Sweetener packet if needed
- 1 tbsp mini chocolate chips sugar-free
-
Mix sweet potato, yogurt, and egg until smooth.
-
Stir in cocoa powder, protein powder, and sweetener if needed.
-
Divide into two small ramekins.
-
Top with chocolate chips.
-
Microwave 3 minutes total (in 1.5-minute increments).