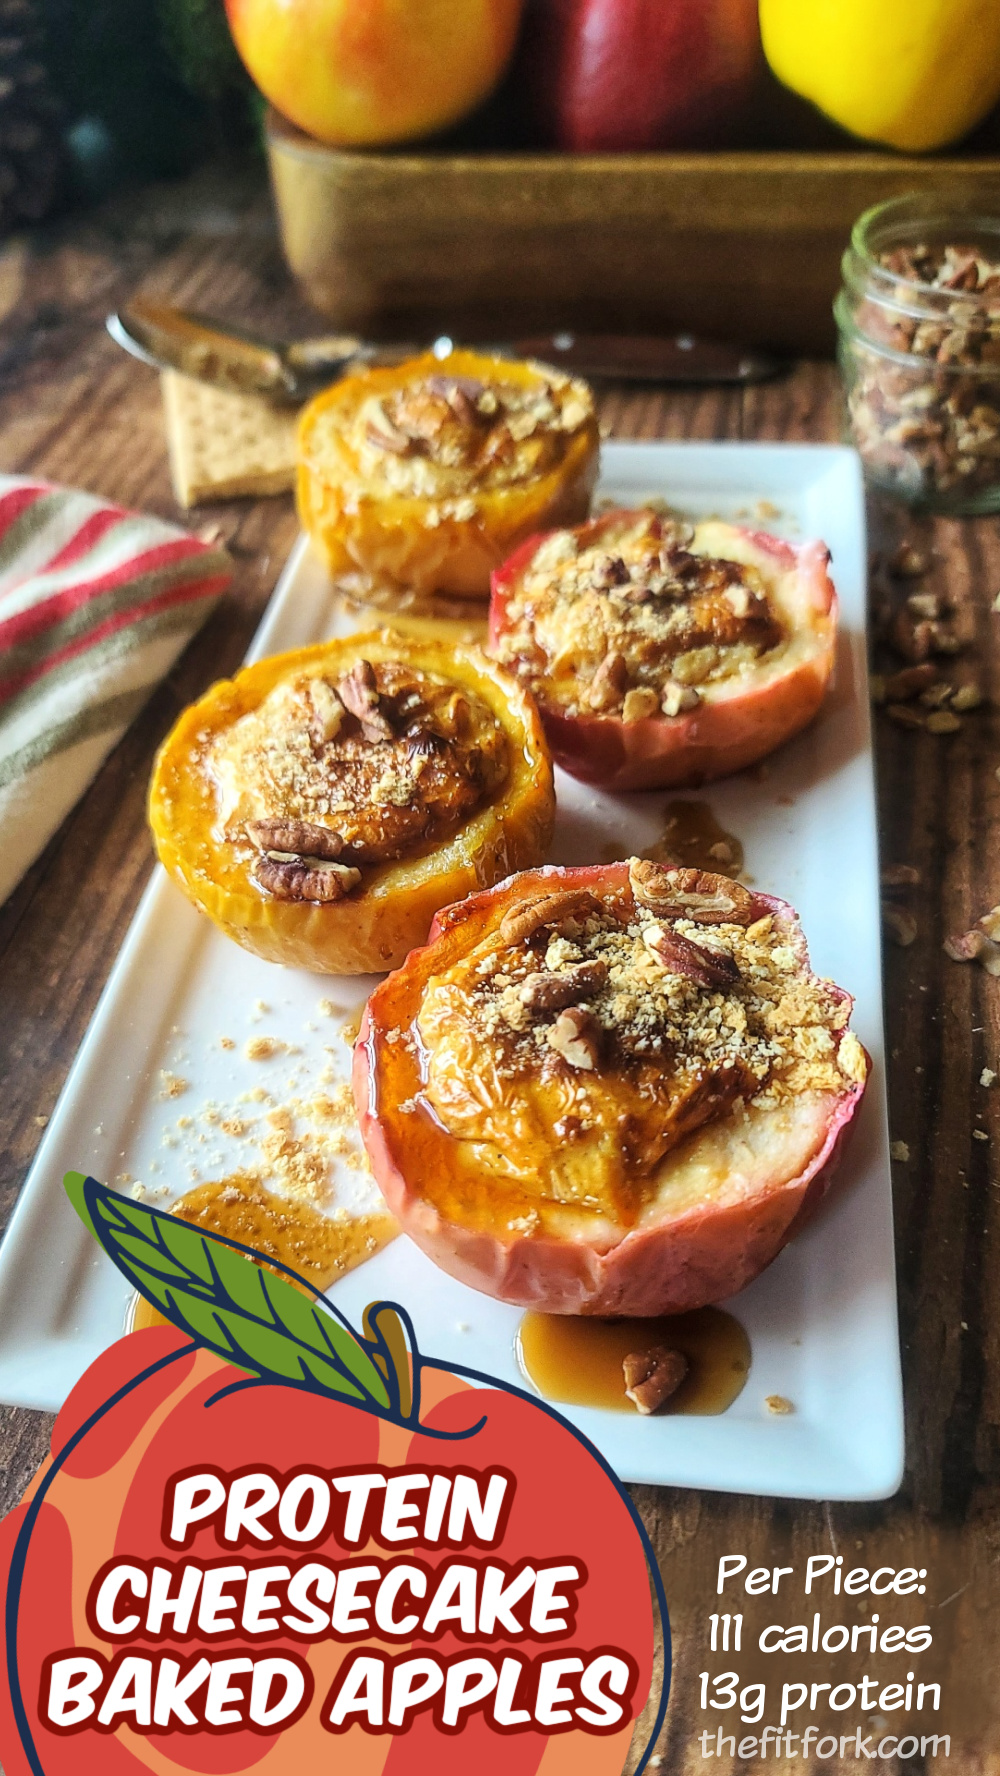
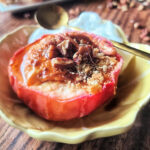
When cheesecake and baked apples unite, they make the perfect fall dessert! Imagine all the cozy goodness of baked apples paired with a protein-packed cottage cheese cheesecake filling that’s not only dessert-worthy but healthy enough for breakfast.

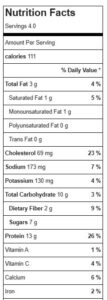
Each apple half is a cute, single-serving treat that fits right into apple season with warm hints of cinnamon and sweet, aromatic flavor. And at just 111 calories and a satisfying 13 grams of protein per piece, it’s a healthy fall snack recipe that fuels you and feels like an indulgence.
The beauty of these Protein Cheesecake Baked Apples (in addition to their cuteness) lies in the simplicity and adaptability. Start with your favorite apple variety—Honeycrisp for a sweet crunch, Granny Smith for a tart bite, or Fuji for that perfect balance. Slice in half crosswise and scoop out the center core about the size of a golf ball (a melon baller or cookie dough scoop works well for this).
The filling for this protein-packed baked apple is straightforward yet packed with protein: just cottage cheese, an egg, a scoop of vanilla protein powder, and a hint of cinnamon for that warm fall flavor. Blended together until smooth, this filling bakes into a creamy, cheesecake-like consistency that pairs beautifully with the tender, roasted apple. Each ingredient serves a purpose, from providing creaminess and protein to enhancing the flavors of fall, so you get a dessert (or protein breakfast apple!) that’s delicious and nutritious.
Whether you’re serving this healthy baked apple recipe at an autumn gathering or just cozying up with one for solo snacking, they’re as versatile as they are delicious. For an extra touch of indulgence, try serving them warm with a drizzle of maple syrup, a sprinkle of crushed graham cracker crumbs (here’s a good gluten-free graham cracker option), or a handful of pecans. Or, if you’re going all out, pair one with a scoop of vanilla ice cream for that perfect creamy, melty contrast.
This healthy apple cheesecake recipe delivers all the flavor and none of the guilt, making them the ideal fix for fall cravings. Protein-packed but also a low-calorie apple dessert (unlike most apple pies and cheesecakes) – so if you want to enjoy two pieces, only 111 calories each without toppings, then make room on your plate! Serve at room temperature or slightly warmed for a fall-inspired flavor experience you’ll want to savor again and again!
Note: This post contains Amazon Affiliate Links and/or my storefront. Commissions earned help offset operating expenses at The Fit Fork. Thank you!
A healthy fall dessert (that’s balanced enough for breakfast), these little protein cheesecakes baked apples are cozy, comforting and a no-added-sugar craving fix with the fall-flavor dessert mood hits. Boosted with protein from cottage cheese and protein powder to support sustained energy.
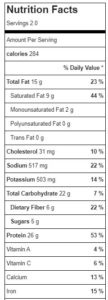
- 2 large apples about 16 oz total, 12 oz after centers scooped
- 2/3 cup 2% cottage cheese
- 30 g vanilla protein powder this was 1 scoop from my bag
- 1 large egg
- 1/2 teaspoon cinnamon
- ½ large graham cracker rectangle broken in 4 pieces (or gluten-free alternative)
- Optional toppings; maple syrup pecans, extra graham cracker crumbs, whipped cream, etc (not included in macros)
-
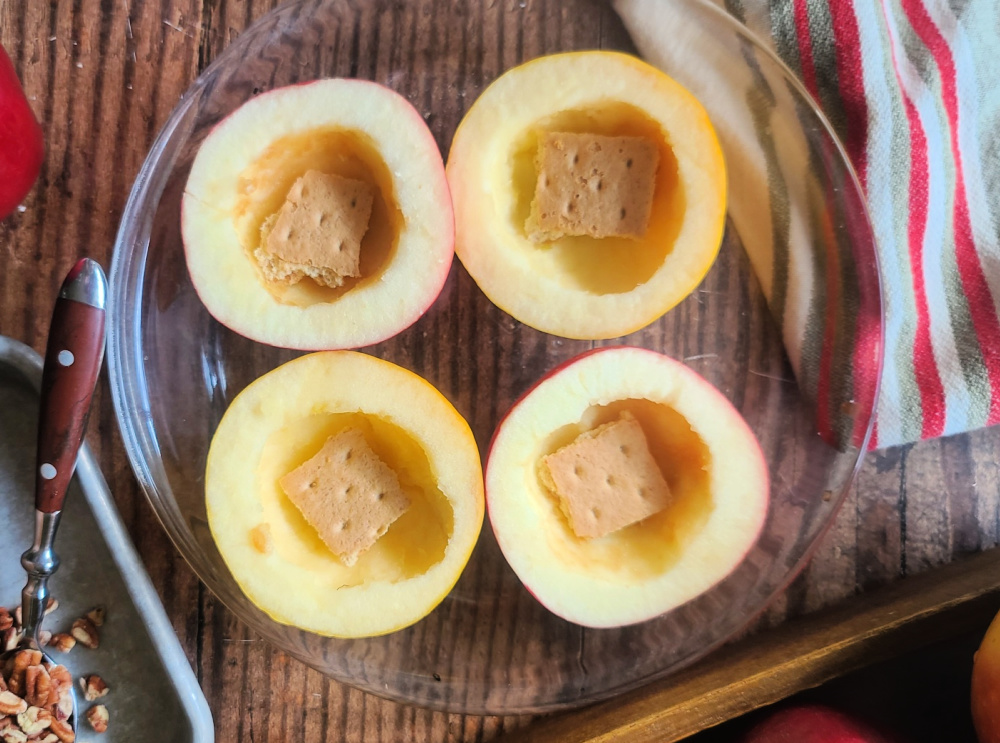
Slice whole apple through the middle crosswise and scoop out the insides for a center well about the size of a golf ball.
-
In small blender, add cottage cheese and egg. Blend until smooth, scraping sides down as needed. If your cottage cheese didn’t have a lot of liquids, you may need to add 1 tbsp milk.
-
Add protein powder and cinnamon to cottage cheese mixture and blend until smooth.
-
Place apples, cut side up, and add a piece of the graham cracker at bottom of well. This is like a mini crust, but also serves as a barrier in case a small whole was created where the stem once was.
-
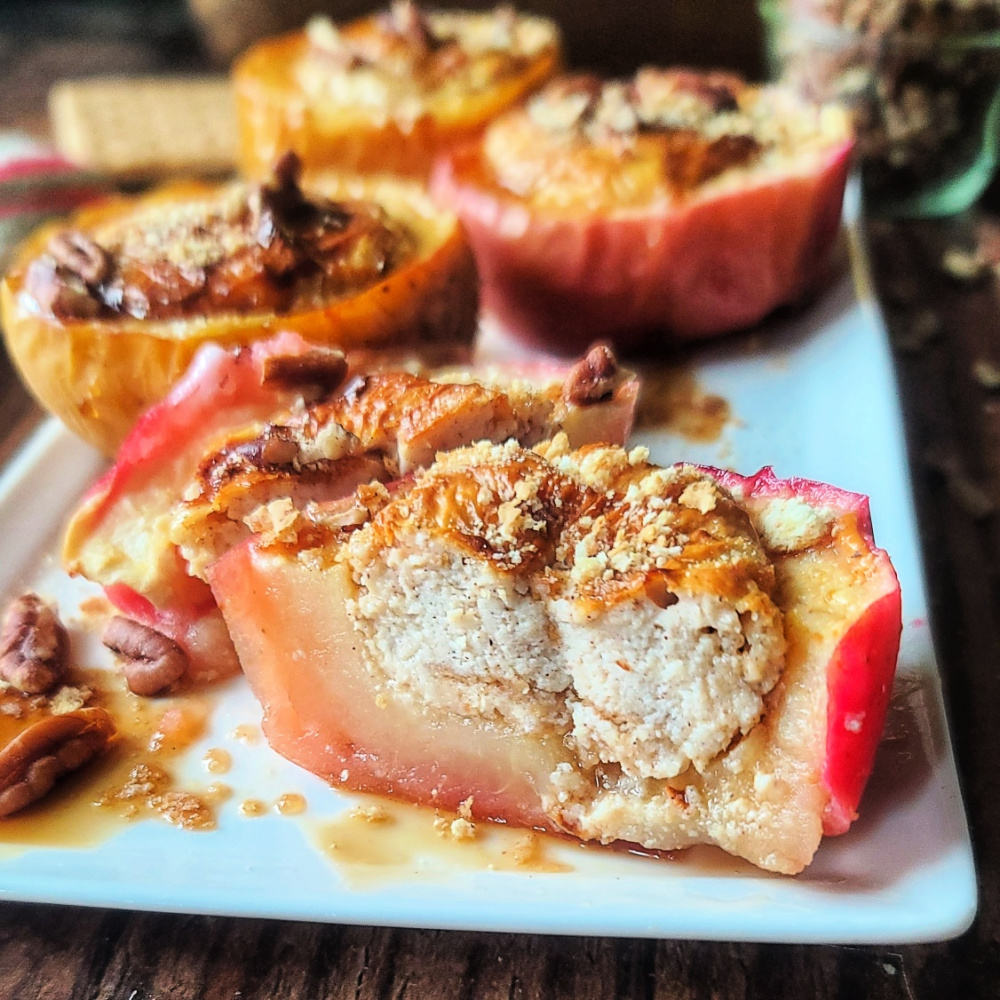
Fill apples to just under the rim with the cheesecake mixture.
-
Bake at 350 for 20-25 minutes until cheesecake filling is set. Transfer to a plate and let cool for 15 minutes.
-
Add toppings of choice, if desired.