Two Dozen Delicious, Protein-Packed Recipes That Use Cottage Cheese

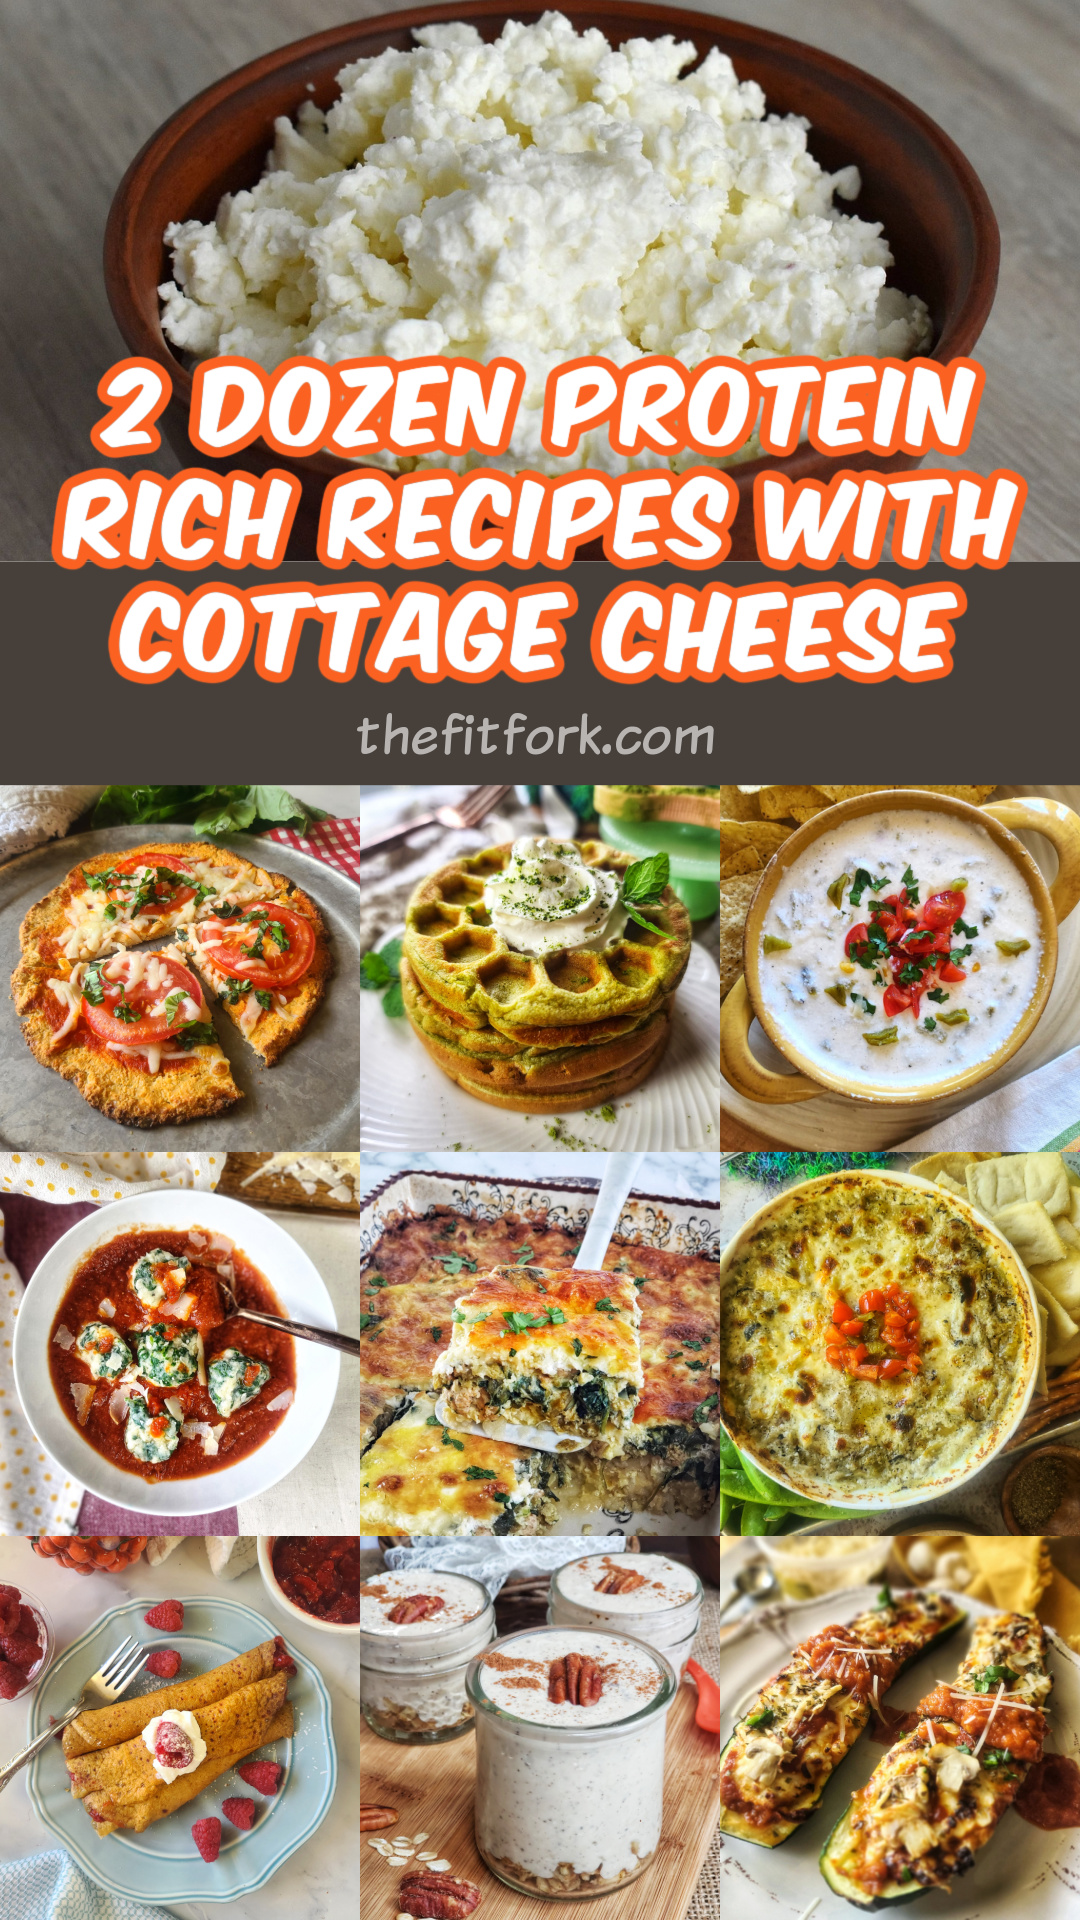
Dig into these 24 delicious recipes that highlight cottage cheese as the secret ingredient to add a protein-packed punch to every meal. From energizing breakfasts to satisfying lunches, hearty dinners, and tasty snacks, these recipes with cottage cheese are designed to make incorporating this surprisingly versatile ingredient into your diet both easy and enjoyable – even for those who maybe once though they didn’t care for this nutrient dense dairy product.

Cottage cheese is the OG of fit foods, so nutrient dense with calcium, b12, phosporus and 25g protein in a cup. Check out these 24 crave-worthy, protein-packed, completely elevated cottage cheese recipes to fuel your active lifestyle - from cottage cheese queso, pizza crusts and stuffed zucchini to cheesecake cups, crepes, and waffles. Great healthy meal inspo for breakfast, lunch, dinner and snacks / treats!

A favorite among health enthusiasts and foodies alike, cottage cheese has a mild flavor and creamy texture, it can easily be incorporated into a variety of dishes, from savory to sweet. Rich in essential nutrients like calcium, vitamin B12, and phosphorus, cottage cheese supports bone health, muscle function, and overall wellness.

Most of these recipes are gluten-free, sugar-free and lower carb where they can be, with a few exceptions – and can be modified to suit your dietary preferences. I hope you enjoy this mini recipes with cottage cheese cookbook!

Dinners and Lunches that Satisfy with Cottage Cheese

Put your trust in this crust for pizza night! A low-carb, high-protein, gluten-free pizza crust that tastes amazing and holds up to the toppings of your choice. Recipe makes two personal-sized crusts, each with 163 cal, 14g carb (4 net carb), 5g fat and 18g protein.

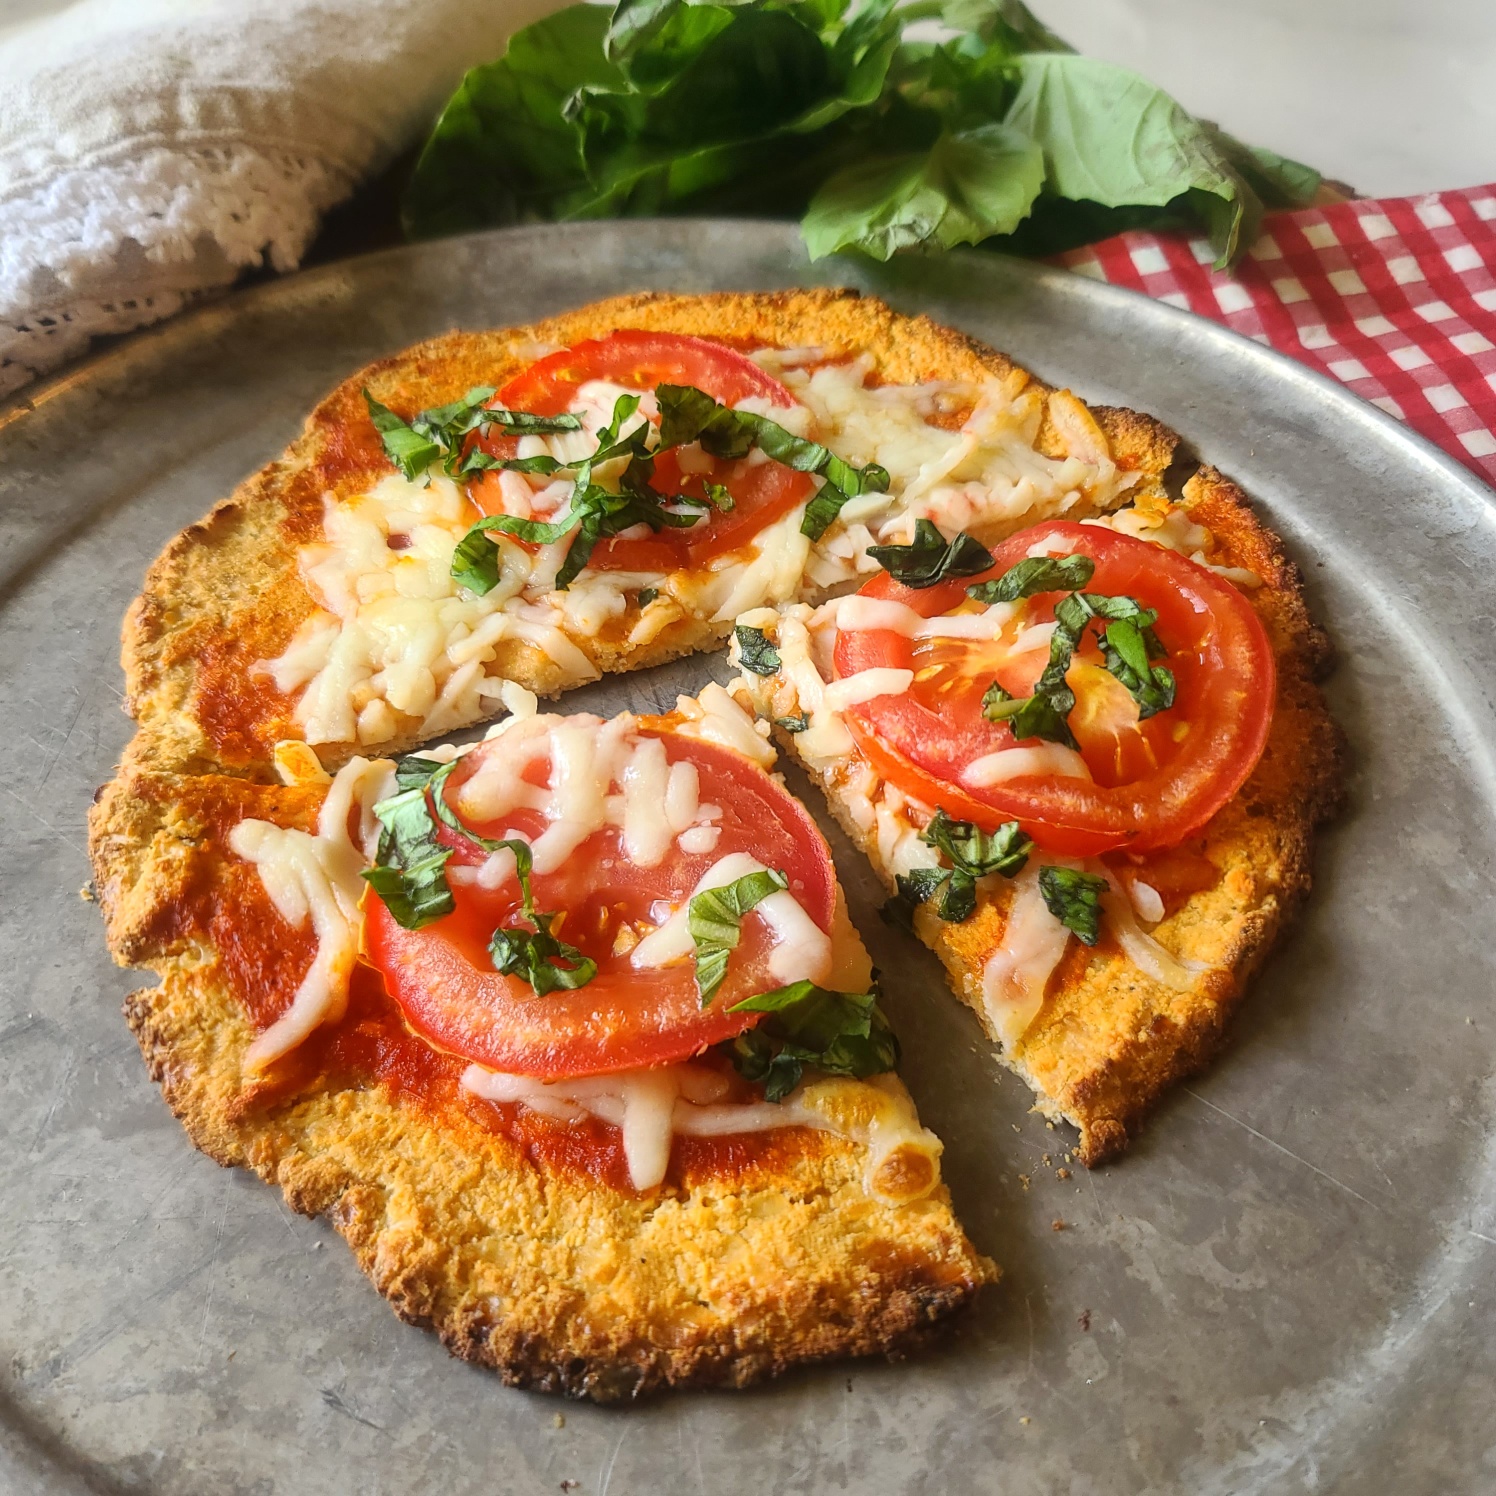
3-Ingredient Cottage Cheese Pizza Crust: The crust made low carb with cottage cheese, coconut flour and flax meal for extra texture and fiber. Gluten-free, lower carb and ready to be topped with your favorite ingredients.

Make an easy vegetarian dinner easy and earn cheers of “yum” from the family with this easy no-boil pasta bake that uses a jar of alfredo sauce, dry pasta, veggies and a little cottage cheese for extra protein.

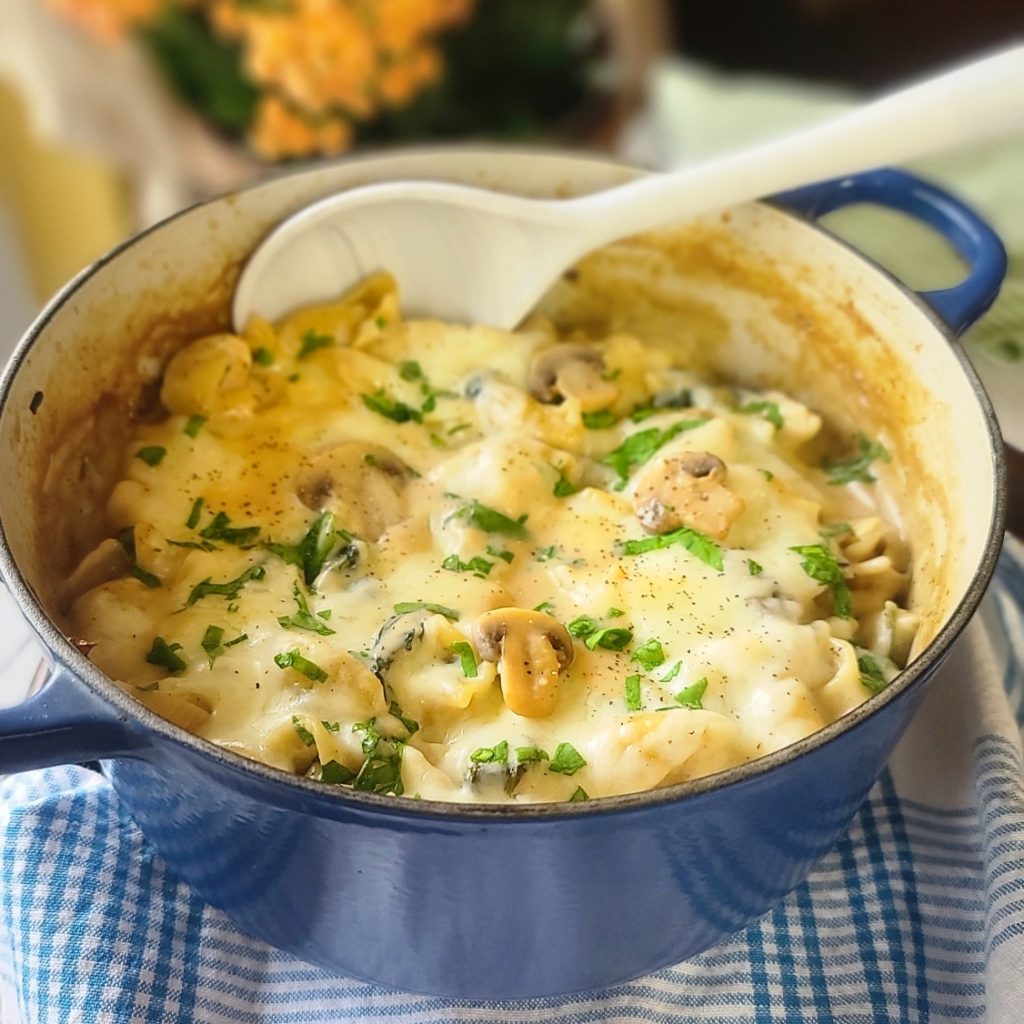
Easy Cottage Cheese Alfredo No-Boil Pasta Bake: A family favorite and easy to make! Less fat, more protein than typical alfredo sauce.

Easy Veggie Enchiladas with Hatch Green Chile and Spinach Sauce offer loads of vegetables and a surprising amount of protein thanks to cottage cheese blended smooth. In fact, each enchilada has about of protein! Sauce is prepared in blender, and the casserole bakes up for 20 to 30 minutes in oven until bubbling! Great for make-ahead weeknight meals.

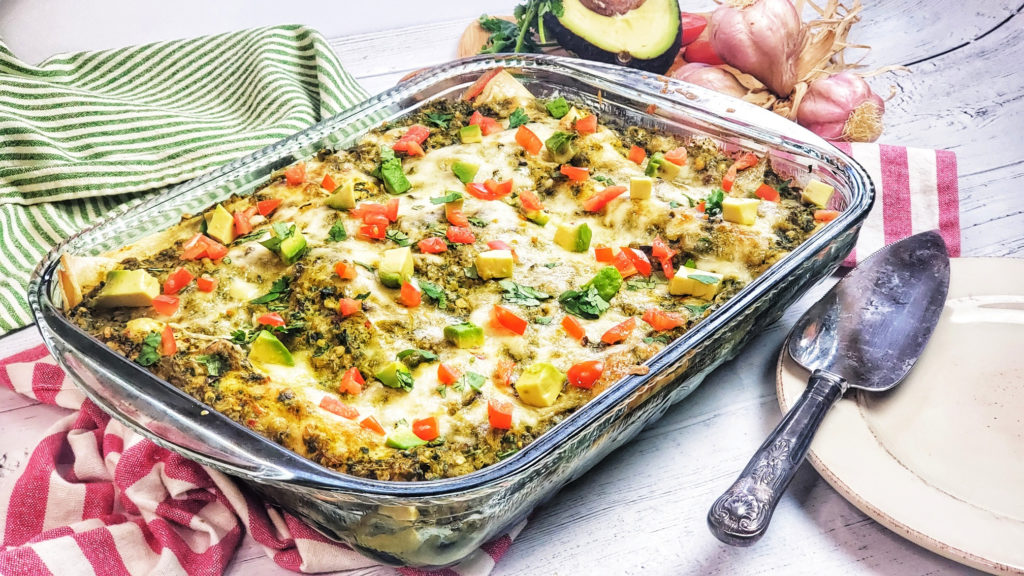
Cottage Cheese Veggie Enchiladas with Green Chile Spinach Sauce: Flex up your Tex-Mex night with this vegetarian enchilada dish that is flavorful and mildly spicy.

spinach and cottage cheese gnudi, an easy vegetarian pasta dish

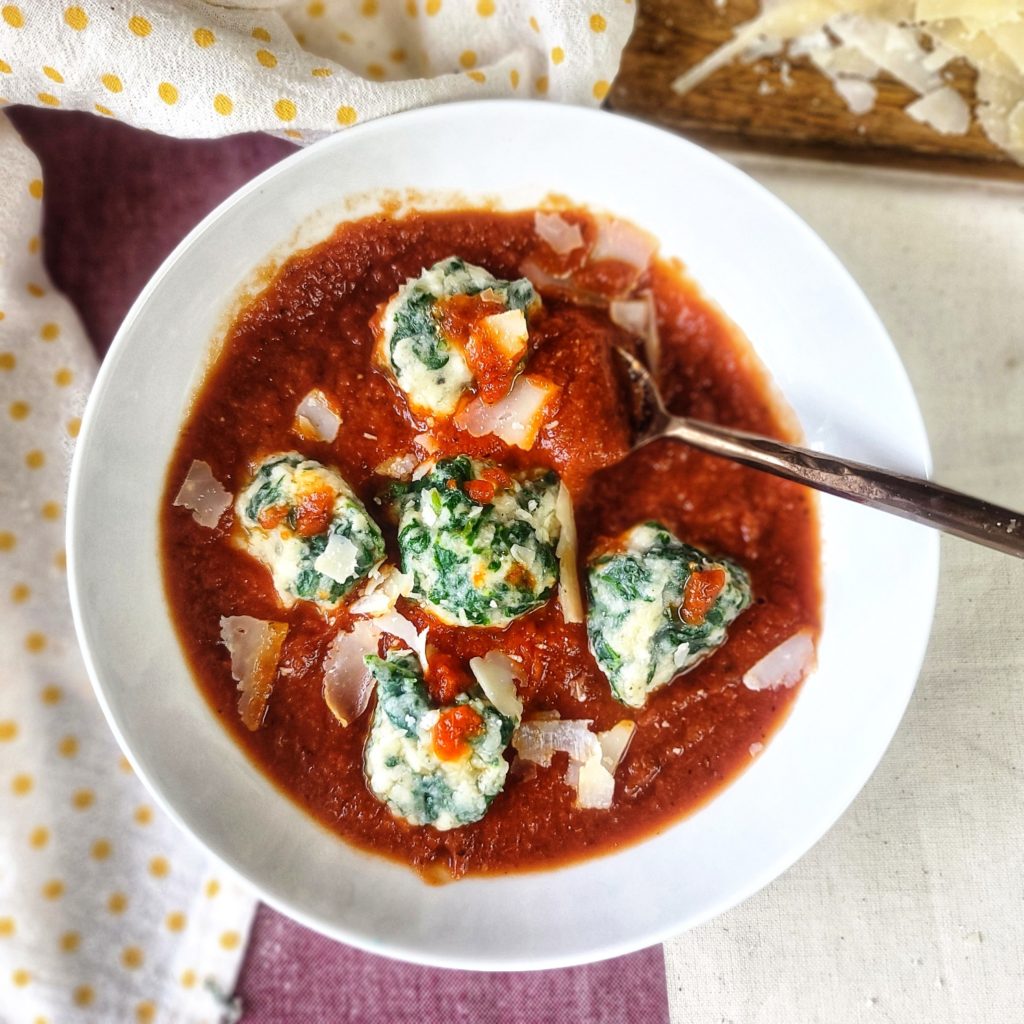
Cottage Cheese Gnudis Florentine (Naked Spinich Ravioli): A clever and fun vegetarian dinner idea. Basically, gnudies are little dumplings — I made mine with gluten-free flour and cottage cheese.

Quick, easy, delicious and nutritious, these cheesy, saucy stuffed zucchini boats will remind you of a mushroom pizza - -but without the crust, so lower calorie, lower carb and gluten-free. A great way to use up a bumper crop of squash!

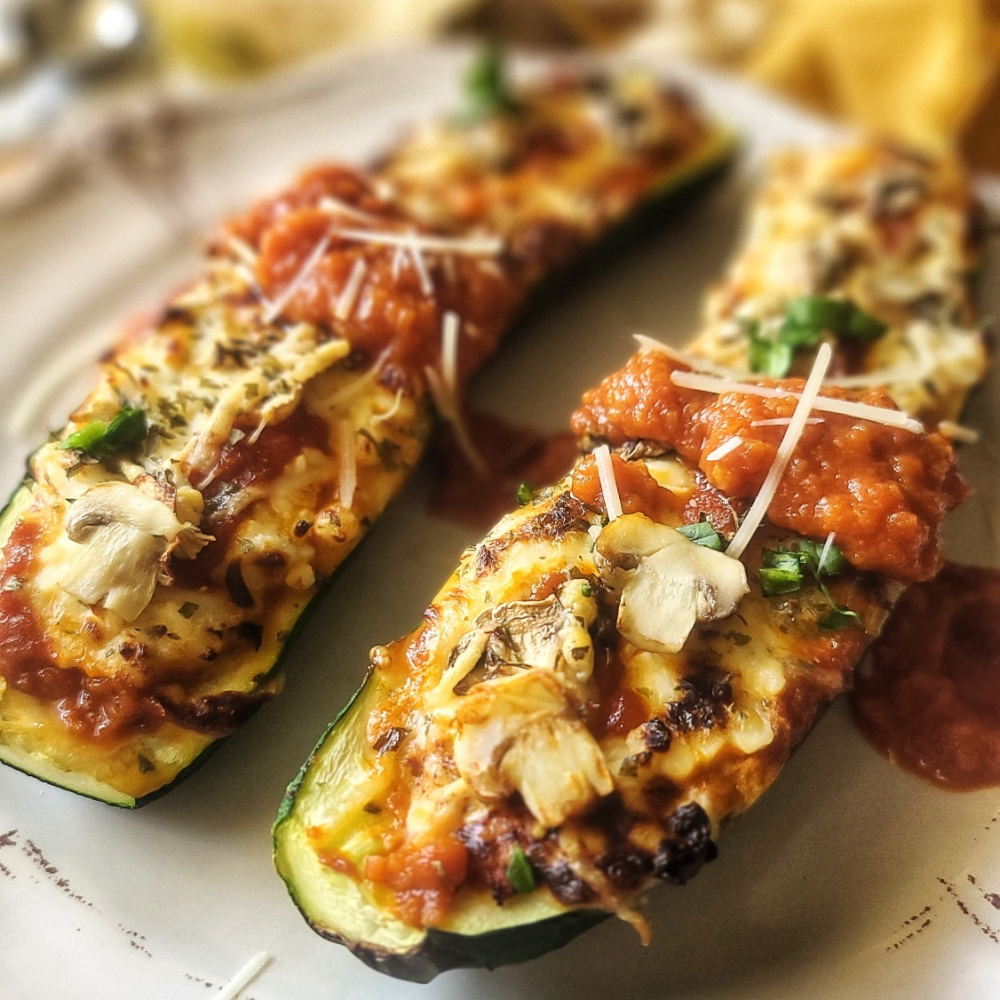
Cheesy Mushroom Pizza Stuffed Zucchini Boats – Zucchini boats are smart way to use up the squash of summer. A vegetarian recipe pumped up with extra protein thanks to cottage cheese. I love mushroom pizza, but you can top however you like.

Appetizer Dips Made Over with Cottage Cheese                           

Lower in fat, but still ooey-gooey, this high protein green chili queso features blended cottage cheese as the hero. Simple to make in the microwave, only 4 ingredients – delicious and nutritious! 100 calories per serving with 11g protein. A healthy appetizer or topping for your Mexican-inspired meal.

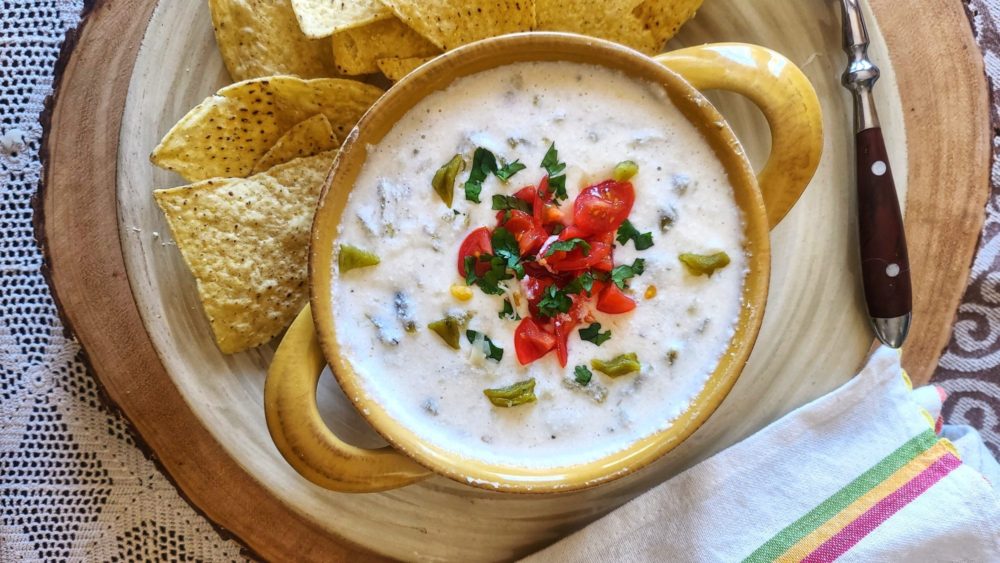
Cottage Cheese Queso with Green Chiles: Enjoy ooey-gooey queso with no guilt. This cottage cheese questo recipes is a makeover of everyone’s favorite hot cheese dip made from that mystery block of cheese — much more nutrient dense and the real deal!

Better-for-You Artichoke and Green Chile Dip with Cottage Cheese is a comforting snack and party appetizer, perfect for football season, the holiday season and upcoming get-togethers.

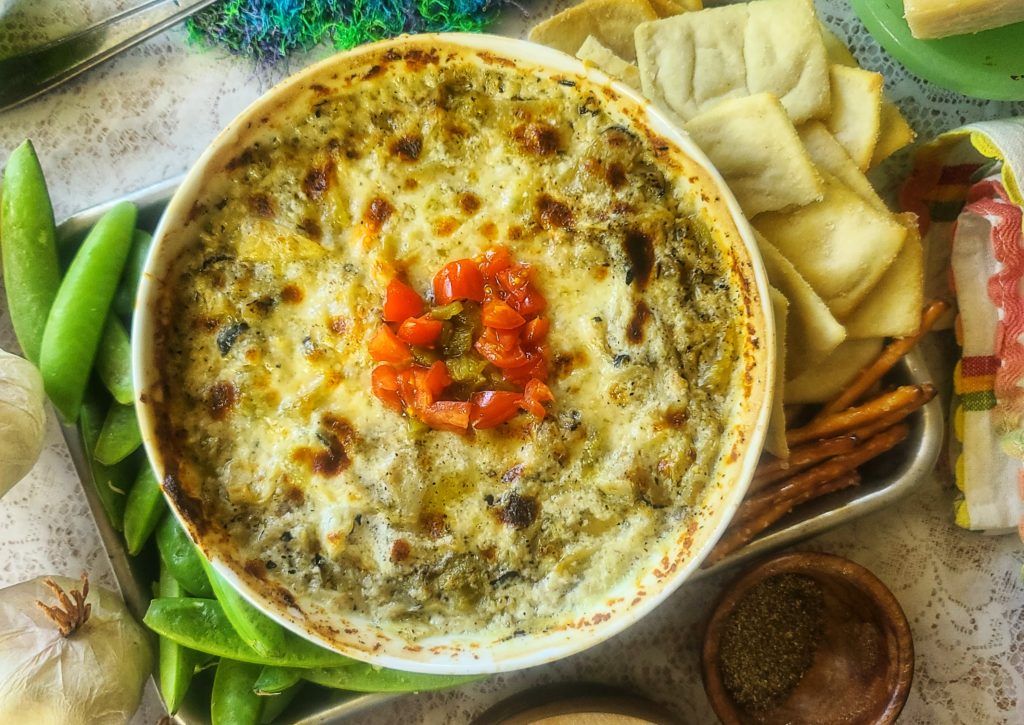
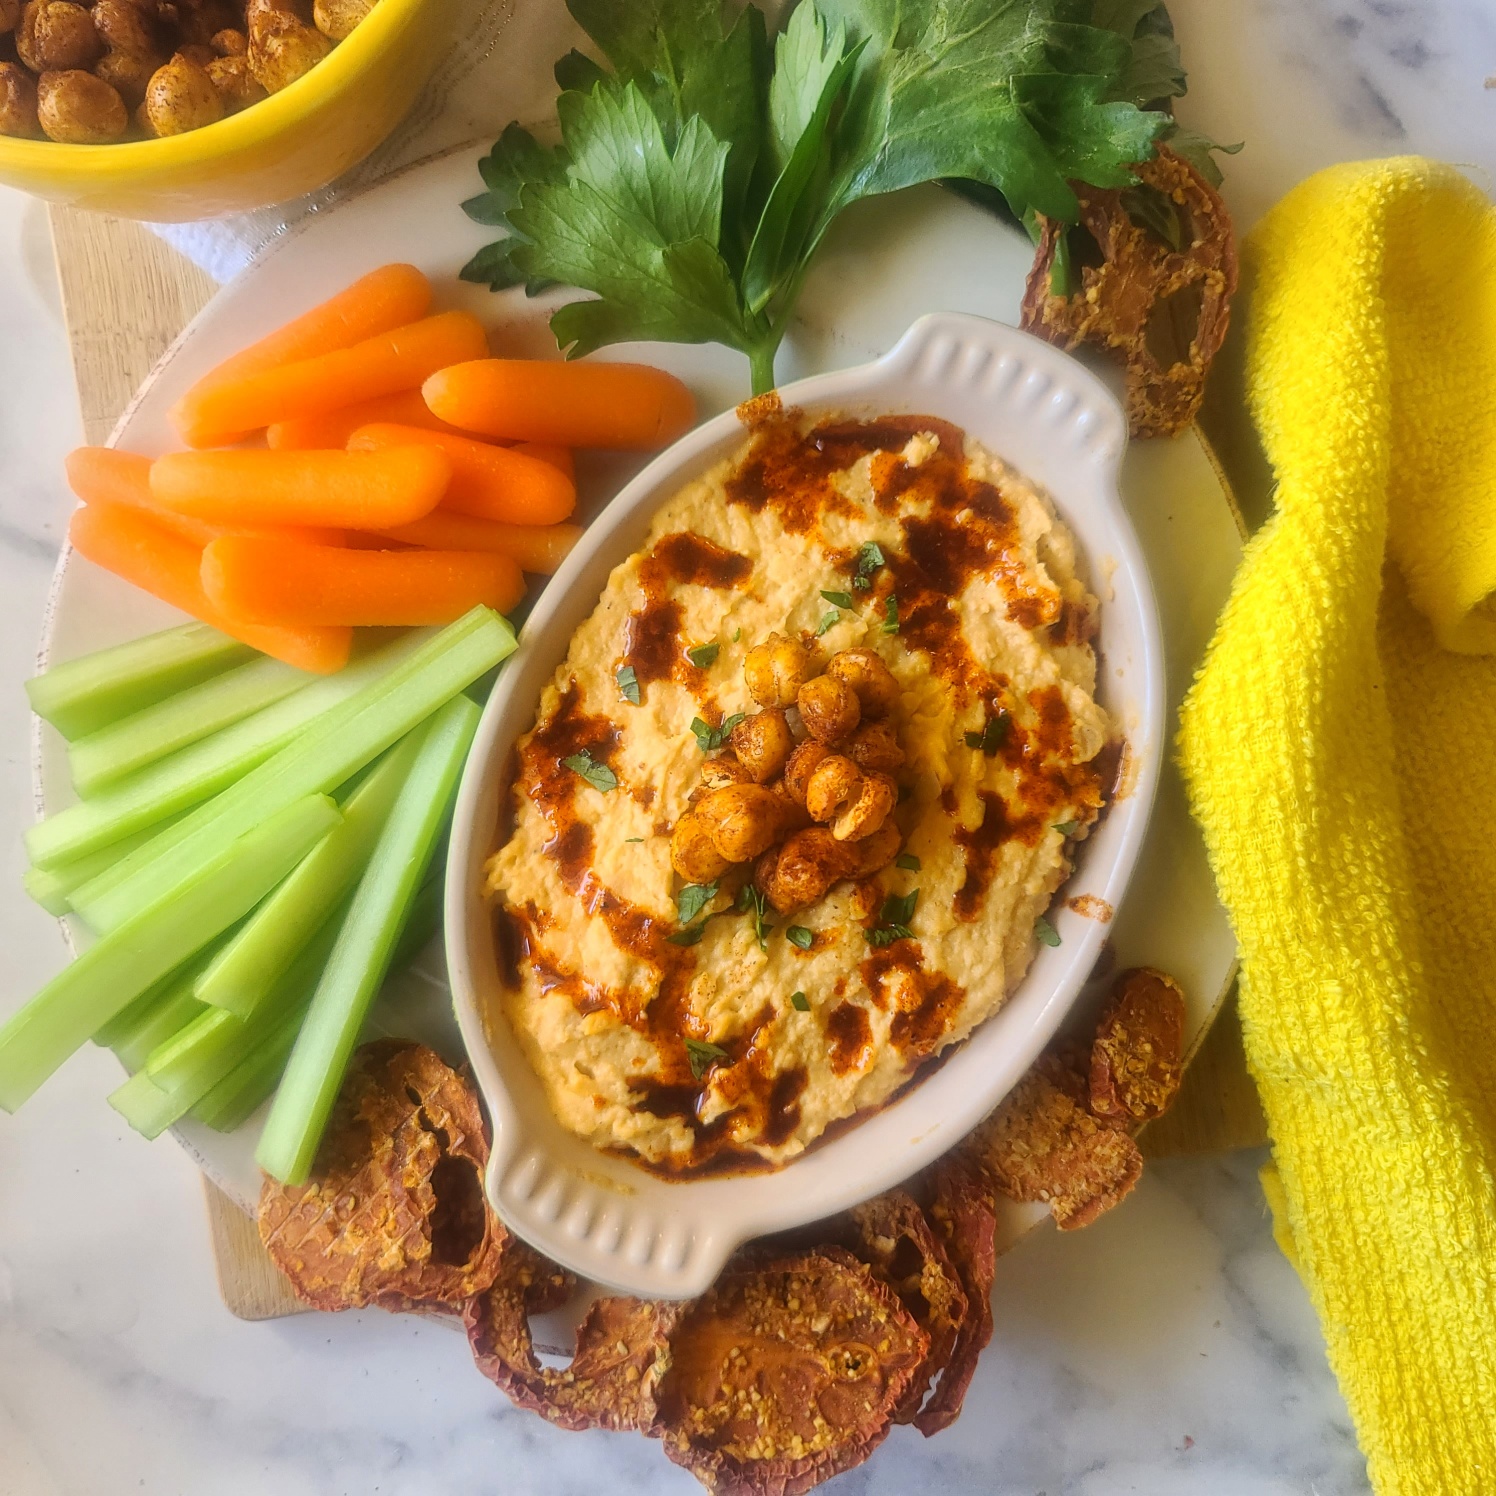
Artichoke Green Chile Dip with Cottage Cheese: Guaranteed to be gone lickity-split at your next party, pot luck or patio gathering.

Sweet & Savory Breakfasts with Cottage Cheese

Matcha Green Tea Waffles are made with protein powder and blended cottage cheese for a protein-packed, low-cal breakfast that will satisfy you all morning. Lightly sweet with no added sugar, so no syrup needed – take on the go! Gluten-free option.

Matcha Protein Waffles with Cottage Cheese make a yummy, protein-packed option for mornings when you need a little pick-me-up. Load up with your favorite toppings, or take unadorned on the go — they are lightly sweet, so no syrup needed!

Chicken Egg Bake: This hearty but well-balanced breakfast bake is also perfect for brunch, lunch and a light dinner! Gluten free, lower carb -- 21g protein for long-lasting energy. Great for a crowd, or meal prep and freeze in single-serve portions to reheat later.

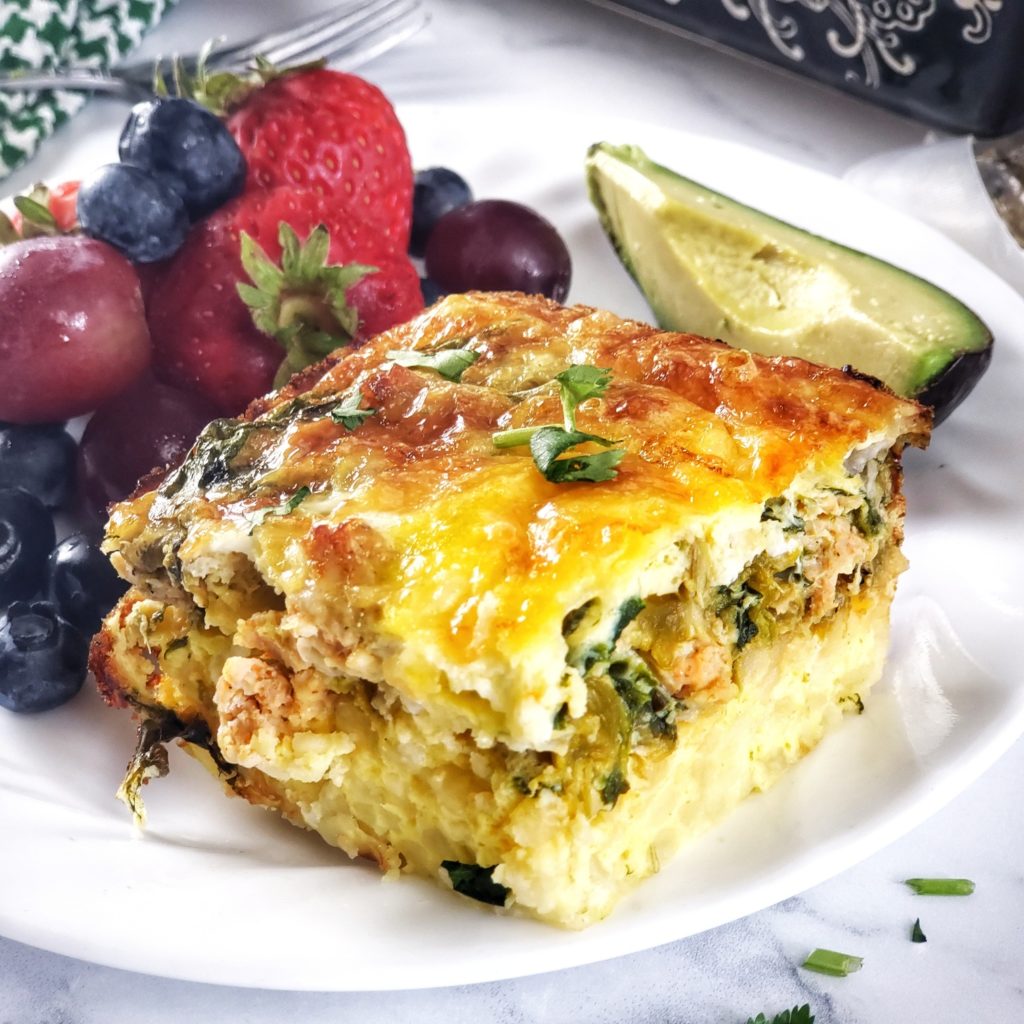
Cheesy Hatch Green Chile Chicken Egg Bake: Eggs, cottage cheese, and browned ground chicken breast make a hearty, healthy breakfast to fill up the family. Also, great for meal prep — you can freeze in individual portions for busy mornings.

Blueberry Steel Cut Oat Bake with protein is sweet, simple, make-ahead goodness. 290 cal per serving, 21 g protein, healthy whole grain carbs. Perfect fuel runs and workouts.

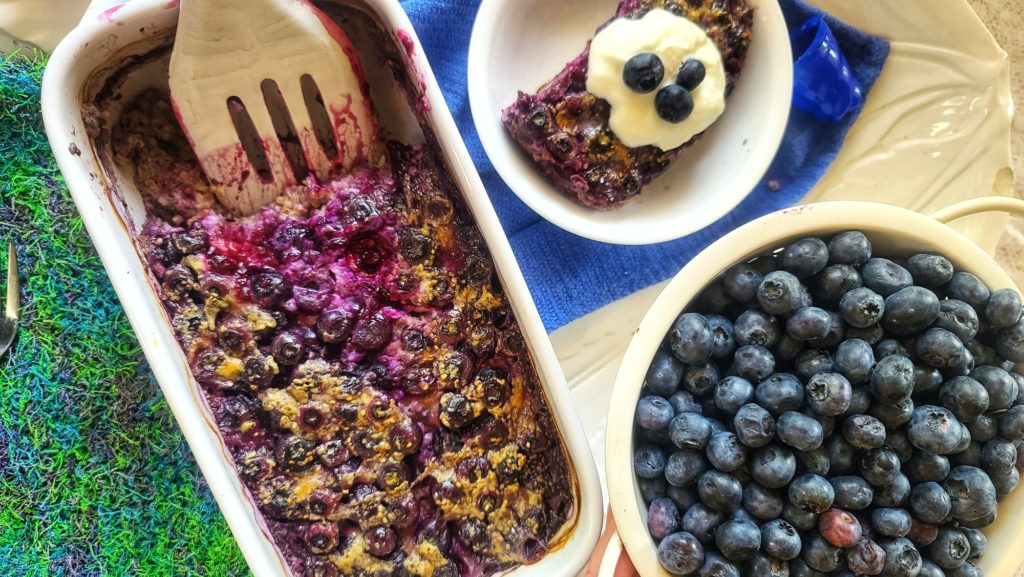
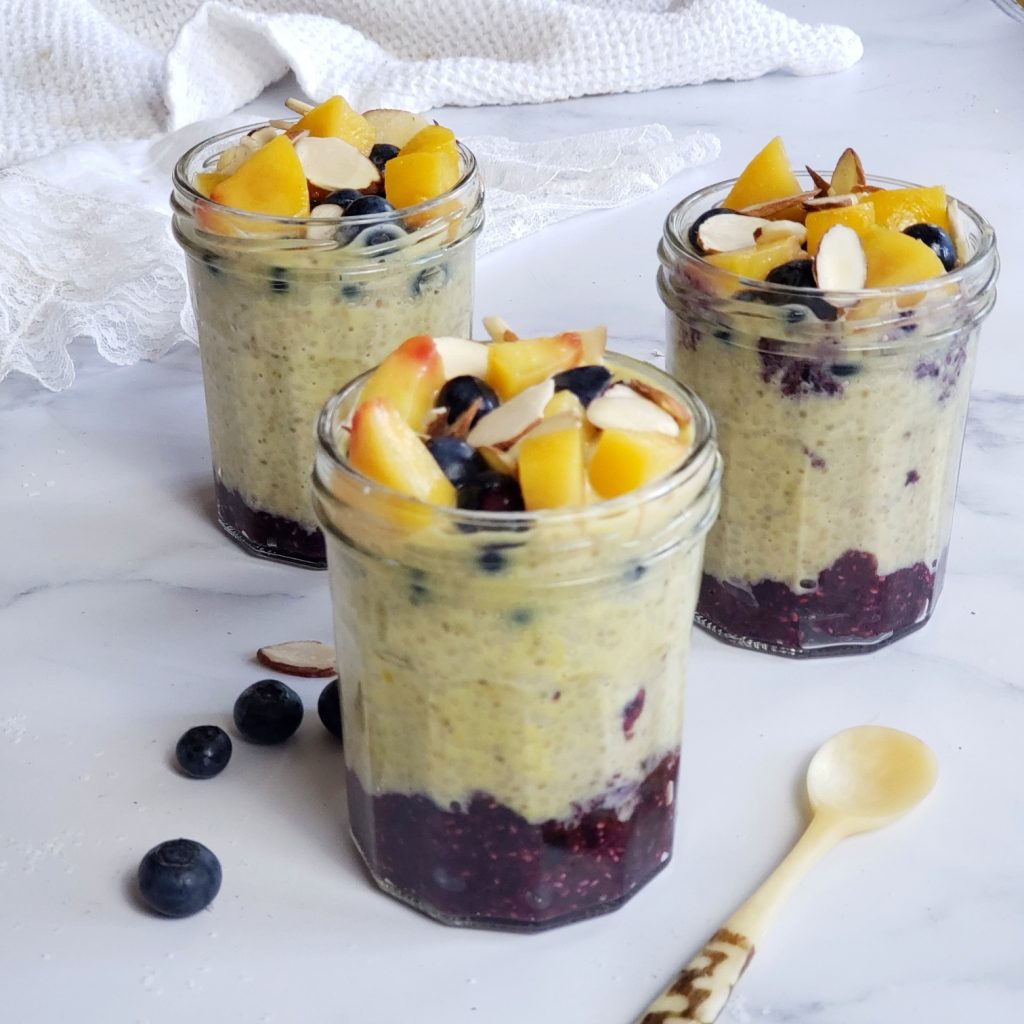
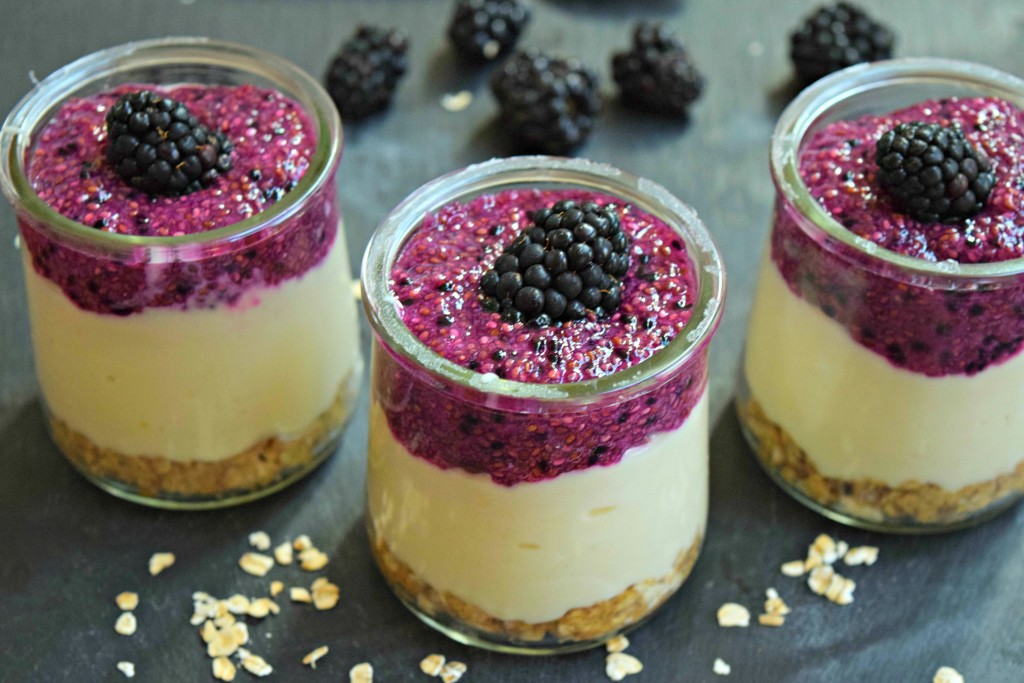
Make-Ahead Blueberry Cheesecake Baked Oats: Whole grain goodness sweetened up with berries and some cottage cheese for protein balance.

Peanut Butter Protein Crepes with raspberries | low carb and gluten free

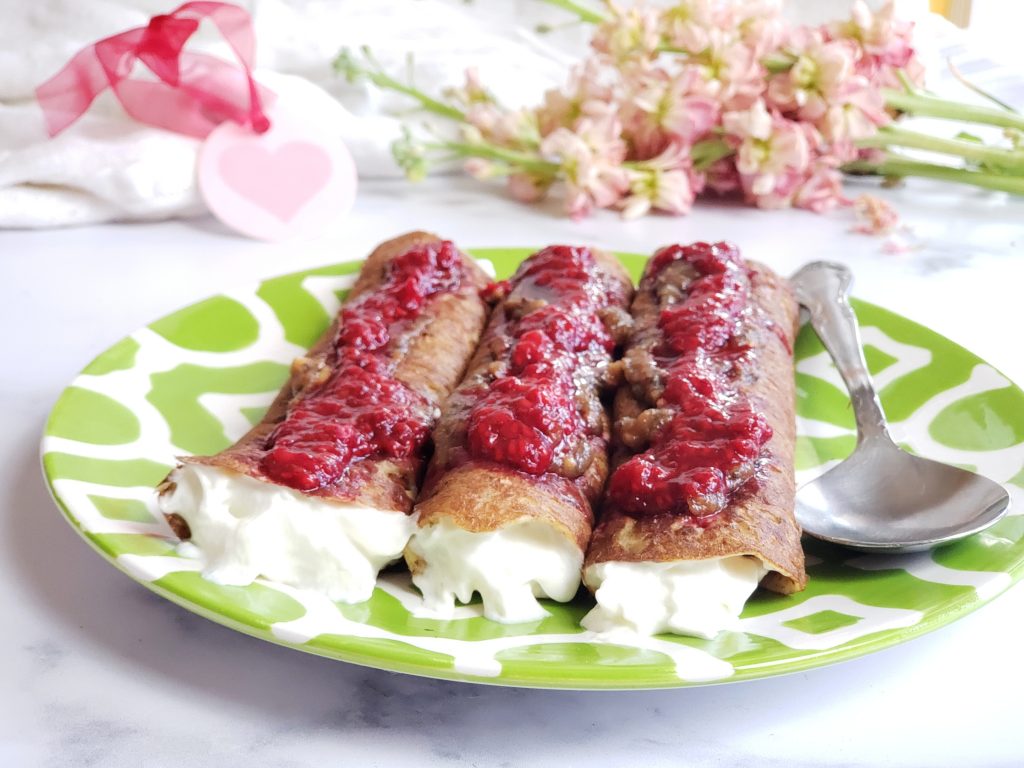
4-Ingredient Low Carb Crepes: These delicate crepes are supringly easy to make and gluten-free. Nearly 5g grams protein and only 61 cal per each plain crepe — fill them up how you like, sweet or savory.

You don't need a bumper crop of fresh berries to enjoy these easy strawberry cottage cheese protein waffles that are also pumped up with cottage cheese and protein powder. Idea for protein-packed mornings and meal-prep!

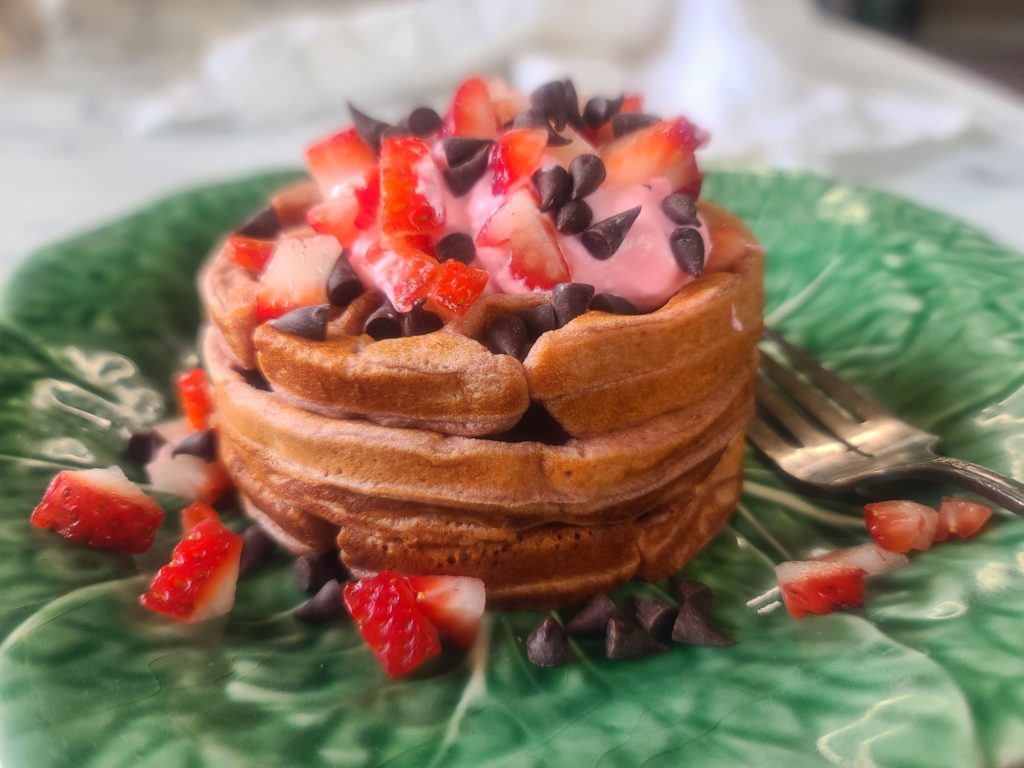
Strawberry Cottage Cheese Waffles: Cottage Cheese, strawberry protein powder . . . and strawberries on top make this a delight for berry lovers.

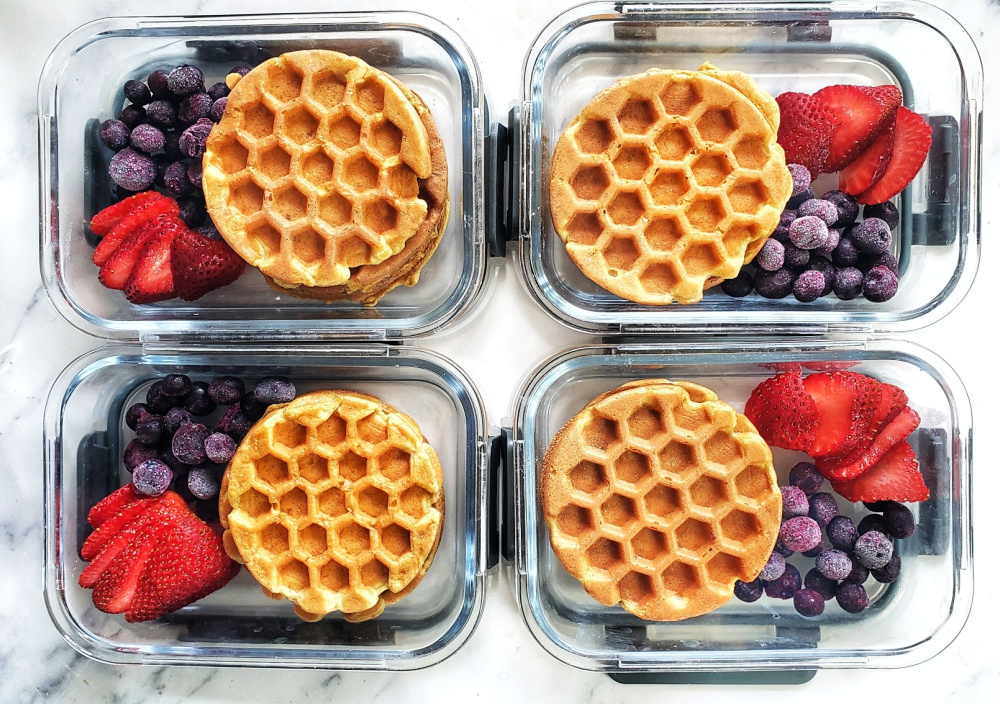
Basic Recipes Cottage Cheese Protein Waffles Easy, amazing and fantastic macros, these little waffles are actually anything but basic in the taste and texture category — I just called them basic because they make a great foundation for all your toppings of choice!

Mindful Sweet Treats and Cottage Cheese Desserts

High Protein Banana Pudding: A healthy twist on this classic comfort food allows you to enjoy dessert with no guilt while making gains on your daily protein goals! Only 285 calories per serving, with 30g protein! Lower carb, lower, sugar, gluten-free.

Banana “Pudding” with Cottage Cheese is a flavorful walk down memory land (at least, if you you’re like me and remember your grandmother’s signature dessert with nostalgic fondness. This version is kept low carb, high protein thanks to blended smooth cottage cheese.

This no added sugar cheesecake dessert features cottage cheese and collagen blended until creamy -- sugar free chocolate chips and strawberries put this no-bake, no crust, lower carb, single-serve recipes over the top.

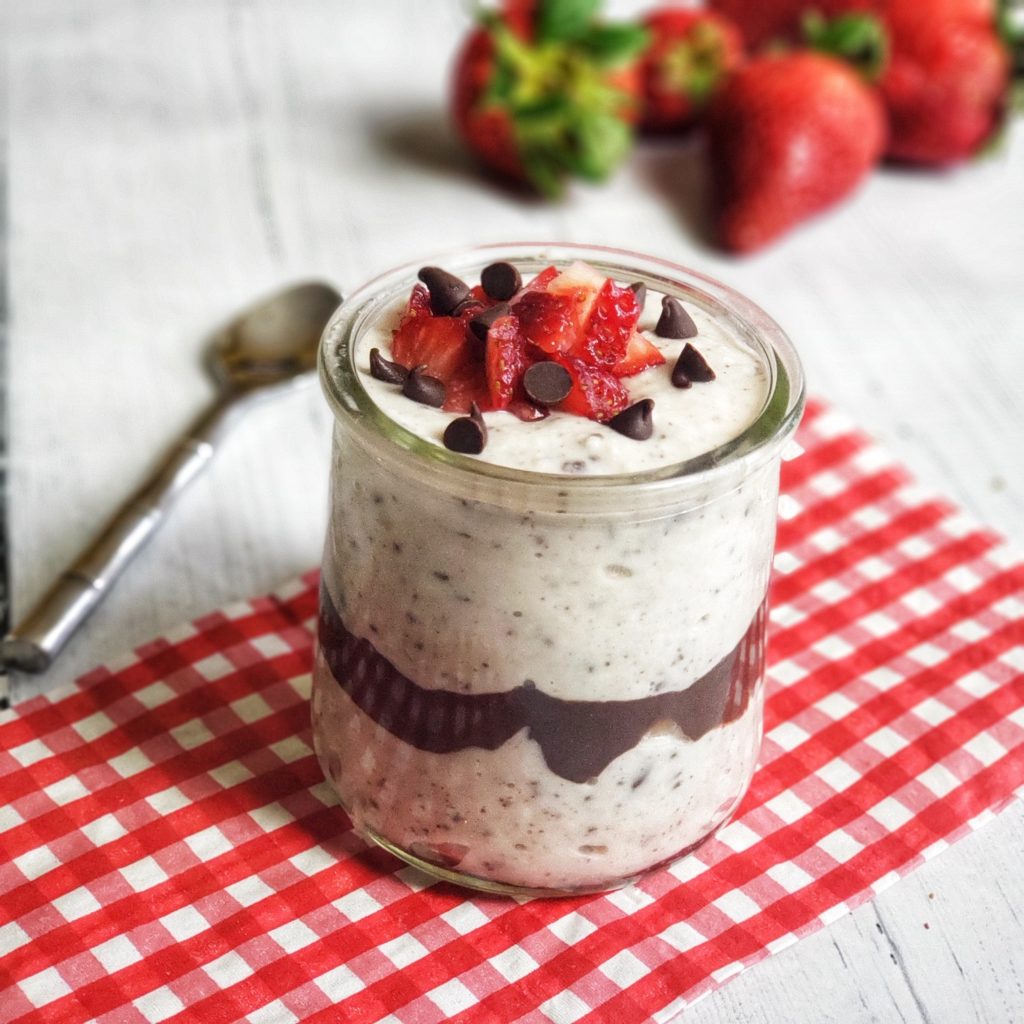
Sugar Free Chocolate Chip Cottage Cheese Cheesecake I’m just here for the chocolate chips, creamy filling and strawberries. The fact it is nutrient dense and protein packed is a bonus!

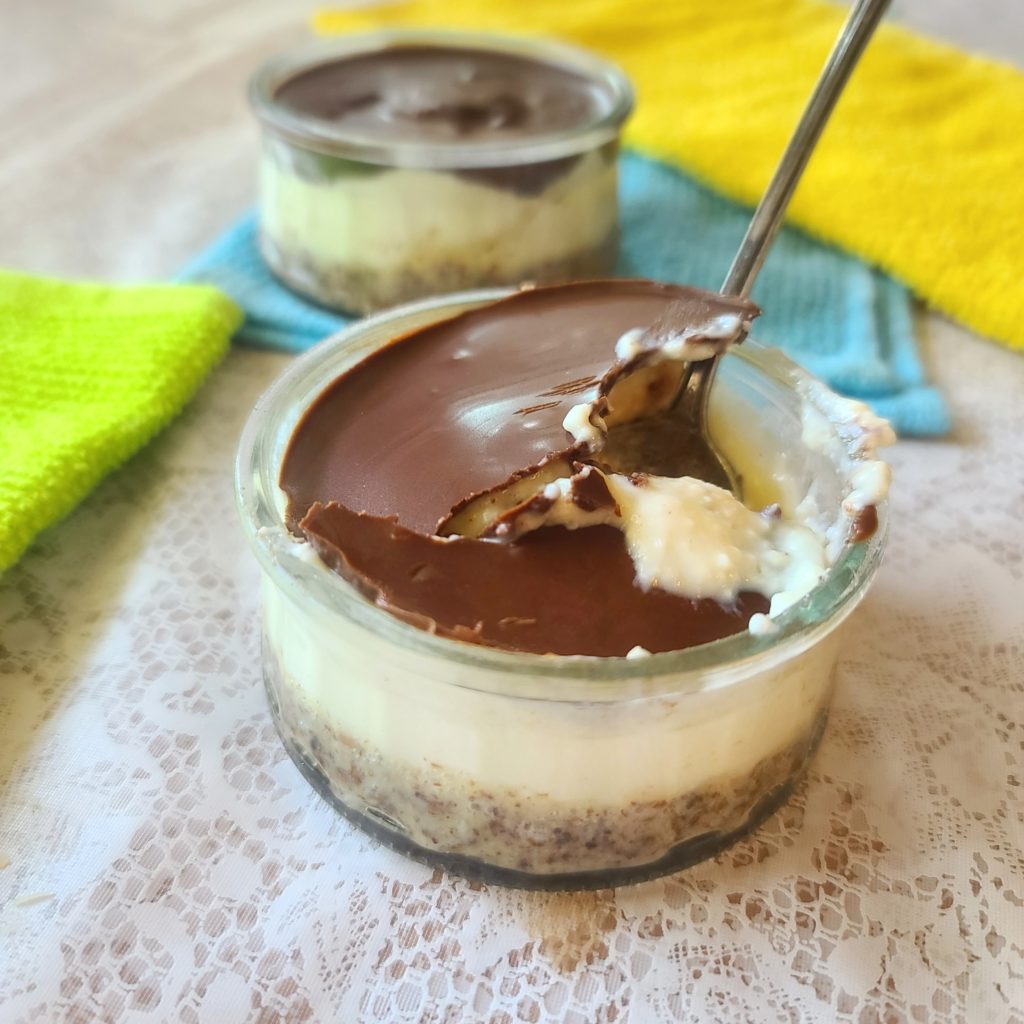
Individual Boston Cream Protein “Pies”: There is just something so satisfying about breaking into that hard shell made from melted sugar-free chocolate chips. Pumped up with cottage cheese and a gluten-free crust, this little treat is worth sharing (that’s why the recipes makes 2 servings!)

Pumpkin Cheesecake Chia Pudding with Pecan Praline Crumble makes a quick, easy and nutritious breakfast, snack or healthy dessert. Natural sweeteners used to keep the carbs low and cottage cheese to help boost the protein -- plus more than 1/2 daily requirement for fiber! For more clean eating recipes, visit thefitfork.com

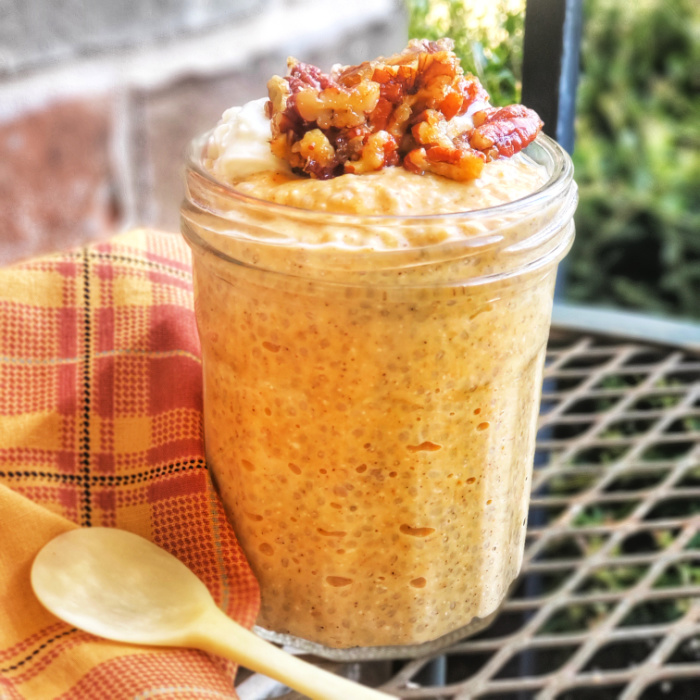
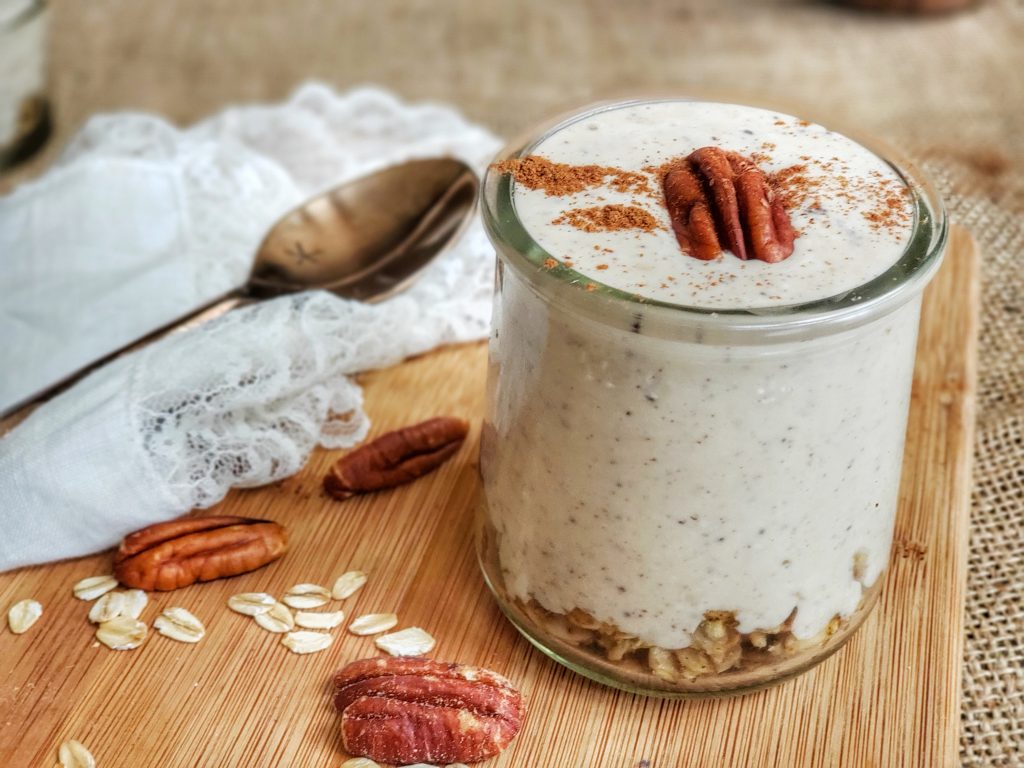
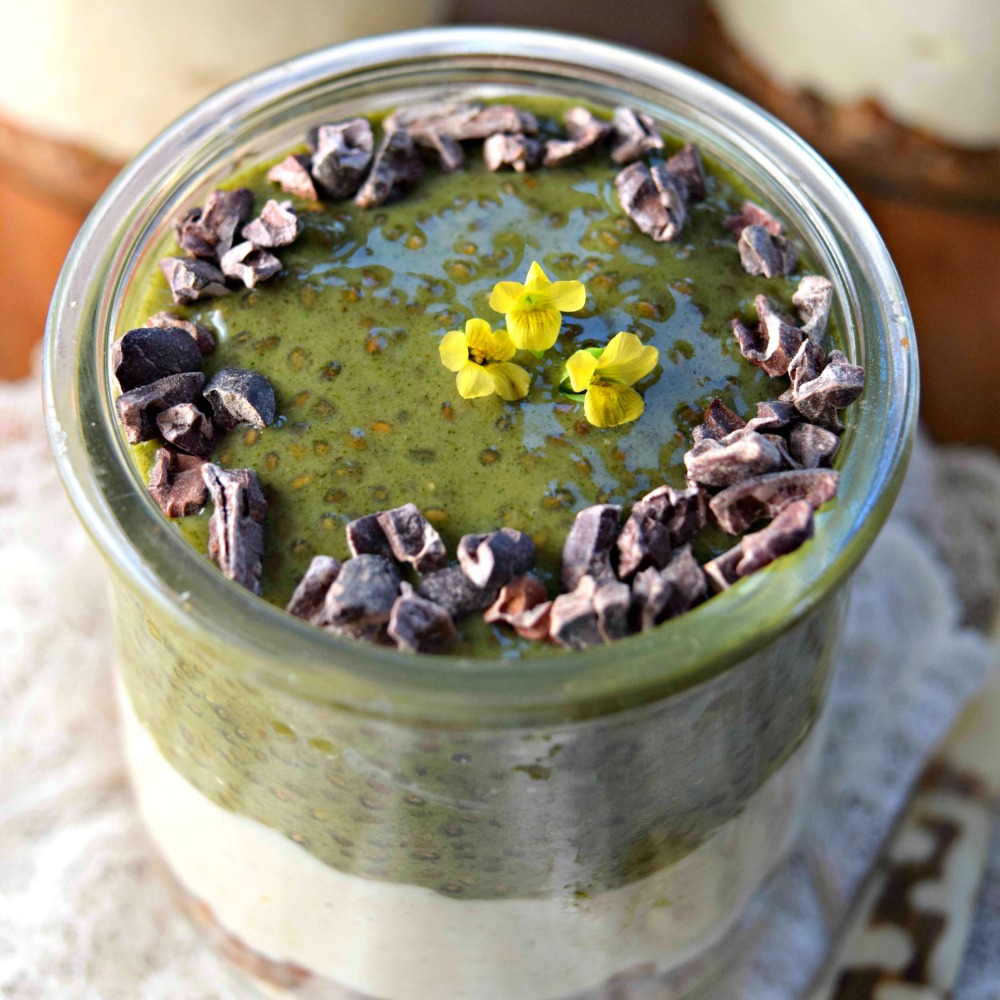
Pumpkin Cheesecake Chia Pudding with Pecan Praline Crumble could work equally well for breakfast or dessert! I keep canned pumpkin in my pantry so I can make year-round.

Mocha Cappuccino Protein Cheesecake Brownie

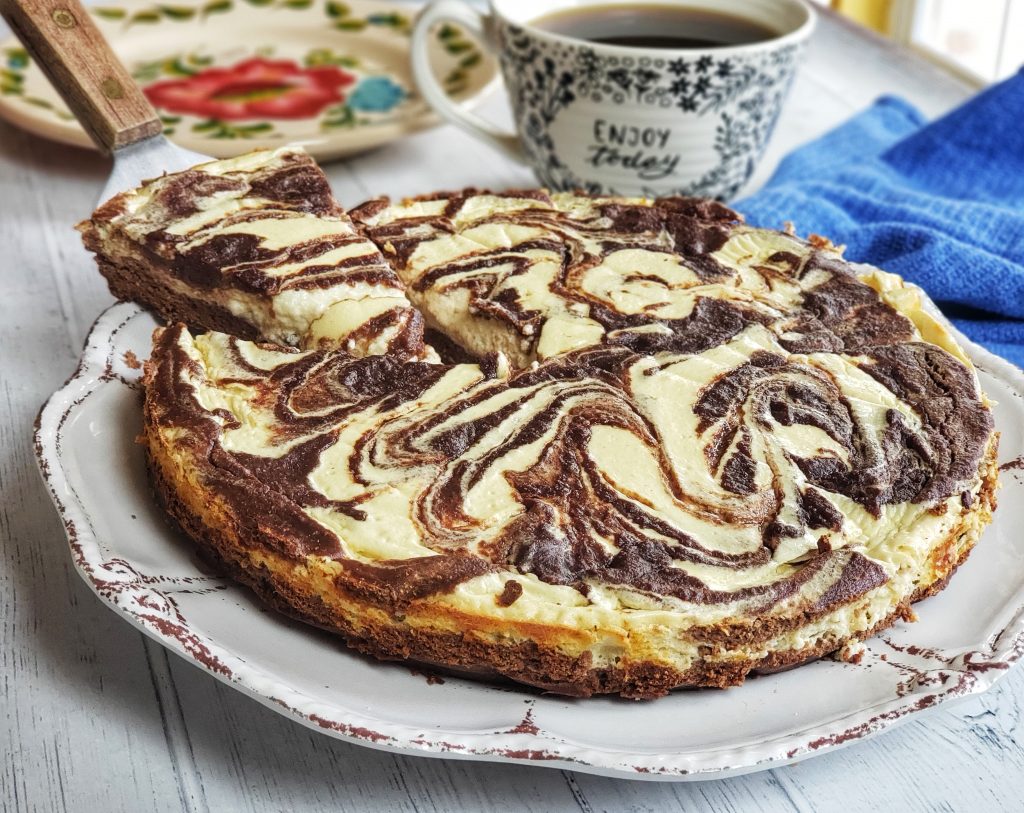
Mocha Cappuccino Protein Cheesecake Brownie: Yes, these are brownies — I just happened to cook in a round pan to make fancy!

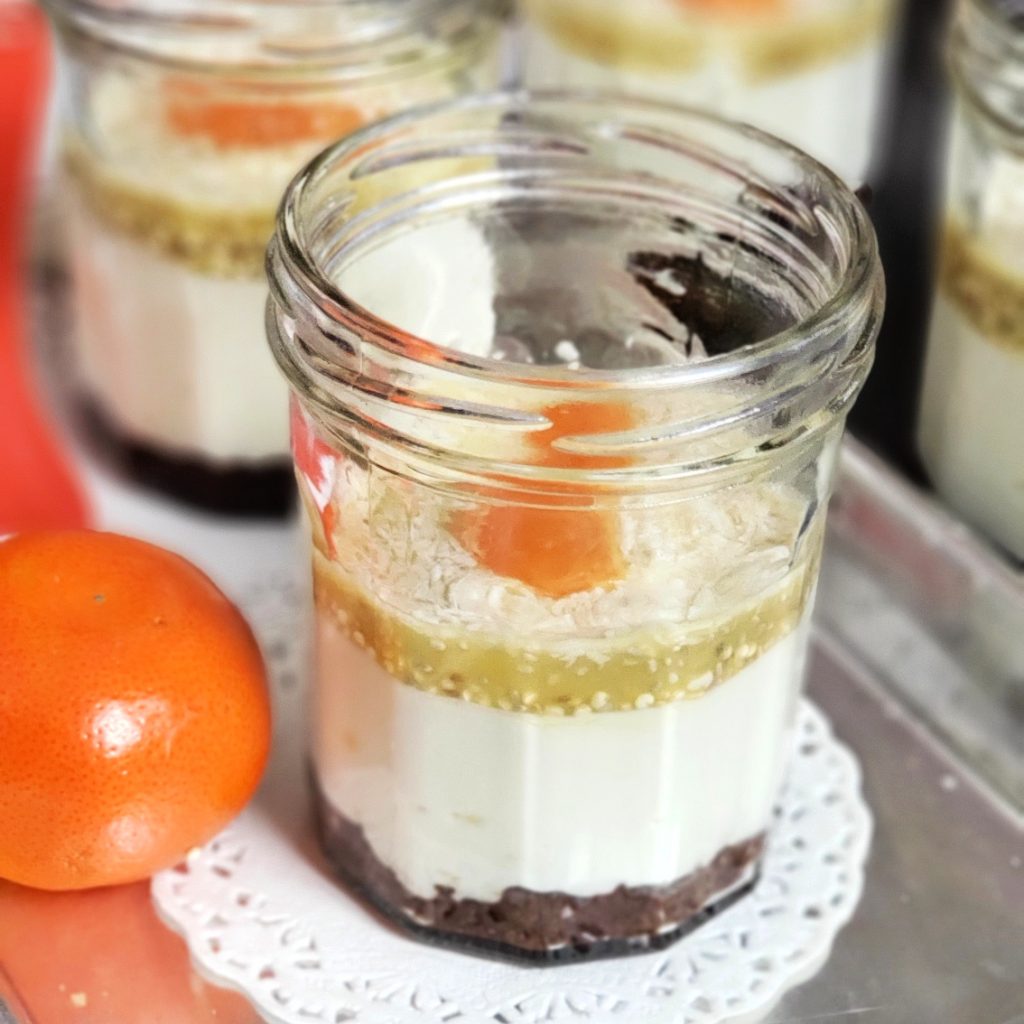
Personal-sized No-Bake Cottage Cheese Cheesecake Cups

Mango Protein Cheesecake Cup for One is a no-bake, easy high protein snack that will be your new tropical-inspired favorite for a healthy dessert, post-workout snack or even an easy breakfast that also boasts lots of calcium and fiber.

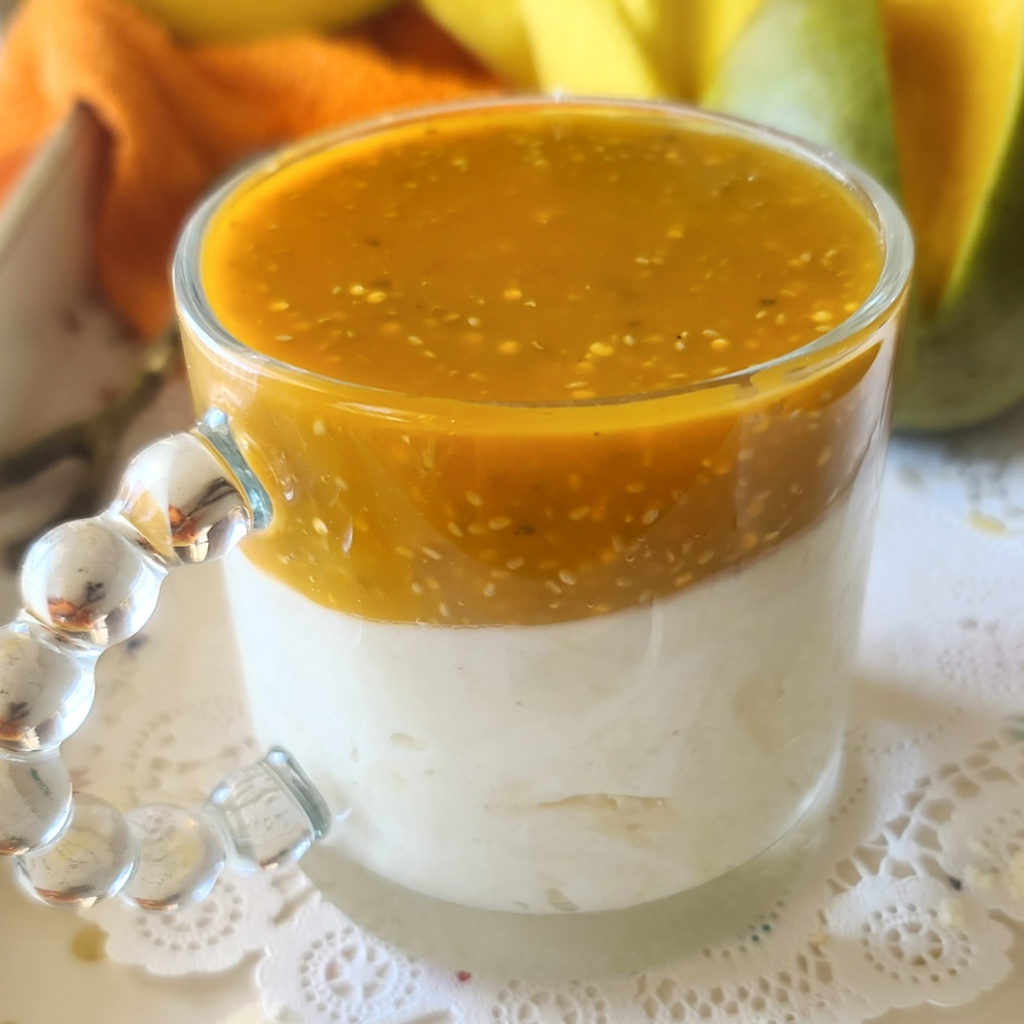
No-bake Mango Protein Cheesecake – A tropical hug in a mug — or a little bowl or mason jar, if you prefer. This is an easy way to boost your calcium, protein and fiber. Macros on point to eat for breafast, too!

3-Ingredient Cottage Cheese Pizza Crust (Low Carb, Gluten Free, Protein)

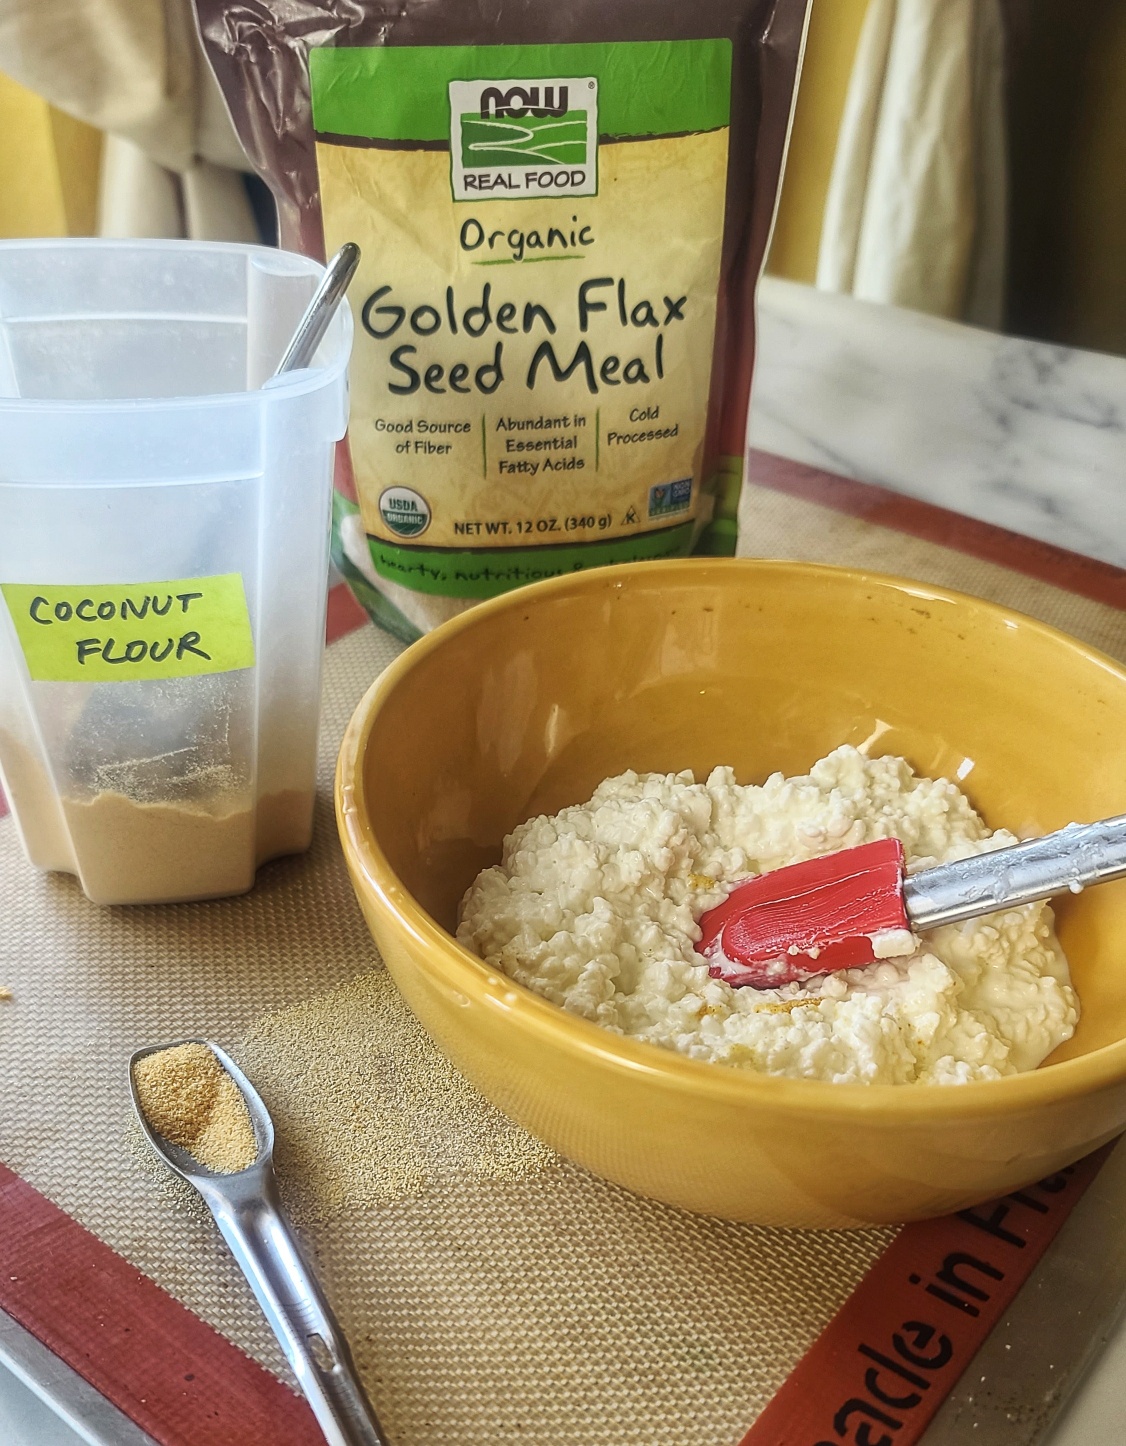
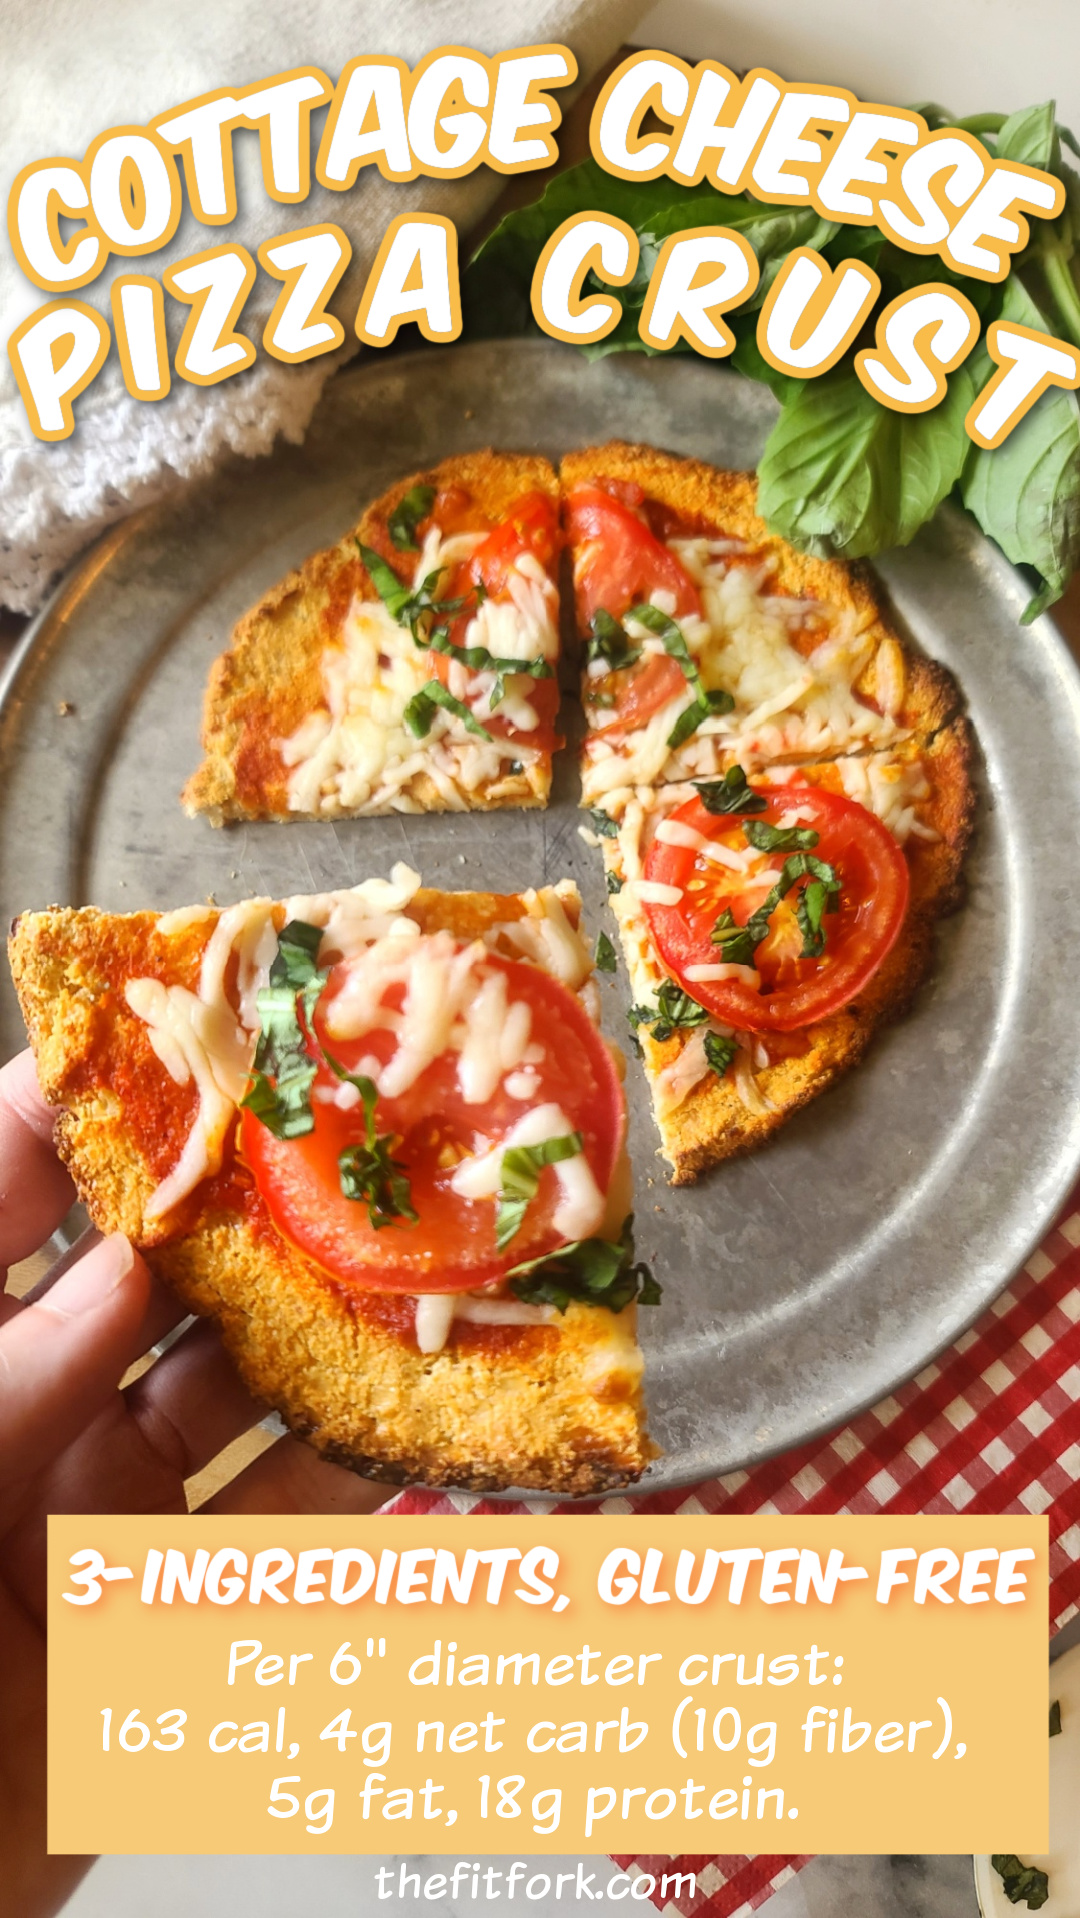
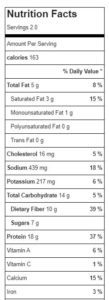
Treat yourself to pizza night done right with 3-Ingredient Cottage Cheese Pizza Crust, a gluten-free, low-carb and protein-packed alternative to traditional crusts.

I’ve been baking and cooking with cottage cheese for YEARS, so it’s funny to see all these viral cottage cheese recipes on TikTok, Instagram and such as if it’s something new! Using cottage cheese is a smart way to bump up protein, lower fat, and minimize carbohydrates in many recipes – pizza crusts included!

The macros on this pizza crust are impressively good. The recipe makes two personal sized crusts (about 6” diameter each) with a single crust (before toppings of your choice) coming in at 163 cal, 4g net carb, 10g dietary fiber, 5g fat and 18g protein.

The only ingredients used in this low carb pizza crust are cottage cheese, coconut flour and ground flax seed meal.

TIPS FOR MAKING COTTAGE CHEESE PIZZA CRUST:

COTTAGE CHEESE: When it comes to selecting cottage cheese for his keto pizza crust recipes, pick a small curd cottage cheese with 2% or 4% milk fat. Stay away from the Fat-free cottage cheese, it does not perform as well. Also, if you use small-curb cottage cheese, there is no need to blend the cottage cheese smooth (as some similar recipes call for). For reference, I used Good Culture 2% Classic Low-Fat Cottage Cheese. They also make a lactose-free cottage cheese, if that is needed.

COCONUT FLOUR: This recipe only calls for ¼ cup of coconut flour, but it is a very “thirsty” flour and much less is required than other types of flour. For this reason, please to not make flour substitutes.

GROUND FLAXSEED MEAL: I added ground flax seed to add more fiber to the recipes, along with omega fatty acids. If you can not source this, you can *likely* just substitute with 1 tablespoon more of coconut flour – but I have not tried this yet, so let me know if you do.

OPTIONAL SEASONINGS: You won’t need salt because cottage cheese has enough sodium. But you might like to add garlic powder, everything bagel seasoning, fresh chopped herbs, or whatever else you would prefer.

BAKING: You will need parchment paper or a silicon baking sheet to cover your baking pan and prevent sticking.

COOLING & STORING: After removing the crust from the initial baking, you will want to let it cool almost completely. Otherwise, it will be too fragile to handle. This recipe makes two homemade personal-sized pizza crusts. If you are not using both, cover the leftover one and keep in the fridge to use later for up to 5 days.

TOPPINGS: After your crust has mostly cooled, feel free to handle it to add sauce, more cheese, veggies, meats or whatever toppings you love. Pop back in the oven for about 10 minutes or until cooked to your preference.

Put your trust in this crust for pizza night! A low-carb, high-protein, gluten-free pizza crust that tastes amazing and holds up to the toppings of your choice. Recipe makes two personal-sized crusts, each with 163 cal, 14g carb (4 net carb), 5g fat and 18g protein.

I also have a 2-Ingredient, 2-Minut Pizza Crust recipe that the family loves too – it uses Greek Yogurt and self-rising flour (or an all-purpose gluten-free baking blend with a bit of baking soda).

2 Ingredient 2 Minute Pizza Dough
5 from 6 votes
Put your trust in this crust for pizza night! A low-carb, high-protein, gluten-free pizza crust that tastes amazing and holds up to the toppings of your choice. Recipe makes two personal-sized crusts, each with 163 cal, 14g carb (4 net carb), 5g fat and 18g protein.
3-Ingredient Cottage Cheese Pizza Crust
Prep Time
5 mins
Cook Time
20 mins
Total Time
35 mins
 
Simple, scrumptious and a crust you will crave for pizza night!! Add the toppings you enjoy. Makes two personal-sized crusts, each with 163 cal, 14g carb (4 net carb), 5g fat and 18g protein.
Course: Appetizer, dinner, lunch
Keyword: cottage cheese, gluten free, high protein, low carb, pizza
Servings: 2 servings
Calories: 163 kcal
Ingredients
  • 1 cup 2% or 4% cottage cheese Not zero-fat
  • ¼ cup coconut flour
  • 1 tbsp ground flax seed*
  • Optional: ½ tsp garlic salt or other seasoning of your choice However, don't add seasonings with a lot of salt added. Cottage cheese already has enough sodium.
Instructions
  1. Preheat oven to 400F.

  2. Add ingredients to bowl, mix until combined. Form into two balls.

  3. Line baking sheet with parchment paper or a silicone baking sheet. Use hands to smoosh down and form into two thin discs, approx. 6” diameter.

  4. Bake for approx. 20 minutes, or until turned golden brown and edges just about to get too brown. Remove from oven and let cool on pan about 5-10 minutes.

  5. Top with ingredients of choice and return to oven to bake for 10 more minutes, or until toppings done to your liking.

  6. If you don’t use the 2nd crust, wrap up and store in fridge for use later, up to 5 days.

  7. *If you can’t find this flax meal, try subbing in with 1 tbsp. more coconut flour. I can’t 100% vouch for outcome, but it should work. The flax is just a nice variety, offers fiber and omega fatty acids.

Recipe Notes

Cottage Cheese Pizza Crust nutrition

Note: This post contains Amazon affiliate links.

Microwave Melted Brie with Honey, Nuts & Dried Fruit

Baked brie might be THE classic when it comes to elegant appetizer that are easy. But, making brie in the microwave takes the convenience of this crowd-pleasing nibble to a new level – it only takes just a few minutes to heat up and assemble into a beautiful brie appetizer!

Like traditional oven-baked brie, but even easier, thanks to warming brie in the microwave! Customize this 3 minute appetizer recipe with the dried fruit, seeds, nuts and honey variety of your preference. Festive enough for any celebration -- easy enough for every day snacking!

Serve this “like baked brie” dish for pre-game, pre-meal, pre-anything, just be sure to prepare enough as it will be gobbled up before it has a chance to even fully ooze out of the rind!

The easiest appetizer recipe on Earth! Pin this for Later!

How to melt brie in the microwave is very easy and no different than in the oven, but MUCH faster. Set the brie wheel in a microwave safe dish (a dish you want to serve it in, as it will be too gooey to pick up after heating). When it comes to the rind, you have the choice of 1) leaving it all intact and cross-hatching the top with a paring knife or 2) using a pairing knife to slice off the top of the rind (leaving the side and bottom as is). A question I get asked frequently – Can you eat brie rind? YES, yes you can eat the rind on brie! It’s perfectly edible, so no worries which method you choose.

Like traditional oven-baked brie, but even easier, thanks to warming brie in the microwave! Customize this 3 minute appetizer recipe with the dried fruit, seeds, nuts and honey variety of your preference. Festive enough for any celebration -- easy enough for every day snacking!
Removing the top rind is optional — brie rind is totally edible! Don’t remove sides and bottom though, you’ll have a mess!

 To heat brie in the microwave, simply set to cook level to about 70% and heat for 90 seconds to 2 minutes (the actual time will depend on the microwave and also the size of your brie wheel). That’s it! You will see that the cheese has soften, is melty, and the natural oils are being released. It’s ready.

Like traditional oven-baked brie, but even easier, thanks to warming brie in the microwave! Customize this 3 minute appetizer recipe with the dried fruit, seeds, nuts and honey variety of your preference. Festive enough for any celebration -- easy enough for every day snacking!

During those 2 minutes that the brie was melting, toss together the toasted nuts and dried fruits of your choice with honey to create a decadent, sweet-salty topping. For my fruit and nut brie appetizer, I used dried apples, dried cherries, toasted walnuts and roasted pistachios – with the bigger pieces chopped coarsely to create a more uniform topping.  

Customize by using the dried fruits and nuts that you prefer!

You can use whatever fruits and nuts (or seeds) you prefer to top microwave brie – slivered almonds, chopped pecans, pumpkin seeds, sunflower seeds, chopped dates or figs, dried mango, toasted coconut – really, it’s up to your imagination.

To pull the topping together into a wonderful, sticky delight, I used Manuka Honey – it’s an amazingly flavorful, thick and rich honey (almost like caramel, in my opinion) that comes from New Zealand. However, and good-quality honey will do!

Note: This post contains affiliate links.

Microwave Melted Brie with Honey, Nuts & Dried Fruit
Prep Time
1 min
Cook Time
2 mins
Total Time
3 mins
 

Like traditional oven-baked brie, but even easier, thanks to warming in the microwave! Customize this 3 minute appetizer recipe with the dried fruit, seeds, nuts and honey variety of your preference. Festive enough for any celebration — easy enough for every day snacking!

Course: Appetizer, Snack
Keyword: blue cheese, brie, holiday, super bowl, walnuts
Servings: 8 servings
Ingredients
  • 1 lb Brie round
  • ¼ cup dried apples chopped*
  • ¼ cup dried cherries halved*
  • ¼ cup roasted pistachios*
  • ¼ cup toasted walnuts chopped*
  • 3 tbsp Manuka honey or other good quality honey
  • Pinch Himalayan Sea salt
Instructions
  1. Slice top rind off (or leave on and lightly cross-hatch), leaving side and bottom rind intact (rind is edible).
  2. Place brie round in small microwave-safe dish.
  3. Microwave on 70% power for about 90 seconds to 2 min. until warm and bubbling. (if preferred, brie can be baked in oven, at 350 F for about 20 to 25 minutes).
  4. While brie is heating, toss together dried fruit and nuts (if needed, chop into smaller pieces). Drizzle with honey, stir lightly, and pile to top of warmed Brie.
  5. Sprinkle with Himalayan Sea salt (may skip if nuts were salted)
  6. Serve with apple slices, crackers or baguette.
Recipe Notes

*can substitute topping ingredients to be dried fruit, nut or seed of choice.

Small Batch Hummus to Serve One or Two

Buying a big tub of hummus can seem like such a commitment, especially if you’re snacking solo or with a just friend or two.  My Small Batch Hummus recipe is perfectly proportioned so that you can finish it off in two sittings (or one snack session if super hungry) – or share it with a buddy and have no leftovers clogging up the fridge!   

Small Batch Hummus - Cooking for One

Exciting News:

This small batch dip (or spread) is featured in my upcoming cookbook, Cooking for One for Dummies (which can be pre-ordered now, ships on March 7, 2023)

Plus, when you make homemade hummus, you’re in total control of the ingredients – there’s no weird preservatives, additives, or yucky stuff.  Plus, you get all the benefits of chickpeas, they are abundant in dietary fiber and also a good source of plant protein, iron, folate and other essential nutrients.

It’s fast, it’s easy, there is no cooking – you start with a can of chickpeas. Of course, you can make your own chickpeas, but that adds a lot of time and hassle to what is an easy-peasy snack recipe for one or two.

skin on chickpeas
Gently rub any remaining skins off your chickpeas for smoother hummus.

After draining the chickpeas (a legume sometimes referred to as garbanzo beans), pour them out onto a clean dishcloth or paper towels and lightly rub dry. In addition to drying the chickpeas, the other goal here is to remove any lingering skins. The light patting dry will encourage stragglers to fall off, simply pick the skins out and discard. The skins will do no harm if they end up in your hummus, it will just be not quite as smooth and creamy.  

Then, it’s just a matter of whipping everything up in a food processor or blender. Since this is a small batch appetizer recipe, a mini food processor or personal sized blender will work best.

How to Serve Small Batch Hummus

  • Simply paired with raw veggies like carrots, celery, radishes, squash rounds are my favorite way to eat hummus.
  • Serve with pita wedges for dipping, smear on crackers, or spread on slices of toasted baguette.
  • Elevate sandwiches, wraps and quesadillas by spreading around as part of the filling.
  • Get creative and toss with hot pasta or zoodles for an instant chickpea sauce.
Pin this for later!

Leftover Chickpeas in Can? While this homemade hummus for two uses just half a can of chickpeas, don’t throw the remainder out — you have options. First, you could easily double the homemade dip recipe, it scales up beautifully (however, do note the capacity of your mini food processor and use a bigger processor or blender, if needed). I also have another “1/2 can chickpea” recipe — Air-Fryer Crispy Chickpeas for One which also make a fabulous, heathy snack or salad topper.

Air Fryer Crispy Chickpeas for One a=is a quick, easy and healthy snack with lots of dietary fiber plus protein, iron, and folate.

Make both the Small Batch Hummus and the Air-Fryer Crispy Chickpeas for Ones and kill off the whole can at once making healthy snacks.

This post contains affiliate links.

5 from 9 votes
Small Batch Hummus - Cooking for One
Small Batch Hummus
Prep Time
5 mins
Total Time
5 mins
 

Make just enough homemade hummus to get your through a couple health snack sessions — or to share with a friend. Easy, healthy, and homemade, a fantastic snack and spread to add to your active lifestyle. Lots of dietary fiber and a good source of plant protein, dietary fiber, iron, folate and other important nutrients.

Course: appetizers, dips, snacks, spreads
Cuisine: Mediterranean
Keyword: appetizer, chickepeas, dip, garbanzo beans, snacks, spread
Servings: 2 servings
Ingredients
  • ¾ cup canned chickpeas drained and rinsed (about half a 15.5-ounce can)
  • 3 tbsp olive oil plus an additional 1 teaspoon for topping, if desired
  • tbsp tahini
  • 1 tbsp lemon juice
  • ½ tsp garlic or garlic paste
  • ¼ teaspoon salt
  • ¼ teaspoon ground black pepper
  • 1/2 teaspoon smoked paprika
Instructions
  1. Place all the ingredients in a personal-sized blender or mini food processor; process until smooth. If the consistency seems too pasty or thick, blend in 1 teaspoon of water at a time until desired texture is achieved.
  2. Transfer the hummus to serving bowl and drizzle with 1 teaspoon of olive oil and a sprinkle of paprika.
Recipe Notes

NOTE: Store the leftovers in an airtight container in fridge for up to 4 days.
VARY IT! Extra chickpeas from can be kept in an airtight container in fridge for a few days and added to salads, soups, and wraps

LEARN MORE! This small batch dip (or spread) is featured in my upcoming cookbook, Cooking for One for Dummies (which can be pre-ordered now, ships on March 7, 2023)

Air Fryer Crispy Chickpeas (for One)

Air Fryer Crispy Chickpeas make snack time a happy time and a healthy experience, especially when that craving for something salty-crunchy hits but are trying to stay away from chips.

If you’re like me, you’ll want to eat theses roasted chickpeas warm, right off the air-fryer and pop the lightly-seasoned, crispy delights into your mouth, one after one! Definitely one of my favorite single-serve snack ideas!

The good news is that unlike typical crunchy snack foods, you control the fats, the sodium, and the flavor. Nothing is processed or yucky, it’s just the goodness of garbanzo beans (the other common name for this legume) simply dressed up with a hint of flavor.  

This quick snack recipe for one makes a single serving (as hinted, lol) and uses ¾ cup of chickpeas (also called garbanzo), about half a can. To use up the other half of the can, check out this Small Batch Hummus recipe (or just easily double the ingredient list for the Air Fryer Crispy Chickpeas below).

PRO TIPS:

Remove skins from chickpeas to help oil & spices adhere.

Remove Skins:  Often canned chickpeas still loosely have their “skins” on. Most fall off during rinsing but any remaining can be removed by patting dry on a paper towel and loosely rubbing around until removed. You CAN eat chickpeas with the skins still hanging on, there is no harm! But removing helps the oil and spices cling onto the legume better in this recipe and for hummus recipes, it creates a smoother outcome.

Oven Option: If you don’t have an air fryer (I LOVE my Omni Pro Plus 18L), the general rule of thumb for crisping up garbanzo beans in the regular oven is to use the same temperature, but double the cooking time (shaking pan around every 10 minutes to promote even cooking).

Seasonings: Instead of smoked paprika, try curry powder, chili powder, Italian seasoning, Everything Bagel spice, or any other spice or blend you can dream up. Even homemade gingerbread spice with a pinch of stevia would make a delicious, unique chickpea snack.

How to Serve: Of course, eating warm off the pan is the obvious way to serve roasted chickpeas! They are also delightful tossed on a salad for extra nutrition and texture. Also try soups (instead of croutons) and as a garnish atop dips (like hummus) or your main entrée (like so yummy with salmon and greens)

How to Store: To maintain crunch, store roasted chickpeas covered at room temperature, for up to a couple days. If desired, pop back into a pre-heated 350F air fyer for 1 to 2 minutes to warm and re-crunch.

This post contains affiliate links.

5 from 5 votes
Air Fryer Crispy Chickpeas for One is a quick, easy and healthy snack with lots of dietary fiber plus protein, iron, and folate. A mindful way to satisfy that salty-crunchy craving when trying to stay away from chips and processed foods.
Air Fryer Crispy Chickpeas for One
Prep Time
5 mins
Cook Time
15 mins
Total Time
20 mins
 

Crunchy, crispy and addictive! This fun and easy-to-make snack offers lots of dietary fiber and also is a good source of plant protein, iron, folate and other essential nutrients. Note: If you want to use up the entire can 15-ish ounce can of chickpeas, just double the recipe!

Course: Snack
Cuisine: healthy, Indian, Mediterranean
Keyword: air fryer, chickpeas, garbanzo beans, legumes
Servings: 1 serving
Ingredients
  • ¾ cup canned chickpeas about half a 15.5-ounce can
  • 2 tsp olive oil
  • 1/2 tsp lemon juice
  • 1/8 teaspoon salt
  • ¼ teaspoon ground black pepper
  • ½ teaspoon smoked paprika
Instructions
  1. Pre-heat air fryer to 390 F degrees.
  2. Drain and rinse chickpeas.
  3. Pour out on paper towel and dry, gently rubbing to release any skins; discard skins.
  4. Add chickpeas to small bowl and drizzle on olive oil and lemon juice, stirring to coat evenly.
  5. Sprinkle with salt, pepper, and smoked paprika and stir around to adhere to chickpeas.
  6. Pour chickpeas out on rimmed baking sheet that fits in air fryer.
  7. Stick in preheated air fryer for about 15 minutes, stopping to shake around once halfway through. Chickpeas should be toasted and crunchy when finished. IF needed (because air fryer models vary in heating), cook for another 2 to 4 minutes.

  8. Remove and let cook a couple minutes before eating. Store leftovers in air-tight container at room temperature, for up to 3 days. If desired, you can warm up in air fryer preheated to 350 for 1 to 2 minutes.

  9. Note: For a conventional oven, cook at 390-400F degrees for 30 minutes, or until golden brown and crispy, stirring up every 10 minutes.

Recipe Notes