Small Batch Hummus to Serve One or Two

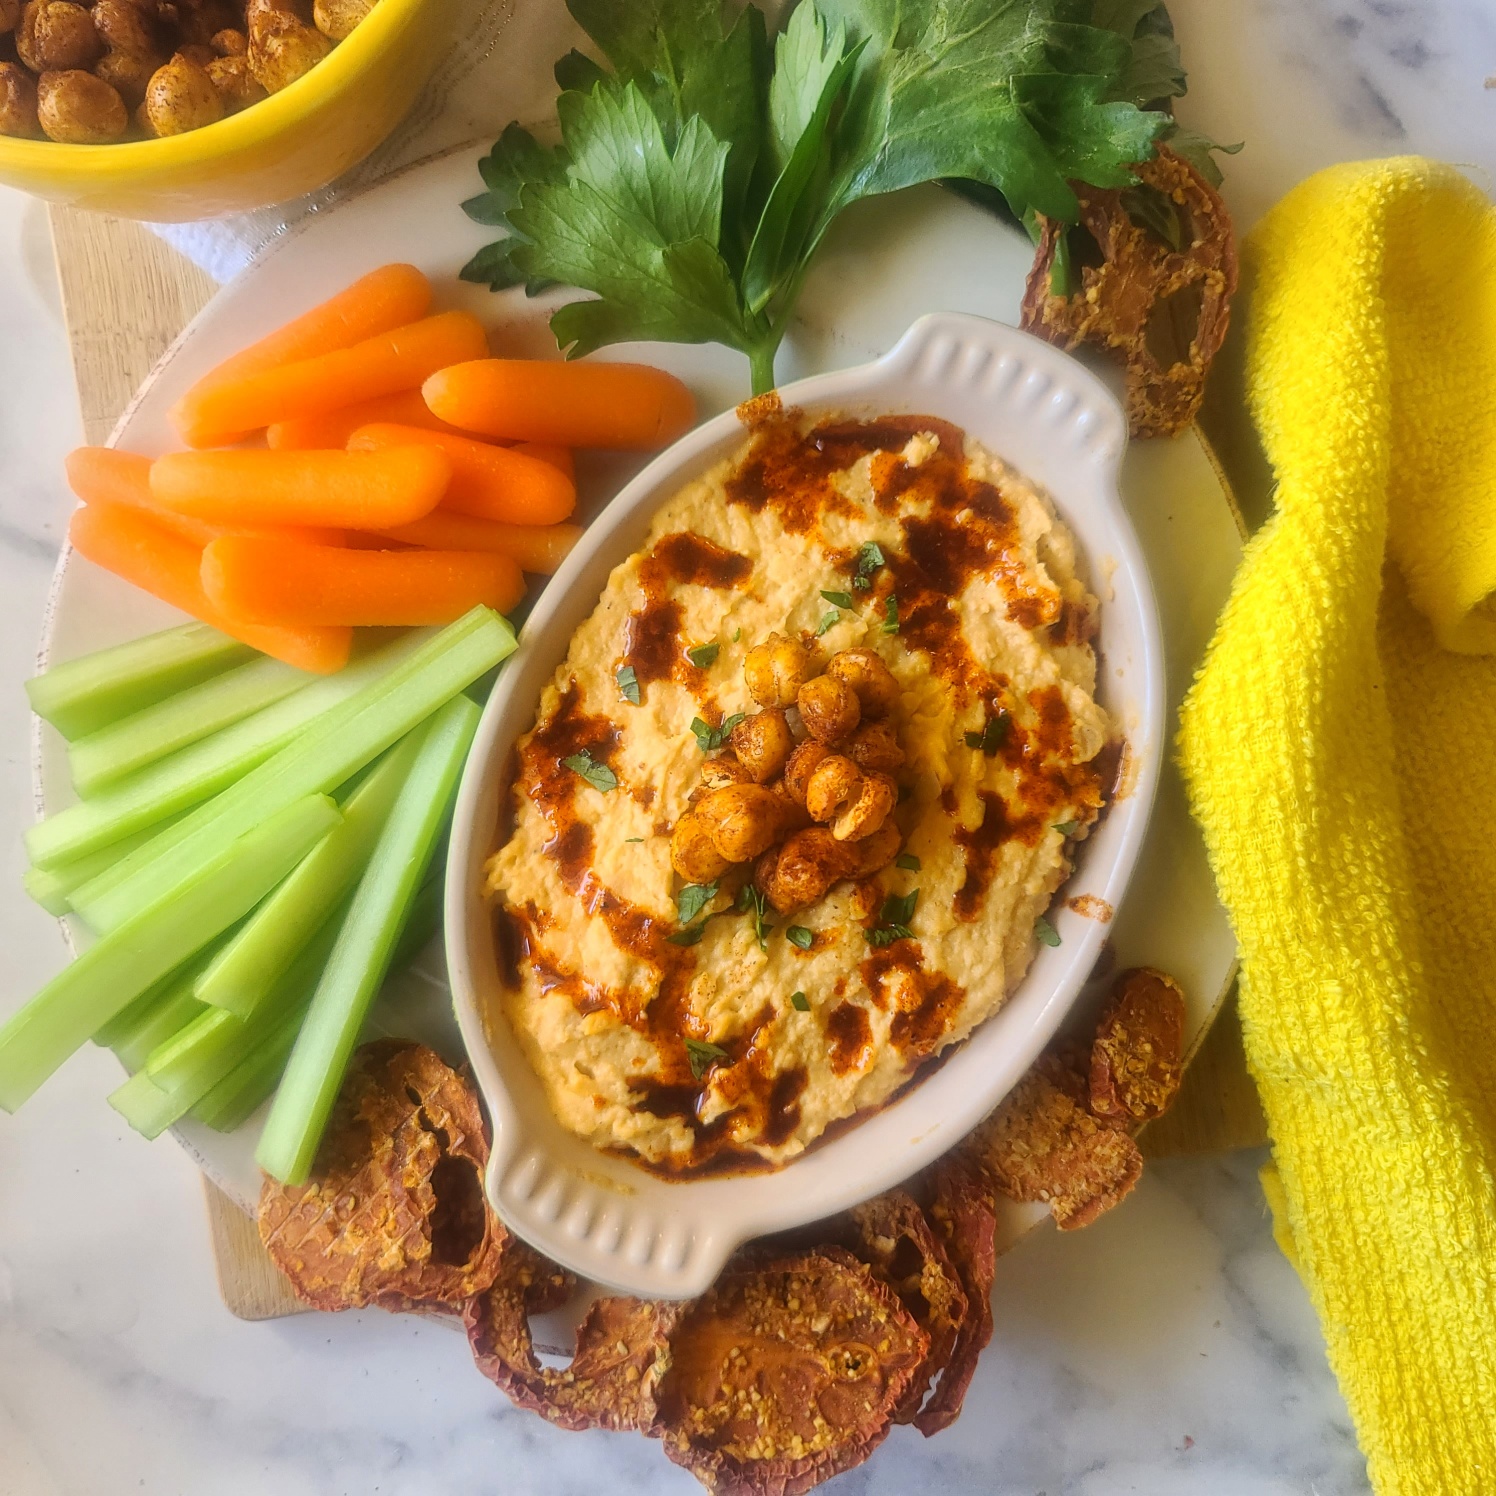
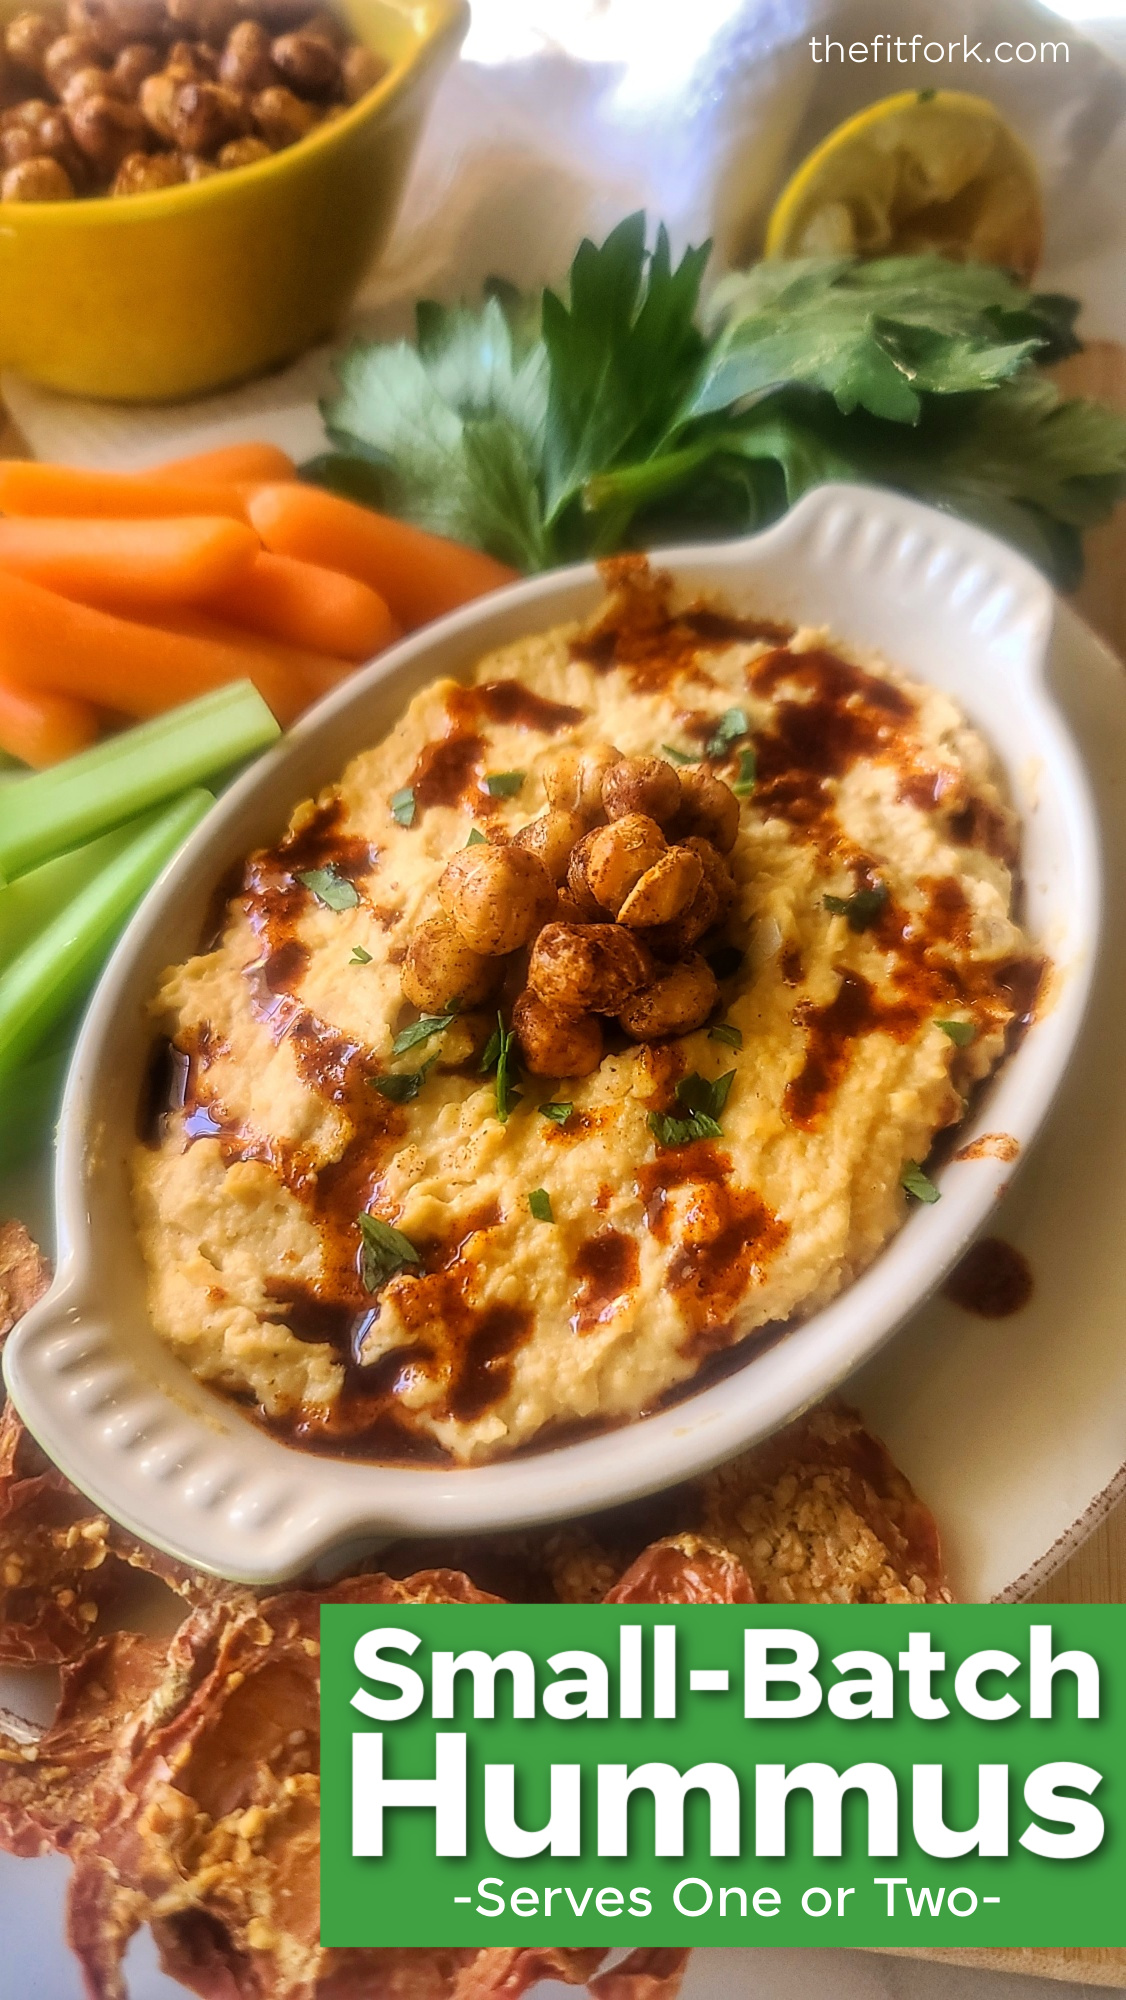
Buying a big tub of hummus can seem like such a commitment, especially if you’re snacking solo or with a just friend or two.  My Small Batch Hummus recipe is perfectly proportioned so that you can finish it off in two sittings (or one snack session if super hungry) – or share it with a buddy and have no leftovers clogging up the fridge!   

Small Batch Hummus - Cooking for One

Exciting News:

This small batch dip (or spread) is featured in my upcoming cookbook, Cooking for One for Dummies (which can be pre-ordered now, ships on March 7, 2023)

Plus, when you make homemade hummus, you’re in total control of the ingredients – there’s no weird preservatives, additives, or yucky stuff.  Plus, you get all the benefits of chickpeas, they are abundant in dietary fiber and also a good source of plant protein, iron, folate and other essential nutrients.

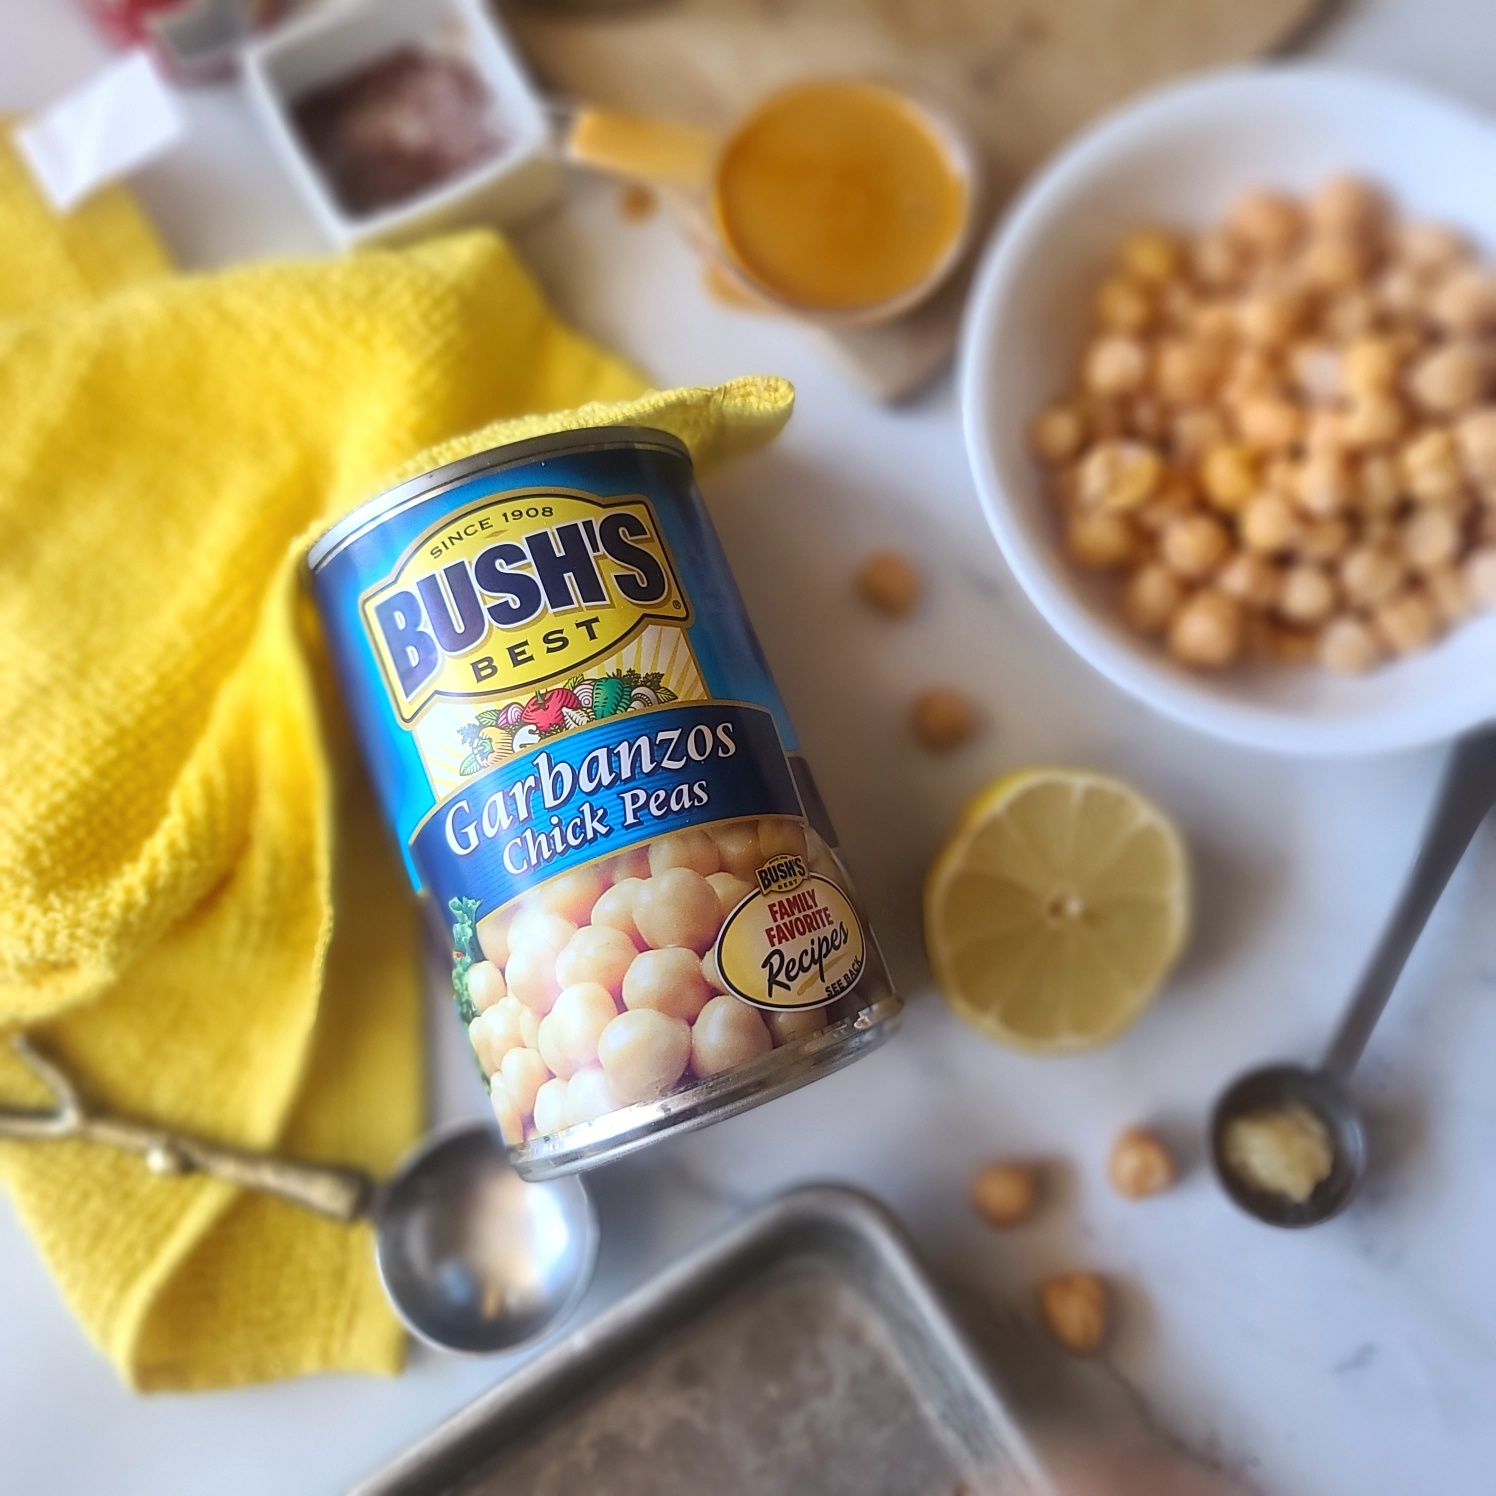
It’s fast, it’s easy, there is no cooking – you start with a can of chickpeas. Of course, you can make your own chickpeas, but that adds a lot of time and hassle to what is an easy-peasy snack recipe for one or two.

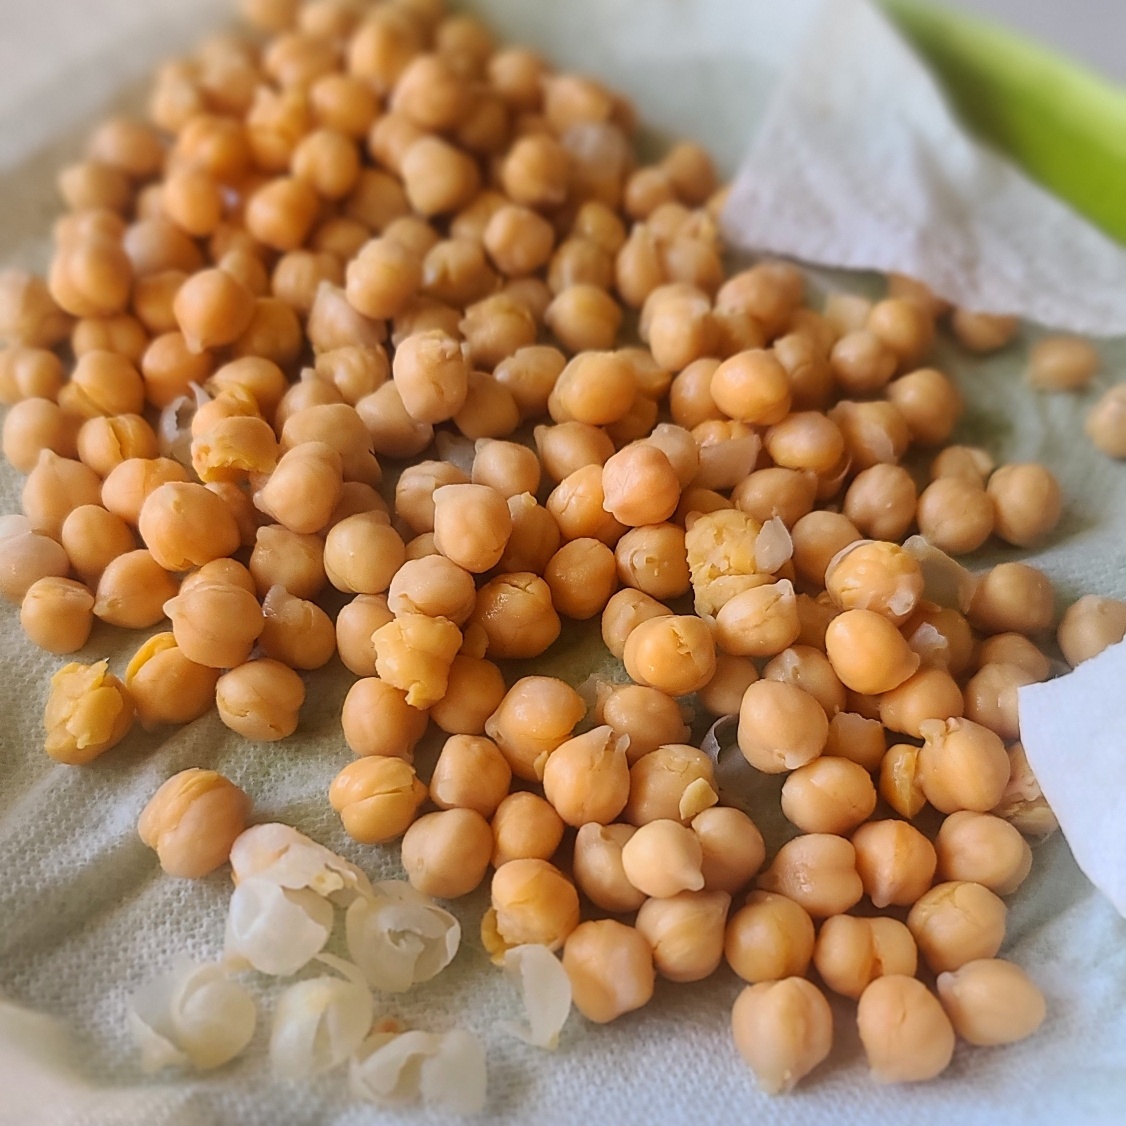
skin on chickpeas
Gently rub any remaining skins off your chickpeas for smoother hummus.

After draining the chickpeas (a legume sometimes referred to as garbanzo beans), pour them out onto a clean dishcloth or paper towels and lightly rub dry. In addition to drying the chickpeas, the other goal here is to remove any lingering skins. The light patting dry will encourage stragglers to fall off, simply pick the skins out and discard. The skins will do no harm if they end up in your hummus, it will just be not quite as smooth and creamy.  

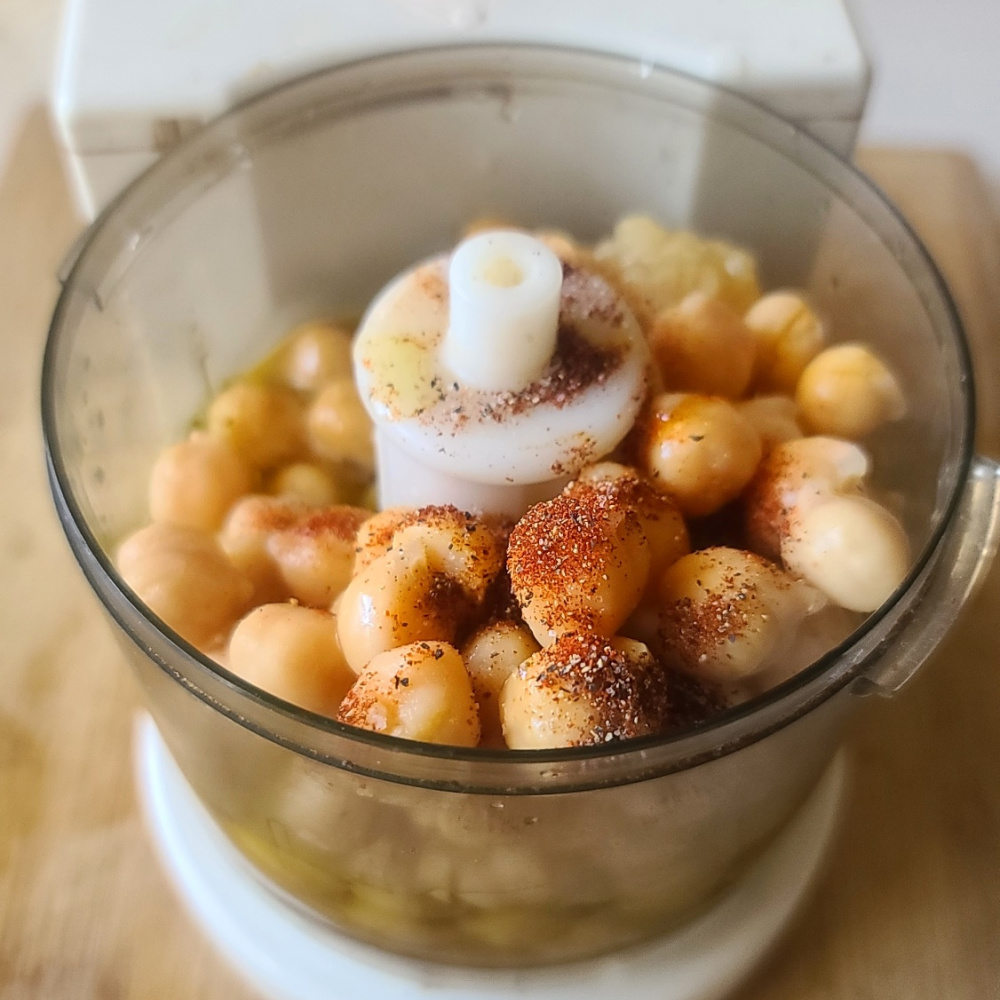
Then, it’s just a matter of whipping everything up in a food processor or blender. Since this is a small batch appetizer recipe, a mini food processor or personal sized blender will work best.

How to Serve Small Batch Hummus

  • Simply paired with raw veggies like carrots, celery, radishes, squash rounds are my favorite way to eat hummus.
  • Serve with pita wedges for dipping, smear on crackers, or spread on slices of toasted baguette.
  • Elevate sandwiches, wraps and quesadillas by spreading around as part of the filling.
  • Get creative and toss with hot pasta or zoodles for an instant chickpea sauce.
Pin this for later!

Leftover Chickpeas in Can? While this homemade hummus for two uses just half a can of chickpeas, don’t throw the remainder out — you have options. First, you could easily double the homemade dip recipe, it scales up beautifully (however, do note the capacity of your mini food processor and use a bigger processor or blender, if needed). I also have another “1/2 can chickpea” recipe — Air-Fryer Crispy Chickpeas for One which also make a fabulous, heathy snack or salad topper.

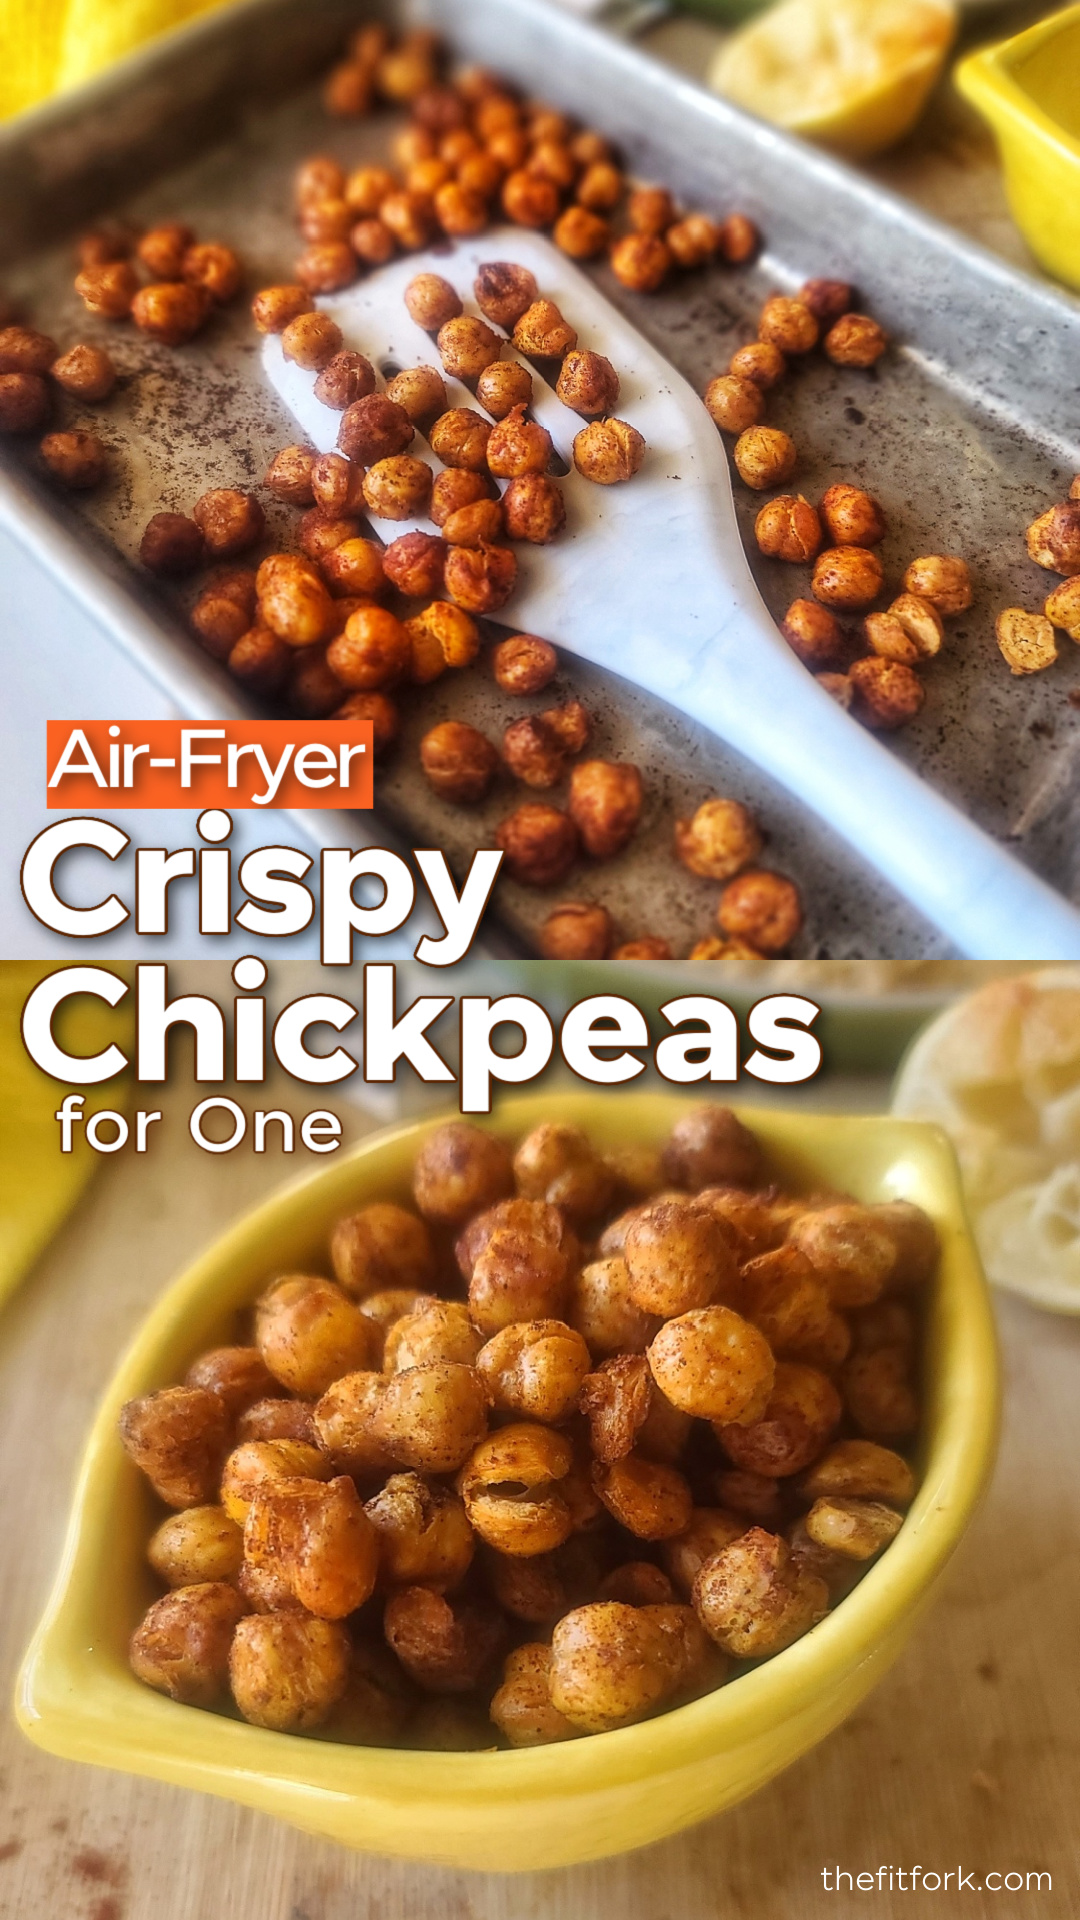
Air Fryer Crispy Chickpeas for One a=is a quick, easy and healthy snack with lots of dietary fiber plus protein, iron, and folate.

Make both the Small Batch Hummus and the Air-Fryer Crispy Chickpeas for Ones and kill off the whole can at once making healthy snacks.

This post contains affiliate links.
5 from 9 votes
Small Batch Hummus - Cooking for One
Small Batch Hummus
Prep Time
5 mins
Total Time
5 mins
 

Make just enough homemade hummus to get your through a couple health snack sessions — or to share with a friend. Easy, healthy, and homemade, a fantastic snack and spread to add to your active lifestyle. Lots of dietary fiber and a good source of plant protein, dietary fiber, iron, folate and other important nutrients.

Course: appetizers, dips, snacks, spreads
Cuisine: Mediterranean
Keyword: appetizer, chickepeas, dip, garbanzo beans, snacks, spread
Servings: 2 servings
Ingredients
  • ¾ cup canned chickpeas drained and rinsed (about half a 15.5-ounce can)
  • 3 tbsp olive oil plus an additional 1 teaspoon for topping, if desired
  • tbsp tahini
  • 1 tbsp lemon juice
  • ½ tsp garlic or garlic paste
  • ¼ teaspoon salt
  • ¼ teaspoon ground black pepper
  • 1/2 teaspoon smoked paprika
Instructions
  1. Place all the ingredients in a personal-sized blender or mini food processor; process until smooth. If the consistency seems too pasty or thick, blend in 1 teaspoon of water at a time until desired texture is achieved.
  2. Transfer the hummus to serving bowl and drizzle with 1 teaspoon of olive oil and a sprinkle of paprika.
Recipe Notes

NOTE: Store the leftovers in an airtight container in fridge for up to 4 days.
VARY IT! Extra chickpeas from can be kept in an airtight container in fridge for a few days and added to salads, soups, and wraps

LEARN MORE! This small batch dip (or spread) is featured in my upcoming cookbook, Cooking for One for Dummies (which can be pre-ordered now, ships on March 7, 2023)

Air Fryer Crispy Chickpeas (for One)

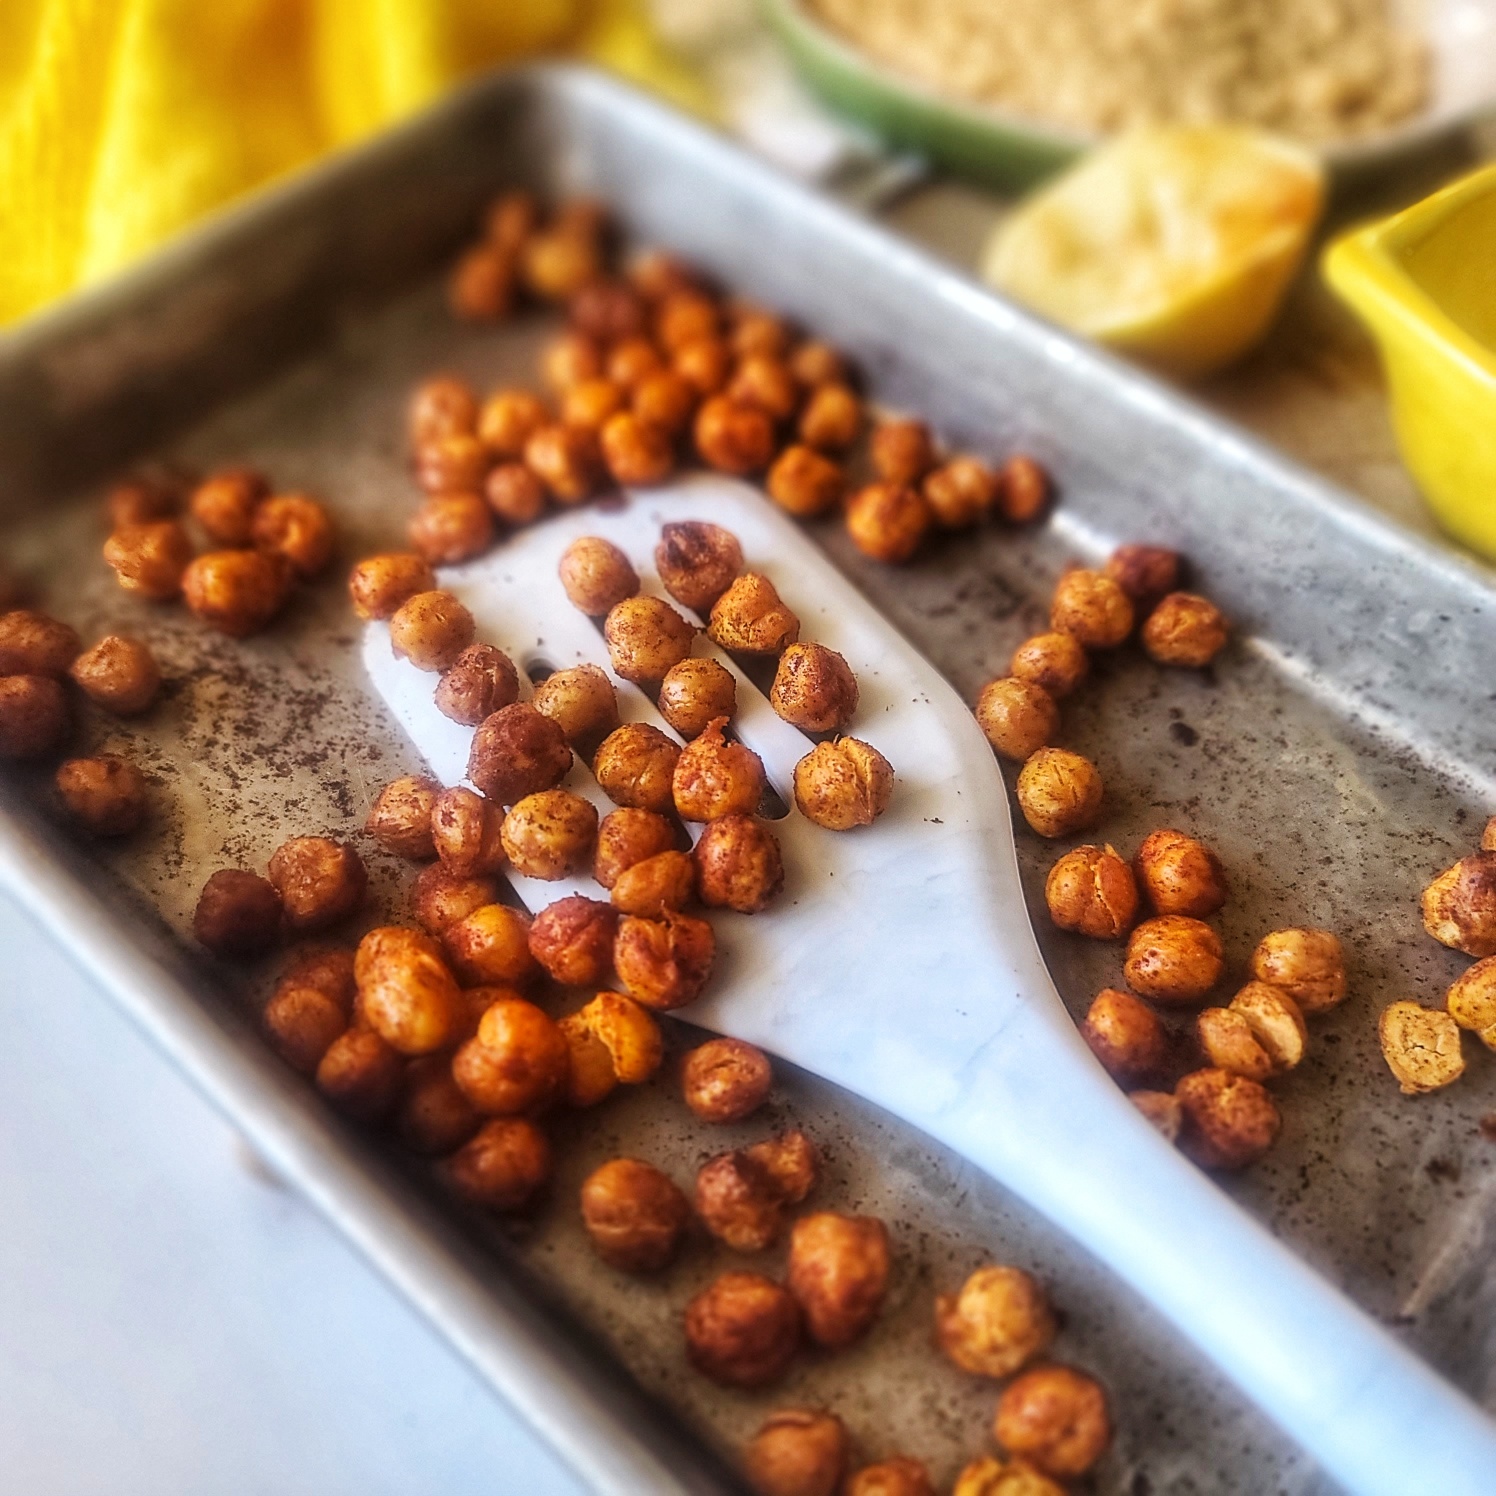
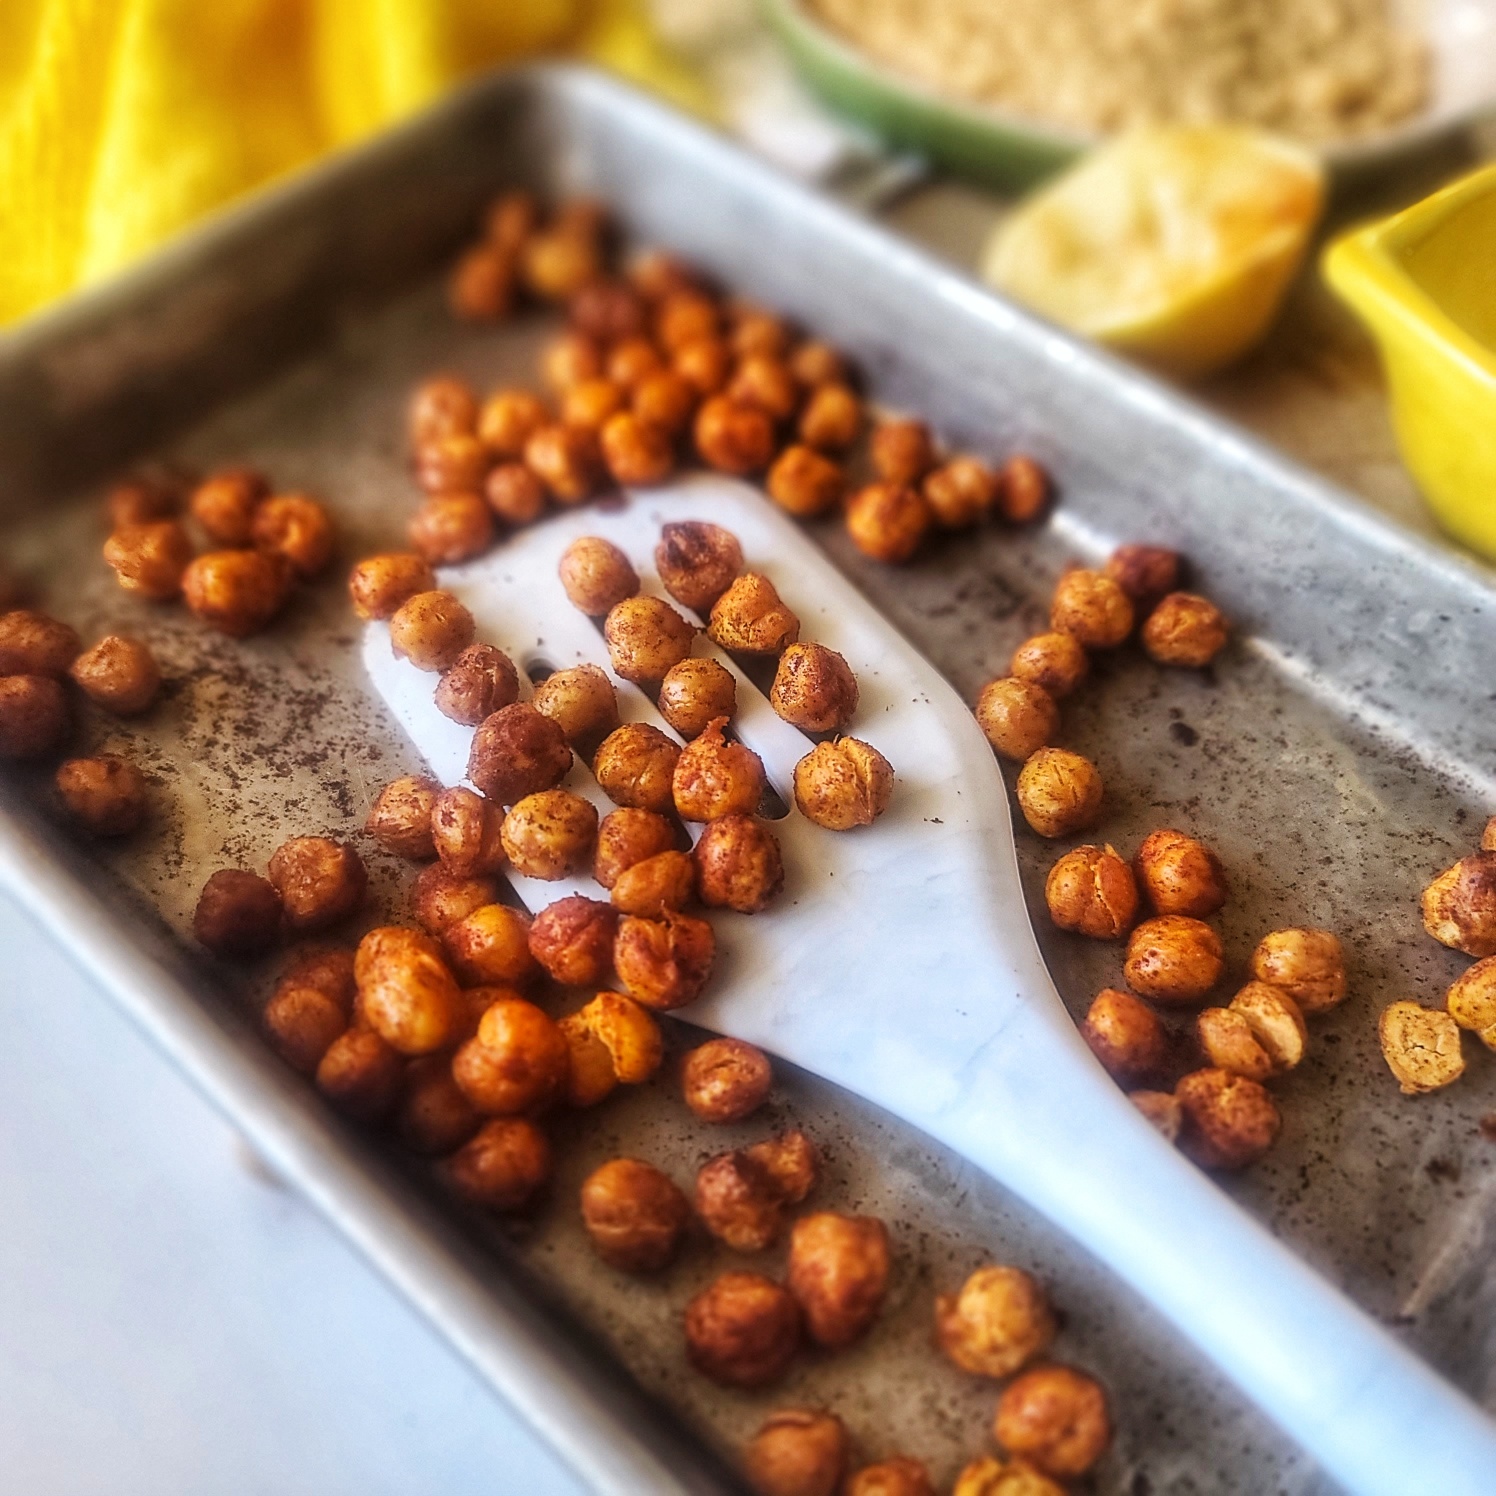
Air Fryer Crispy Chickpeas make snack time a happy time and a healthy experience, especially when that craving for something salty-crunchy hits but are trying to stay away from chips.

If you’re like me, you’ll want to eat theses roasted chickpeas warm, right off the air-fryer and pop the lightly-seasoned, crispy delights into your mouth, one after one! Definitely one of my favorite single-serve snack ideas!

The good news is that unlike typical crunchy snack foods, you control the fats, the sodium, and the flavor. Nothing is processed or yucky, it’s just the goodness of garbanzo beans (the other common name for this legume) simply dressed up with a hint of flavor.  

This quick snack recipe for one makes a single serving (as hinted, lol) and uses ¾ cup of chickpeas (also called garbanzo), about half a can. To use up the other half of the can, check out this Small Batch Hummus recipe (or just easily double the ingredient list for the Air Fryer Crispy Chickpeas below).

PRO TIPS:

Remove skins from chickpeas to help oil & spices adhere.

Remove Skins:  Often canned chickpeas still loosely have their “skins” on. Most fall off during rinsing but any remaining can be removed by patting dry on a paper towel and loosely rubbing around until removed. You CAN eat chickpeas with the skins still hanging on, there is no harm! But removing helps the oil and spices cling onto the legume better in this recipe and for hummus recipes, it creates a smoother outcome.

Oven Option: If you don’t have an air fryer (I LOVE my Omni Pro Plus 18L), the general rule of thumb for crisping up garbanzo beans in the regular oven is to use the same temperature, but double the cooking time (shaking pan around every 10 minutes to promote even cooking).

Seasonings: Instead of smoked paprika, try curry powder, chili powder, Italian seasoning, Everything Bagel spice, or any other spice or blend you can dream up. Even homemade gingerbread spice with a pinch of stevia would make a delicious, unique chickpea snack.

How to Serve: Of course, eating warm off the pan is the obvious way to serve roasted chickpeas! They are also delightful tossed on a salad for extra nutrition and texture. Also try soups (instead of croutons) and as a garnish atop dips (like hummus) or your main entrée (like so yummy with salmon and greens)

How to Store: To maintain crunch, store roasted chickpeas covered at room temperature, for up to a couple days. If desired, pop back into a pre-heated 350F air fyer for 1 to 2 minutes to warm and re-crunch.

This post contains affiliate links.

5 from 5 votes
Air Fryer Crispy Chickpeas for One is a quick, easy and healthy snack with lots of dietary fiber plus protein, iron, and folate. A mindful way to satisfy that salty-crunchy craving when trying to stay away from chips and processed foods.
Air Fryer Crispy Chickpeas for One
Prep Time
5 mins
Cook Time
15 mins
Total Time
20 mins
 

Crunchy, crispy and addictive! This fun and easy-to-make snack offers lots of dietary fiber and also is a good source of plant protein, iron, folate and other essential nutrients. Note: If you want to use up the entire can 15-ish ounce can of chickpeas, just double the recipe!

Course: Snack
Cuisine: healthy, Indian, Mediterranean
Keyword: air fryer, chickpeas, garbanzo beans, legumes
Servings: 1 serving
Ingredients
  • ¾ cup canned chickpeas about half a 15.5-ounce can
  • 2 tsp olive oil
  • 1/2 tsp lemon juice
  • 1/8 teaspoon salt
  • ¼ teaspoon ground black pepper
  • ½ teaspoon smoked paprika
Instructions
  1. Pre-heat air fryer to 390 F degrees.
  2. Drain and rinse chickpeas.
  3. Pour out on paper towel and dry, gently rubbing to release any skins; discard skins.
  4. Add chickpeas to small bowl and drizzle on olive oil and lemon juice, stirring to coat evenly.
  5. Sprinkle with salt, pepper, and smoked paprika and stir around to adhere to chickpeas.
  6. Pour chickpeas out on rimmed baking sheet that fits in air fryer.
  7. Stick in preheated air fryer for about 15 minutes, stopping to shake around once halfway through. Chickpeas should be toasted and crunchy when finished. IF needed (because air fryer models vary in heating), cook for another 2 to 4 minutes.

  8. Remove and let cook a couple minutes before eating. Store leftovers in air-tight container at room temperature, for up to 3 days. If desired, you can warm up in air fryer preheated to 350 for 1 to 2 minutes.

  9. Note: For a conventional oven, cook at 390-400F degrees for 30 minutes, or until golden brown and crispy, stirring up every 10 minutes.

Recipe Notes

“Breakfast at Midnight” Brunch Charcuterie Board for New Year’s Eve

This post is sponsored by Wildgrain.

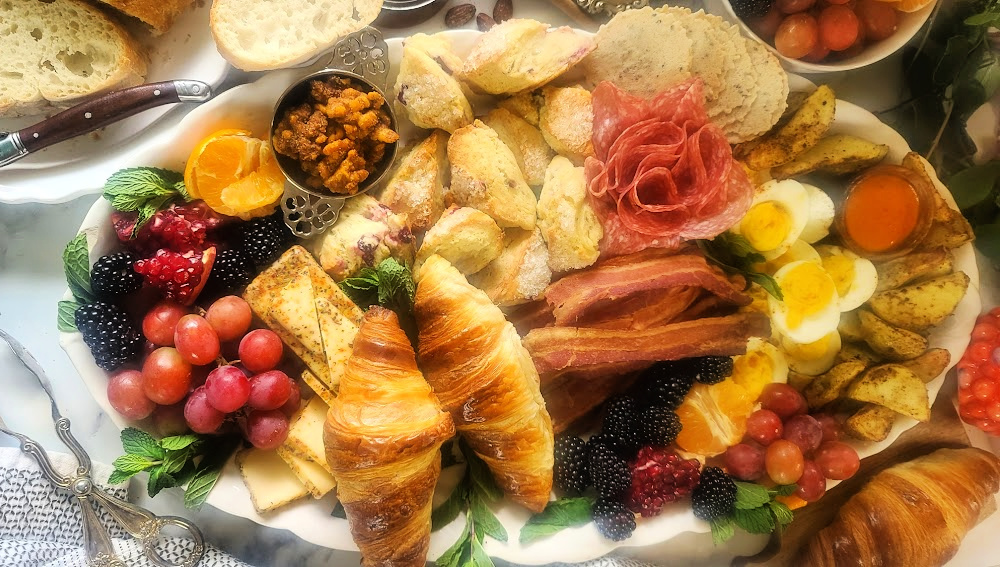
My goal for 2023 is to “Eat More Brunch” . . . and I’m starting now with this “Breakfast at Midnight” snacking board. It’s so perfect for our stay-at-home New Year’s Eve celebration. I’m not a fan of going out on this crazy night and would rather stay at home in my PJs and eat my favorite foods – and a breakfast grazing board pretty much covers all the favorite comfort food bases!

With help from Wildgrain Box (more details below), I made this gorgeous grazing board overflowing with beautiful brunch and breakfast trimmings. To balance my board nutritionally, I like to offer an array of nibbles and noshes.

This is a must make for your breakfast and brunch celebration. – or anytime of day!

Ideas for Your Breakfast or Brunch Charcuterie Tray

Eggs: Deviled eggs, sous-vide egg bites, slices of quiche, egg salad, or simple slices of hard-boiled egg.

Meats: Bacon, breakfast sausages, chunks of steak, and traditional charcuterie meats such as salami, prosciutto and summer sausage.

Cheese: Your favorite cheese cut in “cracker stacker” form, along mini wedges of bold cheese like blue cheese, and spreadable cheese and even a ooey-gooey baked brie.

Seasonal Fruit:  All the beautiful fruits you love, avocados and tomatoes too for sandwich building. 

Dried Fruits and Nuts

Butter, Honey, Jams, Spreads

Artisan Breads, Pastries, Crackers: Sourdough sliced for breakfast sandwich making, biscuits, pastries, donut holes, muffins, crackers and more!  I even added homemade cottage fries with this brunch board.

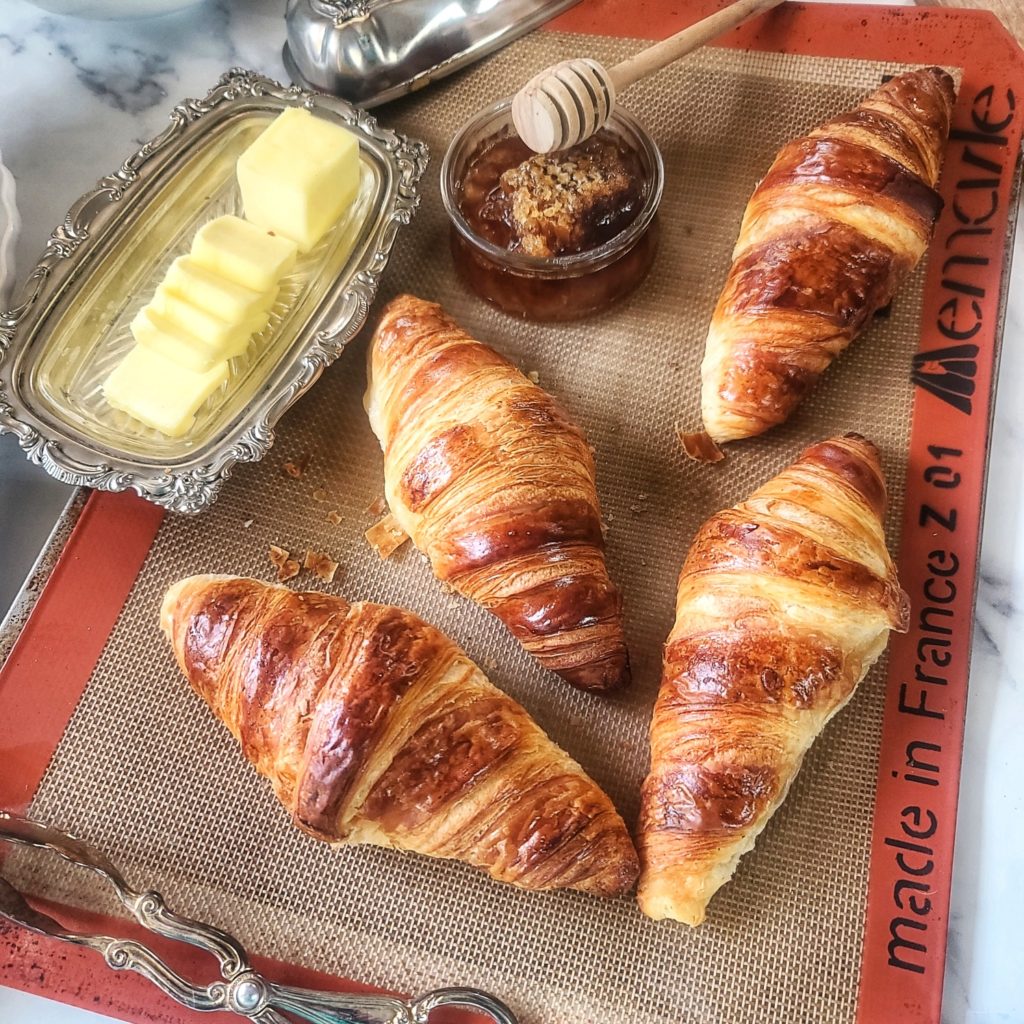
Croissants from Wildgrain are magnifique! For a limited time, new orders get a FREE 4-pack with each shipment for life.


When it comes to artisan breads and pastries, I’ll admit right here and now – I’m NOT a scratch baker (those croissants above would literally take ALL DAY from scratch, but only 18-22 minutes the Wildgrain way)!  Wildgrain Box to sends me other baking championship-worthy items – and no one is the wiser!  Wildgrain is an amazing subscription box that sends artisanal pastas, breads and pastries to my home that are frozen and ready to prepare in no more than 25 minutes!  

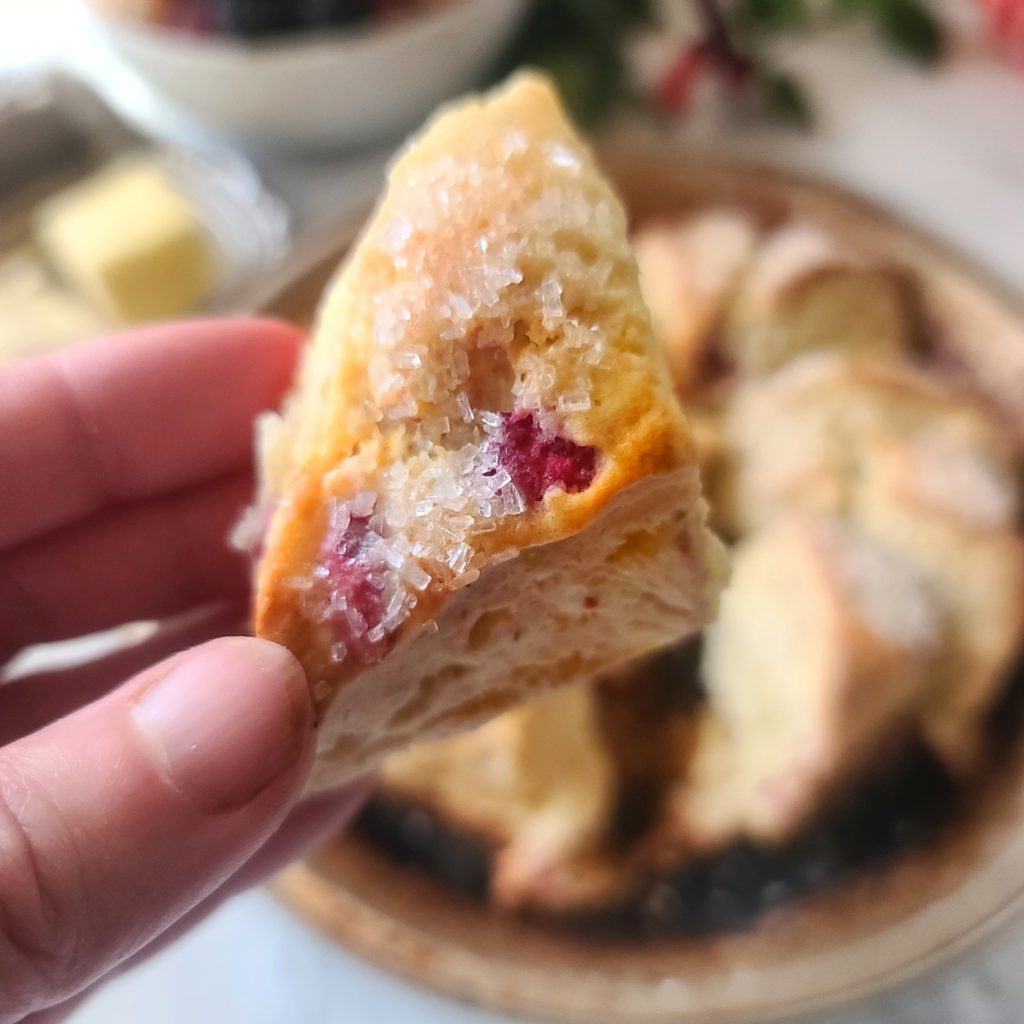
I transformed my Cranberry Orange Biscuits from Wildgrain into look-alike baby scones by cutting in half diagonally, giving an egg wash on top, and sprinkling with sugar crystals.

All the labor-intensive work has been done for me thanks to Wildgrain Box. The dough has been hand-prepped, the breads have been proofed, and the pastries given extra TLC. This means I save a ton of time and no extra mess is made at my house, lol!  I also appreciate that Wildgrain use clean, non-GMO ingredients and their fermentation process provides benefits you won’t find at the grocery store. Items are always shipped free in and eco-friendly box and recyclable stay-cold packaging. They also support small bakeries and responsible source products from some of the best bread and pasta makers in existence. With each bite, I can taste the talent and love these yummy delights.

BTW, you can save $10 on your first order with code THEFITFORK. Every month (pause or cancel at any time), I get a frozen shipment of tender pastas, artisan breads and pastries delivered to my door. 

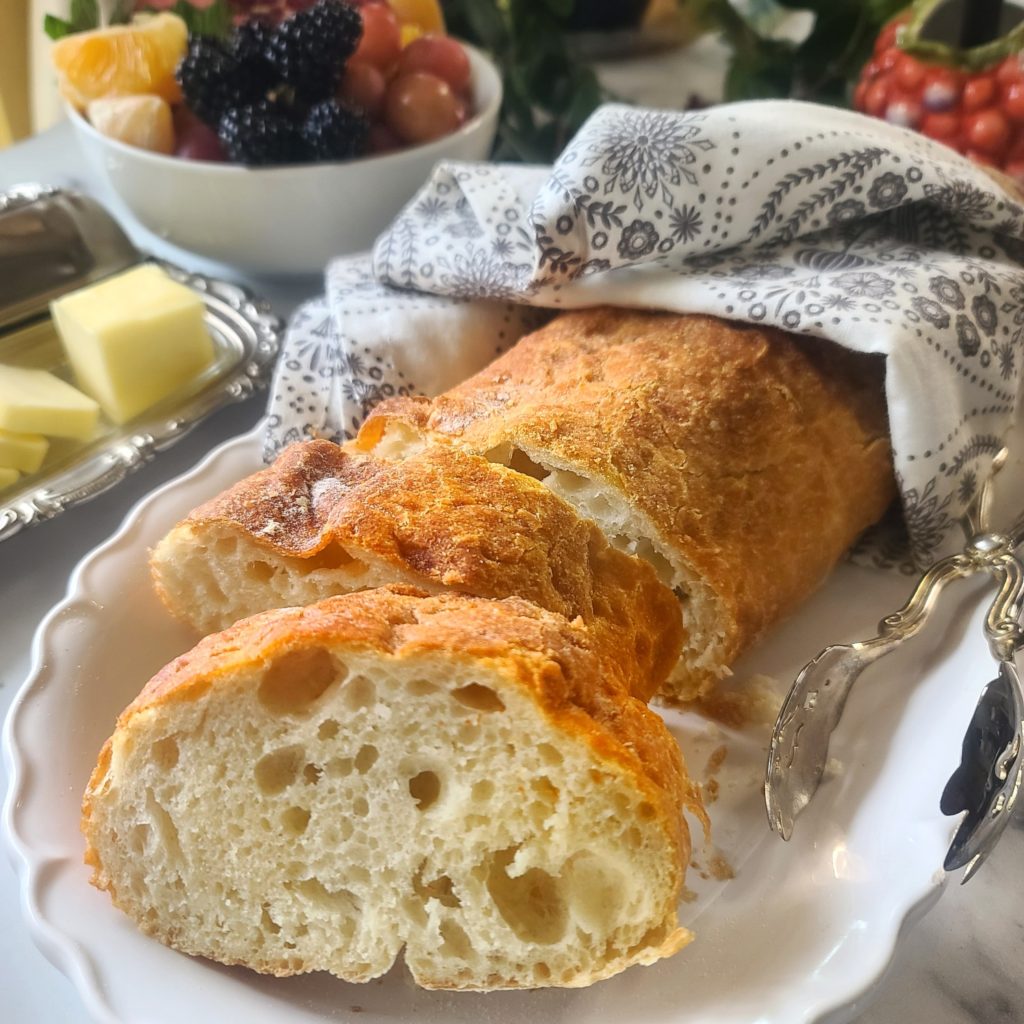
Slow-fermented Olive Oil Ciabatta from Wildgrain is a winner with any meal. I sliced it up to use for breakfast sammies on my brunch board.

For New Year’s Eve . . . and beyond, keep Wildgrain in mind as your secret shortcut. One of my quick and east dinner solutions throughout the year (and to support my carb loading for longs runs, haha) are the artisan pastas from Wildgrain.  These fresh hand-cut pastas taste oh-so “old world,” yet only need to be plopped into boiling water for mere minutes. Add a sauce, some veggies, a protein – and boom-bam, it’s a nutritious meal in under 30 minutes!  

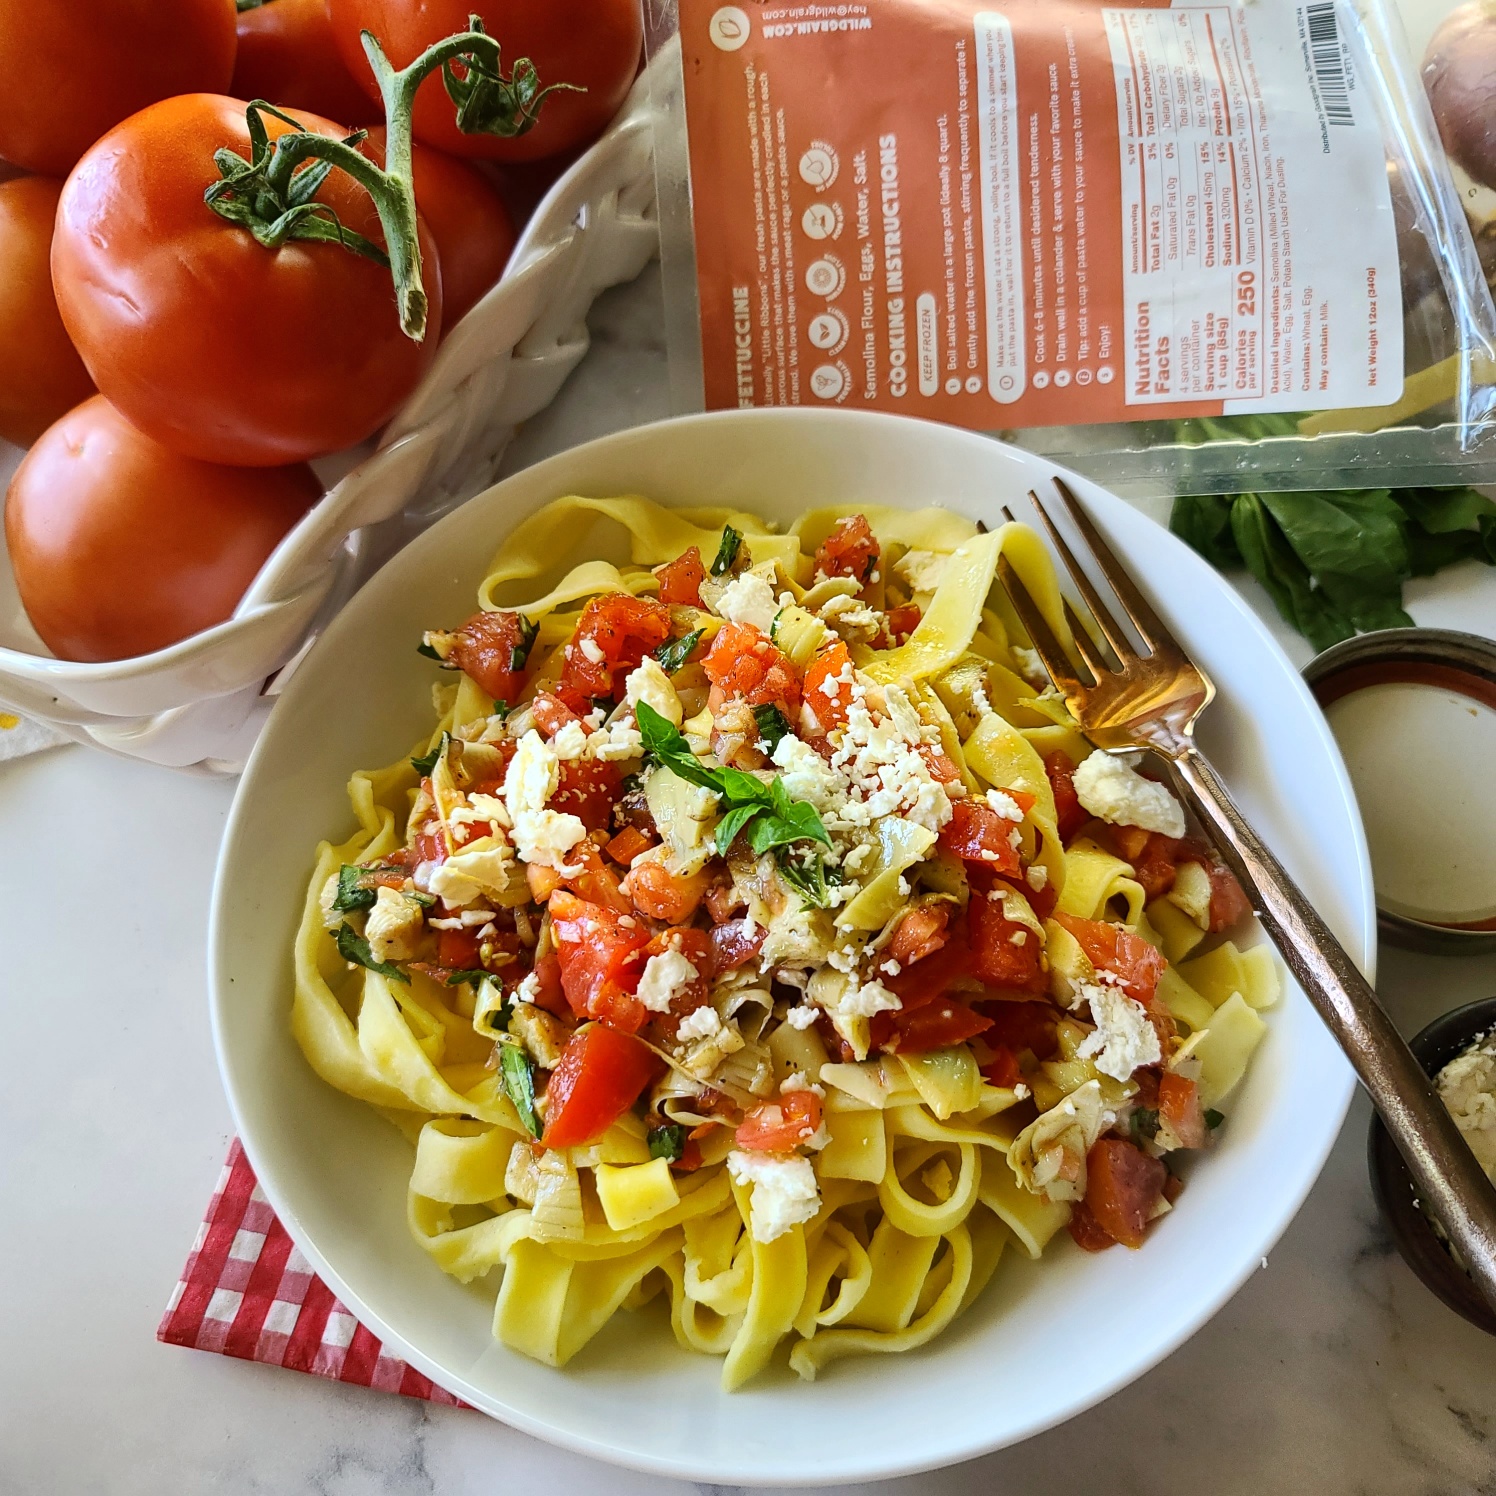
This No Cook Artichoke Fettuccini using Hand Cut Pasta from Wildgrain  is a quick and easy meal to incorporated into your healthy new year!

Whip up a fresh fit meal in minutes with this easy, no-cook pasta sauce that features tomatoes, marinated artichokes, garlic and feta cheese - plus a little EVOO. It's tossed with hot noodles that warms it up! A delicious summer dinner! Used pasta from the Wildgrain subscription box, save $30 with code THEFITFORK at http://bit.ly/Wildgrain
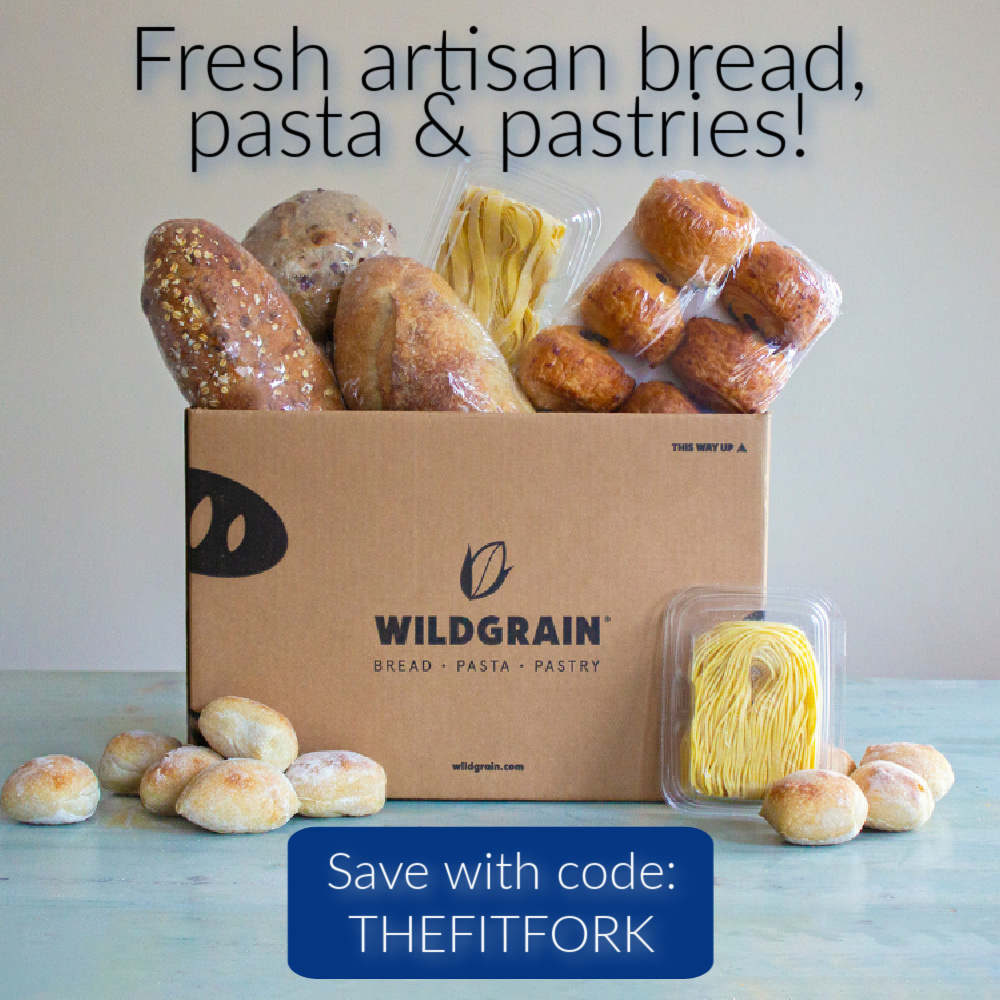
Artisan bread, pastas and pastries in the the Wildgrain subscription box, save $30 with code THEFITFORK at http://bit.ly/Wildgrain

SNEAK PEEK: 

 January 2023 Wildgrain Mixed Box

  • Plain Sourdough Load
  • Cranberry Pecan Sourdough Loaf
  • Spelt Sourdough Loaf
  • Fettuccine Pasta
  • Tonnarelli Pasta
  • Giant Chocolate Chunk Cookes
  • + Free Croissants

 January 2023 Bakery Box: 

  • Plain Sourdough Loaf
  • Cranberry Pecan Sourdough Loaf
  • Spelt Sourdough Loaf
  • English Muffins
  • Slow-Fermented Brioche Rolls (likely but not confirmed)
  • Giant Chocolate Chunk Cookes
  • + Free Croissants

Oh yeah, did I mention that every subscription of a Wildgrain Bread Box started now through January gets a free 4-pack of croissants sent with EVERY box shipment for LIFE. There are no words to describe how good they are! Remember to use my Wildgrain coupon code to save $10 — THEFITFORK

Rustic Mushroom Bacon Blue Cheese Tart with Garlic-Thyme Pastry “Leaves”

This post is sponsored by Wick’s Pies.

Autumn is here, the cozy yet bold flavors are dropping faster than the leaves from a tree! Like this Rustic Mushroom Bacon Blue Tart (with Garlic-Thyme Pastry “Leaves”), an autumn-inspired, delightfully delicious meal that comes together conveniently thanks to frozen pie crusts from Wick’s Pies.

So bold and beautiful, this mushroom blue cheese tart is filled with flavor and easy to make thanks to a frozen pie crust! Sever with a green salad for a brunch or light dinner -- or as an appetizer for your fall-season party!

Eating pie for dinner is where it’s at! This is one of the best savory tarts I have ever made and is brimming with mushrooms, leeks, bacon and fresh herbs on a bold layer of creamy blue cheese.

Oh, and the crust! Let’s talk about the crust! Delicate, tender, flakey yet oh-so convenient! It’s a frozen pie crust from Wick’s Pies. I am NOT a pastry chef, and having the time and skill to make a pie crust worthy to envelope all the delicious ingredients in this mushroom tart stresses me out!

A glimpse at how easy this “use a froze pie crust” recipe actually is!

Using a frozen (and thawed) 8” Raw Circle of rolled out dough from Wick’s Pie, make my life so much easier – and I can spend my culinary talents focusing on the fillings and overall flavor of my tart rather than worrying about a dry, soggy, or otherwise lackluster crust.

So bold and beautiful, this mushroom blue cheese tart is filled with flavor and easy to make thanks to a frozen pie crust! Sever with a green salad for a brunch or light dinner -- or as an appetizer for your fall-season party!
Fold up the sides, easy-peasy – you can’t make a mistake!

Also, I making a “rustic” tart, NOT in a pie pan with fancy lattice work, pinching or braiding also makes easy savory tart recipe a winner. Just put fillings in the middle, leaving about a 1-inch border, and then fold up the edges to secure. This mushroom pie CAN’T be messed up and any imperfections in executing the crust “fold up” just adds to the rustic, country charm.

So bold and beautiful, this mushroom blue cheese tart is filled with flavor and easy to make thanks to a frozen pie crust! Sever with a green salad for a brunch or light dinner -- or as an appetizer for your fall-season party!

Because I’m so addicted to this delicious, tender convenience pie crust, I decided to use a leaf-shaped cookie cutter to make extra savory pie-crust pastries. You can NEVER have too much crust, am I right?! I simply sprinkled these pie dough cut outs with garlic salt and pressed in a bit of fresh thyme decoratively. Feeling so fancy serving this casual yet pretty darnclassy meal to my mom and dad this weekend!

So bold and beautiful, this mushroom blue cheese tart is filled with flavor and easy to make thanks to a frozen pie crust! Sever with a green salad for a brunch or light dinner -- or as an appetizer for your fall-season party!
Use a cookie cutter to punch out your favorite shape and sprinkle with garlic salt!

Mushroom Tart Pro Tips:

After sautéing mushrooms, slightly tilt pan to pool up excess liquid and mop off with a paper towel. This will prevent the crust from getting soggy.

Don’t skip the egg wash step in the recipe, this helps the crust turn a beautiful golden brown with a nice gloss.

If you are not a blue cheese fan, you can substitute another type of cheese (maybe crumbled Feta or even grated sharp white cheddar) instead.

I like to use a vented pizza pan, I think it keeps the crust crispier and flaker.

Check out Wick’s Pies wholesaler page for the source of the 8” Raw Circles used in my recipe . . . or you can also order whole pies of the dessert type to be delivered to your door– what a fabulous way to minimize upcoming holiday entertaining stress!

  1. Website: https://www.wickspies.com/
  2. Facebook: https://www.facebook.com/WicksPies
  3. Instagram: https://www.instagram.com/wickspies/
  4. Twitter: https://twitter.com/WicksPies

Learn more about Wicks Pies!

o bold and beautiful, this mushroom blue cheese tart is filled with flavor and easy to make thanks to a frozen pie crust! Sever with a green salad for a brunch or light dinner -- or as an appetizer for your fall-season party!
Pin this for later!
5 from 3 votes
o bold and beautiful, this mushroom blue cheese tart is filled with flavor and easy to make thanks to a frozen pie crust! Sever with a green salad for a brunch or light dinner -- or as an appetizer for your fall-season party!
Rustic Mushroom Bacon Blue Cheese Tart with Garlic-Thyme Pastry “Leaves”
Prep Time
10 mins
Cook Time
36 mins
Total Time
35 mins
 

So bold and beautiful, filled with flavor and easy to make thanks to a frozen pie crust! Sever with a green salad for a brunch or light dinner — or as an appetizer for your fall-season party!

Course: Appetizer, brunch, dinner
Cuisine: American, country, French
Keyword: bacon, blue cheese, mushroom, pie crust, tart
Servings: 4 servings
Ingredients
  • 4- ounce bacon
  • 10 ounces mushrooms of choice I used Cremini and White Button
  • 1 cup sliced leeks whites and light greens
  • 1/4 teaspoon black pepper
  • ¼ teaspoon sea salt
  • 4 ounces cream cheese softened
  • 2 ounces blue cheese crumbled
  • 1 teaspoon fresh thyme leaves plus extra for garnish and crust “leaves”
  • 1 whisked egg for wash
  • ½ teaspoon garlic salt
  • 2 frozen Wick’s Pie crusts, thawed 1 for tart, 1 for extra crust “leaves” (optional
Instructions
  1. Heat 12-inch stainless steel skillet over medium-high and cook bacon for several minutes each side, until browning and crispy. Remove to paper towel-lined plate to drain, reserving about 1 tablespoon bacon fat in pan (discarding the rest).
  2. Add sliced leeks to pan, and sauté for 2 minutes and then add mushrooms and continue to cook for a 4 to 5 more minutes until softened and liquid released. Season with salt and pepper. Remove from heat and slightly tilt pan to pool up any remaining mushroom liquid and carefully pour off or sop up with paper towel. This will help prevent tart from getting soggy.
  3. Preheat oven to 400F.
  4. Allow mushroom mixture to cool for a few minutes. Meanwhile, make cheese filling by coarsely mashing together 2 ounces of crumbled blue cheese with 4 ounces cream cheese.
  5. Place thawed Wick’s Pie crust on a baking sheet (I prefer a vented pizza pan), coated with non-stick spray.

  6. Using spatula, spread on cheese mixture eaving a 1” border. Next pile on mushroom mixture over cheese and lightly pat down.

  7. Fold up edges of pie crust “rustically,” pinching excesses in the folds together as needed. Brush exposed edges of pie crust with egg wash.
  8. Top with crumbled bacon.
  9. Bake at 400F for 25 minutes or until crust golden and cheese bubbling.

  10. Once you stick tart in oven, start preparing the optional garlic-thyme “leaves” which will bake in the same oven as the tart for the last 5 to 6 minutes of baking.

  11. Spread thawed Wick’s crust on a baking sheet and sprinkle with garlic salt. Use leaf shaped cookie cutter (or other cutter design of choice) to make impressions that cut through – slightly wiggle the cut crust from them, but leave on the pan to cook as “extra” snacking material for later! Press on some of the fresh thyme into to dough decoratively. Bake at 400F for 5 to 6 minutes or until golden. Remove to cool on pan for 5 minutes before handling.
  12. Serve garlic-thyme leaves alongside the tart, if desired (making the leaves is an optional step).

Veggie & Labne Pizza with Pull-Apart Crust

This post is sponsored by Karoun Dairies as part of a blogger recipe contest.

Treat yourself to pizza night, but don’t you dare resort to frozen or consider take out.! That’s because I have something even easier and so much better — My Veggie & Labne Pizza with Pull-Apart Crust.


Veggie & Labne Pizza with Pull-Apart Crust is a quick and easy dinner or appetizer solution that is ready in less than 30 minutes. The no-rise, three-ingredient crust features labne, a creamy kefir cheese, that keeps the quick crust tender yet crispy. Try the genius tip to make a “pull apart” crust so no pizza cutter or knife required. Top with your favorite veggies.  So fun for a quick dinner or appetizer to share.

Ready in just about 30 minutes (can delivery beat that?!), this simple pizza for two (or one, if you’re real hungry) even features a homemade crust!

So much to say about this homemade crust. In need no rising, you just mix together three simple ingredients including flour (can swap in a gluten-free flour blend in needed), baking powder and labne (a thick, creamy, tangy kefir cheese resembling Greek yogurt, my opinion).  The labne helps keep the 3 ingredient crust delicious and tender on the inside, but crispy on the outside.

The flour-labne mixture will be a little crumbly, just ditch you spatula after a while and knead it together with your hands. Then, THIS IS NEAT, instead of doing a traditional crust rolled out and pinched up around the edges, make a pull-apart crust so that you (or you and a friend) can pull off a little pizza nibble at a time.

Labne Mediterranean style Kefir cheese from Karoun Dairies makes is the star in this three-ingredient, no-rise crust.

To do this, the big pizza dough ball is formed into smaller (about 1”) dough balls. This recipe yielded about 18 dough balls for me, but it doesn’t have to be a precise science. Those little balls are pressed down onto the pan (a 9” to 10” pan) until flattened into about ¼” thickness and the edges mostly meet. There may be a few places were a tiny bit of pan peeks through edge-to edge, that’s okay!

Labne Mediterranean style Kefir cheese from Karoun Dairies makes is the star in this three-ingredient, no-rise crust.

After the dough balls are pressed into the pan, top with cheese and veggies. Also, to make this pizza next level delicious and creamy, I like to dollop up to 1/2 cup more Labne Mediterranean Kefir Cheese. Then maybe a little more shredded cheese, because can you really have too much cheese on a pizza?!

Bake for about 15-20 minutes, top with extra garnishes as desired, and enjoy! You don’t even need a knife or pizza cutter to enjoy this pull-apart crust pizza recipe.  Just grab the edge and give a little tug and you will be rewarded with a bite-sized morsel of creamy, cheesy, veggie loaded goodness. I love a labne pizza!


Veggie & Labne Pizza with Pull-Apart Crust is a quick and easy dinner or appetizer solution that is ready in less than 30 minutes. The no-rise, three-ingredient crust features labne, a creamy kefir cheese, that keeps the quick crust tender yet crispy. Try the genius tip to make a “pull apart” crust so no pizza cutter or knife required. Top with your favorite veggies.  So fun for a quick dinner or appetizer to share.

I’m so glad I found this Labne Mediterranean kefir cheese. In the past I’ve made a similar crust with plain yogurt, but I don’t think it turned out as tender and satisfying.  


Veggie & Labne Pizza with Pull-Apart Crust is a quick and easy dinner or appetizer solution that is ready in less than 30 minutes. The no-rise, three-ingredient crust features labne, a creamy kefir cheese, that keeps the quick crust tender yet crispy. Try the genius tip to make a “pull apart” crust so no pizza cutter or knife required. Top with your favorite veggies.  So fun for a quick dinner or appetizer to share.
Pin this for later!

 Since this may be a new type of cheese to you, let me tell you more about it. Labne Mediterranean Kefir Cheese from Karoun Dairies is a centuries-old, Mediterranean-style spreadable kefir. The taste is distinctively tangy, but pleasing! It’s smoother and thicker than yogurt and reminds me of a cross between Greek yogurt and cream cheese – oh my, so good and creamy!  It’s lower in fat than cream cheese and makes great alternative for a healthy lifestyle. Plus you also benefit from live probiotic cultures in every spoonful.

Visit Karoun Cheese to learn more or check them out on Facebook, Instagram, and Twitter for the latest news and recipes! #karoun, #karoundairies, #karounlabne, #labne

5 from 4 votes
Veggie & Labne Pizza with Pull-Apart Crust is a quick and easy dinner or appetizer solution that is ready in less than 30 minutes. The no-rise, three-ingredient crust features labne, a creamy kefir cheese, that keeps the quick crust tender yet crispy. Try the genius tip to make a “pull apart” crust so no pizza cutter or knife required. Top with your favorite veggies. So fun for a quick dinner or appetizer to share.
Veggie & Labne Pizza with Pull-Apart Crust
Prep Time
10 mins
Cook Time
12 mins
Total Time
22 mins
 

 Veggie & Labne Pizza with Pull-Apart Crust is a quickand easy dinner or appetizer solution that is ready in less than 30 minutes. Theno-rise, three-ingredient crust features labne, a creamy kefir cheese, thatkeeps the quick crust tender yet crispy. Try the genius tip to make a “pullapart” crust so no pizza cutter or knife required. Top with your favorite veggies. So fun for a quick dinner or appetizerto share.

Course: Appetizer, dinner, dinner, entree, pizza, starter
Cuisine: Italian, Mediterranean
Keyword: appetizer, blue cheese, labne, pizza
Servings: 2
Ingredients
  • ½ cup Karoun Mediterranean-style Labne Kefir cheese
  • 1 ½ teaspoons of baking powder
  • 1 cup flour or gluten-free flour baking blend
  • ¼ teaspoon garlic salt
  • 3/4 cup shredded mozzarella divided
  • 1/2 cup Karoun Mediterranean-style Labne Kefir cheese
  • 1/2 cup sliced mushrooms
  • 1/2 cup shredded spinach
  • ¼ cup red onion slices
  • ¼ cup chopped tomato
Instructions
  1. Preheat oven to 400F.
  2. In medium bowl, mix together Labne, baking powder and flour with spoon. Will be crumbly, then use hands to knead it together into a cohesive dough ball.
  3. Pinch of 1-inch dough balls (I got approximately 18) and place on a 9-inch to 10-inch pizza pan.
  4. Press balls down with fingers until flattened and edges mostly touching. It’s okay if there are a few spots of pan showing through.
  5. Sprinkle dough with garlic salt. Sprinkle with ½ cup shredded mozzarella and vegetables.
  6. Dollop up to ½ cup additional Karoun Mediterranean-style Labne Kefir cheese on top of veggies. Sprinkle with remaining ¼ cup of reserved mozzarella.
  7. Bake for approximately 12 minutes or until crust browned and cheese bubbling.
  8. No need for a knife or pizza cutter, just pull apart into pizza bites!