Nutritious Pantry Staples for Quick Meals & Snacks

This post is sponsored by BabbleBoxx.

March is National Nutrition Month. It’s a great time to become better informed about your food choices and make any tweaks necessary to support healthful eating that fuels your body and goals.

March is National Nutrition Month, a great time make informed food choices and add better-for-you staples to the pantry. Find out my must-have condiments, prepped whole grains, and nuts I keep on hand for easy meal and snack making.

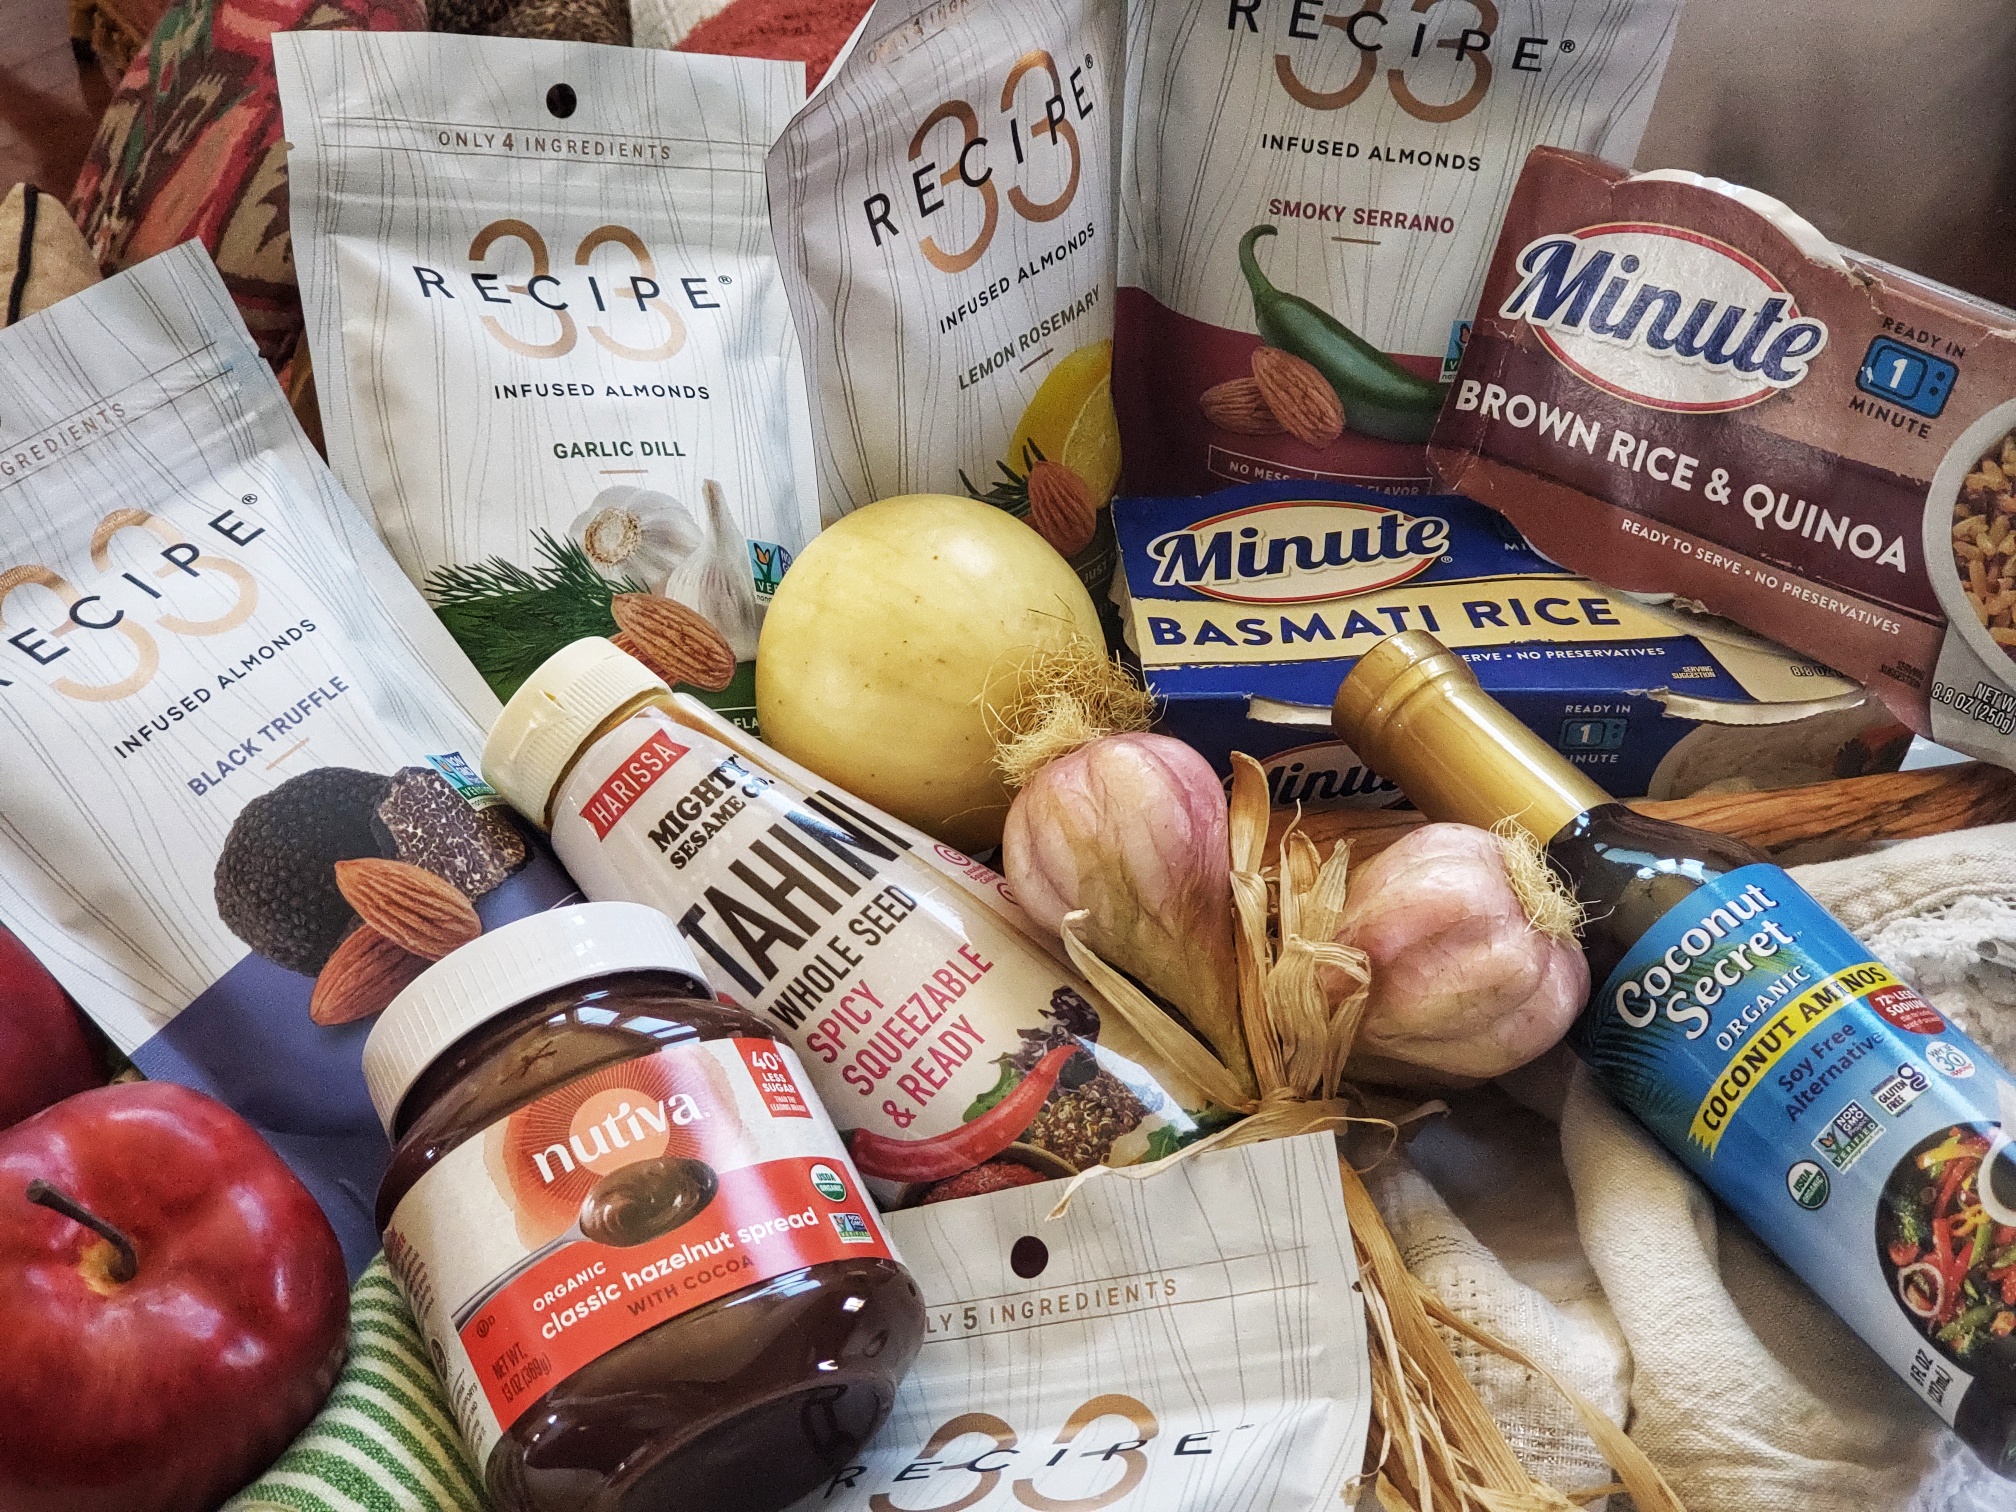
For example, my goal is to eat a balanced diet rich in lean proteins, fruits and veggies, and whole-grain carbs to give me enough energy to perform my runs and workouts along with the proper nutrients to recover quickly. I like making homemade meals, but often convenience is king. However, I’m not willing to scrap my nourishing meals for takeout, so I keep my pantry stocked with quality convenience foods, condiments and better-for-me snacks to help ensure success.

Nutritious Pantry Staples for Quick Meals & Snacks  

is Organic Coconut Aminos from Coconut Secret -- organic, non GMO, lower sodium, soy free. A great substitute for soy sauce.
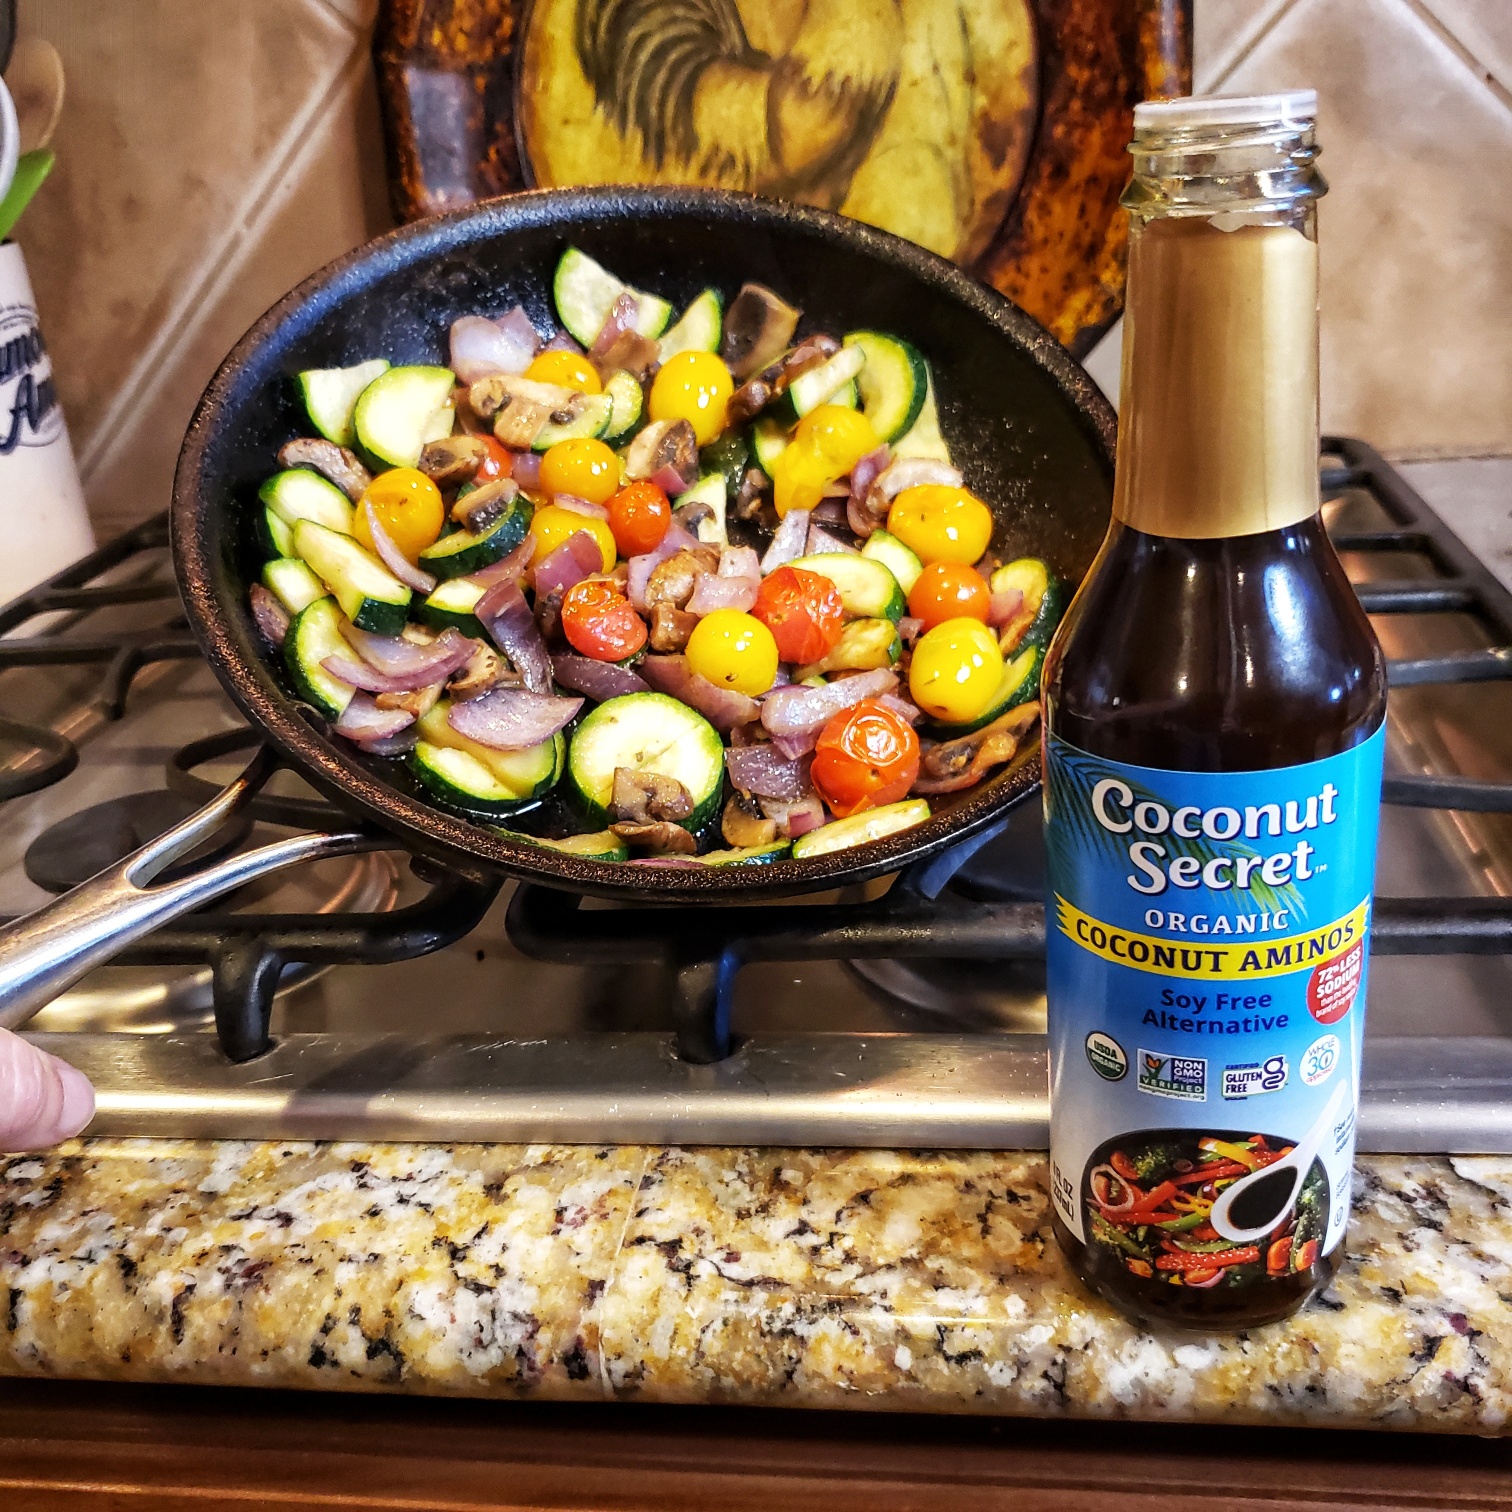
Coconut Secret Coconut Aminos are a lower sodium, soy-free way to add flavor!

Coconut Aminos: One of my must-have pantry staples is Organic Coconut Aminos from Coconut Secret. For those of you who don’t do soy products or are being mindful of salt consumption, this soy sauce alternative really delivers that slightly sweet yet savory punch of umami you crave from a condiment. Made from hand-harvested, naturally fermented organic coconut blossoms, the only other ingredient in Coconut Aminos, is just a hint of sea salt. Coconut Aminos has 72% less sodium than the leading soy sauce brand. It’s also gluten-free, msg-free, has no added sugar, and is Whole30 approved. A 1:1 ratio soy sauce replacement, I use Organic Coconut Aminos in so many ways including in my ramen bowls, in marinades and glazes for grilling and oven roasting, and in veggie skillets.

Mighty Sesame Organic Tahini is a delicious seed based product ready to drizzle on salads, sandwiches and more thanks to the awesome squirt bottle.
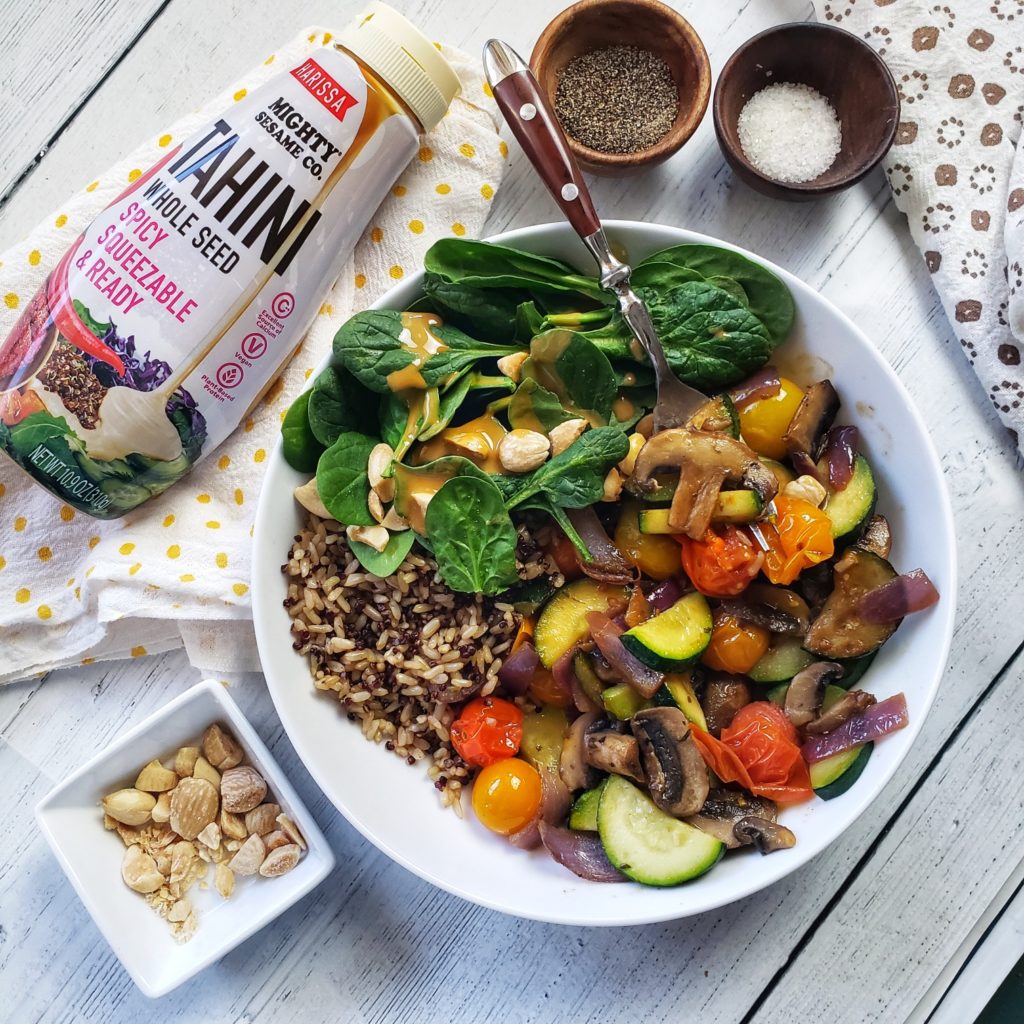
I love how Might Sesame Co. Tahini comes in a squirt bottle – so convenient!

Tahini:  It’s amazing what kind of amazingly flavorful dishes you can create in a flash with a bottle of Mighty Sesame Organic Tahini. If you’re not familiar with tahini, it’s a creamy product made from sesame seeds. The squeeze-bottle on the Mighty Sesame Harissa Tahini is SO CONVENIENT and VERSATILE — it’s shelf-stable, always creamy, always drizzle-ready and is kicked up with a little bit of roasted chili pepper! There is no gunky stirring and spooning from a jar like I’ve persevered with other tahini brands. Perfect to drizzle on salads, grain bowls, tacos and raw veggie snacking for a boost of flavor, healthy fats and extra protein (7g per serving). Suitable for vegan, glute-free, dairy-free, kosher, and halal diets.

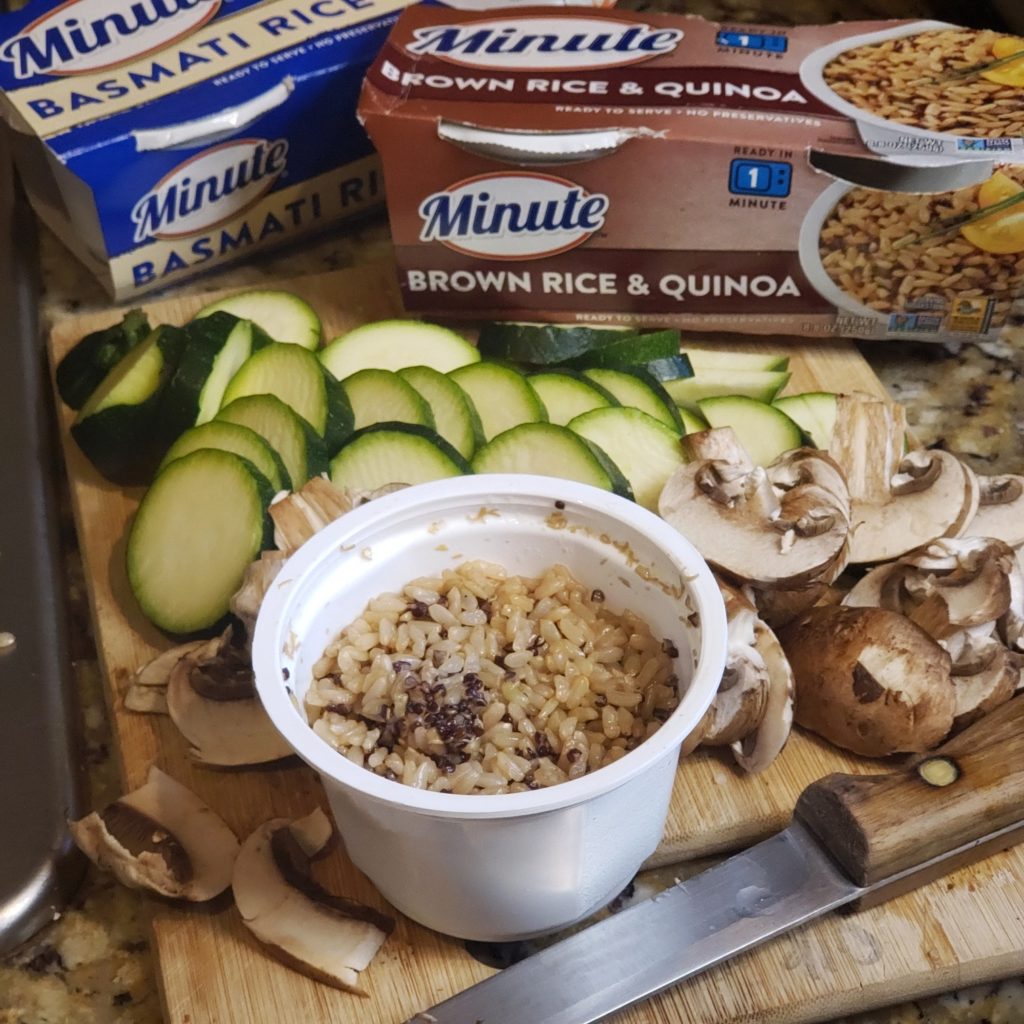
Minute rice cups and brown rice & quinoa cups can be made in 60 seconds. Simple ingredients, nothing artificial, no weird processing. The cups are BPA free and can be recycled.
Oh, hello! Wholesome whole grains in 60 seconds with Minute rice cups!

Pre-Cooked Grains: Keeping shelf-stable, pre-cooked grains (like rice and quinoa) in the pantry allows for quick, creative meal-making on even the busiest nights. I’ve stocked up with Minute rice cups, they are easily made in the microwave in about 60 seconds, perfectly portioned so I don’t overeat, and feature just quality rice – no weird chemicals, harmful ingredients, or weird processing methods. Even the plastic cups are BPA-free and can be recycled.  The Minute Basmati microwavable rice cups offer that nutty, aromatic rice experience that’s hard to resist and Minute Brown Rice & Quinoa microwavable rice cups have a delightful texture with chewy brown rice and crunchy quinoa. Both are non-GMO, preservative-free, MSG-free, gluten-free, cholesterol-free and suitable for vegan and vegetarian diets. These easy rice cups are a smart and simple way to add the beneficial nutrients, like fiber from whole grains, into your busy lifestyle.

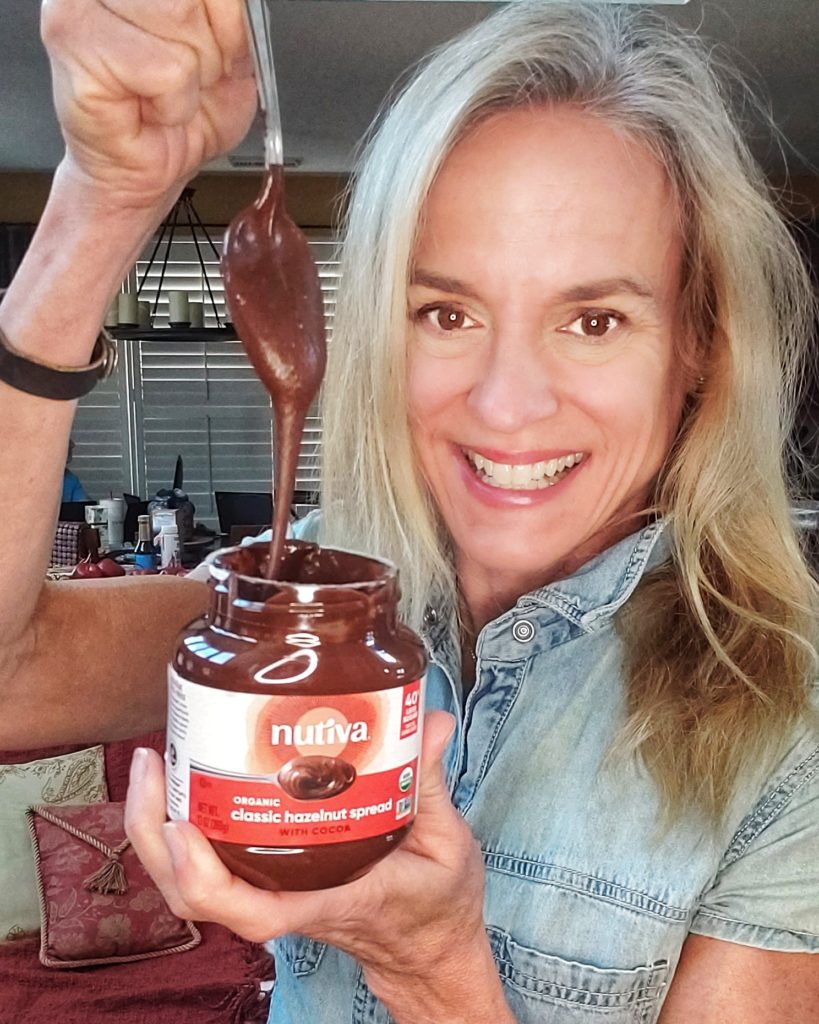
Looking for a vegan nutella? Classic Hazelnut Spread from Nutiva is a win-win with delicious creamy hazelnut taste and 40% less sugar than the leading brand.
Yes, please! Nutiva Hazelnut Spread with 40% less sugar than the leading brand.

Nut-based Spreads: Naturally, almond butter, cashew butter and peanut butter are always stocked in my pantry – -but sometimes something chocolatey can really sooth that sweet tooth!  When cravings hit, I grab a jar of Nutiva Organic Classic Hazelnut Spread from the pantry. It’s creamy, it’s decadent-tasting, it’s delicious all while being a product I can feel good about eating. Not only does it have 40-percent less sugar that the leading brand (that’s huge!), it’s non-GMO, suitable for vegan diets and the hazelnuts are harvested in a way that is rainforest and orangutan safe.  My favorite ways to enjoy this vegan nutella -like spread is to smear it on whole-grain toast, drizzle on my oatmeal, or use as a dip for fruit!

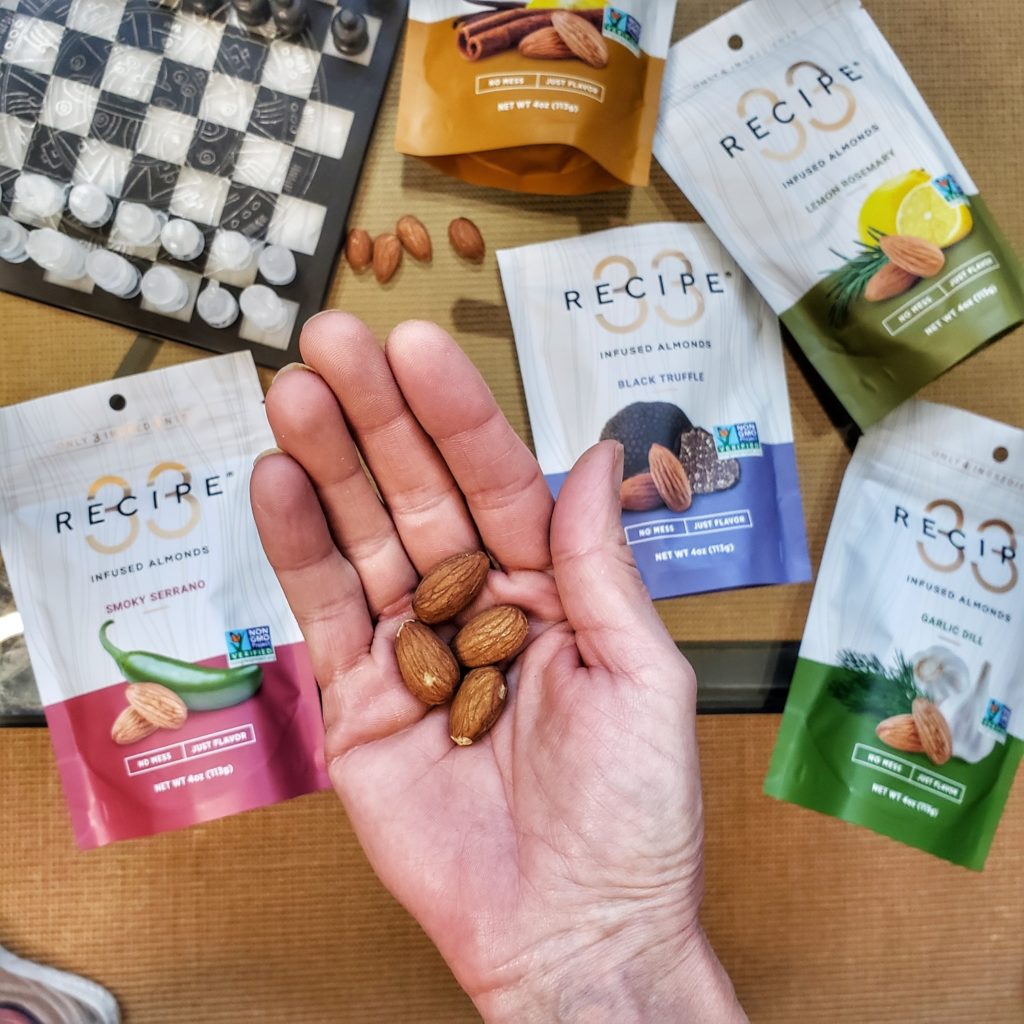
Flavored nuts that are mess free? RECIPE 33 infused almonds are nutritious, delicious and don't leave unwanted residue on your fingers.
The first rule of game night is to always have nuts nearby! RECIPE 33 infused almonds keep my hands neat and are yummy to eat!

Nuts: I LOVE nuts, especially almonds! They store so well in the pantry and are a good source of grab-and-go nutrients including fiber, protein, vitamin e and more. A favorite brand is RECIPE 33 infused almonds, not only for the inherent benefits of nuts, but also because the are flavored yet mess free! A proprietary, small-batch process takes real ingredients to infuse flavor into each almond without artificial flavors or additives. The result is an amazingly flavorful snack that leaves no messy, oily, sticky or other unwanted residue on your hands. These mess free almonds are so perfect for squashing hunger when out and about (I keep a bag in my purse), on salads and other recipes, or for charcuterie boards!  Save $2 on any 4-ounce infused almond bag with code Try RECIPE33. SHOP HERE

Cheddar Zucchini Chips in Air Fryer | Low Carb

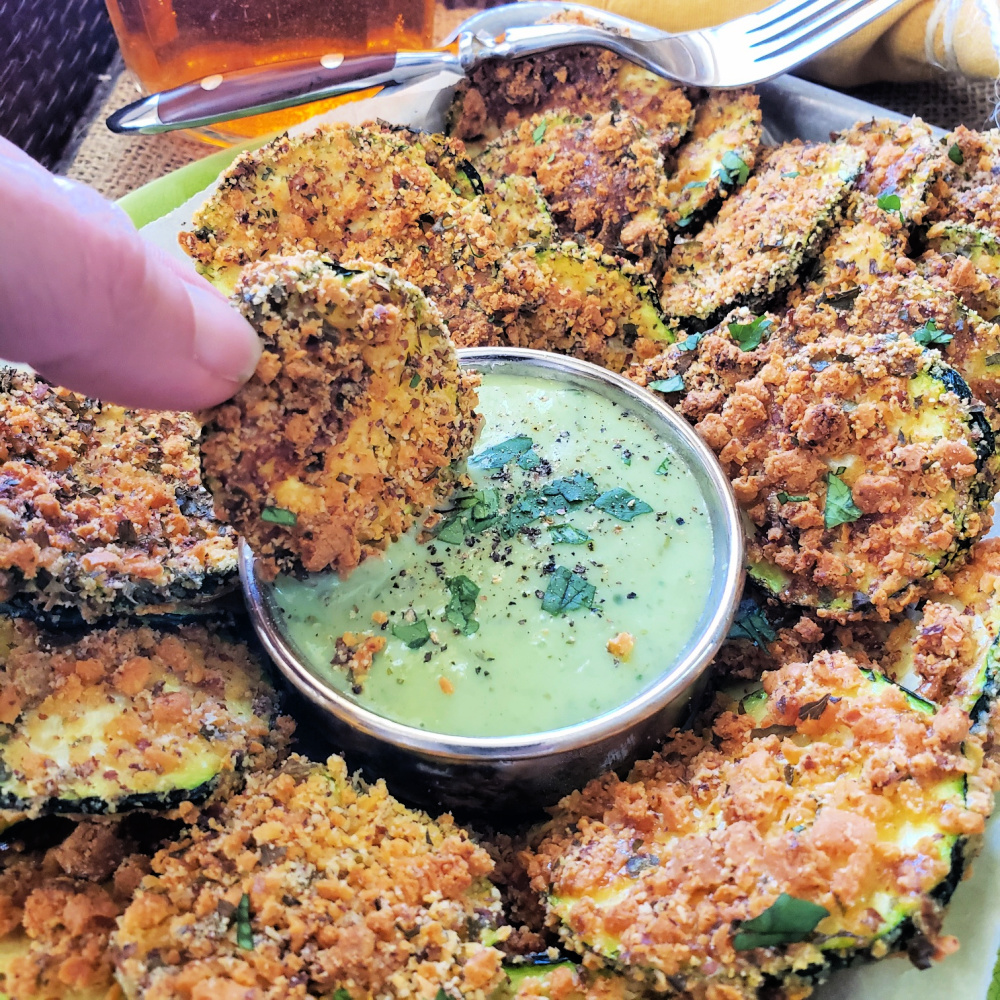
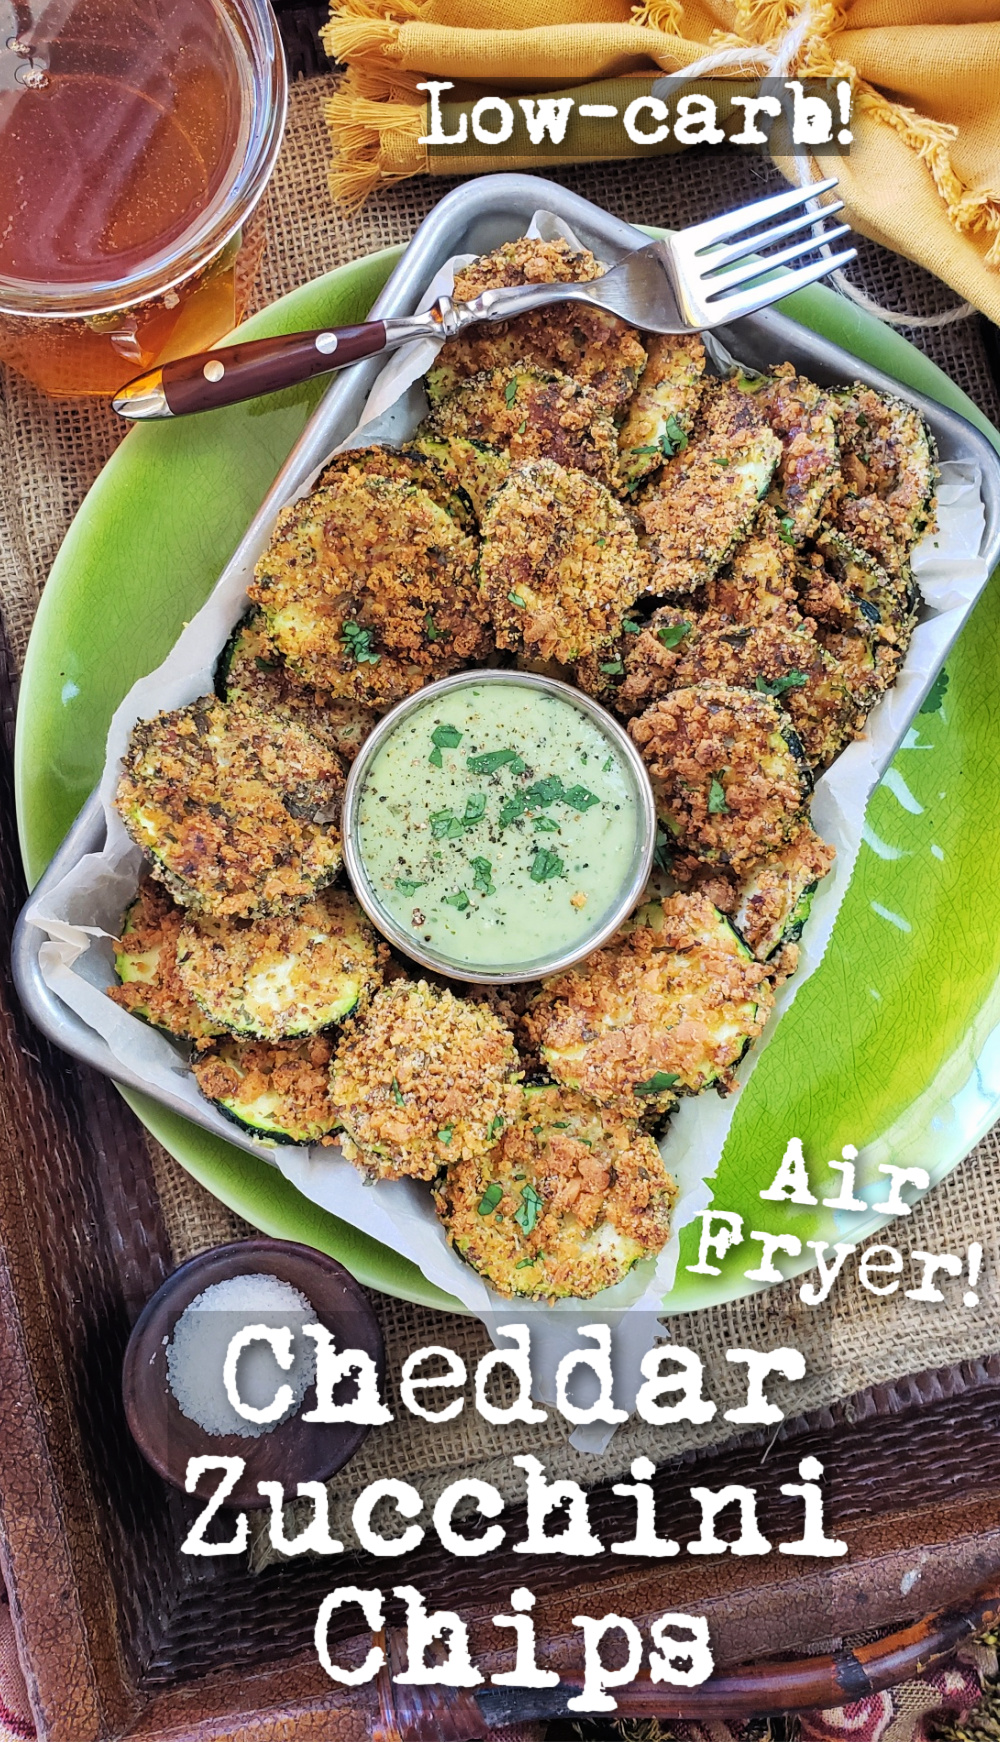
Cheddar Zucchini Chips in the air fryer are a quick, easy and flavor-packed appetizer to serve with your favorite dip or side dish that pairs with most everything.

A low-carb, gluten-free and keto-friendly way to snack and get more vegetables in your day! These easy air fryer zucchini chips use just a few simple ingredients and are done in minutes – perfect for game day entertaining or a delicious side dish and alternative to fries.

This zucchini snack is is also low-carb, gluten-free, and keto-friendly – plus, it only made with a few wholesome ingredients.

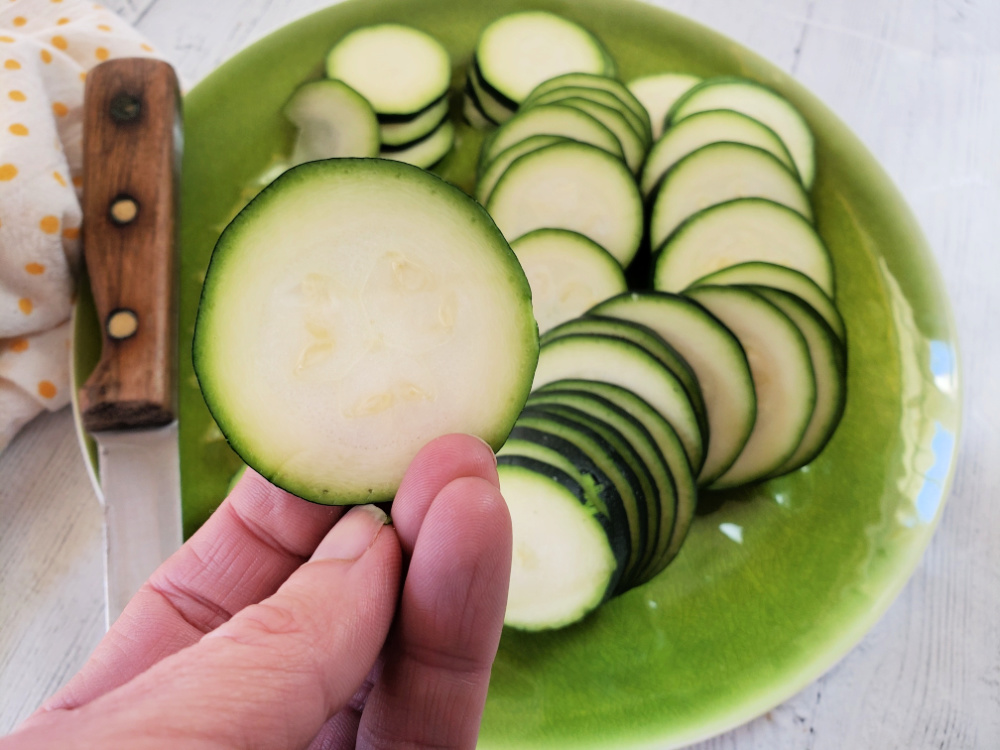
zucchini sliced think for air fryer

For the best, crispy zucchini chips, make sure that the vegetable is cut thiny in about ¼” inch crosswise slices. If you notice excess moisture on the cut zucchini, pat dry with a paper towel. This is how to keep zucchini chips from getting soggy.

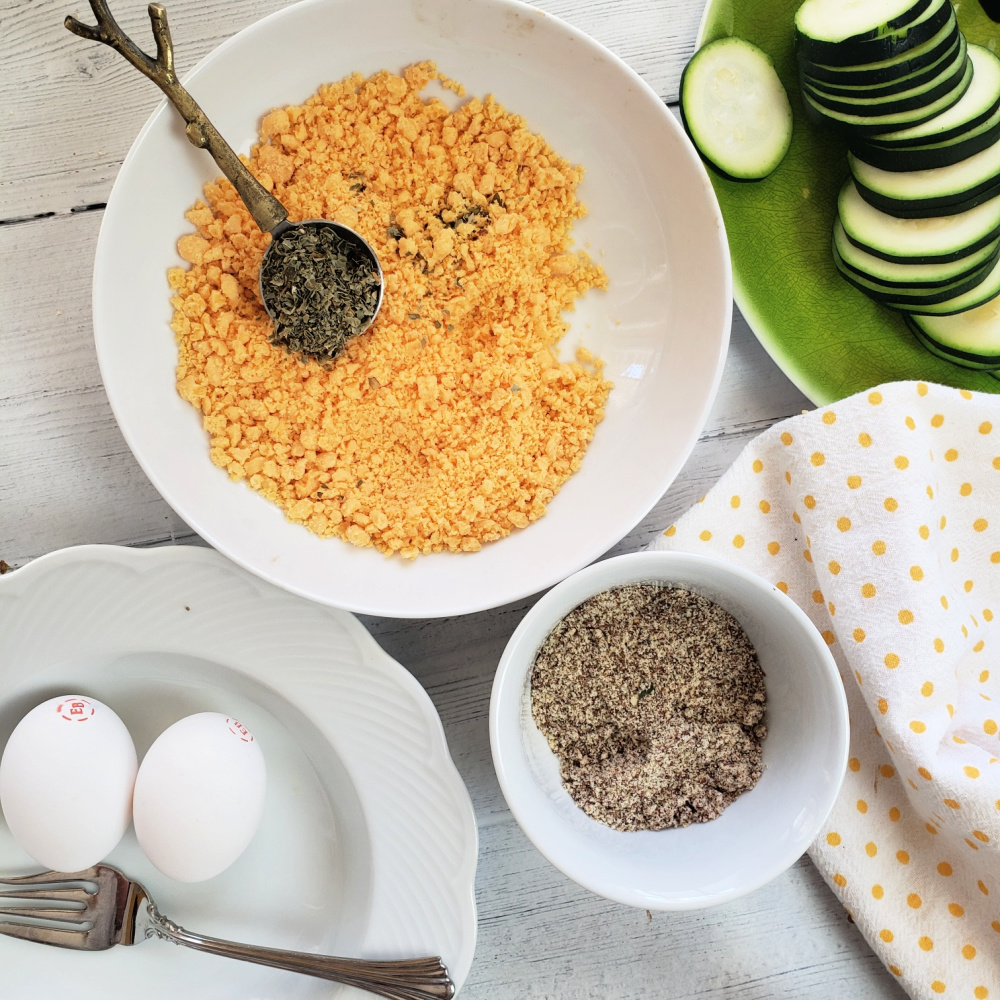
The “breading” isn’t the traditional flour or panko – it’s crushed all-cheese snacks (popular brands are Moon Cheese Snack, Just the Cheese and Whisps Cheese Crisps) along with almond meal and dried herbs. These simple ingredients, held on with an egg wash, ensure these remain low carb zucchini chips – with a surprise bonus of more than 10 grams of protein per serving!

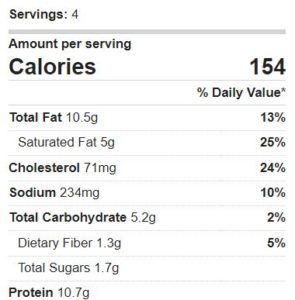
This keto cheddar zucchini chip recipe makes four servings – that’s about 10 “chips” give or take. It’s a satisfying way to use up zucchini and each portion comes in at 154 caloires, 3.9g net carb, 10.5g fat, 10.7g protein.

A low-carb, gluten-free and keto-friendly way to snack and get more vegetables in your day! These easy air fryer zucchini chips use just a few simple ingredients and are done in minutes – perfect for game day entertaining or a delicious side dish and alternative to fries. For more low carb recipes and heal inspo to fuel an active lifestyle visit thefitfork.com
Pin for later!

I used my Omni Pro Air Fryer from from Instant Pot to make my favorite zucchini recipe. In just about 6 to 8 minutes, an air fryer gets everything nice and crisp. You CAN use a traditional oven at 400F degrees for about 10 to 12 minutes, carefully flipping the chips halfway through.

Note: This post contains affiliate links. I may earn a small commisison from purchase, however the price to you remains the same. Proceeds are used to help operate The Fit Fork – thank you!

5 from 2 votes
A low-carb, gluten-free and keto-friendly way to snack and get more vegetables in your day! These easy air fryer zucchini chips use just a few simple ingredients and are done in minutes – perfect for game day entertaining or a delicious side dish and alternative to fries.
Cheddar Zucchini Chips in Air Fryer
Prep Time
10 mins
Cook Time
8 mins
Total Time
18 mins
 
A low-carb, gluten-free and keto-friendly way to snack and get more vegetables in your day! These easy air fryer zucchini chips use just a few simple ingredients and are done in minutes – perfect for game day entertaining or a delicious side dish and alternative to fries.
Course: Appetizer, Side Dish, Snack
Keyword: cheddar, gluten free, keto, low carb, zucchini
Servings: 4 servings
Calories: 154 kcal
Ingredients
  • ¾ lb. zucchini
  • ½ cup almond flour
  • 3 ounces all-cheese snack Moon Cheese, Whisps, etc.. Or, may substitute a very dry cheese like Parmesan
  • 1 tablespoon dried parsley
  • 2 eggs
  • Optional: dipping sauce
Instructions
  1. Cut zucchini into ¼” slices crosswise. Pat dry if excess moisture.
  2. In baggie, crush cheese snack into a coarse powder.
  3. In a bowl, mix “cheddar crumbs” with almond flour and dried parsley.
  4. Whisk eggs in shallow bowl. Dip each slice in egg and then dredge in cheese coating.
  5. Place crumb-coated zucchini slices on basket of air fryer and cook 390F degree air fryer (pre heated) for 6 to 8 minutes.
  6. Depending on the size of your air fryer, you may have to make in two batches.
  7. Remove from air fryer and serve with dipping sauce of choice.
  8. Store covered leftovers in fridge. To reheat, place cold zucchini chips in the air fryer basket and reheat for a couple minutes – good as new!
Recipe Notes

7-Layer Italian Pesto Quinoa Dip – Easy Appetizer

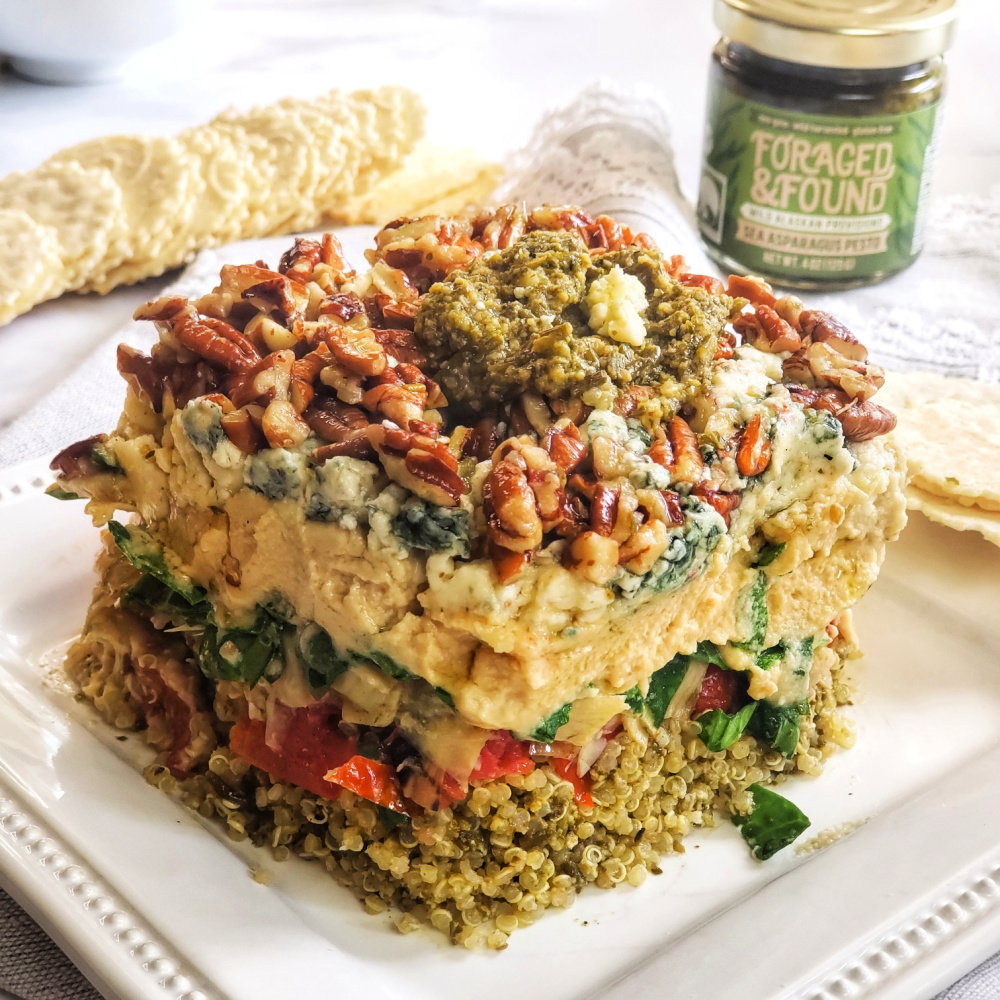
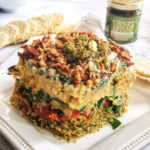
Seven Layer Italian Pesto Quinoa Dip is a quick, easy and elegant appetizer for holiday entertaining or just everyday munching. Made with flavorful, nourishing items convenient to keep on hand in the pantry and fridge, this simple-to-assemble party dip can be ready to serve in under 10 minutes – and stores beautifully overnight if you want to make ahead.

This quick and easy layered dip makes a show-stopping appetizer in just a few minutes thanks to bottled pesto sauces (I used Sea Asparagus Pesto - but feel free to get creative). You can also serve mixed up in a bowl for an easier presentation. Great scooped onto crackers, or with chips -- also leftovers fantastic on a green salad for lunch or a light dinner.

Inspired by easy party dips my mom used to make in the 80s as well as elegant molded and stacked tartare dishes, this layered dish features strata upon strata of marinated and bold flavors and various textures that play well together when scooped up with a chip, dolloped on a cracker or just eaten by the spoon! I like to use up any leftovers sprinkled on a green salad!

This quick and easy layered dip makes a show-stopping appetizer in just a few minutes thanks to bottled pesto sauces (I used Sea Asparagus Pesto - but feel free to get creative). You can also serve mixed up in a bowl for an easier presentation. Great scooped onto crackers, or with chips -- also leftovers fantastic on a green salad for lunch or a light dinner.

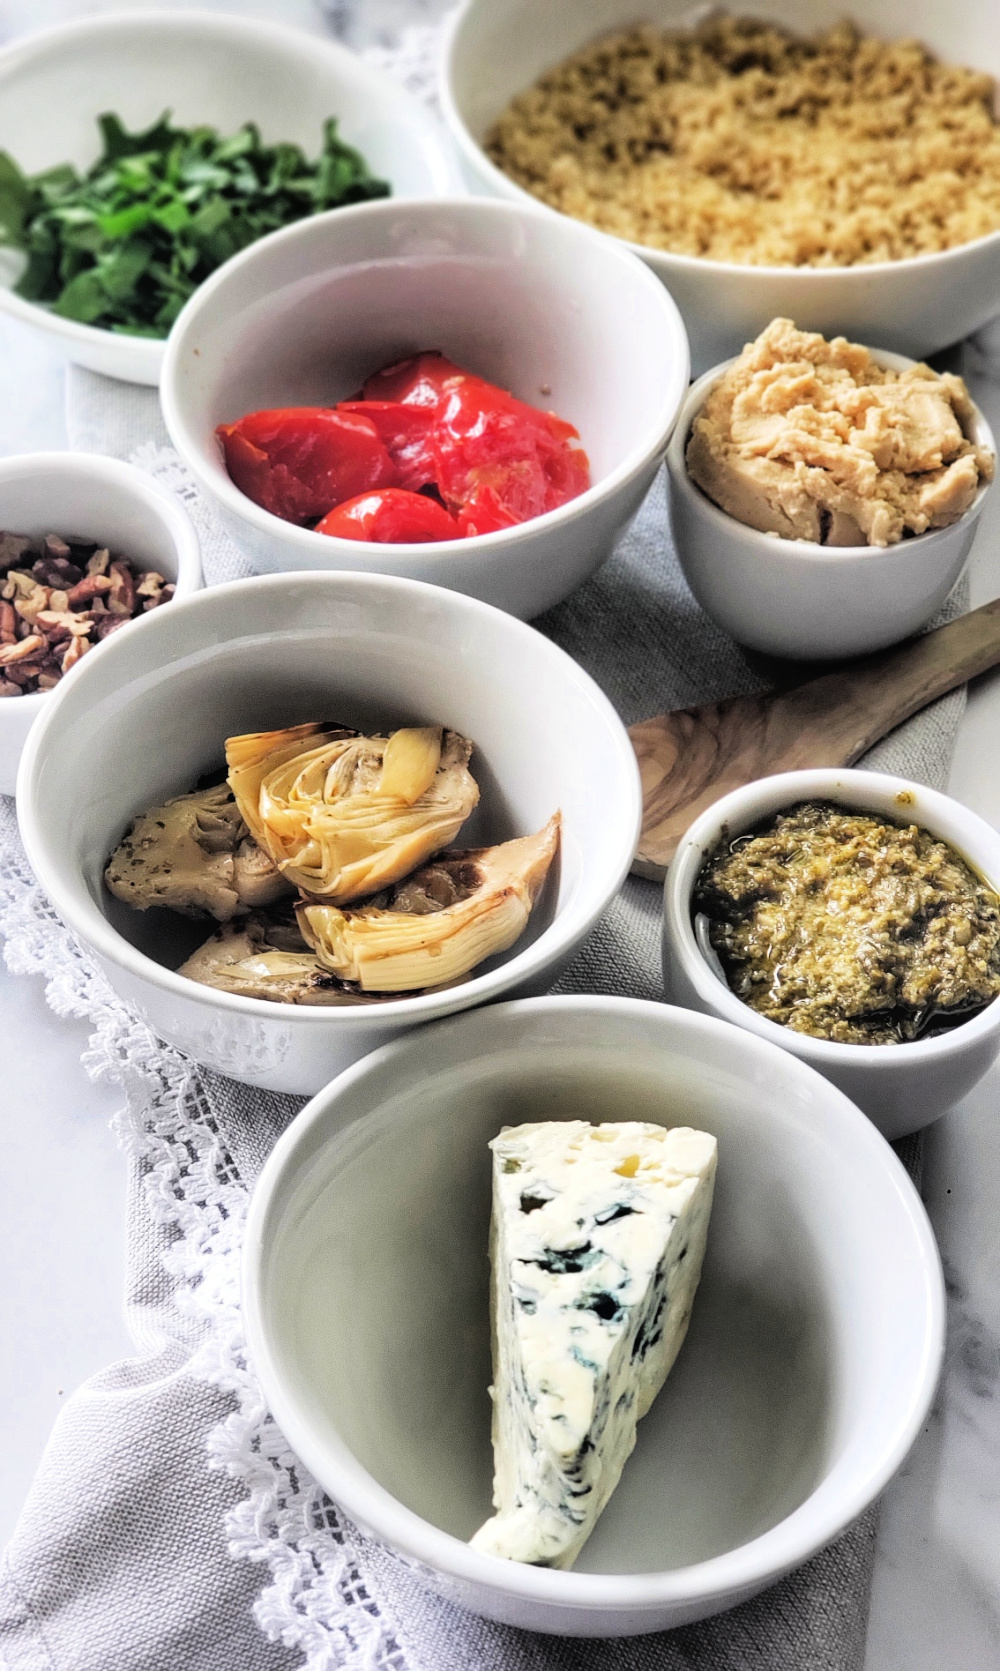
Many of the ingredients (such as the hummus, marinated artichokes, and sun-dried tomatoes) can be conveniently purchased pre-prepared in the deli or gourmet aisle of your favorite market. To make things speedy, you can also pick up a pouch of pre-cooked quinoa on the grain aisle – or defrost a bag of frozen cooked quinoa that has been meal prepped (that is my economical way – see quinoa freezer and meal prep post here).

This quick and easy layered dip makes a show-stopping appetizer in just a few minutes thanks to bottled pesto sauces (I used Sea Asparagus Pesto - but feel free to get creative). You can also serve mixed up in a bowl for an easier presentation. Great scooped onto crackers, or with chips -- also leftovers fantastic on a green salad for lunch or a light dinner.

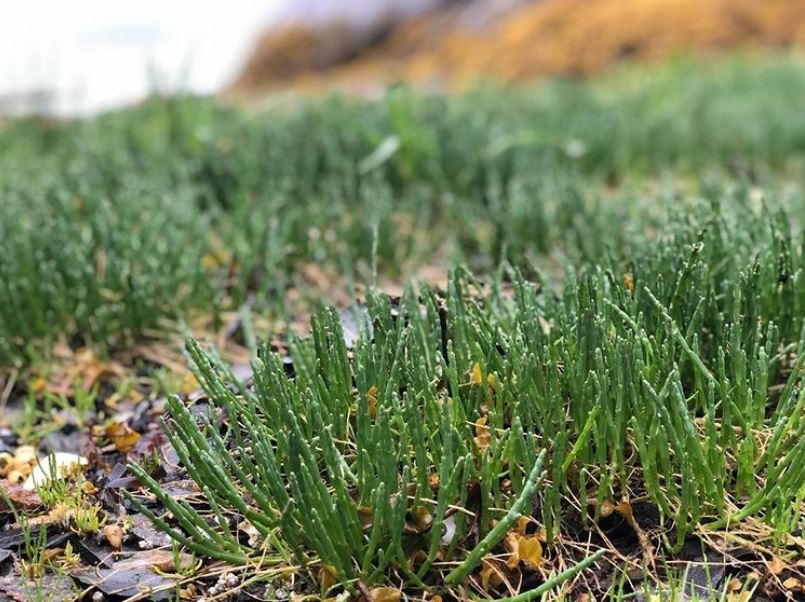
The flavor cornerstone of this Italian layered dip is pesto – but not just any ole pesto! I used Sea Artichoke Pesto from Foraged & Found. I must admit, when I was sent some jars to try out, I did have to Google “What is Sea Asparagus.” What I found out is that Sea Asparagus (Salicornia) is a sea succulent that has a salty, ocean taste when eaten raw and brined, mellower flavor when cooked — used as an ingredient it really maximizes the umami taste in so many dishes from pasta and pizza to seafood and grilled meats.

Sea Asparagus sustainably harvested in Alaska.

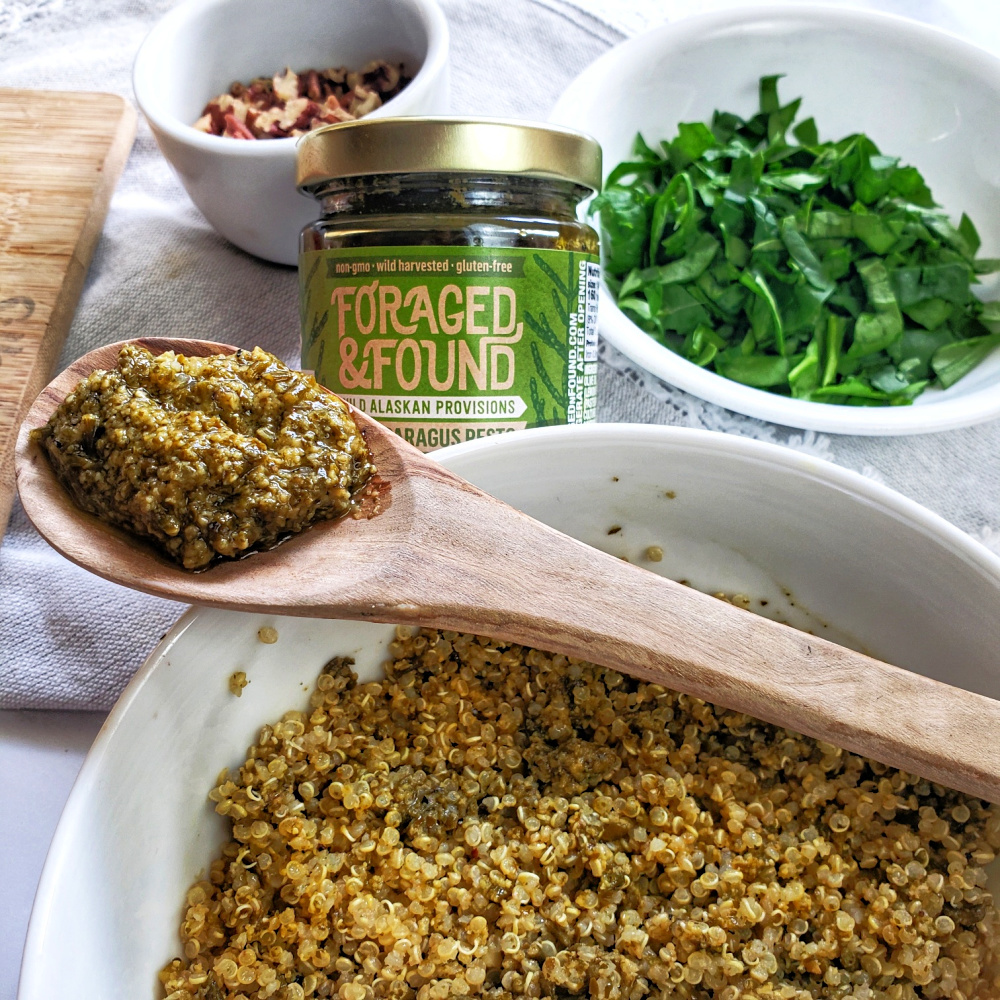
What I love about the Foraged & Found company is that they have found a way to share healthful Alaskan foods from the wild that have been sustainably harvested and transformed into some of my favorite kitchen staples – like this Sea Asparagus Pesto. The sea asparagus pesto tastes very similar to a traditional pesto (but better) made with additional ingredients such as almonds, Parmesan cheese, olive oil, garlic and lemon. So clever and eco-conscious!

Sea Asparagus Pesto
Sea Asparagus Pesto from Foraged & Found is mixed into quinoa.

Turning this pesto layered dip is a snap! Most of the pesto is soaked into the quinoa, and a generous dollop is saved for the top.

This quick and easy layered dip makes a show-stopping appetizer in just a few minutes thanks to bottled pesto sauces (I used Sea Asparagus Pesto - but feel free to get creative). You can also serve mixed up in a bowl for an easier presentation. Great scooped onto crackers, or with chips -- also leftovers fantastic on a green salad for lunch or a light dinner.
Use a 16-oz. container for a mold.

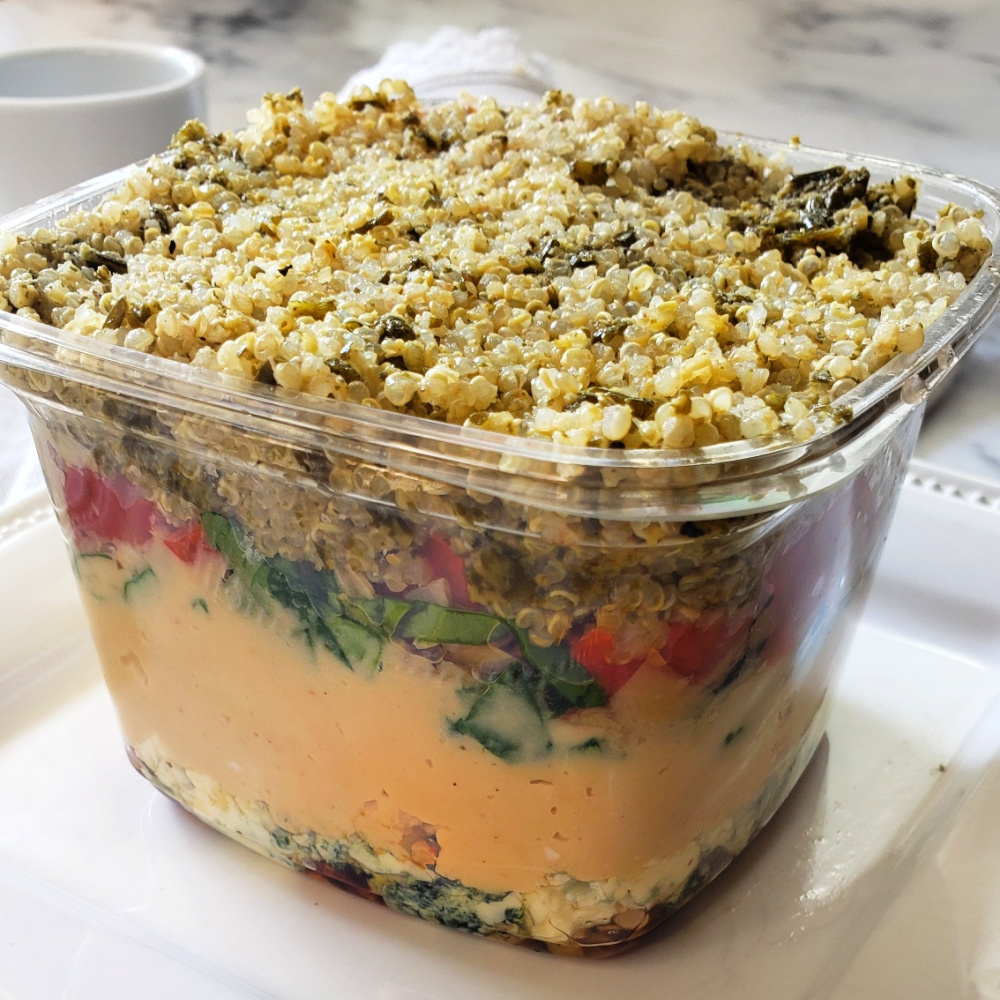
You’ll need a 16-ounce container to use as a mold – it can be cylinder-shaped (like a yogurt or sour cream container) or even a bowl – just make sure that the bottom (which will be the “top” when inverted) is narrower than the opening. I simply used the square plastic container that was provided at the olive bar when I loaded up on marinated tomatoes and artichokes for the recipe!

When layering this creative Italian dip, remember that each level loaded in goes in reverse of how it will look when presented. When inverting on a plate and releasing from a mold, the first ingredients put in at the bottom of the container become the items on top.

Order for Layers (press down lightly, as needed, after each layer):

Note: Start with 1 Tbsp. of reserved oil from the marinated artichokes or tomatoes (this helps release from the mold)

  • Pecans, chopped
  • Blue Cheese, crumbled
  • Garlic Hummus
  • Sun-dried Tomatoes, chopped
  • Marinated Artichokes, chopped
  • Fresh Spinach, shredded
  • Quinoa Mixed with Pesto

Chill a bit if needed to firm up and then, invert by placing a plate on top and flipping over quickly.

This quick and easy layered dip makes a show-stopping appetizer in just a few minutes thanks to bottled pesto sauces (I used Sea Asparagus Pesto - but feel free to get creative). You can also serve mixed up in a bowl for an easier presentation. Great scooped onto crackers, or with chips -- also leftovers fantastic on a green salad for lunch or a light dinner.
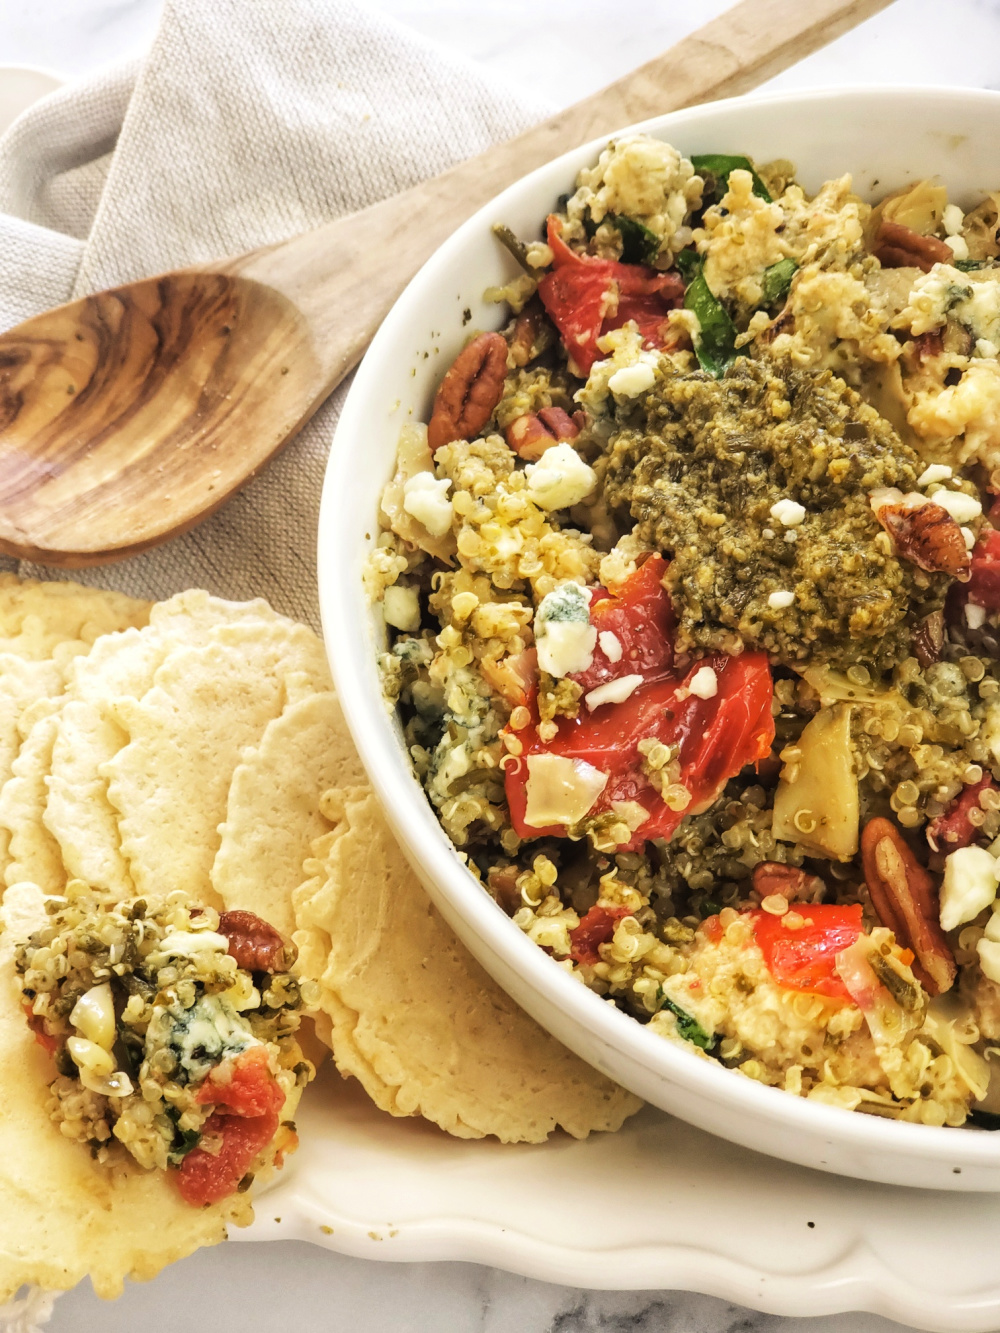
If your mold fails, just serve it jumbled up in a bowl — it still tastes great!

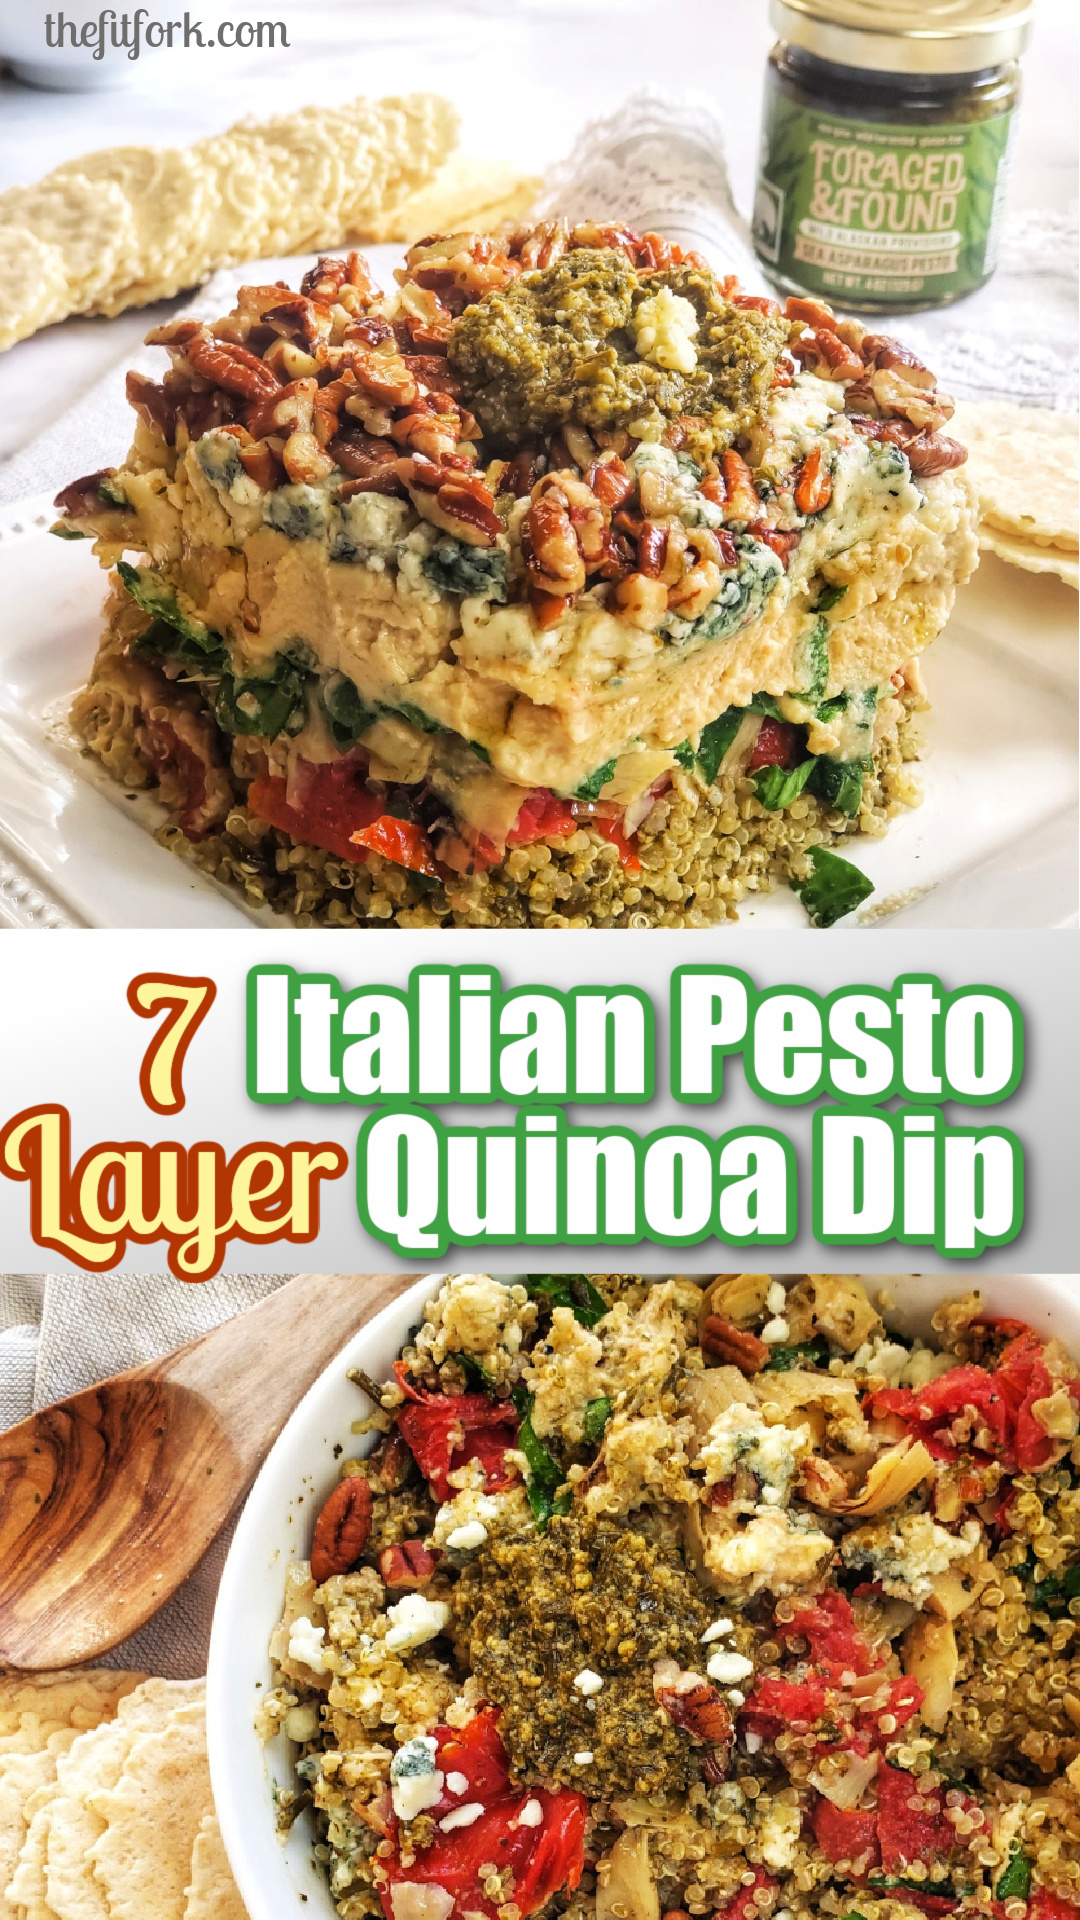
The cool thing about this Italian quinoa recipe is that if you have a “fail” when trying to release the mold, and it falls all over the place, you can just throw it all into a bowl and stir up! It tastes just the same, and still looks pretty because it’s so colorful – in fact, I’ve made it this way on purpose before! Also, you can just skip the inverting and stand-alone presentation – just layer it up how you want in a dish. The only downside here is that all the pretty ingredients can’t be seen at once.

Learn more about Foraged & Found and get more sea asparagus recipes:

Note: This post is sponsored by Foraged & Found as part of a bloggers recipe contest. #foragednfoundak #eatwild #wildalaskanprovisions

5 from 3 votes
This quick and easy layered dip makes a show-stopping appetizer in just a few minutes thanks to bottled pesto sauces (I used Sea Asparagus Pesto - but feel free to get creative). You can also serve mixed up in a bowl for an easier presentation. Great scooped onto crackers, or with chips -- also leftovers fantastic on a green salad for lunch or a light dinner.
7-Layer Italian Pesto Quinoa Dip
Prep Time
10 mins
Total Time
10 mins
 

r a light dinner.

Course: Appetizer, entree salad, Snack
Cuisine: Italian
Keyword: appetizer, dip, party food, pesto, quinoa
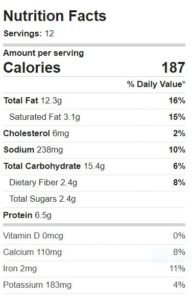
Calories: 187 kcal
Ingredients
  • ¼ cup chopped pecans
  • 2 oz. blue cheese crumbled
  • 4 oz. garlic hummus
  • 1 cup fresh spinach chopped
  • 4 oz. sun-dried tomatoes packed in oil (mostly drained*) chopped
  • 4 oz. artichokes packed in oil mostly drained, chopped
  • 4 oz. Sea Asparagus Pesto from Found & Foraged reserve 2 Tbsp. for garnish
  • 1 cup cooked quinoa
  • * Reserve 1 tbsp oil from marinated tomatoes or artichokes to use as a “lube” for the mold.
Instructions
  1. Use a 16-ounce square or round “mold” that is slightly tapered, meaning the bottom is narrower than the top – this will allow layered dip to slide out easily when inverted. A sour cream or yogurt container works nicely.
  2. In medium bowl, mix together cooked quinoa with most of the 4 ounces of pesto (save about 2 tablespoons for garnish).
  3. Add the approximate 1 Tbsp. of reserved oil from the marinated artichokes or tomatoes to bottom of mold container and swirl around. This helps release layers later).
  4. Add layers in this order: Chopped Pecans, Crumbled Blue Cheese, Hummus, Chopped Sun-dried Tomatoes, Chopped Marinated Artichokes, Shredded Spinach, Pesto Quinoa Mixture.
  5. If needed, stick in fridge for 10 minutes to firm up (sometimes the hummus gets too soft at room temperature).
  6. Remove from fridge and carefully run knife around edges of container to help release layers when inverted (but taking care not to “smear” it all together).
  7. Place plate on top of mold opening and quickly invert, gently pulling off mold container. ***
  8. Dollop with remaining pesto.
  9. *** If you have a failure when trying to release the mold, the nice thing about this recipe is that it can be served in a bowl stirred together as a jumble! It tastes just the same, and still looks pretty because it’s so colorful!
Recipe Notes

Air Fryer Chicken Alfredo Quinoa Balls

My Air Fryer recipe for Chicken Alfredo Quinoa Balls is inspired by one of my favorite indulgent creamy Chicken Alfredo and hot, crispy Arancini (those delicious little balls of deep-fried rice or risotto) – but made more nutritious.

Chicken Alfredo Quinoa Balls are inspired by one of my favorite indulgent Italian meals, creamy Chicken Alfredo and hot, crispy Arancini (those delicious little balls of deep-fried rice or risotto) – but made more nutritious. So quick and simple to make, and definitely kid-friendly, these delicious morsels can be served as an appetizer or served on sauce as a meal. Visit thefitfork.com for more Instant Pot and Air Fryer recipes with great nutrition to fuel a busy and active lifestyle.

Instead of heavy sauces, super carby-carbs, and cooking methods I shy from (like traditional deep frying of rice balls), Air Fryer Chicken Alfredo Quinoa Balls keep all the decadent flavor served up in fun, nourishing “two-bite” morsels. For me, one Chicken and Quinoa appetizer or dinner is easy to portion – one makes a snack and three quinoa balls make a dinner (especially yummy on the sauce of your choice or on a spinach salad).  A three-piece serving has 364 calories, 16g fat, 28g net carb, 27g protein.

Chicken Alfredo Quinoa Balls are inspired by one of my favorite indulgent Italian meals, creamy Chicken Alfredo and hot, crispy Arancini (those delicious little balls of deep-fried rice or risotto) – but made more nutritious. So quick and simple to make, and definitely kid-friendly, these delicious morsels can be served as an appetizer or served on sauce as a meal. Visit thefitfork.com for more Instant Pot and Air Fryer recipes with great nutrition to fuel a busy and active lifestyle. -- The Instant Pot Duo Crisp  (that's also an air fryer) is the perfect appliance to make this simple recipe even more quick and convenient.

This air fryer quinoa arancini recipe is surprisingly simple to make, especially if you already have cooked, shredded chicken breast on hand. I always make a big batch in Instant Pot® Duo Crisp™ + Air Fryer and shred up when cooled, and keep portioned in various serving sizes in the freezer – for recipes like this Chicken Quinoa Balls in Air Fryer. Or, just to thaw and throw on a salad. While this post is all about Quinoa Balls, and not so much how to cook chicken in an Instant Pot – there are several ways. I prefer the slow-cooking function, and really don’t use an official recipe – just about ½ cup of chicken broth, and 1 tablespoon of my favorite freeze-dried herb poultry seasoning per every 1 pound of boneless, skinless chicken breast. I just throw it all in there and let it cook low and slow for 8 hours before shredding up.

Chicken Alfredo Quinoa Balls are inspired by one of my favorite indulgent Italian meals, creamy Chicken Alfredo and hot, crispy Arancini (those delicious little balls of deep-fried rice or risotto) – but made more nutritious. So quick and simple to make, and definitely kid-friendly, these delicious morsels can be served as an appetizer or served on sauce as a meal. Visit thefitfork.com for more Instant Pot and Air Fryer recipes with great nutrition to fuel a busy and active lifestyle. 

The Instant Pot Duo Crisp  (that's also an air fryer) is the perfect appliance to make this simple recipe even more quick and convenient.
Pin this for later!

The rest of the air fryer chicken quinoa meal recipe is a snap. First, cook quinoa according to package directions (takes about 15 minutes) and let cool down to room temperature – another 10 to 15 minutes (faster if you spread out on a baking sheet). You can also use pre-cooked, frozen and defrosted quinoa – check out this quinoa meal prep post.

The it’s just a matter of mixing the seasonings into the softened cream cheese, followed by the shredded chicken and quinoa (btw, I used tri-color quinoa, but any type will do).

Rolling Chicken Alfredo Quinoa Balls in panko.

Next grab a handful of the mixture, and roll into golf ball-sized portions, making about a dozen. Then roll each ball in panko bread crumbs (or if needed gluten free bread crumbs) until nice and coated, no longer sticky to picky up.

- The Instant Pot Duo Crisp  (that's also an air fryer) is the perfect appliance to make this simple recipe even more quick and convenient.
Love the convenience of this “shelf” that can be added to Air Fryer basket to
double the cooking capacity!

Stick in the Air Fryer basked of the Instant Pot® Duo Crisp™+ Air Fryer, layering half on the bottom of the basket and using the metal, circular insert to make a shelf to hold the remaining half-dozen. Air fry on 400F degrees for approximately 8 to 10 minutes. They will be done when crunchy and golden brown on the outside, and heated through and a bit, soft and gooey on the inside.

Chicken Alfredo Quinoa Balls are inspired by one of my favorite indulgent Italian meals, creamy Chicken Alfredo and hot, crispy Arancini (those delicious little balls of deep-fried rice or risotto) – but made more nutritious. So quick and simple to make, and definitely kid-friendly, these delicious morsels can be served as an appetizer or served on sauce as a meal. Visit thefitfork.com for more Instant Pot and Air Fryer recipes with great nutrition to fuel a busy and active lifestyle. -- The Instant Pot Duo Crisp  (that's also an air fryer) is the perfect appliance to make this simple recipe even more quick and convenient.

Serving suggestion:  Make a creamy tomato sauce by mixing in a splash of heavy cream into warmed tomato pasta sauce. Place three Chicken Alfredo Quinoa Balls in the center and garnish with fresh basil.

Chicken Alfredo Quinoa Balls are inspired by one of my favorite indulgent Italian meals, creamy Chicken Alfredo and hot, crispy Arancini (those delicious little balls of deep-fried rice or risotto) – but made more nutritious. So quick and simple to make, and definitely kid-friendly, these delicious morsels can be served as an appetizer or served on sauce as a meal. Visit thefitfork.com for more Instant Pot and Air Fryer recipes with great nutrition to fuel a busy and active lifestyle. -- The Instant Pot Duo Crisp  (that's also an air fryer) is the perfect appliance to make this simple recipe even more quick and convenient.

Also, don’t forget to check out the Instant Pot® Duo Crisp™ + Air Fryer, an 11-in-1 pressure cooker, slow cooker, steamer, sauté pan, food warmer, sous vide, air fryer, roaster, mini oven, broiler, and dehydrator. It comes with two lids so you can instantly transform it into an Air Fryer with proprietary air flow technology that gives the crunch and tenderness of deep-frying with 95% less oil! Plus, I personally LOVE having just ONE countertop appliance that does it all, instead of a whole closet full! Stay tuned for more Instant Pot Duo Crisp recipes from The Fit Fork!

By the way, this recipe is my own, but was inspired by The Complete Quinoa Cookbook by Catherine Gill, that was recently sent to me by the publisher. Check it out, fabulous stuff in there.

This post contains affiliate links. I earn a small commission on products purchased, however price to you remains the same. Proceeds are used to offset operation expense for The Fit Fork. Thank you!

4.8 from 5 votes
Chicken Alfredo Quinoa Balls are inspired by one of my favorite indulgent Italian meals, creamy Chicken Alfredo and hot, crispy Arancini (those delicious little balls of deep-fried rice or risotto) – but made more nutritious. So quick and simple to make, and definitely kid-friendly, these delicious morsels can be served as an appetizer or served on sauce as a meal. Visit thefitfork.com for more Instant Pot and Air Fryer recipes with great nutrition to fuel a busy and active lifestyle.
Air Fryer Chicken Alfredo Quinoa Balls
Prep Time
15 mins
Cook Time
10 mins
Total Time
25 mins
 

Chicken Alfredo Quinoa Balls are inspired by one of my favorite indulgent Italian meals, creamy Chicken Alfredo and hot, crispy Arancini (those delicious little balls of deep-fried rice or risotto) – but made more nutritious. So quick and simple to make, and definitely kid-friendly, these delicious morsels can be served as an appetizer or served on sauce as a meal. Visit thefitfork.com for more Instant Pot and Air Fryer recipes with great nutrition to fuel a busy and active lifestyle. — The Instant Pot Duo Crisp (that's also an air fryer) is the perfect appliance to make this simple recipe even more quick and convenient.

Course: Appetizer, dinner, dinner, entree
Cuisine: Italian
Keyword: air fryer, alfredo, chicken, quinoa
Ingredients
  • 8 ounces Neufchatel cheese
  • 1 ½ cups COOKED quinoa
  • 8 ounces shredded chicken breast already cooked
  • 1 teaspoon garlic powder
  • 1 teaspoon onion powder
  • ½ teaspoon ground black pepper
  • ½ teaspoon salt
  • ¾ cup panko
  • 1 tablespoon fresh chopped parsley if desired
  • Optional: pasta sauce for serving.
Instructions
  1. Cook quinoa and chicken breast beforehand, if needed.
  2. Soften Neufchatel cheese and stir in garlic power, onion powder, ground black pepper and salt.
  3. Next stir in cooked quinoa and shredded chicken until mixed thoroughly into the cheese.
  4. Use hands to form golf ball-sized balls (about ¼ cup) of mixture, before rolling each into panko crumbs, patting crumbs on to create a thick coating.
  5. Should make about 12 balls.
  6. Set Air Fryer to 400F degrees and set 6 balls on bottom of basket, and 6 balls on top of tray or 2nd tier metal insert. Or, if smaller capacity air fryer, then do in two batches.
  7. Air fry for 8 – 10 minutes or until turning golden grown and heated well throughout.
  8. Serve as appetizer, or set three in a bowl of pasta sauce for a meal.
Recipe Notes

Nutrition for THREE balls:

Salsa Verde Spinach & Corn Rice Poppers |Appetizer

This post sponsored by Sam’s Fresh Salsa, however all comments, content and enthusiasm remain my own!

I could make a meal out of appetizers, couldn’t you?! Especially munching on these Salsa Verde Spinach & Corn Rice Poppers – they are super satisfying and the perfect prelude to a summery southwestern meal or hearty snack to pair with happy hour drinks on the patio.

Delicious baked rice balls loaded with cheese and veggies are perfect for dunking in mild salsa verde! The secret to maximum flavor is also using the salsa as part of the cooking liquid in the rice! Surprising low cal and lower carb -- 56 calories and 6g carbs per piece. An appetizer and snack that makes everyone happy!

These little two-bite nibbles are basically rice balls loaded with veggies and cheese (win-win), with even more winning from the secret ingredient – Sam’s Fresh Salsa Verde.

Delicious baked rice balls loaded with cheese and veggies are perfect for dunking in mild salsa verde! The secret to maximum flavor is also using the salsa as part of the cooking liquid in the rice! Surprising low cal and lower carb -- 56 calories and 6g carbs per piece. An appetizer and snack that makes everyone happy! For more easy recipes and inspo to fuel an active lifestyle, visit thefitfork.com
Pin this for later!

Not only are the spinach and corn poppers paired with Sam’s Fresh Salsa Verde for dipping, the foundational ingredient – rice – is prepped using Salsa Verde as part of the cooking liquid! It’s a flavor hack you’ll want to replicate time and time again, not just with these rice balls, but any night you are making a rice side dish! Rice becomes tender and ready for consumption as it absorbs boiling liquid. Water is standard (and oh-so-boring), but rice prepared in salsa as the cooking liquid is just simply amazing and so easy (swap up to half the water for salsa) – there’s no need to add garlic, spices and this and that – all those flavor boosts are already in the salsa!

Rice hack! The secret to maximum flavor is also using the salsa as part of the cooking liquid in the rice!
Flavor boost! Sam’s Fresh Salsa Verde is used as part of the cooking liquid for the rice!

After the “next level” salsa verde rice has been prepped, it’s just a matter of quickly sautéing spinach and corn and mixing together with the rice along with a mixture of queso fresco and mozzarella for double cheesy goodness!  I use a silicone cookie scoop (or spoon) to made generous tablespoon-sized balls of the mixture and then bake for 30 minutes!

corn and spinach for rice poppers -- veggies always a great addition to any appetizer.
Get some veggie goodness in this delicious appetizer recipe!

By the way, as decadent as this rice appetizer sounds, loaded with rice and cheese, each popper is very reasonable – each with 56 calories, 2.2g fat, 6.3g net carb, and 2.6g protein.

Delicious baked rice balls loaded with cheese and veggies are perfect for dunking in mild salsa verde! The secret to maximum flavor is also using the salsa as part of the cooking liquid in the rice! Surprising low cal and lower carb -- 56 calories and 6g carbs per piece. An appetizer and snack that makes everyone happy!
We piled up our poppers and Sam’s salsa in taco boats to take on the patio!

Of course, these rice ball poppers are best served with a side of this salsa verde for dunking. The fresh green salsa has that tangy, limey taste that pairs so well with the tomatillos and lots of garlic – yum! I really appreciate these new salsas from Sam’s Fresh Salsas, they are completely farm fresh with a clean label – no preservatives, nothing artificial. In addition to the Salsa Verde, there is a Cantina Medium Salsa and Watermelon Jicama Salsa. you can purchase Sam’s Fresh Salsa at: ShopRite, Acme, and Safeway or ask your store to stock it!

Sam's Fresh Salsa Verde perfect for all your southwestern-inspired recipes
I love Salsa Verde because it’s tangy and loaded with garlic and mild tomatillos — not too spicy!

You can also learn more about Sam’s Fresh Salsa at SamsSalsa.com on Facebook and Instagram!

Salsa Verde Spinach & Corn Rice Poppers
Prep Time
10 mins
Cook Time
50 mins
rice cooling
10 mins
Total Time
1 hr
 

Delicious baked rice balls loaded with cheese and veggies are perfect for dunking in mild salsa verde! The secret to maximum flavor is also using the salsa as part of the cooking liquid in the rice! Surprising low cal and lower carb — 56 calories and 6g carbs per piece. An appetizer and snack that makes everyone happy!

Course: Appetizer, Snack
Cuisine: Southwestern
Keyword: corn, mexican food, nibbles, rice, salsa, spinach
Servings: 24 balls
Calories: 56 kcal
Ingredients
  • 2/3 cup uncooked white or brown rice
  • 1 cup water
  • 2/3 cup verde salsa highly suggest Sam’s Fresh Salsa
  • 2 teaspoons olive oil
  • 1 cup frozen corn kernels thawed
  • 1 1/2 cups chopped fresh spinach
  • ¾ cup shredded mozzarella cheese
  • ½ cup crumbled queso fresco
  • 2 large eggs whisked
  • ½ teaspoon salt
  • 1 teaspoon ground black pepper
Instructions
  1. Add rice, water and salsa to medium pot and bring to boil. Once boiling, reduce to simmer and add lid. Cook rice according to time on package instructions, or until liquid has been absorbed. Remove lid and set aside to cool to room temperature. To speed process, you can pour rice out on baking sheet and stick in refrigerator for 15 minutes.
  2. Preheat oven to 350F when rice almost done cooling.
  3. Meanwhile, add olive oil to skillet and sauté spinach and corn for approximately 3 minutes until warmed and wilted. Remove from heat.
  4. Add cooled rice to large bowl along with spinach-corn mixture. Stir together. Next stir in egg and cheeses and season with salt and pepper.
  5. Line baking sheet with parchment paper or silicone baking sheet.
  6. Use a tablespoon (I found a little cookie scooper works well) to create approximate generous 1 tablespoon-sized balls. Set balls on baking sheet.
  7. Bake for about 30 minutes, or until cheese bubbling and turning lightly golden brown on tops.
  8. Remove from oven and serve warm with additional salsa verde.
Recipe Notes