Red Velvet Sheet Pan Protein Pancakes: A No-Fuss Breakfast to Love

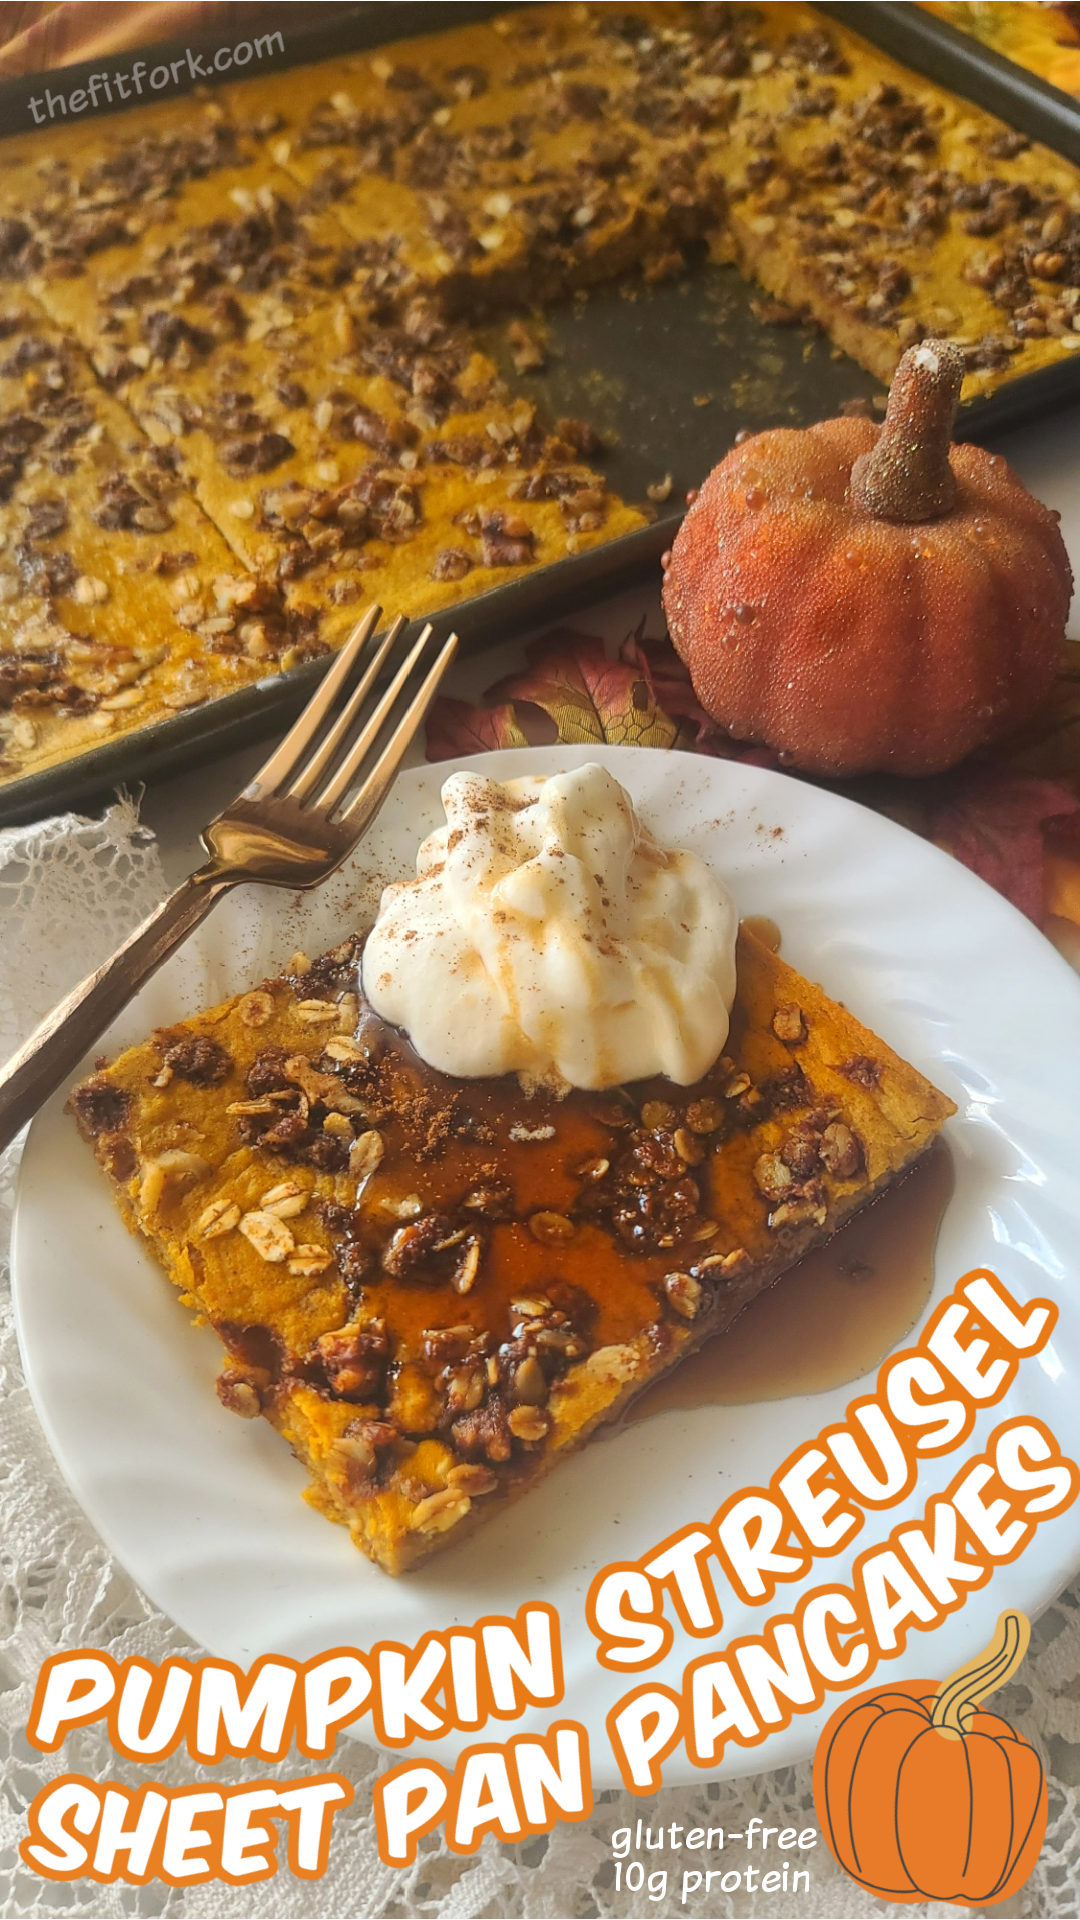
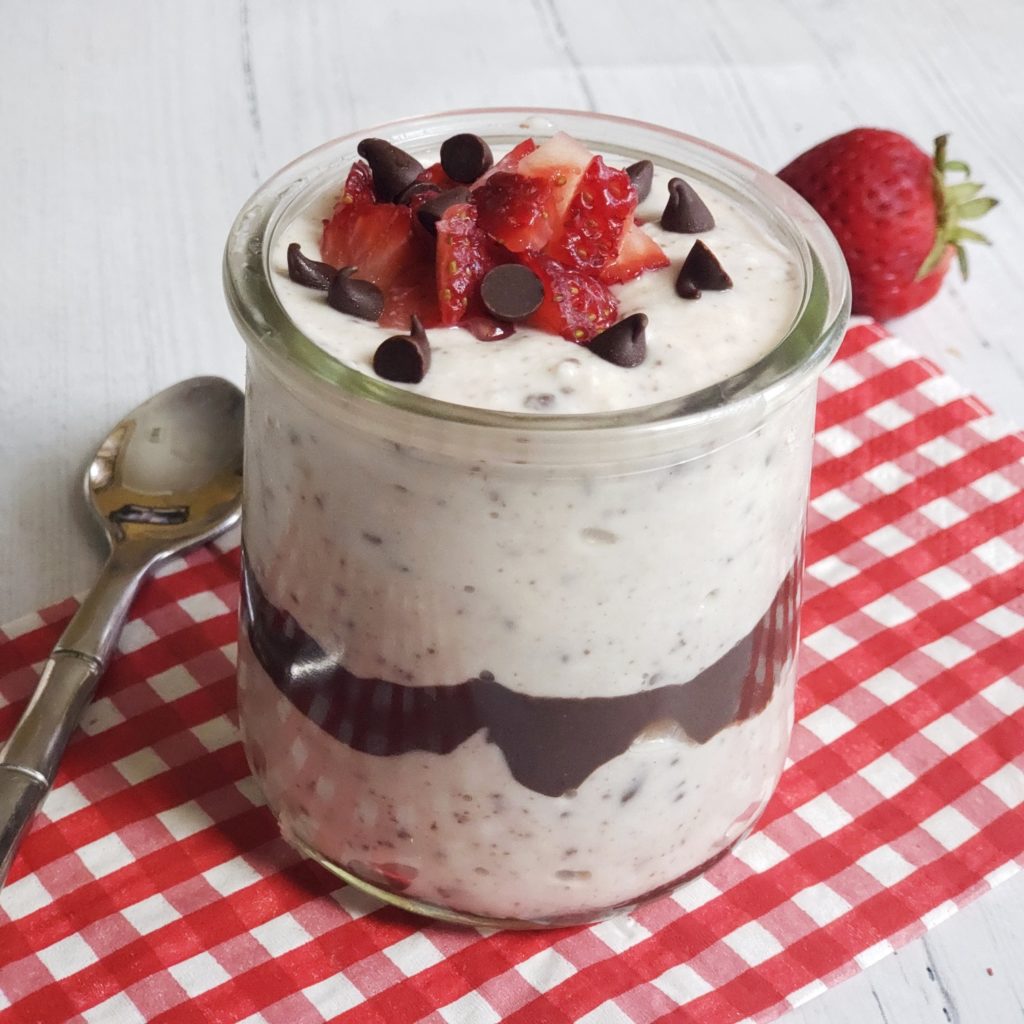
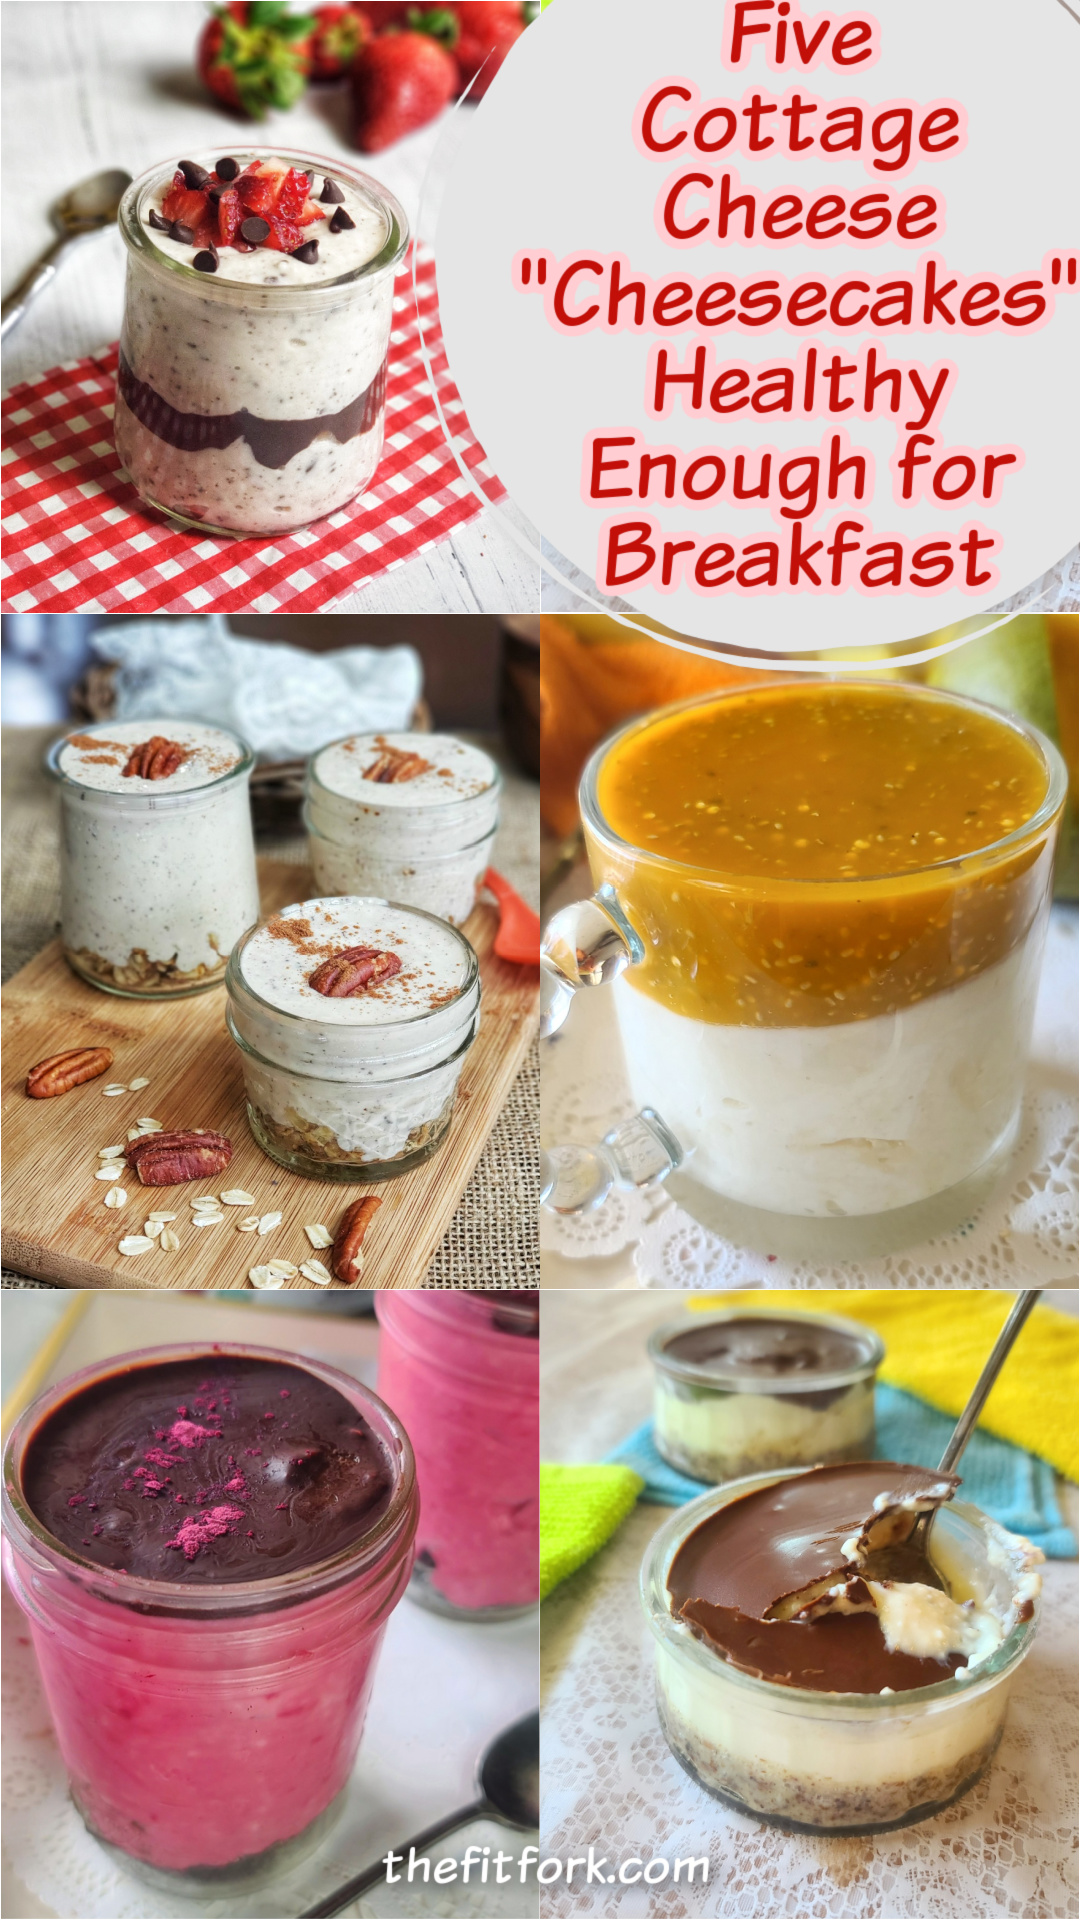
 Looking for a fun, festive, and fueling breakfast? These Red Velvet Sheet Pan Protein Pancakes check all the boxes! Whether you’re celebrating Valentine’s Day or just craving a little extra indulgence in your morning routine, this easy-to-make recipe brings all the nostalgic flavors of red velvet cake—without the sugar crash.

Why You’ll Love Red Velvet Protein Sheet Pan Pancakes

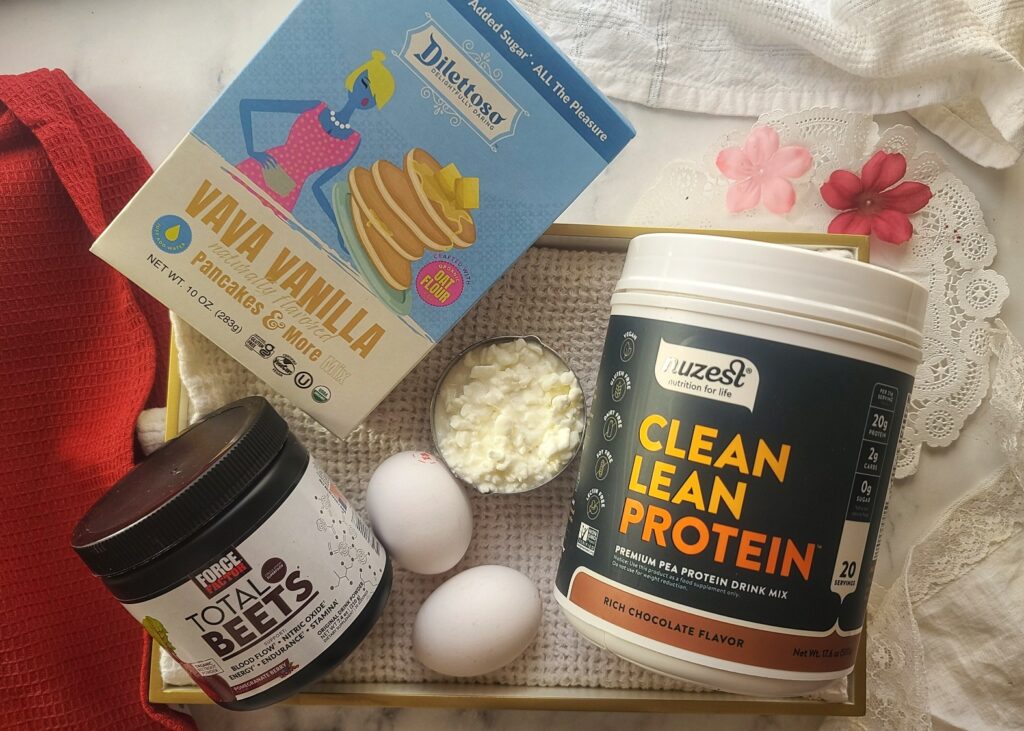
  • Starts with a Mix: Just use 2 cups of your favorite pancake mix, traditional or gluten free.
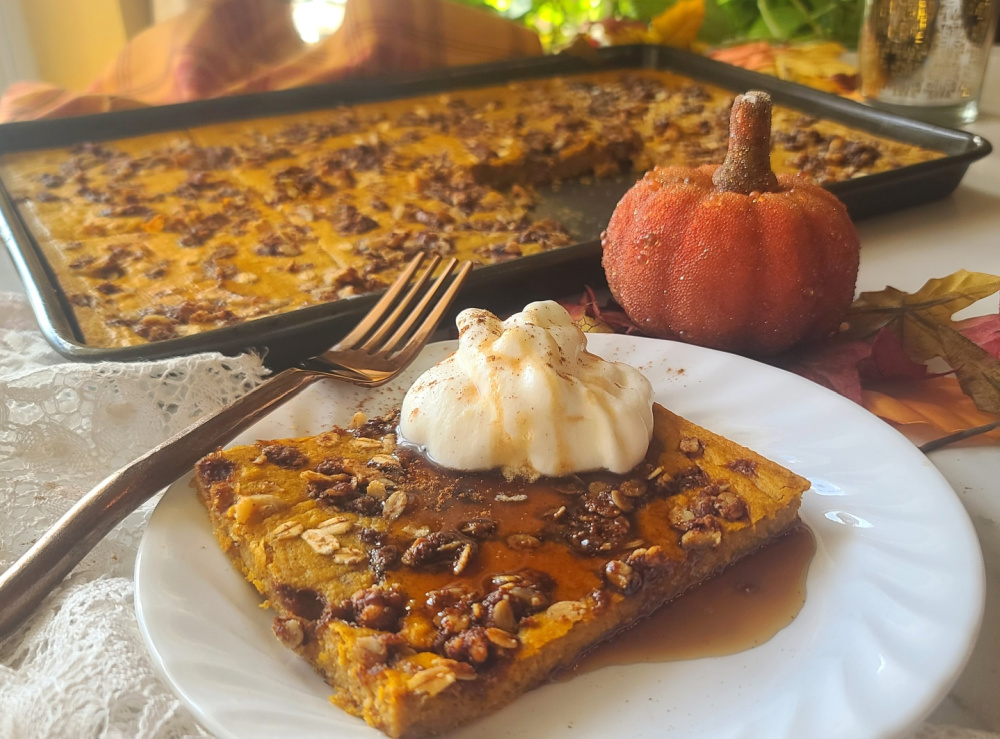
  • Baked All at Once – No standing over the stove flipping pancakes one by one! Just blend, pour, bake, and slice. 
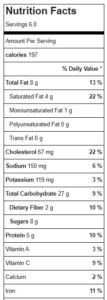
  • High-Protein & Satisfying – Each pancake packs 15g of protein and 235 calories, making them a great way to fuel your day. Thanks to protein powder, eggs, and cottage cheese.
  • Naturally VibrantBeet root powder gives these pancakes that signature red velvet hue without artificial coloring. Plus, you get extra beetroot benefits for heart health and energy.
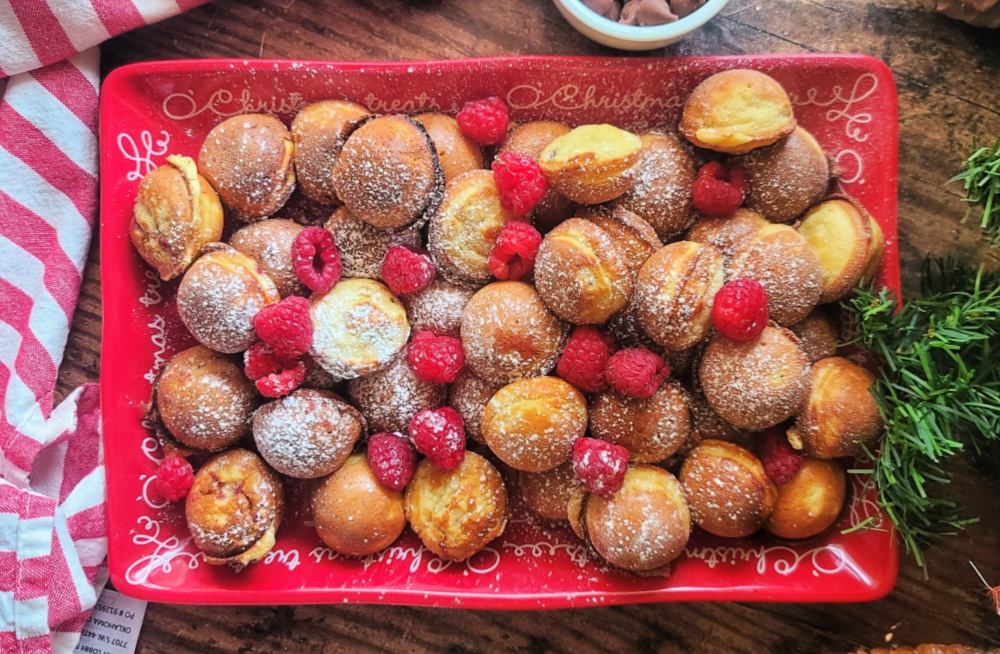
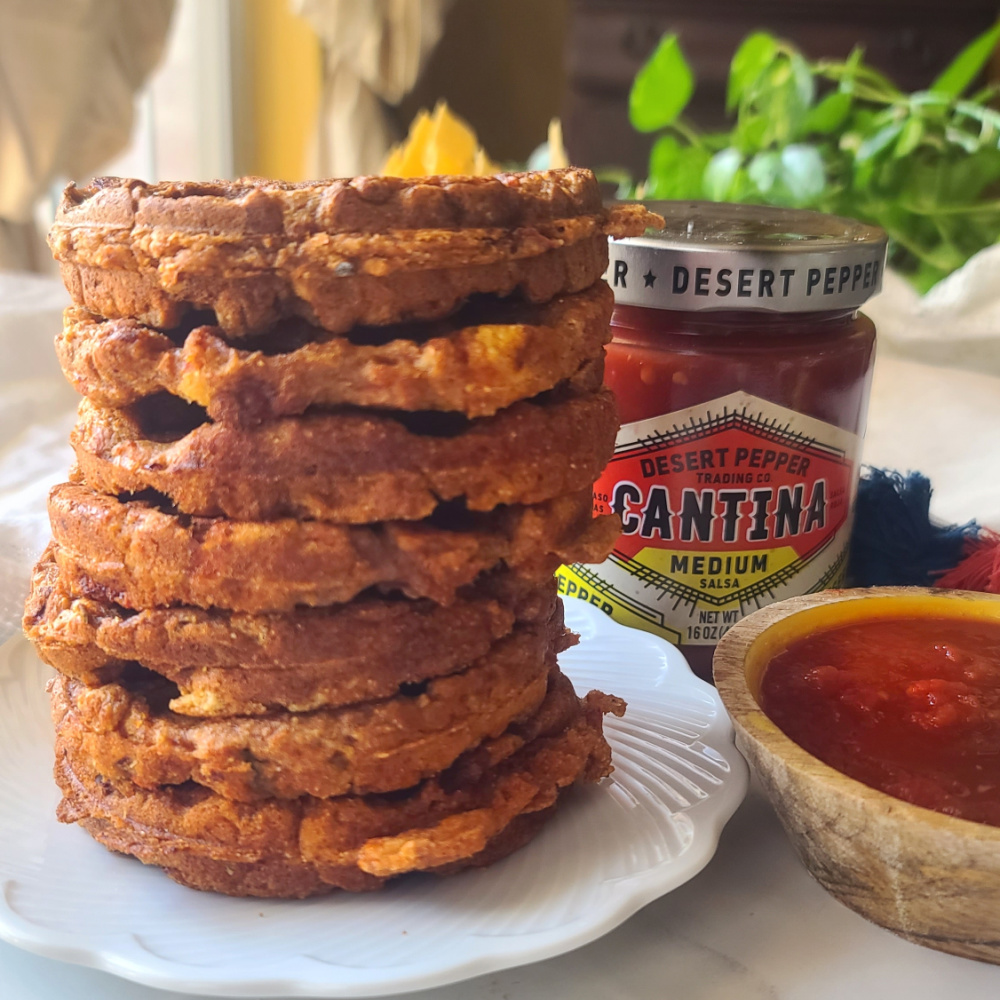
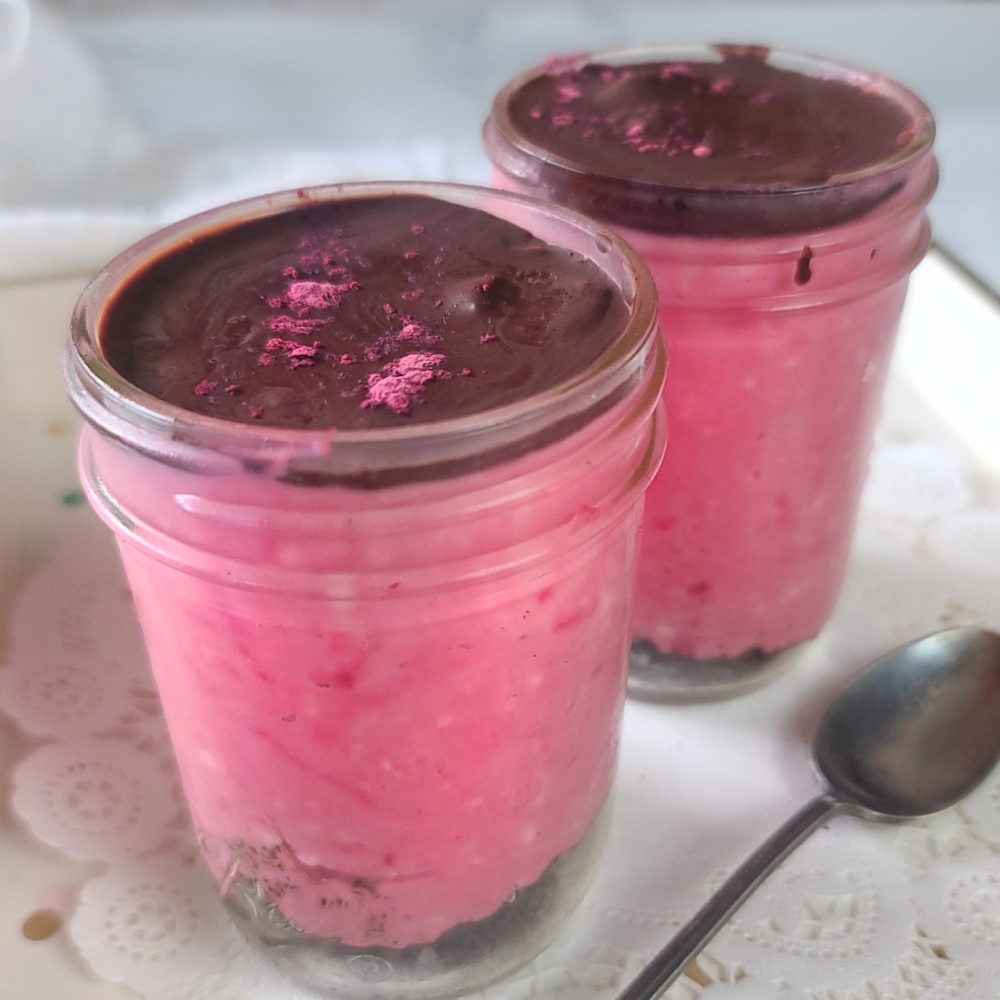
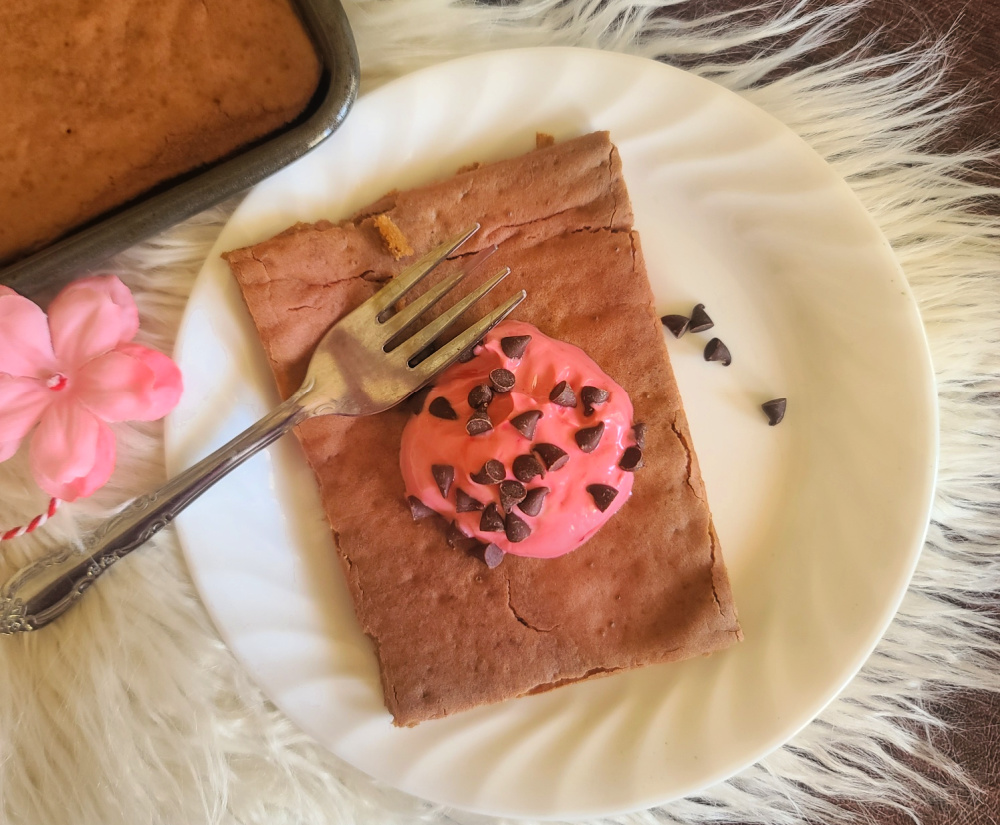
  • Customizable Toppings – I went with Greek yogurt (with extra beet powder for a pop of pink!) and sugar free chocolate chips, but you can get creative with your favorite toppings. Try nut butter, berries, or even a drizzle of maple syrup!  

 Perfect for Meal Prep & Busy Mornings

If you’re someone who loves pancakes but doesn’t have time to make them fresh every morning, this sheet pan method is a game-changer. Bake a batch, slice them up, and store leftovers in the fridge or freezer. Just reheat and enjoy—no skillet required just a standard size rimmed baking sheet.

 Fall in love with these Red Velvet Sheet Pan Protein Pancakes made with pancake mix, chocolate protein powder, and beet root powder for that classic red velvet vibe . . . but with better-for-you ingredients. No flipping, no fuss—just bake and enjoy! Each pancake has 15g protein and 235 calories to fuel your day.

Red Velvet Pancakes for Special Breakfast or Brunch

Whether you’re planning a Valentine’s Day breakfast, a weekend brunch, or meal prepping for a busy week, these Red Velvet Sheet Pan Protein Pancakes make a delicious and nutritious choice that can be made ahead. Everyone loves pin pancakes for Valentine’s Day breakfast and brunch food!

Note: This post contains affiliate links. I may earn a small commission for purchases made through links. Process help to offset operating expenses for The Fit Fork. Thank you!

Red Velvet Sheet Pan Protein Pancakes
Prep Time
5 mins
Cook Time
15 mins
Total Time
20 mins
 

Fall in love with these Red Velvet Sheet Pan Protein Pancakes made with pancake mix, chocolate protein powder, and beet root powder for that classic red velvet vibe . . . but with better-for-you ingredients. No flipping, no fuss—just bake and enjoy! Each pancake has 15g protein and 235calories to fuel your day.  
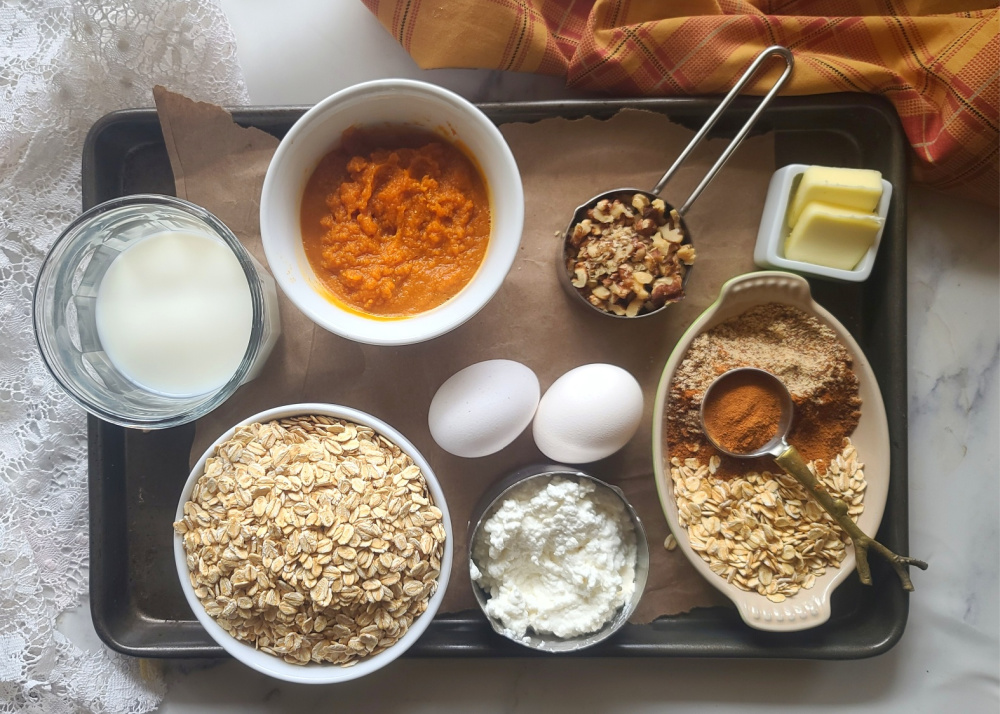
Course: Breakfast, brunch
Keyword: beet powder, cottage cheese, pancakes, protein powder, sheetpan
Servings: 8
Calories: 235 kcal
Ingredients
  • 3 eggs
  • 1 1/12 cups water
  • 1 cup 2% cottage cheese
  • 2 Tablespoons melted coconut oil or melted butter
  • ¾ cups chocolate protein powder of choice
  • 2 Tablespoons beet root powder
  • 2 cups gluten free pancake mix of choice
  • Optional toppings
Instructions
  1. Preheat oven to 400F degrees.
  2. In blender, add eggs, cottage cheese, water melted butter or oil. Blend for 20-30 seconds to combine until smooth.
  3. Next blend in protein powder and beet powder.
  4. Finally, blend in pancake mix, 1 cup at a time, scraping down sides as needed. If mixture seems too thick (can vary based on pancake mix used) then add up to ¼ cup water.
  5. Spray standard rimmed baking sheet with cooking spray and pour in batter. Bake for 12-15 minutes or until set and lightly browning on top.
  6. Remove and let cool in pan a couple minutes, cut into 8 rectangles and enjoy with the toppings of your choice.
Recipe Notes

Raspberry Chocolate Mini Pancake Puffs (Holiday Aebleskivers)

Take your breakfast or brunch to the next level with Raspberry Chocolate Pancake Puffs, a delightful treat stuffed with juicy raspberries and melty chocolate.

These little pancake bites are inspired by Danish aebleskivers, a beloved holiday dish, but with a simpler, modern twist. Instead of using a traditional aebleskiver pan (which can be a bit tricky to master), this version makes use of a donut hole or cake pop machine. The result? A convenient, mess-free, mini-sized way to enjoy this festive favorite.

Why You’ll Love These Mini Pancake Puffs

  • Light and Fluffy Texture: The secret is in the egg whites! Whipping them to stiff peaks ensures the puffs are tender and airy. While stiff peaks may sound intimidating, they’re surprisingly easy to achieve with a few simple tricks:
    1. Use cold, fresh eggs.
    2. Make sure no yolk sneaks into the whites.
    3. Add a pinch of salt to stabilize the peaks.
    4. Beat on medium speed for 4–5 minutes (don’t overdo it!).
  • Healthier Cooking: Unlike traditional aebleskivers, these pancake puffs can be made with little to no butter or oil thanks to the nonstick magic of a donut hole machine.
  • Endless Customization: While fresh raspberries and chocolate chips are a dreamy combination, the possibilities are endless. Jam, nut butters, diced fruit, or even savory fillings can be used to suit your mood or menu.

A Holiday Treat to Remember

Perfect for holiday brunches, weekend breakfasts, or even as a festive dessert, these cake pop maker pancake bits this are guaranteed to be a hit with kids and adults alike. Each tender bite is a surprise, with bursts of fresh raspberry and chocolate that make every puff feel like a special treat.

Make it a family tradition: Invite the kids to help fill the batter and discover the joy of biting into a “hidden treasure” inside each puff. It’s an easy way to create holiday memories while enjoying a dish that’s as fun to make as it is to eat.

Pro Tips for Pancake Puff aka Aebleskivers Success

  • Don’t overfill: A small dollop of batter, followed by your filling, and then another small dollop on top ensures a neat seal.
  • Preheat your machine: Like any pancake, these cook best when your cooking surface is hot and ready.
  • Serve warm: The gooey chocolate and warm raspberries are best enjoyed fresh from the machine. But, if you have leftovers (almost unheard of!), keep them in the fridge, and then microwave on a paper towel-lined sheet for 10 seconds or so.

Whether you’re hosting a festive brunch or just looking to bring a little holiday cheer to your table, this easy aebleskivers recipe is an easy, impressive, and utterly delicious option. With their light texture, customizable fillings, and festive appeal, they’re sure to become a new family favorite.

What’s your favorite filling for pancake puffs? Let me know in the comments and happy cooking!

Raspberry Chocolate Pancake Puffs
Prep Time
10 mins
Cook Time
20 mins
Total Time
30 mins
 

Stuffed with raspberries and chocolate, these little pancake puffs make a fun, festive treat for breakfast or brunch. Inspired by a Danish holiday dish called aebleskivers – except skipping the traditional tricky pan in lieu of an easy, convenient donut hole / cake pop machine. Bringing egg whites to stiff peaks help the puffs cook up light and fluffy and I always use Eggland’s Best eggs for the great taste and superior nutrition.

Course: Breakfast, brunch, holiday
Keyword: danish, gluten free pancake, holiday, pancake, waffles
Servings: 6 servings (8 puffs each)
Calories: 200 kcal
Ingredients
  • 1 cup all-purpose flour
  • 2 tablespoon sugar
  • 1/2 teaspoon baking powder
  • 1/4 teaspoon salt
  • 2 large eggs separated
  • 1 cup buttermilk
  • 2 tablespoons melted butter
  • 1 teaspoon vanilla extract
  • 6- oz container fresh raspberries should have about 48-60 in there
  • 48 chocolate chips
  • Optional: powdered sugar or maple syrup
Instructions
  1. In a large bowl, whisk together flour, sugar, baking powder & salt.
  2. Separate eggs, set whites aside.
  3. Whisk in egg yolks, buttermilk, melted butter and vanilla extract. Whisk until mostly smooth, slight lumps okay.
  4. In a separate bowl, using electric mixers, beat egg whites until stiff peaks form. Ad a tiny pinch of salt before mixing to help them peak.
  5. Gently fold egg whites into batter.
  6. Let cake pop/donut hole machine preheat for about 3 minutes, or indicator light says its ready.
  7. While machine is pre-heating, stuff a chocolate chip into the center of each raspberry; set aside.
  8. Fill each well in the machine with about 1 tablespoon batter.
  9. Moving quickly, add one chocolate-stuffed raspberry to the center of each. The top each raspberry with just enough batter to cover.
  10. Close machine and let cook for about 3 minutes or until indicator light notifies. Pancake puffs with be lightly golden brown when ready.
  11. Use a fork or spoon to carefully remove each; let cool on a paper towl.
  12. Repeat process until remaining batter and raspberries used up. (Note: my machine makes 12 at a time, so I did the process 4 times).
  13. Sprinkle with powdered sugar or maple syrup and any leftover raspberries!
Recipe Notes

Pumpkin Streusel Sheet Pan Pancakes (Gluten-free)

Fall mornings can be hectic, but that doesn’t mean a healthy breakfast needs to be an afterthought. Pumpkin season is in full swing, and there’s no better way to celebrate than with a cozy, nutrient-packed meal that can be prepped in advance. Enter the sheet pan pumpkin pancake—a convenient, flavorful, and protein-packed way to feed a crowd or make your mornings easier with quick breakfast meal prep. After the ease of prep and first yummy bit, this will be your favorite among pumpkin breakfast recipes.

Why Sheet Pan Pancakes?

Sheet pan pancakes are a game-changer for busy mornings. Instead of flipping pancakes one by one, you can bake everything at once in a standard “half” sized rimmed baking sheet (about 17” x 13”), saving time and effort. It’s a great option for large families, meal prep, or hosting a holiday brunch. Plus, you can freeze individual portions and pop them in the toaster or microwave on rushed days.

Power Up with Pumpkin, Cottage Cheese and Oats: First, we have to fist-pump the pumpkin! Canned pumpkin is a low-cal pantry powerhouse that is rich in vitamin A (in the form of beta-carotene), which supports eye health, skin, and immunity. It also provides vitamin C, potassium, and fiber, all important for overall wellness.

Also, yay for cottage cheese! Blending cottage cheese into the pancake batter not only adds richness but also boosts the protein content. If you’re looking to start your day with a solid, satiating breakfast, this ingredient does the trick, turning them into protein pumpkin pancakes!   And, instead of traditional flour, we’re using ground oats to make gluten-free pumpkin pancakes. You can easily make your own oat flour by pulsing rolled oats in a blender. This gluten-free swap keeps the pancakes fiber-packed and light, helping to fuel you for whatever the day has in store. If you’d like it even easier, you can used packaged oat flour (the blending is already done for you).

Nutty Cinnamon Streusel Topping: Fall flavors wouldn’t be complete without a little warm spice. A cinnamon streusel topping made with walnuts or pecans adds a delicious layer of crunch to these pancakes. Coconut sugar adds light sweetness. The combination of warm spices and nutty richness of this pumpkin streusel topping creates the perfect balance to the cottage cheese sheet pan pancakes and makes every bite feel like a fall treat.

Meal Prep Friendly: One of the best parts about this sheet pan pancake recipe is that it’s meal-prep friendly. You can slice the finished sheet pan into squares (or rectangles as it may be) and then store individual servings in the freezer. When the morning rush hits, just grab a square and reheat it for a quick, wholesome breakfast. Thanks to a little coconut sugar in the batter and streusel topping, these pumpkin cottage cheese pancakes are lightly sweet enough to eat without syrup (if desired) – making them perfect for literally eating on the run.

Macros Per Serving (Serves 8): Each “square” of this pumpkin sheet pan pancake is packed with balanced nutrition: – 275 calories, 27g net carbs, 13g fat and 10g protein.

Pumpkin Streusel Sheet Pan Pancakes
Prep Time
10 mins
Cook Time
20 mins
Total Time
30 mins
 
Embrace pumpkin season while minimizing morning stress with this easy sheet pan pancake recipe! Cottage cheese blended into the batter adds extra richness and protein while the ground up oats create a gluten-free, fiber-packed flour. Plus, that cinnamon, nutty streusel topping adds a pleasing sweetness and crunch to this convenient and yummy fall breakfast. Feed a crowd, or meal prep and store in single-portion servings in the freezer for busy mornings.
Course: Breakfast, brunch
Cuisine: gluten free
Keyword: gluten free, pancakes, pumpkin, sheetpan
Servings: 8 Servings
Ingredients
Batter:
  • 2.5 cups old-fashioned rolled oats
  • 1 cup pumpkin puree
  • 3/4 cup 2% cottage cheese
  • 1 ¼ cup milk
  • 2 large eggs
  • 2 Tbsp. butter, melted
  • 2 Tbsp. coconut sugar
  • 2 tsp. baking powder
  • 2 tsp. pumpkin pie spice
  • 1/4 tsp. salt
  • Topping:
  • ¼ cup rolled oats
  • 3 Tbsp. finely chopped walnuts or pecans
  • 3 Tbsp. coconut sugar
  • 2 Tbsp. butter, melted
  • 2 Tbsp. almond meal
  • ½ tsp. ground cinnamon
  • tsp salt
Instructions
  1. Pre-heat oven to 375F.
  2. Add rolled oats to high-speed blender or food processor and process, pulsing on and off for about 45 seconds, or until a “flour” is created.
  3. Leave oat flour in blender and add remaining dry ingredients: coconut sugar, baking powder, salt and pumpkin pie spice. Pulse quickly to combine.
  4. Add pumpkin, milk, melted butter, and eggs to dry mixture and blend for 30 seconds until incorporated, scraping down sides with spatula, as needed.
  5. Pour into approximate 13” x 18” rimmed baking sheet, that has been coated with cooking spray.
  6. In medium bowl, mix together melted butter, coconut sugar, almond flour, oats, and chopped walnuts until combined and crumbly. Sprinkle this over the top of the pancake batter.
  7. Bake for 20 minutes, or until set and top is turning golden. Remove and let cool in pan for 5 minutes.
  8. Slice into 8 rectangles and serve with syrup of choice and any extra toppings (or eat plain). Can be meal-prepped by freezing in single portions and thawed and reheating when ready.
Recipe Notes

Macros: 275 cal, 27g net carb, 13g fat, 10g protein per “square”

Spice Up Breakfast with Savory Southwest Bean and Salsa Waffles

If you’re craving something a little different for breakfast (or really any meal of the day), these Savory Southwest Bean & Salsa Waffles are a must-try! They’re a tasty twist on traditional waffles, starting with simple pantry staples like fat-free refried beans and jarred salsa. For this batch, I used Cantina Medium Salsa from Desert Pepper Trading Co., which packs just the right amount of heat and flavor.

The waffles get their satisfying texture from a cornmeal-based batter that crisps up beautifully in the waffle iron. The ingredients are mostly pantry staples and I think you’ll love making this easy waffle recipe on repeat.

They’re perfect as is, but the fun really starts when you get creative with toppings. Whether you go with a sunny-side-up egg, avocado, shredded chicken, or even deli meat for a sandwich-style creation, these waffles are endlessly versatile. And for those of you with a sweet tooth, don’t knock it ’til you try it—we even love them drizzled with syrup!

If you’re hosting friends or family, cut the waffles into quarters and serve them as a fun appetizer alongside more salsa for dipping. However you serve them, these savory waffles are a deliciously unexpected way to add Southwest flair to your day!

Nutrition perks: These are vegetarian waffles and vegan waffles, containing no milk or eggs. If you would like to make gluten-free, swap out the all-purpose flour for a gluten-free baking blend alternative. Each waffle has 131 calories, with 3g protein and 3g dietary fiber. See nutrition facts in recipe below for more details.

What type of waffle iron to use? I used a personal-sized mini waffle for these salsa bean cornbread waffles. The recipe makes eight, and you cook them one at a time this way. If you have a larger 4-square iron, the recipe will make 2 large waffles (eg 8 squares). I have not tested it in any other type of waffle iron.

Bean choice: For convenience, use a fat-free refried bean from can – I’ve tried pinto bean (here) and also black bean.

Salsa choice: I loved using Cantina Salsa from Dessert Pepper Trading Co. The heat level was just right for me—medium heat. This El Paso, Texas company makes other authentic salsa varieties in a range of heat levels if you’d like to try something different, you can purchase at Sprouts, Publix, Hannaford, Harris Teeter, Shop Rite, Walmart, Giant Eagle, Market Basket, Jewel, and Meijer or pick up your favorites online at DessertPepper.com. Follow on Facebook or Instagram for more recipe inspo.

Savory Southwest Bean and Salsa Waffles
Prep Time
5 mins
Cook Time
32 mins
Total Time
37 mins
 

Thesesavory waffles make a fiesta of flavor for breakfast and brunch or evenappetizers or dinner. Easy and convenient thanks to jarred salsa and fat-freerefried beans. The cornmeal base batter crooks them up crispy and golden. Deliciousplain or topped with an egg, avocado or other creative toppings.

Course: Appetizer, Breakfast, brunch, dinner, lunch
Cuisine: Southwestern, tex mex
Keyword: beans,, cornbread, salsa, waffles
Servings: 8 waffles
Ingredients
  • ½ cup salsa Cantina Medium Salsa from Desert Pepper Trading Co
  • 7.5 oz about ½ can fat-free refried beans
  • 1/3 cup almond milk or other milk of choice
  • 2 tablespoons olive oil
  • 2/3 cups all-purpose flour or gluten-free baking alternative
  • 2/3 cup cornmeal
  • 1 teaspoons baking powder
  • 1/2 teaspoon baking soda
  • 1/8 teaspoon salt
Instructions
  1. In bowl, mix together wet ingredients (beans, salsa, milk and oil).
  2. Add flour, corn meal, and baking powder, baking soda and salt to bean mixture; mix until a thick batter has been formed. It will be pretty thick!
  3. Heat waffle iron and spray with cooking spray. Add about ¼ cup* of batter to a personal-sized waffle iron, spreading around with a spatula to reach the edges. * For a 4-square waffle iron, add about 1 cup (half the batch).
  4. Cook in waffle iron for 3 to 5 minutes until browned and turning crispy on the exterior. Repeat for each waffle (will make 8 individual waffles or 2 4-square waffles).

  5. Top as desired, egg or guacamole always a good choice – with extra salsa drizzled on top! Used for sandwiches is great too – or cut in quarters for an appetizer and serve with salsa.

Creamy Cottage Cheese Cheesecakes in 5 Delicious Flavors for Breakfast or Dessert

Whether for breakfast, dessert or snack-time, these little, no-bake cheesecakes are pleasingly delicious, creamy and protein packed. They all starts with one of my favorite ingredients, blended cottage cheese. A cottage cheese cup is such a powerhouse food providing lots of protein and calcium for a relatively low-calorie expenditure. I love easy cottage cheese recipes.

Featuring blended smooth cottage cheese, these creamy, no-bake treats are packed with protein, calcium and other great nutrition, making them a smart choice for breakfast, snack time or a healthy dessert!

Cottage cheese makes the perfect base for these healthy cheesecakes that are portioned up in single-serve size. Even if you think you don’t like cottage cheese, you’ll change your mind – once the curds are blended up smooth, it becomes an amazing creaming filling for cheesecake creations (and also cottage cheese bowls, smoothies, savory pasta dishes, baked recipes and more). When I get home from the store, I usually blend mine up in a smaller blender (like this one) and keep on hand in the fridge for whatever use I have in mind!

Also, it’s a good idea to have smaller mason jars, mugs, ramekins or bowls – around 10-14 ounces to portion out the no-bake cheesecakes before setting in the fridge! ENJOY!

This no added sugar cheesecake dessert features cottage cheese and collagen blended until creamy -- sugar free chocolate chips and strawberries put this no-bake, no crust, lower carb, single-serve recipes over the top.

Sugar-free Chocolate Chip Cottage Cheese Cheesecake: Dig into this smart, no-added-sugar, single-serve solution that will sooth your sweet tooth and give you enough protein (30g) to stand in for a full meal – thanks to cottage cheese and collagen powder.

These No-Bake Beet Protein Cheesecakes are not only pretty in pink and very delicious, but also include the functional benefits of eating beets and lots of protein thanks to blended cottage cheese and protein powder! Plus, that sugar-free chocolate topping is amazing. A healthy dessert or post workout snack.

No-Bake Beet Protein Cheesecakes with Sugar-Free Chocolate: You’ll love the pretty-in-pink benefits of Beetroot Powder, plus 39g protein per cup!

Boston Cream Pie Cottage Cheese Protein Chesecake

Boston Cream Protein Cheesecake for Two: You’ll love how an American classic dessert is transformed into a luscious, lower-carb (and high protein) treat that is also gluten-free and has no added sugar.

Mango Protein Cheesecake Cup for One is a no-bake, easy high protein snack that will be your new tropical-inspired favorite for a healthy dessert, post-workout snack or even an easy breakfast that also boasts lots of calcium and fiber.

Mango Protein Cheesecake Cup for One: Mango pairs up so deliciously with chia seeds and dresses up the top of this creamy protein snack. You’ll feel oh-so tropical.

Maple Pecan Protein Cheesecakes -- are a protein-packed, low-carb option that is healthy enough for breakfast or a smart dessert!

Maple Pecan Protein Cheesecake Cups: These no-bake, mini cheesecakes are lower-carb, higher protein, and offers 75% of your recommended daily calcium needs. Plus, you’ll fall in love with that maple flavor.

Featuring blended smooth cottage cheese, these creamy, no-bake treats are packed with protein, calcium and other great nutrition, making them a smart choice for breakfast, snack time or a healthy dessert!