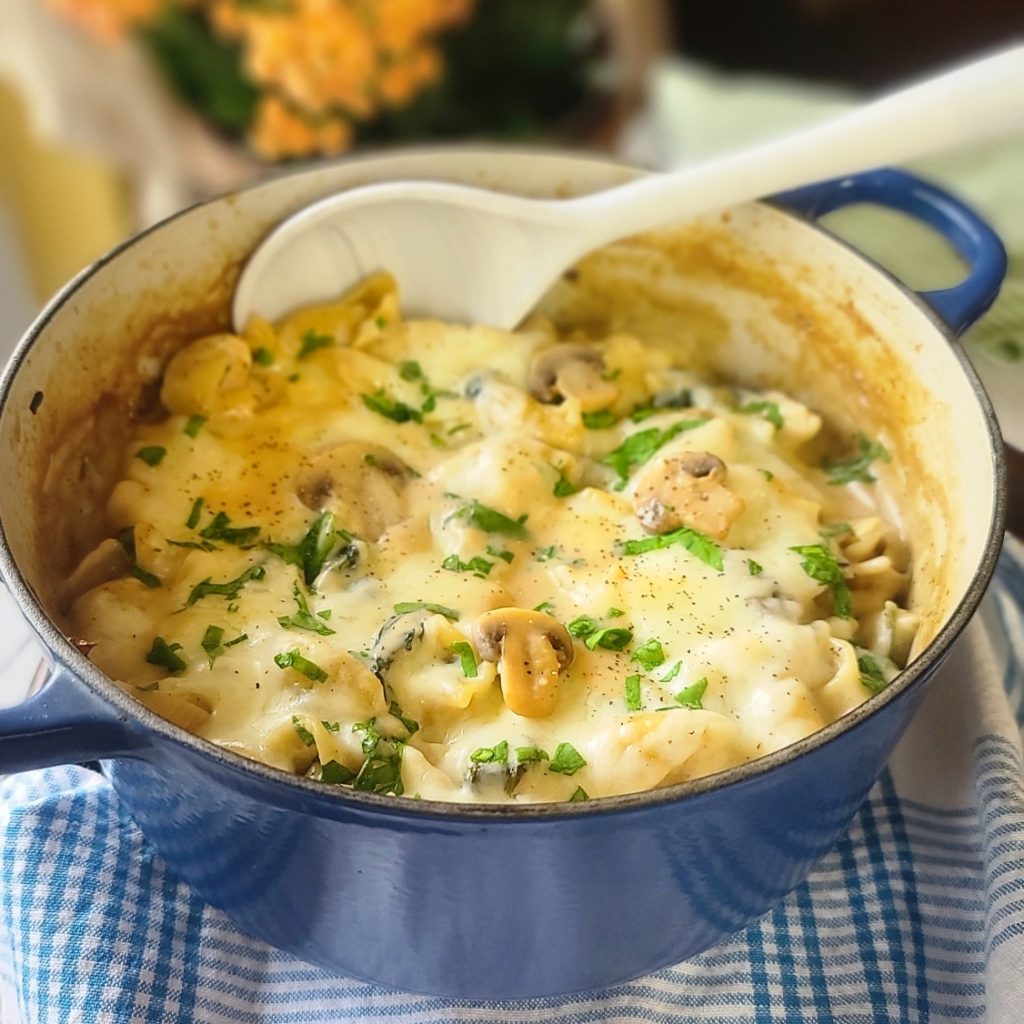
Who isn’t looking for a quick, healthy, and delicious meal that can be whipped up in minutes? My Layered Veggie Mug Lasagna for One is the perfect, perfectly-portioned solution for those busy lunch hours or hectic evenings when you want to stick to your clean-eating goals and avoid take-out or lackluster packaged meal products.

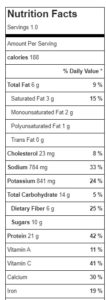
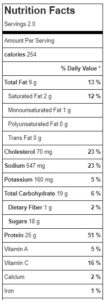
The entire portion of this no-noodle veggie lasagna has amazing macros to fuel your day. Only 188 calories, 16g carbs, 6g fat and 21 g protein. The protein primarily comes from cottage cheese (2% milkfat) that makes an excellent cheesy, creamy swap for lasagnas signature ricotta cheese.
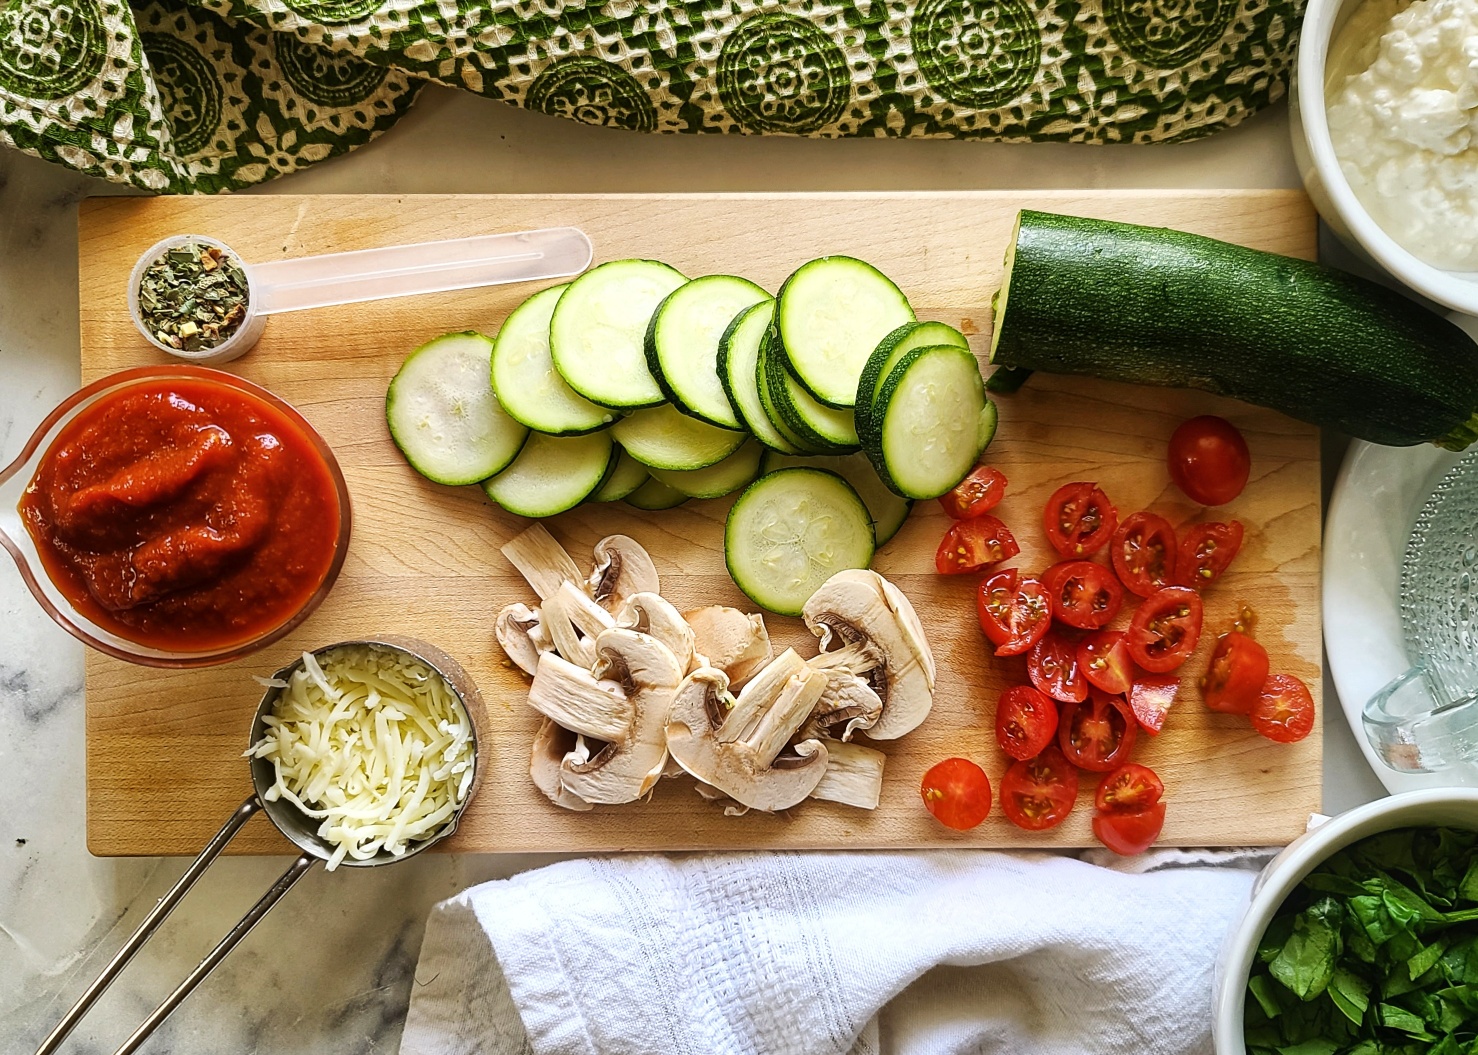
Also, this healthy comfort food dish replaces traditional lasagna noodles with thinly-sliced zucchini and packs in a variety of fresh veggies, offering a nutritious and satisfying meal. In addition to the zucchini, I used fresh spinach, button mushrooms and grape tomatoes – you can tweak this to suit your taste preferences (and what you might need to use up in your produce bin).
Why You’ll Love This Lasagna in a Mug Recipe:
- Zucchini Noodles: Swap out carb-heavy pasta with thinly sliced zucchini, adding a delightful crunch and a boost of vitamins. The key for success here is to slice the zucchini very thinly (it cooks quicker) and also to pat it down to remove extra moisture before layering up you mug (this helps prevent watery lasagna).
- Protein-Packed: As mentioned above, using cottage cheese (I recommend 2%, not 0% milkfat) instead of ricotta provides more protein and less fat, making it a healthier option.
- Quick and Easy: Assemble your lasagna in a 16-ounce mug (wider mug a better option than tall and skinny) and microwave it in minutes. It’s perfect for a speedy lunch or dinner.
- Portion-Controlled: This single-serving recipe ensures you have the right portion size, helping you stay on track with your dietary goals.
- Meal Prep Friendly: You can prepare your mug lasagna ahead of time and store it in the fridge for up to a couple of days. Consider doubling or tripling the batch into multiple mugs. Just heat and eat when you’re ready!
This layered veggie mug lasagna is a game-changer for busy days when you need a wholesome meal without the hassle. Enjoy the convenience and taste of this delightful dish, perfect for anyone looking to eat healthily without spending hours in the kitchen.

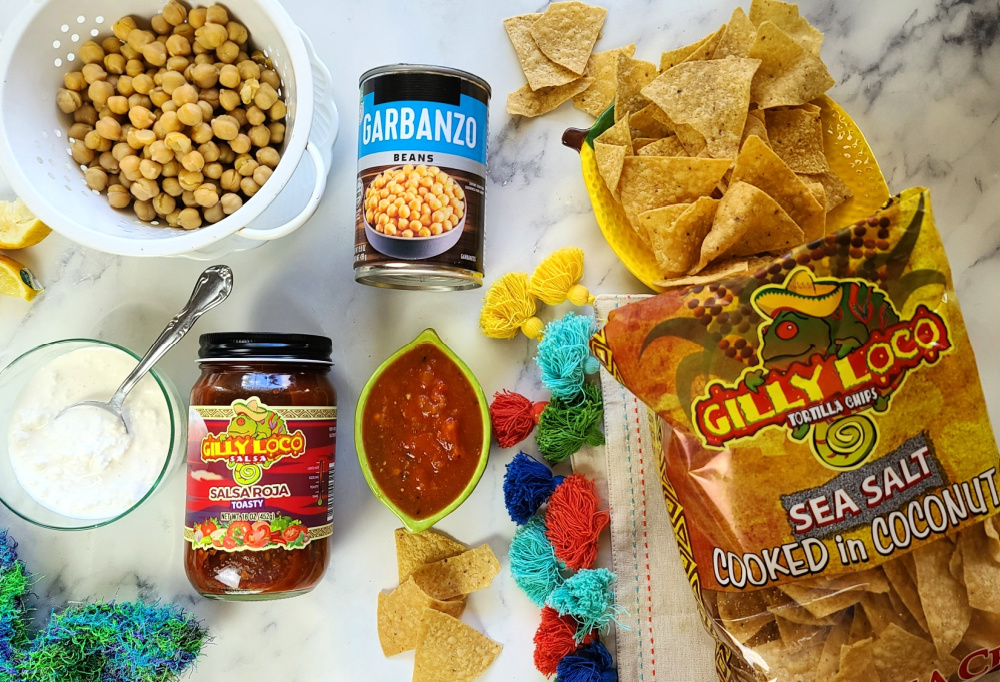
This post may contain affiliate links. I earn a small commission from any sales, which helps me host and operate this site. Thank you!

This single portion lasagna made in a mug for one is a quick, nutrition and delicious meal that is ready in minutes. A perfectly portioned, high-protein and lower carb solution for your busy lunch hour or a hectic evening. Easy to meal prep ahead and then heat and eat when ready. Gluten free and vegetarian.
- 3 ounces zucchini sliced into very thin discs
- ½ cup 2% cottage cheese
- ½ tsp Italian seasoning
- ½ tsp garlic powder
- 2/3 cup chopped fresh spinach
- ¼ cup marinara sauce
- 3 small button mushrooms sliced thin
- 5 grape tomatoes chopped
- 2 tbsp shredded mozzarella
- Optional: chopped fresh basil
-
Take sliced zucchini and blot with paper towel to remove any excess moisture. Set aside.
-
Mix Italian seasoning and garlic powder into cottage cheese until combined.
-
In minimum 16-ounce mug (wider better than tall and skinny mug), layer 1/3 of zucchini slices in bottom. Top with about 3 tbsp cottage cheese mixture, spread to cover zucchini. Next add half of spinach to this layer. Then sliced mushrooms and about 2 tbsp marinara.
-
Add another layer of zucchini (another 1/3 portion) and top with 3 tbsp cottage cheese mixture, then more mushrooms and marinara
-
Top with zucchini one last time, using up remainder, and top with the remaining cottage cheese. Sprinkle with shredded mozzarella and top with tomatoes.
-
Microwave on high for 1 minute, then let rest 15 seconds. Microwave 1 more minute (or until hot and bubbling through, then let rest for 1 minute before eating. Top with fresh basil if desired.