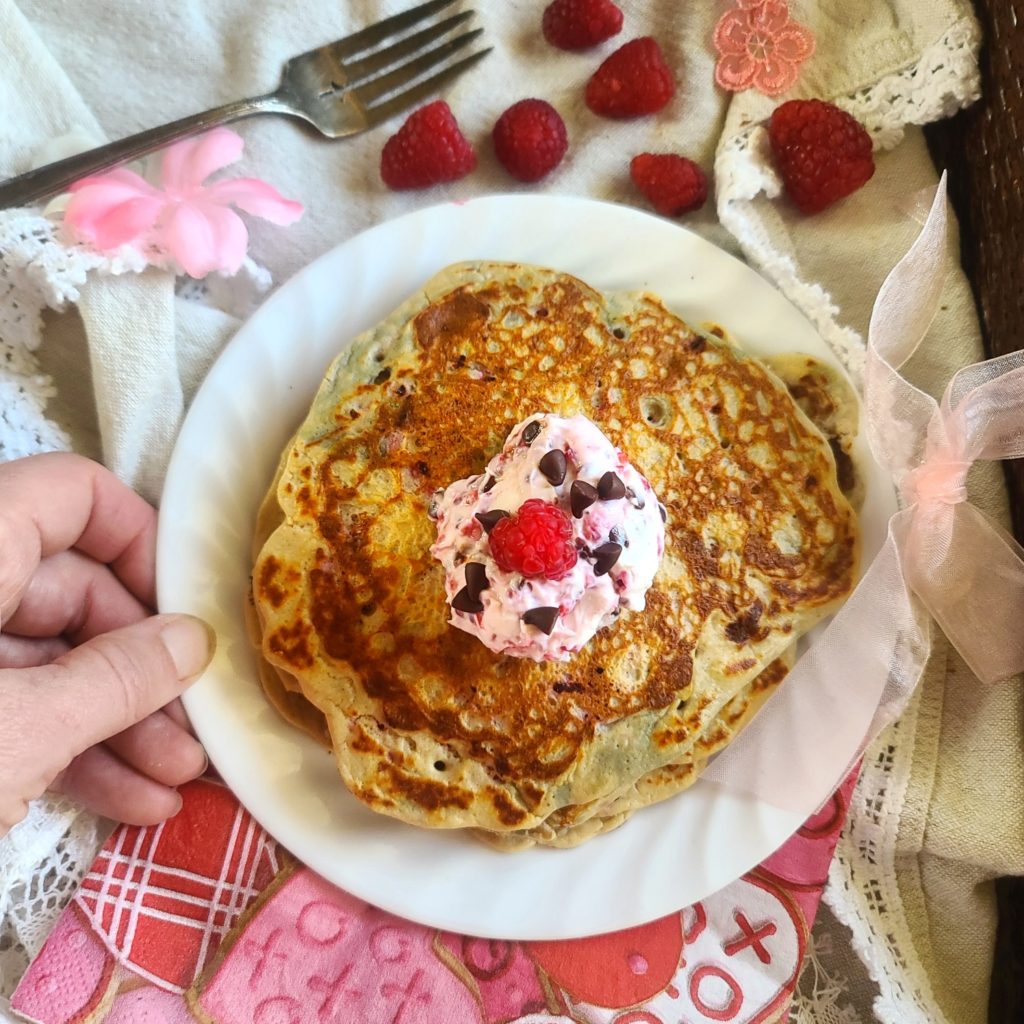
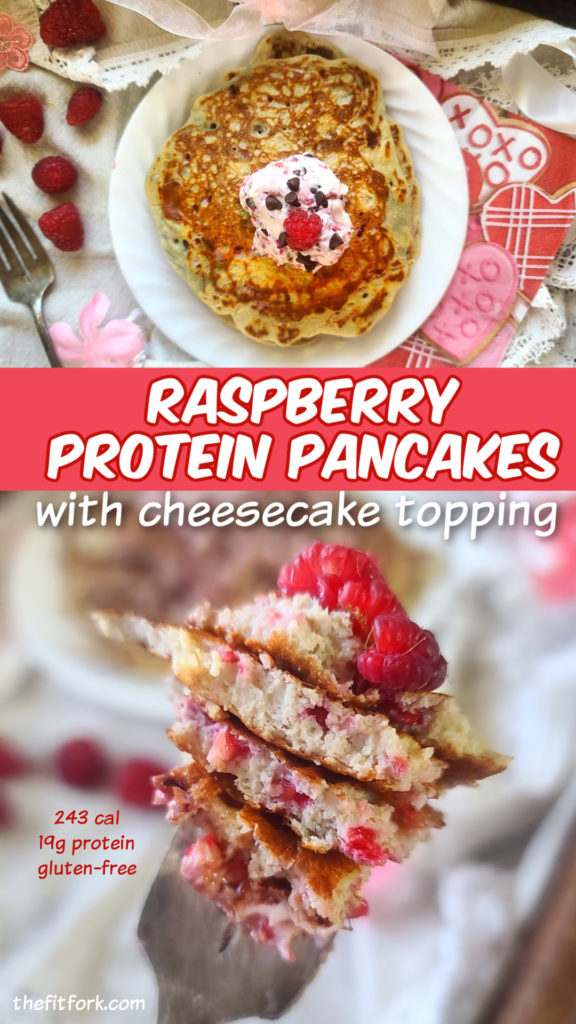
Raspberry Protein Pancakes with Easy Cheesecake Topping

Sundays are for rest, recharging, and really yummy things. Raspberry Protein Pancakes with Cheesecake Topping makes a tasty breakfast that feels indulgent, but is actually “no worries” at just 243 calories and 19g protein per serving* Lower carb and gluten-free too.

Raspberry Protein Pancakes with Cheesecake Topping makes a tasty breakfast that feels indulgent, but is actually “no worries” at just 243 calories and 19g protein per serving* Lower carb and gluten-free too.

Very simple to make these protein pancakes with raspberries, just mash up the fresh berries into a jam-like consistency and then mix in coconut milk, coconut flour, protein powder* and a pinch of baking soda. Then batter up a non-stick skillet (I used this skillet, it’s inexpensive & effective) and get to flipping and stacking! This protein pancake recipe is ready in a snap – only 4 pancakes to make (two pancakes for each serving, or eat them all for a really big appetite).

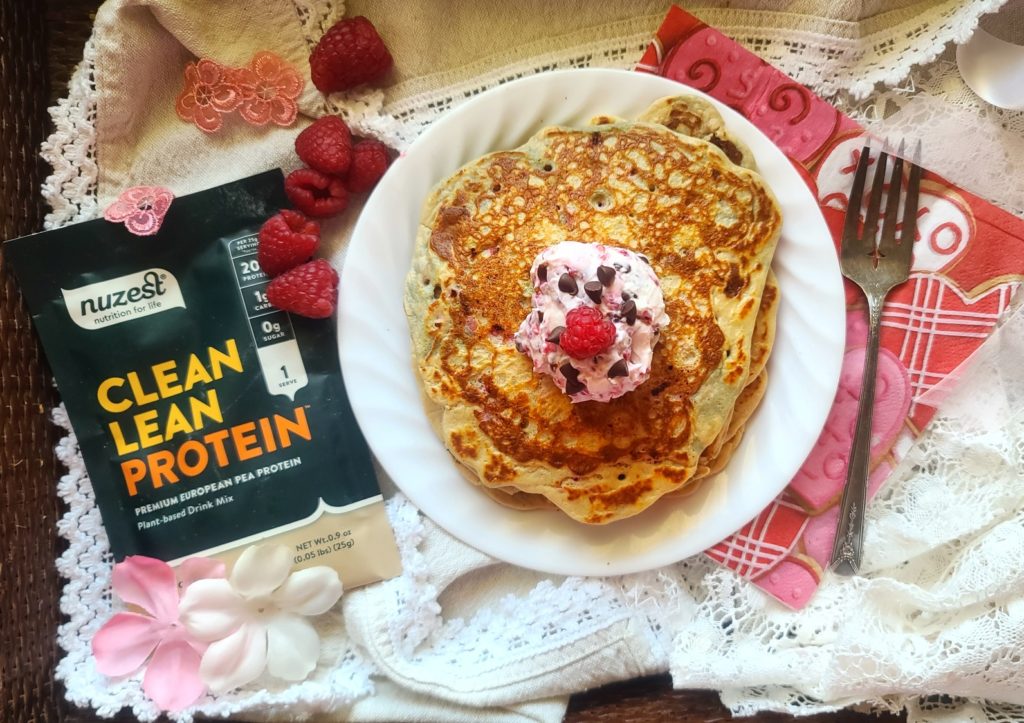
Use the protein power variety of your choices, like whey, plant-based or casein, etc. IF the batter starts to seem too thick (which can, based on the powder), then just mix in a splash more of milk. I used Clean Lean Protein from Nuzest in Smooth Vanilla. A cake batter or even chocolate protein powder would be yummy to.

*Nutrition can vary some based on the protein powder you choose. Try Nuzest, a plant-based protein powder, and save 15% with my discount code FITFORK-15

The crown on top of these raspberry pancakes is the Cheesecake Topping – it is simple softened low-fat cream cheese mixed together with a few more raspberries and sugar-free mini chocolate chips.  Dollop it on top of your warm pancakes and it will begin to melt – just smear it around for the most delicious pancake topping (no syrup or butter required)!

This raspberry protein pancakes recipes makes two servings – if you don’t polish them all off, keep covered in the fridge for up to 3 days, microwaving for 15-20 seconds to reheat. They can also be frozen (without the topping).

Raspberry Protein Pancakes with Cheesecake Topping makes a tasty breakfast that feels indulgent, but is actually “no worries” at just 243 calories and 19g protein per serving* Lower carb and gluten-free too.
5 from 5 votes
Raspberry Protein Pancakes with Cheesecake Topping makes a tasty breakfast that feels indulgent, but is actually “no worries” at just 243 calories and 19g protein per serving* Lower carb and gluten-free too.
Raspberry Protein Pancakes with Easy Cheesecake Topping
Prep Time
5 mins
Cook Time
10 mins
Total Time
15 mins
 

Indulge in a healthy, protein-packed stack of berry-studded pancakes featuring a cheesecake like topping to smear around on top, instead of syrup and butter. Only 243 calories per serving, 19g protein — plus lower carb and gluten free.

Course: Breakfast, brunch
Keyword: cheesecake, pancakes, protein powder, raspberry
Servings: 2 servings
Calories: 243 kcal
Ingredients
  • 2/3 cup fresh raspberries divided
  • 1 egg
  • 1/2 cup unsweetened coconut milk from carton splash more, if batter too thick
  • 1/3 cup vanilla protein powder your choice of variety
  • 3 tbsp coconut flour
  • 1/4 tsp baking soda
  • 2 Tbsp low-fat cream cheese softened
  • 2 tsp sugar free chocolate chips
Instructions
  1. Add ½ cup raspberries into bowl (Reserving remainder for the topping). Use a fork to smash them up into a jam-like consistency.
  2. Stir in egg and coconut milk into raspberries, whisking together with a fork until combined.
  3. Next, mix in coconut flour, protein powder, and baking soda until combined.
  4. Heat non-stick skillet over medium heat.
  5. Pour 1/3 cup batter in center of skillet. Cook for 3 minutes or until mostly set and no longer runny. Slide spatula underneath and flip
Recipe Notes

High Protein Banana Pudding with Cottage Cheese

Every time I eat a bite of my High Protein Banana Pudding recipe, it’s like a nostalgic trip down memory lane – except with less sugar, less fat, and more protein! That’s very “a-peeling” to my fitness nutrition goals!

High Protein Banana Pudding: A healthy twist on this classic comfort food allows you to enjoy dessert with no guilt while making gains on your daily protein goals! Only 285 calories per serving, with 30g protein! Lower carb, lower, sugar, gluten-free.

Indulge in guilt-free dessert-eating, all while making gains on your daily protein intake. Cottage cheese and protein powder, blended with a banana creates pudding-like mixture that can be layered with banana slices and low-carb vanilla wafers.

Each serving of this cottage cheese banana pudding has 30g protein and 285 calories! A bowl full makes a great workout snack, healthy dessert – or even balanced breakfast (hey, there’s fruit in it!!)

 This lower carb banana pudding blends up easily in a smoothie-sized, smaller personal blender – the recipe yields two servings.


High Protein Banana Pudding: A healthy twist on this classic comfort food allows you to enjoy dessert with no guilt while making gains on your daily protein goals! Only 285 calories per serving, with 30g protein! Lower carb, lower, sugar, gluten-free.

You can use the protein powder of your choice: whey, casein, plant-based, or whatever. You may have to add a splash more milk, depending on what type you use – the way it thickens up varies by product.

I used a plant-based protein powder from Nuzest and my milk suggestion in recipe is based on that.  Save 15% on Nuzest with discount code: FITFORK

High Protein Banana Pudding: A healthy twist on this classic comfort food allows you to enjoy dessert with no guilt while making gains on your daily protein goals! Only 285 calories per serving, with 30g protein! Lower carb, lower, sugar, gluten-free.
I used Highkey Vanilla Wafers which are low carb and gluten free.

Whip up this banana cottage cheese recipe quickly – it only takes about 5 minutes, start to finish. No need to let it thicken in the fridge like a boxed pudding mix. It’s best eaten within a few hours after preparation (keep chilled, of course). Any leftovers may be also be kept covered in the fridge for a couple days. However, the banana blended into the cottage cheese and the banana slices may turn slightly light brown. It’s still perfectly fine to eat, the fruit has just come into contact with air and oxidized.

As an Amazon Influencer and Nuzest Affiliate, I earn from qualifying purchases.

5 from 5 votes
High Protein Banana Pudding: A healthy twist on this classic comfort food allows you to enjoy dessert with no guilt while making gains on your daily protein goals! Only 285 calories per serving, with 30g protein! Lower carb, lower, sugar, gluten-free.
High Protein Banana Pudding with Cottage Cheese
Prep Time
5 mins
Total Time
5 mins
 

A healthy twist on this classic comfort food allows you to enjoy dessert with no guilt while making gains on your daily protein goals! Only 285 calories per serving, with 30g protein! Lower carb, lower, sugar, gluten-free.

Course: Dessert, Snack, workout
Cuisine: American, Southern
Keyword: banana, cottage cheese, high protein, protein powder
Servings: 2 servings
Calories: 285 kcal
Ingredients
  • 1 cup 2% cottage cheese
  • 1 to 2 tablespoons milk as needed
  • 1 large ripe banana divided
  • 1 scoop protein powder vanilla
  • ¼ cup sugar-free fat-free non-dairy topping
  • 1 ounce low-carb gluten-free vanilla wafers
Instructions
  1. Add cottage cheese, 1/2 banana, 1 Tbs. of milk, and protein powder to blender and process until smooth, scraping down sides as needed.
  2. If mixture seems too thick (which may happen depending on type of protein powder used), then add in the remaining 1 Tbsp milk. However, it is better to have too thick than too runny, so use extra milk sparingly.
  3. Add to bowl and layer ½ of cookies and ½ of the remaining banana slices. Pour in “pudding” mixture and top with remaining cookies and banana slices. Dollop with non-dairy topping. If desired, sprinkle with cinnamon.
Recipe Notes

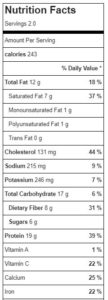
Makes 2 servings, each serving: 285 cal, 9g total fat (5g saturated), 29g total carb (7g fiber, 12g sugar), 30g protein

No-Sugar Peanut Butter-Chocolate Protein Poke Cake

No-Sugar Peanut Butter-Chocolate Protein Poke Cake is a quick and easy dessert that works with a lower carb, less sugar lifestyle. It’s a favorite for nearly every occasion! Each serving has 186 calories, 6g net carb, 12g fat and 10g protein when prepared as directed. That’s winning!

Poke cakes bring up nostalgic memories of baking up batter in a sheet pan, poking holes in the top, and then pouring on a sauce that gets sopped up by the holes. Traditionally though, the sauces have leaned toward the high-sugar side – sweetened condensed milk, chocolate sauce, pudding, and such. This makeover poke cake recipe uses peanut butter, sugar-free chocolate chips, milk (and some protein powder!) to create a better-for-you yet still decadent cake filling.

Quick, easy and makes 9 servings!

TIPS FOR MAKING PROTEIN POKE CAKE

Cake Mix: For convenience, I used a Fit Bake low-carb yellow cake mix (7-ounce pouch) sized to make a single round layer cake or 8”X8” square cake. You can use any cake mix that you like, just be aware that the Nutrition Facts will change. ALSO, if you are using a mainstream cake mix (like Betty Crocker, etc), those are typically 15-oz for two layers (so you will need to measure out ½ of dry mix for this recipe)

Pan Size: As noted, 8×8” brownie pan will work and is my preference. A 9” round cake pan works too! Anything bigger, the cake becomes too thin. I’ve never made as cupcakes, but the recipe should yield about 12 traditional-sized cupcakes or 6 jumbo cupcakes.

Filling: Use the creamy nut putter of your choice. I did peanut butter, but you can do almond butter, etc. Sugar-free chocolate chips helped keep the carb content down, and a scoop of protein powder added some extra nutrition (really any flavor will work – chocolate, vanilla, cake batter, etc. – as long as you think it sounds good)! I used Nuzest (see below for savings)

Toppings: For convenience, I used a sugar-free non-dairy whipped topping, but you could make your own whipped cream and sweeten with stevia drops. Extra sugar-free chocolate chips and some chopped peanuts for texture and flair!

This post contains affiliate links.

5 from 4 votes
Fun and flavorful, this easy-to-make poke cake will delight peanut butter and chocolate lovers. It's a lower carb and higher protein, so you can enjoy without guilt! A sugar-free and gluten-free dessert for any occasion
Sugar-Free Peanut Butter Chocolate Poke Cake
Prep Time
5 mins
Cook Time
25 mins
Cooling
10 mins
Total Time
40 mins
 

Fun and flavorful, this easy-to-make poke cake will delight peanut butter and chocolate lovers. It's a lower carb and higher protein, so you can enjoy without guilt! Sugar free and gluten free!

Course: desesrt
Cuisine: American
Keyword: cake, chocolate, gluten free, low carb, peanut butter, protein powder, sugar-free
Servings: 9 servings
Calories: 186 kcal
Ingredients
Cake:
  • 1 7- ounce package Fitbake Yellow Low-carb Cake Mix or similar
  • 3 eggs
  • ½ cup Greek yogurt 0% fat
  • 2 tbsp water
Filling:
  • 1/3 cup creamy peanut butter
  • ½ sugar-free chocolate chips divided
  • ½ cup milk of choice
  • 1/3 cup protein powder either vanilla or chocolate will work
Topping:
  • 4- oz Sugar Free Non-Dairy Topping like SF Cool Whip – ½ the container
  • 1 tbsp chopped peanuts
Instructions
  1. Preheat oven to 350F.

  2. In mixing bowl, mix up cake ingredients and pour out into an 8×8” baking pan that has been sprayed with cooking spray. Bake for 25 minutes. Remove from oven and let cool in pan for 5-10 minutes.

  3. While cake is cooling, make peanut butter chocolate filling. In microwave-safe bowl, add milk, peanut butter and 1/3 cup of the chocolate chips (reserving the remaining for topping). Microwave in 20 second increments, stirring between, until chocolate melted and a smooth consistency achieved. Stir in protein powder.

  4. With end of a wooden spoon, poke holes in cake approximately ¾” apart, all over cake. Pour filling over cake, spreading around with spatula. Let cool a few minutes before spreading around whipped topping and then sprinkling with remaining chocolate chips and chopped peanuts.
  5. Cut into 9 squares. Store leftovers, covered, in fridge for up to 5 days.

Recipe Notes

Chocolate Cookies ‘n Cream Collagen Mini Donuts

It’s been a hot minute since I used my mini donut pan, but these Chocolate Cookies ‘n Cream Collagen Mini Donuts are SO GOOD that I’ll never let that pan get lost in the back of the cabinet again. *

Bake up these yummy chocolate collagen donuts with a cookies 'n creme topping in the oven -- better for you with less fat and calories over traditional doughnuts. This recipe has only 64 cal (with 4.5g protein) per mini donut, is gluten-free, has no added table sugar and features protein and nutrition benefits from collagen.

Baking donuts is such a smart alternative to . . . eh, deep-fat frying. These cookies ‘n crème donuts have a cake donut texture, but without the added calories and fat.

Bake up these yummy chocolate collagen donuts with a cookies 'n creme topping in the oven -- better for you with less fat and calories over traditional doughnuts. This recipe has only 64 cal (with 4.5g protein) per mini donut, is gluten-free, has no added table sugar and features protein and nutrition benefits from collagen.

These chocolate protein donuts feature collagen powder to bump up the nutrition, and also rely on a low-carb sweetener to keep the carbs down. The flour is a mix of coconut flour and then a gluten-free baking blend so that the donuts stay light and fluffy (and not dense like an all-coconut flour recipe).

 Save 10% on Great Lakes Wellness products like collagen and others with code THEFITFORK10OFF

I’ve used a chocolate flavored collagen powder from Great Lakes Wellness, it worked so well! BUT, since I have added a couple tablespoons of unsweetened cocoa powder to the recipe to make it even richer and chocolatier, an unflavored collagen powder or vanilla flavor collagen powder would work just fine.

save 10% Great Lakes Wellness collagen and products with code THEFITFORK10off

Additionally, I’ve used sugar-free chocolate sandwich cookies (ya know, similar to an Oreo) for these crumbled cookie topped chocolate collagen doughnuts . . . in a pinch, you could just use the real thing (there are only 6 cookies across the whole recipes, so it’s minimal), or use another type of sugar-free cookie crumbled up. OR, they are also just pretty dang delicious even without the cookie glaze topping.

Bake up these yummy chocolate collagen donuts with a cookies 'n creme topping in the oven -- better for you with less fat and calories over traditional doughnuts. This recipe has only 64 cal (with 4.5g protein) per mini donut, is gluten-free, has no added table sugar and features protein and nutrition benefits from collagen.

Protein donuts are a great way to ensure that I’m meeting my daily protein goals, and with nearly 5g per little donut it adds up if I have a few for breakfast or a post-workout snack! Leftovers are delicious, just keep them in an air-tight container on the counter for up to a few days (if they even last that long). You can also keep plain, without the icing and cookie topping, in the freezer, for up to 6 months. Just pop out and defrost in the microwave — they are lightly sweet and still delicious “naked.”

Chocolate Collagen Protein Mini Donut without icing

*If you don’t have a mini donut pan, you can use a muffin tin – just add the same amount of batter as (about ¼ cup per tin) and they will cook up the same (just without the hole)!

5 from 5 votes
Bake up these yummy chocolate collagen donuts with a cookies 'n creme topping in the oven -- better for you with less fat and calories over traditional doughnuts. This recipe has only 64 cal (with 4.5g protein) per mini donut, is gluten-free, has no added table sugar and features protein and nutrition benefits from collagen.
Cookies ‘n Creme Chocolate Collagen Donuts
Prep Time
10 mins
Cook Time
15 mins
Cool
5 mins
Total Time
30 mins
 

Chocolate Cookies ‘n Cream Collagen Mini Donuts

Course: Breakfast, brunch, Snack
Keyword: collagen, donut, doughnut
Servings: 24 mini donuts
Calories: 64 kcal
Ingredients
  • ½ cup coconut flour
  • ½ cup gluten-free baking blend like Bob’s Red Mill
  • 2/3 cup collagen power preferably Chocolate Flavor from Great Lakes Wellness
  • 2 Tbsp unsweetened cocoa powder
  • 1/3 cup low-carb granulated sweetener 1:1 cup equivalency
  • 2 tsp baking soda
  • ¼ tsp salt
  • 2 large eggs
  • 1 ½ cups milk of choice, 1%
Topping:
  • 2/3 cup sugar-free white chocolate chips
  • ½ cup heavy cream
  • 6 sugar-free chocolate sandwich cookies, crumbled up
Instructions
  1. Preheat oven to 350F.
  2. Gather 12-count mini donut pan or 12-count standard muffin tins. Recipe makes 24, so if you don't have 2 pans, you'll need to bake in 2 batches.

  3. Add dry ingredients to large mixing bowl, stir together with whisk to combine and remove clumps. Add eggs and milk and whisk together until smooth batter formed.
  4. Add batter (approx. ¼ cup) to each opening in a non-stick mini donut pan. Bake at 350F for about 13-15 minutes. Let cool 2-3 minutes in pan and then loosen with spatula to release from pan.

  5. Let donuts cool 10 minutes.

  6. Then, break up sandwich cookies into small bits and set aside in a bowl. Add white chocolate chips to a microwave safe bowl and heat for 45 seconds on 50% heat. Remove and add cream, return to microwave and heat (stirring between) in 15 second increments until chocolate chips are melted and cream is incorporated into a smooth, glossy glaze. Do not let cream boil.

  7. Immediately turn a donut over into chocolate mixture to glaze the top and then lightly press into cookie crumbles. Repeat for remaining donuts.
  8. Store leftovers in an air-tight container for up to 2 days.

Festive Pomegranate Orange Quinoa Salad – Hassle-free & Healthy Holiday Side

Deck your plate for the holidays with this festive quinoa salad featuring pomegranate and orange. it’s a beautiful, healthy, delicious recipe elegant enough for the season’s celebrations and simple enough for a simple weeknight dinner.

A simple creamy dressing made with a vinaigrette base along with Greek yogurt and date syrup adds even more flavor to this simple holiday quinoa salad that comes together with just a handful of healthy ingredients.


This pomegranate orange quinoa recipes makes 4 servings, each with 146 calories, 26g carbs, 3.1g fat and 4.8g protein.

 I pair this cold quinoa salad with a quality protein to make sure I’m hitting my 25-30g per meal goal. Tonight, I made cod that was simply seasoned and air-fried.

TIPS FOR FESTIVE QUINOA SALAD:

Quinoa: You can use any color quinoa (eg: white, red, black, mixed). Also, consider batch-cooking quinoa and keeping in the freezer in 1-cup portions. This makes creating quick recipes with this healthy whole grain (really a seed), even easier – you can read my quinoa prep post HERE.

Pomegranate & Oranges: Use fresh or pre-packaged, it really only comes down to your preference and time to prep. If using either from a jar, tub, or can, choose “no sugar added” and drain off the juice so the quinoa isn’t soggy later. However, do reserve about 1 tablespoon of pomegranate juice for the dressing (or if fresh, drain it from the bowl after getting the arils out).

Dressing: This recipe makes just enough for the salad, and I prefer underdressed salads. If you think it needs more, double the dressing recipe and pour it on a little at a time – going by taste. Also, if you’d like to turn this from a vegetarian quinoa recipe into a vegan quinoa recipe, then use a substitute for the Greek yogurt, such as a plant-based yogurt, tahini or a natural nut butter.

Optional Ideas: You can swap out the pistachios for a chopped nut of choice like almonds, pecans – or none at all. Also, I love to sprinkle mine with feta cheese for a salty contrast with the sweet.

Make Ahead & Storing: This recipe will get a little soggy if you make the day before. To save time, it’s best to prep the ingredients (cook quinoa, chop spinach, peel/seed fruit, etc) the day before. Then simply toss everything together and shake up the dressing – it will literally just take 2 minutes! You can store leftovers in the fridge for up to 3 days. Still tastes yummy, but the crunch of the nuts and crisp of the spinach will be gone.

This is one of my favorite creative quinoa salad ideas – for it’s flavor, fast-fixing, and festive appearance! Enjoy!

As an Amazon Influencer, I earn from qualifying purchases.

Festive Holiday Pomegranate Orange Quinoa Salad
Prep Time
10 mins
Total Time
10 mins
 

Transform plain quinoa into something to celebrate for theholiday season! Pomegranate, orange segments and pistachios bejewel this quick,easy and nourishing vegetarian salad that is equally beautiful for a dinnerparty or quick lunch!

Course: entree salad, Side Dish
Cuisine: holiday
Keyword: holiday, orange, pomegranate, quinoa
Servings: 4 servings
Calories: 162 kcal
Ingredients
  • 1 cup cooked quinoa
  • 1 cup chopped fresh baby spinach
  • ¾ cup pomegranate arils juice drained & reserved if packaged container
  • ¾ cup mandarin orange segments packed in water or juice or fresh
  • ¼ cup shelled pistachio kernels coarsely chopped
Dressing:
  • 1 tablespoon olive oil
  • 1 tablespoon juice reserved from pomegranate or orange segments
  • 1 tablespoon white wine vinegar
  • 2 tablespoons Greek yogurt
  • 1 tablespoon date syrup
  • 1/8 teaspoon salt
Instructions
  1. Add quinoa, spinach, pomegranate and orange segments (cut in half crosswise) into medium bowl.
  2. In small mason jar, shake together dressing ingredients until emulsified.
  3. Pour dressing over salad and gently stir.
  4. Before serving, stir in pistachios.
  5. Best eaten right after making to keep the texture of the lettuce and pistachios. But you can store leftovers in fridge for up to 3 days and it’s still good.
Recipe Notes