

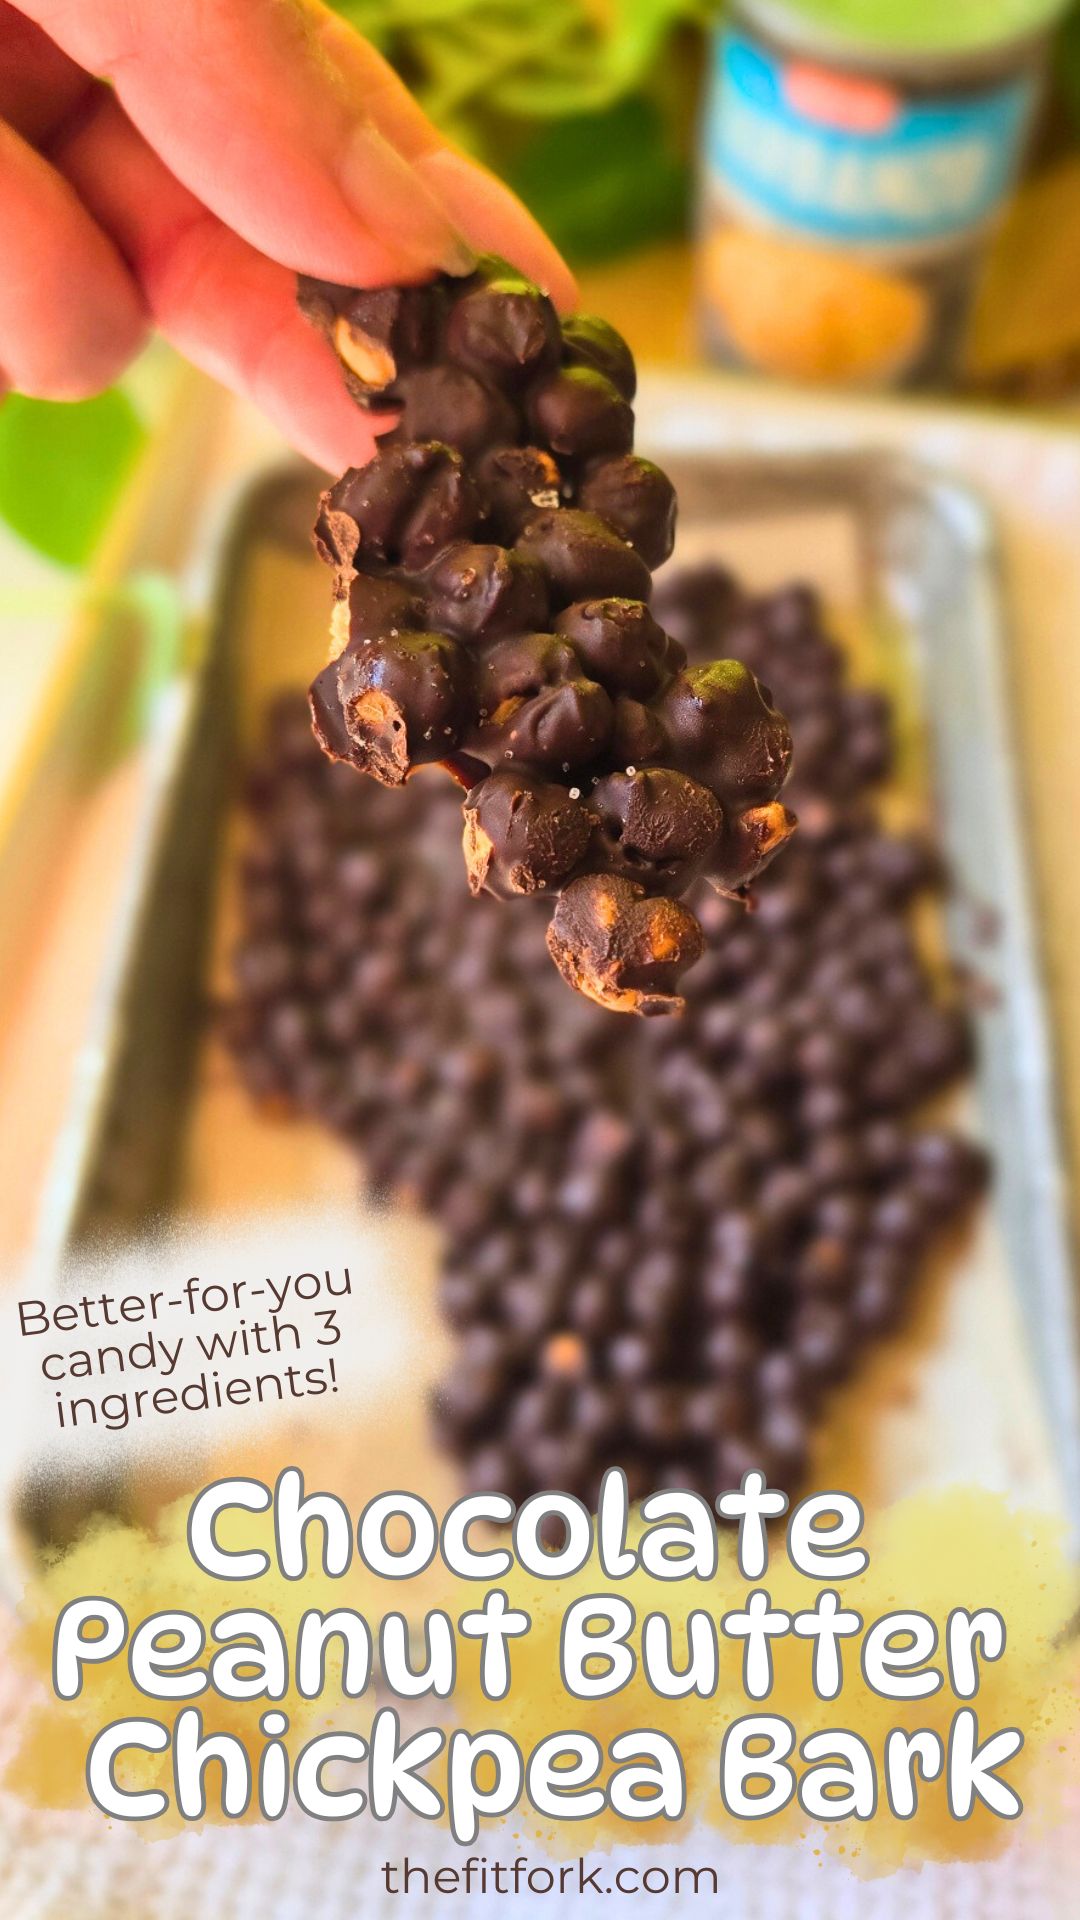
If you’ve ever wished your favorite candy came with a little more nutrition and a little less sugar crash, allow me to introduce you to your new snack crush: Chocolate Peanut Butter Chickpea Bark.
Yep — chickpeas (aka garbanzo beans). In bark. And before you question my sanity, trust me when I say this crunchy-creamy-chocolatey masterpiece is 100% legit and absolutely addictive. Bonus: it’s made with only three simple ingredients you probably already have in your pantry.
This better-for-you bark breaks into 8 generous pieces, each with just 116 calories, 7g fat, 17g carbs (3g fiber), and 3.5g protein. 🤎🥜🍫
It’s the kind of treat you can feel good about snacking on whether it’s mid-afternoon, post-workout, late-night Netflix munching and even a creative make for holiday gift giving.
Why It Works: Big Benefits from Simple Ingredients
Chickpeas (Garbanzo Beans): The humble chickpea brings surprise crunch and quiet superfood energy. They offer dietary fiber for fullness, a touch of plant protein, and a satisfying snacky bite once roasted. Think of them as the healthier, grown-up version, larger version of the candy bar “crispies.”
Sugar-Free Chocolate Chips: All the rich, melty chocolate flavor you crave — without the added sugar. You get the indulgence without the blood-sugar spike, and it sets beautifully into bark form. Of course, if you prefer – the recipe works equally well with full-sugar chocolate.
Peanut Butter (or Any Nut/Seed Butter You Love): Peanut butter adds creaminess, healthy fats, and that salty-sweet balance we all obsess over. Almond butter, cashew butter, sunflower seed butter, and tahini all work too, making this bark adaptable to your dietary needs or flavor mood.
Why You’ll Love This Unique Chocolate Bark
- Satisfies a Sweet Tooth — the Better Way: Lower sugar, more fiber, a touch of protein… your favorite candy bar could never.
- Just 3 Ingredients: Minimal effort, pantry-friendly, and ready to go whenever you need a treat ASAP.
- Customizable to the Max: Sprinkle sea salt for luxe vibes, dust with cinnamon for warm spice, or hit it with cayenne if you love a little fire with your chocolate.
- Breaks Into Perfect Portions: Make a batch once and enjoy clean, portion-friendly pieces all week long. Or, if you prefer – skip the “bark” format and dollop the mixture into eight little mounds (like a peanut cluster).
Chocolate Peanut Butter Chickpea Bark proves that healthy treats don’t need to taste “healthy.” They just need to taste amazing and give your body a little extra love in the process. Keep this one on hand for snacking, gifting, pre- or post-workout fuel, or those “I need chocolate NOW” moments we all understand.
Note: This post contains affiliate links. I earn a small commission from purchases made through links which helps me offset operating costs for The Fit Fork. Thank you!
- 1 15.5 oz. can chickpeas garbanzo beans, drained rinsed and skinned (see instructions)
- ½ cup sugar-free dark chocolate chips can use regular
- 1 tablespoon peanut butter or nut/seed butter of preference
- Optional 1/4 tsp coarse sea salt, ground cinnamon, or cayenne pepper
-
Preheat air-fryer to 380F or oven to 425F.
-
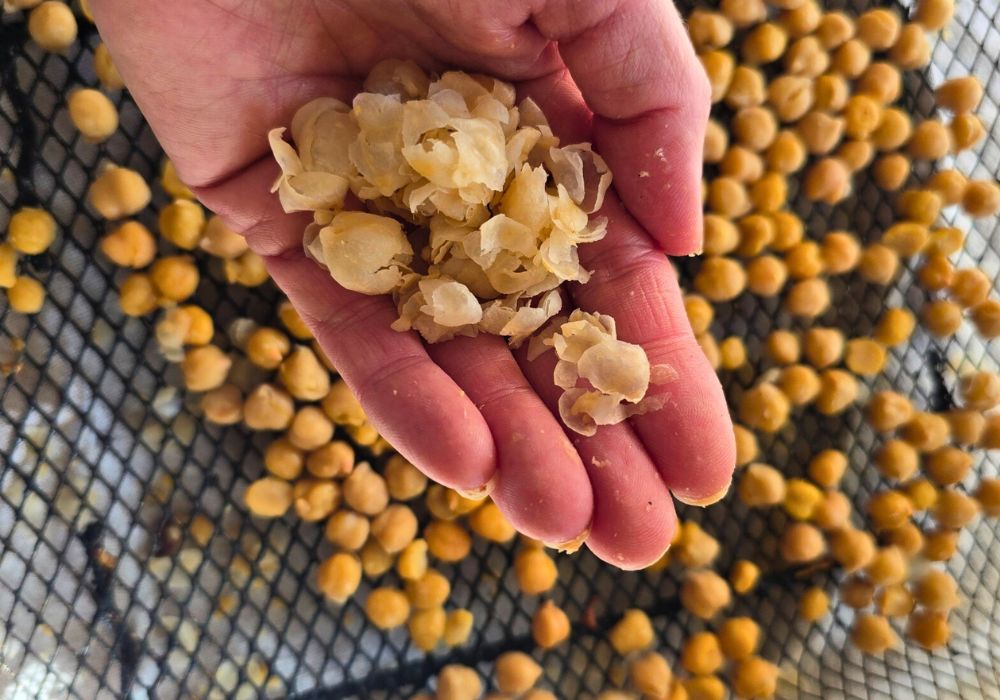
Pour our drained, rinsed chickpeas in a clean dish towel and gently roll to back and forth loosen outer skins; dispose of these. No worries if you don’t get them all off, they are fine to eat – just removing helps get crispier.
-
Roast chickpeas until crispy, for about 12-14 minutes in air fryer or 35-40 minutes in oven; shaking pan at least once for even cooking.
-
Set on counter to cool for a couple minutes while preparing chocolate mixture.
-
To make chocolate mixture, melt chocolate chips with peanut butter in microwave for 30 sec intervals, stirring between until smooth and glossy. About 1 to 1.5 minutes total.
-
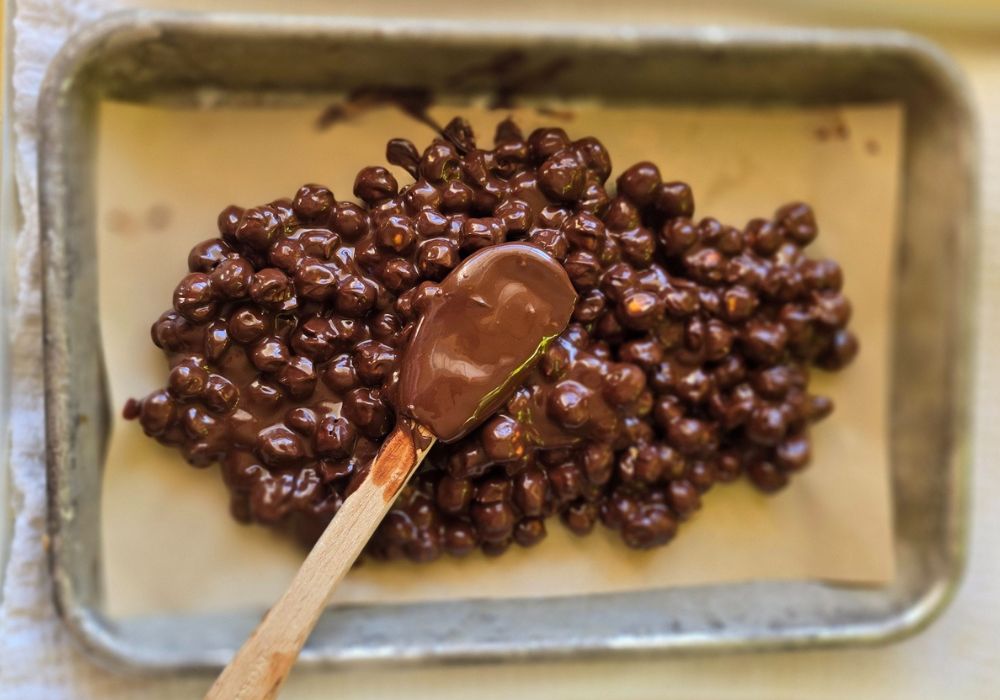
Pour chocolate mixture over crisped chickpeas; stir to coat evenly.
-
Pour out onto parchment lined baking pan. Use spatula to spread into a single layer. Alternately, you can “dollop” into eight mounds like peanut clusters.
-
Stick in freezer 20 minutes to firm up. Break in 8 pieces.
-
Store leftovers in fridge.


