Sheet Pan Mixed Berry Clafoutis (No Added Sugar)

Ooh-la-la! I really love my easy Mixed Berry Sheet Pan Clafouti recipe. My take on the famous French dessert is easy, it’s bursting with beautiful berries, has been “low carbed” with sweetener alternatives and a portion of the flour with almond meal. This berry sheet pan breakfast also features a good amount of protein thanks to six eggs in the recipe.  

Based on a famous French dessert, but with mindful low-carb tweaks, this Berry Clafoutis makes a delicious brunch, breakfast or healthy dessert. It reminds me of a hybrid flan-pancake. Lower cal and lots of protein from eggs. Size up for a sheet pan to make a little more than the traditional recipe.

For all these reasons and more, I declare my Clafouti in a sheet pan suitable for breakfast or brunch, any day!  Macros on a generous-sized serving come in at 250 calories, 12g fat, 24g carbohydrates, 4g dietary fiber, and 12g protein.

Based on a famous French dessert, but with mindful low-carb tweaks, this Berry Clafoutis makes a delicious brunch, breakfast or healthy dessert. It reminds me of a hybrid flan-pancake. Lower cal and lots of protein from eggs. Size up for a sheet pan to make a little more than the traditional recipe.
Use berries . . . or another favorite fruit!

If you’ve never heard of clafoutis, it’s one of those French things. Clafoutis (the “S” is silent) is a baked dessert classically featuring black cherries (but most any fruit will work) arranged in a buttered dish and covered with a thick flan-like batter. It’s served slightly warm or room-temperature, with a dusting of powdered sugar or whipped cream.

My version is baked up in a sheet pan (actually a Jelly Roll Sheet Pan (10.5″ x 15″ x 1″), for a larger scale dish that can serve a big hungry family – or be meal-prepped to eat for breakfast, brunch or dessert throughout the week. This sheet pan clafoutis also freezes beautifully – just thaw out and warm up in the microwave on busy mornings.

The batter is pretty thin, it’s just eggs, flour (or gluten-free alternative), almond flour, and a low-carb sweetener that measures as a cup-for-cup for granulated white sugar. I really just see the atter as the binder to hold the berries together! You don’t need a mixer or blender to make it, in fact, that would over work the batter– all you need is a whisk. I’m in love with this kitchen-drawer space-saving Collapseable Whisk.

Based on a famous French dessert, but with mindful low-carb tweaks, this Berry Clafoutis makes a delicious brunch, breakfast or healthy dessert. It reminds me of a hybrid flan-pancake. Lower cal and lots of protein from eggs. Size up for a sheet pan to make a little more than the traditional recipe.

PRO TIPS:

  1. Let batter rest for 20 minutes to prevent a rubbery final product
  2. Use a mesh tea strainer to sprinkle on powdered sugar.
  3. Cut into 6 large slices (1 per serving) or 12 slices (2 per serving), your preference.
  4. Freeze leftovers, cut into portions and then warm up on defrost button for about 45 seconds until thawed and lightly warm.

Based on a famous French dessert, but with mindful low-carb tweaks, this Berry Clafoutis makes a delicious brunch, breakfast or healthy dessert. It reminds me of a hybrid flan-pancake. Lower cal and lots of protein from eggs. Size up for a sheet pan to make a little more than the traditional recipe.
Save this pin for later!
Sheet Pan Mixed Berry Breakfast Clafoutis (Lower Carb)
Prep Time
5 mins
Cook Time
40 mins
Total Time
45 mins
 

Based on a famous French dessert, but with mindful low-carb tweaks, this Berry Clafoutis makes a delicious brunch, breakfast or healthy dessert. It reminds me of a hybrid flan-pancake. Lower cal and lots of protein from eggs. Size up for a sheet pan to make a little more than the traditional recipe.

Course: Breakfast, brunch, Dessert
Keyword: blueberries, clafoutis, low carb, sheet pan
Servings: 6 Servings
Calories: 250 kcal
Ingredients
  • 6 large eggs
  • 2 tsp. vanilla extract
  • 1/8 tsp. salt
  • ½ cup baking sweetener 1:1 cup measuring equivalency, I used a stevia blend
  • ½ cup unbleached all-purpose flour or gluten-free alternative
  • ½ cup packed almond meal
  • 2 cups whole milk
  • Baking spray for baking sheet
  • 1 lb. mixed fresh berries such as blueberries, raspberries, blackberries, sliced strawberries (rinsed and dried) about 3 to 3.5 cups
  • 1/2 cup sliced almonds about 2 ounces
  • Optional Powdered sugar for dusting (I used a zero-carb powdered sweetener)
Instructions
  1. Preheat oven to 350F.
  2. In large bowl, crack open eggs and whisk smooth. Whisk in milk until incorporated.
  3. Next, whisk in sweetener, flour, almond meal and salt until smooth.
  4. Spray 10” x 15” “jelly roll” sheet pan with baking spray. Do NOT try to use a standard 9” x 13” low-rimmed sheet pan, it will be too small and overflow. As an alternative, you can use a 9” x 13” ceramic or glass baking dish with HIGHER sides (cooking time will need to be increased).
  5. Pour egg batter into pan. Gently scatter berries as evenly as possible on top of batter. Next, sprinkle on sliced almonds.
  6. Bake on center rack for 40 minutes, or until turning golden on top and set. If using the 9”x13” glass baking dish, the batter will be deeper, so add on 5 to 10 more minutes of cooking time (so 45 – 50 minutes cooking time).
  7. Remove from oven at let cool 5 minutes. Dust with powdered sugar or alternative, if desired. Cut into either 6 large squares or 12 smaller squares (2 smaller pieces per serving).
  8. Store leftovers in fridge for up to 3 days. Reheat in microwave for about 45 seconds.
Recipe Notes

No-Bake Protein Brownies with Real Strawberry “Sprinkles”

Satisfy your sweet tooth in a lower-carb and protein-boosted way with this easy recipe for No-Bake Protein Brownies with Real Strawberry “Sprinkles.”

It’s a seemingly decadent strawberry chocolate brownie is actually a homemade brownie protein bar that is low in sugar and higher in protein. Macros for each generous slice of this homemade protein brownie: 219 calorie, 16g fat, 14g carb (6g net carb), 8g dietary fiber, 12g protein.

 Almond meal, unsweetened cocoa powder, and protein powder make the low-carb, protein-rich base that is held together by sugar-free syrup (or the sticky sweetener of your choice like real maple syrup or honey). There is no need to bake this homemade protein brownie, you simply press into the pan (I used a 1/8th sheet pan size with dimensions of about 9” x 6” – you can also use an 8”-diameter cake pan).

I came up with this chocolate protein powder recipe idea at the beginning of the year, as I was clearing out all our holiday treats but still craving a healthy sweet treat – I’m a chocolate lover for sure! You can use most any variety of chocolate protein powder (for example whey or plant-based).

I use Clean Lean Protein in Rich Chocolate flavor, a plant protein powder from Nuzest that is easy to digest, has a great texture, and can work with most types of diets including keto, gluten-free, paleo and more.

Here’s a don’t-miss-deal: you can always save 15% at Nuzest HERE with my code FITFORK

What makes this fudgy protein brownie extra special is the rich chocolate ganache topping. Making a ganache (a shiny thin layer of chocolate icing) seems so fancy and like you need major chocolatier skills – but it’s easy. The standard ganache formula is 2:1 chocolate to heavy cream. So, for a heaping ¼ cup chocolate chips, that would be 2 tablespoons of cream. It’s as easy as putting both in a microwave safe small bowl and heating at 70% power for about 1 minute, and stirring quickly afterward until smooth and glossy (return to microwave in 15 second increments if not melted thoroughly).

And, the strawberries on top! I’m calling them sprinkles – I took freeze-dried strawberries and coarsely crushed them before sprinkling on top of the still-warm ganache. You could substitute any other type of freeze-dried fruit, or swap out for nuts, seeds, and/or coconut.

Nuzest Plant-Based Protein Powder - save 15% with code THEFITFORK15

These no-bake protein brownies should be placed in the fridge for 30 minutes to set up before slicing. Store any leftovers in the fridge too, for up to 1 week. ENJOY!

Pin this for later!

Note: This post contains affiliate links.

5 from 6 votes
Satisfy your sweet tooth mindfully with this easy recipe for No-Bake Protein Brownies with Real Strawberry “Sprinkles.” Deliciously chocolate and seemingly decadent dessert or snack, but only 219 calories, plus low carb with 6g net carb, and 12g protein.
No-Bake Chocolate Protein Brownies with Real Strawberry “Sprinkles”
Course: Dessert, Snack
Keyword: brownies, chocolate, fudge, protein powder
Servings: 6 servings
Calories: 219 kcal
Ingredients
  • 1 cup almond meal
  • ¼ cup unsweetened cocoa powder
  • ½ cup chocolate protein powder
  • ¼ cup sugar-free maple syrup or can sub real syrup, just more carbs
  • 3 to 4 tbsp water
Topping
  • 2 ounces sugar free chocolate chips about heaping ¼ cup
  • 2 tbsp heavy cream
  • ½ to 1/3 cup freeze-dried strawberries* or other freeze dried fruit (or nuts, seeds and coconut for a swap)
Instructions
  1. In bowl, mix together almond meal, cocoa powder and protein powder. Add syrup and 3 tablespoons of water. Stir until combined and making a cohesive dough. If too crumbly (like because of super thick syrup, mix in the additional 1 tbsp water).
  2. Press dough into approximate 9” x 6” rimmed pan. In ramekin, add chocolate chips and cream. Microwave for 1 minute on High. Stir until smooth and spread over top of protein mixture. Place freeze-dried strawberries in plastic bag and crush with bottom of cup or rolling pin until coarsely powdered. Sprinkle of chocolate topping. Set in fridge for 30 minutes before cutting into 6 squares.

  3. Store leftovers in air-tight container in fridge for up to 7 days

Recipe Notes

Small Batch Hummus to Serve One or Two

Buying a big tub of hummus can seem like such a commitment, especially if you’re snacking solo or with a just friend or two.  My Small Batch Hummus recipe is perfectly proportioned so that you can finish it off in two sittings (or one snack session if super hungry) – or share it with a buddy and have no leftovers clogging up the fridge!   

Small Batch Hummus - Cooking for One

Exciting News:

This small batch dip (or spread) is featured in my upcoming cookbook, Cooking for One for Dummies (which can be pre-ordered now, ships on March 7, 2023)

Plus, when you make homemade hummus, you’re in total control of the ingredients – there’s no weird preservatives, additives, or yucky stuff.  Plus, you get all the benefits of chickpeas, they are abundant in dietary fiber and also a good source of plant protein, iron, folate and other essential nutrients.

It’s fast, it’s easy, there is no cooking – you start with a can of chickpeas. Of course, you can make your own chickpeas, but that adds a lot of time and hassle to what is an easy-peasy snack recipe for one or two.

skin on chickpeas
Gently rub any remaining skins off your chickpeas for smoother hummus.

After draining the chickpeas (a legume sometimes referred to as garbanzo beans), pour them out onto a clean dishcloth or paper towels and lightly rub dry. In addition to drying the chickpeas, the other goal here is to remove any lingering skins. The light patting dry will encourage stragglers to fall off, simply pick the skins out and discard. The skins will do no harm if they end up in your hummus, it will just be not quite as smooth and creamy.  

Then, it’s just a matter of whipping everything up in a food processor or blender. Since this is a small batch appetizer recipe, a mini food processor or personal sized blender will work best.

How to Serve Small Batch Hummus

  • Simply paired with raw veggies like carrots, celery, radishes, squash rounds are my favorite way to eat hummus.
  • Serve with pita wedges for dipping, smear on crackers, or spread on slices of toasted baguette.
  • Elevate sandwiches, wraps and quesadillas by spreading around as part of the filling.
  • Get creative and toss with hot pasta or zoodles for an instant chickpea sauce.
Pin this for later!

Leftover Chickpeas in Can? While this homemade hummus for two uses just half a can of chickpeas, don’t throw the remainder out — you have options. First, you could easily double the homemade dip recipe, it scales up beautifully (however, do note the capacity of your mini food processor and use a bigger processor or blender, if needed). I also have another “1/2 can chickpea” recipe — Air-Fryer Crispy Chickpeas for One which also make a fabulous, heathy snack or salad topper.

Air Fryer Crispy Chickpeas for One a=is a quick, easy and healthy snack with lots of dietary fiber plus protein, iron, and folate.

Make both the Small Batch Hummus and the Air-Fryer Crispy Chickpeas for Ones and kill off the whole can at once making healthy snacks.

This post contains affiliate links.

5 from 9 votes
Small Batch Hummus - Cooking for One
Small Batch Hummus
Prep Time
5 mins
Total Time
5 mins
 

Make just enough homemade hummus to get your through a couple health snack sessions — or to share with a friend. Easy, healthy, and homemade, a fantastic snack and spread to add to your active lifestyle. Lots of dietary fiber and a good source of plant protein, dietary fiber, iron, folate and other important nutrients.

Course: appetizers, dips, snacks, spreads
Cuisine: Mediterranean
Keyword: appetizer, chickepeas, dip, garbanzo beans, snacks, spread
Servings: 2 servings
Ingredients
  • ¾ cup canned chickpeas drained and rinsed (about half a 15.5-ounce can)
  • 3 tbsp olive oil plus an additional 1 teaspoon for topping, if desired
  • tbsp tahini
  • 1 tbsp lemon juice
  • ½ tsp garlic or garlic paste
  • ¼ teaspoon salt
  • ¼ teaspoon ground black pepper
  • 1/2 teaspoon smoked paprika
Instructions
  1. Place all the ingredients in a personal-sized blender or mini food processor; process until smooth. If the consistency seems too pasty or thick, blend in 1 teaspoon of water at a time until desired texture is achieved.
  2. Transfer the hummus to serving bowl and drizzle with 1 teaspoon of olive oil and a sprinkle of paprika.
Recipe Notes

NOTE: Store the leftovers in an airtight container in fridge for up to 4 days.
VARY IT! Extra chickpeas from can be kept in an airtight container in fridge for a few days and added to salads, soups, and wraps

LEARN MORE! This small batch dip (or spread) is featured in my upcoming cookbook, Cooking for One for Dummies (which can be pre-ordered now, ships on March 7, 2023)

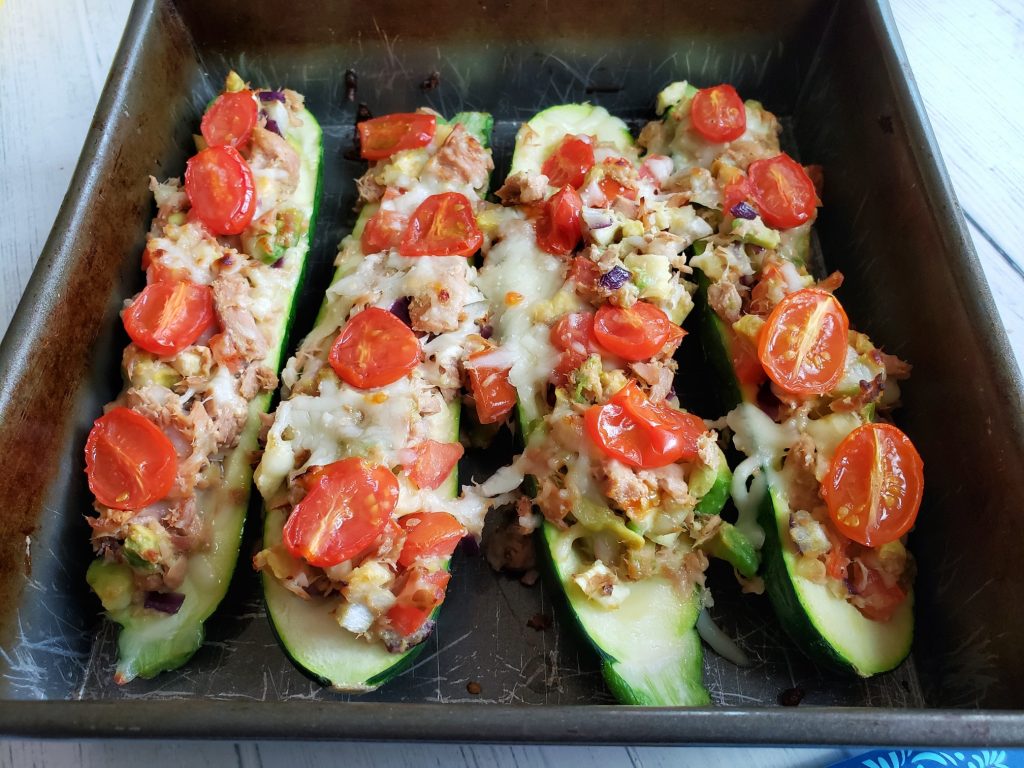
Mushroom Pizza Stuffed Zucchini Boats

Make waves with these delicious, nutritious Mushroom Pizza Stuffed Zucchini Boats. Easy, cheesy and a smart way to optimize zucchini season!

Quick, easy, delicious and nutritious, these cheesy, saucy stuffed zucchini will remind you of a mushroom pizza - -but without the crust, so lower calorie, lower carb and gluten-free. A great way to use up a bumper crop of squash!

Even if you don’t grow your own zucchini (I don’t, but my neighbors do, lol) this green squash is a great way to add extra fiber, vitamins, minerals, and volume to your meals. Exceptionally versatile if you are gluten-free or a lower carb kinda person, plus it seems to be a perennial in the produce department and inexpensive, to boot!

Check out this short video tutorial!

If air-frying, you only need 15 minutes, prep to plate, for this cheesy stuffed zucchini recipe. Takes a little longer in regular oven, but still not time-consuming, especially if you give zucchini boats a 1 minute microwave “par cook” before stuffing and baking.

Quick, easy, delicious and nutritious, these cheesy, saucy stuffed zucchini boats will remind you of a mushroom pizza - -but without the crust, so lower calorie, lower carb and gluten-free. A great way to use up a bumper crop of squash!

I love easy recipes that pack a nice punch of protein. These mushroom pizza zucchini boats help you meet your protein goals on nights when you are going no-meat or just don’t have the time to prepare beef, chicken or pork. It’s a blend of cottage cheese and mozzarella cheese for the protein win!

A serving (of TWO halves) has 25g protein, 20g net carb, 12g fat and 293 calories. This is A LOT of food that will ya up! Alternatively, you can just serve one piece as a scrumptious side dish!

Quick, easy, delicious and nutritious, these cheesy, saucy stuffed zucchini boats will remind you of a mushroom pizza - -but without the crust, so lower calorie, lower carb and gluten-free. A great way to use up a bumper crop of squash!
5 from 5 votes
Quick, easy, delicious and nutritious, these cheesy, saucy stuffed zucchini boats will remind you of a mushroom pizza - -but without the crust, so lower calorie, lower carb and gluten-free. A great way to use up a bumper crop of squash!
Mushroom Pizza Stuffed Zucchini Boats
Prep Time
5 mins
Cook Time
10 mins
Total Time
15 mins
 

Quick, easy, delicious and nutritious, these cheesy, saucy stuffed zucchini will remind you of a mushroom pizza – -but without the crust, so lower calorie, lower carb and gluten-free.

Course: dinner, side
Cuisine: Italian
Keyword: gluten free, low carb, pizza, zucchini
Servings: 1 serving (or serves 2 as a side)
Calories: 293 kcal
Ingredients
  • 1 approximate 10- to 12-ounce zucchini ends cut off and sliced lengthwise
  • 1/3 cup bottle marinara or tomato-based pasta sauce divided
  • ¼ cup 2% cottage cheese
  • ¼ cup shredded mozzarella cheese
  • ½ teaspoon garlic salt
  • ½ teaspoon Italian seasoning
  • 2 to 3 white mushrooms sliced
  • 2 tablespoons Parmesan cheese
  • Optional fresh herbs
Instructions
  1. Preheat air fryer to 390F degrees (or oven to 375F)
  2. Cut ends off zucchini and slice lengthwise. Use small spoon to scoop out seeds and some flesh in center, leaving about 1/3” of flesh around outside so that it keeps shape during cooking.
  3. Place zucchini halves on microwave safe plate and “par” cook for 60 seconds in microwave on high.
  4. Transfer lightly cooked zucchini halves to air fryer tray.
  5. Spread the inside of each zucchini with 1 tablespoon sauce.
  6. In small bowl, mix together cottage cheese, mozzarella cheese, garlic salt and Italian seasoning.
  7. Spoon cheese mixture into zucchini halves, pat down with spoon.
  8. Add just few little dollops of sauce to top, if desired.
  9. Arrange sliced mushrooms on top.
  10. Sprinkle with parmesan cheese.
  11. Air fry for 6 to 8 minutes (or oven for 15 to 20 minutes) until cheese lightly browning and hot and zucchini softened (but not soggy)
  12. Spoon bean mixture evenly into the two zucchini boats.
  13. Sprinkle with chopped Italian herbs and serve with additional warmed sauce, if desired.
Recipe Notes

Watermelon Juice 101: How to Make, Store, and Serve with a Boost

I’m here to give you all the juicy details about watermelon juice. Not just why I personally adore it, but why you will be hard-pressed not to love it too! Ex-squeeze me for all the puns. Also, learn how to make watermelon juice at home, how to store it plus how long it will stay fresh, and discover simple 1-ingredient stir-ins to entertain your taste buds.

At 92% water, watermelon is one of my favorite choices to stay hydrated, especially after runs, workouts and other active endeavors. During the summer season, icy cold juice (or even handful of frozen cubes) is so refreshing and in the winter months, I’ve been known to warm it up, which is surprisingly delicious. Either way, an 8-ounce serving of watermelon juice provides me fluids, vitamins and minerals that my body needs like vitamin C (19.4mg), vitamin A (67.2mcg), and B6 (108mcg), potassium (269mg), and lycopene (10.9mg).

Watermelon is a Smart Alternative to Soda

If had to name one vice, it would be drinking soda. But swapping with watermelon juice satisfies my craving in a naturally sweet way and helps me avoid the refined sugar, caffeine and artificial stuff.  At 72 calories per 8-ounce serving, watermelon juice is a great alternative to sodas – plus you can even add sparkling water to make it a bigger, bubblier treat.

How to Make Watermelon Juice

Watermelon juice is really something you should make at home if you want to ensure the best beverage every time plus save a ton of money. I’ve seen bottled fresh watermelon juice in some better stores, but you really have to scrutinize the label to make sure you’re getting 100% juice and not flavorings and sugar fillers. Also, those elusive cold-pressed bottles of watermelon juice out there are expensive – anywhere from $3 to $5 or more for a “single” serving bottle.  Heck for $5 or a little more here in Texas, I can get the whole watermelon and make much, much more juice (plus have leftovers enjoy a wedge or two on the side). 

Also, here’s an easy watermelon juice tutorial from Watermelon.org You can see it’s as easy as cutting, blending and straining (if you desire).

Straining watermelon juice is not necessary, just stir up pulp before serving.

You can also avoid food waste by making watermelon juice with the remaining flesh of a cut watermelon that is over-ripe or is about to reach expiration in the fridge. Watermelon.org says that a large watermelon can last up to 7 days chilled between 9°F and 36°F.  Also, I have another watermelon juice collecting hack. After I cut up a big watermelon to store in the fridge, I pour off the seeped juice sitting in the bottom of the container every night and morning – it’s amazing how much juice you collect, even when you end up eating all the watermelon! I also feel like it helps keep the texture of the cut watermelon at its best.

How Long Does Watermelon Juice Stay Fresh? Watermelon juice, because it is fresh and unpasteurized, should be consumed in 24 to 72 hours after juicing and kept chilled between 9°F-36°F In addition, the USDA recommends not leaving unpasteurized juice sitting out for more than 2 hours to prevent bacteria growth. At this time, watermelon juice can be frozen for longer term storage

How to Freeze Watermelon Juice Freeze watermelon juice within 24-72 hours of making it and having storing it properly in the fridge. You can freeze watermelon juice for up to 6 to 12 months in a freezer set to 0°F.  Freeze watermelon juice in glass canning jars, air-tight freezer containers (tubs or heavy baggies), or even ice cube trays (later pop out and store in a freezer bag).  Make sure that your container has enough headroom at the top, about 1 or 2 inches for a jar, to allow for expansion during the freezing process.  When ready to thaw, please set in the refrigerator overnight rather than leaving on the counter

Other Food Safety Tips for Cutting Watermelon & Juicing

Only use watermelon that are free from signs of damage. Bruises, fissures and mushy spots could indicate contamination. Wash hands thoroughly with soap and water before cutting watermelons. Before cutting watermelon for juicing (or just eating), wash the outer surface thoroughly with cool tap water to remove surface dirt. Use a clean knife. Chill cut watermelon within 4 hours of cutting and store between 9°F-36°F for no more than 7 days.

Single-Ingredient Watermelon Juice “Mix-Ins”

Looking for a simple way to switch it up! Have fun with these easy flavor ideas to boost your watermelon juice.

Watermelon Juice Pro-Tips for School-Age Parents:

  • Pour watermelon juice into ice-pop molds for a naturally sweet dessert.
  • Add a frozen bottle of watermelon juice to a child’s lunchbox as a drink that will thaw out by lunch and also keep the lunchbox cool.
  • Add sparkling water to watermelon juice as a faux-soda for children who are starting to beg for bubbly drinks.
Simple Watermelon Juice (1 ingredient)
Prep Time
10 mins
Total Time
10 mins
 

Enjoy a refreshing, hydrating, nutrient-packed beverage by making watermelon juice. Making your own watermelon juice is much more economical the purchasing fresh in the store (if you can even find it). So great for post workout refueling (or to make cocktails and mocktails)!

Course: Beverage, beverages, Fruit
Keyword: fruit, immersion blender, juice, juicing, watermelon
Ingredients
  • 1 watermelon (or part of one watermelon) cut into 1" chunks
OPTIONAL INGREDIENTS
MIX-INS: Add to 8-ounces watermelon juice:
  • tbsp. Lemon or Lime Juice
  • 3 drops Vanilla Extract
  • 1/4 tsp. ground Cinnamon
  • 1/2 tsp. grated Ginger
  • 1/2 tsp. Sriracha Sauce
  • 2 tbsp. Collagen Powder
  • Pinch Himalayan Sea Salt
  • 1- oz. Tequila Vodka or Rum
MIXERS – Choose one, mix 50/50 with juice:
  • Sparkling Mineral Water
  • Vegetable Blend Juice
  • Prosecco Wine
  • Hot or Iced Tea
Instructions
  1.  Wash outside of watermelon. Slice and cut into1” chunks.    .

  2.  Place in blender pitcher, and pulse for about 15to 30 seconds until liquified.

  3. Pour through strainer to remove pulp. Discard pulp to compost or save for another use.

  4. If preferred, you can leave pulp in juice for a thicker effect. Remember to stir back in before serving.

  5. Store in fridge for 24to 72 hours or freeze inair-tight containers for up to 12 months.

  6. Amazing to drink "as-is" but add optional mix-ins or mixers, as desired, to satisfy any given mood.

Recipe Notes